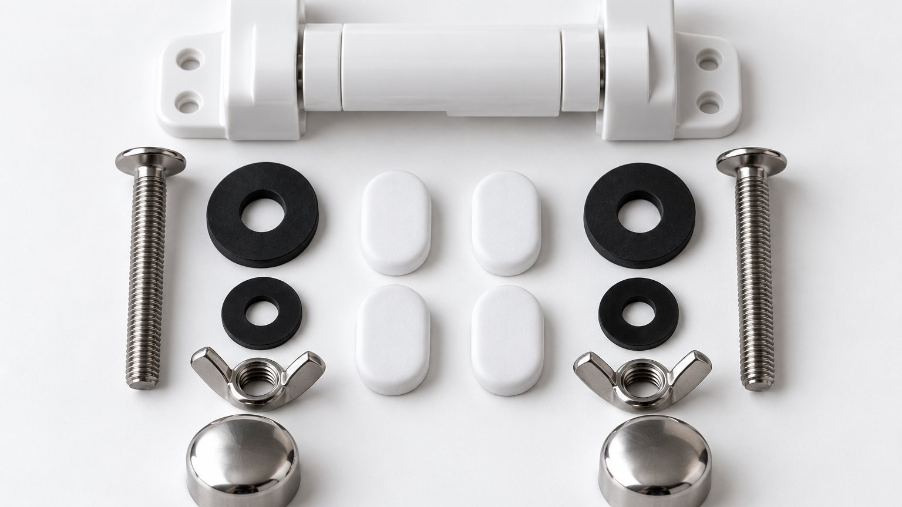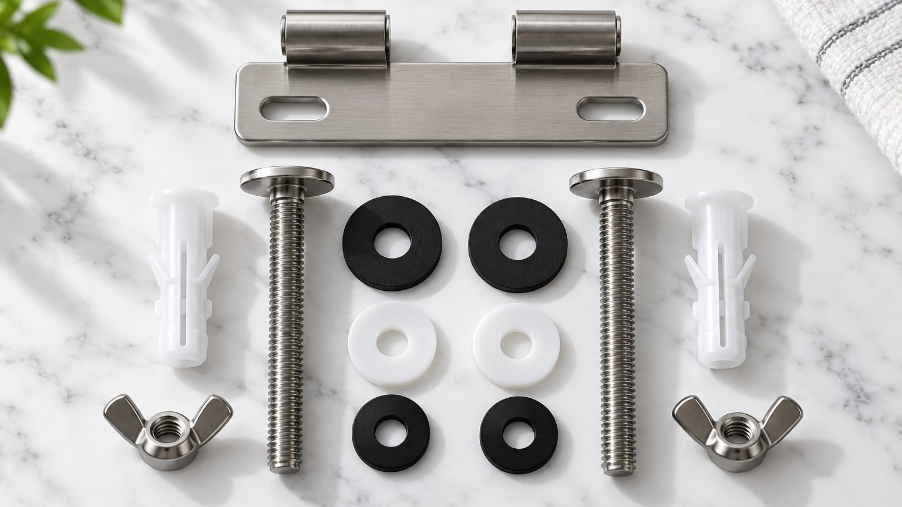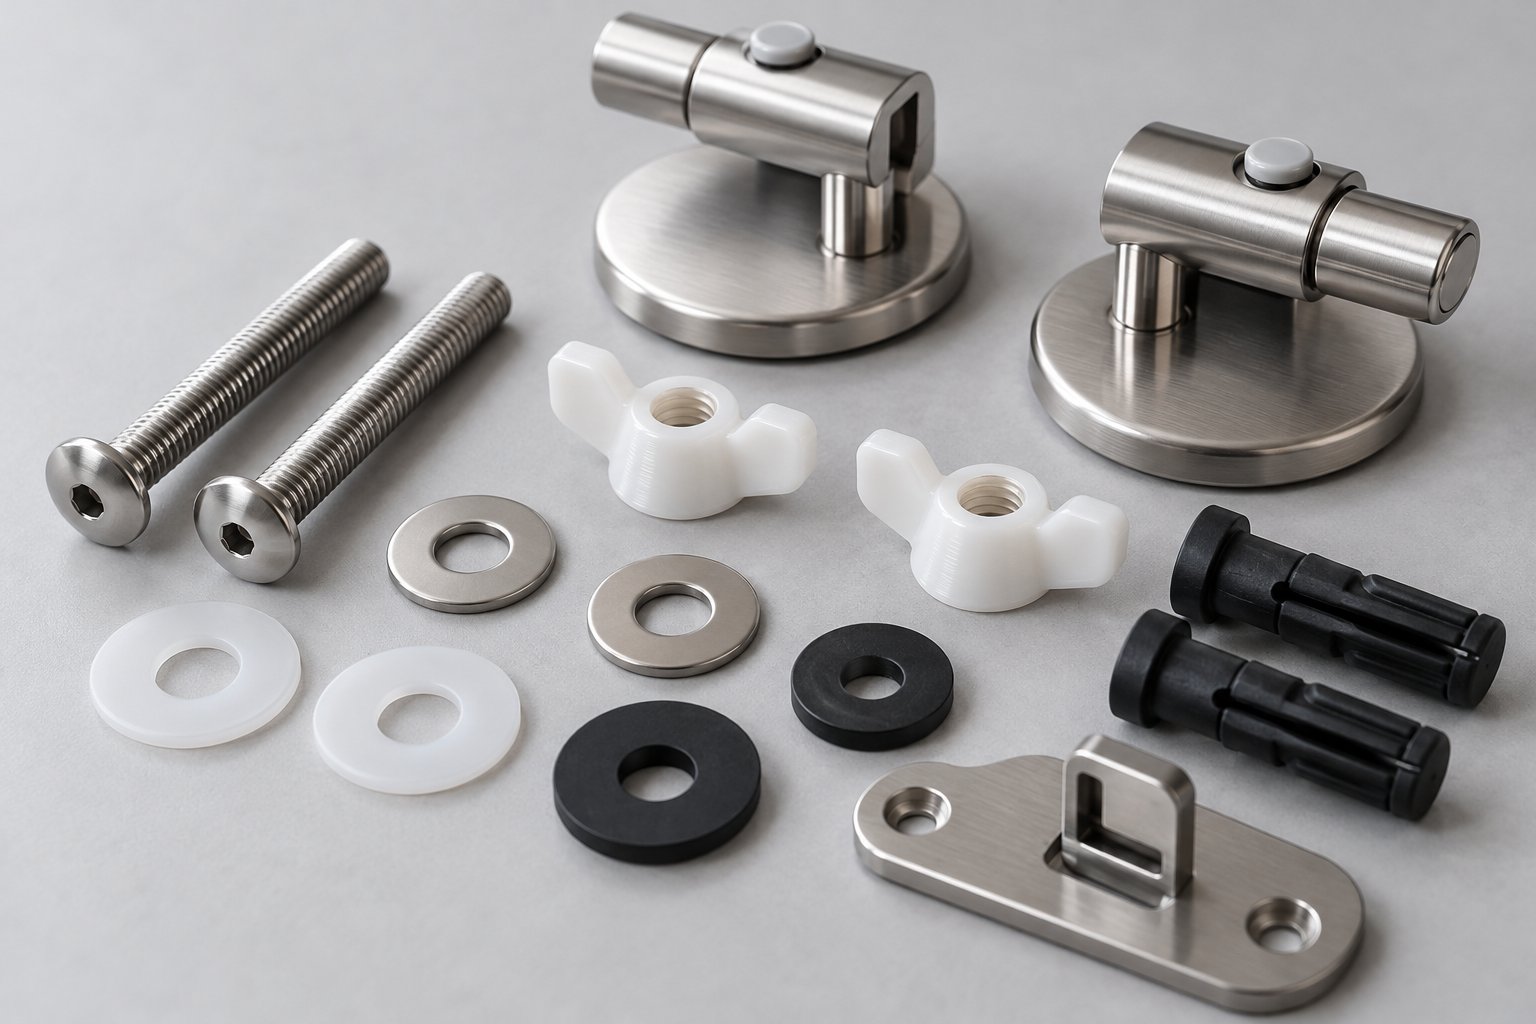
Understanding Toilet Seat Fitting Types Before You Buy
You've got a wobbly seat, a cracked hinge, or maybe you're staring at a brand-new porcelain toilet seat still in its box — and nothing lines up. Sound familiar? The problem almost always traces back to one overlooked detail: the fitting type. Before you worry about color, material, or even shape, you need to know exactly how your toilet seat attaches to the bowl.
Toilet seat fitting types refer to the specific hardware configurations — including bolts, brackets, hinges, and mounting plates — that mechanically secure a seat and lid assembly to a toilet bowl. The fitting type determines how the seat is anchored, from which direction it is tightened, and whether it is compatible with a given toilet design.
This article follows the real user journey from start to finish: identify your current fitting, measure your bowl, choose the right replacement, and install it correctly. If you've ever searched "how to tell what toilet seat I need" and ended up more confused than when you started, you're in the right place.
What Are Toilet Seat Fitting Types
Think of the fitting type as the mechanical handshake between your toilet seat and your toilet bowl. It covers every piece of hardware involved in that connection — the bolts that pass through the pan, the brackets or anchors that grip from above or below, and the mounting plates that hold the hinge assembly in position. These are distinct parts of a toilet that work together as a single system.
It's easy to confuse fitting type with related decisions like seat shape (round vs. elongated), seat material (plastic vs. wood), or hinge mechanism (standard vs. soft-close). Each of those matters, but none of them will help you if the seat physically cannot bolt onto your bowl. The fitting type is the foundation — everything else builds on top of it.
Why Fitting Type Is the First Decision That Matters
Imagine ordering a sleek new toilet seat online, only to discover the bolts don't reach through the holes, or there's no underside access to tighten the wing nuts. Choosing the wrong fitting type leads to a seat that wobbles from day one, risks cracking the ceramic under stress, or simply cannot be installed at all. It's the most common — and most frustrating — purchasing mistake in the category.
Most guides cover only the basic top-fix versus bottom-fix split and stop there. This resource goes further, unifying shape compatibility, material considerations, hinge mechanisms, toilet design matching, and step-by-step measurement guidance into one complete walkthrough. Whether you're replacing a single toilet seat at home or sourcing toilet seats for a renovation project, the path starts here — with the hardware that holds everything together.
The logical first step? Figuring out what's already bolted to your bowl right now.
How to Identify the Fitting Type Your Toilet Already Uses
Most people don't think about toilet seat replacement until something breaks — a cracked hinge, a bolt that spins freely, or a toilet cover seat that slides sideways every time someone sits down. When that moment arrives, the fastest path to a fix is diagnosing what you already have. Buying blind leads to returns, wasted weekends, and a bathroom that stays out of commission longer than it should.
The good news? You can identify your fitting type in under five minutes with no tools and no plumbing knowledge. All you need are your eyes, your hands, and ideally a phone camera.
Checking Your Bolt Holes and Access Points
Start by lifting the seat and lid all the way up so they rest against the cistern or wall. Look at the back of the bowl rim — the flat area where the seat's hinge meets the ceramic. You'll notice two holes spaced apart on that ledge. These are the bolt holes, and they're the entire reason one seat fits a particular toilet while another doesn't.
Pay attention to two things. First, how are the fixing bolts accessed? If you can reach underneath the bowl rim and feel a wing nut or hex nut threaded onto a bolt, your toilet uses a traditional bottom-fix system. If there's no hardware underneath and the entire mechanism tightens from the top — usually with a screwdriver or Allen key turning into an expanding anchor — you're looking at a top-fix arrangement. Second, check whether the bolt holes are plainly visible or hidden behind a slim decorative plate. A cover plate typically signals a concealed fixing system, which is common on modern wall-hung and back-to-wall designs.
Bolt-hole spacing matters just as much as access direction. On most standard toilets, the distance between the centers of the two holes sits around 150 mm (roughly 6 inches). However, variations exist across manufacturers and regions. A Beneke toilet seat, for example, may assume slightly different spacing than a European brand, so never rely on a guess. Grab a tape measure or ruler and record the exact center-to-center distance before you start shopping.
Reading the Clues on Your Current Hardware
Even if the original seat is damaged, the remaining hardware tells a story. Here's what to look for:
Plastic wing nuts sitting underneath the bowl rim are a clear sign of a bottom-fix setup — the oldest and most widespread method. If instead you see a screw head or bolt head visible on top of the hinge with no corresponding nut below, the seat was installed using a top-fix system. And if you spot a slim metal or stainless-steel plate with no visible bolts at all — just a clean bracket that the seat slides or clicks onto — you're dealing with concealed fixings.
Before heading to the store or browsing online, take a few photos of the hinge area from above and below the rim. Capture the bolt holes with any remaining hardware in place. Then measure the bolt-hole spacing and jot it down. These two steps — photograph and measure — eliminate most of the guesswork involved in choosing between a plastic versus wood toilet seat, a standard model, or a specialty replacement like a Crane Plumbing toilet seat designed for older pans.
For quick reference, here are the three primary indicators that reveal your fitting type at a glance:
- Bolt access direction — Are fixings tightened from above the rim (top-fix) or below it with wing nuts (bottom-fix)?
- Hole spacing — What is the center-to-center distance between the two mounting holes? Standard is approximately 150 mm, but always measure.
- Hinge cover presence — Are the bolts exposed, or concealed behind a decorative plate or integrated into the hinge body?
Recording these three details gives you a reliable profile of your toilet's requirements. Whether you're shopping for a wooden toilet seat with classic charm or a modern soft-close model, that profile ensures the hardware underneath will actually cooperate. With your fitting type identified and your measurements in hand, the next question becomes understanding exactly how each system works — and which one outperforms the other in your specific situation.
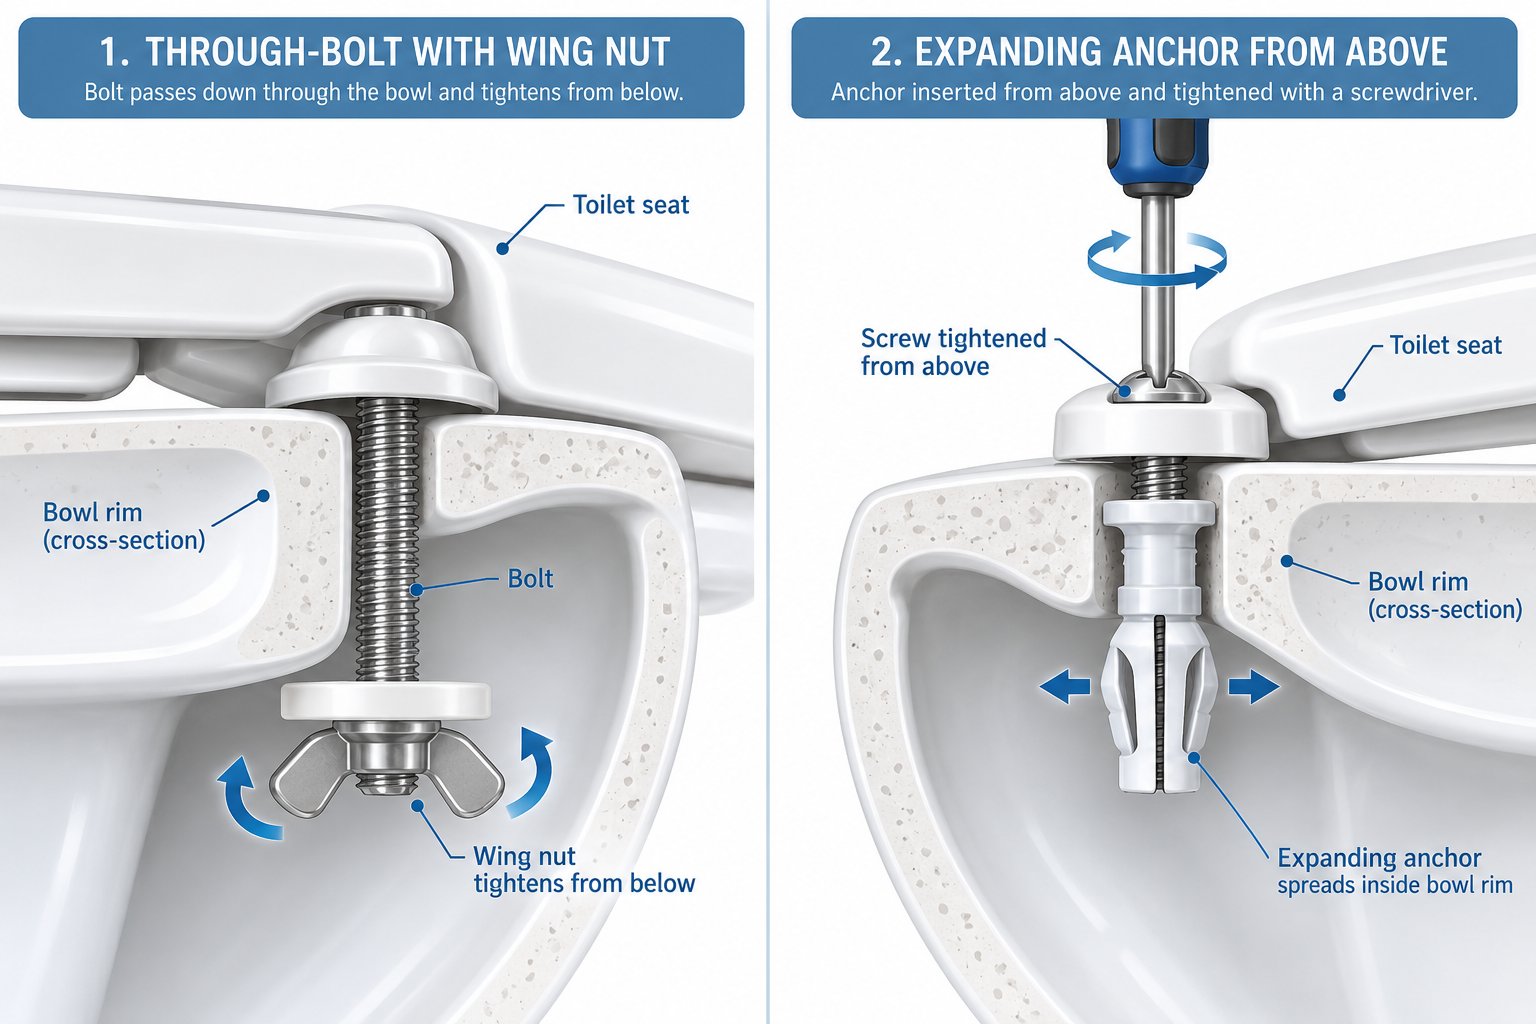
Top-Fix vs Bottom-Fix Fittings Compared
Knowing which fitting type your toilet uses is only half the equation. Understanding how each system actually works — its mechanics, strengths, and weak points — puts you in a far stronger position when evaluating toilet seat sizes, replacement options, and long-term reliability. These two categories form the backbone of virtually every toilet seat attachment method on the market, so let's break them down in plain language.
Bottom-Fix Fittings Explained
Picture the simplest possible bolt connection: a long threaded bolt drops down through each of the two mounting holes on the back of the bowl rim, passes through the ceramic, and pokes out underneath. From below, you slide on a washer, thread on a wing nut or hex nut, and tighten until the hinge is snug against the porcelain. That's bottom-fix in a nutshell — and it has been the standard toilet seat attachment method for decades.
Why has it lasted so long? Compatibility. Bottom-fix hardware works with the widest range of toilet designs because the only requirement is physical access to the underside of the bowl rim. Open-back close-coupled toilets, traditional pedestal models, and most older WC seat size configurations accept this system without modification. The bolts and nuts are straightforward, replacement parts are inexpensive, and the clamping force you can achieve is predictable and strong.
The trade-off is ergonomic, not mechanical. Reaching underneath the bowl rim — especially in a cramped bathroom where the toilet backs up against a wall or sits between a vanity and a bathtub — can be genuinely awkward. You're kneeling on tile, feeling blindly for a wing nut, and trying to hold the bolt still from above with one hand while tightening from below with the other. If you've ever wrestled with this setup, you already know why the industry developed an alternative.
Top-Fix Fittings Explained
Top-fix systems flip the process. Instead of reaching underneath, you do everything from above. A rubber or plastic expanding anchor (sometimes called a blind plug) is dropped into each bolt hole. You then insert a screw or bolt from the top, thread it into the anchor, and tighten with a screwdriver or Allen key. As the screw draws down, the anchor expands inside the hole, gripping the ceramic from within and locking the hinge firmly in place.
This approach gained popularity alongside modern toilet designs — particularly back-to-wall, skirted, and wall-hung models — where the underside of the bowl is partially or entirely enclosed. On these toilets, bottom-fix installation is physically impossible because there's no way to reach the nuts. Top-fix solves that access problem entirely, and installation typically takes five to ten minutes with a single household tool.
There is one critical caveat, though. Expanding anchors need bolt holes of a specific diameter range to grip correctly. If the holes are too wide, the anchor won't expand enough to create a secure hold; too narrow, and the anchor won't seat properly. This is why understanding how to measure for a toilet seat goes beyond just bowl length and width — bolt-hole diameter matters when you're selecting top-fix hardware. Manufacturers like Croydex address this with their Flexi-Fix range, which offers adaptable anchor sizes, but not every brand provides the same flexibility.
When to Choose One Over the Other
Here's the reality most guides skip: your toilet's design usually makes this decision for you. Personal preference plays a role only when both systems are physically possible — which is the case on standard open-back toilets but not on enclosed modern pans. Whether you're browsing Lowes toilet seats or shopping at a specialist plumbing supplier, the first filter should always be what your toilet can accept, not which method sounds easier.
Some manufacturers even offer convertible seats that ship with both fixing kits. FIX-A-TAP's Econo seat, for instance, installs as bottom-fix by default but converts to top-fix with a separate blind fixing kit — a practical solution if you're unsure or managing mixed toilet types across a property.
The comparison below lays out the practical differences across five criteria that matter most during installation and daily use. Whether you're weighing up a toilet seat round vs elongated shape or simply trying to find the best replacement for your existing bowl, this table helps you see the full picture at a glance.
| Criteria | Bottom-Fix | Top-Fix |
|---|---|---|
| Ease of Installation | Moderate — requires reaching underneath the bowl rim, which can be difficult in tight spaces | Easy — all tightening done from above with a screwdriver or Allen key |
| Compatibility Range | Broadest — works with any toilet that provides underside access to the bolt holes | Limited to toilets with bolt holes sized for expanding anchors; ideal for enclosed and skirted designs |
| Stability Over Time | Strong initial clamp, but wing nuts can loosen with vibration and daily use; periodic retightening may be needed | Expanding anchors grip internally and resist loosening; generally stays secure longer with less maintenance |
| Tool Requirements | Adjustable wrench or pliers for the nut below; sometimes a screwdriver to hold the bolt from above | Screwdriver or Allen key only — single tool, single direction |
| Suitability for Enclosed / Skirted Toilet Bases | Not suitable — no underside access means nuts cannot be reached or tightened | Ideal — designed specifically for toilets where the underside is enclosed or inaccessible |
One detail worth noting for anyone shopping across different toilet seat lid and seat combinations: the fixing method is independent of the hinge feature. A soft-close seat can be top-fix or bottom-fix. A quick-release seat can also be either. The fixing type anchors the base bracket to the bowl; the hinge mechanism sits on top of that bracket. Treating them as separate decisions — first the fixing, then the hinge — prevents the kind of mix-up that sends a perfectly good seat back to the store.
Of course, top-fix and bottom-fix aren't the only options in play. Modern bathrooms increasingly feature concealed bracket systems and quick-release mounting mechanisms that push the concept of toilet seat fittings well beyond this traditional two-way split.
Concealed Fixings and Quick-Release Mounting Systems
Walk into any contemporary bathroom showroom and you'll notice something missing — visible bolts. The clean, almost sculptural look of modern toilets isn't accidental. It's the result of fitting systems engineered to disappear entirely from sight. While top-fix and bottom-fix methods handle the vast majority of residential installations, a growing number of toilet designs rely on concealed fixings, quick-release mechanisms, and adjustable-hinge mounts that most buying guides barely acknowledge. If your bathroom features anything more modern than a standard close-coupled toilet, these are the systems you need to understand.
Concealed Fixing Systems for Modern Bathrooms
Concealed fixings do exactly what the name suggests — they hide every piece of visible hardware behind a decorative cover plate or within the hinge body itself. The result is a seamless sightline across the back of the bowl, with no bolt heads, no screw caps, and no exposed brackets breaking the visual flow. For anyone who's invested in a sleek wall-hung or back-to-wall toilet, this level of finish isn't just aesthetic preference; it's the design standard the entire fixture was built around.
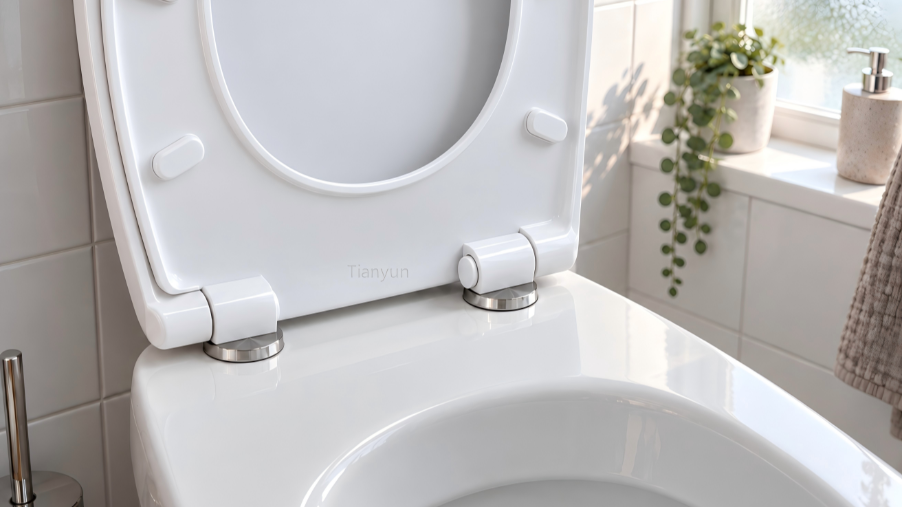
So how does it work? In a typical concealed system, a metal keyhole bracket or stainless-steel mounting plate is pre-attached to the ceramic pan during installation. The toilet seat's hinge assembly then clicks, slides, or hooks onto that bracket from above. Some designs use a bayonet-style twist-lock; others rely on a vertical drop-in slot. Either way, the connection point sits entirely behind the hinge housing, invisible once the seat is in position.
You'll encounter concealed fixings most often on wall-hung toilets — where the pan is cantilevered from the wall and underside access is restricted — and on back-to-wall units where a decorative shroud wraps the trapway and bowl base. In both cases, traditional bottom-fix bolts simply can't reach through, and even standard top-fix anchors may not be appropriate because the manufacturer has designed a proprietary bracket interface. This is important: concealed systems are frequently brand- or model-specific. A plastic toilet seat designed for a Villeroy & Boch concealed hinge won't click onto a Duravit bracket, even if the bolt-hole spacing looks identical. Always confirm the bracket type matches the seat before purchasing.
Quick-Release Mechanisms and How They Attach
Here's a distinction that trips up a lot of shoppers: quick-release is a seat-removal feature, not a separate fixing type. It doesn't replace your top-fix, bottom-fix, or concealed bracket — it sits on top of whichever base system is already anchoring the seat to the bowl. Think of it as a second layer of functionality built into the hinge.
The mechanism itself is straightforward. A button, lever, or sliding catch is integrated into the hinge body at the point where the seat meets the base bracket. Press or slide that catch, and the entire seat and lid assembly lifts straight off in one piece. The base bracket — the part actually bolted or anchored to the ceramic — stays put. You clean the bowl rim without obstruction, then drop the seat back onto the bracket until it clicks secure.
Why does this matter beyond convenience? Hygiene. The junction where the hinge meets the bowl rim is one of the hardest spots in a bathroom to clean. Grime, moisture, and bacteria accumulate in the narrow gap between the seat's hinge barrel and the ceramic surface. With a fixed seat, you're scrubbing around those tight spaces with a toothbrush. With quick-release, you lift the whole assembly away in two seconds and wipe a flat, exposed surface. If you've ever searched for a toilet seat near me because a stubborn seat felt permanently bonded to the pan, a quick-release upgrade can transform your cleaning routine.
One practical note: quick-release mechanisms add slight bulk to the hinge housing. On toilets with minimal clearance between the bolt holes and the cistern or wall, verify that the hinge body won't collide with the tank when the lid is raised. This is a common oversight on compact close-coupled designs.
Adjustable Hinge Mounts for Non-Standard Spacing
Not every toilet rolls off the production line with perfectly standardized bolt-hole positioning. Across different manufacturers, regions, and decades of production, mounting-hole spacing can vary by ten millimeters or more. Beewill's technical documentation highlights that some hinge systems are published with adjustment ranges — for example, 155 ± 20 mm — specifically to accommodate this variability. That's where adjustable hinge mounts earn their place in the fitting-type lineup.
An adjustable mounting plate typically features slotted bolt holes or a sliding track rather than fixed-position openings. This allows the hinge to shift laterally — left or right — or even slightly forward or backward to align with bolt holes that don't match the seat's default spacing. The adjustment range varies by product, but even a few millimeters of play can mean the difference between a perfect fit and a return trip to the store.
These mounts are especially valuable in two scenarios. First, when you're fitting an aftermarket seat onto an older or less common toilet where the bolt spacing drifts from the typical 140-155 mm range. Second, when you're managing a renovation with mixed toilet brands and want to standardize on a single seat model across multiple bathrooms. Adjustable hinges absorb the dimensional differences that fixed-position brackets can't.
If you're browsing commode seats at Lowes or any large retailer, you'll find that some brands advertise adjustable hinges prominently on the packaging while others bury the specification in fine print. Always check the published adjustment range against your measured bolt-hole spacing before assuming compatibility.
To keep these three systems straight, here's a quick summary of the standout benefit each one delivers:
- Concealed fixings — Aesthetics. All hardware is hidden, delivering a clean, uninterrupted visual line across the hinge area. Ideal for designer and modern toilet installations.
- Quick-release mechanisms — Hygiene. The seat lifts off in seconds for thorough cleaning of the bowl rim and hinge zone, then clicks back into place without tools.
- Adjustable hinge mounts — Compatibility. Slotted or sliding mounting plates bridge the gap between non-standard bolt-hole spacing and off-the-shelf seat hardware.
Each of these systems can work in combination with the others — a concealed bracket can incorporate quick-release, and an adjustable mount can feed into either a top-fix or concealed base. The key takeaway is that modern toilet seat fitting goes far beyond a simple bolt-and-nut arrangement. Matching the right combination of base fixing, removal mechanism, and adjustment capability to your specific toilet design is what separates a rock-solid installation from one that never quite feels right.
That confidence, however, depends on accurate numbers. Even the most sophisticated hinge system fails if the bowl measurements feeding into the decision are off by a centimeter.
How to Measure Your Toilet for the Correct Fitting
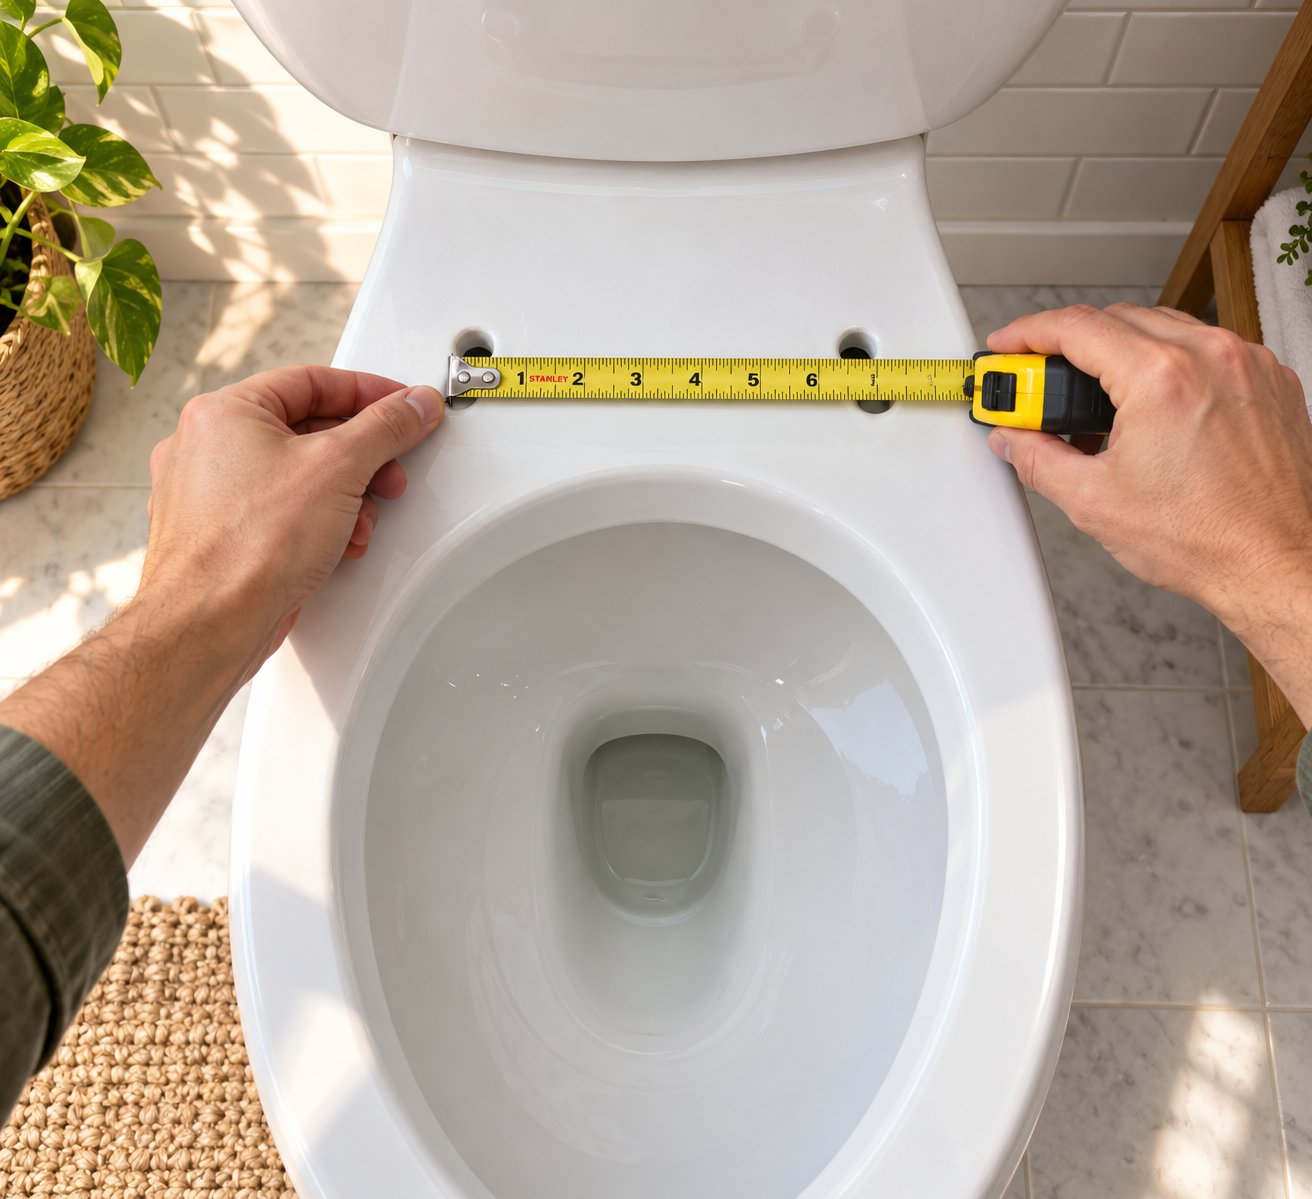
A centimeter off in one direction and the bracket won't grip. A centimeter off in another and the seat overhangs the bowl like a diving board. Picking the best toilet seat in the world means nothing if the numbers don't line up with your actual toilet. The good news? You only need three measurements, a flexible tape measure, and about two minutes.
The Three Measurements Every Buyer Needs
Forget complicated diagrams. Here's exactly what to measure — and why each number matters for fitting compatibility.
1. Bolt-hole center-to-center distance. This is your most critical measurement for fitting-type purposes. Lift the seat and lid, then look at the two mounting holes on the back of the bowl rim. Place your tape measure at the center of the left hole and stretch it across to the center of the right hole. On most standard toilets, this distance clusters around 150 mm (roughly 5.9 inches), though some North American models standardize closer to 140 mm (5.5 inches). Even a small deviation here determines whether a top-fix anchor will expand properly, whether a concealed bracket will align, or whether an adjustable hinge has enough lateral travel to compensate.
2. Bowl length. Find the midpoint between those two bolt holes — the spot directly between them on the rim's back edge. Now run your tape measure in a straight line from that midpoint to the very front outer edge of the bowl. Don't follow the curve of the rim; keep the tape taut across the center axis. This measurement tells you the commode seat size category your toilet falls into: round, elongated, or D-shape.
3. Bowl width. Measure across the widest point of the bowl rim, perpendicular to the length line you just captured. This confirms whether the seat you're considering will sit flush with the ceramic edges or leave awkward gaps on either side. Standard widths are fairly consistent, but designer bowls and compact models can throw surprises.
A quick tip: record every measurement in both centimeters and inches. Manufacturer specs aren't always presented in the same unit — a new toilet seat listed on a UK retailer's site may use millimeters, while a Lowes toilet seat product page defaults to inches. Having both figures written down lets you cross-reference instantly without converting on the fly.
Matching Measurements to Seat Shapes
Your three numbers now serve as a fingerprint for your toilet. Matching them to a seat shape is straightforward once you know the general reference ranges. Round bowls typically measure roughly 40-42 cm (about 16-16.5 inches) from the bolt-hole midpoint to the front rim. Elongated bowls stretch to roughly 46-48 cm (about 18-18.5 inches). D-shape bowls — common on modern European-style fixtures — tend to fall somewhere in between, often around 43-46 cm (17-18 inches), with a distinctively flat rear edge and a gently curved front.
Bolt-hole spacing on most residential toilets clusters near 15 cm (5.9 inches), but as Horow's WC seat size guide notes, the practical range across brands and regions can run from about 14 cm to 19 cm (5.5-7.5 inches). This is precisely why measurement one — bolt-hole center-to-center — is non-negotiable before purchasing. An adjustable hinge mount can bridge a few millimeters of variance, but it can't compensate for a fundamentally mismatched spacing.
The table below presents a measurement-to-shape reference grid. Use it as a starting point, not a guarantee — always measure the actual toilet rather than assuming it matches a category.
| Seat Shape | Typical Bowl Length (Bolt Holes to Front Rim) | Typical Bowl Width (Widest Point) | Common Bolt-Hole Spacing |
|---|---|---|---|
| Round | 40-42 cm / 16-16.5 in | 35-37 cm / 14-14.5 in | 14-15 cm / 5.5-5.9 in |
| Elongated | 46-48 cm / 18-18.5 in | 35-37 cm / 14-14.5 in | 14-15 cm / 5.5-5.9 in |
| D-Shape | 43-46 cm / 17-18 in | 35-38 cm / 14-15 in | 14-16 cm / 5.5-6.3 in |
Notice that width stays remarkably consistent across all three shapes — it's the bowl length that really separates one category from another. This is why toilet seat dimensions discussions so often focus on the front-to-back measurement. If your bowl measures 47 cm from bolt holes to rim, you're almost certainly in elongated territory. If it reads 41 cm, a round seat is your match. Values in the 43-45 cm range suggest a D-shape bowl, and you'll want to pay extra attention to the seat's outline profile to ensure the flat-back contour aligns with your ceramic.
For shoppers browsing the best rated toilet seats online, here's one more practical step: compare your three recorded measurements against the toilet seat dimensions listed on the product page before adding anything to the cart. Many returns happen simply because a buyer assumed "elongated" meant the same thing across every brand. Your tape measure is a far more reliable guide than a product thumbnail.
With precise measurements in hand, the next logical question shifts from "what size?" to "what toilet design?" — because the shape of your bowl is only part of the compatibility equation. The type of toilet you own determines which fitting methods are even possible.
Which Fitting Types Work with Which Toilet Designs
Here's where most buying guides fall silent. They'll explain what top-fix and bottom-fix mean, walk you through concealed brackets, maybe even list measurements — and then leave you to figure out on your own whether any of it actually applies to the toilet sitting in your bathroom. The missing link is the connection between fitting method and toilet design. Your toilet's physical structure dictates which attachment systems are mechanically possible, and getting this match wrong is one of the most common reasons people end up with a great toilet seat they can't install.
Every toilet falls into a design category based on how the bowl, cistern, and trapway are arranged. That arrangement determines how much access you have to the bolt holes — from above, from below, or not at all without manufacturer-specific hardware. Whether you're shopping for a round or elongated toilet seat, choosing between a plastic or wood toilet seat, or hunting for a toilet seat cover replacement for a cracked lid, none of those decisions matter until you've confirmed your toilet's design supports the fixing system the seat requires.
Close-Coupled and Pedestal Toilets
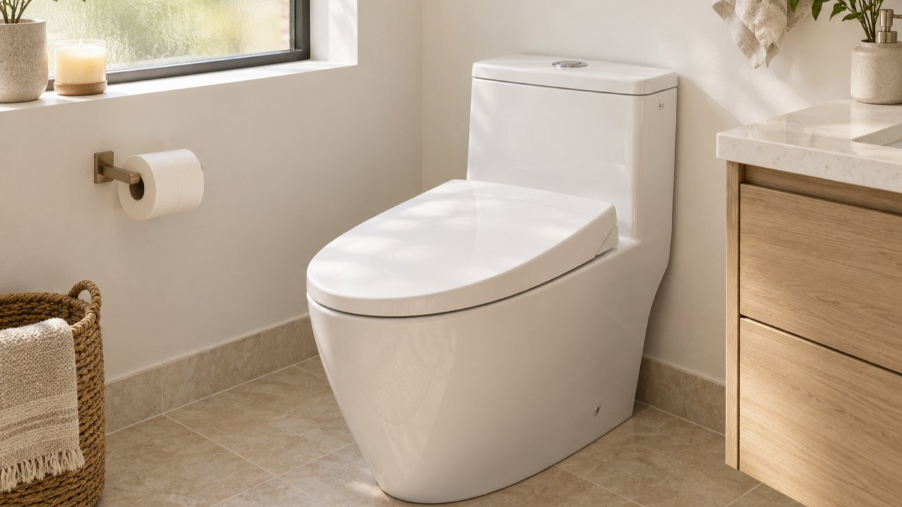
If your toilet has a visible cistern mounted directly on top of the bowl and sits on the floor with the trapway exposed at the back, you're looking at a close-coupled or pedestal design. This is the most common residential toilet type across both the US and the UK, and from a fitting perspective, it's the most forgiving.
Why? Because these designs offer full, unobstructed access to the bowl rim — both above and below. You can reach over the top to insert expanding anchors for a top-fix installation, or you can kneel down and thread wing nuts onto bolts from underneath for a traditional bottom-fix setup. Both methods work. Both deliver a stable, long-lasting hold. The toilet lid lifts freely without hitting any enclosure, and there's plenty of clearance around the hinge area for soft-close mechanisms or quick-release housings.
This universal compatibility is precisely why close-coupled toilets are the easiest to fit. You'll rarely encounter a seat — whether it's a budget round model or a premium elongated soft-close — that can't physically attach to a standard close-coupled pan. The only variable worth double-checking is bolt-hole spacing, which can differ slightly between older and newer models. As QS Supplies notes, close-coupled toilets remain the cheapest and simplest to install and service overall, and that accessibility extends directly to seat replacement. If you own one, count yourself lucky — virtually every fitting type on the market is at your disposal.
Wall-Hung Toilets
Wall-hung toilets present a very different scenario. The pan is cantilevered off the wall with no floor contact whatsoever, supported by a concealed steel frame hidden behind the bathroom wall or a furniture unit. The cistern is also buried inside the wall, leaving only a flush plate visible. It's a sleek, minimalist look — and a fitting challenge that catches a surprising number of buyers off guard.
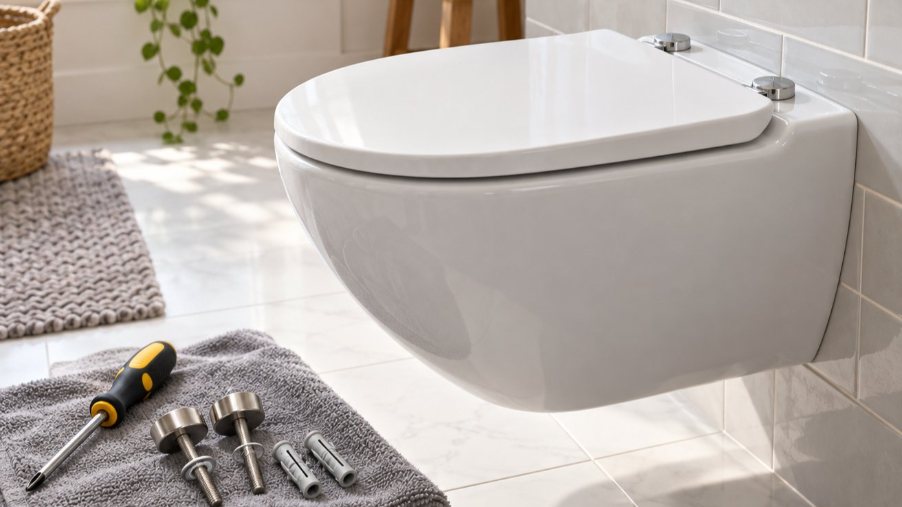
Technically, the underside of a wall-hung bowl is accessible. The pan hangs in open space, so you could reach beneath it. In practice, though, the clearance between the bowl's underside and the wall or floor is often tight, awkward, and poorly lit. More importantly, the toilet seat specifications for wall-hung pans frequently call for concealed fixings or top-fix systems that integrate with the pan's specific bracket design. Many wall-hung toilets ship with proprietary mounting plates already attached to the ceramic, and the matching seat simply clicks or slides into position from above.
There's a structural consideration here that goes beyond convenience. Wall-hung toilets transfer all load — the weight of the user, the seat, and any lateral movement — through the pan and into the concealed wall frame. A poorly fitted seat that wobbles or shifts can create repetitive stress at the wall-mount connection points. Over time, that stress can loosen the frame's fixings or even crack the ceramic where the pan meets the bracket. Using the manufacturer-recommended fitting system isn't just about aesthetics; it's about protecting the structural integrity of the entire installation.
Bottom-fix systems are generally a poor match for wall-hung pans. Even if you manage to reach underneath, standard wing nuts and washers aren't designed for the load dynamics of a cantilevered bowl. Stick with top-fix expanding anchors or — ideally — the concealed bracket system the toilet manufacturer specifies.
Back-to-Wall and Skirted Toilets
Back-to-wall and skirted designs occupy the trickiest spot in the fitting compatibility spectrum. Both styles share a defining feature: a decorative shroud or enclosure that hides the trapway, supply lines, and often the bolt-hole area itself from view. The result is a clean, sculptural profile — and a near-total loss of underside access.
A back-to-wall toilet pushes the rear of the pan flush against a wall or furniture unit, concealing the cistern and pipework behind it. QS Supplies describes back-to-wall models as compact and minimalist, but that space efficiency comes with a trade-off: the area beneath and behind the bowl rim is often completely enclosed. Skirted toilets go a step further, wrapping a smooth ceramic skirt around the entire base of the bowl. As Alpha Bidet's installation guide explains, skirted toilets require that the seat is secured and tightened from above using long screws that fit into rubber sleeves, because the traditional plastic bolts and nuts designed for two-piece toilets simply cannot be mounted onto the compact skirted design.
For these toilet types, top-fix systems are the default — and in many cases, the only viable option. The expanding anchors drop into the bolt holes from above, and the entire tightening process happens without ever needing to touch the underside. Some manufacturers take it further with proprietary concealed bracket systems specific to a model or product line, where a metal plate is integrated into the pan's rim and the seat slides onto it with no visible hardware at all.
The takeaway is simple but critical: if you own a back-to-wall or skirted toilet, always verify the required fixing method before ordering a replacement seat. A standard bottom-fix seat — no matter how great the reviews or how perfect the dimensions — physically cannot be installed on a toilet that offers no underside access. This single compatibility check prevents the most frustrating return scenario in the entire toilet seat category.
The table below maps each major toilet design to its compatible fitting methods and flags the key considerations that affect seat selection.
| Toilet Design | Compatible Fitting Methods | Underside Access | Special Considerations |
|---|---|---|---|
| Close-Coupled / Pedestal | Bottom-fix, top-fix, concealed, adjustable | Full access above and below | Most universally compatible; verify bolt-hole spacing on older models |
| Wall-Hung | Top-fix, concealed (manufacturer-specific preferred) | Limited — pan is suspended, space beneath is tight | Incorrect fitting risks stressing the concealed wall frame; avoid bottom-fix |
| Back-to-Wall | Top-fix, concealed bracket | None or severely restricted by furniture/wall unit | Cistern and pipework hidden; seat must attach entirely from above |
| Skirted | Top-fix (long screw with rubber sleeve), manufacturer-specific concealed | None — ceramic skirt blocks all underside access | Standard bottom-fix bolts and wing nuts will not work; confirm seat ships with skirted-compatible hardware |
Choosing a toilet seat without confirming fitting compatibility with your toilet design is one of the most common — and most avoidable — purchasing errors in the bathroom category. It doesn't matter whether you're sourcing a toilet seat cover replacement for a modern skirted model or picking up a simple round or elongated toilet seat for a classic close-coupled pan. The design of your toilet narrows your fitting options before you ever consider shape, material, or hinge style.
Speaking of hinges — once you've locked in your toilet design and compatible fixing method, the next layer of the decision involves the hinge mechanism itself. The type of hinge you choose determines how the seat moves, how long it lasts, and whether it can be fine-tuned to sit perfectly on your specific bowl.
Hinge Types and How They Connect to Your Fixings
A fitting system bolts the seat to the bowl. A hinge mechanism controls how the seat moves once it's attached. These are two distinct functions — yet they share the same physical housing, which is exactly why so many buyers confuse them. You might see a product listed as a "soft-close top-fix toilet seat" and assume soft-close is the fixing type, when in reality soft-close describes the hinge behavior while top-fix describes the mounting method beneath it. Keeping these two layers separate in your mind is the difference between a confident purchase and a frustrated return.
Think of it this way: the fixing method is the foundation anchored to ceramic, and the hinge mechanism is the moving joint that sits on top of that foundation. Every hinge type discussed below can pair with a top-fix, bottom-fix, or concealed bracket base — though some combinations work more smoothly than others. Let's walk through the three main hinge categories you'll encounter when shopping for the best toilet seats on the market.
Standard Open Hinges
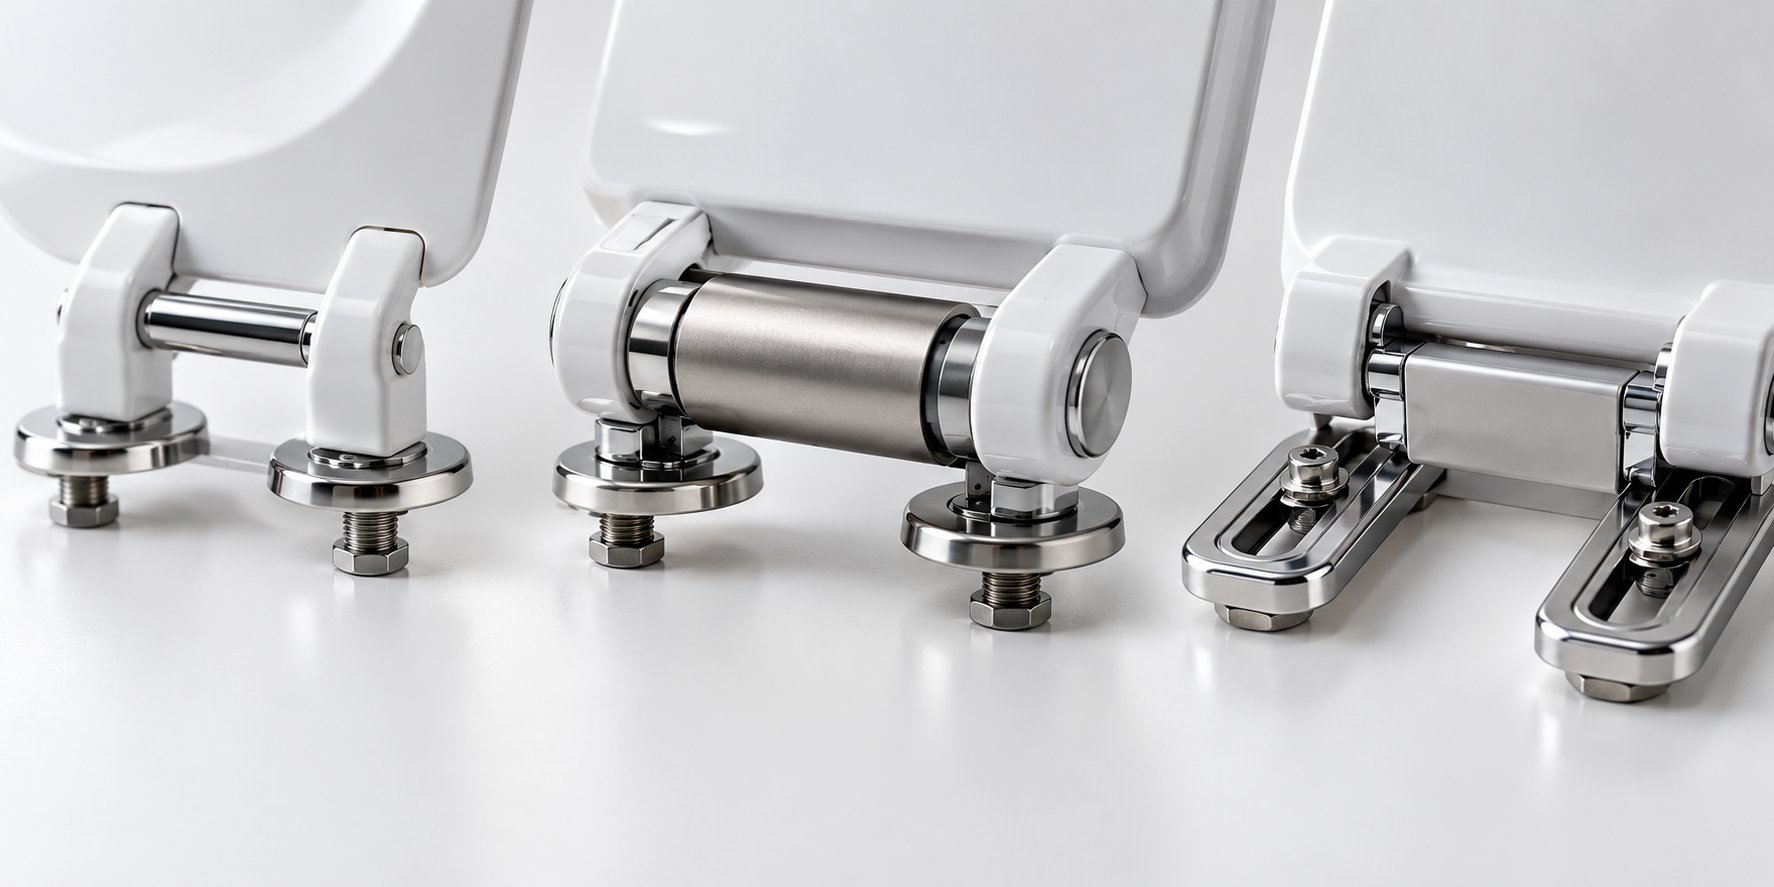
These are the workhorses of the toilet seat world. A standard open hinge uses a simple pin-and-barrel or post-pivot design: the seat and lid rotate freely around a metal or plastic rod running through the hinge barrel at the back of the seat. Lift the lid, and it swings up with no resistance. Let go, and gravity brings it down — fast, loud, and with the kind of slam that echoes through the house at 2 a.m.
Why do they remain so popular despite that drawback? Three reasons: simplicity, cost, and compatibility. Standard hinges have the fewest moving parts, which means there's less to wear out or break. They're the most affordable option by a wide margin, making them a natural fit for rental properties, commercial restrooms, and budget renovations. And because the hinge barrel is compact and lightweight, it pairs effortlessly with any fixing method — bottom-fix bolts, top-fix anchors, or concealed brackets. There's no clearance issue, no extra bulk pressing against the cistern, and no proprietary mounting requirement to worry about.
If you're debating a wood toilet seat vs plastic and want to keep the overall cost low, a standard open hinge on either material delivers reliable daily function without unnecessary complexity. It won't win style points, but it won't give you installation headaches either.
Soft-Close Hinges
Drop the lid on a standard hinge and you get a bang. Drop it on a soft-close hinge and it floats down in near silence, settling onto the bowl rim with barely a whisper. That controlled descent is the single feature most responsible for soft-close seats earning a reputation as some of the comfiest toilet seat upgrades available — not because they change the seat's shape or padding, but because they eliminate the jarring slam that makes every late-night bathroom trip a household announcement.
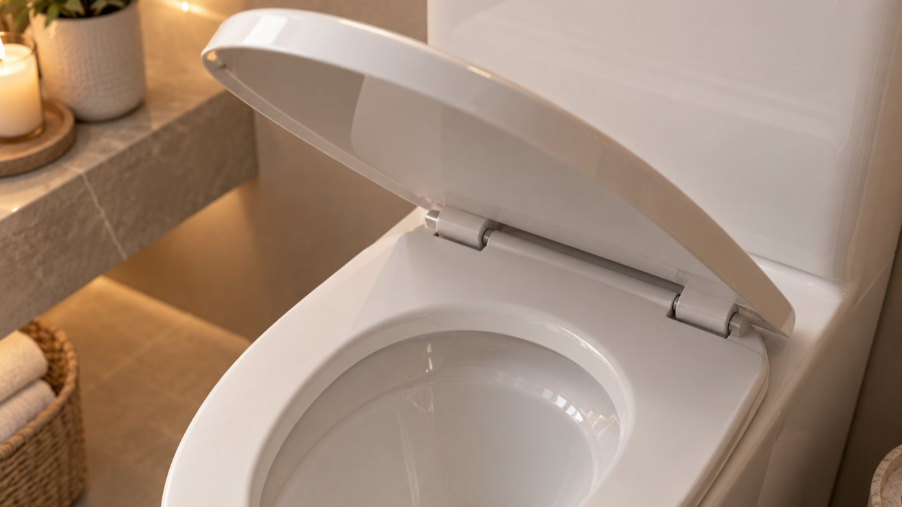
The mechanism behind this is a rotary damper integrated inside the hinge barrel. When the seat begins to close, the hinge rotates and activates this damper. Internally, specially designed structures and damping fluid create controlled resistance, gradually absorbing the kinetic energy of the falling lid. The result is a smooth, slow arc from fully open to fully closed — no slamming, no pinched fingers, no cracked ceramic edges.
From a fitting perspective, soft-close hinges attach to the same top-fix or bottom-fix base plates as their standard counterparts. The damper lives inside the hinge barrel itself, so the mounting footprint at the bolt holes doesn't fundamentally change. What does change is the hinge housing's size and weight. The internal damper mechanism adds bulk to the barrel — sometimes noticeably so — and soft-close seats tend to weigh more than equivalent standard-hinge models. This matters in two scenarios:
First, clearance. On compact close-coupled toilets where the cistern sits close to the bolt holes, a bulkier soft-close hinge barrel can bump against the tank when the lid is raised to its full upright position. Before buying, measure the gap between the back edge of the bolt holes and the nearest obstruction (cistern, wall, or furniture unit) and compare it to the hinge depth listed in the product specifications.
Second, longevity. The damping fluid and seals inside a rotary damper degrade over time with repeated use. A soft-close hinge that works perfectly for two years may gradually lose its damping effect, causing the lid to close faster and eventually slam. Toyou Industry's technical overview notes that when damping performance declines, the damper or entire hinge assembly typically needs replacement — a consideration worth factoring into a round vs elongated toilet seat decision if you're choosing between a premium soft-close model and a simpler alternative.
Adjustable and Multi-Point Hinges
Imagine you've confirmed your fixing type, measured your bolt-hole spacing, and ordered what should be a perfect seat — only to discover that the hinge holes on the seat are two millimeters narrower than the holes on your bowl. The seat installs, technically, but it sits slightly off-center. The lid doesn't align with the rim. One side overhangs while the other underhangs. Frustrating? Absolutely. Avoidable? Yes — with adjustable hinges.
Adjustable and multi-point hinges build lateral slide or front-to-back movement directly into the mounting plate. Instead of fixed bolt positions, these hinges use slotted tracks or telescoping brackets that allow you to shift the seat left, right, forward, or backward after the base is loosely attached to the bowl. Once alignment looks right, you tighten the fixings to lock everything in place. Bemis's Precision Seat Fit system, for example, provides front-to-back adjustability during installation, eliminating both unattractive overhang and underhang by letting you position the seat exactly where it belongs on the rim.
This adjustability is especially valuable when bolt-hole positions across different manufacturers don't quite match a seat's default hinge width — a scenario that's far more common than most buyers expect. It's also a practical solution for anyone managing multiple bathrooms with mixed toilet brands who wants to standardize on a single seat model without worrying about minor dimensional inconsistencies.
Adjustable hinges pair best with top-fix or concealed bracket systems, where the slotted mounting plate can be positioned precisely before the expanding anchor or bracket is locked down. Bottom-fix setups can accommodate adjustable plates too, but the need to hold alignment from above while tightening a wing nut from below makes the process significantly fiddlier.
Here's a quick summary of how each hinge type pairs with common fixing methods:
- Standard open hinges — Compatible with any fixing type (bottom-fix, top-fix, concealed). Compact barrel, lightweight, no clearance concerns. The universal default.
- Soft-close hinges — Compatible with any fixing type, but verify clearance between the hinge barrel and the cistern or wall. The added bulk and weight of the damper mechanism can interfere on compact toilets.
- Adjustable and multi-point hinges — Best paired with top-fix or concealed bracket systems where precise positioning is easiest. Bottom-fix is possible but less convenient due to simultaneous above-and-below alignment requirements.
The hinge you choose shapes the daily experience of using your toilet — quiet or loud, precisely aligned or slightly off, easy to maintain or locked in place for good. But hinges don't exist in isolation. They're only as durable as the hardware holding them to the ceramic, and that hardware comes in a surprising range of materials — each with its own strengths, trade-offs, and failure modes.
Fixing Hardware Materials and What to Expect from Each
You've nailed down your fitting type, confirmed compatibility with your toilet design, and chosen a hinge mechanism that suits your household. There's one more variable that quietly determines whether your installation holds firm for years or starts wobbling within months: the material of the fixing hardware itself. Not the seat body — whether you prefer a wood or plastic toilet seat is a separate conversation — but the bolts, nuts, washers, anchors, and mounting plates that physically clamp the seat to the ceramic.
This distinction matters more than most people realize. Two toilet seats can look identical on the shelf, carry the same fitting type, and match the same toilet bowl shapes — yet perform completely differently over time because one ships with nylon bolts and the other with stainless steel. The hardware material affects clamping strength, corrosion resistance, ceramic safety, and how long the connection stays tight under daily use. Let's break down the four most common options you'll encounter.
Plastic and Nylon Fixings
Pick up almost any replacement toilet seat from a big-box retailer, and the bolts, wing nuts, and washers inside the box will be molded from plastic or nylon. There's a reason this is the default consumer-grade choice: plastic fixings are lightweight, completely immune to rust, and gentle on ceramic surfaces. You can tighten a nylon bolt directly against porcelain without worrying about chipping or scratching the glaze — no protective washer required between the bolt head and the bowl rim.
The downsides, however, show up with time and torque. Plastic bolts can crack if overtightened, especially during installation when you're trying to eliminate any wobble. Even when installed correctly, nylon threads compress and creep under sustained load, meaning the connection gradually loosens. You'll notice the seat starting to shift side-to-side after several months of regular use, requiring periodic retightening that metal fixings rarely demand. For a standard toilet seat at an average toilet seat height in a guest bathroom that sees light traffic, plastic hardware is perfectly adequate. In a busy household bathroom, it may need attention sooner than you'd like.
If you've ever browsed toilet lids Lowes carries in their bathroom aisle, you'll notice that budget and mid-range seats almost universally ship with plastic fixing kits. That's fine for most homeowners — just know what you're getting and keep a screwdriver handy for the occasional retighten.
Stainless Steel and Brass Fixings
Step up to metal fixings and the difference in clamping strength is immediately obvious. A stainless-steel bolt torqued into an expanding anchor or threaded through a wing nut delivers a firm, unyielding hold that plastic simply can't match. Stainless steel also resists the humid, splash-prone bathroom environment exceptionally well — it won't rust, corrode, or weaken over years of exposure to moisture and cleaning chemicals. For these reasons, stainless steel is the preferred material for professional-grade fixing systems used in commercial restrooms, hospitality projects, and high-specification residential installations.
Brass shares many of the same mechanical advantages. It's strong, corrosion-resistant in most conditions, and has been a plumbing-hardware staple for over a century. Horing Sanitary's guide to toilet fixing bolts notes that brass is known for its strength and resistance to tarnishing, though it may corrode over time in environments with consistently high moisture levels. If your bathroom runs hot and steamy — think a small ensuite with poor ventilation — stainless steel edges ahead of brass for long-term reliability.
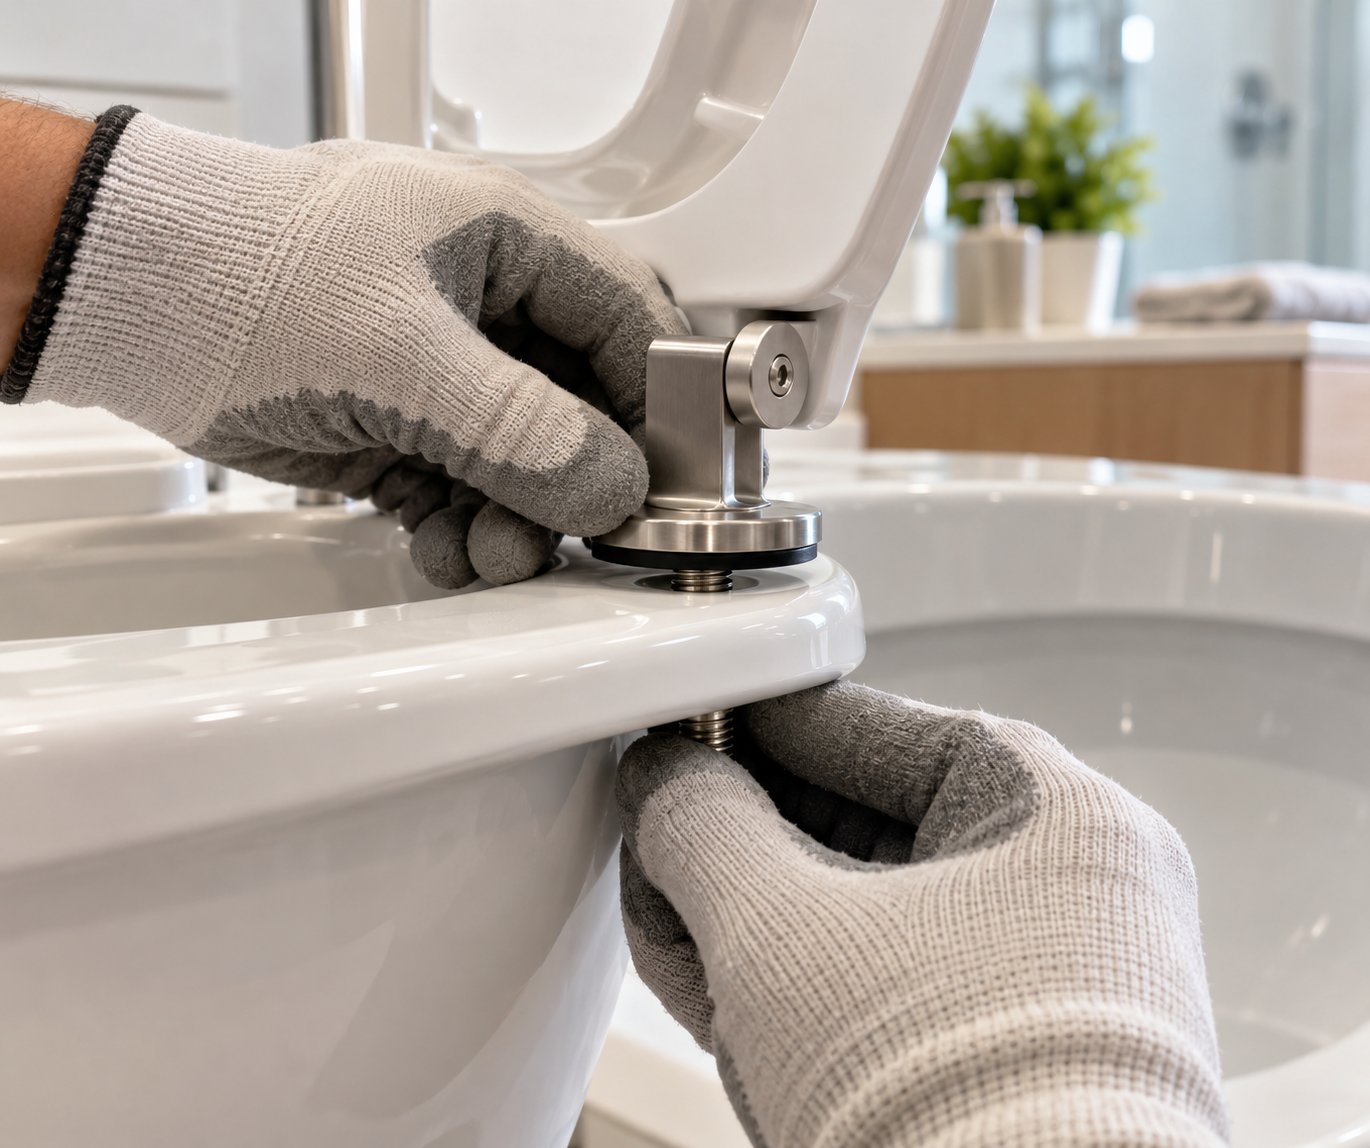
The critical trade-off with any metal fixing is ceramic safety. Metal-on-ceramic contact under clamping pressure can chip, crack, or score the glaze on your bowl rim. This risk is entirely manageable — you just need protective washers (rubber or nylon) between every metal surface and the porcelain. Most quality stainless-steel and brass fixing kits include these washers in the box, but it's worth confirming before you start installation. Skipping the washer is one of the fastest ways to damage a perfectly good toilet.
For sanitary ware manufacturers and replacement-hardware sourcing teams evaluating stainless-steel options at scale, Tianyun's Toilet Seat Fixing Systems offer a useful reference point. Their range brings together hinge mounting kits, stainless-steel bases, and custom fixing assemblies designed for professional integration — the kind of B2B hardware that underpins OEM seat production and commercial refurbishment projects rather than individual retail purchases.
Chrome-Plated and Zinc-Alloy Fixings
Sitting between plastic and solid stainless steel, chrome-plated and zinc-alloy fixings offer a middle ground that balances looks, durability, and cost. You'll find these most often on mid-range to premium seats where the manufacturer wants the hinge hardware to carry a polished, metallic finish that complements the bathroom's other fixtures — faucets, towel rails, flush plates — without the price tag of solid stainless steel.
The appeal is largely aesthetic. A chrome-plated bolt head or hinge cap catches light and looks deliberate in a way that matte plastic never will. From a performance standpoint, the zinc-alloy core provides decent clamping strength — stronger than nylon, though not quite matching solid stainless steel or brass. Corrosion resistance, however, depends entirely on the integrity of the chrome plating. As long as the surface layer remains intact, the underlying zinc stays protected. The moment a scratch, chip, or wear spot exposes the base metal, moisture creeps in and corrosion begins — often appearing as a bubbling or flaking finish around the bolt head or hinge barrel.
In practice, this means chrome-plated fixings perform well in bathrooms where they won't be subjected to abrasive cleaning products or frequent removal and reinstallation. A round commode seat on a seldom-used powder room toilet? Chrome-plated hardware will look great for years. A busy family bathroom where the seat gets removed weekly for deep cleaning? The repeated handling accelerates wear on the plating, and you may see cosmetic degradation within a year or two.
Material Comparison at a Glance
The table below lays out the practical differences across the five criteria that matter most when selecting fixing hardware. Whether you're choosing a single replacement toilet seat for your home or specifying hardware across an entire development, these trade-offs shape long-term satisfaction.
| Fixing Material | Corrosion Resistance | Clamping Strength | Ceramic Safety | Typical Use Case | Relative Cost |
|---|---|---|---|---|---|
| Plastic / Nylon | Excellent — immune to rust and chemical damage | Low to moderate — threads can strip or crack under overtightening | High — soft material won't chip or scratch porcelain | Consumer retail seats, budget replacements, light-use bathrooms | Low |
| Stainless Steel | Excellent — resists humidity, chemicals, and prolonged moisture exposure | High — strong, consistent clamping force with minimal loosening over time | Requires protective washers to prevent chipping | Commercial installations, hospitality, OEM manufacturing, high-spec residential. Tianyun's fixing systems serve as a B2B sourcing example for stainless-steel bases and hinge mounting kits at scale. | Moderate to high |
| Brass | Good — tarnish-resistant but can corrode in high-humidity environments over time | High — excellent mechanical strength and thread durability | Requires protective washers | Traditional and heritage-style toilets, premium residential replacements | Moderate to high |
| Chrome-Plated Zinc Alloy | Moderate — strong while plating is intact; vulnerable once the base metal is exposed | Moderate — stronger than plastic, softer than solid stainless or brass | Requires protective washers | Mid-range seats with a polished finish, powder rooms, design-focused bathrooms | Moderate |
A few patterns emerge from this comparison. If your priority is a trouble-free installation that stays tight with minimal maintenance, stainless steel is the strongest long-term investment — especially for toilets in high-traffic or commercial settings. If you want a quick, inexpensive fix and your bathroom sees moderate use, plastic or nylon gets the job done without fuss. Chrome-plated zinc alloy earns its place in design-conscious spaces where visual finish matters as much as function, provided you accept the maintenance trade-off.
One final consideration that often goes overlooked: the fixing material should match the demands of your chosen hinge type. A heavy soft-close seat exerts more downward and rotational force on the mounting hardware than a lightweight standard-hinge model. Pairing a substantial soft-close mechanism with thin plastic bolts is asking for accelerated loosening. For heavier seats — particularly those installed on toilets where the seat height puts additional leverage on the hinge point — metal fixings provide the mechanical backbone the system needs.
Selecting the right material is the last piece of the specification puzzle. But knowing what to choose is only valuable if you also know what not to do. Even the best hardware can fail when common installation mistakes compromise the connection — and some of those mistakes risk damaging more than just the seat.
Common Fitting Mistakes and How to Avoid Them
Great hardware in the wrong hands still leads to a bad outcome. You could choose the perfect fitting type, measure every dimension down to the millimeter, and invest in stainless-steel bolts — then undo all of that careful planning with a single installation error. Worse, some mistakes don't just loosen your seat; they crack your ceramic, strip your bolt holes, or leave you with a replacement seat that never should have been ordered in the first place.
The mistakes below fall into three categories: physical errors that damage your toilet, purchasing errors that waste money, and situations where the smartest move is putting down the screwdriver and picking up the phone. Each one ties directly back to the fitting-type decisions covered throughout this article, because that's almost always where the breakdown starts.
Mistakes That Damage Ceramic or Loosen Seats
These are the errors that leave visible evidence — chipped porcelain, cracked rims, and seats that wobble worse after "fixing" than they did before.
Using metal bolts directly against ceramic without protective washers. A stainless-steel or brass toilet seat screw delivers excellent clamping force, but metal pressing directly against a glazed porcelain surface under torque will chip, score, or crack the finish. Every metal bolt needs a rubber or nylon washer between the bolt head and the ceramic rim — and another between the nut and the underside. Skip these, and you're trading a stable seat for a damaged bowl that no washer can fix after the fact. As Oatey's bolt replacement guide cautions, overtightening against porcelain can crack the fixture itself — a repair far more expensive than the seat you were trying to install.
Overtightening plastic wing nuts until they crack. Plastic and nylon fixings are gentle on ceramic, but they have a breaking point that arrives much sooner than most people expect. When a standard toilet seat feels slightly loose, the instinct is to crank the wing nut another half turn. With plastic hardware, that extra half turn can split the nut, strip the bolt threads, or crack the expanding anchor inside the hole. The fix is restraint: tighten until the seat no longer shifts when you press down on it, then stop. If it still moves, the problem isn't insufficient torque — it's likely the wrong anchor size or a worn bolt hole.
Forcing top-fix anchors into bolt holes that are too wide or too narrow. An expanding anchor works by gripping the inner walls of the bolt hole as the screw draws it tight. If the hole diameter is larger than the anchor's expansion range, the plug spins freely and never locks. If the hole is too narrow, you can't seat the anchor deep enough for it to function. Forcing it — hammering, reaming, or overtightening — damages the ceramic around the hole and can make future installations impossible without professional repair. Always check the anchor's specified hole-diameter range against your actual bolt holes before inserting anything.
Buying Errors That Waste Time and Money
Installation mistakes cost effort. Purchasing mistakes cost money — plus the effort of boxing the seat back up and arranging a return. These are the errors that happen before you ever pick up a tool.
Assuming all toilet seats are universally compatible. They aren't. Different types of toilets demand different fixing systems, and even within the same fitting category, bolt-hole spacing, anchor diameter, and hinge clearance vary across manufacturers. A seat that fits perfectly on one standard toilet seat may not align with another brand's version of the same design. Always verify before buying.
Buying a top-fix seat for a toilet that only supports bottom-fix — or vice versa. This is the single most common return reason in the toilet seat category. If your toilet has a skirted or back-to-wall design with no underside access, a bottom-fix seat is mechanically impossible to install. Conversely, bolt holes on some older toilets are too wide for standard top-fix expanding anchors to grip. Confirming access direction — from above or below — takes thirty seconds and saves days of waiting for an exchange.
Ignoring bolt-hole spacing differences between manufacturers. That 150 mm standard? It's a guideline, not a guarantee. Toilet seats oval in shape, round models, and elongated designs can all ship with hinge holes set at slightly different widths. If you're wondering how to measure toilet seat for replacement, start with the bolt-hole center-to-center distance on your bowl, then compare it to the hinge width listed in the product specifications. A five-millimeter mismatch might be absorbed by an adjustable hinge mount; a fifteen-millimeter mismatch means the seat simply won't fit.
Purchasing an elongated seat for a round bowl based on appearance alone. Elongated toilet seat sizes and round seat sizes overlap just enough in width to look plausible in a product photo. But the front-to-back length difference — roughly four to six centimeters — means an elongated seat will overshoot a round bowl's front rim dramatically, creating an unstable platform and an awkward appearance. Always match your measured bowl length to the seat's published dimensions, not to a thumbnail image on a product listing.
When to Call a Professional Instead of DIY
Most toilet seat installations are genuine DIY territory — fifteen minutes, one or two tools, no plumbing expertise required. But a few scenarios fall outside that comfort zone, and pushing through them risks damage that far exceeds the cost of a professional callout.
Cracked porcelain around the bolt holes. If the ceramic surrounding either mounting hole is chipped, fractured, or crumbling, tightening a new bolt into that damaged area can propagate the crack further — potentially splitting the bowl rim entirely. A plumber or bathroom installer can assess whether the damage is superficial or structural and recommend repair or replacement before a new seat goes on.
Wall-hung toilet installations requiring concealed-frame access. The steel support frame behind a wall-hung pan is hidden inside the wall cavity. If seat mounting requires adjusting or replacing the concealed bracket attached to that frame, you're dealing with a structural connection, not just a toilet seat. Incorrect work here can compromise the pan's load-bearing capacity. Leave this to someone who understands the frame system.
Corroded metal fixings that are seized and won't release. Old brass or steel bolts exposed to years of bathroom humidity can fuse to their nuts or anchors. Forcing them risks snapping the bolt inside the ceramic, cracking the bowl rim, or shearing the bolt hole entirely. A professional has the right penetrating lubricants, extraction tools, and experience to remove seized hardware without collateral damage — a far cheaper outcome than a new toilet.
Before you begin any installation — DIY or professional — run through this quick verification checklist to confirm everything lines up:
- Measure bolt-hole spacing — Confirm the center-to-center distance matches the seat's hinge width or falls within the adjustable range.
- Confirm top-fix vs. bottom-fix — Verify whether your toilet allows access from above only, below only, or both, and ensure the seat's fixing method matches.
- Check clearance for soft-close hinges — Measure the gap between the bolt holes and the nearest obstruction (cistern, wall, or furniture unit) to ensure the hinge barrel won't collide when the lid opens fully.
- Inspect ceramic for cracks — Examine the porcelain around both bolt holes and along the back rim for chips, hairline fractures, or erosion that could worsen under clamping pressure.
- Verify seat shape matches bowl shape — Cross-check your measured bowl length and width against the seat's published dimensions to confirm a round, elongated, or D-shape match.
Five checks. Five minutes. That's all it takes to prevent the frustration, wasted money, and potential damage that come from skipping the basics. Every mistake on this page traces back to the same root cause: rushing past the fitting-type fundamentals that the rest of this article was built to explain.
With those pitfalls mapped and your verification steps complete, the final piece of the puzzle is a single, scannable reference that ties every fitting type, compatibility detail, and decision point together in one place — so you can bookmark it and pull it up the moment you're ready to buy.
Quick-Reference Summary
Every chapter in this guide has tackled one layer of the toilet seat fitting puzzle — identification, measurement, compatibility, hinge selection, material grade, and mistake prevention. Useful when you're reading in depth, but not exactly what you want to scroll through while standing in a hardware aisle with your phone in one hand and a toilet seat box in the other. This final section distills the entire article into a single bookmarkable resource you can pull up the moment you're ready to make a decision.
Fitting Type Quick-Reference Table
Are all toilet seats the same size, and do they all attach the same way? Not even close. The table below lays out every fitting type covered in this guide, side by side, so you can match your toilet design to the right system in seconds.
| Fitting Type | How It Works | Best For (Toilet Design) | Typical Materials | Key Advantage |
|---|---|---|---|---|
| Bottom-Fix | Bolts pass down through the bowl rim and are secured from underneath with washers and wing nuts. | Close-coupled, pedestal, and open-back toilet types with full underside access | Plastic/nylon, brass, stainless steel | Widest compatibility — works on almost any traditional floor-mounted toilet |
| Top-Fix | Expanding rubber or plastic anchors are inserted into the bolt holes and tightened entirely from above with a screwdriver or Allen key. | Wall-hung, back-to-wall, skirted, and enclosed toilet types where underside access is limited or impossible | Plastic/nylon anchors with steel or nylon screws | No reaching underneath — fast, single-direction installation |
| Concealed Bracket | A metal keyhole plate or stainless-steel bracket is pre-mounted on the pan, and the seat clicks or slides onto it with no visible hardware. | Wall-hung and back-to-wall designs where a clean sightline is a design priority | Stainless steel, zinc alloy, chrome-plated metal | Aesthetics — all hardware is hidden behind the hinge body or cover plate |
| Quick-Release (Overlay) | A button-press or slide-off catch lets the toilet seat and lid detach for cleaning while the base bracket stays bolted to the pan. | Any toilet type — sits on top of a bottom-fix, top-fix, or concealed base system | Plastic catch mechanism on a metal or nylon base bracket | Hygiene — seat lifts off in seconds for unobstructed bowl cleaning |
| Adjustable Mount | Slotted or sliding mounting plates allow lateral and front-to-back hinge movement to accommodate non-standard bolt-hole spacing. | Mixed-brand renovations, older toilets, or any pan with bolt-hole spacing outside the standard 150 mm range | Stainless steel or reinforced nylon plates | Compatibility — bridges dimensional gaps between the seat and the bowl |
For manufacturers, sourcing teams, or commercial refurbishment projects that need to evaluate these systems at scale — particularly stainless-steel bases, hinge mounting kits, and custom fixing assemblies — Tianyun's Toilet Seat Fixing Systems provide a professional B2B reference point worth reviewing alongside broader supplier options.
Choosing the Right Fitting Type for Your Situation
Strip away all the detail and the decision path is surprisingly linear. Start by identifying your current fixing — lift the toilet lids and inspect whether bolts are accessed from above, below, or hidden behind a bracket. Measure your bolt-hole spacing and bowl dimensions (length and width) so you know exactly how to size a toilet seat for your specific pan. Match those measurements and your toilet design — close-coupled, wall-hung, back-to-wall, or skirted — against the compatible fitting methods listed in the table above. From there, choose your hinge mechanism (standard, soft-close, or adjustable) and your hardware material grade based on usage demands and budget. Finally, install the seat yourself using the pre-installation checklist from the previous section, or bring in a professional if cracked ceramic, seized bolts, or concealed-frame access makes DIY risky.
That's the complete journey: identify, measure, match, choose, install. Every step narrows the field until you're left with the one toilet seat and lid combination that actually belongs on your bowl — not just in shape and style, but in the mechanical handshake that holds it all together. Whether you're sourcing top rated toilet seats for a renovation or simply replacing a single worn-out hinge, the fitting type is the foundation that makes everything else work. Get that right, and the rest falls into place.
Frequently Asked Questions About Toilet Seat Fitting Types
1. How do I know what fitting type my toilet seat uses?
Lift the seat and lid, then inspect the back of the bowl rim where the hinges attach. If you can feel wing nuts underneath the rim, you have a bottom-fix system. If the bolts tighten from above with a screwdriver or Allen key and there are no nuts below, it is a top-fix setup. A slim decorative plate hiding all hardware indicates concealed fixings. Photograph the hinge area and measure the bolt-hole center-to-center distance before shopping to ensure an accurate match.
2. What is the difference between top-fix and bottom-fix toilet seat fittings?
Bottom-fix fittings use bolts that pass down through the bowl rim and are tightened from underneath with washers and wing nuts — the most universal method but awkward in tight spaces. Top-fix fittings use expanding anchors dropped into the bolt holes and tightened entirely from above, making them ideal for wall-hung, skirted, and back-to-wall toilets where underside access is blocked. Your toilet's physical design typically determines which system you need rather than personal preference.
3. Are all toilet seat fittings universal?
No. Toilet seat fittings vary by bolt-hole spacing, access direction (top or bottom), anchor diameter, and bracket type. Standard bolt-hole spacing clusters around 150 mm but can range from 140 mm to over 160 mm across manufacturers and regions. Concealed bracket systems are often brand- or model-specific. Always measure your bolt-hole spacing and confirm whether your toilet requires top-fix, bottom-fix, or a proprietary concealed mounting system before purchasing a replacement seat.
4. Can I use a top-fix toilet seat on any toilet?
Not always. Top-fix expanding anchors require bolt holes within a specific diameter range to grip securely. If the holes are too wide, the anchor spins without locking; too narrow, and it will not seat properly. Top-fix works best on enclosed designs like skirted and back-to-wall toilets, but standard close-coupled toilets with appropriately sized holes can also accept them. Check the anchor's published hole-diameter range against your actual bolt holes before installation.
5. What materials are best for toilet seat fixing hardware?
Stainless steel offers the strongest clamping force and excellent corrosion resistance, making it ideal for high-traffic or commercial bathrooms — sourcing teams often reference suppliers like Tianyun for professional-grade stainless-steel mounting kits. Brass is durable but may tarnish in very humid conditions. Plastic and nylon bolts are rust-proof and ceramic-safe but can loosen or crack over time. Chrome-plated zinc alloy balances aesthetics and moderate strength but is vulnerable once the plating is scratched. Always use protective washers between metal fixings and porcelain.
Apply This Insight to Your Project
Tell us what you are building and how the topic “Toilet Seats Fitting Types Decoded: Stop Buying The Wrong Seat” relates to your application. Our engineering team can help evaluate the next step.