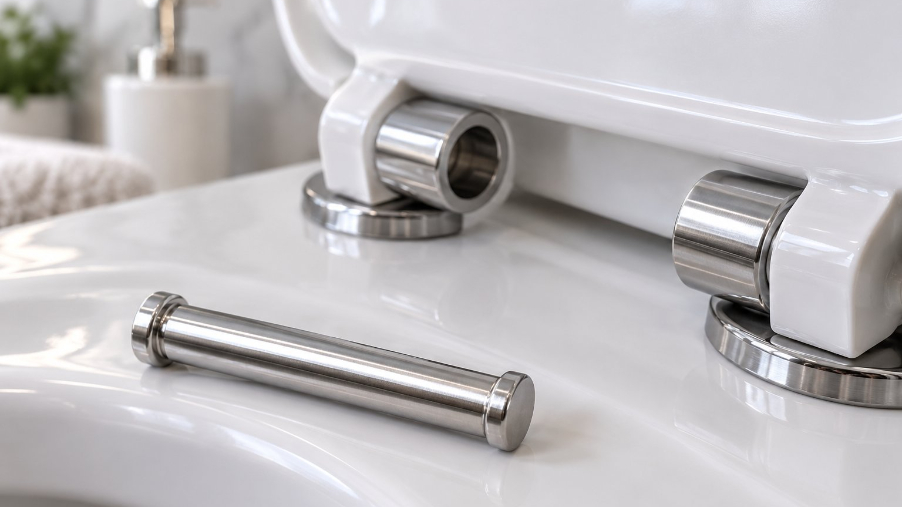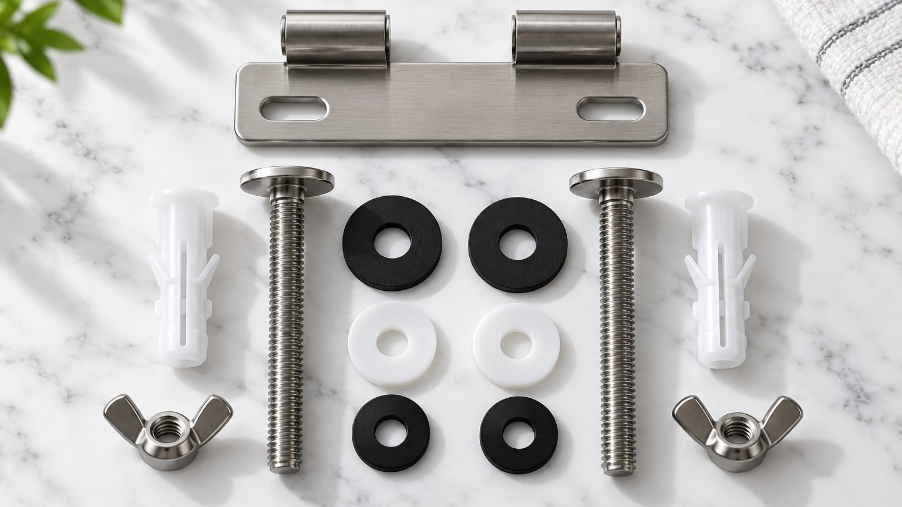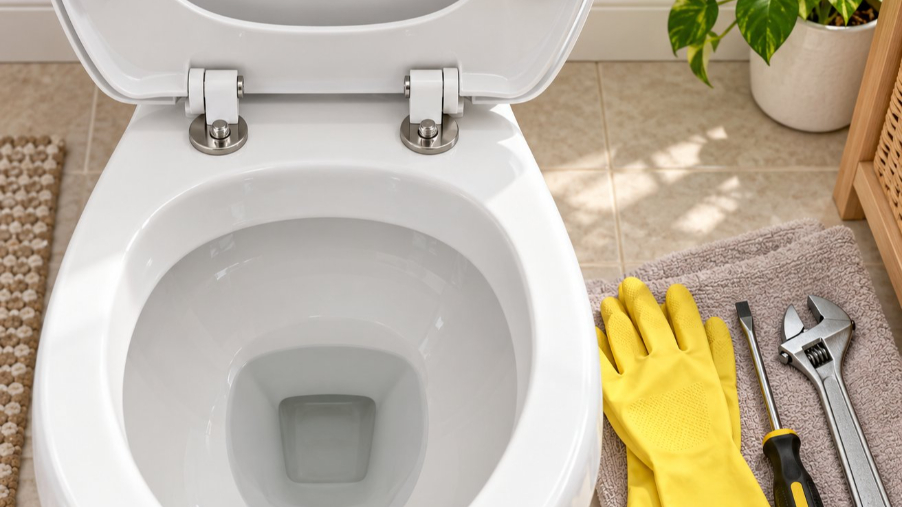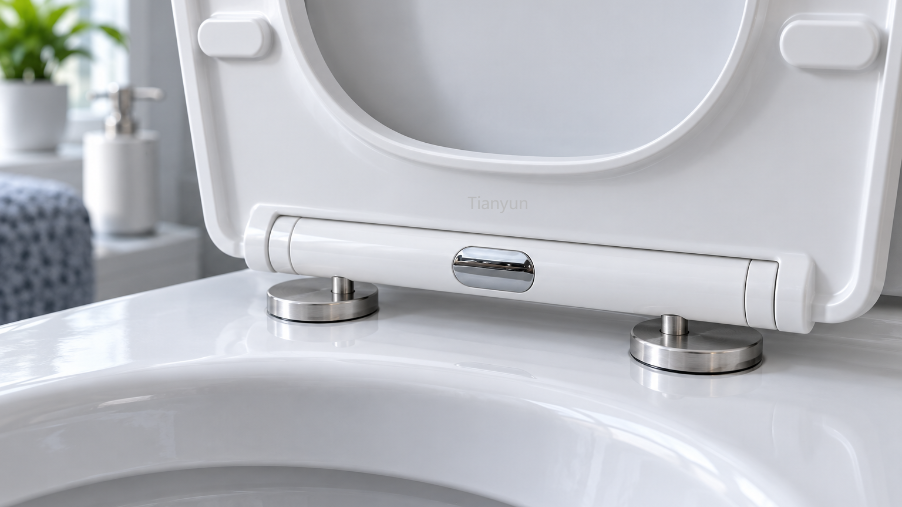
What Are Plastic Toilet Seat Hinge Bolts and Why They Matter
When you sit down and the toilet seat slides sideways, you already know something is wrong. Maybe the seat wobbles every time you shift your weight. Maybe you heard a quiet snap the last time someone closed the lid a little too hard. Or maybe you just pulled a brand-new seat out of the box and found a bag of small plastic parts you cannot quite identify. Whatever brought you here, the culprit is almost always the same overlooked component: the hinge bolts holding everything together.
Plastic toilet seat hinge bolts are threaded nylon or polypropylene fasteners—typically sold as part of a mounting assembly that includes a bolt, nut, washer, and sometimes a bushing—designed to anchor a toilet seat to the bowl without scratching porcelain or corroding over time.
These fasteners sit at the rear of your bowl rim, passing through two mounting holes that every standard residential toilet shares. They are small, inexpensive, and easy to ignore—until they fail. A loose or broken hinge bolt is the single most common reason a toilet seat feels unstable, and the fix is far simpler than most people expect.
What Plastic Hinge Bolts Actually Do
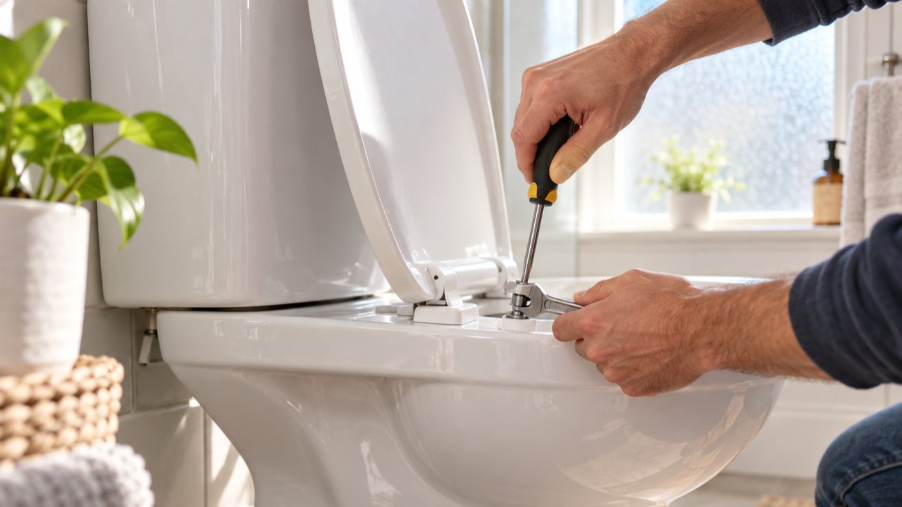
Imagine the seat and lid assembly as a door. Just like a door needs hinges screwed into a frame, your toilet seat needs fasteners anchoring its hinge ears to the bowl. Each hinge bolt drops through a hole in the seat's hinge, passes through the corresponding mounting hole in the porcelain rim, and extends below the bowl. A nut threads onto the bolt from underneath, and as you tighten it, the assembly clamps the seat firmly against the ceramic surface.
The term "hinge bolts" is the industry-standard label covering a range of plastic fastener configurations—from simple bolt-and-nut pairs to multi-piece kits with washers, bushings, and decorative caps. Regardless of the specific setup, the mechanical job stays the same: hold the seat steady so it does not shift, rock, or detach during use. Because these fasteners are plastic rather than metal, they protect the porcelain from scratches and eliminate the rust that plagues steel hardware in humid bathroom environments.
Who Needs This Guide
This article is built for three types of readers, and you likely fall into one of them:
- The homeowner with a loose or broken seat. You have retightened those bolts more times than you can count, or one finally cracked. You need a clear path from diagnosis to a permanent fix.
- The DIYer mid-replacement. You bought a new toilet seat, opened the package, and realized the included hardware does not match your bowl—or the old bolts will not come out. You need practical removal and installation steps.
- The maintenance professional sourcing parts in bulk. You manage multiple properties or commercial restrooms and want to standardize on reliable hardware that saves callbacks. You need selection criteria and sourcing guidance.
From the anatomy of each component to step-by-step removal, installation, troubleshooting, and long-term maintenance, every section ahead targets a specific stage of the process. The goal is straightforward: help you fix the problem once and never think about these fasteners again.
Of course, understanding what goes wrong starts with knowing exactly what each piece in the assembly looks like and what role it plays—details that become critical the moment you open a replacement kit and find five different parts staring back at you.
Anatomy of a Plastic Toilet Seat Hinge Bolt Assembly
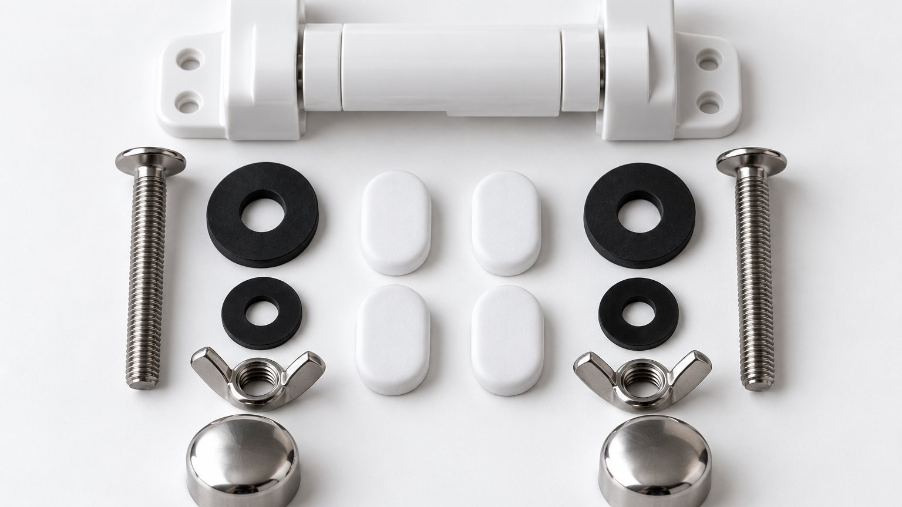
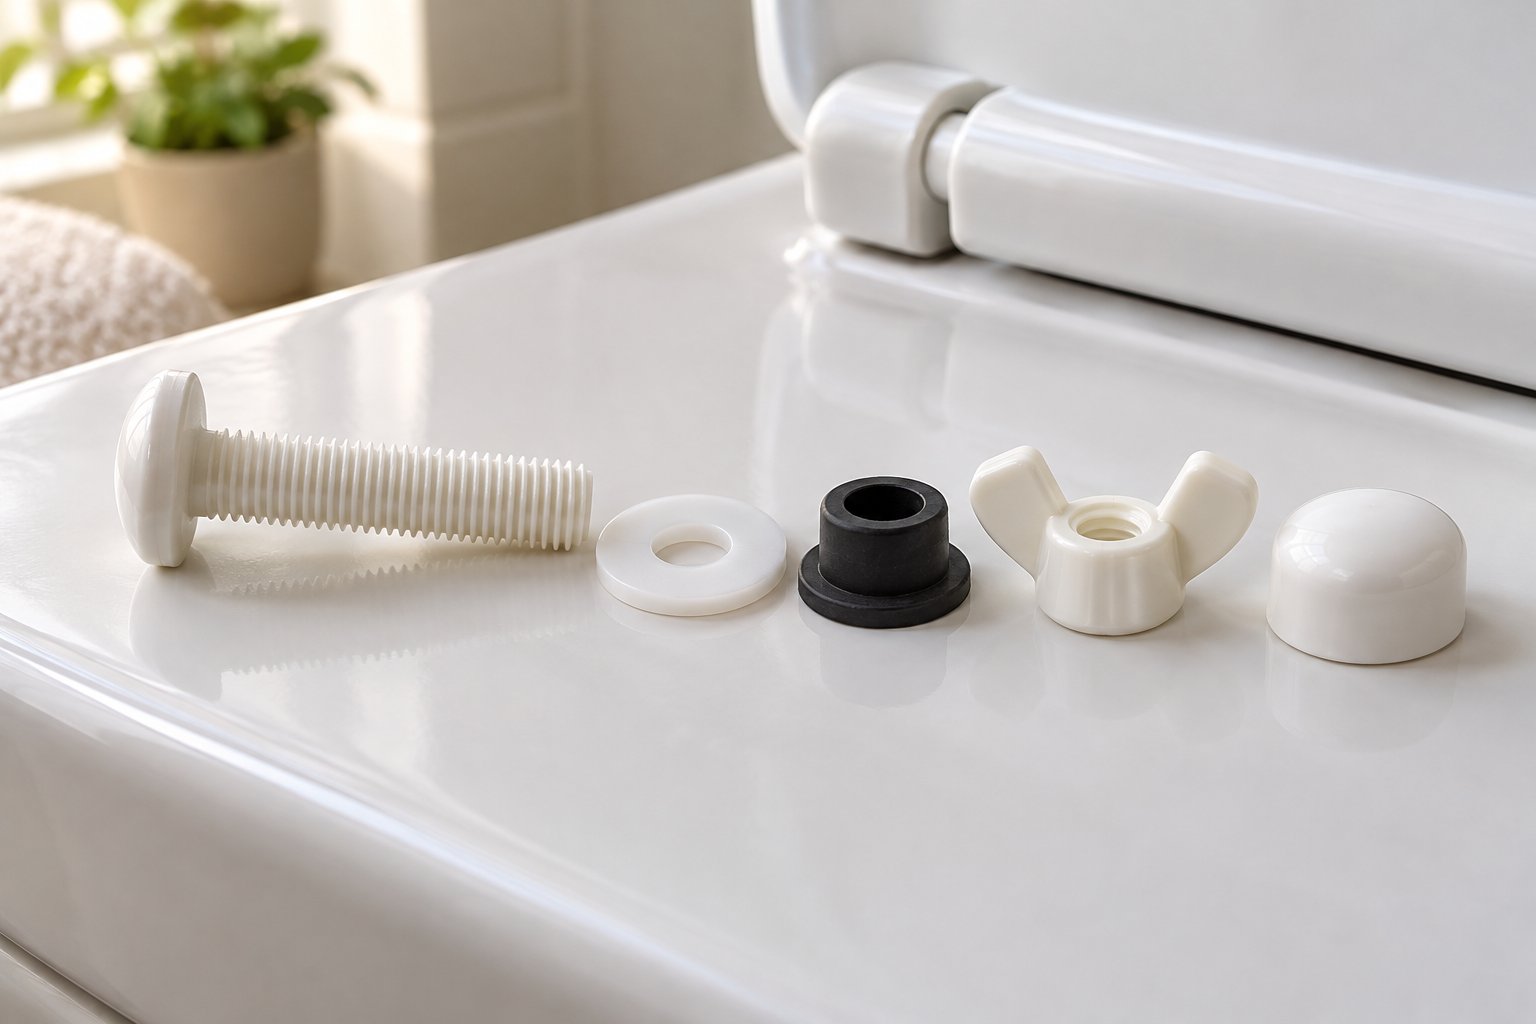
Picture five small plastic parts spread across your bathroom counter. Each one looks simple enough on its own, yet every piece serves a distinct mechanical purpose. Together, they form the complete mounting assembly that keeps your toilet seat locked in place. Understanding what each component does—and why skipping even one leads to problems—is the difference between a rock-solid seat and one that starts wobbling again within a week.
Here is a breakdown of every part you will find inside a standard plastic toilet seat hinge bolt kit:
- Bolt (threaded shaft): The central fastener, typically molded from nylon or polypropylene. It passes through the seat hinge ear and drops into the ceramic mounting hole from above.
- Nut (wing nut or hex nut): A plastic nut that threads onto the bolt from beneath the bowl rim, pulling the assembly tight against the porcelain.
- Washer (flat washer): A disc that sits between the nut and the underside of the bowl, distributing clamping force across a wider area to protect the ceramic.
- Bushing or sleeve (optional): A centering piece that fills the gap between the bolt shaft and the mounting hole, keeping the bolt aligned and reducing lateral play.
- Decorative cover cap: A snap-on cap that conceals the bolt head from above, giving the hinge area a clean, finished look.
Every one of these toilet plastic bolts plays a role in the assembly's overall stability. Remove the washer, and the nut concentrates all its force on a tiny ring of porcelain. Leave out the bushing, and the bolt can drift inside an oversized hole. Skip the cap, and moisture slowly works its way into the bolt head, accelerating wear. The system only performs correctly when every piece is present and properly seated.
Bolt Shaft and Threading
Pick up a plastic toilet seat hinge bolt and you will notice a few things right away. The shaft is smooth near the head—where it passes through the hinge ear—and threaded along the lower portion that extends below the bowl rim. Most residential plastic toilet seat screws use a shaft diameter of approximately 3/8 inch (roughly 10 mm), a size that fits the standard mounting holes found on the majority of North American toilet bowls.
The threading itself is coarse by design. Coarse threads grip more aggressively per turn, which means you can achieve a snug clamp with hand-tightening alone—no power tools needed. Some mounting systems use a quarter-turn locking mechanism instead of continuous threading. In that design, you drop the bolt in, give it a 90-degree twist, and the bolt locks into a keyhole-shaped slot in the hinge. Either way, the goal is the same: secure attachment without requiring excessive torque that could crack the plastic.
Bolt length is the other variable you will encounter. Common sizes fall in the 40 mm to 70 mm range, and the right length depends on two factors: the thickness of your bowl rim at the mounting point and the height of the hinge ear sitting on top. A bolt that is too short will not extend far enough below the bowl for the nut to engage fully. One that is too long leaves excess threading dangling underneath, which can snag cleaning cloths or collect grime. When in doubt, measure the combined thickness of hinge and rim before ordering, and choose a bolt that extends roughly 15 to 20 mm past the underside of the bowl.
Nuts, Washers, and Cover Caps
The bolt gets most of the attention, but the supporting hardware does the heavy lifting when it comes to long-term stability. Let's walk through each piece.
Wing nuts vs. hex nuts. Wing nuts are the homeowner-friendly option. Their two protruding "wings" let you tighten or loosen by hand from the cramped space beneath the bowl—no tools required. Hex plastic nuts, on the other hand, need a wrench or pliers to turn. They offer a slightly more secure grip because a tool can apply more controlled torque, making them a common choice in commercial or institutional settings where maintenance teams handle tightening.
Washers. A flat plastic washer might seem like an afterthought, but it is arguably the most important protective element in the assembly. Without it, the nut presses directly against the glazed underside of the bowl. Over time, that concentrated pressure can create a stress point that chips or cracks the porcelain—especially if someone over-tightens the nut. The washer spreads the clamping load across a broader surface, acting as a buffer between hardware and ceramic. If you are replacing toilet seat hinge bolts and your new kit includes a washer, always use it.
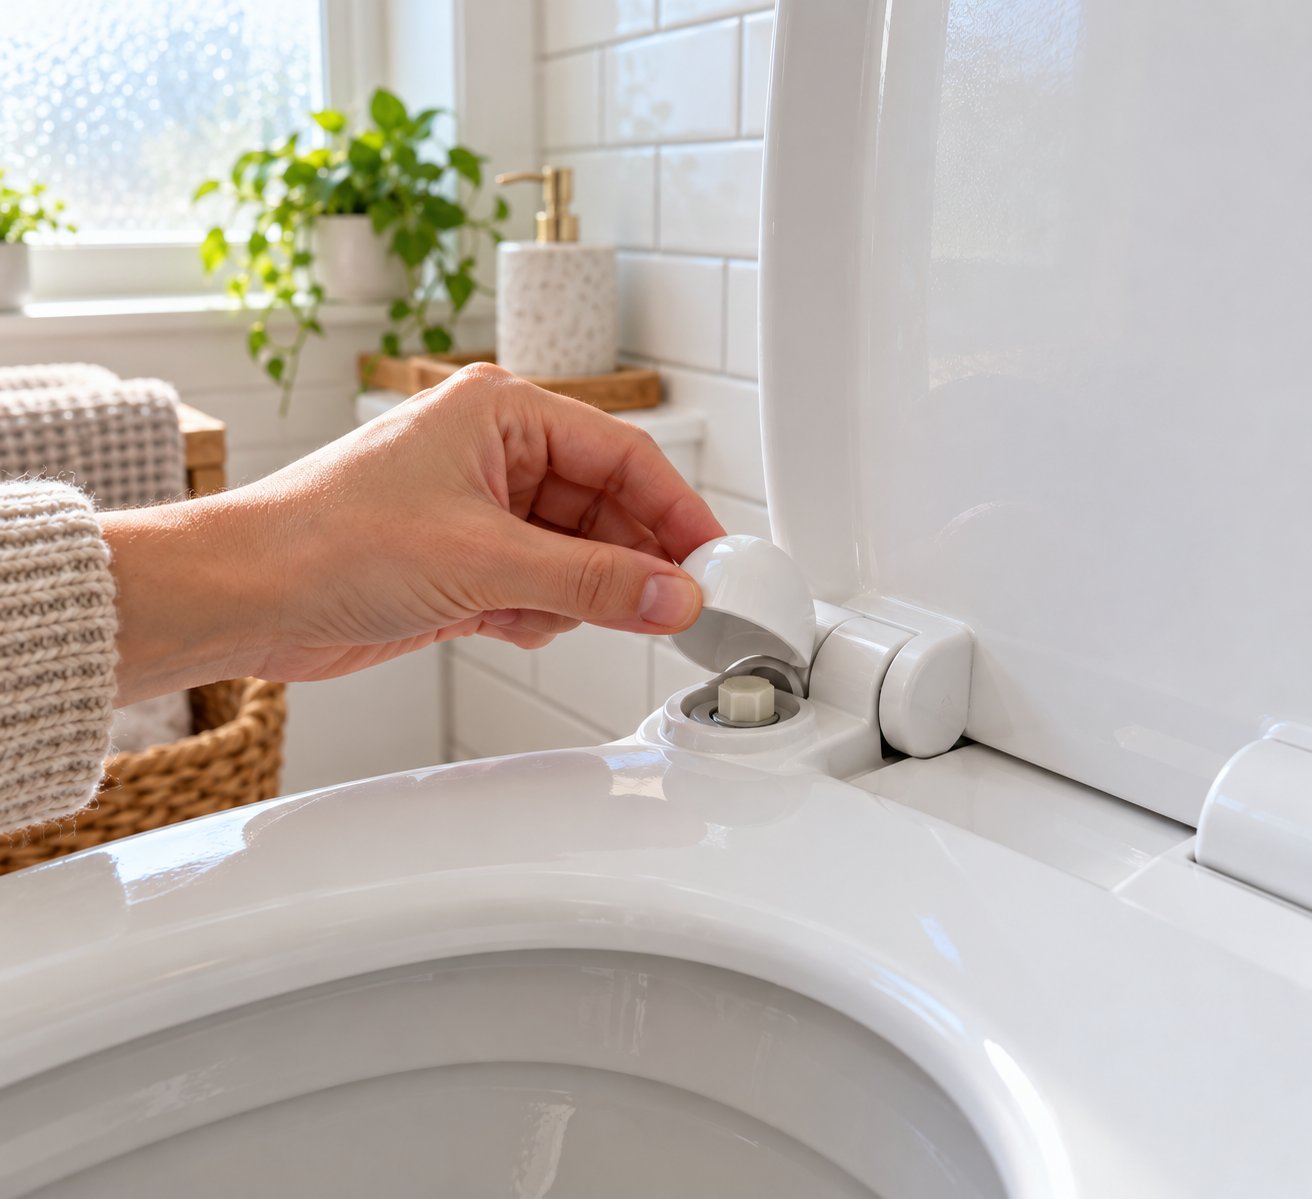
Cover caps. These small caps snap over the bolt head on top of the hinge, hiding the hardware from view. Their role is primarily cosmetic, giving the rear of the seat a polished appearance. They also serve a subtle functional purpose: by sealing the bolt head from the bathroom environment, caps reduce exposure to humidity, cleaning chemicals, and mineral-laden splashes that can degrade plastic over months and years.
Here is the key takeaway: all these parts work as a matched system. Swapping in a bolt from one kit with a nut from another—or reusing a flattened old washer with brand-new plastic toilet seat screws—invites fit problems. Thread pitch, shaft diameter, and washer bore are designed to match within a single kit. Mixing components often results in cross-threading, uneven clamping, or the frustrating cycle of a seat that just will not stay tight.
With each piece of the assembly mapped out, the natural next question becomes a practical one: should those fasteners be plastic at all, or would metal hardware do a better job? The answer depends on more factors than you might expect.
Plastic vs Metal Hinge Bolts and When to Use Each
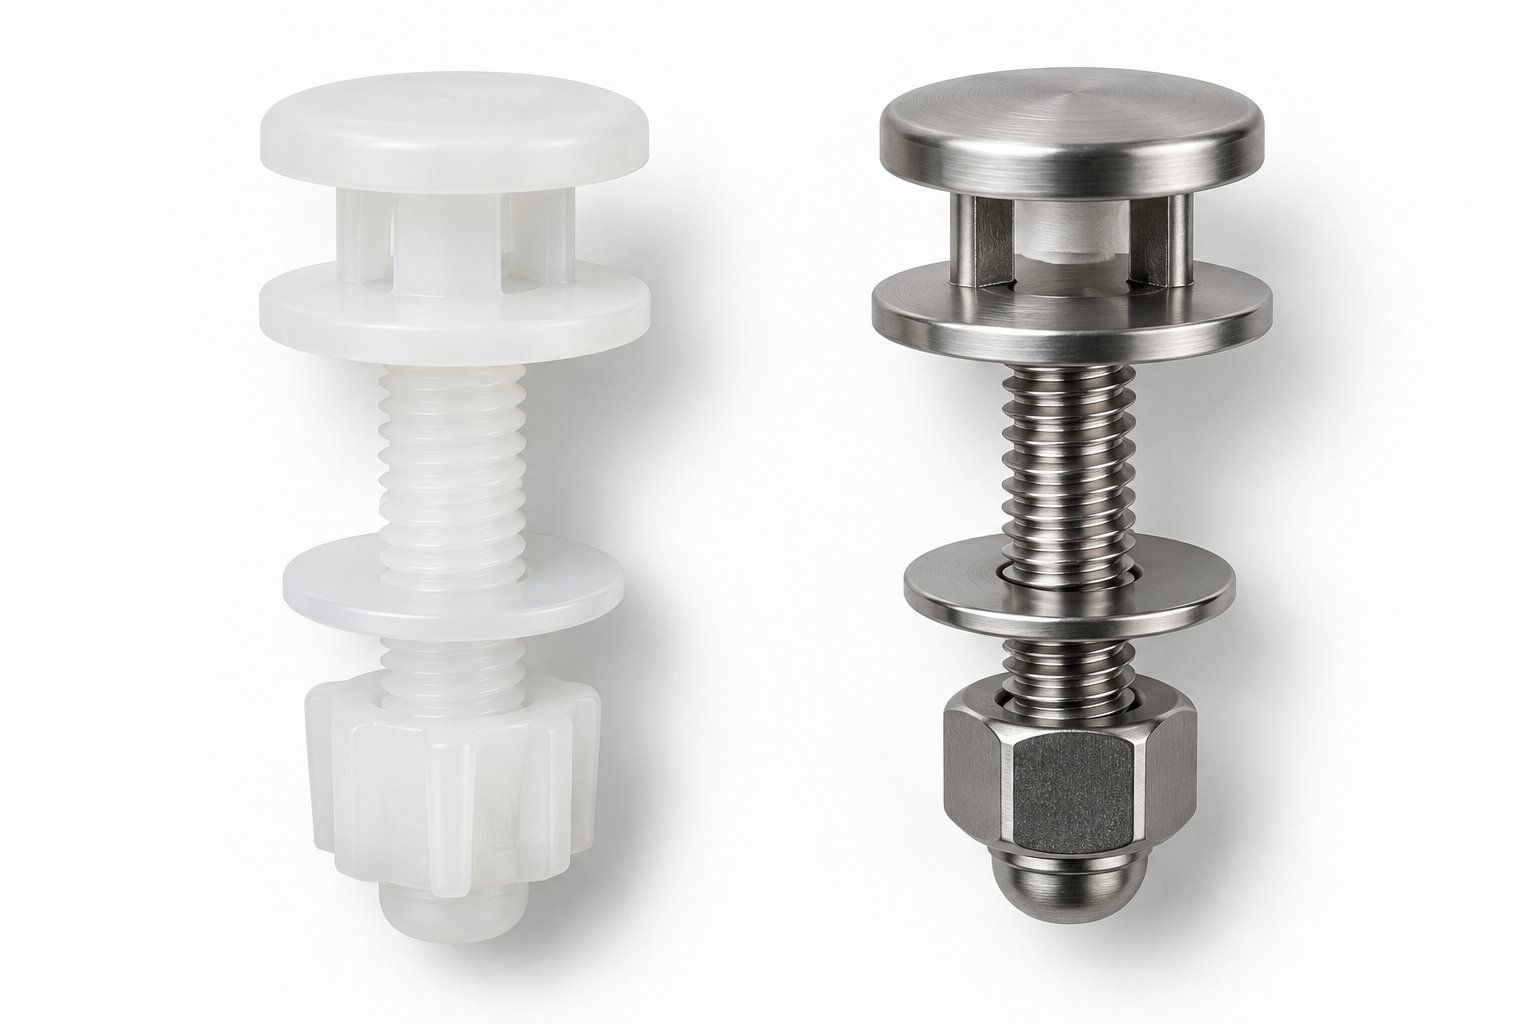
You are standing in the hardware aisle—maybe at Ace or a big-box store—staring at two packages of toilet seat fasteners. One contains plastic toilet bolts, the other stainless steel. The metal ones feel sturdier in your hand, so they must be the better choice, right? Not necessarily. Residential toilet manufacturers overwhelmingly specify plastic for their hinge hardware, and the reasoning goes far deeper than cost savings. Understanding why requires a side-by-side look at how each material actually performs in the demanding environment beneath a toilet seat.
| Attribute | Plastic Bolts | Metal Bolts |
|---|---|---|
| Corrosion Resistance | Immune to rust; unaffected by humidity, condensation, or splashes | Susceptible to rust and oxidation, especially in poorly ventilated bathrooms |
| Porcelain Safety | Cannot scratch, chip, or crack ceramic surfaces | Can gouge glaze during installation, removal, or if overtightened |
| Galvanic Reaction | Chemically inert—no discoloration where bolt contacts porcelain glaze | Metal-to-glaze contact can cause dark staining or mineral deposits over time |
| Ease of Removal After Years | Can be cut quickly with a hacksaw or oscillating tool if stuck | May seize from corrosion, requiring bolt extractors or penetrating oil |
| Weight Load Capacity | Adequate for standard residential use (up to approximately 300 lbs typical rating) | Necessary for heavy-duty, bariatric, or high-traffic commercial applications |
| Cost | Significantly less expensive; often included with new seats at no extra charge | Higher material and manufacturing cost; usually purchased separately |
The comparison reveals a pattern: for everyday residential bathrooms, a bolt plastic fastener outperforms metal in nearly every practical category. It resists the environment better, protects the fixture it attaches to, and comes out easily years later when a replacement is finally needed. Metal only pulls ahead on raw load capacity—a factor that matters in specific commercial scenarios but rarely in a typical home.
Why Plumbing Professionals Prefer Plastic
Talk to a plumber who installs dozens of seats a month and you will hear the same reasoning over and over: the hinge bolt is a sacrificial part. It is intentionally designed to be the weakest link in the chain connecting seat to bowl. If someone drops onto the seat at an odd angle or a child pushes the whole assembly sideways with enough force, the plastic bolt absorbs that stress and snaps—long before the porcelain cracks. Replacing a two-dollar bolt is a five-minute job. Replacing a cracked toilet bowl is a hundred-dollar-plus ordeal that involves shutting off water, pulling the entire fixture, and resetting a new one with fresh flange hardware.
Manufacturer installation guides reinforce this preference. Most residential toilet and seat brands ship their products with plastic hardware and explicitly state in their documentation that metal fasteners are not recommended for standard installations. The logic is simple: a softer fastener protects the more expensive component it attaches to. You would not use hardened steel screws to mount a glass shelf for the same reason—you choose a material that gives before the thing you are trying to protect does.
There is also a practical argument every homeowner with a screwdriver for toilet seat repairs will appreciate. When it is time to remove an aging bolt, plastic cooperates. A quick pass with a close-quarters hacksaw blade and the fastener falls away. Metal bolts that have spent years bathed in bathroom humidity can fuse with corrosion, turning a ten-minute swap into an hour-long wrestling match. Oatey's maintenance guidance highlights visible rust and corroded bolt heads as top indicators that hardware has overstayed its useful life—a problem that simply does not exist with plastic.
When Metal Bolts Make Sense
Dismissing metal entirely would not be fair. Stainless steel and brass hinge bolts earn their place in specific situations where plastic reaches its limits:
- Bariatric or heavy-duty seats. Installations rated for users above 400 to 500 pounds require fasteners that will not flex or fatigue under sustained high loads. Metal provides the tensile strength plastic cannot match at those extremes.
- High-traffic commercial restrooms. Airports, stadiums, and busy restaurant bathrooms see hundreds of uses per day. The constant cycling of load and lateral movement can wear through plastic faster than maintenance schedules allow for replacement. Metal buys extra time between inspections.
- Institutional settings with routine maintenance programs. Hospitals, schools, and government buildings often have dedicated facilities teams that inspect restroom hardware on a set calendar. Because trained staff can spot and address early corrosion before a bolt seizes, the primary disadvantage of metal—difficult removal after years of neglect—is managed away.
Even in these cases, best practice calls for pairing metal bolts with rubber or nylon washers to cushion the porcelain interface. A bare steel bolt tightened directly against ceramic is a chip waiting to happen, regardless of the setting.
The bottom line is refreshingly straightforward: if you are working on a standard home toilet, plastic is the right material almost every time. It protects your bowl, resists your bathroom's humidity, costs less, and comes out without a fight when the next replacement rolls around. Reserve metal for the specialized scenarios where load demands genuinely exceed what polymer fasteners can handle.
Choosing the right material is only half the battle, though. If your old hardware is still clinging to the bowl—corroded, mineral-crusted, or spinning uselessly in place—you need a reliable way to get it out without cracking the porcelain underneath.
How to Remove Old or Stuck Toilet Seat Hinge Bolts Safely
Every replacement job begins with one unavoidable task: getting the old hardware out. Sometimes a plastic toilet seat hinge bolt unscrews cleanly in a few turns. Other times it feels welded in place by years of mineral buildup, stripped threads, or sheer stubbornness. Forcing the issue with brute strength risks the one outcome you absolutely want to avoid—a cracked porcelain bowl that costs ten times more than any fastener. The right approach is methodical, patient, and tailored to whatever condition the old bolts are in.
Before you touch a single bolt, gather your tools and have replacement hardware sitting on the counter. You do not want to discover halfway through that the old fasteners are destroyed, the new ones have not shipped yet, and the toilet is now seatless for the foreseeable future. With fresh plastic toilet seat bolts ready to go, the entire swap can happen in a single session—often under twenty minutes.
Here is the step-by-step removal process that covers everything from cooperative bolts to the ones that refuse to budge:
- Lift the cover caps. Look at the rear of the seat where the hinges meet the bowl rim. You will see small plastic caps—usually oval or round—snapped over the bolt heads. Pry them up gently with a flat-head screwdriver or pop them open with your fingernail. Set them aside; they are cosmetic and will not be reused with new hardware.
- Hold the bolt head from above. Insert a flat-head screwdriver into the slot on top of the exposed bolt head. Apply steady downward pressure so the bolt cannot spin while you work from below.
- Unscrew the nut from below. Reach under the bowl rim and grip the wing nut or hex nut. Turn it counterclockwise. If it is a wing nut, your fingers may be enough. For hex nuts, use an adjustable wrench or pliers. Keep the screwdriver firmly seated in the bolt head above to prevent the entire fastener from rotating.
- Apply penetrating lubricant if the hardware is seized. When the nut will not turn despite solid effort, spray a penetrating lubricant—WD-40 or a similar product—around the nut, the bolt threads, and the junction where the bolt passes through the bowl. Wait five to ten minutes for the lubricant to wick into the threads before trying again.
- Cut through a bolt that will not release. If lubrication fails, reach for an oscillating multi-tool fitted with a thin cutting blade, or a close-quarters hacksaw. Position the blade between the underside of the bowl rim and the top of the nut, then saw through the bolt shaft slowly and carefully. Keep the blade angled away from the porcelain at all times.
- Clean the mounting holes. Once both bolts are out, wipe the exposed holes and the surrounding rim area with a damp cloth and a mild disinfectant. Remove any debris, old washer fragments, or mineral crust so the new hardware seats flush against clean porcelain.
That six-step sequence handles the majority of removal scenarios. Two specific situations, however, trip up even experienced DIYers—and both deserve a closer look.
Dealing with Bolts That Spin Freely
You grip the nut from below, start turning, and the entire bolt just spins along with it. No matter how fast you twist, the nut never actually travels down the threads. Sound familiar? This is one of the most common—and most frustrating—problems with an aging toilet seat hinge bolt, and it happens when the plastic threads inside the hinge ear are stripped or the bolt slot is too worn to hold a screwdriver.
The fix relies on one principle: you need to immobilize the bolt head while the nut turns independently. Try these approaches in order:
- Flat-head screwdriver with firm downward pressure. Press the screwdriver blade into the bolt head slot and push down hard enough to create friction between the bolt flange and the hinge ear. This often provides just enough resistance to keep the bolt stationary while the nut breaks free below.
- Locking pliers on the bolt head. If the screwdriver alone is not enough, clamp a pair of locking pliers (Vise-Grips) directly onto the bolt head from above. The pliers grip the head with far more force than a screwdriver can, effectively freezing it in place so the nut can be removed normally.
- Cut the bolt below the hinge. When nothing stops the spin, it is time to cut. Slide a close-quarters hacksaw blade between the bottom of the hinge ear and the top surface of the bowl rim. Saw through the bolt shaft with short, controlled strokes. Once severed, the bolt drops free from below and the hinge lifts off.
Cutting might feel drastic, but remember—you are replacing the bolt anyway. A clean cut takes about thirty seconds and spares you the aggravation of fighting a stripped fastener that will never unthread on its own.
Removing Corroded or Fused Hardware
"But these are plastic bolts—how can they corrode?" It is a fair question. Plastic itself does not rust, yet it can become just as stuck as metal under the right conditions. Hard-water mineral deposits—calcium, lime, and silica—slowly crystallize around the bolt shaft and inside the mounting hole, effectively cementing the fastener to the bowl. Bathroom cleaning products that splash into the hinge area can accelerate the buildup, creating a chalky crust that locks everything in place.
The solution is chemical, not mechanical. Horow's seat removal guide recommends applying penetrating oil and waiting before resorting to force—sound advice that applies equally to mineral-fused plastic. Here is a targeted approach:
- Soak the bolt area with undiluted white vinegar or a commercial calcium-lime-rust (CLR) remover. Drip it generously around the bolt head from above and around the nut from below.
- Let the solution sit for 15 to 30 minutes. For severe buildup, lay a vinegar-soaked rag around the bolt and check back after half an hour.
- Attempt to turn the nut again. The dissolved mineral layer usually breaks the bond, and the nut spins free with moderate hand pressure.
- If the bolt still resists, repeat the soak-and-wait cycle one more time before moving to the cutting method described above.
Throughout this entire process, one rule overrides everything else: never use excessive force on the porcelain. A toilet bowl is strong under compression but surprisingly fragile under lateral or point stress. Yanking a seized bolt sideways, hammering a wrench, or prying against the rim with a metal tool can crack the ceramic in an instant. A single hairline fracture can turn into a leak that damages subfloor framing and the ceiling below. No fastener is worth that risk—when in doubt, cut the bolt and move on.
With the old hardware cleared and the mounting holes cleaned, you are looking at a blank slate—two open holes in a porcelain rim, ready for a fresh set of fasteners. The quality of what happens next determines whether this is the last time you deal with a wobbly seat or just the start of another retightening cycle.
Step-by-Step Replacement of Plastic Toilet Seat Hinge Bolts
A clean set of mounting holes and a fresh hardware kit on the counter—that is all you need to turn this into a permanent fix rather than another temporary patch. Toilet seat bolts replacement is one of those jobs that sounds fussier than it actually is. The entire process takes about ten minutes, requires no power tools, and comes down to eight straightforward steps. Follow them in order, and you will end up with a seat that stays exactly where it belongs.
- Confirm the mounting-hole spacing on the bowl. Grab a tape measure and check the distance between the centers of the two holes at the rear of the rim. For most North American toilets, that measurement is 5 1/2 inches (roughly 140 mm). If your bowl deviates from that standard—some European or designer models do—you will need hardware sized to match. Measuring first prevents the frustrating discovery that your new bolts do not line up after everything else is already in position.
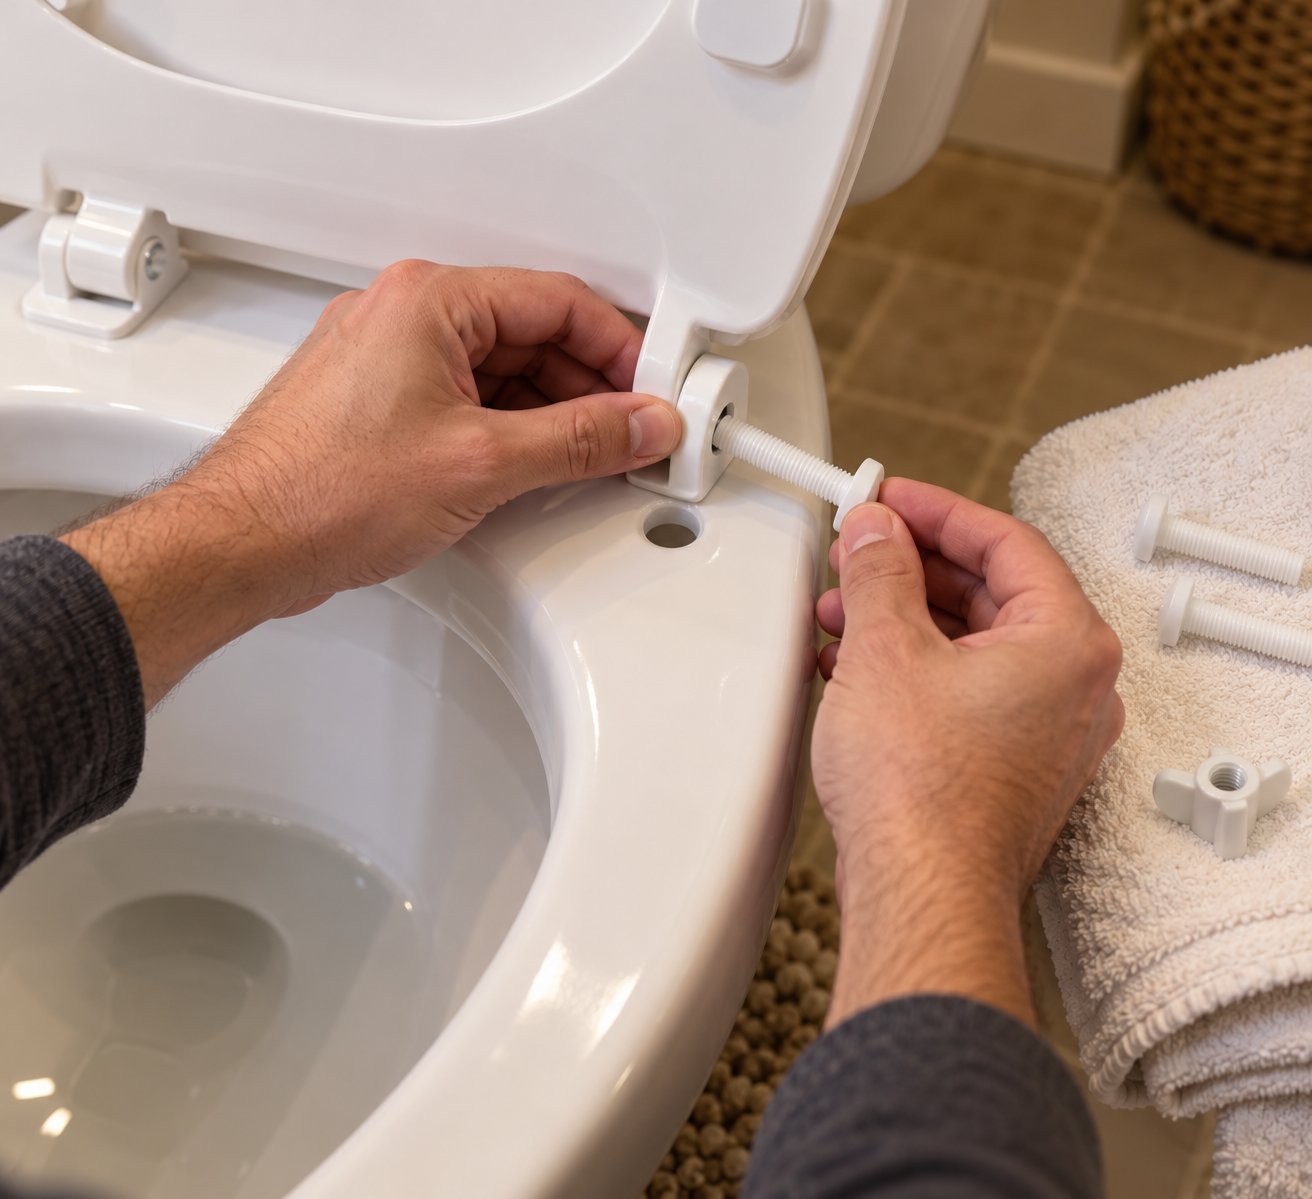
- Unbox the new hardware and verify all components are present. Lay every piece out on a towel: bolts, nuts, washers, bushings (if included), and cover caps. Compare the parts against the packaging list. A missing washer or mismatched nut is easy to catch now and nearly impossible to notice once you are reaching blindly beneath the bowl rim.
- Position the new seat on the bowl so the hinge holes align with the mounting holes. Set the seat and lid assembly on the rim with the hinge ears facing the rear. Slide it forward or backward until the holes in the hinges sit directly over the holes in the porcelain. A quick visual check from above tells you whether the alignment is right—you should see straight through both sets of openings.
- Drop each bolt through the hinge ear and through the bowl hole from above. Feed the bolt down through the hinge first, then let it continue through the ceramic mounting hole. The bolt head should rest snugly on top of or inside the hinge ear, with the threaded shaft extending below the bowl rim. Repeat for the second bolt. If a bushing or centering sleeve came with the kit, slide it onto the bolt shaft before inserting it through the bowl hole—it will keep the bolt centered and reduce side-to-side play.
- From below the bowl rim, slide on the washer, then thread the nut by hand. Reach underneath and slip the flat washer over the bolt's exposed threads so it rests against the underside of the porcelain. Then start the nut by hand—wing nuts are easiest here because you can spin them with your fingers in tight quarters. Thread the nut clockwise until it contacts the washer, but do not tighten yet. Repeat on the other side. Do not use power tools. An electric drill or impact driver delivers far too much torque for plastic fasteners and will crack the bolt head before you can react.
- Alternate tightening each nut a quarter turn at a time. This is the step most people skip—and the one that makes the biggest difference. Give the left nut a quarter turn, then move to the right nut and do the same. Go back and forth, a quarter turn each pass. Alternating evenly draws the seat down flat against the rim and prevents one hinge from bearing all the clamping force while the other stays loose. You will feel resistance build gradually; keep alternating until the seat feels firmly planted.
- Check that the seat is centered and operates correctly. Lower the seat and lid. Look at the gap between the seat edge and the bowl rim on both sides—it should be roughly equal. Open and close the lid a few times. Verify that the lid does not bump the tank behind it and that the seat does not shift left or right during the swing. If something is off, loosen both nuts slightly, reposition the seat, and retighten using the same alternating pattern.
- Snap on cover caps if included. Press each decorative cap over its bolt head until you hear or feel a click. The caps conceal the hardware, give the hinge area a finished appearance, and shield the bolt heads from moisture and cleaning-product splashes that can degrade plastic over time.
That is the complete procedure. Eight steps, no specialty tools, and a seat that should stay rock-solid through years of daily use—provided you get one critical detail right.
Getting the Torque Right
Over-tightening is the single leading cause of cracked plastic bolts. It is a natural instinct: the seat wobbled before, so you crank the nuts down as hard as possible to make sure it never moves again. The problem is that nylon and polypropylene have a much lower yield point than steel. Push past that limit and the bolt head mushrooms, the threads strip, or the shaft snaps outright—sometimes all three at once.
The correct torque is easier to feel than to measure. You want the nut snug enough that the seat does not slide on the bowl, but not so tight that the plastic begins to deform or the washer starts bowing. Here is a reliable real-world test: once you finish tightening, place both hands on the front corners of the closed seat and push sideways with moderate pressure. If the seat stays put, you are done. If it shifts even slightly, give each nut another quarter turn and test again.
Think of it like tightening a jar lid—firm enough that it seals, loose enough that you can open it again without tools. That analogy holds almost perfectly for toilet hold down bolts made from plastic. You should be able to remove the nuts by hand months or years later when the next replacement eventually comes around. If a nut feels impossible to loosen, it was over-tightened during installation.
One more detail worth noting: temperature changes in a bathroom—hot showers creating steam, followed by cooler ambient air—cause plastic to expand and contract slightly over its first few weeks. Some homeowners notice a tiny bit of looseness after the first month. A single quarter-turn snug on each nut corrects it. After that initial settling period, the hardware should hold steady without further adjustment.
Common Installation Mistakes to Avoid
Even a straightforward eight-step process has pitfalls. These are the errors that send people back to the hardware store—or back to this article—sooner than necessary:
- Skipping the washer. Without a washer distributing the clamping load, the nut presses directly against bare porcelain. That concentrated point of force can chip the ceramic glaze or crush the plastic nut itself. Always use every washer your kit provides.
- Tightening one side fully before starting the other. Cranking the left bolt all the way down while the right side is still loose pulls the seat off-center and creates uneven stress on both the hinge ears and the porcelain rim. Alternate sides with quarter turns to keep everything balanced.
- Forcing a mismatched bolt diameter into the hole. If the bolt feels too tight going into the mounting hole, or if it rattles around with visible clearance on all sides, you likely have the wrong size. Forcing an oversized bolt can crack the ceramic lip of the hole. An undersized one will never clamp securely no matter how much you tighten the nut. Confirm the shaft diameter matches your bowl's mounting holes before you start threading.
- Forgetting to verify seat alignment before final tightening. It is surprisingly easy to tighten both bolts, stand up, and realize the seat is shifted a half-inch to the left. Correcting alignment after the bolts are fully torqued means loosening everything and starting over. A five-second visual check while the nuts are still finger-tight saves that hassle entirely.
- Reusing old washers or nuts with new bolts. Mixing components from different kits introduces mismatched thread pitches and washer bore sizes. The result is often a nut that cross-threads halfway down or a washer that wobbles on the shaft instead of sitting flat. Treat the mounting kit as a matched set and install all new parts together.
Follow the procedure, respect the torque limits, and avoid these five mistakes—and you will join the group of homeowners who install their toilet seat bolts once and never think about them again. The trickier decision often is not how to install, but what to install: a universal-fit bolt kit from the nearest home improvement store, or brand-specific hardware that matches a particular hinge system. That choice depends on the type of seat you own—and the differences between the two options are more significant than the packaging suggests.
Universal-Fit Kits vs Brand-Specific Replacement Bolts
You are staring at a wall of blister-packed hardware at the store, and two categories jump out: universal-fit bolt kits labeled "fits most toilets" and brand-specific replacement packs tied to a single manufacturer's hinge system. The price difference between them can be five dollars or fifty, so which one actually solves your problem? The answer hinges—no pun intended—on the type of seat sitting on your bowl and how its mounting system is designed.
Universal-Fit Plastic Bolt Kits
Most aftermarket kits sold at home-improvement retailers use a standard bolt diameter (typically 3/8 inch or 10 mm) paired with multiple washer sizes or rubber grommets that compensate for minor variations in mounting-hole diameter. The idea is simple: one package covers the widest possible range of toilets. Inside, you will usually find two plastic bolts for toilet seat mounting, two matching nuts, a pair of flat washers, and sometimes rubber cone washers or bushings that compress into slightly oversized holes for a snugger fit.
These kits work reliably for the majority of round-front and elongated residential seats—especially those with a traditional top-mount hinge design where the bolt drops straight through the hinge ear and into the bowl hole from above. If any of the following situations sound like yours, a universal kit is likely all you need:
- You are replacing a basic top-mount seat with standard exposed hinges and a straightforward bolt-through-the-rim attachment.
- The original hardware brand is unknown. Maybe the seat was already installed when you moved in, the packaging is long gone, and there are no identifying marks on the hinge. A universal kit sidesteps the guesswork entirely.
- You want inexpensive spares on hand for future repairs. Buying two or three universal kits at a few dollars each means you always have a fresh set of plastic screws for toilet seat tightening ready in the junk drawer—no emergency hardware-store run required.
The key limitation? "Universal" does not truly mean universal. These kits assume a standard 5.5-inch mounting-hole spacing and a top-fix bolt orientation. Step outside those parameters—concealed hinges, proprietary quick-release mechanisms, or non-standard hole spacing—and the generic kit sitting in your cart will not fit, no matter how many grommets it includes.
Brand-Specific and Specialty Fasteners
Imagine you own a soft-close seat and the hinge feels sloppy. You grab a universal bolt kit, bring it home, and discover that the hinge does not use a simple pass-through bolt at all. Instead, the bolt is integrated into a larger hinge cartridge—a self-contained mechanism that controls the slow-close damping action. No loose bolt, regardless of diameter, threads into that system. You need the exact replacement cartridge from the seat's manufacturer.
This scenario is more common than most people realize. Here are the situations where universal kits consistently fall short:
- Soft-close and quick-release seats. These hinges often combine the bolt, damper cylinder, and release latch into one molded unit. The toilet seat plastic nut on the underside may also be proprietary—shaped to interlock with a specific hinge body rather than simply threading onto a generic shaft. Replacing only the bolt in these systems is not just ineffective; it is physically impossible without the matching cartridge.
- Concealed or bottom-fix mounting systems. Some modern seats hide all hardware beneath the bowl rim for a cleaner look. The bolt threads upward from below, expanding into a toggle or anchor inside the mounting hole. Brand-matched hardware is essential because the expansion mechanism is unique to each manufacturer's design.
- Heavy-duty bolt kits rated for higher weight loads. Bariatric or commercial-grade seats sometimes use thicker shafts, reinforced polymer blends, or metal-core plastic bolts that exceed the dimensions of any standard universal kit. These specialty fasteners are engineered as part of the seat's overall load-rated system and cannot be safely substituted with lighter hardware.
The fastest way to determine which category your seat falls into is to flip the lid over and examine the hinge. If you see a simple bolt head sitting in an open slot, a universal kit will almost certainly work. If the hinge looks like a self-contained module with no visible bolt head—or if removing the seat requires pressing release buttons rather than unscrewing nuts—you are dealing with a proprietary system that demands brand-specific parts. Checking the seat manufacturer's website or the original installation manual usually points you to the correct replacement part number in under a minute.
Replace Just the Bolts or the Entire Seat?
Here is a practical decision framework that can save you both money and time. Ask yourself two questions:
Is the seat surface still in good shape? If the seat itself is free of cracks, deep stains, and discoloration—and the hinge arms still move smoothly—then a bolt kit is the cost-effective repair. You spend a few dollars on new plastic screws for toilet seat mounting, ten minutes on installation, and the seat is back to solid performance. There is no reason to replace a perfectly functional seat just because its fasteners wore out.
Are there problems beyond the bolts? Cracked seat surfaces, hinges that have lost their soft-close damping, yellowed or permanently stained plastic, and hinge ears with elongated holes all point toward replacing the entire seat. Every new seat ships with its own matched hardware—bolts, nuts, washers, caps, and any proprietary hinge components included. Buying a fresh seat is almost always more economical than sourcing a new hinge assembly and a separate bolt kit individually, especially once you factor in shipping costs for specialty parts.
A good rule of thumb: if you are pricing out more than two individual replacement components—say, both hinge cartridges plus a bolt kit plus new cover caps—compare that total against the cost of a complete new seat. More often than not, the full seat wins on price and gives you a clean, unworn surface in the bargain.
Whether you chose the universal route or tracked down a manufacturer-specific part, the hardware is only as reliable as the diagnosis behind it. A bolt kit solves a bolt problem, but if the real issue is a stripped mounting hole, a missing washer, or threads that no longer match, the wobble comes right back. Pinpointing the actual symptom—and pairing it with the right fix—is what separates a one-time repair from the endless retightening cycle.
Troubleshooting Loose Seats and Worn Plastic Hardware
You installed the right bolts, followed every step, tightened everything evenly—and the seat still is not behaving. Maybe it slides sideways when you sit down. Maybe you hear an annoying squeak every time the lid closes. Or maybe a bolt head cracked the moment you gave it one last turn. Toilet seat bolts plastic hardware can fail in a handful of predictable ways, and each symptom points to a specific cause with a targeted fix. Rather than guessing, use the quick-reference table below to match what you are experiencing to the most likely culprit.
| Symptom | Likely Cause | Recommended Fix |
|---|---|---|
| Seat slides left and right | Under-tightened nuts or worn/missing washers allowing lateral play | Retighten both nuts evenly using quarter-turn alternation; replace flattened or cracked washers with fresh ones from a matched kit |
| Seat rocks front to back | Bolt holes in the hinge ears have elongated from repeated stress, allowing the bolts to shift in their slots | Replace the entire hinge bolt assembly—elongated holes cannot be restored, and a new bolt in a worn slot will rock just as badly |
| Bolt head cracks during tightening | Over-torque or a low-quality fastener with thin walls at the bolt head | Discard the cracked bolt; install a new one and tighten by hand only—stop as soon as the seat resists lateral push |
| Nut will not stay tight | Stripped threads on the bolt, the nut, or both, preventing the nut from gripping as it advances | Replace both the bolt and the nut as a matched pair; mixing old and new components often reproduces the same thread-mismatch problem |
| Seat squeaks during use | Dry plastic-on-plastic contact between bolt shoulders, hinge ears, and the porcelain rim surface | Apply a thin film of silicone-based lubricant to the bolt shoulders and the underside of the hinge ears where they contact the bowl; avoid petroleum-based products that can degrade certain plastics |
Most of these fixes take less than ten minutes once you have identified the root cause. Two scenarios, however, deserve a deeper look because they frustrate homeowners more than any others: fasteners that break during installation and seats that refuse to stay tight no matter what you do.
Stripped Bolt Heads and Cracked Fasteners
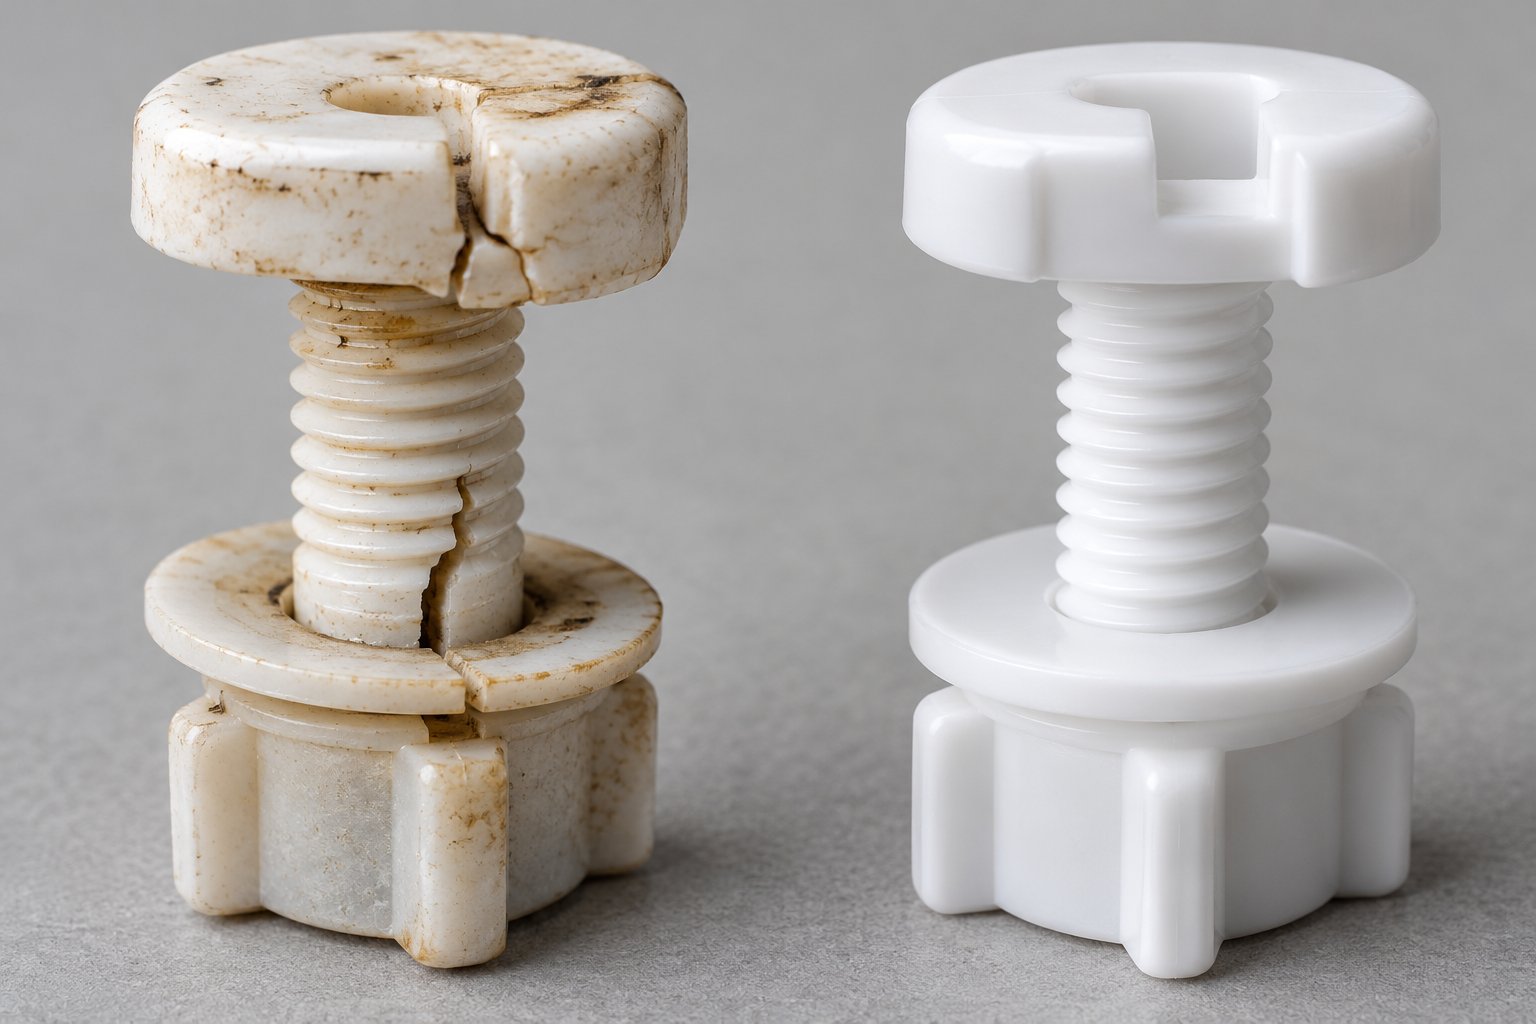
You are mid-tightening when you hear a faint pop, and the bolt head splits into two pieces under the screwdriver. Frustrating? Absolutely. Unusual? Not at all. Plastic toilet seat plastic bolts are engineered from nylon or polypropylene—materials that are intentionally softer than the porcelain they attach to. That softness is a feature, not a flaw. If something has to give under excessive force, you want it to be the two-dollar bolt, not the two-hundred-dollar toilet bowl. The fastener acts as a sacrificial component that absorbs stress before the ceramic ever reaches its breaking point.
A cracked bolt head almost always traces back to one of two causes:
- Over-torque. The nut was tightened past the plastic's yield point. Nylon and polypropylene can handle a surprising amount of clamping force, but they have a hard limit. Once the polymer begins to deform, the molecular structure fails quickly—first a hairline crack, then a full split. If you needed a wrench to tighten a wing nut that was designed for finger pressure, you went too far.
- Abnormal lateral load. Someone sat down off-center, leaned hard to one side, or dropped onto the seat at an angle. The sideways force translated through the hinge ear and concentrated on the bolt head. Plastic handles compression well but resists shear forces poorly, so that lateral snap is predictable under enough sideways pressure.
Here is the critical point when you find a cracked fastener: do not just replace the broken bolt and reuse the old nut and washer. Toilet seat screws plastic hardware functions as a matched system. The nut that was over-torqued alongside the cracked bolt may have stripped or deformed threads that are invisible to the naked eye. The washer may have compressed unevenly. If you thread a fresh bolt into a damaged nut, the same failure is waiting to happen all over again. Replace all mating components—bolt, nut, and washer—as a complete set. The cost difference between a single bolt and a full kit is negligible, and the reliability difference is enormous.
One more practical tip: if bolt heads keep cracking on the same toilet, examine the hinge design itself. Some older or bargain-priced seats use hinge ears with very tight tolerances that pinch the bolt head during tightening, creating a stress riser. In that case, the issue is not the bolt quality—it is the hinge geometry. Replacing the seat entirely is often the most efficient path forward.
Loose Seat That Keeps Coming Back
This is the problem that brings most readers to an article like this in the first place. You tighten both nuts firmly, test the seat, confirm it is stable—and two or three weeks later, the wobble is back. You retighten. It loosens again. The cycle repeats until you are ready to throw the whole seat in the trash. Before you do, consider that a seat that will not stay tight is rarely a tightening problem. It is almost always a component or fit problem that tightening alone cannot solve.
Walk through these potential causes in order:
- Missing or flattened washers. Without a washer distributing the clamping load, the nut sits on a smooth, glazed porcelain surface with almost no friction. Every time the seat absorbs lateral force—someone shifting weight, a lid closing with momentum—the nut rotates a fraction of a turn. Multiply those micro-rotations over hundreds of uses and the nut has effectively backed itself off the threads. Installing a proper flat washer, or better yet a rubber washer that grips the porcelain, eliminates the slippage.
- Oversized mounting holes in the bowl. Porcelain mounting holes are molded during manufacturing, and tolerances vary. If the holes in your bowl are even slightly larger than the bolt shaft diameter, the bolt can drift side to side inside the hole, transferring movement to the entire seat assembly. Each shift applies a tiny loosening force to the nut. Over time, the seat feels progressively more wobbly despite correct initial tightening.
- Thread mismatch between bolt and nut. Mixing a bolt from one kit with a nut from another—or reusing an old nut with a new bolt—can result in threads that engage loosely rather than biting firmly. The nut may thread on and feel snug, but the imperfect engagement means it backs off under vibration and load cycling far more easily than a properly matched pair.
The most reliable fix for recurring looseness is to stop replacing individual pieces and upgrade to a complete mounting assembly that includes rubber bushings or cone washers. These components compress into the mounting hole as the nut tightens, filling the gap between the bolt shaft and the inside wall of the hole. The result is a snug, vibration-resistant connection that does not rely on nut torque alone to stay put. Think of the bushing as a shim that custom-fits the bolt to your specific bowl—once compressed, it locks everything in place and absorbs the micro-movements that would otherwise gradually walk the nut loose.
If you have tried a complete assembly with bushings and the seat still loosens, the problem may have moved beyond the hardware. Inspect the porcelain around the mounting holes for hairline cracks or chips. Damaged ceramic cannot provide a stable clamping surface, and no amount of new hardware will compensate. At that point, a professional assessment of the bowl itself is the smartest next step.
Diagnosing and fixing the right symptom saves you from the retightening treadmill—but even perfect hardware needs to be the correct size for your specific toilet. A bolt that is half a millimeter too narrow or five millimeters too short introduces the very fit problems this chapter just walked you through. Getting the measurements right before you order is the difference between buying once and buying twice.
Measuring and Sourcing the Right Replacement Hinge Bolts
A bolt that is one millimeter too wide will not drop through the mounting hole. One that is five millimeters too short leaves the nut dangling without enough thread engagement to clamp anything. And a kit designed for a 155 mm bolt spread is useless on a bowl drilled at 140 mm. The difference between a one-trip fix and a frustrating return to the store almost always comes down to three measurements you can take in under two minutes—before you ever open your wallet.
How to Measure Your Toilet Seat Hinge Bolts
Grab a pair of digital calipers if you have them, or a ruler and a set of drill bits if you do not. You need three numbers, and each one eliminates a different category of misfit hardware.
1. Bolt shaft diameter. This is the most critical dimension. Remove the old bolt—or, if it snapped, retrieve the piece that dropped below the bowl—and measure straight across the threaded shaft. Most residential plastic toilet seat hinges use a shaft diameter of approximately 3/8 inch (about 10 mm), but variations exist. If you do not own calipers, try sliding the shaft into drill bits of known sizes until you find one that matches the diameter closely. A 3/8-inch bit that slips over the shaft with minimal play confirms the standard size. Anything noticeably smaller or larger tells you to look for a specialty kit.
2. Bolt length. Measure from the underside of the bolt head—where it contacts the hinge ear—down to the very tip of the threaded end. Common lengths fall between 40 mm and 70 mm, and the right choice depends on the combined thickness of your hinge ear and bowl rim. Too short and the nut cannot fully engage the threads. Too long and excess shaft protrudes below the bowl, snagging cleaning cloths and collecting grime. Aim for a bolt that extends roughly 15 to 20 mm past the underside of the porcelain when fully seated.
3. Mounting-hole center-to-center distance. This measurement happens on the bowl, not on the bolt. Most North American toilets use a center-to-center spacing of 5.5 inches (about 140 mm), but some European, designer, or specialty bowls deviate from that figure. Measure from the center of the left ceramic hole to the center of the right one—not from the outside edges, which is a common mistake that adds several millimeters of error. If your bowl falls outside the 140 mm standard, you will need an adjustable hinge system or brand-specific hardware sized for the actual spread.
Not confident in your measurements? Two low-tech backup methods work surprisingly well:
- Bring the old bolt to the store. Walk into any hardware or plumbing aisle, hold your bolt next to the packaged options, and compare shaft diameter, thread pitch, and length visually. Staff at home-improvement retailers deal with these comparisons daily and can usually confirm a match in seconds.
- Photograph the bolt next to a ruler. If you are ordering online—where you cannot hold products side by side—lay the old bolt on a flat surface beside a ruler or tape measure and snap a clear photo. Upload that image when contacting a supplier or searching product listings. Seeing the actual scale eliminates the guesswork that leads to wrong-size orders.
Where to Source Replacement Hardware
Knowing the correct dimensions is half the equation. The other half is finding a supplier that stocks what you need at a price and quantity that makes sense for your situation. Sourcing paths vary widely depending on whether you are fixing one toilet in your home or outfitting an entire building.
- Local hardware stores and home-improvement retailers. Big-box chains and neighborhood hardware shops carry universal-fit bolt kits that cover the vast majority of standard residential toilets. These are your fastest option for a single replacement—walk in, match the bolt, and walk out with a kit for a few dollars. Home depot toilet seat screws and similar generic listings typically include two bolts, two plastic nuts for toilet seats, washers, and sometimes rubber bushings, all in one blister pack. The trade-off is limited selection: you will find one or two universal sizes, rarely anything brand-specific or rated for heavy-duty use.
- Online plumbing retailers and manufacturer websites. When you need brand-specific parts—a proprietary soft-close hinge cartridge, a concealed bottom-fix anchor, or a bolt with a non-standard diameter—online specialty retailers and the seat manufacturer's own parts catalog are the most reliable sources. Search by the seat's model number (usually printed on the underside of the lid or inside the hinge housing) to find the exact replacement SKU. Shipping adds a day or two, but you avoid the compatibility gamble of a universal kit that may not fit a proprietary system.
- Manufacturer-direct fixing systems for bulk or custom requirements. Facilities teams, property managers, and sanitary-ware manufacturers face a different challenge: sourcing consistent, compatible hardware across dozens or hundreds of units. Buying one blister pack at a time is neither practical nor cost-effective at that scale. Tianyun's Toilet Seat Fixing Systems consolidate hinge mounting kits, stainless steel bases, and custom fixing options into a single product selection—supporting compatible seat installation, alignment, and hardware replacement at volume. This type of manufacturer-direct channel reduces SKU complexity and ensures every unit ships with matched components from bolt to base. A note worth keeping in mind: individual plastic bolts, loose washers, hinge pins, and cover caps were not verified as separately sold standalone parts through Tianyun, so teams sourcing those specific items should explore the broader compatible mounting-assembly selection rather than expect exact standalone pieces.
Whichever channel you choose, one purchasing habit saves more headaches than any other: buy the complete assembly, not just the bolt. A matched kit—where every component is engineered to work together—eliminates the thread-pitch mismatches, washer-bore discrepancies, and nut-compatibility issues that plague piecemeal replacements. If you are buying for a single home toilet, grab two kits so a spare is always on hand. If you are buying for a fleet of properties, standardize on one fixing system and keep a small inventory at each site. Either way, the goal is the same: when a bolt finally wears out, the correct replacement is already within arm's reach.
Getting the right hardware on the shelf is only useful if it stays in good shape long enough to be there when you need it. The bolts already installed on your toilets deserve the same forward thinking—a simple maintenance routine that keeps them tight, clean, and functional for years instead of months.
Maintaining Plastic Hinge Bolts and Knowing When to Replace Them
You have measured, sourced, and installed the correct hardware. The seat is solid, centered, and silent. It would be easy to close the lid, walk away, and forget about those fasteners entirely—and honestly, that is exactly what most people do. But plastic hinge bolts live in one of the harshest micro-environments in your home: constant humidity, temperature swings from hot showers, chemical exposure from cleaning products, and hundreds of load cycles every month. A few minutes of preventive attention twice a year is all it takes to keep that hardware performing and avoid sliding back into the retightening cycle you just escaped.
Preventive Maintenance Schedule for Plastic Hinge Bolts
Think of this the same way you think about changing HVAC filters or testing smoke detectors—a small task you attach to an existing routine so it actually gets done. Add a toilet seat bolt check to your spring and fall home-maintenance checklist, and the entire inspection takes less time than brewing a cup of coffee.
The quick stability test. Sit on the seat normally and shift your weight deliberately from side to side. Any lateral movement—even a subtle click or slide—means the nuts have backed off slightly. Reach below the bowl rim and give each nut a quarter-turn snug by hand. That is usually all it takes. If you have wing nuts, fingers alone do the job. For hex nuts, keep a small adjustable wrench in your bathroom toolkit drawer so the repair never waits for a trip to the garage.
Wipe down the hardware during deep cleans. Every time you give the bathroom a thorough scrub, lift the cover caps and run a damp cloth over the bolt heads and the hinge area on top of the bowl rim. Flip your hand underneath and wipe around the nuts and washers as well. This removes the thin film of mineral residue, soap scum, and dust that gradually cements itself to plastic surfaces. Left unchecked for years, that buildup is what turns a simple two-minute bolt removal into the hacksaw-and-vinegar ordeal covered earlier in this guide. Keeping the hardware clean now means easy access later.
Keep aggressive chemicals away from hinge hardware. Bleach-heavy drop-in bowl tablets are a popular shortcut for keeping porcelain white, but plumbing professionals consistently warn against them. Experts at The Spruce note that continuous chlorine exposure accelerates the deterioration of rubber and plastic components inside and around the toilet. That degradation extends to your hinge bolts, washers, and bushings sitting just inches above the waterline. The concentrated bleach vapors rising from the bowl attack the polymer chains in nylon and polypropylene, making the plastic brittle over time. Safer alternatives—white vinegar, baking soda, or enzyme-based bowl cleaners—keep the porcelain spotless without silently destroying the hardware holding your seat in place.
Temperature cycling is one more environmental factor worth understanding. Hot showers fill a bathroom with steam, and when the room cools, condensation forms on every hard surface—including bolt shafts and nut threads beneath the bowl rim. Repeated expansion and contraction of the plastic can gradually relax the clamping force. This is perfectly normal and is the exact reason a biannual check matters. A quarter-turn correction after six months of thermal cycling keeps the seat as stable as the day you installed it.
Signs It Is Time for a Full Hardware Refresh
Preventive maintenance extends the life of your fasteners significantly, but no plastic component lasts forever. At some point, the hardware reaches the end of its useful service and no amount of retightening will restore reliable performance. Recognizing that moment early prevents the frustrating loop of tightening, loosening, tightening again, and eventually cracking a bolt at the worst possible time.
Watch for these warning indicators:
- Visible cracks or discoloration on the bolt shaft. Hairline fractures in the threaded section mean the polymer has fatigued. A discolored or chalky-white surface on an originally smooth bolt suggests chemical degradation—often from prolonged bleach exposure or UV light in a sun-facing bathroom.
- A nut that no longer grips despite being fully threaded. If you can spin the nut all the way down the bolt and it still feels loose at the bottom, the threads on one or both components are stripped beyond recovery. No amount of extra turning creates a grip that is not there.
- A washer that has flattened or cracked. Washers absorb and distribute clamping force over thousands of load cycles. A washer that has compressed paper-thin or split in half can no longer do its job, and the nut starts bearing directly on the porcelain—a recipe for ceramic damage and recurring looseness.
- Any bolt that has been retightened more than three times without holding. This is the clearest behavioral signal. If you have tightened the same bolt on three separate occasions and it keeps backing off, the hardware has told you everything you need to know. Something in the assembly—thread engagement, washer friction, or bushing compression—has passed its functional limit.
When one component shows wear, replacing just that piece is tempting but risky. A fresh bolt threaded into a worn nut inherits the old nut's stripped threads. A new nut tightened over a flattened washer still lacks proper load distribution. The most reliable approach—especially when multiple warning signs appear together—is to swap out the full mounting assembly: bolt, nut, washer, bushing, and cap as a matched set. The cost difference between a single bolt and a complete heavy duty toilet seat fastener bolt kit is usually a dollar or two, while the reliability difference is night and day.
For a single household toilet, keeping one spare kit in the bathroom cabinet ensures the replacement is always within arm's reach the moment you notice a problem. For professionals managing multiple units—hotel housekeeping teams cycling through dozens of guest rooms, property maintenance departments overseeing apartment complexes, or sanitary-ware manufacturers planning seat installation at scale—the math changes. Buying individual blister packs from a retail shelf for every unit is neither time-efficient nor cost-effective. Standardizing on a comprehensive fixing system like Tianyun's Toilet Seat Fixing Systems reduces SKU complexity across an entire portfolio, ensuring every installation ships with matched, compatible hardware from bolt to base. When every room uses the same mounting assembly, maintenance staff carry one kit instead of a dozen, training simplifies, and callbacks for mismatched parts drop to near zero.
Whether you are a homeowner who just wants the wobble gone for good or a facilities manager responsible for hundreds of seats, the takeaway from this entire guide is the same: toilet seat hinge bolts plastic hardware is small, inexpensive, and easy to overlook—but it is the single component that determines whether your seat stays solid or drives you back to the toolbox every few weeks. Identify the right parts, install them correctly, check them twice a year, and replace the full assembly when wear appears. Do that, and you can finally stop retightening.
Frequently Asked Questions About Plastic Toilet Seat Hinge Bolts
1. What size are standard plastic toilet seat hinge bolts?
Most residential plastic toilet seat hinge bolts have a shaft diameter of approximately 3/8 inch (about 10 mm) with coarse threading. Bolt length typically ranges from 40 mm to 70 mm depending on the bowl rim thickness and hinge design. The standard mounting-hole center-to-center spacing on North American toilets is 5.5 inches (roughly 140 mm). Before purchasing replacements, measure the shaft diameter, bolt length, and hole spacing on your specific toilet to ensure a proper fit.
2. Why do plastic toilet seat bolts keep coming loose?
Recurring looseness usually stems from a missing or flattened washer, oversized mounting holes in the bowl, or mismatched bolt-and-nut threading rather than insufficient tightening. Without a washer, the nut sits on smooth porcelain with minimal friction and gradually backs off through daily use. Upgrading to a complete mounting assembly that includes rubber bushings or cone washers fills any gap between the bolt shaft and the ceramic hole, creating a vibration-resistant connection that holds without constant retightening.
3. Are plastic or metal toilet seat bolts better?
For standard residential bathrooms, plastic bolts are the preferred choice recommended by most toilet and seat manufacturers. They resist corrosion in humid environments, cannot scratch or crack porcelain, and are easy to cut and remove years later. Plastic also acts as a sacrificial component, snapping before the ceramic bowl can crack under abnormal force. Metal bolts, such as stainless steel or brass, are reserved for bariatric seats, high-traffic commercial restrooms, or institutional settings where load demands exceed what polymer fasteners can handle.
4. How do you remove a plastic toilet seat bolt that keeps spinning?
A spinning bolt means the threads inside the hinge ear are stripped and the bolt can no longer grip. First, try pressing a flat-head screwdriver firmly into the bolt head slot while turning the nut from below - the added friction may hold it still. If that fails, clamp locking pliers directly onto the bolt head for a stronger grip. When nothing stops the spin, slide a close-quarters hacksaw blade between the bottom of the hinge ear and the bowl rim and cut through the shaft. The bolt drops free and you can install a fresh matched set of hardware in minutes.
5. Can I use a universal bolt kit for a soft-close toilet seat?
In most cases, no. Soft-close and quick-release toilet seats typically integrate the bolt into a larger proprietary hinge cartridge that controls the damping action. A generic universal bolt kit will not thread into or engage with that specialized mechanism. Check the underside of your seat lid for a model number and order the exact replacement cartridge from the seat manufacturer. Universal kits work best for standard top-mount seats with simple exposed hinges and a traditional bolt-through-the-rim design.
Apply This Insight to Your Project
Tell us what you are building and how the topic “Stop Retightening! Toilet Seat Hinge Bolts Plastic Done Right” relates to your application. Our engineering team can help evaluate the next step.