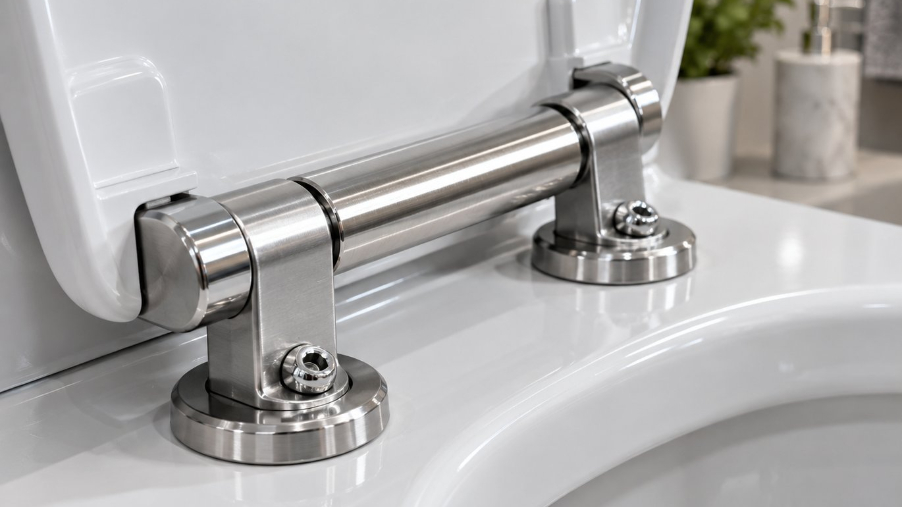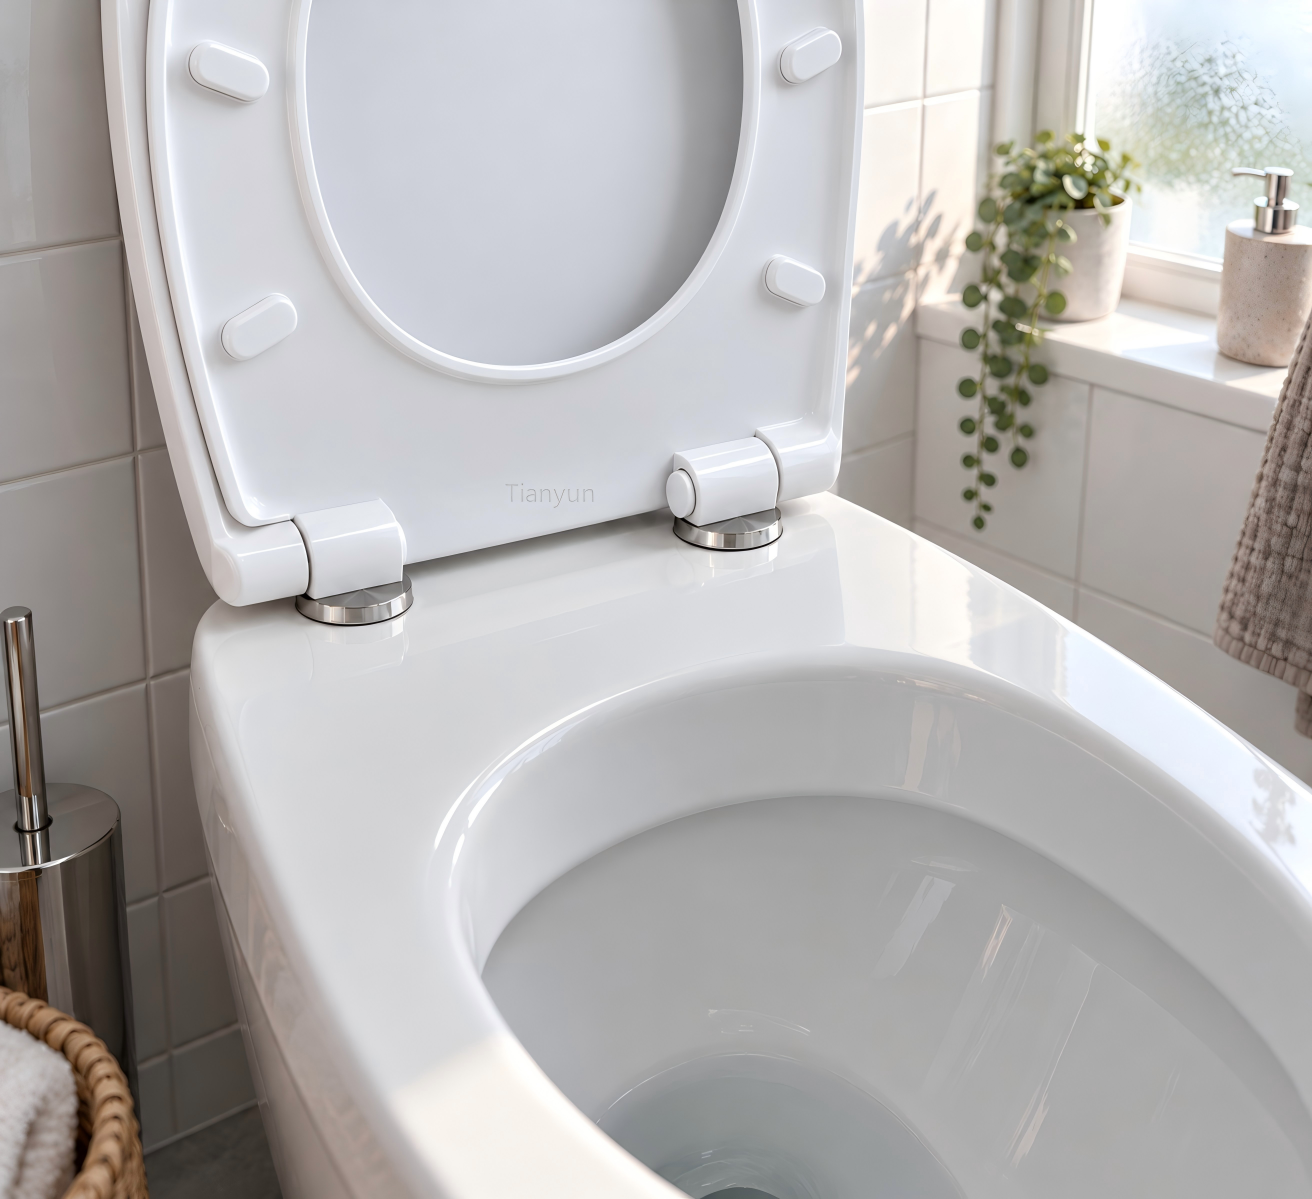
What Is a Top Fixing Toilet Seat and Why Does It Exist
You bought a new toilet seat, pulled it out of the box, and then realized there is no way to reach the underside of the bowl to tighten it down. Sound familiar? You are not dealing with a defective product or a missing part. Your toilet almost certainly requires a top fixing toilet seat — a design built specifically for bowls where access from below is blocked, limited, or simply nonexistent.
A top fixing toilet seat is a seat that attaches to the toilet bowl using bolts inserted and tightened entirely from above the ceramic rim. Instead of wing nuts secured underneath, it relies on expanding rubber grommets or anchors inside the mounting holes to lock the seat firmly in place — no underside access required.
The Top Fix Mechanism Explained in Plain Language
Imagine dropping a bolt down into a hole and having it grip the walls from the inside — that is essentially how toilet seat top fixing works. A threaded bolt passes through the hinge of the seat and slides into the mounting hole on the ceramic rim. Attached to the bolt is a rubber grommet or expanding anchor. As you turn the bolt clockwise from above, that grommet compresses vertically and expands outward, pressing against the inner walls of the hole. The friction holds everything securely in place. You never need to reach underneath the bowl, use a wrench from below, or awkwardly contort yourself behind the toilet. Every step happens from the top.
Why Some Toilets Require Top Fixing Seats
Not every toilet gives you the luxury of accessible bolt holes underneath. Modern bathroom design has moved toward sleeker, more streamlined silhouettes — and that means the underside of many bowls is completely hidden. Back-to-wall, wall-hung, and closed-back close-coupled toilets all push the rear of the bowl flush against the wall or conceal the trapway inside the ceramic body. The result? Those two mounting holes at the back of the seat area become blind holes — dark voids in the ceramic with no access from below. A top fix toilet seat is the only option that works. Even some freestanding toilets with tight cistern placement make bottom access impractical, pushing homeowners toward top mount toilet seat fixings as the easier, more reliable solution.
Regional Terminology You Should Know
Here is where things get a little confusing depending on where you live. In the UK and Australia, "top fixing" is the standard term you will find on packaging, in product listings, and across DIY guides. Search for a toilet seat in the US, though, and you are more likely to encounter "top-mount" or "top-bolt" descriptions for the same mechanism. Some retailers also label these as "blind hole fixings," referencing the fact that the mounting holes do not pass fully through to an accessible underside. Regardless of the label, the principle is identical: bolts go in from the top, anchors expand inside, and the seat locks down without any work from below. Knowing these terms saves you from ordering the wrong product — especially when shopping across international retailers.
The real question, of course, is whether your toilet actually needs this type of seat — or whether a traditional bottom fix setup would work just as well. The distinction comes down to a few key differences in how each system attaches.
Top Fix vs Bottom Fix Toilet Seats Compared
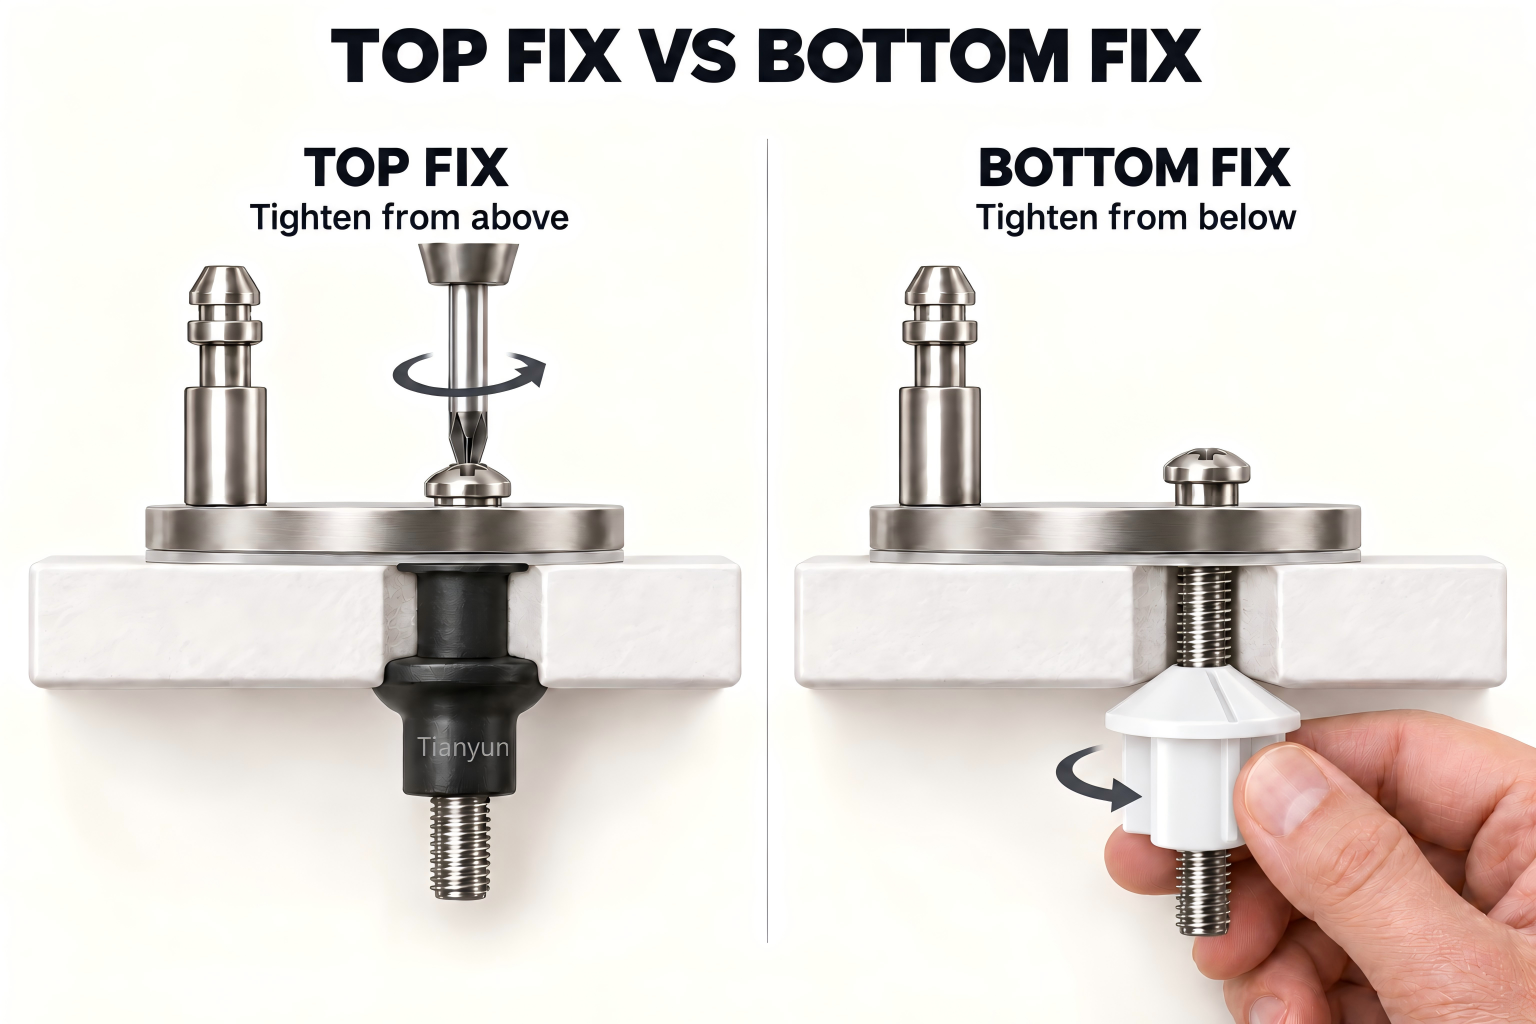
The difference between top and bottom fixing toilet seat designs is not just a matter of preference — it determines whether the seat you buy will physically attach to your toilet at all. Pick the wrong type, and you will end up with a perfectly good seat that spins, wobbles, or flat-out refuses to secure. So how do you tell which one you need? It comes down to where the tightening happens and what your toilet allows you to reach.
How Bottom Fix Toilet Seats Attach
Bottom fix is the traditional method most people picture when they think about installing a toilet seat. Two long bolts drop through the hinge holes from the top of the ceramic rim and poke out underneath the bowl. You then reach under the toilet, slide on a washer, and hand-tighten a wing nut or hex nut onto each bolt. It is simple, time-tested hardware — but it requires full access to the underside. If your toilet is a classic freestanding model with an open back and visible trapway, you will have no trouble getting your hands underneath to fasten things. If the bowl is pressed against a wall or enclosed by cabinetry, though, this approach becomes anywhere from frustrating to impossible.
How Top Fix Toilet Seats Attach
A top fix or bottom fix toilet seat choice really hinges on your bowl's design. Top fix seats eliminate the need to go underneath entirely. Instead of a wing nut below, these systems use expanding rubber grommets or anchors that slide into the mounting hole from above. As you tighten the bolt clockwise with a screwdriver or coin, the grommet compresses and mushrooms outward against the inner ceramic walls. That outward pressure is what locks everything in place — no under-bowl access, no awkward kneeling, no blind fumbling. This is why back-to-wall, wall-hung, and concealed-trapway toilets almost always require top fixing or bottom fixing toilet seat hardware designed for top-side installation.
Can You Convert Between Fixing Types
This is one of the most common questions homeowners ask, and the answer is: sometimes. If you have a bottom fix toilet with open access underneath, you can usually convert toilet seat to top fix hardware without any issues. The expanding anchors will still grip the mounting hole from inside, and you gain the convenience of doing everything from above. Many people prefer this even when they do not strictly need it.
The reverse, however, is not possible. You cannot use bottom fix hardware on a toilet with blind mounting holes — there is simply nowhere to attach the wing nut. The mounting hole diameter also matters. If the holes in your bowl are unusually narrow or wide, not every top fix kit will create a secure grip. Always check the manufacturer's specifications for compatible hole sizes before purchasing.
| Factor | Top Fix | Bottom Fix |
|---|---|---|
| Installation Access | Entirely from above — no under-bowl access needed | Requires reaching underneath to tighten wing nuts or hex nuts |
| Typical Toilet Styles | Back-to-wall, wall-hung, skirted, concealed-trapway models | Freestanding, open-back, exposed-trapway toilets |
| Ease of Removal | Bolt caps lift off from above; loosen bolts counterclockwise from the top | Must access underside nuts, which can corrode and seize over time |
| Hardware Complexity | Expanding rubber grommets or anchors; slightly more specialized | Standard bolts, washers, and wing nuts; widely available and straightforward |
| Adjustability | Easy to retighten or realign from above at any time | Retightening means reaching under the bowl again — difficult in tight spaces |
| Cross-Compatibility | Can be used on bottom fix toilets as an upgrade | Cannot be used on top fix (blind hole) toilets |
So which is better — top fix or bottom fix toilet seat hardware? Neither is inherently superior. The right choice depends entirely on your toilet's construction. What does matter is understanding exactly what sits inside the fixing kit and how each small component contributes to a stable, wobble-free seat.
Anatomy of Top Fix Toilet Seat Fittings and Hardware
Open up a toilet seat top fixing kit for the first time and you will find a small collection of parts that look deceptively simple — a couple of bolts, some rubber pieces, maybe a washer or two. Yet every single component plays a specific role, and understanding what each one does is the difference between a rock-solid seat and one that starts wobbling within a week.
Every Part Inside a Top Fix Fitting Kit
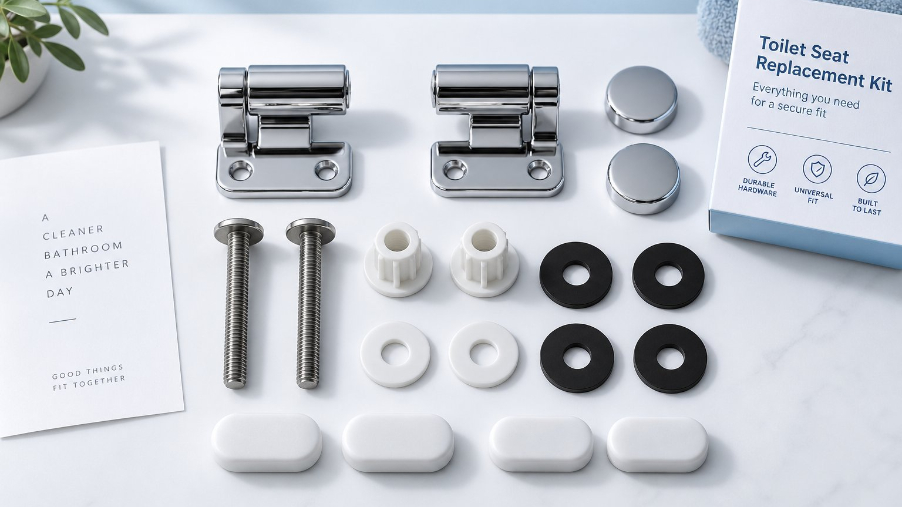
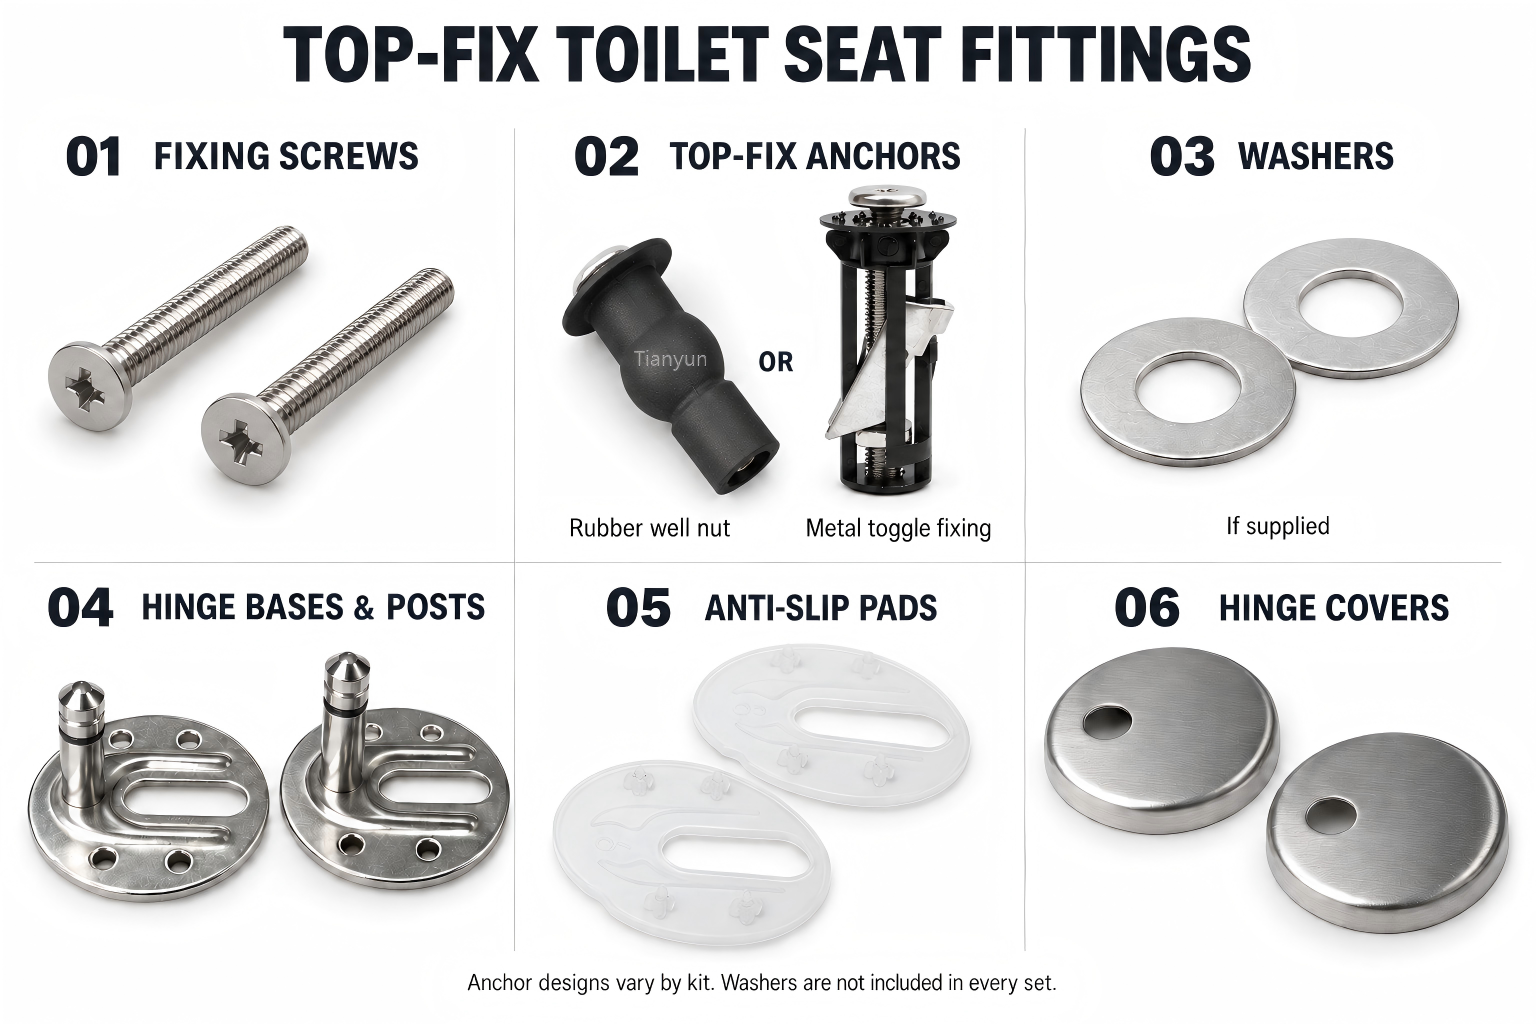
Most top fix toilet seat fittings ship with a standardized set of components. Here is what you will typically find inside the bag:
-
Fixing Screws (x2): These threaded fasteners pass through the hinge bases and engage with the top-fix anchors. Tightening them from above secures the bases to the toilet pan. Screw size, length and head type must match the fitting kit.
-
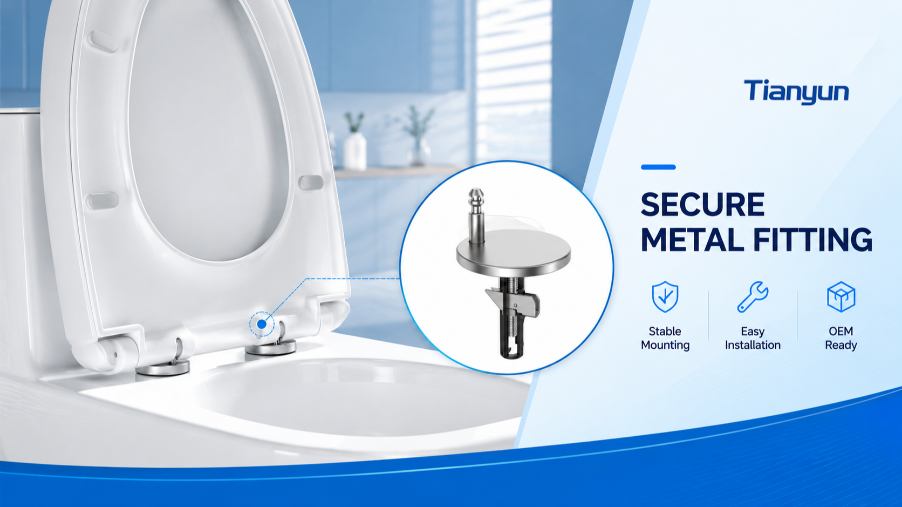
Top-Fix Anchors (x2): Rubber expansion nuts, also called rubber well nuts, contain a threaded metal insert. Tightening the screw compresses the rubber so it expands and grips the mounting hole. Alternatively, metal toggle fixings use a plate or toggle that engages beneath the ceramic mounting surface, with a separate or captive nut providing the threaded connection. These are alternative fixing systems and are not used together.
-
Washers (x2, If Supplied): Some kits include flat metal or plastic washers beneath the screw heads to spread the clamping load. Other hinge bases are designed for the screw heads to bear directly on the base plates. Use the arrangement specified for the particular kit.
-
Hinge Bases and Posts (x2): The bases attach to the toilet pan and support the seat assembly. On compatible quick-release designs, the seat connects to mounting posts. Slotted bases allow adjustment before the fixing screws are fully tightened.
-
Anti-Slip Pads (x2): These pads sit between the hinge bases and the ceramic mounting surface. They help resist movement and cushion contact. Their shape, material and transparency vary by product.
-
Hinge Covers (x2): These covers fit over the hinge bases to conceal the fixing screws and give the installation a neat finish. Their attachment method depends on the hinge design.
How the Expanding Anchor Creates a Secure Hold
The real engineering happens with the rubber grommet — and the physics are elegantly simple. Picture a short rubber cylinder sitting loosely inside a ceramic hole. When you turn the bolt clockwise from above, the threading pulls the bolt downward while a fixed plate or nut at the base of the grommet resists that movement. The grommet gets squeezed between two opposing forces. With nowhere else to go, the rubber deforms outward, pressing firmly against the inner walls of the mounting hole. That radial friction is what holds the bolt — and your entire seat — in place. The tighter you turn, the more the grommet expands. This is why top fix toilet seat fixings can create such a surprisingly strong hold without any hardware beneath the bowl.
Material Differences That Affect Durability
Not all fixing kits are created equal, and the materials used directly impact how long your seat stays tight. Plastic bolts are lightweight, corrosion-proof, and inexpensive — but they are more prone to stripping under high torque or snapping if overtightened. Stainless steel top fix toilet seat screws offer significantly greater tensile strength and resist bending, making them the better choice for heavy-use bathrooms or heavier wooden seats.
Grommet material matters just as much. Softer rubber (lower durometer) compresses easily and conforms well to slightly irregular hole shapes, but it can degrade faster when exposed to moisture and cleaning chemicals. Firmer grommets hold their shape longer and provide a tighter grip, though they demand more precise hole sizing to function correctly.
The top fix toilet seat hinges themselves also vary. Budget kits often pair with basic plastic hinges that flex under repeated load — every time someone sits down, the hinge micro-moves, gradually loosening the bolt. A quality top fix toilet seat hinge reinforced with metal inserts or made entirely from stainless steel absorbs that stress without transferring it to the fixing hardware below. If you want a seat that stays put for years rather than months, paying attention to these material details at the point of purchase saves significant frustration down the road.
Of course, even the best hardware is useless if it ends up on the wrong toilet. Before you buy any kit, you need to confirm that your bowl actually requires top-side installation — and take a few key measurements to make sure everything fits.
How to Identify Whether Your Toilet Needs a Top Fix Seat
Grabbing a tape measure and spending five minutes with your toilet before placing an order can save you from the frustration of a seat that simply will not attach. The hardware differences between top fix and bottom fix are clear in theory — but how do you figure out which type your specific toilet demands? It starts with a quick hands-on inspection and a few critical measurements.
Inspect Your Mounting Holes First
Walk over to your toilet and lift the seat — or look at the bare bowl if you have already removed the old one. At the back of the bowl rim, you will see two holes spaced a few inches apart. These are the mounting holes where any toilet seat with top fixings bolts down. Your job is to determine what is happening beneath those holes.
Reach underneath the back of the bowl, near where those holes sit. If your fingers can touch the underside of the holes — or you can feel existing bolt threads, washers, or wing nuts poking through — you have a bottom fix toilet. The holes pass completely through the ceramic, giving you access from below.
If there is nothing there — no bolt tips, no access, just a smooth or concealed ceramic surface — you are dealing with blind mounting holes. This happens when the rear of the bowl is pushed flush against a wall, enclosed by a cistern, or designed with a skirted trapway that hides everything. In these cases, a top fixing toilet seat is the only option that will work. There is simply no way to reach underneath to secure a wing nut.
One quick tip: even if you can technically reach underneath, check whether the space is so tight that tightening a nut would be impractical. Some close-coupled toilets offer a sliver of access that looks usable but becomes maddening during actual installation. If access is marginal, a top fix approach may still be the smarter move.
- Remove or lift your existing toilet seat to expose the two mounting holes on the rear of the bowl rim.
- Reach underneath the bowl behind those holes. Feel for exposed bolt threads, wing nuts, or open access to the underside of each hole.
- If you can access the underside: your toilet supports bottom fix hardware. You may still choose top fix for convenience, but you have both options available.
- If the underside is blocked or concealed: you need a top fixing seat. The mounting holes are blind, and only expanding anchors inserted from above will create a secure hold.
- Check the hole diameter using a ruler or caliper. Most top fix kits fit holes between 15 mm and 25 mm, but confirming this prevents buying a grommet that is too narrow or too wide to grip properly.
- Note the hole spacing — measure center to center between the two mounting holes. This is your bolt spread, and it must match the hinge spacing on the seat you purchase.
Key Measurements Before You Buy
Knowing you need a top fix seat is only half the equation. You also need the right size seat, and that means capturing three measurements from your bowl.
Bolt hole spacing: Measure from the center of one mounting hole to the center of the other. In the UK, the most common spacing falls around 150 mm to 160 mm. In the US, the standard distance is approximately 5.5 inches (roughly 140 mm), with a midpoint of about 2.75 inches. Most adjustable top fix hinges accommodate a range, but always verify compatibility before purchasing.
Bowl length: Place the end of your tape measure at the midpoint between the two bolt holes, then measure straight forward to the outermost front edge of the bowl rim. This single number tells you more about seat fit than almost anything else. A round bowl typically measures around 16 to 16.5 inches (roughly 400 to 420 mm), while an elongated bowl runs closer to 18 to 18.5 inches (460 to 470 mm). D-shape bowls can vary more significantly — some sit in the 14 to 16 inch range depending on the manufacturer's design — so relying on the measurement rather than the label is important.
Bowl width: Measure across the widest point of the bowl opening. This confirms you are not ordering a seat that overhangs the sides or sits too narrow on the rim. Most bowls fall between 14 and 15 inches wide, but square-edged and D-shape models can surprise you.
Matching Bowl Shape to Seat Profile
Here is where many people make an expensive mistake: they confirm the fixing type, nail the measurements, and then order a seat with the wrong profile. A round seat on an elongated bowl leaves exposed ceramic at the front. An elongated seat on a round bowl hangs over the edge and looks — and feels — wrong.
For D-shape bowls, the stakes are even higher. A top fix D-shape toilet seat has a flat rear edge and a curved front, designed to trace the specific contour of a D-profile bowl. These seats are not interchangeable with round or elongated models, even if the overall length seems close. The curvature at the front and the straight line at the back must align with the ceramic rim beneath, or you end up with gaps, overhang, or an unstable seat that rocks on uneven contact points.
If your bowl has that characteristic flat rear and soft rounded front, a D-shaped toilet seat top fixing kit is what you want. Many modern bathrooms use this profile because it pairs well with the clean, contemporary lines of back-to-wall and wall-hung toilets — the same styles that almost always require top fix hardware. You will find that a D-shaped toilet seat top fix configuration is one of the most commonly available combinations on the market specifically because these two features go hand in hand.
For round bowls, matching is more forgiving since the symmetrical shape offers fewer alignment surprises. Elongated bowls are similarly straightforward — just confirm the length measurement matches the seat's specifications. When in doubt, lay the new seat on top of the bowl without installing it. The rim of the ceramic should be fully covered by the seat all the way around, with no more than a few millimeters of play on any side.
With your fixing type confirmed, measurements recorded, and bowl shape matched, you are ready to move forward — but if there is an old seat still bolted on, getting it off cleanly is the next challenge. And as many homeowners discover, removal can be trickier than installation.
How to Remove a Top Fixing Toilet Seat Without Damage
Installing a top fix seat is usually straightforward. Removing one that has been in place for years? That is where the real fight begins. Mineral deposits, corroded threads, and rubber grommets baked into ceramic by years of moisture can turn a five-minute job into a battle of patience. Whether you are upgrading to a soft-close model or dealing with a cracked seat, understanding how to remove a top fixing toilet seat cleanly — without chipping your porcelain — is a skill worth having.
Locating and Exposing the Hidden Bolt Heads
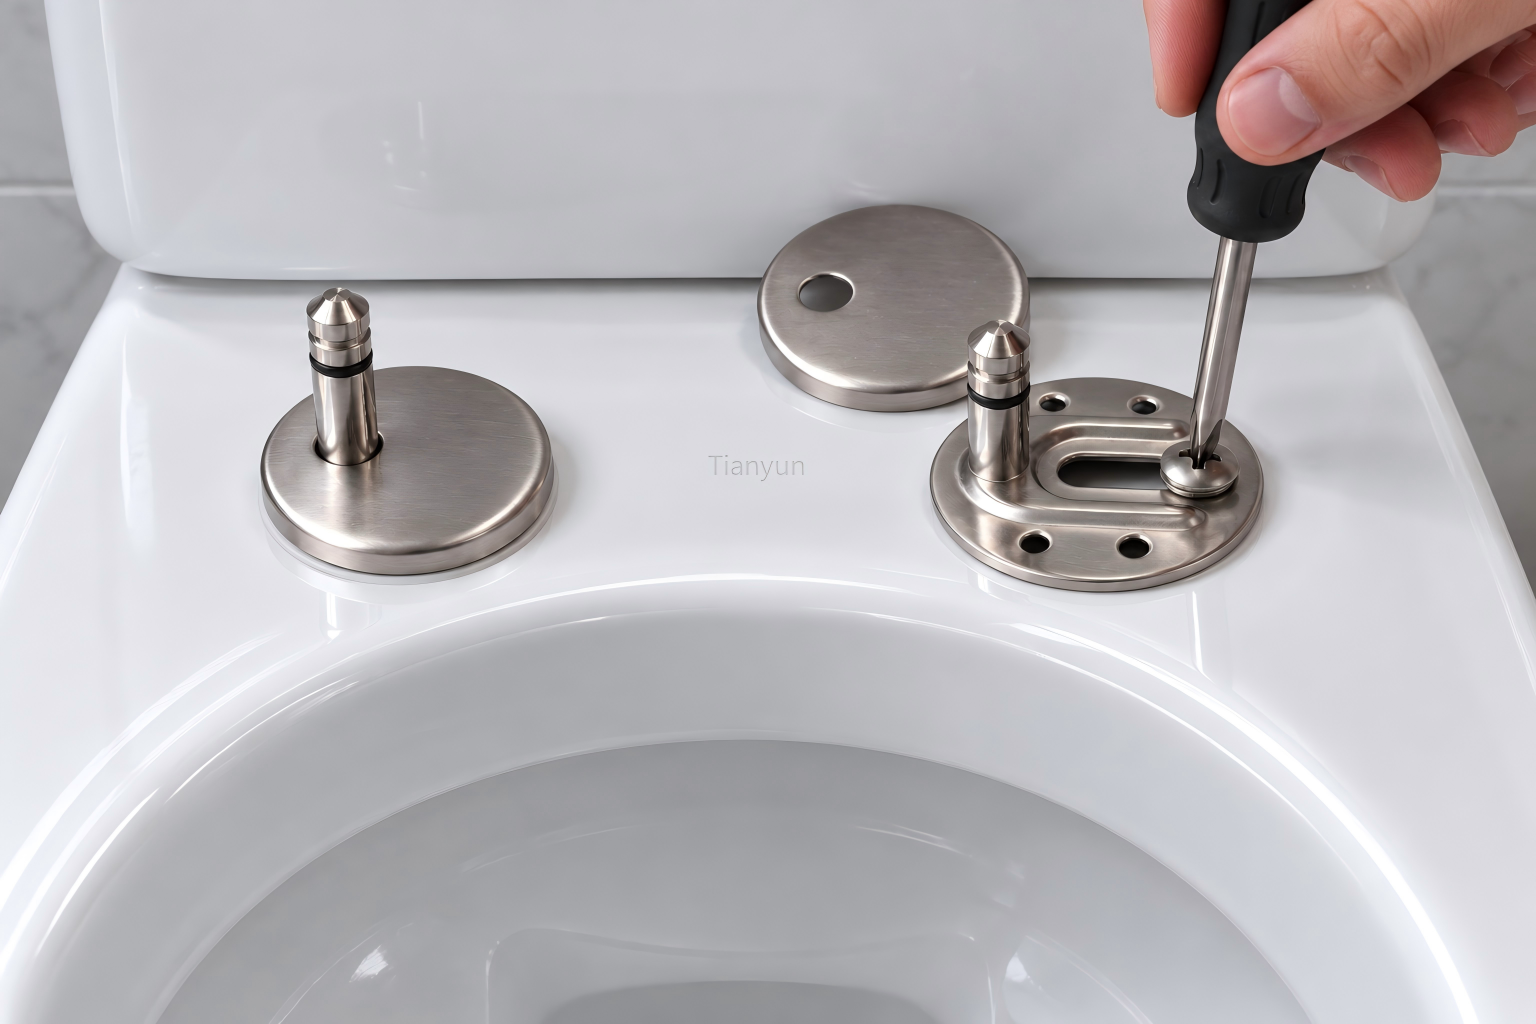
The first challenge is simply finding where the bolts are hiding. Most top fix seats conceal the bolt heads beneath small decorative caps or cover discs located at the rear of the hinge area. These caps snap on, screw on, or occasionally slide into place. Look for a small seam or notch on the top surface of each hinge cover — that is your access point.
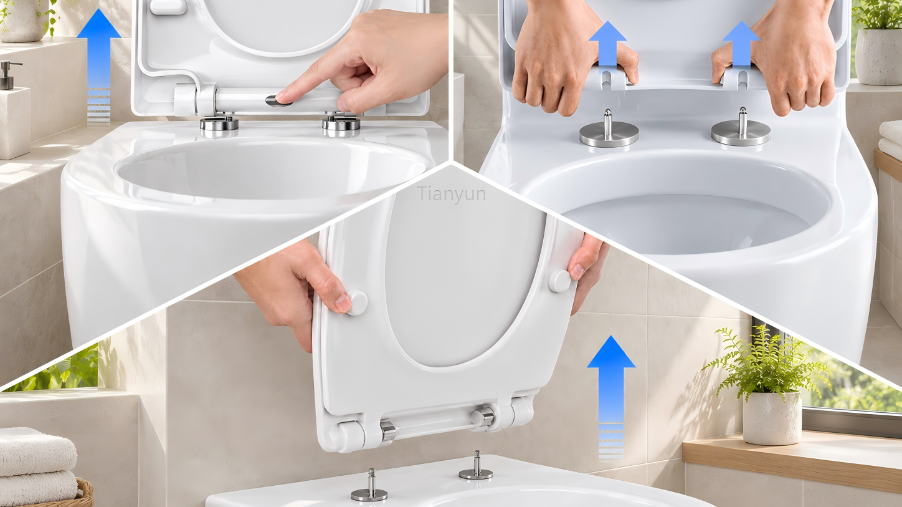
For snap-on caps, slide a flat-head screwdriver or butter knife gently under the edge and pry upward. They usually pop off with light pressure. Screw-on covers twist counterclockwise — sometimes a coin fits the slot if no screwdriver head matches. Once the caps are off, you will see the head of the bolt sitting inside the hinge. It will either have a slot for a screwdriver, a hex recess for an Allen key, or a simple crosshead. This is the bolt you need to turn counterclockwise to release the expanding grommet beneath.
Before you start twisting, take a mental note of the bolt material. Plastic? Metal? Stainless steel? This tells you what kind of resistance to expect and which tools to have nearby.
Dealing With Seized or Corroded Bolts
Here is the part where most people learn the hard way how frustrating top fixing toilet seat removal can actually be. The bolt turns freely but nothing loosens. Or the screwdriver slot starts to strip. Or the bolt simply will not budge at all. These are extremely common problems, and each one has a different root cause.
When a bolt spins without loosening, the grommet beneath has likely degraded — it is no longer gripping the ceramic, so the entire assembly just rotates in place. When a bolt refuses to turn at all, corrosion or mineral buildup has effectively welded the threads together. Metal bolts are especially prone to this in humid bathrooms, where rust slowly fuses the bolt to the anchor. Plastic bolts do not rust, but they can become brittle over time and strip the moment you apply force.
So how do you remove a top fixing toilet seat when the hardware fights back? Here is a quick-reference troubleshooting guide:
- Bolt spins freely without loosening: The grommet has lost its grip. Use pliers or locking grips to hold the bolt shaft steady from above while turning the head with a screwdriver. If the grommet is completely worn, grip the rubber from beneath (if any access exists) or carefully pull the bolt upward while wiggling the seat free.
- Bolt will not turn at all (seized): Apply a penetrating oil such as WD-40 or PB Blaster directly around the bolt head and let it soak for 15 to 20 minutes. Tap the bolt head gently with a hammer to help the oil work into the threads. Retry turning counterclockwise with firm, steady pressure — avoid sudden jerking.
- Plastic bolt head is stripping: Stop turning immediately. Use a pair of pliers to grip the sides of the bolt head for a more secure hold. If the head is too damaged, carefully cut through the bolt shaft just below the hinge using a mini hacksaw blade or an oscillating multi-tool.
- Metal bolt is rusted solid: Soak with penetrating oil and allow a longer dwell time — up to an hour for severe corrosion. If it still will not budge, a hacksaw blade slipped between the hinge and the ceramic can cut through the bolt shaft. Wrap the ceramic rim with painter's tape first to protect the surface from accidental scratches.
- Rubber grommet fused to ceramic: After removing the bolt, the grommet may refuse to slide out. Use a thin flat-head screwdriver to gently pry and rotate the grommet inside the hole. Avoid hammering or using excessive downward force — the goal is to break the bond between rubber and ceramic without cracking the porcelain.
Safe Removal Without Damaging the Ceramic
Ceramic is strong under compression but surprisingly fragile under point loads and lateral force. One overzealous wrench twist or a misplaced hacksaw stroke can chip or crack the bowl — and a cracked toilet bowl is not a repair job, it is a replacement. Knowing how to remove top fix toilet seat hardware safely means respecting that limitation at every step.
Never use an impact driver or power drill on toilet seat bolts. The sudden torque can shatter the ceramic around the mounting hole. Stick to hand tools — screwdrivers, pliers, and manual hacksaws. When cutting through a seized bolt, keep the saw blade angled away from the ceramic surface and use slow, controlled strokes. A piece of cardboard or thick tape placed over the porcelain near the cutting area provides an extra layer of protection against slips.
If you are learning how to change a top fixing toilet seat for the first time, resist the urge to rush. A few extra minutes of soaking with penetrating oil or carefully working a stubborn bolt beats the cost of replacing an entire toilet. Once the old bolts and grommets are out, clean the mounting holes thoroughly with a stiff brush and mild descaler to remove any mineral buildup or rubber residue. Smooth, clean holes give the new fixing kit the best possible surface to grip — which is exactly what you want heading into a fresh installation.
How to Install a Top Fixing Toilet Seat Step by Step
Clean mounting holes and a fresh set of hardware in hand — that is the ideal starting point. But even with perfect preparation, the actual installation process has nuances that generic toilet seat guides completely overlook. A top fix system demands a specific sequence of actions, and skipping or rushing any one of them is the fastest route back to a wobbly seat. Here is exactly how to fit a top fixing toilet seat so it stays locked in place from day one.
Preparing the Mounting Holes and Dry Fitting
Before any bolt goes near a hole, you need to make sure the foundation is right. If you removed an old seat, the mounting holes may still have remnants of old rubber grommet material, mineral scale, or dried cleaning product residue clinging to the inner walls. Use a stiff nylon brush or a rolled-up piece of fine sandpaper to clear the inside of each hole. You want smooth, clean ceramic walls — that is what the new expanding anchor will press against, and any debris reduces its grip.
Lay out every component from your new fixing kit and check it against the manufacturer's parts list. You should have two bolts, two rubber grommets or expanding anchors, two washers, and any decorative caps or covers. Missing a single washer might seem minor, but it changes how pressure distributes across the hinge and can lead to cracking over time. If anything is absent, contact the manufacturer before proceeding rather than improvising.
With everything accounted for, place the seat on the bowl without any hardware. Just set it on the rim, align the hinge holes over the mounting holes, and look at the fit. Does the seat cover the ceramic rim evenly on all sides? Is the front edge flush with the bowl's front curve? Does the rear sit flat against the back of the rim? This dry fit takes thirty seconds and catches alignment problems before bolts are tightened — problems that become much harder to fix once the grommets are expanded and gripping. Slide the seat slightly left and right to confirm you have enough lateral play to center it during final tightening.
Step-by-Step Bolt Insertion and Tightening
This is where the real work happens, and the order matters. Follow these steps exactly to ensure a secure, centered result:
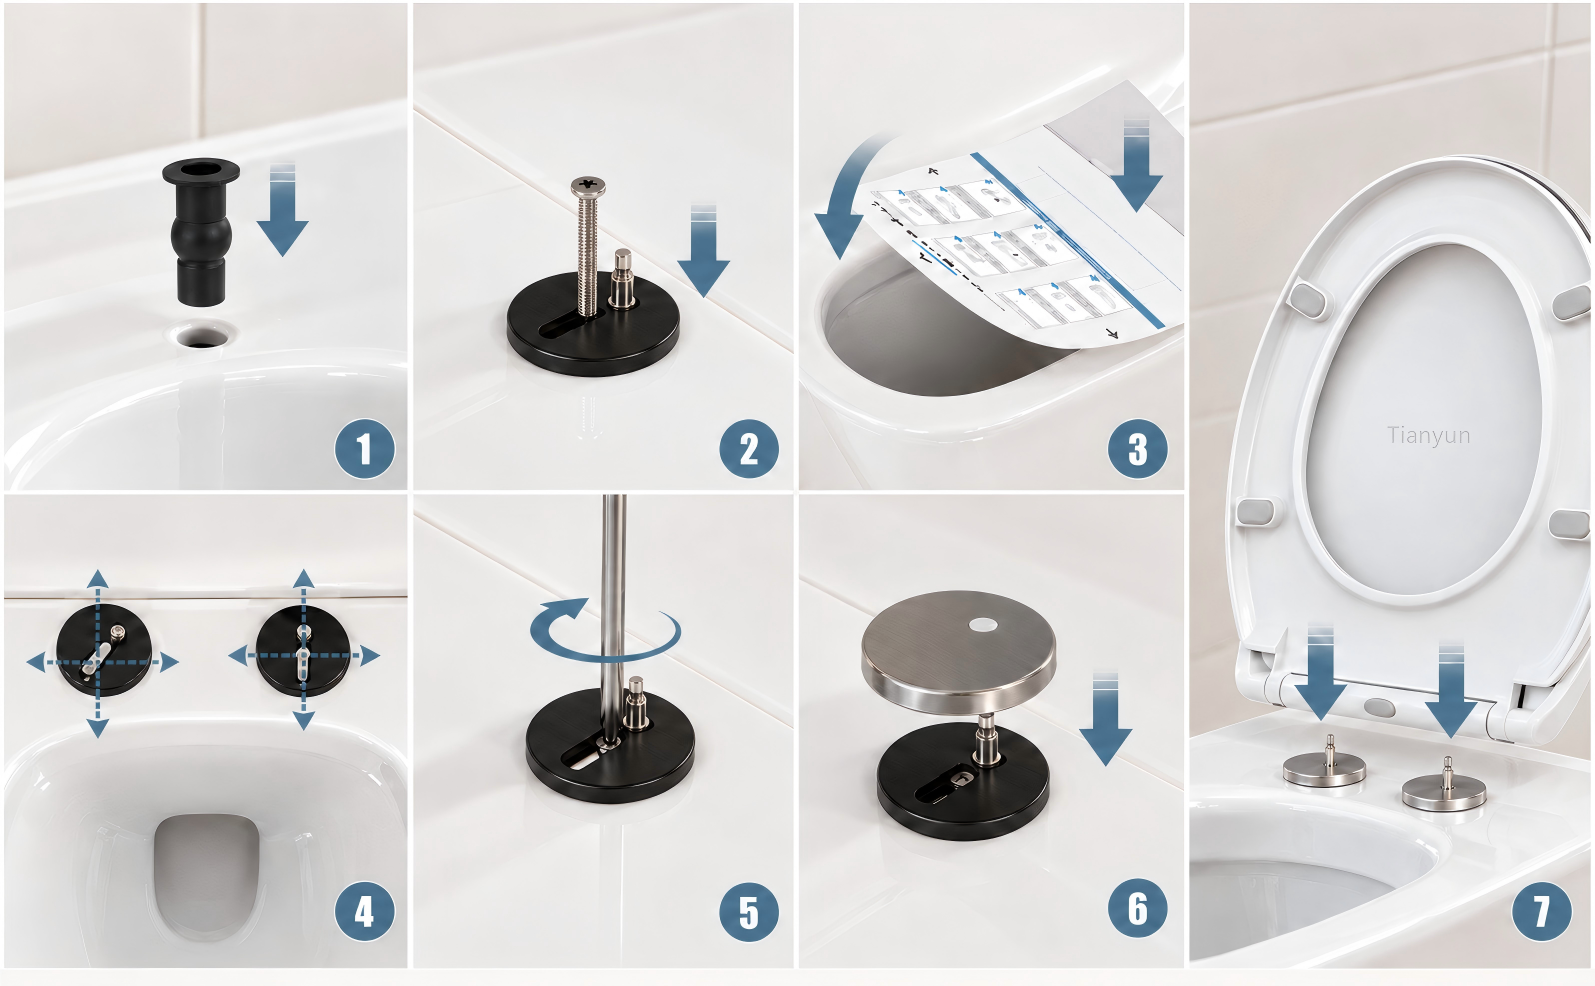
- Slide the rubber grommet onto each bolt. The grommet should sit near the bottom of the bolt shaft, with the expandable section facing the tip. Some kits have a built-in washer at the grommet's base — if yours does not, thread a washer onto the bolt first, then the grommet. Confirm the grommet moves freely and is not pinched or twisted on the threads.
- Insert one bolt-and-grommet assembly into a mounting hole. Drop the grommet end into the hole from above. It should slide in smoothly. If it feels too tight, do not force it — check for debris inside the hole or verify you have the correct kit for your hole diameter. If it drops in too loosely, the grommet may not expand enough to grip. Most kits accommodate holes between 15 mm and 25 mm in diameter.
- Thread the bolt through the seat hinge. Lift the seat and position it so the hinge bracket sits over the bolt head. Pass the bolt up through the hinge hole from below, or — depending on your kit's design — drop the bolt through the hinge first and then guide the grommet into the ceramic hole. Each manufacturer handles this slightly differently, so follow the included instructions for the threading sequence specific to your hardware.
- Repeat for the second bolt. Insert the other bolt-and-grommet assembly into the opposite mounting hole and thread it through the second hinge bracket. Both bolts should now be sitting loosely in their holes with the seat resting on the rim.
- Hand-tighten both bolts until snug. Turn each bolt clockwise by hand — just enough to feel the grommet start to engage the walls of the mounting hole. Do not fully tighten either bolt yet. This stage is purely about confirming that the seat sits centered on the bowl and the hinges are aligned evenly. Wiggle the seat gently and adjust its position left, right, forward, or backward as needed.
- Tighten the first bolt a quarter turn using a screwdriver or coin. Most top fix bolt heads accept a flat-head screwdriver or have a wide slot designed for a coin. Apply firm, steady pressure — never sudden force. You will feel the resistance increase as the rubber grommet compresses and begins expanding against the ceramic walls.
- Switch to the second bolt and tighten it a quarter turn. This alternating approach is critical. Tightening one bolt fully before touching the other pulls the seat off-center and creates uneven pressure on the ceramic rim. Alternate between bolts, a quarter turn at a time, keeping the seat straight and the pressure balanced.
- Continue alternating until both bolts are firmly secured. You will reach a point where the grommet is fully expanded and the bolt offers strong resistance to further turning. Stop here. The seat should feel solid — no rocking, no lateral slide. If you are wondering how to top fix toilet seat hardware without going too far, the simple rule is this: when the seat no longer moves under firm hand pressure, you are done.
Never use a power drill or impact driver to tighten top fix bolts. The sudden, uncontrolled torque can crush the rubber grommet, strip plastic bolt threads, or crack the ceramic around the mounting hole.
Over-tightening is the single most common installation mistake. A crushed grommet loses its elasticity and cannot maintain outward pressure against the hole walls, which means the seat will loosen again within weeks. Worse, excessive force can fracture the ceramic rim — a repair that usually means replacing the entire toilet. If the bolt keeps turning without increasing resistance, the grommet may be too small for the hole. Stop, remove everything, and check your sizing rather than forcing it further.
Checking Alignment and Final Adjustments
Bolts are tight, the seat looks straight — but how do you know it is actually secure? A quick stability test tells you everything. Press down firmly on the front left corner of the seat. Then the front right. Then push the seat sideways from one edge. Finally, try sliding it forward and backward. If there is any movement at all — even a slight wobble or shift — one or both grommets have not fully engaged.
To fix minor instability, identify which side moves and give that bolt another quarter turn. Retest. If the seat slides forward or backward rather than side to side, the grommets may need one more round of alternating tightening to fully lock down. For persistent wobble despite tight bolts, check whether the bowl rim itself is level — a bead of clear silicone between the seat and an uneven rim can compensate for minor irregularities without affecting the fixing hardware.
Once the seat passes your stability check, snap the decorative caps over the bolt heads. These covers protect the hardware from moisture and cleaning chemicals, slowing corrosion and keeping the installation looking clean. Open and close both the lid and the seat ring a few times to confirm the hinges operate smoothly and nothing catches or binds.
Fitting a top fix toilet seat properly — including learning how to fit top fixing toilet seat hinges that stay aligned — typically takes less than fifteen minutes. But as anyone who has done this more than once knows, installation is only half the story. The real test comes weeks and months later, when daily use reveals whether the seat holds firm or gradually starts to shift. Knowing what to watch for — and how to respond — keeps a five-minute annoyance from becoming a recurring headache.
Troubleshooting Common Top Fix Toilet Seat Problems
Everything felt solid on installation day. The seat did not budge, the bolts were snug, and the grommets gripped the ceramic like they were made for it — because they were. Fast-forward a few weeks or months, and something changes. A subtle rock when you sit down. A slight sideways slide you did not notice at first. Maybe the seat has crept forward so the rear edge no longer lines up with the bowl. These are not signs of a bad product. They are predictable mechanical outcomes that every top fix system can experience over time, and each one has a specific cause and a straightforward fix.
Seat Wobbles or Slides After Installation
This is the single most common complaint — a loose top fix toilet seat that seemed perfectly stable a few weeks ago. You press down on one corner and the opposite side lifts slightly. Or the entire seat shifts a few millimeters to the left or right when you sit. What happened?
In most cases, the rubber grommets have settled. Fresh out of the box, grommet material is at peak elasticity. Once compressed and locked in position, though, the rubber slowly conforms to the shape of the ceramic hole under constant pressure. That settling reduces the outward force holding the bolt in place, and the seat starts to move. Daily use accelerates this — every time someone sits down, stands up, or shifts their weight, the hinge transfers micro-loads to the bolts. Those tiny movements compound over time.
The fix is simple, and knowing how to tighten a top fix toilet seat properly saves you from pulling the whole assembly apart. Pop or unscrew the decorative caps covering the bolt heads. Hold the seat firmly centered on the bowl with one hand to prevent it from shifting during tightening. Using a screwdriver or coin, turn the first bolt clockwise in small increments — a quarter turn at a time. Switch to the second bolt and match that quarter turn. Alternate back and forth until the seat feels solid again. This balanced approach prevents pulling the seat off-center, which is exactly what happens when you crank one bolt all the way down before touching the other.
After retightening, run the same stability test you performed during installation: press down on each corner, push the seat sideways, and try sliding it forward and backward. If the wobble is gone, snap the caps back on and you are done. If it persists despite firm bolts, the grommets may have degraded beyond the point where retightening helps — and that is a different problem entirely.
Bolts Spin Freely Without Gripping
This one is genuinely frustrating. You turn the bolt clockwise, expecting resistance as the grommet expands, but it just keeps spinning. No increase in friction, no grip, no tightening — the bolt rotates endlessly without doing anything useful.
Two root causes explain this behavior. The first is a size mismatch: the rubber grommet is too narrow for the mounting hole. Even at full expansion, it never contacts the ceramic walls, so there is nothing to grip against. This usually happens when a universal fixing kit is paired with a toilet that has oversized mounting holes — typically anything wider than 22 to 25 mm. The second cause is grommet damage. If the rubber has cracked, split, or lost its elasticity from age and chemical exposure, it cannot deform properly when compressed. Instead of mushrooming outward, the degraded material simply collapses under pressure.
For a size mismatch, you need a fixing kit with larger grommets rated for your specific hole diameter. Some manufacturers sell grommets in multiple sizes, so check the product specifications before buying a completely new kit. For a damaged grommet, replacement is the only reliable fix. Attempting to wrap tape around a worn grommet or wedge extra material into the hole might hold temporarily, but these improvised solutions fail under daily use within days or weeks.
Here is a quick way to diagnose which cause you are dealing with: remove the bolt and grommet from the hole and inspect the rubber. If it looks intact — smooth, pliable, no visible cracks — the issue is almost certainly a size mismatch. If the rubber is cracked, hardened, or visibly deformed, it needs replacing regardless of the hole size.
When to Replace the Fixing Kit Entirely
Retightening solves most early-stage loosening, but there comes a point where the hardware itself is the problem. Recognizing that moment saves you from an endless cycle of tighten-loosen-retighten that never fully resolves. Here are the clearest signals that a top fixing toilet seat replacement of the entire fixing kit — not just an adjustment — is necessary:
- Grommets are visibly cracked, flattened, or hardened — rubber that has lost its elasticity will never regain enough expansion force to hold, no matter how much you tighten.
- Bolt threads are stripped or rounded — a bolt that cannot engage its threading will spin without compressing the grommet. Plastic bolts are especially vulnerable to this after repeated retightening cycles.
- The bolt shaft is bent — even a slight bend changes the angle of force on the grommet, creating uneven expansion and a seat that always pulls to one side.
- Top fixing toilet seat hinges are cracked or flex visibly under load — damaged hinges transfer movement directly to the bolts with every use, accelerating wear on the grommets and loosening the seat far faster than normal.
- Retightening holds for less than a week — if you are adjusting the same bolts every few days, the components have reached the end of their functional life.
When you replace toilet seat top fixing hardware, treat it as a complete swap rather than mixing old and new parts. A fresh bolt paired with a worn grommet — or vice versa — creates mismatched compression characteristics that undermine the whole system. Most replacement kits cost very little relative to the seat itself and install in under ten minutes using the same steps covered in the installation chapter.
| Problem | Likely Cause | Fix |
|---|---|---|
| Seat wobbles or rocks side to side | Grommets have settled and lost outward pressure after initial installation | Retighten bolts in alternating quarter turns; hold seat centered while tightening |
| Seat slides forward or backward over time | Rubber anchors are degrading from moisture or chemical exposure, losing grip | Retighten first; if the problem recurs within days, replace the grommets or full kit |
| Bolt spins freely without tightening | Grommet is too small for the mounting hole or has cracked and cannot expand | Check grommet condition — replace with correctly sized grommet or a new fixing kit |
| Bolt tightens but seat still moves | Hinge is cracked or flexing, transferring movement to the bolt assembly | Replace the hinge assembly; consider upgrading to metal-reinforced hinges |
| Retightening only holds for a few days | Hardware is worn beyond recovery — stripped threads, flattened grommets, or bent bolts | Replace the entire fixing kit as a complete set; do not mix old and new components |
Most of these issues trace back to a single factor: hardware quality. Cheap plastic bolts, thin grommets, and flimsy hinges are not defective — they are simply built to a lower tolerance that wears out faster under real-world conditions. The difference between a seat that needs retightening every month and one that stays firm for years often comes down to the materials and engineering behind the fixing kit and hinges you choose at the point of purchase.
Choosing the Right Top Fix Toilet Seat and Hardware
Materials and engineering, then — those are the variables that separate a seat you install once from one you wrestle with repeatedly. But which materials actually matter, and where should your money go? Whether you are a homeowner replacing a single seat or a trade professional specifying hardware across dozens of units, the choices you make at the point of purchase dictate years of performance. Here is how to navigate the decisions that count.
Seat Materials and Their Trade-Offs
The seat itself sits against your skin, endures daily weight, and faces constant exposure to moisture and cleaning chemicals. The material it is made from determines how long it holds up — and how it feels along the way.
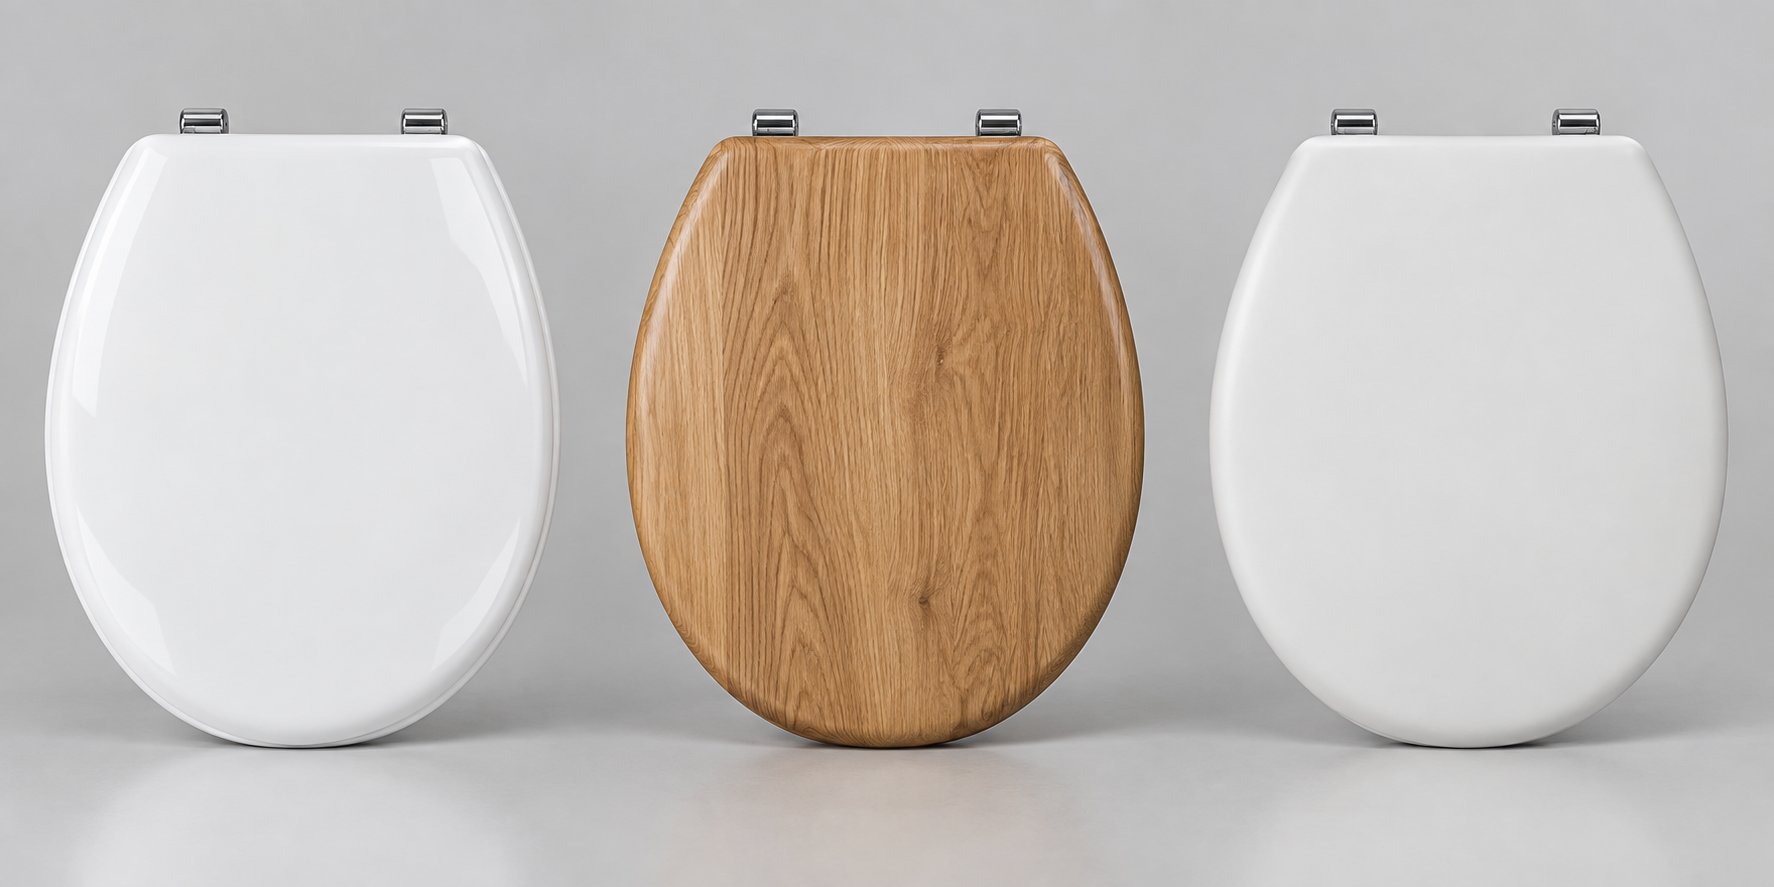
Polypropylene (PP) plastic is the most common and affordable option. It is lightweight, resistant to water, and easy to clean. However, plastic seats are more prone to cracking under pressure and can discolor over time, especially in bathrooms with heavy use. For budget-conscious buyers who want a functional seat without a premium price tag, PP handles the job — just expect a shorter lifespan than pricier alternatives.
A top fixing wooden toilet seat delivers warmth, both visually and to the touch. Wood species like oak, teak, and bamboo bring natural beauty and solid durability — they resist chipping and cracking better than plastic. The trade-off? A wooden top fix toilet seat is heavier, which puts more stress on the hinge hardware with every open-and-close cycle. Wood can also warp or swell in high-humidity bathrooms if the protective coating deteriorates. Metal hinges are typically required to support the added weight, which drives the overall cost higher.
Duroplast — a thermosetting material reinforced with wood fiber — occupies the sweet spot between plastic and wood. Once molded, the surface achieves a hard, ceramic-like finish that resists scratches, staining, and bacterial growth. Some manufacturers report antibacterial rates exceeding 99% on duroplast surfaces. It will not discolor or warp the way PP or wood can, and it pairs naturally with the sleek, modern toilet designs that typically require top fix mounting. The downside is cost — duroplast seats carry a higher price point than PP, though most users consider the durability and aesthetics worth the investment.
Why Hinge Quality Determines Long-Term Stability
You could buy the best top fix toilet seats on the market, but if the hinges are flimsy, the seat will loosen. It is that straightforward. The hinge is the mechanical bridge between the seat and the ceramic bowl — every gram of body weight, every shift in position, every slam of the lid channels through the hinge assembly and into the bolts and grommets below.
Basic plastic hinges flex under load. That flex might be invisible to the eye, but it creates micro-movements at the bolt connection point with every use. Over weeks and months, those tiny shifts gradually work the grommets loose. Metal hinges outperform plastic in stability, durability, and load-bearing capacity, maintaining consistent performance even after years of frequent use. Stainless steel and zinc alloy options resist corrosion in humid bathroom environments, whereas cheap plastic alternatives can become brittle and crack — particularly around the bolt pass-through points where stress concentrates.
For anyone choosing between comparable seats, the hinge material should be a deciding factor. A well-known brand like Bemis offers a range of top fix toilet seat models with robust hinge systems, and they are a reliable benchmark for quality. But regardless of brand, look for these features when evaluating any seat:
- Metal-reinforced or full-metal hinges — these resist flexing and transfer less movement to the fixing hardware
- Stainless steel bolts rather than plastic — higher tensile strength, better resistance to stripping and snapping
- Multi-point adjustment range — hinges that allow lateral and front-to-back adjustment during installation make centering easier and reduce the risk of misalignment stress
- Correctly rated grommets — rubber anchors sized for your specific mounting hole diameter, with a durometer firm enough to maintain expansion over time
- Quick-release mechanisms — hinges that detach from the mounting bolts for easy cleaning, without disturbing the installed fixing hardware in the bowl
For manufacturers and trade buyers sourcing top-fix hardware components at scale, the quality of the fixing kit itself becomes even more critical — consistency across hundreds or thousands of units demands reliable engineering. Tianyun's Top-Fix Toilet Seat Fixing Kits are designed specifically for manufacturers working with top-mounted toilet seat assemblies, offering secure installation from above with dependable grommet expansion and consistent seat alignment across production runs. When you are specifying hardware that will ship inside finished products, that kind of repeatable performance matters more than any single installation.
Soft Close Options in Top Fix Configurations
If you have ever been jolted awake by a toilet seat slamming shut at 2 a.m., you already understand the appeal of soft close. The good news? A soft close top fix toilet seat is not a niche product — it is one of the most widely available combinations on the market. Nearly every major manufacturer offers top fix soft close toilet seat models across round, elongated, and D-shape profiles.
The mechanism behind a soft close toilet seat top fix design relies on integrated rotary dampers built into the hinge assembly. When the lid begins to fall, the damper creates fluid resistance that slows the descent, allowing the seat to lower gently and silently rather than dropping under gravity. This controlled motion eliminates slamming noise, reduces the risk of pinched fingers — especially important in homes with young children — and minimizes the repeated impact that gradually loosens fixing hardware over time.
That last point is worth emphasizing. Every time a standard seat slams shut, the impact sends a shock through the hinge and into the bolts and grommets. Over months of daily use, those impacts accelerate grommet compression and bolt loosening. Soft close mechanisms absorb that energy before it reaches the fixing hardware, which means your grommets and bolts last significantly longer between retightening cycles. It is a durability advantage that most buyers do not think about until they experience the difference firsthand.
Looking for a specific combination? A D shape toilet seat soft close top fix configuration is especially popular because D-profile bowls are most commonly found on the modern, concealed-trapway toilets that require top-side mounting in the first place. The pairing is practically standard in contemporary bathroom design.
Whichever seat material, hinge type, or closing mechanism you choose, remember that installation is only the beginning. The long-term stability of any top fix seat depends just as much on what happens after it is installed — the small, routine maintenance steps that keep hardware tight and grommets functional month after month.
Maintaining Your Top Fix Seat for Lasting Stability
A perfectly installed seat and a high-quality fixing kit buy you time — but they do not buy you permanent immunity from loosening. Rubber compresses. Moisture infiltrates. Cleaning chemicals break down organic materials. These forces work slowly and invisibly, and if you ignore them long enough, you wake up one morning to a seat that rocks under your weight despite feeling rock-solid the day you installed it. A few minutes of proactive maintenance every few months is all it takes to stay ahead of the problem.
How Often to Check and Retighten Top Fix Bolts
Think of your top fixing toilet seat fixings the same way you think about tire pressure — you do not wait until the car pulls to one side before checking. A quick inspection every three to four months catches loosening before it becomes noticeable during use. In high-traffic bathrooms — households with multiple people, rental properties, commercial washrooms — shorten that interval to every six to eight weeks. More users mean more load cycles on the hinges, and more load cycles mean faster grommet compression.
The check itself takes under two minutes. Pop the decorative caps off the bolt heads, hold the seat centered with one hand, and try turning each bolt clockwise with a screwdriver or coin. If either bolt moves even slightly, you have found early-stage loosening. Tighten in alternating quarter turns — one bolt, then the other, back and forth — until the seat feels solid under pressure from every direction. Resist the temptation to crank hard and call it done. Over-torquing crushes the rubber grommet flat, which actually accelerates future loosening because the rubber loses its ability to spring back and maintain outward pressure against the ceramic walls.
A good rule of thumb: stop tightening the moment the seat no longer shifts under firm hand pressure on each corner. If you can press down on the front left, front right, and push sideways without any movement, the top toilet seat fixings are doing their job. Replace the caps, and you are set for another few months.
Signs Your Rubber Grommets Need Replacing
Retightening only works when the grommets still have enough elasticity to expand against the mounting hole walls. Over time, that elasticity degrades — and recognizing the warning signs early prevents the unpleasant surprise of a seat that suddenly feels completely unsecured.
Moisture is the primary enemy. Rubber grommets sit inside ceramic holes in one of the wettest rooms in your home, exposed to condensation, splashes, and the chemical residue of bathroom cleaners. Cleaning agents like bleach, hydrochloric acid, and even strong vinegar solutions can accelerate rubber degradation when they seep into the mounting holes during routine bathroom cleaning. The rubber hardens, cracks, and loses the pliability it needs to deform outward under compression.
Watch for these red flags:
- Retightening holds for shorter and shorter periods — if the interval between adjustments shrinks from months to weeks to days, the grommets have lost meaningful elasticity.
- Visible cracking or hardening — remove a bolt and inspect the grommet. Healthy rubber feels pliable and smooth. Degraded rubber looks dry, cracked, or waxy, and feels stiff when you squeeze it between your fingers.
- Pieces of rubber in the mounting hole — if fragments break off when you remove the bolt, the grommet is disintegrating and cannot maintain a reliable seal against the ceramic.
- The bolt tightens fully but the seat still moves — this indicates the grommet has compressed to its minimum height without generating enough outward expansion to grip the hole walls. No amount of additional tightening will fix this.
When you spot any of these signs, replacement is the only real solution. Improvised fixes — wrapping tape around the grommet, stuffing extra material into the hole, adding silicone — may hold for a day or two under light use, but they fail consistently under the repeated dynamic loads of daily sitting and standing. Fresh top fit toilet seat fixings restore the full expansion force the system was designed to deliver.
Keeping Spare Fixing Kits for Quick Replacement
Here is a scenario that plays out in homes everywhere: the seat starts wobbling, you remove the bolt to check the grommet, and it crumbles in your hand. The toilet is now unusable until you source a replacement kit — which might mean a trip to a hardware store, an online order with a two-day wait, or hunting through listings for top fix toilet seat fittings at Screwfix or a similar retailer. Meanwhile, the toilet sits seatless.
The simplest way to avoid this is to keep a spare fixing kit in the bathroom cabinet or utility drawer. Top down toilet seat fixings kits are small, inexpensive, and shelf-stable for years. Having one on hand means a degraded grommet goes from discovery to replacement in ten minutes rather than two days. This is especially true for blind top fix toilet seat fittings, which are not always stocked at every local store — the specialized expanding anchors designed for blind mounting holes can be harder to find at short notice than standard bottom fix wing nuts.
For professionals managing multiple properties — landlords, property managers, facility maintenance teams — the value of stocking spare hardware multiplies. A loose or broken seat in a rental unit or commercial restroom is not just an inconvenience; it is a maintenance ticket, a tenant complaint, and a potential liability. Having standardized top fixing toilet seat fixings on hand across all properties means any unit can be serviced immediately without waiting on deliveries or hunting through different retailers. Whether you source kits at a top fixing toilet seat Screwfix listing, a plumbing supply house, or directly from a manufacturer, consistency across your stock matters. When every property uses the same bolt diameter, grommet size, and hinge spacing, any technician can grab a kit and complete the job without guesswork.
For manufacturers producing toilet seats at scale or maintenance operations handling high volumes, Tianyun's Top-Fix Toilet Seat Fixing Kits simplify this workflow by delivering consistent grommet expansion and reliable seat alignment across every unit — making both initial installation and ongoing replacement predictable rather than variable.
A top fixing toilet seat is a small piece of hardware that makes an outsized difference in daily comfort. Understand the mechanism, choose quality materials, install with care, and maintain with a few minutes of attention every few months — and you will never deal with the wobble again.
Frequently Asked Questions About Top Fixing Toilet Seats
1. What is the difference between a top fix and bottom fix toilet seat?
A top fix toilet seat uses expanding rubber grommets that grip inside the ceramic mounting hole when tightened from above, so you never need to reach underneath the bowl. A bottom fix seat uses bolts that pass through the rim and are secured with wing nuts from below. The key distinction is access: if your toilet is back-to-wall, wall-hung, or has a concealed trapway that blocks access underneath, a top fix seat is required. Bottom fix works only when the underside of the bowl is fully accessible. Top fix hardware can also be used on bottom fix toilets as a convenience upgrade, but the reverse is not possible.
2. How do you remove a top fixing toilet seat that is stuck?
Start by popping off the decorative caps covering the bolt heads at the rear of the hinge area. If the bolts are seized, apply penetrating oil like WD-40 around the bolt head and let it soak for 15 to 20 minutes before retrying. For plastic bolts that have stripped, grip the shaft with pliers or carefully cut through it using a mini hacksaw blade. For metal bolts fused by rust, allow the penetrating oil to dwell for up to an hour and tap the bolt head gently to help the oil penetrate. Always use hand tools rather than power drills to avoid cracking the ceramic.
3. How do you tighten a loose top fix toilet seat?
Remove the decorative caps from the bolt heads, hold the seat centered on the bowl with one hand, and turn each bolt clockwise using a screwdriver or coin. Alternate between the two bolts in quarter turns to keep the seat aligned and avoid pulling it off-center. Stop tightening once the seat no longer shifts when you press firmly on each corner and push sideways. Avoid over-torquing, as this can crush the rubber grommet and actually accelerate future loosening. Check bolt tightness every three to four months as part of routine maintenance.
4. Can you convert a bottom fix toilet to use a top fix seat?
Yes, in most cases. If your toilet has open-access mounting holes that pass through the ceramic, top fix expanding anchors will still grip the hole walls from inside. Many homeowners prefer this conversion for convenience since all tightening happens from above. However, the mounting hole diameter must fall within the range supported by the top fix kit, typically between 15 mm and 25 mm. Always verify the manufacturer's specifications before purchasing to ensure the grommets will create a secure hold in your specific bowl.
5. How often should you replace top fix toilet seat fittings?
Rubber grommets and bolts do not have a fixed replacement schedule, but you should inspect them every three to four months. Replace the entire fixing kit when you notice retightening holds for less than a week, the grommets are visibly cracked or hardened, bolt threads are stripped, or the bolt shaft is bent. Keeping a spare kit on hand ensures immediate replacement when needed. For consistent, reliable performance, manufacturers and property managers often standardize on quality kits like Tianyun's Top-Fix Toilet Seat Fixing Kits, which deliver dependable grommet expansion and seat alignment across multiple installations.
Apply This Insight to Your Project
Tell us what you are building and how the topic “No More Wobble: How To Secure a Top Fixing Toilet Seat For Good” relates to your application. Our engineering team can help evaluate the next step.