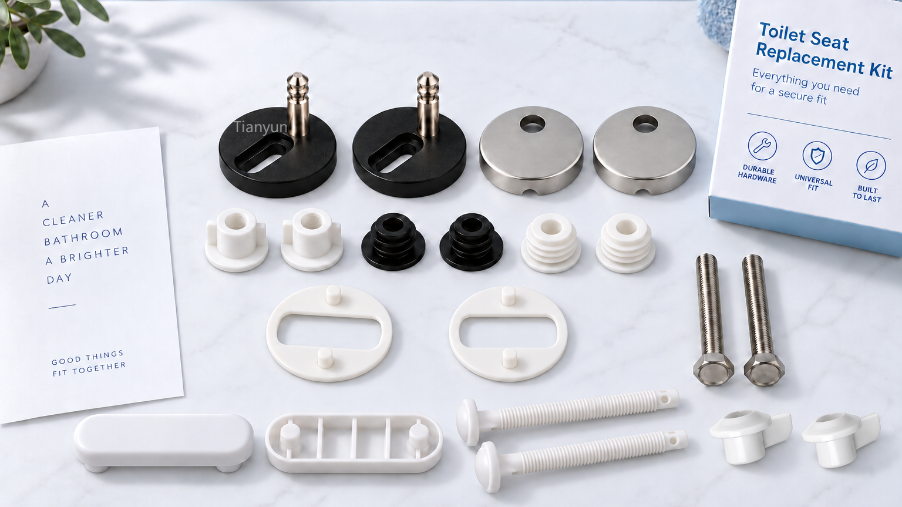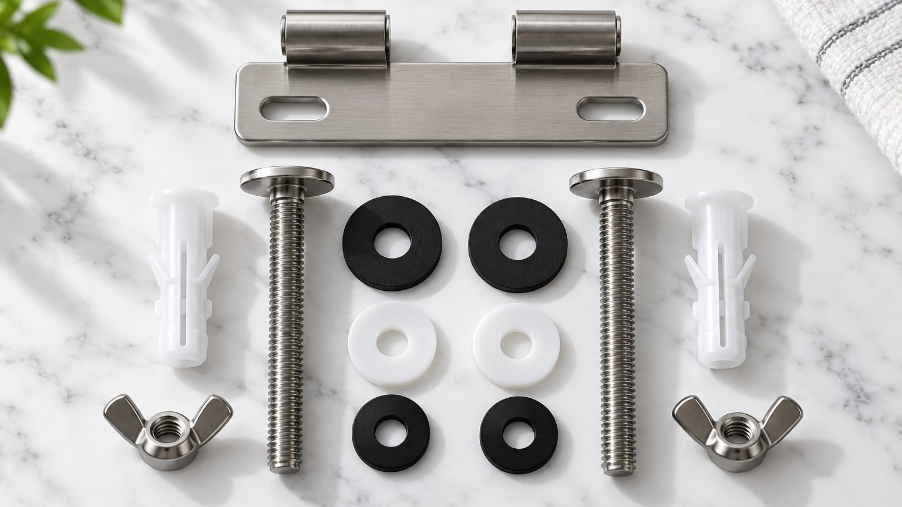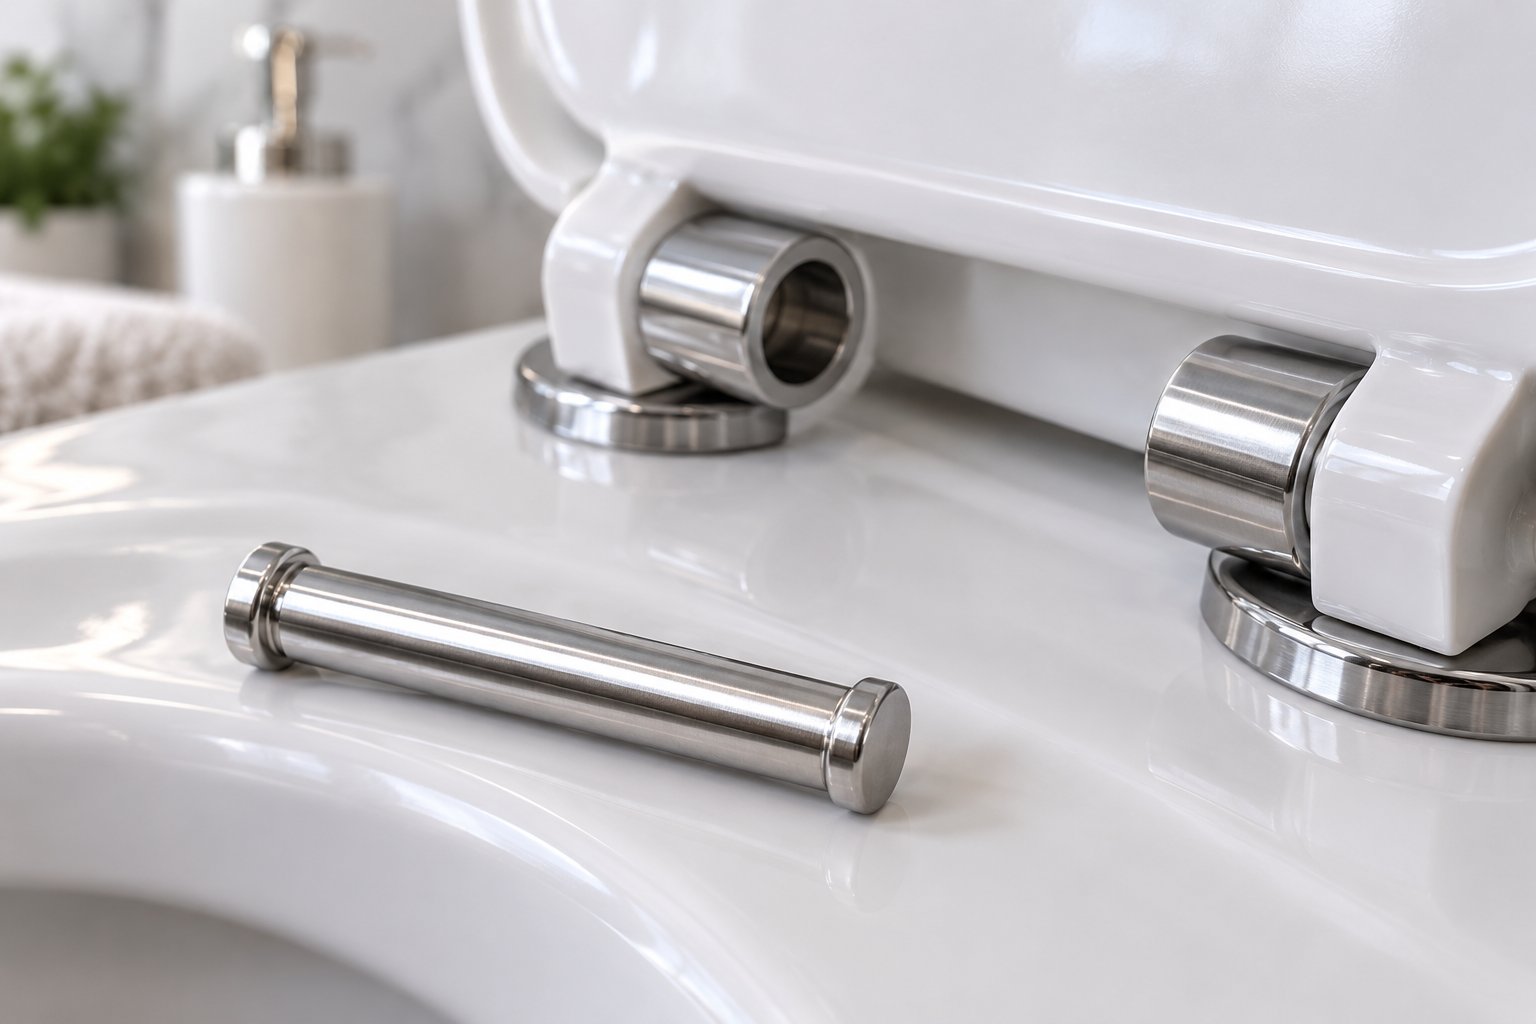
What Are Toilet Seat Hinge Pins and Why They Matter
You sit down, the seat shifts, and you instinctively reach back to wiggle the bolts. They feel fine. So why is the seat still wobbling? Chances are, the real culprit is a tiny component most people never think about: the hinge pin. It is one of the smallest parts in your toilet's hardware, yet it single-handedly controls whether your seat stays stable or turns into an annoying, sliding hazard.
Toilet seat hinge pins are easy to overlook, partly because they hide inside the hinge body where you can not see them without disassembly. But understanding what they are, how they differ from other toilet seat fastener types, and when they fail can save you from replacing an entire seat unnecessarily.
What Exactly Is a Toilet Seat Hinge Pin
Imagine the hinge on a door. A small rod runs through the knuckles of that hinge, letting the door swing open and closed. A toilet seat hinge pin works the same way. It is a short cylindrical rod, typically made of metal or durable plastic, that sits inside the hinge barrel and acts as the pivot point. Every time you lift the lid or lower the seat, it rotates around this pin.
A toilet seat hinge pin is the small rod or shaft housed inside the hinge barrel that serves as the pivot point, allowing the seat and lid to rotate open and closed while the hinge body remains fixed to the toilet bowl.
Here is where confusion usually creeps in. People often use the words "hinge," "hinge pin," and "mounting bolt" interchangeably, but they are three distinct things:
- Hinge pin — the internal rod that enables the pivoting motion of the seat and lid.
- Hinge bracket (or hinge body) — the housing that attaches to the toilet bowl and contains the barrel through which the pin passes.
- Mounting bolts and nuts — the fasteners that secure the hinge bracket to the bowl through pre-drilled holes, using either a top-fix or bottom-fix method.
The pin itself is usually a smooth, uniform-diameter shaft, though some designs feature a stepped or tapered profile. Unlike bolts, it does not thread into anything. Unlike screws, it does not bite into material. Its sole job is to sit snugly inside the hinge barrel and provide a low-friction axis of rotation.
Why Hinge Pins Are Often Overlooked
Most homeowners only discover this component exists when something goes wrong. A broken toilet seat hinge, a seat that rocks side to side, or a lid that will not stay upright — these symptoms often trace back to a worn or corroded pin rather than the more visible mounting hardware. Yet if you search for help online, you will mostly find product listings and generic fixing kits. Very few resources explain the different hinges types of toilet seat fixings at the component level.
That gap is exactly what this guide fills. Understanding this one small part can mean the difference between a five-minute, low-cost pin swap and an unnecessary full seat replacement. In the sections ahead, you will find a complete breakdown of pin types and materials, a practical measurement guide for finding the right replacement, step-by-step troubleshooting for common failures, and honest sourcing advice for both homeowners and professional hardware teams.
The first step toward any of that, though, is understanding how the pin actually functions inside the broader assembly — and why its relationship with the hinge barrel matters more than most people realize.
How Toilet Seat Hinge Pins Work Inside the Assembly
Picture lifting your toilet seat lid. It swings up smoothly, holds its position, and lowers back down without flying off the bowl. That controlled arc of motion does not happen by accident. It is the direct result of how a small pin interacts with the hinge barrel, and how that hinge barrel connects to everything else bolted to your toilet. Understanding this mechanical chain is the fastest way to diagnose whether a problem lives in the pin, the hinge body, or the mounting hardware underneath.
The Role of the Hinge Pin in Seat Movement
At its core, the hinge pin creates a fixed axis of rotation. The pin slides through a series of aligned cylindrical sleeves — often called knuckles or barrels — that alternate between the seat, the lid, and the hinge body. When you raise the lid, the knuckles attached to the lid rotate around the stationary pin while the knuckles attached to the hinge body stay put. The seat operates on the same principle, sometimes sharing the same pin or using a second one positioned alongside it.
Three factors determine how smooth that rotation feels:
- Friction between pin and barrel — A well-fitted pin with a clean, lightly lubricated surface allows the seat to glide open and closed. A corroded or rough pin creates stiffness and resistance.
- Weight distribution — The seat and lid exert downward force on the pin at an angle that changes as you open or close them. A pin that fits loosely in its barrel allows that force to translate into lateral wobble rather than clean rotation.
- Pin material — Harder materials like stainless steel resist deformation under repeated load cycles, while softer plastics can gradually wear down, enlarging the gap between pin and barrel over time.
Not all toilet hinges use the same pin configuration, either. Two broad design categories exist:
Through-pin designs feature a removable rod that passes through separately molded knuckles on the seat, lid, and hinge body. You can slide the pin out, inspect it, and replace it independently. This design is common in heavier-duty or traditional toilet seat attachments where serviceability matters.
In contrast, integrated-pin designs mold the pin directly into the plastic hinge body during manufacturing. The seat snaps onto these built-in pegs rather than threading onto a separate rod. Integrated pins are lighter, cheaper to produce, and typical of budget residential seats — but when one breaks, you usually have to replace the entire hinge rather than just the pin. As the Bemis glossary notes, this pivot component — sometimes called a pintle — is most commonly made from plastic, aluminum, or stainless steel.
How Hinge Pins Connect to the Broader Mounting Assembly
The pin does not work in isolation. It is one link in a chain of components that together keep your seat firmly attached and properly aligned on the bowl. Imagine building that chain from the porcelain upward, and you will see exactly where the pin fits in.
A typical toilet seat hinge assembly includes these key components:
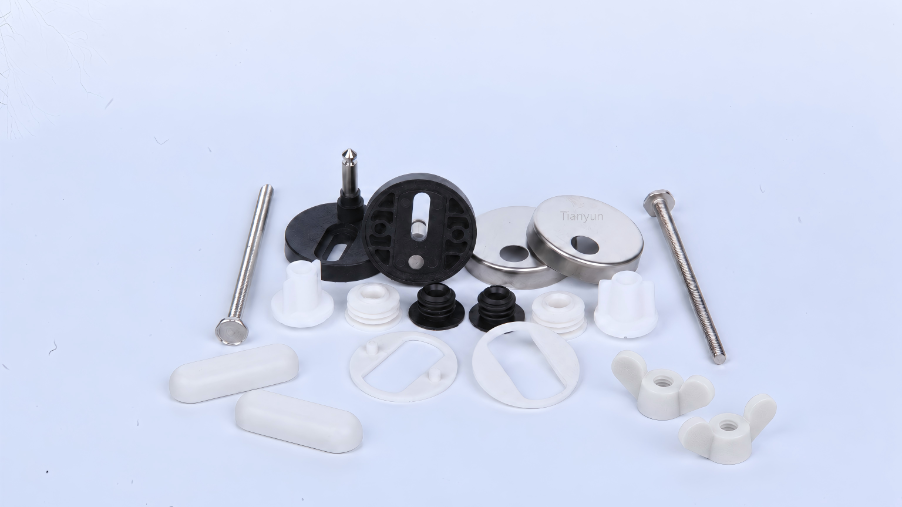
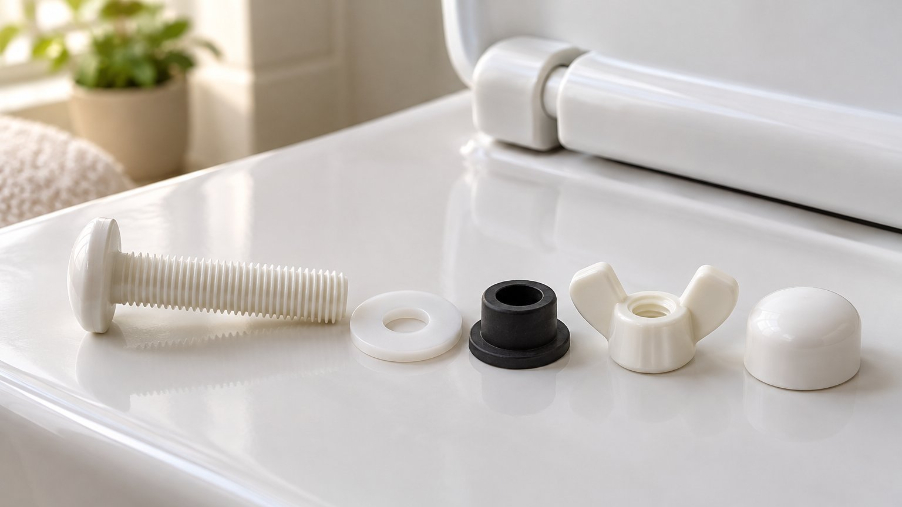
- Mounting bolts — Pass down through the pre-drilled holes on the back of the toilet bowl (or up from underneath, depending on the fixing style). These anchor the entire hinge system to the porcelain.
- Rubber or plastic bushings — Sit between the bolt and the porcelain to prevent metal-on-ceramic contact, reduce vibration, and protect against cracking.
- Hinge plate or bracket — The flat base that rests on top of the bowl and holds the hinge barrel assembly in position. The mounting bolts pass through holes in this plate.
- Hinge barrel (knuckles) — Cylindrical sleeves on the hinge body, seat, and lid that align to form a channel for the pin.
- Hinge pin (pintle) — The rod that threads through the aligned knuckles, creating the pivot axis.
- Washers and nuts — Secure the mounting bolts from below the bowl, holding everything snug against the porcelain.
When all these toilet seat fittings work together, the seat feels rock-solid and rotates without any lateral play. But problems in one component often masquerade as problems in another. A seat that shifts side to side, for example, might look like a loose mounting bolt issue — and tightening those bolts is the first thing most people try. If the real cause is a worn hinge pin that no longer fits tightly in its barrel, though, no amount of bolt tightening will fix the wobble. The seat will keep sliding because the slop is in the pivot, not in the anchor points.
This distinction matters because it changes the repair path entirely. A loose bolt needs a wrench. A worn pin needs a replacement part — or, in the case of integrated-pin toilet hinges, a whole new hinge assembly. Knowing which layer of the system has failed saves you time, money, and the frustration of repeated repairs that never quite solve the problem.
That knowledge also becomes essential when you start shopping for parts, because hinge pins are not one-size-fits-all. Material, diameter, length, and design style all vary by manufacturer and seat type — differences that matter far more than most people expect.
Types of Hinge Pins and Toilet Seat Fixing Systems
A stainless steel rod is not the same as a nylon peg, and a top-fix hinge does not use the same pin configuration as a concealed bracket system. Yet walk into any hardware store, and you will find replacement pins lumped together as if they are all interchangeable. They are not. The material a pin is made from, the way it is shaped, and the fixing style it belongs to all determine whether it will hold your seat steady or leave you back at square one within weeks.
This section maps out the major categories so you can match the right pin to the right system — and understand why certain combinations work while others fail.
Common Hinge Pin Materials and Designs
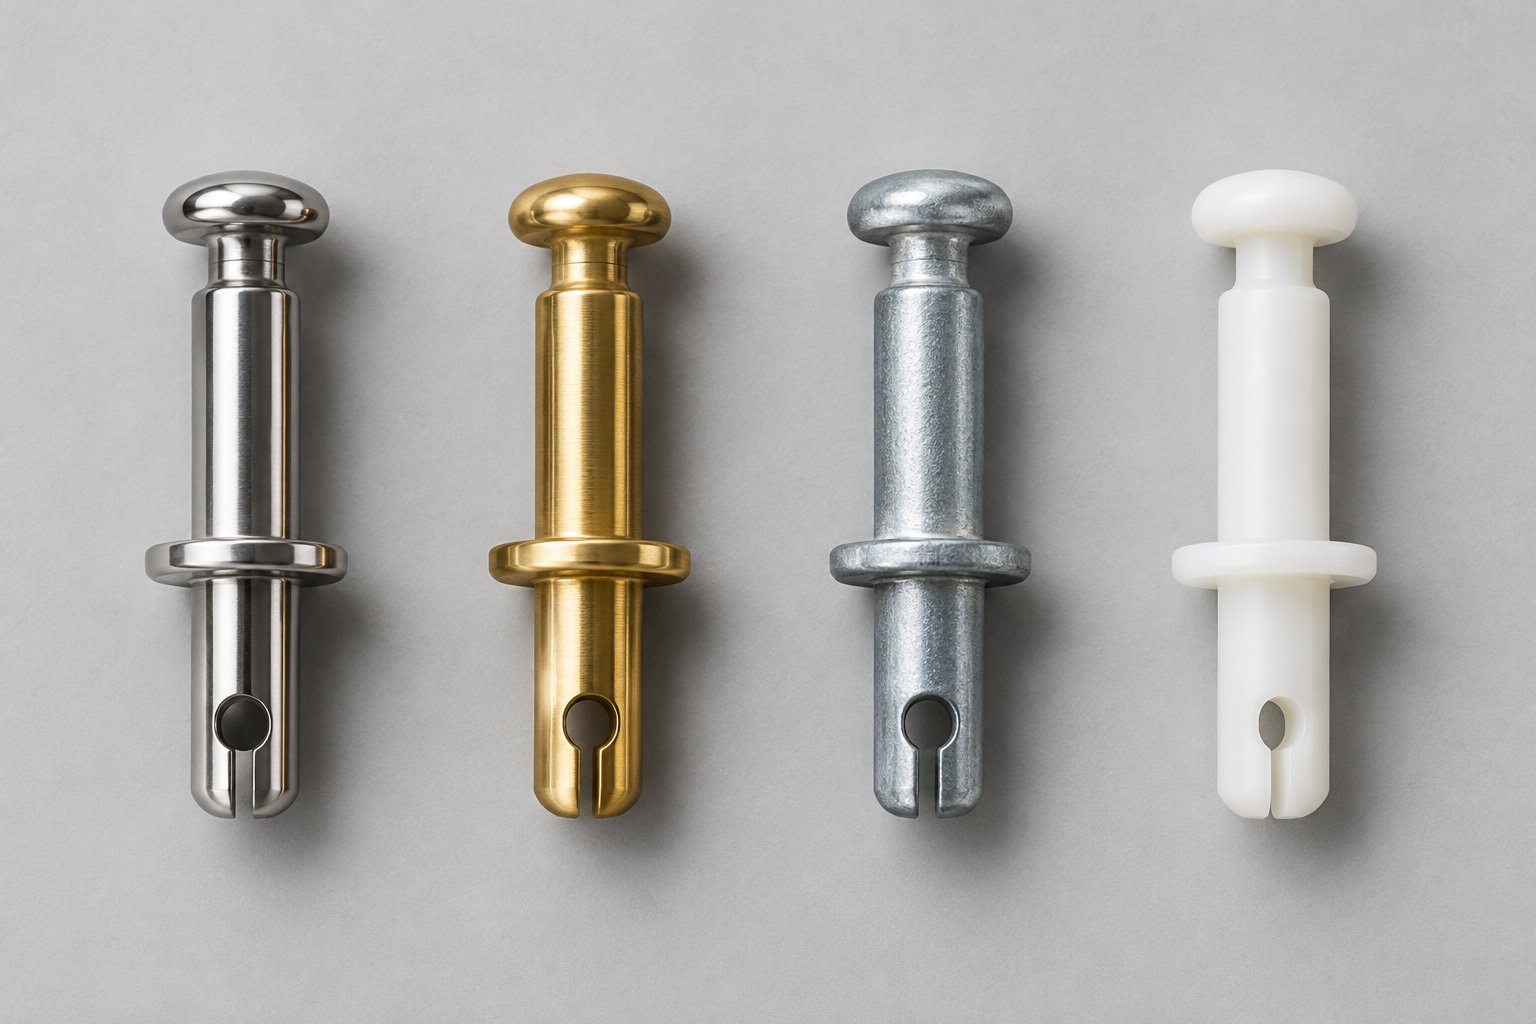
The material of a hinge pin directly affects how long it lasts, how smoothly the seat operates, and how well it resists the humid, splash-prone environment inside your bathroom. Here is a breakdown of the most common options:
| Material | Corrosion Resistance | Durability | Typical Use Case |
|---|---|---|---|
| Stainless Steel | Excellent — resists rust even in consistently wet conditions | High — handles repeated load cycles without deformation | Premium residential seats, commercial installations, coastal or high-humidity environments |
| Zinc-Plated Steel | Moderate — protective coating wears over time, exposing base metal to rust | Moderate — strong initially, but corrosion weakens structural integrity | Budget and mid-range residential seats, short-to-medium-term installations |
| Brass | Very Good — naturally resistant to oxidation and water damage | High — softer than steel but extremely long-lasting in wet settings | Traditional or heritage-style fixtures, premium hinge assemblies |
| Plastic / Nylon | Excellent — immune to rust and electrochemical corrosion | Low to Moderate — lighter duty, can wear or deform under heavy or repeated stress | Lightweight residential seats, integrated-pin hinge designs, budget applications |
Beyond material, the physical design of the pin itself varies:
- Solid pins — A single continuous rod with uniform density. These are the strongest and most common in metal hinge systems.
- Hollow pins — Lighter than solid versions, sometimes used in plastic hinges where weight savings and material cost matter more than sheer strength.
- Spring-loaded pins — Feature an internal spring mechanism that applies tension, helping hold the seat or lid in a specific position (usually upright). You will find these in check-hinge designs used on commercial toilet seats where the lid needs to stay open hands-free.
When you need to repair a toilet seat hinge, identifying which of these designs your seat uses is the critical first step. A solid stainless steel pin cannot substitute for a spring-loaded one without changing how the seat behaves, and a plastic pin forced into a metal barrel will wear out far faster than the original.
Hinge Fixing Styles That Use Different Pin Types
The pin does not exist in a vacuum — it belongs to a broader fixing system that determines how the entire hinge assembly attaches to the toilet bowl. Three main fixing styles dominate the market, and each one tends to pair with different pin configurations.
Top-fix hinges are installed entirely from above the toilet bowl. Expanding anchors or threaded fittings drop into the mounting holes, and screws tighten from the top to lock everything in place. As Bofan's installation guide explains, this method is essential for modern back-to-wall and skirted toilets where the underside of the bowl is enclosed and inaccessible. Top-fix systems often use integrated plastic pins molded into the hinge body, since the entire assembly is designed as a compact, self-contained unit.
Bottom-fix hinges use the traditional approach: bolts pass through the bowl from above, and nuts tighten from underneath. This style is standard on older, open-back toilets where you can easily reach below the rim. Bottom-fix systems more commonly use removable through-pins — separate metal rods that slide through the knuckles — because the hinge components tend to be individually replaceable rather than fused into a single molded piece.
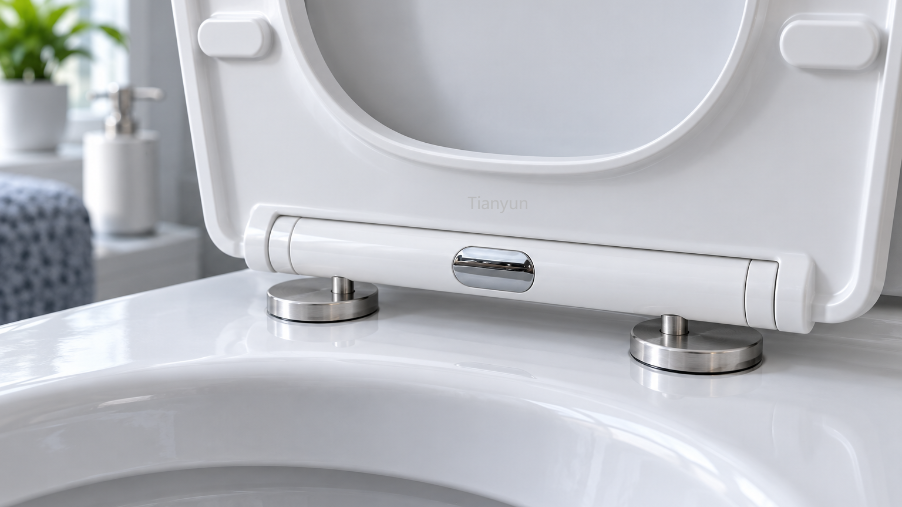
Hidden or concealed-fix hinges take aesthetics a step further by recessing the entire mounting mechanism so no hardware is visible from outside. These hidden toilet seat fittings use pins that sit inside enclosed hinge housings, often accessed only through a quick-release button or a small cover plate. The pins in these systems are typically precision-machined to tight tolerances, since even slight play would compromise the clean, gap-free look the design is intended to achieve.
Branded hinge systems add another layer of specificity. Church toilet seat hinges, for instance, use proprietary pin-and-post configurations that differ from standard universal hardware. Church seats — manufactured by Bemis — often feature unique hinge geometries where the pin diameter, post length, and barrel alignment are designed to match only their own product line. Attempting to swap in a generic pin from a hardware store bin will usually result in a poor fit, reinforcing why identifying the brand and model matters before sourcing any replacement parts.
Open-Front vs. Closed-Front Seat Hinge Differences
You have probably noticed that toilet seats in restaurants, offices, and airports look different from the one at home. Commercial open-front seats — the ones with a U-shaped gap at the front — serve hygiene codes in public restrooms, and their hinge hardware reflects heavier-duty demands. These seats endure far more use cycles per day than a residential seat, so their hinge pins tend to be thicker, made from stainless steel or brass, and paired with check-hinge mechanisms that use spring-loaded pins to hold the lid upright without user support.
Residential closed-front seats, by contrast, prioritize aesthetics and cost efficiency. Their pins are lighter, often plastic or zinc-plated steel, and the hinge assemblies rely on simpler through-pin or integrated-pin designs without spring tension.
One detail that sometimes confuses homeowners: bowl shape — round versus elongated — affects hinge spacing (the center-to-center distance between the two mounting holes), but it does not typically change the pin diameter itself. A round bowl and an elongated bowl from the same manufacturer will usually accept the same hinge pin, even though the seat profiles differ. The spacing distinction matters when selecting a complete hinge assembly, but the pin inside that assembly remains consistent across bowl shapes within a product line.
All of these variables — material, design, fixing style, seat type — interact to create a surprisingly wide range of possible configurations. That variety is exactly why grabbing a random replacement off a store shelf rarely works. And for anyone dealing with an RV or marine toilet, the mismatch problem gets even more pronounced.
Residential vs. RV and Marine Hinge Pins
If you have ever tried to fix a wobbly seat on an RV or boat toilet using parts from a home improvement store, you already know the frustration. The pin looks roughly the right size, the hinge body seems similar enough, but nothing lines up correctly once you try to assemble it. That is not bad luck — it is a fundamental design mismatch. Residential and RV/marine toilets are engineered for entirely different environments, and the hinge pins inside them reflect those differences down to the millimeter.
Residential Toilet Seat Hinge Pins
In a standard home bathroom, the toilet bowl is made from porcelain or vitreous china — heavy, rigid, and permanently anchored to the floor. The hinge hardware bolted to it does not need to account for movement, vibration, or weight savings. It just needs to hold the seat securely on a stable surface for years at a time.
Most residential bowls follow a widely adopted bolt-hole spacing of approximately 5.5 inches (140 mm) measured center-to-center between the two mounting holes at the back of the rim. This near-universal spacing means that a huge range of aftermarket seats, hinges, and toilet seat connectors will physically bolt onto most home toilets, even across different brands. The pin toilet seat systems used in residential settings typically feature pin diameters that cluster within a narrow range, though the exact measurement varies by manufacturer and hinge style.
Because the bowl itself is rock-solid and the installation environment is climate-controlled, residential hinge pins can be made from almost any common material — stainless steel, zinc-plated steel, brass, or plastic. The primary threat is moisture-related corrosion over the long term, not mechanical shock or vibration fatigue. That relatively forgiving environment is why even budget zinc-plated pins can last several years in a home bathroom before showing signs of wear.
Replacement parts are also easy to source. Universal mounting kits stocked at virtually every hardware store include hinge assemblies with pins sized for standard residential bolt-hole spacing. If you know your seat brand and model, OEM replacement hinges are usually just a quick online search away.
RV and Marine Toilet Seat Hinge Pins
Step inside a recreational vehicle or onto a boat, and the rules change completely. Toilets made by manufacturers like Thetford and Dometic are built around lightweight plastic or composite bowls — not porcelain. These bowls weigh a fraction of their residential counterparts because every pound matters when you are towing a trailer or keeping a vessel balanced.
That lightweight construction directly shapes the hinge hardware. The mounting points on a plastic bowl cannot handle the same bolt torque or clamping force as vitreous china, so RV and marine hinge designs use wider bearing surfaces, softer fasteners, and pin toilet configurations specifically calibrated for thinner, more flexible bowl walls. The bolt-hole spacing often differs from the residential standard as well, sometimes significantly, which immediately rules out most off-the-shelf residential hinge kits.
Then there is vibration. A home toilet sits on a concrete slab or plywood subfloor that barely moves. An RV toilet endures road vibration, braking forces, and lateral sway during every trip. A marine toilet deals with wave impact, constant humidity, and salt air. These stresses place very different demands on the pin and barrel interface. A pin that fits snugly in a stationary residential hinge can gradually work loose in an RV application as vibration amplifies even tiny gaps between the pin and its housing. Material choice becomes critical — a pin that would last a decade at home might fatigue and crack within a year on the road.
Sourcing is another challenge entirely. RV-specific hinge pins, like Thetford's replacement pin sets, are typically proprietary parts available only through OEM channels or authorized parts distributors. You will not find them hanging on a pegboard at a general hardware store. If your RV toilet seat needs a new pin, identifying the exact toilet model number is essential before ordering — a detail that trips up many first-time RV owners who assume a trip to the local home center will solve the problem.
| Feature | Residential | RV / Marine |
|---|---|---|
| Bowl Material | Porcelain or vitreous china | Lightweight plastic or composite |
| Typical Pin Material | Stainless steel, zinc-plated steel, brass, or plastic | Engineered plastic, nylon, or corrosion-resistant metal specified by OEM |
| Bolt-Hole Spacing | ~5.5 inches (140 mm) center-to-center (near-universal) | Varies by manufacturer and model — no universal standard |
| Primary Stress Factors | Moisture and long-term corrosion | Vibration, mechanical fatigue, salt air (marine), road shock (RV) |
| Replacement Availability | Widely available — universal kits and OEM parts stocked at most retailers | Limited — typically OEM-only through authorized suppliers |
| Replacement Complexity | Straightforward — standard tools, common sizing | Higher — requires exact model identification, proprietary parts |
Why Cross-Compatibility Rarely Works
It is tempting to assume a pin is a pin. After all, they are just small metal or plastic rods, right? In practice, the differences are precise enough to make cross-use unreliable and sometimes damaging.
A residential hinge pin inserted into an RV toilet hinge barrel may be slightly too wide, cracking the lightweight plastic housing under clamping pressure. Or it may be slightly too narrow, introducing wobble that road vibration will amplify into a full-blown seat failure within a few hundred miles. Length mismatches create similar problems — a pin that is even two or three millimeters too short may not engage all the hinge knuckles, leaving the outermost knuckle unsupported and prone to snapping off.
Mounting geometry adds another barrier. Even if the pin diameter happens to match, the bolt-hole spacing, hinge plate footprint, and barrel alignment on an RV or marine toilet are almost certainly different from residential standards. Forcing a residential hinge assembly onto an RV bowl can stress the plastic mounting points, leading to hairline cracks that worsen over time and eventually require replacing the entire bowl — a far more expensive repair than sourcing the correct OEM pin in the first place.
The same caution applies in reverse. An RV-specific pin designed for a flexible plastic barrel may be too soft or too thin for a heavy porcelain-mounted hinge, wearing out quickly under the greater weight of a standard residential seat and lid.
The bottom line is straightforward: always match the pin to the toilet it was designed for. Whether you are dealing with a home bathroom or a motorhome restroom, knowing the exact measurements of the pin you need is the single most reliable way to avoid these compatibility traps — and getting those measurements right is simpler than most people expect.
How to Measure Toilet Seat Hinge Pins for Replacement
Knowing you need a new pin and actually finding one that fits are two very different challenges. Most replacement parts do not come with sizing charts, and the pins themselves almost never have their dimensions printed on them. A stainless steel rod that looks identical to your old one on a store shelf could be off by half a millimeter in diameter — just enough to rattle inside the barrel or refuse to slide through at all. The only reliable way to get a match is to measure the original yourself, and the good news is you do not need specialized equipment to do it accurately.
Tools You Need to Measure Hinge Pins
Before removing anything from the toilet, gather a few basic items. You probably already own most of them:
- A ruler or tape measure with both metric and imperial markings — Many toilet seat hardware 2 hinges systems are manufactured overseas using metric specs, while domestic packaging often lists imperial sizes. Having both scales prevents conversion errors.
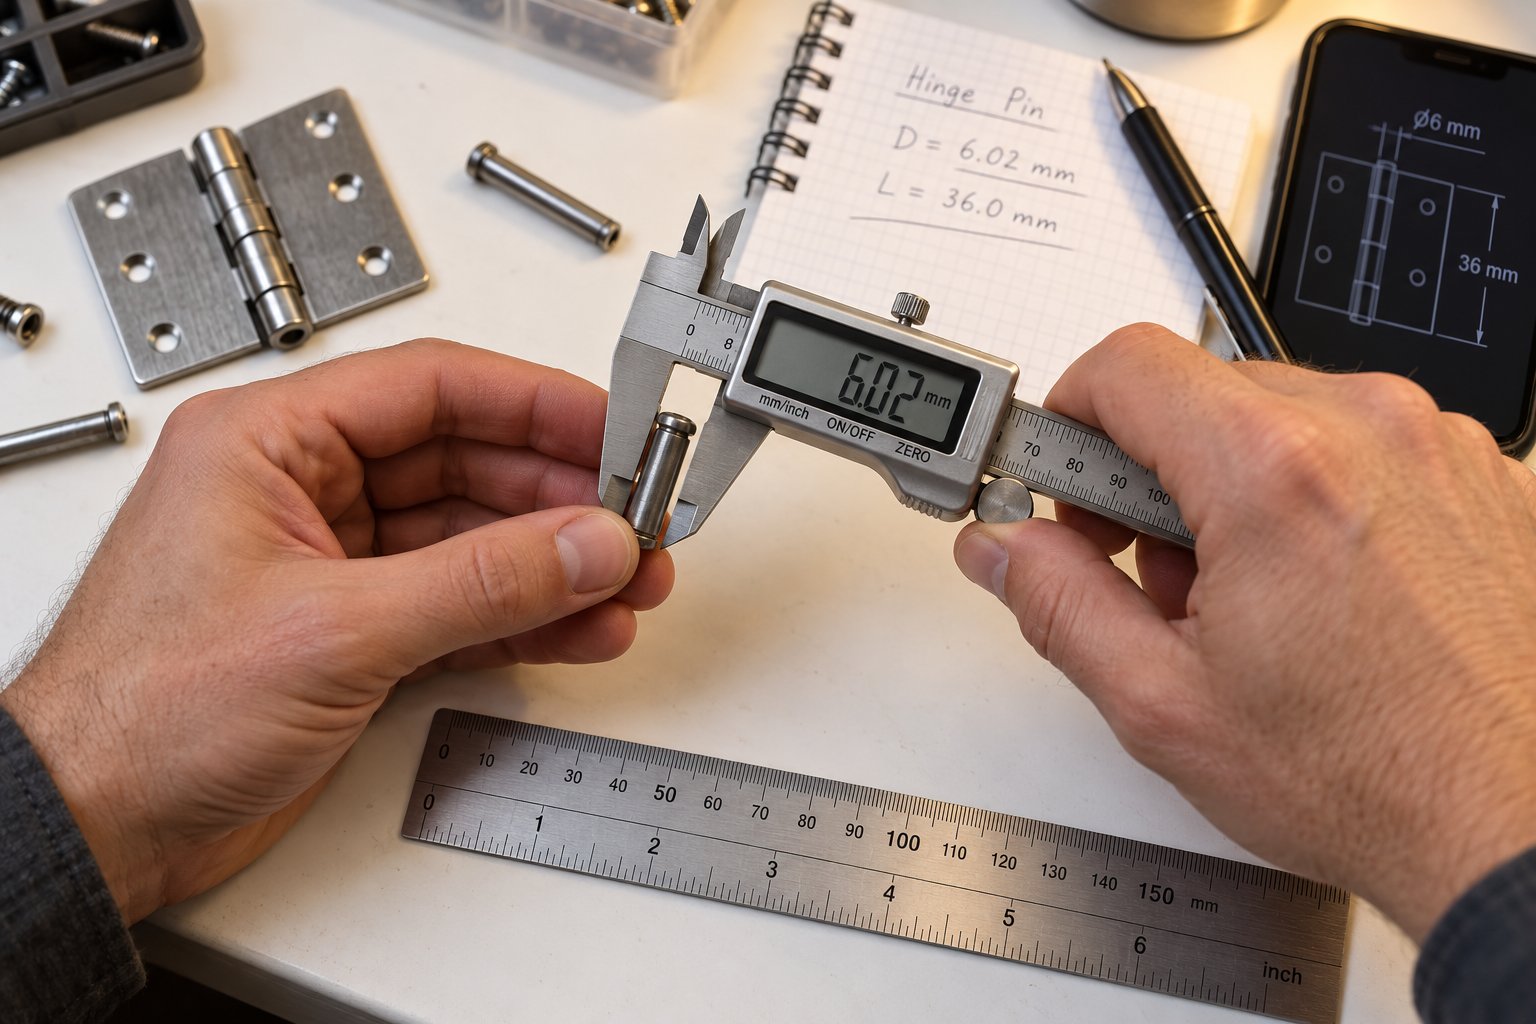
- Digital calipers — If you have a pair, use them. Calipers measure diameter and length to a tenth of a millimeter, which is the level of precision that actually matters here. Inexpensive digital calipers are available for under fifteen dollars at most hardware stores.
- A notepad or your phone's notes app — Write every measurement down immediately. Relying on memory when you are standing in a plumbing aisle twenty minutes later is a recipe for a return trip.
- A smartphone camera — Photos of the old pin, the hinge assembly, and any brand markings will serve as a visual reference when comparing parts.
Why this level of care for such a small part? Because precision is everything with toilet seat hinge pins. Even a 1 mm difference in pin diameter can separate a snug, wobble-free fit from a loose seat that shifts every time you sit down. And a pin that is just slightly too thick will not slide into the barrel at all — or worse, it will jam partway through and crack a plastic hinge housing when you try to force it.
How to Measure Pin Diameter and Length
Start by removing the existing pin from the hinge assembly. On through-pin designs, this usually means sliding the rod out from one end of the hinge barrel after lifting the seat and lid off the hinge body. Some pins have a small retaining cap or C-clip on one end — gently pry this off with a flathead screwdriver before pulling the pin free. If the pin is corroded and stuck, a few drops of penetrating oil and ten minutes of patience will save you from snapping it inside the barrel.
With the pin in hand, measure these three dimensions:
- Shaft diameter at the widest point. Place the calipers (or ruler) across the thickest section of the pin's cylindrical body. If you are using a ruler, roll the pin on a flat surface and measure the widest visible cross-section as accurately as you can. Common residential toilet seat pins fall in the range of 4 mm to 8 mm in diameter, though proprietary designs can sit outside this window.
- Total usable length. Measure from the point where the pin enters the first hinge knuckle to the point where it exits the last one — in other words, the functional shaft length, excluding any protruding head, cap, or clip. This is the dimension that determines whether the pin engages all the knuckles in your hinge body. A pin that is too short leaves the outermost knuckle unsupported, which leads to cracking under load.
- Profile shape. Look carefully at whether the pin has a uniform diameter along its entire length or features a stepped or tapered section. Some designs include a slightly wider head that acts as a built-in stop, preventing the pin from sliding all the way through. Others taper at one end to make insertion easier. Note these details — a replacement with a different profile may not seat correctly even if the diameter and length match.
While the seat is off, take one more measurement that is just as important: bolt-hole spacing. Using your tape measure, find the center-to-center distance between the two mounting holes on the back rim of the toilet bowl. This spacing determines which hinge assemblies are physically compatible with your bowl, and by extension, which toilet seat pins will be part of a matching kit. Most residential bowls cluster around 5.5 inches (140 mm), but variations exist — especially on older fixtures, European imports, and RV or marine models. If your bolt-hole spacing is non-standard, your replacement options narrow significantly, and confirming this number up front prevents ordering a hinge kit that arrives only to not line up.
Recording Your Measurements for Accurate Replacement
You have the numbers. The next step is making sure they survive the trip to the store or the search for an online listing. A few simple habits dramatically increase your chances of getting the right part on the first try:
- Photograph the old pin next to a ruler. Lay the pin flat on a light-colored surface with a ruler running alongside it. Take the photo straight on, not at an angle. This gives you a visual scale reference you can pull up on your phone at any time.
- Record the toilet seat brand and model number. Flip the seat over and look for a sticker, stamped text, or molded lettering on the underside — usually near the hinge area or on the inner rim. Write down everything you see: brand name, model number, and any part codes. This information lets you search for OEM replacement hinges that are guaranteed to include the correct pin.
- Note the hinge style. Is it a top-fix or bottom-fix system? Through-pin or integrated? Metal or plastic barrel? These details help narrow your search when browsing universal mounting kits that do not list pin dimensions explicitly.
One reality worth accepting: hinge pin dimensions are almost never printed on the part itself. Unlike plumbing fittings that stamp pipe sizes right into the metal, toilet seat pins are unmarked components. Manual measurement is not optional — it is the only path to an accurate replacement. Skipping this step and eyeballing a match at the store is the single most common reason people end up buying two or three kits before finding one that actually fits.
With your measurements documented and your photos saved, you are equipped to source a compatible part confidently. But what if the pin is not the only thing that has gone wrong? A corroded pin rarely exists in isolation — the barrel it sits in, the bolts holding the hinge down, and even the seat itself may have deteriorated alongside it. Recognizing those related failures before you order parts can save you a second repair a few weeks down the line.
Troubleshooting Broken and Worn Hinge Pins
A corroded pin you can see is only part of the story. The real challenge is figuring out what went wrong, what else might be failing alongside it, and whether a simple swap will actually fix the problem — or just delay a bigger repair. Most people jump straight to tightening bolts or ordering a new seat, skipping the diagnostic step entirely. That approach wastes time and money more often than it solves anything.
Hinge pin failures fall into a handful of distinct categories, each with recognizable symptoms. Learning to read those symptoms correctly is what separates a five-minute fix from a frustrating cycle of repeated repairs.
Rust and Corrosion on Metal Hinge Pins
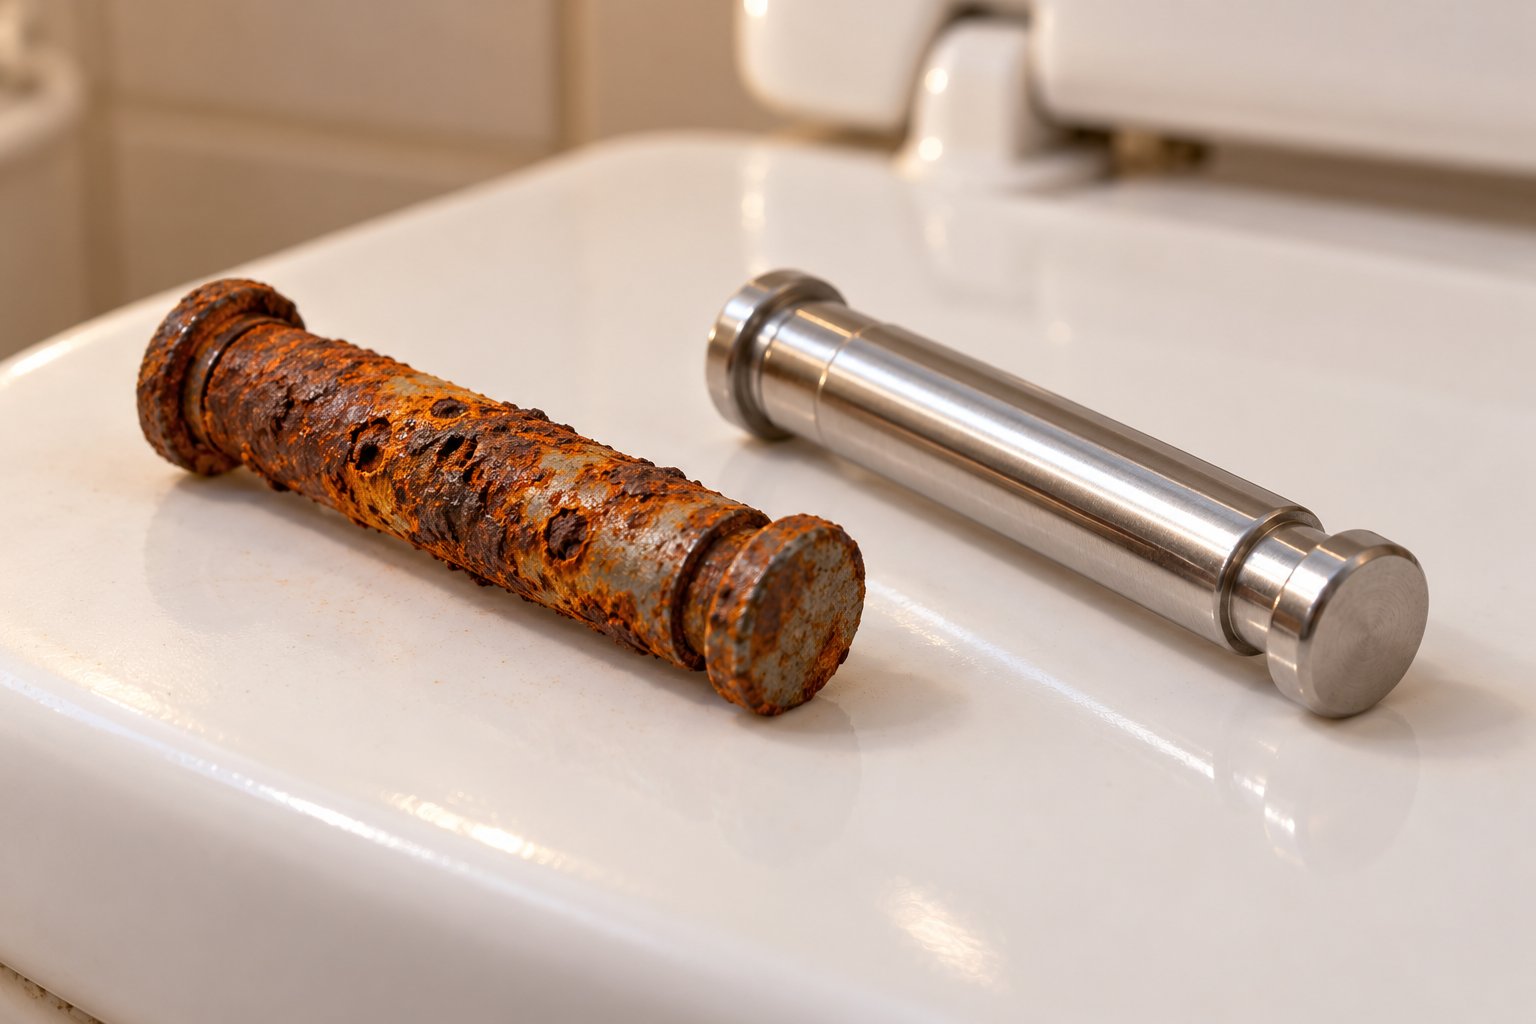
Bathrooms are punishing environments for bare metal. Constant humidity, splashing water, and cleaning chemicals create ideal conditions for oxidation — and steel hinge pins sit right in the middle of it all. If your pin is zinc-plated rather than stainless steel, that thin protective coating will eventually wear through, exposing the base metal underneath to relentless moisture.
A rusted toilet seat hinge announces itself in stages. Early on, you might notice faint orange-brown streaks running down from the hinge area onto the porcelain — staining that no amount of scrubbing permanently removes because the rust keeps regenerating at the source. Run your finger along the pin (if accessible) and you will feel a rough, pitted texture replacing what was once a smooth surface. The seat starts to resist when you lift or lower it, requiring more force to pivot because the corroded pin is essentially grinding against the barrel instead of gliding through it.
Left unchecked, corrosion does not just create friction. It weakens the pin's structural integrity from the outside in. A visibly rusted pin may look solid but can be brittle enough to snap under a load it once handled easily. That tipping point often arrives without warning — one normal use and the seat suddenly detaches on one side.
If you spot early rust, removing the pin and cleaning it with fine sandpaper or a rust dissolver can buy you time. But pitting that goes deeper than surface discoloration has already compromised the metal. At that point, replacement is the more reliable path forward.
Loose or Wobbling Seats Caused by Worn Pins
Here is the scenario nearly every homeowner has experienced: you sit down and the toilet seat wobbles side to side. You reach back, grab the seat near the hinges, and give it a wiggle. There is definite play. The natural instinct is to grab a wrench and tighten the mounting bolts underneath the bowl. Sometimes that works. Often it does not — and when it does not, the problem is almost always hiding inside the hinge body rather than below the bowl.
Every time the seat pivots, the pin rotates against the inner wall of the hinge barrel. Over months and years of daily use, that contact gradually wears material away from one or both surfaces. Metal pins wear down plastic barrels faster than you might expect, and plastic-on-plastic contact can create wear on both the pin and the housing simultaneously. The result is a growing gap between the pin and barrel — a gap that translates directly into lateral movement you can feel as side-to-side wobble.
This type of wear is particularly tricky to diagnose because the pin often looks fine to the naked eye. The dimensional change might only be a fraction of a millimeter, invisible unless you measure with calipers. But that tiny gap, multiplied by the lever arm of a full-length toilet seat, produces several millimeters of movement at the front of the seat. Enough to feel unstable. Enough to be annoying. And if the seat keeps shifting under load, the stress on the hinge barrel accelerates the wear, making the problem progressively worse rather than self-correcting.
If tightening the mounting bolts underneath the bowl does not eliminate seat movement, the hinge pin or the barrel it sits in is likely worn — and no amount of bolt tightening will compensate for slop in the pivot.
Snapped or Broken Hinge Pins
A broken toilet seat hinge pin is harder to misdiagnose because the symptoms are dramatic. The seat suddenly feels loose on one side, tilts at an angle, or detaches from the hinge body entirely when lifted. If you remove the hinge cover or pop the seat off its mounting, you will find one clean break — or sometimes two sheared fragments still lodged inside the barrel.
Several things cause pins to reach this failure point:
- Overtightening during installation — Forcing a mounting bolt too far can put lateral stress on the pin, bending it slightly. That bend creates a stress concentration point where fatigue cracking initiates over time.
- Material fatigue — Even properly installed pins undergo thousands of load cycles. Cheaper materials, especially thin plastic pins, eventually reach their fatigue limit and fracture without any single dramatic event causing it.
- Corrosion weakening — As discussed above, rust eats into the cross-section of a metal pin, reducing the amount of solid material carrying the load until what remains can no longer handle the stress.
- Impact damage — Slamming the seat down repeatedly is the single fastest way to shorten a pin's lifespan. Each impact sends a shock load through the hinge barrel and directly into the pin. Soft-close hinges exist specifically to eliminate this type of stress, which is one reason seats equipped with damped hinges tend to outlast those without.
A snapped pin almost always means partial or full hinge assembly replacement. If the pin is a removable through-pin design, you may be able to slide the broken pieces out and insert a new rod — assuming the barrel itself is undamaged. But if the pin sheared inside an integrated hinge body, the barrel walls are frequently cracked or deformed as well, meaning the whole hinge needs to go. Inspect carefully before assuming a pin-only swap will be sufficient.
Repair vs. Replace Decision Framework
So you have identified the symptom. The seat wobbles, the pin is corroded, or the hinge has snapped on one side. The question now is whether a targeted toilet seat hinge repair is enough — or whether you are better off replacing the full assembly, or even the entire seat.
Work through this checklist in order. Each question builds on the last, and the first "yes" answer that points toward replacement usually defines the most cost-effective path:
- Is the pin itself damaged, or just loose? If the pin is intact but simply sitting loosely in an unworn barrel, a snugger replacement pin or a thin shim (such as a wrap of plumber's tape around the shaft) may restore a tight fit. This is the cheapest possible fix.
- Is the hinge barrel or knuckle also worn? If the barrel has widened from wear and a new pin still wobbles inside it, the pin alone is not the problem. You need a new hinge body — which typically means buying a complete hinge assembly, since barrels are not sold as separate parts.
- Is the mounting hardware corroded or damaged? Pull the mounting bolts and check them. If the bolts, washers, or nuts are rusted, stripped, or cracked, replace them at the same time as the hinge. Pairing a fresh hinge with deteriorated mounting hardware undermines the entire repair.
- Is the seat itself cracked, stained, or warped? A seat with hairline cracks near the hinge attachment points will not hold a new hinge securely, no matter how perfect the pin fit is. Discoloration and warping are cosmetic issues, but cracks are structural — and a cracked seat should be replaced entirely rather than re-hinged.
Most toilet seat hinge pin failures fall into the first two categories, where replacing the pin or the hinge assembly solves the problem at minimal cost. Reaching categories three or four means the damage has spread beyond the pivot point, and a full seat replacement becomes the more sensible investment. Either way, working through the checklist prevents the common mistake of replacing too little (and repeating the repair) or replacing too much (and spending money you did not need to).
A clear diagnosis, though, is only half the battle. The other half is executing the repair without introducing new problems — and that is where a surprising number of otherwise straightforward hinge pin replacements go sideways.
Common Mistakes to Avoid During Hinge Pin Replacement
You have diagnosed the problem, measured the old pin, and sourced what looks like the right replacement. The tempting next move is to rush through installation and get on with your day. But this is exactly the stage where small errors turn a ten-dollar repair into a fifty-dollar trip back to the hardware store — or worse, a cracked hinge body that forces you to replace the entire seat assembly. Knowing how to replace a toilet seat hinge pin matters, but knowing what not to do matters just as much.
Most of these mistakes are not obvious until the damage is already done. A bolt that felt like it needed one more quarter turn. A pin that seemed close enough in diameter. A shiny new stainless steel rod dropped into a brass housing without a second thought. Each of these shortcuts creates a failure that shows up days or weeks later, disguised as a brand-new problem when it was really baked in during installation.
Cross-Threading Bolts and Forcing Mismatched Pins
Imagine sliding a pin into a hinge barrel and feeling resistance halfway through. The instinct is to push harder, maybe tap it with a hammer or twist it with pliers. This is where things go wrong fast. A pin with a slightly oversized diameter — even half a millimeter too wide — can crack a plastic hinge barrel from the inside out. The crack may not be visible immediately, but it widens under the cyclic stress of daily use until the hinge body splits and the seat detaches.
The same principle applies to mounting bolts. Cross-threading occurs when a bolt enters a nut or threaded insert at a slight angle, chewing up the threads rather than engaging them cleanly. Plastic wing nuts and nylon-threaded inserts are especially vulnerable because their threads are softer than metal and deform permanently once cross-threaded. You will feel a toilet seat bolt keeps spinning without tightening — a clear sign the threads are stripped and the nut needs to be replaced.
The fix is simple patience. Always start any pin or bolt by hand. Slide the pin into the barrel without tools first, checking that it passes through every knuckle smoothly with minimal resistance. Thread mounting bolts finger-tight before reaching for a wrench. If anything binds, stop. Back the fastener out, realign it, and try again. Forcing a misaligned component is never faster than restarting the alignment — it only feels that way until something cracks.
Over-Tightening Plastic Components
Here is a scenario that plays out constantly: the seat feels slightly loose after installation, so you give the mounting nuts one more firm crank with a wrench. You hear a faint click. The nut has cracked, or the plastic hinge plate beneath it has developed a stress fracture that will spread over the coming weeks.
Many modern toilet seat hinges rely on plastic or nylon hardware — wing nuts, threaded inserts, compression washers, and sometimes the hinge body itself. These materials are chosen for their corrosion resistance and light weight, not for their ability to withstand high torque. Unlike a steel nut that will stretch or strip before fracturing, a plastic nut simply snaps. And because the crack often starts on the hidden underside, you will not see it until the seat starts wobbling again and you pull everything apart to investigate.
A reliable guideline for most plastic mounting hardware: tighten by hand until snug, then add roughly a quarter turn with a wrench or pliers. The seat should feel secure without any lateral play, but the fastener should not feel like it is under strain. If you can rotate the seat slightly by pushing sideways with moderate finger pressure, it needs a small additional turn. If the seat is completely immovable and the nut feels like it is fighting you, you have already gone too far. Back off slightly and test the seat by sitting on it — body weight will settle the assembly into its final position better than extra torque ever will.
Mixing Metals and Galvanic Corrosion
This mistake is less obvious than the others because its consequences take months to appear. When two different metals sit in direct contact in a wet environment — which describes every toilet hinge assembly — an electrochemical reaction called galvanic corrosion can accelerate the deterioration of one or both metals far beyond what normal oxidation would cause.
A common example: you replace a corroded zinc-plated steel pin with a shiny new stainless steel one, but the hinge barrel is brass. Stainless steel and brass sit at different positions on the galvanic series, meaning one metal effectively acts as an anode and the other as a cathode when moisture provides an electrolyte between them. The result is accelerated corrosion at the junction — often eating into the brass barrel even though the stainless pin itself looks pristine. You might open the hinge a year later and find a perfectly intact pin sitting inside a barrel that has corroded into a thin, crumbly shell.
The safest approach is to match materials whenever possible. A stainless steel pin belongs in a stainless steel barrel. A brass pin pairs best with brass fittings. When a perfect material match is not available, inserting a plastic or nylon washer between the dissimilar metals acts as an insulator, breaking the electrochemical circuit and dramatically slowing galvanic corrosion. It is a minor step that most people skip, but it can double or triple the functional life of the replacement hardware in a high-moisture environment.
- Do not force a pin that meets resistance — if it does not slide smoothly through the barrel by hand, the diameter is wrong or the barrel is obstructed.
- Do not use power tools on plastic fasteners — hand-tighten first, then add a quarter turn with a hand wrench at most.
- Do not mix metal types without an insulating barrier — a nylon washer between dissimilar metals prevents galvanic corrosion.
- Do not cross-thread mounting bolts — start every bolt by hand to confirm thread engagement before applying any turning force.
- Do not ignore a bolt that keeps spinning — this signals stripped threads, not a need for more force. Replace the nut or threaded insert.
Ignoring the Condition of Surrounding Hardware
You have the seat off. The old pin is out. The new pin is ready to go in. This is the moment most people waste — and the single best opportunity you will get to inspect everything else in the assembly without any extra disassembly work.
A worn hinge pin rarely fails in isolation. The same moisture that corroded the pin has been working on the mounting bolts underneath the bowl. The same years of pivoting that wore down the pin have also been grinding away at the hinge barrel. The rubber bumpers on the underside of the seat — the little pads that cushion contact with the porcelain — may be compressed flat or missing entirely, which changes how weight distributes through the hinge and accelerates pin wear all over again.
Before dropping in the new pin, take five minutes to check each related component:
- Mounting bolts and nuts — Look for rust, stripped threads, or a toilet seat bolt that keeps spinning freely without tightening. Replace any compromised fasteners now rather than reassembling over them.
- Washers and bushings — Check rubber or plastic washers for cracking, hardening, or permanent compression. These components cushion the assembly against the porcelain and dampen vibration. A flattened washer transfers stress directly to the bowl surface and the hinge body above it.
- Hinge barrel condition — Peer inside the barrel with a flashlight. Look for scoring, widening, or cracks. A new pin in a worn barrel will wobble from day one.
- Rubber seat bumpers — These small pads on the underside of the seat prevent direct porcelain contact and help distribute the sitter's weight evenly across the hinge points. Missing or flattened bumpers shift stress toward the hinges, shortening pin life.
- Seat integrity near hinge mounting points — Run your fingers around the bolt holes on the seat itself. Hairline cracks radiating from these holes mean the seat cannot hold a hinge securely regardless of how perfect the new pin is.
Replacing only the pin while leaving a corroded bolt or a cracked washer in place is the repair equivalent of patching one tire on a car with four worn ones. The weakest remaining component becomes the new failure point, and you end up back under the toilet with a wrench far sooner than you should. A few extra dollars spent on fresh washers, bolts, and bumpers during the same repair session buys you years of trouble-free service — and eliminates the most common reason toilet seat hinge replacement tips online fail to produce lasting results.
With the mechanical pitfalls covered, one practical question remains: where do you actually find compatible replacement pins and hardware that match your specific toilet — and what should you look for when the options range from loose generic parts to complete fixing systems?
Sourcing Compatible Hinge Pins and Mounting Hardware
You have the measurements, the photos, and a clear diagnosis. The logical next step is finding the right part — and this is where many people hit an unexpected wall. Toilet seat hinge pins are not stocked the way faucet washers or showerhead adapters are. You will not find a labeled bin of assorted pins hanging in the plumbing aisle with diameter and length printed on the packaging. The way these components are sold shapes your entire replacement strategy, and understanding the retail landscape before you start searching saves a significant amount of frustration.
Sourcing Hinge Pins as Individual Parts vs. Complete Mounting Kits
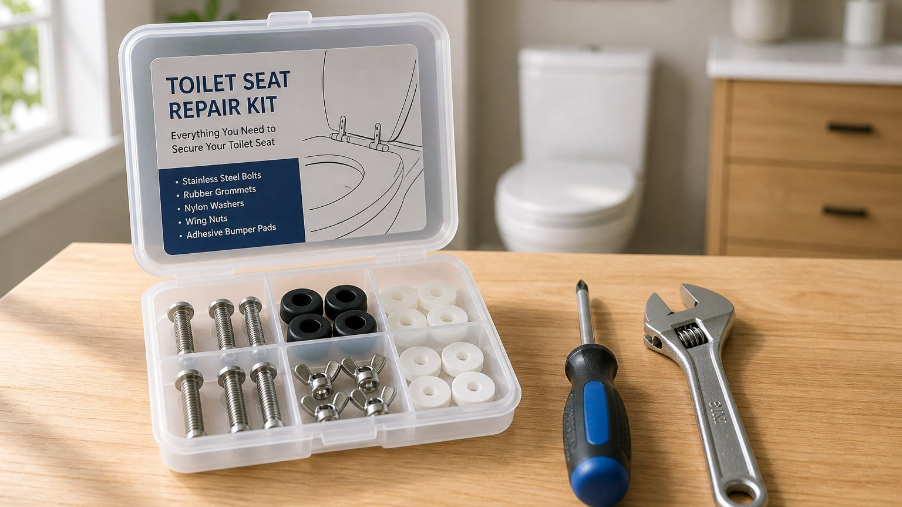
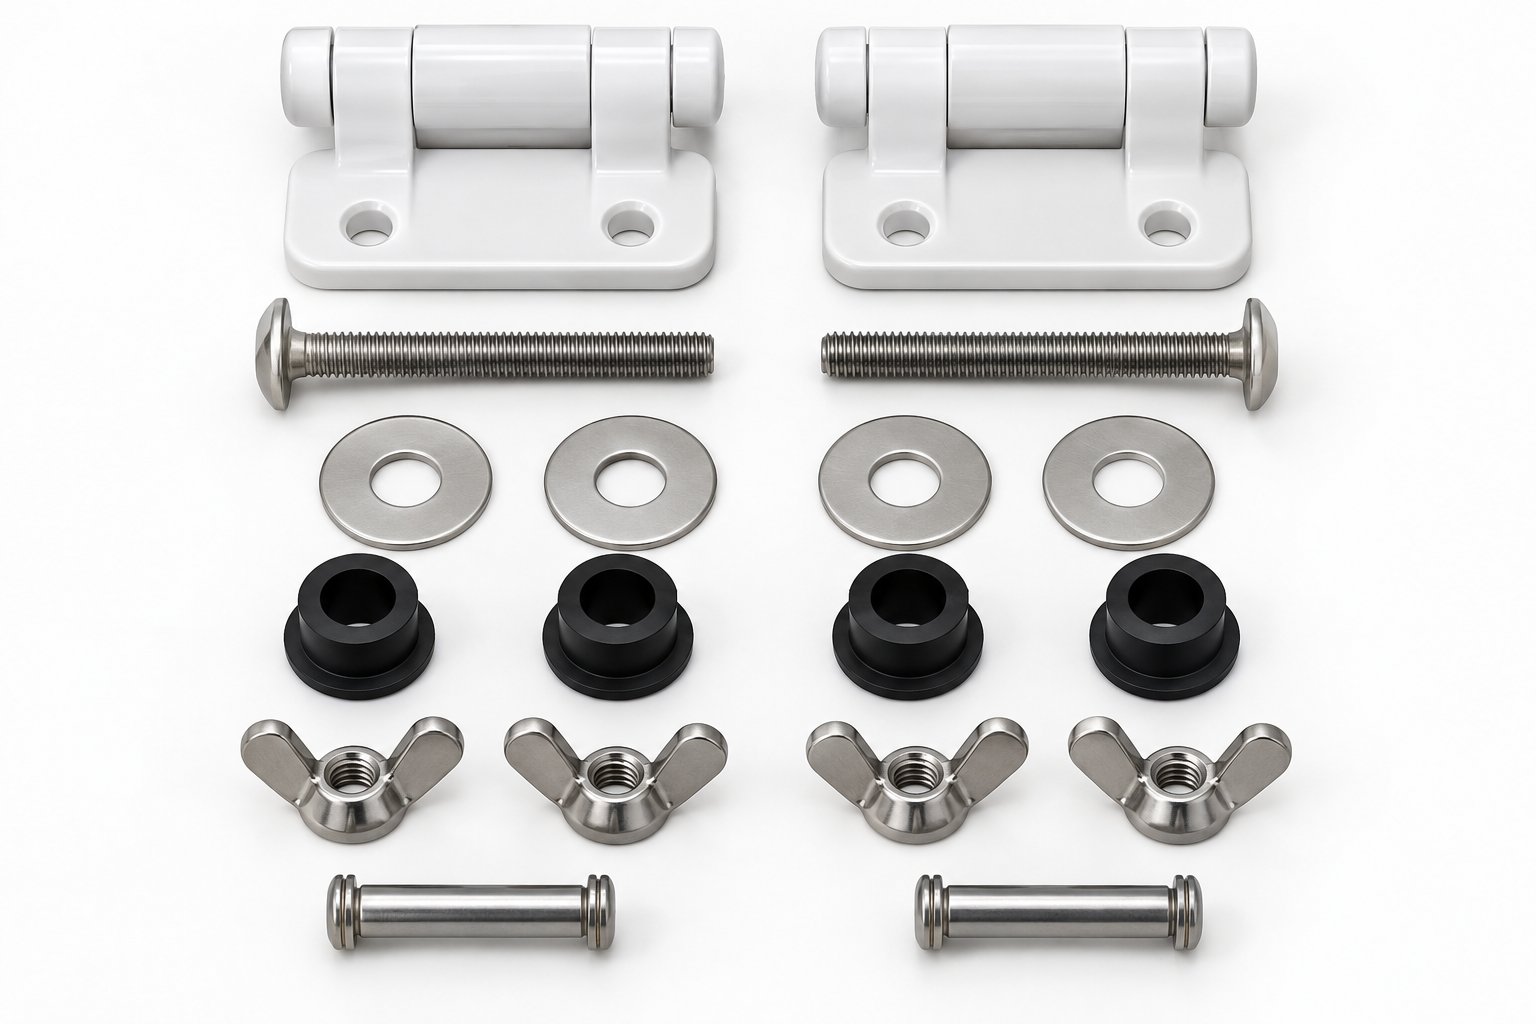
Here is the reality most homeowners discover only after spending twenty minutes browsing online or wandering through a hardware store: standalone hinge pins are remarkably difficult to buy for most residential toilet seat brands. Manufacturers like Bemis, Kohler, TOTO, and American Standard almost never sell the pin as a separate SKU. Instead, they package it inside a complete hinge assembly or a full toilet seat hinge mounting kit that includes the hinge body, mounting bolts, washers, nuts, and the pin already installed in the barrel.
Why? Because from a manufacturer's perspective, the pin and the barrel are a matched set. Selling them independently would invite fit problems — a third-party pin slightly out of spec could damage the hinge body and generate warranty complaints that the manufacturer would rather avoid. So the industry defaults to selling the assembly as a unit, and the pin simply comes along for the ride.
For you as a buyer, this means the most practical and reliable approach is usually searching for a compatible mounting assembly that includes the correct pin, rather than hunting for the pin alone. Two broad categories of replacement assemblies exist, each with distinct trade-offs:
OEM replacement parts are brand-matched assemblies designed specifically for your toilet seat model. Order a Kohler hinge kit for a Kohler seat, and every dimension — pin diameter, barrel bore, bolt-hole spacing, hinge plate footprint — is guaranteed to match because it was manufactured on the same production line as the original. The downside is cost. OEM kits typically run two to four times the price of generic alternatives, and availability can be spotty for older or discontinued models.
Universal toilet seat hinge replacement kits take the opposite approach. They are designed to fit as many toilet models as possible, usually by including adjustable mounting hardware, multiple bolt sizes, and hinge bodies with generous tolerances. The price is lower — often under ten dollars — and you can find them at virtually any home improvement retailer. The trade-off is a slightly higher risk of imperfect fit. A universal kit might bolt onto your bowl just fine but leave a small gap between the hinge plate and the porcelain, or the pin may sit a fraction looser in the barrel than an OEM equivalent. For most residential bathrooms, that marginal difference is acceptable. For heavy-use commercial installations or situations where the seat must feel absolutely rock-solid, OEM is the safer bet.
A middle path exists for specific brands. Church toilet seat hinges, for instance, are available as branded replacement assemblies through Bemis's parts catalog. These are not quite universal and not quite model-specific — they cover a range of Church seat models that share a common hinge geometry. If your seat falls within that range, you get OEM-grade fit at a price point below a full model-specific kit.
What Manufacturers and Sourcing Teams Should Look For
The sourcing equation changes dramatically when you shift from a single homeowner replacing one pin to a sanitary ware manufacturer or hardware sourcing team procuring fixing systems in volume. At this level, buying individual loose pins or retail-packaged mounting kits is neither practical nor cost-effective. What matters is evaluating complete toilet seat fixing systems — integrated solutions that bundle stainless steel bases, hinge pins, mounting bolts, bushings, and custom configuration options into a single, specification-controlled package.
Why does the bundled approach matter at scale? Because installation failures and warranty returns in commercial production almost always trace back to component mismatches — a pin from one supplier paired with a barrel from another, torqued down with bolts from a third. Each component may meet its individual spec, yet the assembled system wobbles or corrodes prematurely because the parts were never tested together. A complete fixing system sourced from a single supplier eliminates that variable entirely.
For sourcing teams evaluating potential suppliers, Tianyun's Toilet Seat Fixing Systems offer a practical reference point. Developed specifically for manufacturers and replacement-hardware procurement teams, their range brings together hinge mounting kits, stainless steel bases, and custom fixing options designed to support compatible seat installation, alignment, and hardware replacement as a coordinated system rather than a collection of loose parts.
Whether you evaluate Tianyun or any other toilet seat fixing system supplier, the core criteria remain the same. Use this checklist to compare options systematically:
- Material quality and consistency — Are the pins, bolts, and bases made from verified-grade stainless steel, or is the material sourced opportunistically and variable between batches? Ask for material certifications and salt-spray test data if corrosion resistance is critical to your application.
- Compatibility range — Does the supplier's fixing system accommodate multiple bowl types, bolt-hole spacings, and seat profiles? A broader compatibility range reduces the number of unique SKUs you need to stock and simplifies your supply chain.
- Customization options — Can the supplier adjust pin length, diameter, base plate geometry, or finish to match your proprietary seat design? Off-the-shelf systems work for standard applications, but any seat with non-standard hinge geometry will need tailored components to avoid the fit problems discussed throughout this article.
- Assembly completeness — Does the kit arrive ready to install, with every washer, bushing, bolt, and pin included and pre-matched? Or does it require your production line to source supplementary hardware separately? Incomplete kits introduce the same mismatch risk you are trying to eliminate by buying a system in the first place.
- Testing and quality documentation — Does the supplier provide torque specifications, cycle-life test results, and dimensional tolerances for the assembled system? These documents are essential for writing your own installation instructions and defending warranty claims downstream.
One detail worth emphasizing for B2B buyers: if your immediate need is specifically a replacement hinge pin rather than a full assembly, confirm with the supplier whether pins are available as standalone components or only as part of a complete kit. Many fixing system manufacturers — Tianyun included — design their products as integrated assemblies, meaning the pin is part of a coordinated hinge mounting kit rather than a separately sold item. Knowing this upfront prevents procurement delays and mismatched expectations.
For homeowners, the takeaway is simpler. Start with your toilet seat's brand and model number, search for an OEM hinge assembly first, and fall back to a universal kit if OEM parts are unavailable or overpriced. For manufacturers and sourcing professionals, the priority is finding a supplier whose complete fixing system eliminates component-mismatch risk at scale — because at production volumes, a single mismatched pin dimension does not just wobble one seat. It generates hundreds of warranty calls.
Regardless of which sourcing path you follow, the final step is the same: pulling together everything you have learned — measurement, diagnosis, material selection, and sourcing — into a clear action plan that matches your specific situation.
Making the Right Hinge Pin Decision
A wobbly toilet seat feels like a minor annoyance — until it cracks the porcelain, strips a mounting hole, or sends you on a third trip to the hardware store for yet another kit that does not fit. Every section of this guide points toward one central idea: the more you understand about that small cylindrical pin inside your hinge, the fewer surprises you encounter during repair, replacement, or procurement.
Key Takeaways for Homeowners
Whether you are tackling a quick fix or planning a full toilet seat hinge pin replacement guide-style overhaul, these fundamentals keep the job on track:
- Always measure before buying. Pin diameter, usable length, and bolt-hole spacing are the three numbers that determine fit. Photograph the old pin next to a ruler and record your toilet seat's brand and model — these details prevent mismatched purchases.
- Match materials to avoid corrosion. A stainless steel pin in a brass barrel — or any dissimilar metal pairing without an insulating washer — accelerates galvanic corrosion in your bathroom's humid environment.
- Determine whether you need a standalone pin or a complete toilet seat hardware kit. Most manufacturers bundle the pin inside a full hinge assembly. Searching for the assembly rather than the pin alone is usually the faster, more reliable sourcing path.
- Inspect all surrounding hardware while the seat is off. Corroded bolts, cracked washers, and worn barrels undermine a fresh pin. Replacing everything in one session prevents repeat failures.
- Use the repair-vs-replace checklist. If the pin is damaged but the barrel, bolts, and seat are sound, a targeted swap is all you need. If damage has spread to multiple components, a full seat replacement is the smarter investment.
Knowing how to fix a loose toilet seat hinge starts with correctly identifying whether the looseness lives in the pin, the barrel, or the mounting hardware beneath the bowl — and then addressing the actual weak point rather than just tightening everything and hoping for the best.
Key Takeaways for Manufacturers and Hardware Sourcing Teams
At production scale, the stakes multiply. A single undersized pin does not just wobble one seat — it generates returns, warranty claims, and reputational cost across an entire batch. The principles that matter most at this level are systemic rather than mechanical:
- Source complete, pre-matched assemblies. Pins, barrels, bolts, bases, and bushings tested together as a unit eliminate the component-mismatch failures that plague mixed-supplier procurement.
- Prioritize material traceability. Verified-grade stainless steel with salt-spray test documentation protects your warranty position far more effectively than spot-checking inbound parts on the production floor.
- Evaluate customization capability. Proprietary seat designs demand tailored pin lengths, diameters, and base geometries. A supplier that only offers standard configurations will not support non-standard product lines.
For sourcing teams actively evaluating options, Tianyun's Toilet Seat Fixing Systems provide a practical starting point — bundling hinge mounting kits, stainless steel bases, and custom fixing options into coordinated assemblies built specifically for manufacturers and replacement-hardware procurement.
The humble hinge pin may be the smallest part in your toilet's hardware, but understanding it empowers homeowners to make smarter, cheaper repairs — and helps professionals specify fixing systems that hold up across thousands of installations.
Frequently Asked Questions About Toilet Seat Hinge Pins
1. What size are most toilet seat hinge pins?
Most residential toilet seat hinge pins range from roughly 4 mm to 8 mm in diameter, though exact dimensions vary by manufacturer and hinge style. Because pin sizes are almost never printed on the part, the only reliable way to find the correct replacement is to remove the old pin and measure its shaft diameter and usable length with calipers or a ruler. You should also record the bolt-hole spacing on your bowl — typically around 5.5 inches (140 mm) center-to-center for standard residential toilets — since this determines which hinge assemblies and their included pins are compatible.
2. Can I replace just the hinge pin instead of the whole toilet seat?
Yes, but only if your toilet seat uses a through-pin design where the rod is removable. In that case, sliding out the worn pin and inserting a correctly sized replacement can restore a stable, wobble-free seat at minimal cost. However, if the hinge barrel the pin sits in is also worn or cracked, a pin swap alone will not solve the problem — you will need a new hinge assembly. Most manufacturers sell hinge pins only as part of complete mounting kits rather than as standalone parts, so sourcing a full hinge assembly that includes the correct pin is often the most practical route.
3. Why does my toilet seat wobble even after I tighten the bolts?
A toilet seat that wobbles side to side despite tight mounting bolts almost always points to wear inside the hinge pivot. Over time, the hinge pin and the barrel it rotates in gradually wear against each other, creating a small gap. That gap translates into noticeable lateral movement at the front of the seat. Since the slop is in the pivot mechanism rather than the anchor points beneath the bowl, tightening bolts cannot compensate. The fix requires either replacing the worn pin with a snugger one or installing a new hinge assembly if both the pin and barrel have degraded.
4. Will residential toilet seat hinge pins fit an RV or marine toilet?
In nearly all cases, no. RV and marine toilets from brands like Thetford and Dometic use lightweight plastic or composite bowls with proprietary hinge designs. Their pin diameters, lengths, bolt-hole spacings, and mounting geometries differ significantly from residential standards. Forcing a residential pin into an RV hinge barrel risks cracking the plastic housing or introducing wobble that road vibration will amplify. Always source OEM replacement pins matched to your specific RV or marine toilet model number for a reliable fit.
5. How do I stop my toilet seat hinge pins from rusting?
The most effective prevention is choosing the right material from the start. Stainless steel hinge pins offer excellent corrosion resistance in humid bathroom environments and will outlast zinc-plated alternatives by years. If your current hinges use zinc-plated or bare steel pins, upgrading to a stainless steel hinge assembly during your next replacement is the best long-term investment. You should also avoid mixing dissimilar metals — for example, pairing a stainless pin with a brass barrel — without placing a nylon washer between them, as the resulting galvanic corrosion can accelerate deterioration even faster than normal rust.
Apply This Insight to Your Project
Tell us what you are building and how the topic “Toilet Seat Hinge Pins: Fix That Wobbly Seat Before It Cracks” relates to your application. Our engineering team can help evaluate the next step.