What Are Toilet Seat Replacement Parts and Why They Matter
Imagine this: you sit down, and the seat shifts sideways. Or maybe the lid slams shut every single time because the soft-close feature gave up months ago. Your first instinct might be to toss the whole seat and buy a new one. But here's what most homeowners don't realize - that annoying wobble, crack, or slam is almost always caused by a single worn-out component, not a failed seat. The fix is usually a specific toilet seat part that costs a fraction of a full replacement.
Toilet seat replacement parts are the individual hardware components that attach, cushion, stabilize, and control the movement of your toilet seat and lid. They're the small but essential pieces that keep everything functioning the way it should. And when one of them wears out, the entire seating experience suffers.
What Counts as a Toilet Seat Replacement Part
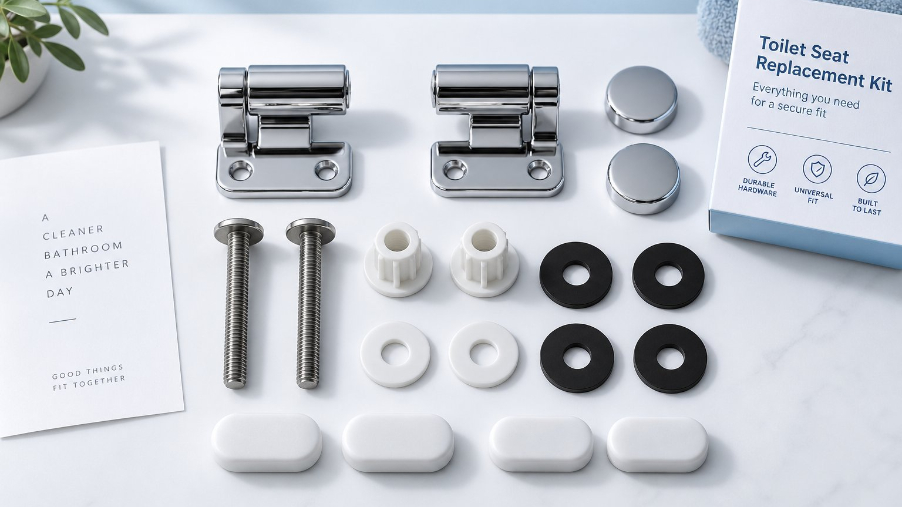
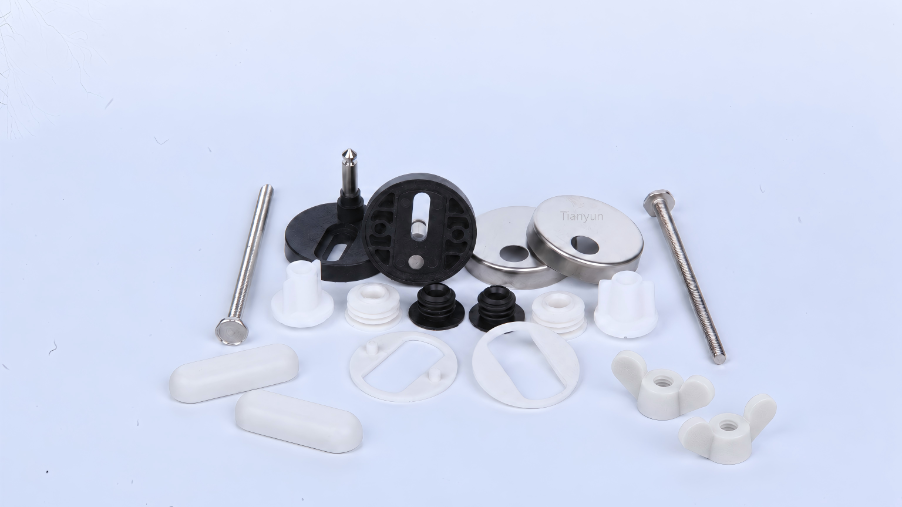
The category is broader than most people expect. The parts of a toilet seat include hinges that allow the seat and lid to pivot open and closed, bolts that anchor the seat to the bowl, nuts and washers that secure those bolts and protect the porcelain, rubber or silicone bumpers that prevent hard contact between surfaces, damper mechanisms that power the slow-close feature, stabilizer clips that stop lateral movement, and complete mounting kits that bundle several of these toilet seat components together. Each one serves a distinct purpose, and each one can fail independently.
Why Understanding These Parts Matters Before You Buy
Here's the problem you'll run into if you skip straight to shopping: buying the wrong part is the single most common mistake homeowners make with toilet seat repairs. Search online for toilet seat parts, and you'll find page after page of product listings with no context - just catalog grids that assume you already know exactly what you need. That gap between "my seat is loose" and "I need a 3/8-inch nylon wing nut" is where most people get stuck, waste money on incompatible hardware, or give up and overspend on an entirely new seat.
This guide is built to close that gap. Every section ahead breaks down the specific parts of toilet seat assemblies, maps common symptoms to the right components, explains material differences, and walks you through hands-on replacement steps. Think of it as the informational bridge between your bathroom problem and the correct fix.
Most toilet seat fixes take under 15 minutes once you identify the correct component. The real time investment is in diagnosis, not installation.
A wobbly seat doesn't demand a full replacement any more than a flat tire demands a new car. The key is knowing which toilet seat part has failed - and that's exactly where the next section picks up, with a full anatomy breakdown of every replaceable component you'll find on a standard seat.
Every Part of a Toilet Seat Named and Explained
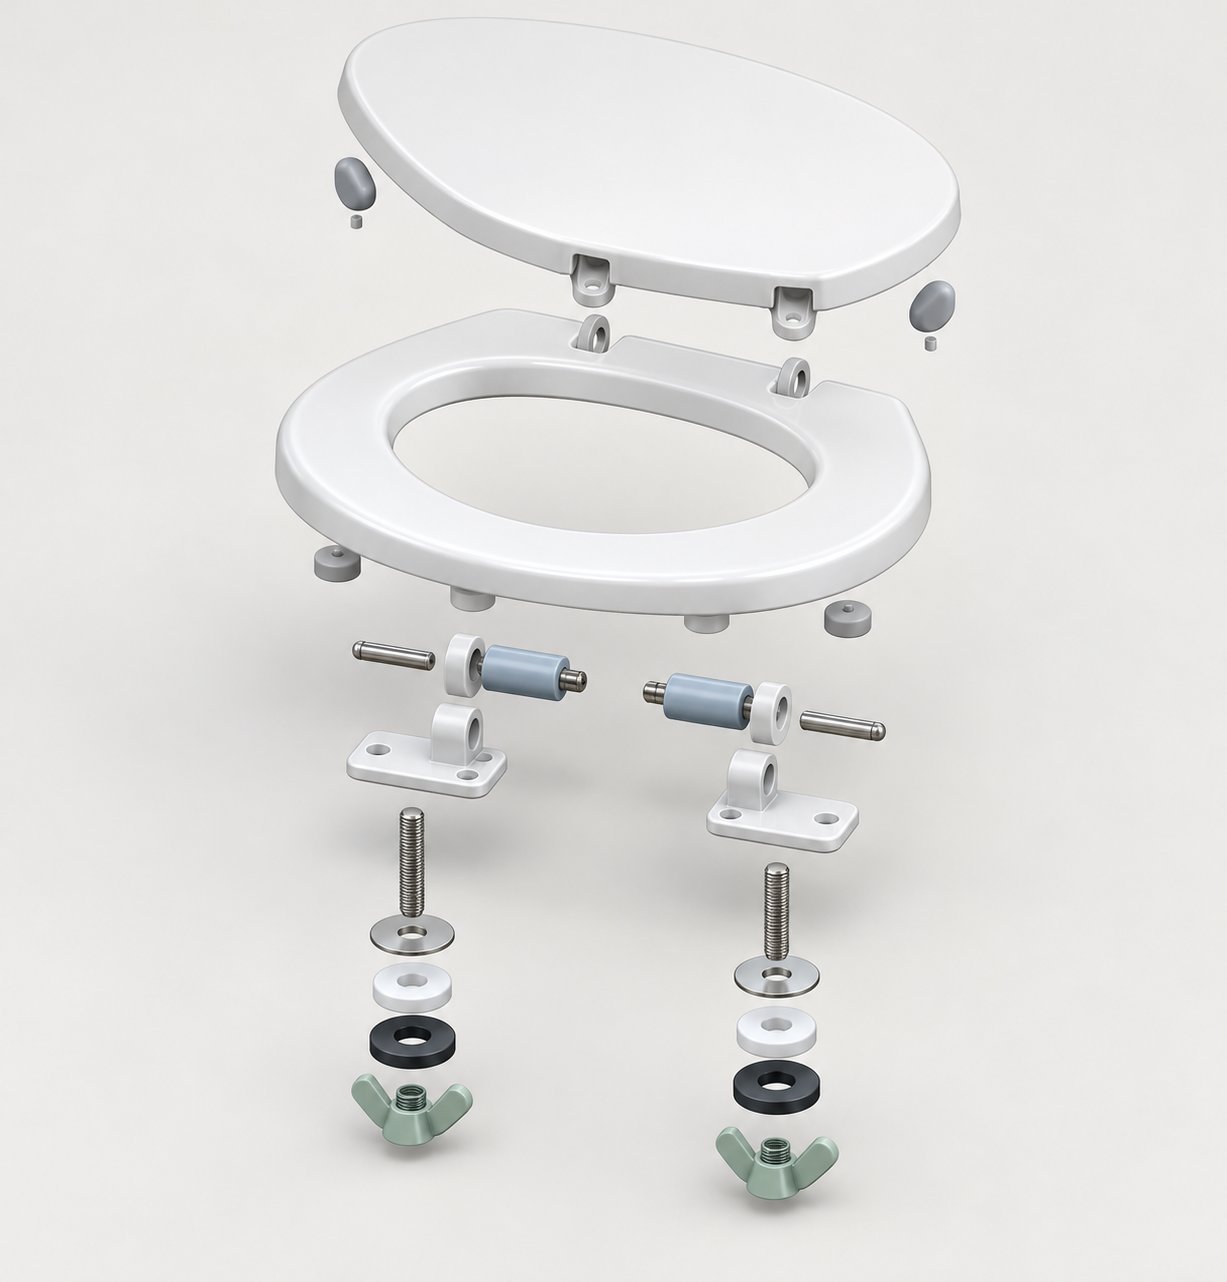
Knowing that a single component is the culprit is only half the battle. You also need to identify which component. Picture your toilet seat as a small assembly of interconnected toilet seat pieces, each with a specific job. When you can name every part and understand what it does, diagnosing a problem becomes straightforward. Consider the following breakdown your personal toilet seat parts diagram - a complete anatomy reference you can come back to anytime something feels off.
Hinge Assemblies and Hinge Pins
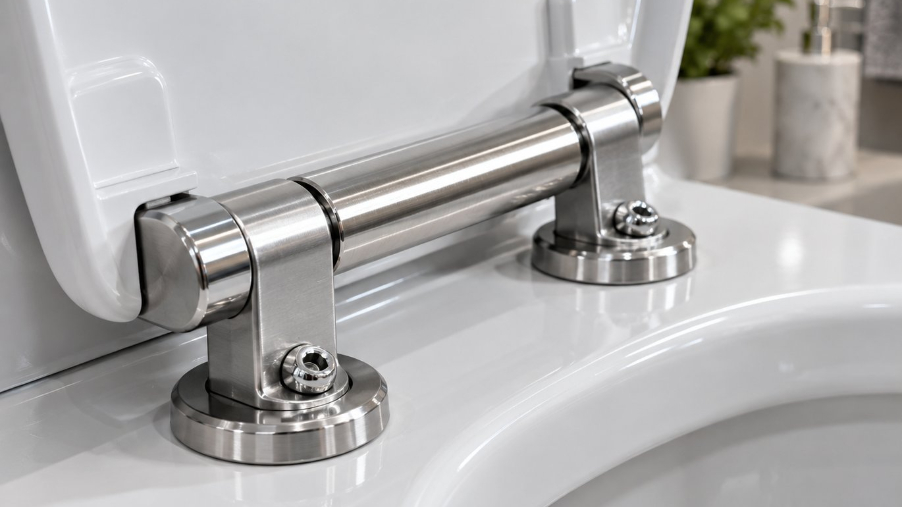
The hinge assembly is the mechanical heart of any toilet seat. It's what allows the seat and lid to pivot open and closed, and it absorbs repeated stress every single day. A typical hinge assembly consists of three core elements:
- Hinge plate - the flat bracket that sits on or against the back of the toilet bowl, anchoring the entire pivot mechanism.
- Hinge post - the vertical shaft or barrel around which the seat rotates. On many models, this post is where toilet seat pins slide through to create the pivot point.
- Hinge pin - a small rod that passes through the hinge post and seat ear, locking the rotation axis in place.
Here's an important distinction you'll want to remember. Some toilet lid parts, including the hinges, are integrated - meaning they're molded directly into the seat body. If an integrated hinge cracks, you're looking at a full seat replacement. Replaceable hinge mechanisms, on the other hand, bolt or clip onto the seat and can be swapped independently. Knowing which type you have saves you from ordering commode seat parts that won't work with your setup.
Bolts, Nuts, Washers, and Mounting Hardware
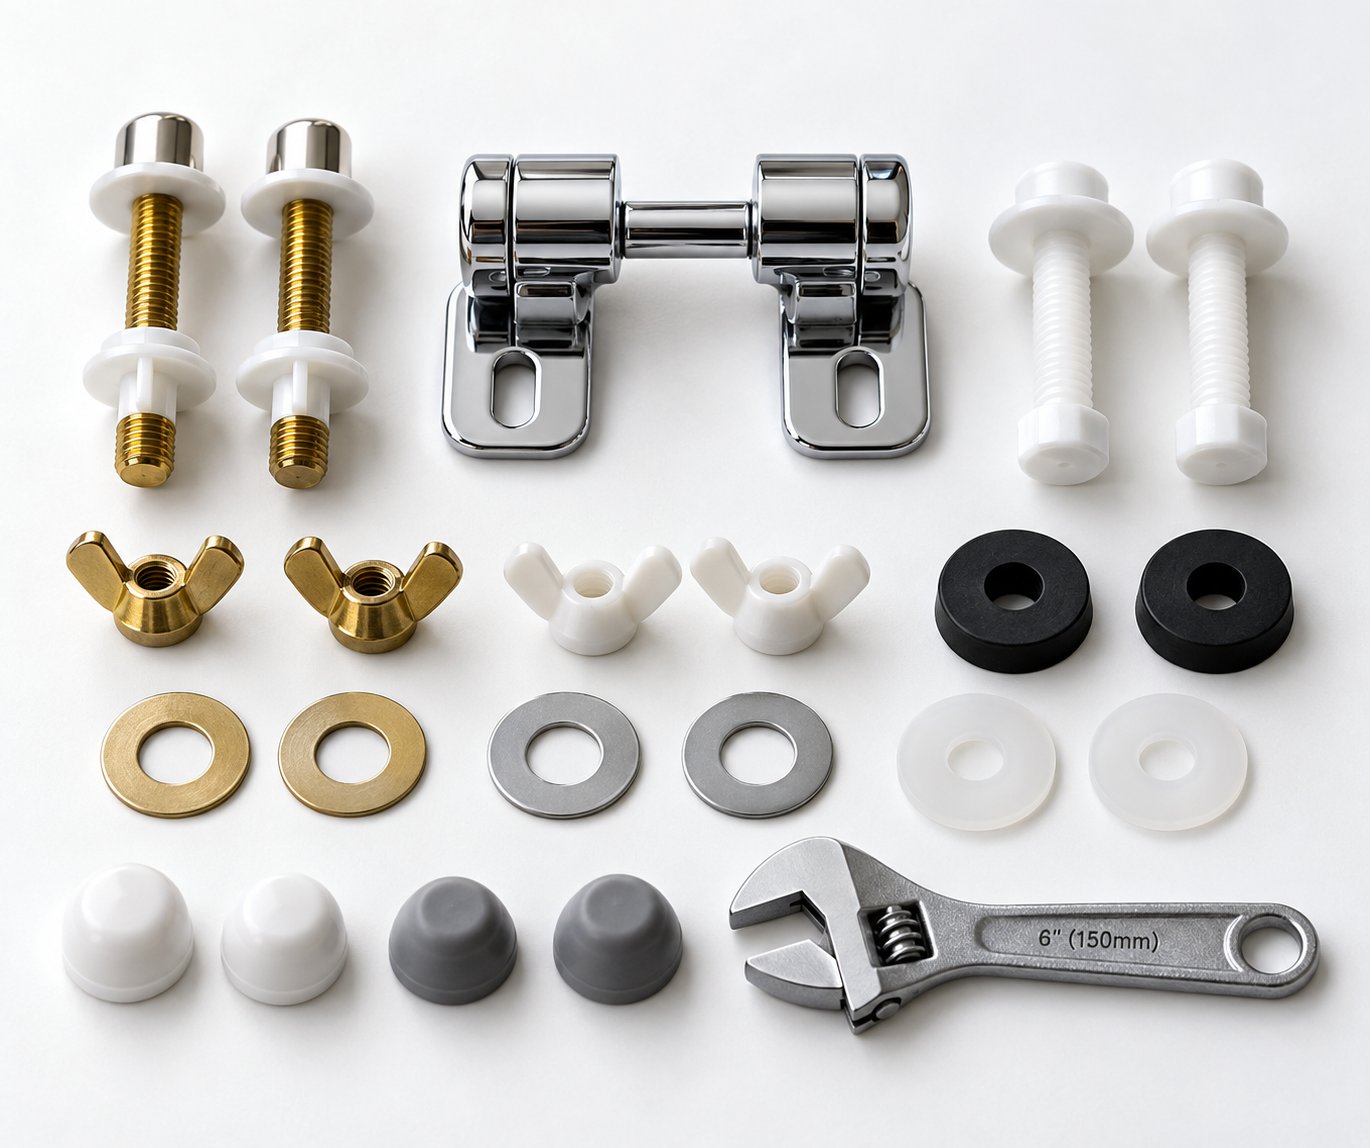
Beneath the hinges sits the fastener stack - the toilet seat hardware that physically secures the seat to the porcelain bowl. Think of it as a vertical sandwich held together by tension:
- Bolt - a threaded rod (usually 3/8-inch diameter) that drops down through the mounting hole at the back of the bowl.
- Washer - a flat disc, often rubber or plastic, that sits between the bolt head and the porcelain. This washer creates a seal, distributes pressure evenly, and prevents the bolt from cracking the bowl.
- Nut - typically a wing nut or hex nut that threads onto the bolt from below the bowl, clamping everything tight.
These three toilet seat fittings work as a team. If one fails - say, the washer compresses flat or the nut strips - the entire connection loosens. Most universal mounting kits bundle all three together because replacing just one rarely solves the problem permanently.
Bumpers, Dampers, and Stabilizer Pads
The smaller, often overlooked toilet seat pieces live on the underside of the seat and lid. Rubber or silicone bumpers are the soft pads that prevent the seat from making hard contact with the porcelain rim. You'll usually find four to six of them - a few under the seat ring and a few under the lid. When these degrade or fall off, you'll hear clacking, feel rocking, and may even notice scratches forming on the bowl.
Damper mechanisms are built into slow-close (soft-close) hinge assemblies. These small hydraulic or friction-based cartridges control the descent speed of the seat and lid. They're the reason the lid drifts shut gently instead of slamming. Over time, the internal fluid or resistance wears down, and the slow-close effect fades.
Stabilizer pads attach near the hinge area and press against the inside of the bowl to stop the seat from sliding side to side. If your seat shifts laterally even when the bolts feel snug, worn stabilizers are a likely cause.
Quick-Reference Anatomy Chart
If you've ever searched for a commode seat parts name list and come up empty, this table is built for you. Use it to cross-reference what you see on your toilet with the correct part name, location, and telltale signs that it needs replacing.
| Part Name | Location | Function | Common Signs of Wear |
|---|---|---|---|
| Hinge plate | Top rear of bowl, under the seat | Anchors the pivot mechanism to the bowl | Cracks, visible warping, loose mounting |
| Hinge post and pin | Inside the hinge body | Creates the rotation axis for seat and lid | Seat droops to one side, grinding noise |
| Mounting bolt | Passes through bowl mounting holes | Secures the seat assembly to the bowl | Rust, stripped threads, visible corrosion |
| Washer | Between bolt head and porcelain | Seals and distributes pressure | Compressed flat, cracked, missing |
| Wing nut / hex nut | Underside of the bowl | Clamps bolt tight from below | Stripped wings, won't hold tension |
| Bumpers | Underside of seat ring and lid | Cushions contact with porcelain | Flattened, missing, sticky residue left behind |
| Damper cartridge | Inside slow-close hinge body | Controls descent speed of seat and lid | Lid slams or closes unevenly |
| Stabilizer pads | Near hinge area, pressing against bowl | Prevents lateral seat movement | Side-to-side shifting despite tight bolts |
Each of these components can fail on its own timeline, and the symptom it produces is surprisingly specific. A seat that wobbles front to back points to a different part than a seat that slides left to right - a distinction that matters when you're standing in the hardware aisle trying to choose between a bolt kit and a stabilizer set.
Match Your Toilet Seat Problem to the Right Part
That distinction between a front-to-back wobble and a side-to-side slide isn't just trivia - it's the fastest path to the correct fix. Instead of browsing product pages and guessing, start with the symptom you're actually experiencing. Every toilet seat problem produces a specific set of clues, and those clues point directly to a specific replacement part. Think of this section as a diagnostic flowchart: describe what your seat is doing wrong, and you'll know exactly what to buy.
Loose or Sliding Toilet Seat
When you sit down and the seat shifts sideways, rocks forward, or feels generally unstable, the instinct is to assume the seat itself is broken. In most cases, it isn't. A loose or sliding toilet seat almost always traces back to the fastener stack beneath the hinges - the bolts, nuts, and washers that clamp the seat to the porcelain bowl.
Start with the simplest check: tighten the existing hardware. Flip open the hinge covers at the back of the seat, hold the nut from below with an adjustable wrench, and snug the bolt from above with a screwdriver. If the seat stabilizes, you're done. But if the nut spins freely without gripping, or the bolt turns without pulling tight, you're dealing with stripped threads. No amount of tightening will fix stripped fasteners - they need to be replaced entirely.
A toilet seat screw replacement kit is the right move here. These kits typically include new bolts, wing nuts, and washers sized to fit standard mounting holes. If the seat continues to slide laterally even after fresh bolts are snug, the issue may be worn toilet seat stabilizers - those small pads near the hinge area that press against the inside of the bowl to prevent sideways drift. Adding or replacing a toilet seat stabilizer pad often solves persistent lateral movement that new bolts alone can't fix.
Cracked or Broken Hinge
Does the seat droop to one side, or does it feel like the pivot point has a gap in it? You're likely looking at a cracked or broken hinge. Plastic toilet hinges are the most common failure point on older seats. Repeated stress from daily use - opening, closing, sitting, standing - gradually weakens the hinge body. The problem accelerates when the lid gets dropped rather than lowered, or when heavier users place significant load on the seat near the hinge connection.
Here's where the distinction covered in the anatomy section becomes critical. If your seat has replaceable hinges - meaning the hinge mechanism bolts or clips onto the seat body - you can repair the toilet seat hinge without buying a new seat. You simply remove the old hinge assembly, match its dimensions to a compatible replacement, and attach the new one. Many manufacturers sell hinge kits specifically for this purpose, and universal hinge sets cover a wide range of toilet seat hinge bolts configurations.
If the hinge is integrated - molded directly into the seat as a single piece of plastic - a crack there means the seat is done. No amount of glue or creative clamping will restore structural integrity to an integrated hinge that has split under stress. In this case, full seat replacement is the only practical option. To tell the difference, look at the back of your seat where it meets the hinge. If you see visible screws, clips, or a seam between the hinge and the seat body, it's replaceable. If the hinge flows seamlessly into the seat with no fasteners, it's integrated.
Slow-Close Feature Stopped Working
Few things are as satisfying as a soft-close lid that drifts shut silently - and few things are as jarring as when that feature suddenly stops working and the lid crashes down. The culprit is almost always the damper mechanism inside the hinge body. These small cartridges use either hydraulic fluid or friction-based resistance to control how fast the seat and lid descend. Over months and years of daily cycling, the internal mechanism wears down, loses fluid, or loses its resistance entirely.
The good news? Toilet seat dampers replacement doesn't require a new seat in many cases. Several soft-close seat models use modular damper cartridges that slide, click, or screw into the hinge housing. Replacing them restores the slow-close action at a fraction of the cost of a new seat. Some brands even sell the damper cartridge as a standalone part. If the entire hinge unit is a sealed assembly with no removable cartridge, you can often swap the complete hinge instead - still cheaper and less wasteful than discarding the seat.
One important note: if both toilet hinges have lost their damping effect at the same time, replace both dampers simultaneously. Mismatched damping - one side slow, one side fast - creates uneven descent that stresses the hinge pins and can lead to premature cracking.
Missing or Worn Bumpers
When you lower the seat and hear a hard clack against the porcelain, or when the seat rocks slightly even though the bolts are tight, missing or degraded bumpers are the most likely explanation. These small rubber or silicone pads sit on the underside of the seat ring and lid, acting as cushions and stabilizers. They absorb impact, prevent scratching, and keep the seat from making direct contact with the bowl rim.
Bumpers fail in predictable ways. Rubber versions compress flat over time, losing their cushioning. Adhesive-backed bumpers peel off entirely, leaving behind sticky residue and a bare seat bottom. In humid bathrooms, the adhesive degrades faster, accelerating the problem. Once bumpers are gone, every contact between the hard seat material and the porcelain surface risks scratching or chipping - and the noise alone is enough to make anyone cringe.
Replacement toilet seat bumpers are inexpensive and take seconds to install. Peel off the old ones (a razor blade helps with stubborn adhesive), clean the surface with rubbing alcohol, and press the new bumpers into position. For longer-lasting results, choose silicone bumpers over rubber - they resist compression and humidity far better.
Quick Symptom-to-Part Reference
Use this list as a fast diagnostic tool. Find your symptom, then look at the corresponding replacement part:
- Seat wobbles front to back - worn mounting bolts, compressed washers, or stripped wing nuts
- Seat slides side to side - degraded stabilizer pads or unevenly tightened bolts
- Seat droops or tilts to one side - cracked or broken hinge (check if replaceable or integrated)
- Lid slams shut instead of closing slowly - worn damper cartridge or failed slow-close hinge mechanism
- Clacking noise when seat contacts bowl - missing or flattened bumpers on the seat underside
- Seat rocks on the rim despite tight bolts - missing bumpers or uneven bumper wear creating an unstable contact surface
- Bolts feel tight but seat still shifts - stripped bolt threads or cracked mounting holes in the porcelain
- Visible rust staining around bolt area - corroding metal bolts or washers that need replacement with corrosion-resistant alternatives
Every symptom on this list maps to a specific, affordable component - not to a brand-new toilet seat. The distinction matters, especially when you factor in that the hardware connecting your seat to the bowl comes in two fundamentally different mounting configurations, each with its own set of advantages and limitations.
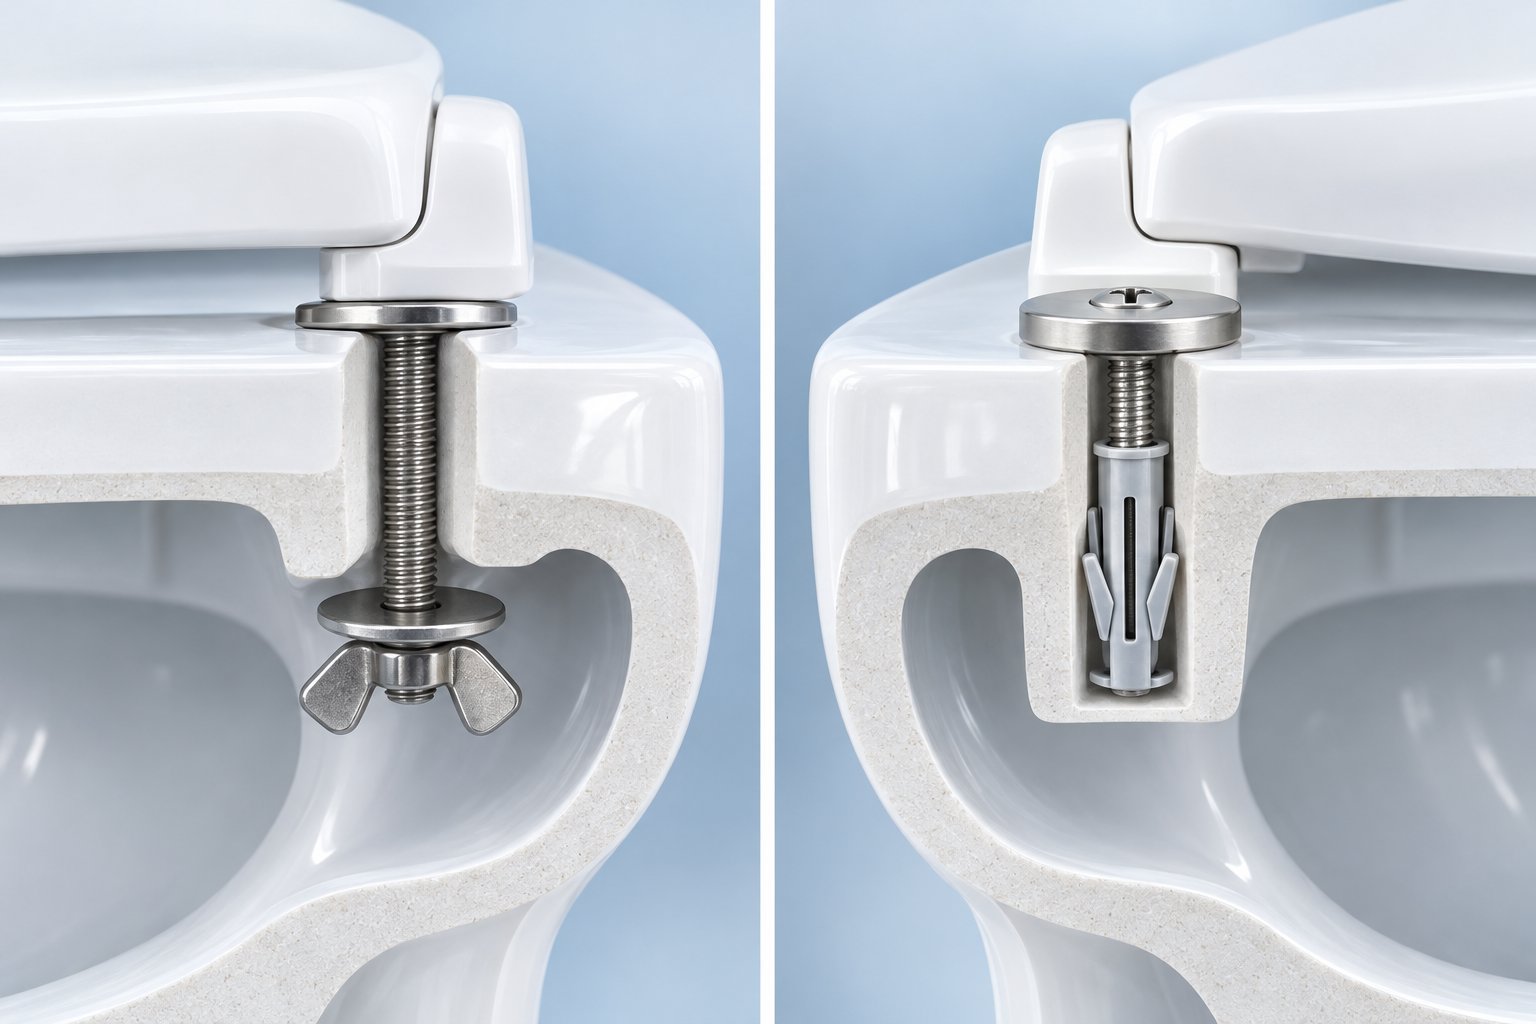
Top-Mount vs Bottom-Mount Hardware Explained
Those two mounting configurations - top-mount and bottom-mount - aren't just installation preferences. They determine which replacement bolts for toilet seat repairs will actually fit your bowl, how difficult the swap will be, and whether you'll need a second pair of hands or a contortionist's flexibility to get the job done. Retailers list these as filter categories, yet almost none explain what the terms actually mean. Here's the breakdown.
How Bottom-Mount Bolts Work
The bottom-mount system is the traditional approach that's been around for decades. A bolt drops through each of the toilet seat holes from above, passes through the porcelain mounting holes at the rear of the bowl, and extends out the underside. From below, you thread a washer and wing nut onto the exposed bolt end and tighten until the seat is clamped firmly to the porcelain.
Simple in theory. Often frustrating in practice. You'll need to reach behind and underneath the bowl to access those wing nuts - a task that ranges from mildly uncomfortable to nearly impossible depending on how close your toilet sits to the wall or vanity. In tight bathrooms, you might find yourself wedged between the toilet and the wall, blindly fumbling for a nut you can barely touch. And if those toilet seat bolts and nuts are metal, months of bathroom humidity can fuse the nut to the bolt through corrosion, turning a five-minute job into a thirty-minute ordeal involving penetrating oil and possibly a hacksaw.
There's also the loosening problem. Standard bottom-mount wing nuts rely on friction to hold their position, but vibration from daily use gradually backs them off. That's why bottom-mount seats are the most common culprits behind the "my seat keeps getting loose" complaint. Periodic retightening is essentially built into the system.
How Top-Fix Mounting Systems Work
Top-fix (also called top-mount) systems flip the entire process. Instead of securing hardware from below, everything installs and tightens from above the bowl. A specially designed expanding anchor or threaded insert drops down into each toilet seat hole, and when you tighten the screw from the top, the anchor expands inside the mounting hole to grip the ceramic from within.
The advantages are immediate. No kneeling behind the toilet. No reaching blindly under the bowl. No need for a second person to hold a wrench underneath while you turn the bolt from above. A toilet seat mounting kit designed for top-fix installation typically takes five to ten minutes to install - even in cramped bathrooms where bottom-mount hardware would be a nightmare. Future removal is equally simple: loosen the screws from the top and lift everything out.
Top-fix systems were originally designed for modern back-to-wall, skirted, and wall-hung toilets where the underside of the bowl is completely enclosed, making bottom-mount installation physically impossible. But the convenience benefits have pushed top-fix kits into mainstream use even on standard open-back toilets where bottom-mount would technically work.
Which System Does Your Toilet Use
Figuring out your current system is straightforward. Look at the back of your toilet bowl where the seat attaches. If you can see bolt heads or screw caps on top and feel wing nuts underneath, you have a bottom-mount setup. If you see screw heads on top but nothing accessible below - or if the underside of your bowl is fully enclosed - you're looking at a top-fix system.
Here's what many homeowners don't realize: if your bowl has open, through-hole mounting holes, most top-fix toilet seat mounting hardware will work as a direct replacement for your old bottom-mount bolts. The expanding anchors simply grip inside the same holes that bolts previously passed through. This means toilet seat bolts replacement doesn't have to be a like-for-like swap. You can upgrade from bottom-mount to top-fix and eliminate the under-bowl hassle permanently.
| Feature | Bottom-Mount System | Top-Fix System |
|---|---|---|
| Installation access | Requires access above and below the bowl | All work done from above the bowl |
| Typical install time | 10-20 minutes (longer in tight spaces) | 5-10 minutes regardless of space |
| Tools required | Screwdriver, adjustable wrench, possibly pliers | Screwdriver or coin (some designs are tool-free) |
| Removal simplicity | Must access underside again; corroded nuts may seize | Loosen from top and lift out |
| Corrosion risk | Higher - exposed metal hardware traps moisture | Lower - anchors are concealed inside mounting holes |
| Stability over time | Wing nuts may loosen with use | Expanding anchors resist loosening |
| Compatibility | Open-back toilets with accessible undersides | All toilet types, including skirted and wall-hung |
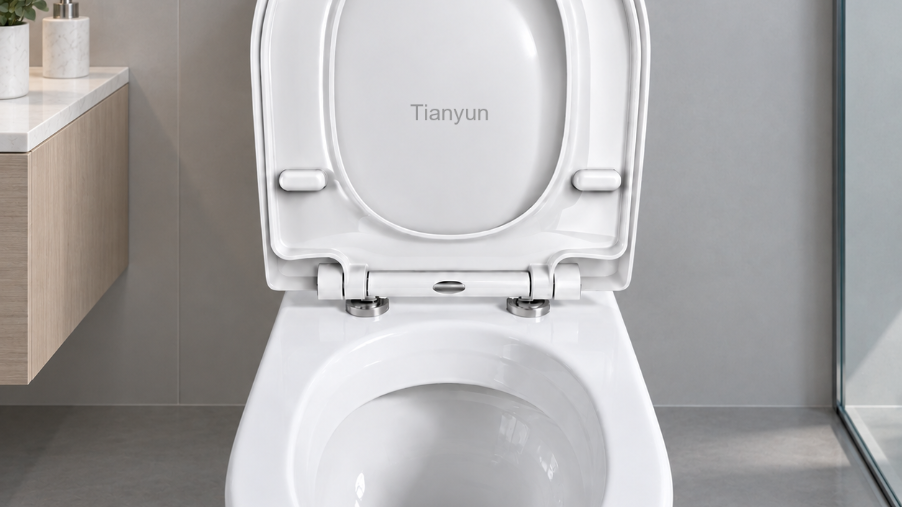
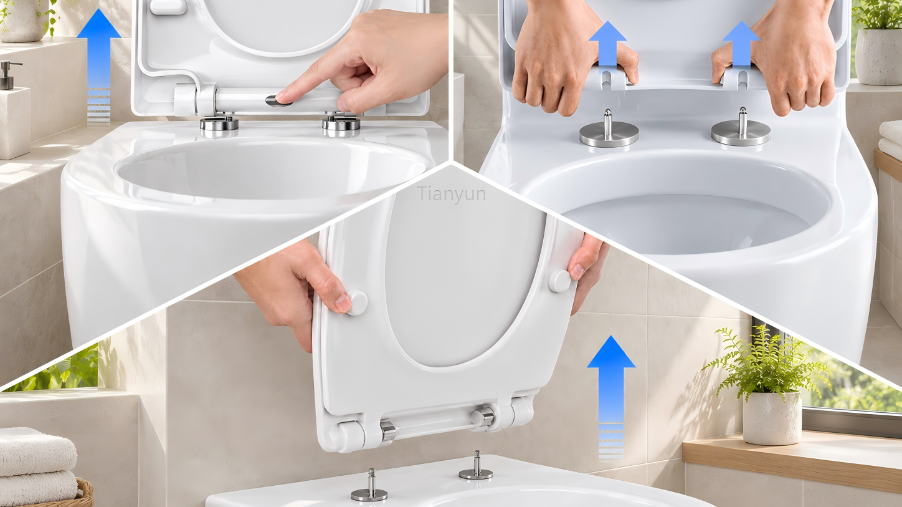
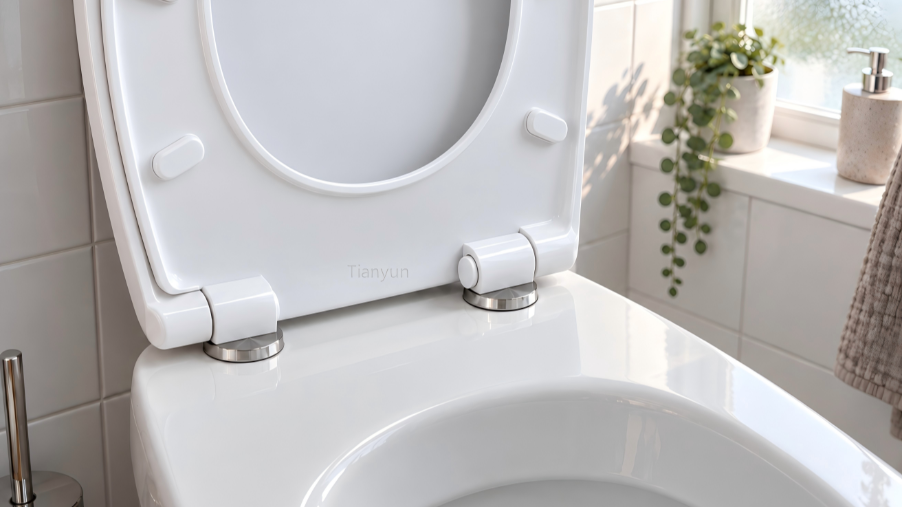
For sanitaryware manufacturers and buyers sourcing professional-grade toilet seat hardware replacement solutions, purpose-built top-fix systems offer clear production and maintenance advantages. Tianyun's toilet seat fixing systems - including top-fix kits, quick-release hinge bases, and lift-off kits - are engineered specifically for both OEM assembly lines and replacement-hardware applications where fast installation and long-term stability are non-negotiable.
Whichever mounting system you choose, the hardware only lasts as long as its materials hold up. And the gap between a plastic bolt and a brass bolt - or a rubber washer and a silicone one - can mean the difference between a fix that lasts six months and one that lasts six years.
Plastic vs Metal and Other Material Trade-Offs
A plastic bolt and a brass bolt might look interchangeable in the packaging, but put them both in a humid bathroom for two years and you'll see dramatically different results. The material your toilet seat fasteners are made from quietly determines how long your repair holds up - and yet most shoppers never give it a second thought.
Material choice is the single most overlooked factor in replacement part longevity. The right component in the wrong material often fails faster than the part it replaced.
Plastic vs Metal Hinges and Bolts
Plastic toilet seat nuts and bolts - typically made from nylon or polypropylene - have one undeniable advantage: they cannot corrode. In a bathroom environment where moisture, condensation, and cleaning chemicals are constant, corrosion immunity is a big deal. Plastic hardware will never fuse to itself, which means future removal stays effortless. The trade-off? Plastic cracks under heavy or repeated stress. Wing nuts for toilet seat assemblies made from thin plastic can strip if overtightened, and plastic hinge bodies may fracture on seats that support heavier users.
Metal options - stainless steel, brass, and zinc-plated steel - bring superior strength. A stainless steel hinge pin handles thousands of open-close cycles without deforming. Brass screws for toilet seat mounting resist corrosion nearly as well as plastic while offering far greater tensile strength. Zinc-plated bolts, however, are the weak link in the metal family. The plating wears away over time, exposing bare steel to moisture. Once that happens, rust develops fast, and a routine toilet seat replacement bolts job turns into a corroded-bolt nightmare.
If you're choosing metal, brass or stainless steel is worth the premium. If budget is tight, plastic outperforms cheap zinc-plated hardware in the long run simply because it avoids the corrosion trap entirely.
Rubber vs Silicone Bumpers and Washers
Bumper and washer material matters more than most people expect. Standard rubber bumpers are the default in most budget kits - they're inexpensive and provide decent cushioning initially. But rubber compresses under sustained weight, loses elasticity in humid conditions, and its adhesive backing tends to fail within a year or two. You'll find flattened bumpers or bare sticky residue where bumpers used to be.
Silicone bumpers hold their shape significantly longer. They resist compression, tolerate temperature fluctuations, and maintain adhesion in high-humidity environments where rubber gives up. The same principle applies to washers for toilet seat mounting stacks. A rubber washer between the bolt head and the porcelain will eventually compress flat, loosening the connection. A silicone or high-density plastic washer maintains its thickness and seal far longer, keeping each toilet seat nut snug against the bowl without periodic retightening.
Choosing the Right Material for Your Situation
The best material depends less on brand and more on your specific bathroom conditions and usage patterns. Use this checklist to match your situation to the right material choice:
- High-humidity bathrooms (poor ventilation, frequent steam) - plastic or brass toilet seat nuts and bolts; silicone bumpers and washers. Avoid zinc-plated metal entirely.
- Heavy daily use (large households, frequent guests) - stainless steel or brass hinges for durability; silicone bumpers to resist compression from constant load cycling.
- Rental properties and turnover situations - inexpensive plastic mounting kits that install quickly and remove without corrosion issues. Easy replacement between tenants outweighs long-term durability.
- Households with children - plastic fasteners paired with silicone bumpers. No sharp corroded edges, no risk of metal staining on porcelain, and simple hand-tightening without tools.
- Premium or long-term installations - brass screws for toilet seat mounting with stainless steel hinge pins and silicone washers. Higher upfront cost, but you won't be revisiting the repair for years.
The pattern is clear: spend a little more on corrosion-resistant toilet seat nuts and bolts and compression-resistant bumpers now, or spend more time and money repeating the repair later. Material choice isn't glamorous, but it's the silent factor that separates a fix lasting six months from one lasting six years - and it's just as important as making sure the parts you buy actually fit your specific toilet brand and model.
How to Match Replacement Parts to Your Toilet Brand
Picking the right material is only half the equation. A brass bolt in the perfect alloy still won't help if it's the wrong diameter, the wrong thread pitch, or designed for a hinge system that doesn't match your bowl. Compatibility is where most toilet seat repair projects quietly fail - and it's the one topic that almost no online resource bothers to explain.
Understanding Brand-Specific Hardware
Here's a detail that catches many homeowners off guard: major manufacturers don't all use the same hardware geometry. American Standard toilet seat hinges, for example, vary across model lines - some use a wide hinge plate with proprietary post spacing, while others accept universal fittings. Kohler frequently designs integrated hinge systems that require OEM parts for a proper match. Church and Bemis seats often share hardware since they're produced under the same parent company, but even within that family, bolt styles shift between product tiers.
What does this mean practically? If you're sourcing american standard toilet seat parts or Kohler replacement hardware, a generic "universal" kit from the hardware store may not align correctly. American Standard toilet seat bolts on one model line might differ in length or head style from another, and american standard toilet seat screws on slow-close models often feature proprietary thread patterns designed to mate with specific damper cartridges. The same applies to american standard toilet lid hinges - some clip on, some screw in, and some lock with a quarter-turn bayonet mechanism. Assuming interchangeability without checking is the fastest way to waste money on parts you can't use.
Round vs Elongated Seat Hardware Compatibility
Does your bowl shape affect which replacement parts you need? The answer is nuanced. Elongated bowls measure roughly 18 inches from the mounting holes to the front rim, while round bowls measure about 16.5 inches. Despite this size difference, the bolt-hole spacing at the rear of the bowl is typically standardized across both shapes - usually around 5.5 inches center to center. That means mounting bolts, nuts, and washers are generally cross-compatible between round and elongated toilet seats for American Standard, Kohler, and most other brands.
Where compatibility diverges is in hinge geometry and bumper placement. Elongated seats use longer hinge arms to accommodate the extended bowl, so an elongated hinge assembly won't fit a round seat even if the bolt holes line up perfectly. Bumper positioning also shifts - elongated seats place their front bumpers farther forward, and using round-seat bumpers on an elongated seat leaves the front unsupported, inviting rocking and porcelain contact.
How to Measure and Identify What You Need
Before you shop, spend five minutes gathering the measurements and details that prevent a return trip. Follow this identification checklist:
- Measure bolt-hole spacing. Use a tape measure to find the center-to-center distance between the two mounting holes at the rear of the bowl. Standard spacing is approximately 5.5 inches (140mm). Non-standard spacing usually indicates proprietary hardware.
- Note the bolt diameter. Most residential toilet seats use a 3/8-inch (10mm) bolt, but some brands - particularly European models - use metric sizing. Bring the old bolt to the store if possible.
- Check the hinge type. Determine whether your hinges are replaceable (attached with visible screws or clips) or integrated (molded into the seat body). If replaceable, note whether they use a pin-style pivot, a barrel hinge, or a bayonet-lock mechanism.
- Identify the mounting system. Confirm whether your current setup is top-fix or bottom-mount, since replacement kits are designed for one or the other.
- Record your toilet and seat brand and model number. Look for stamps or stickers inside the tank lid, on the bowl's underside, or on the seat itself. This is the single most reliable way to source compatible american standard replacement parts toilet hardware or equivalent OEM components from any manufacturer.
- Photograph everything. Take close-up photos of the hinges, bolts, mounting holes, and any identifying labels. These images save time when comparing products online or asking for help at a hardware counter.
Brand Compatibility at a Glance
This table summarizes how the most common brand families handle their toilet seat hardware - and whether universal parts are likely to work as a substitute for an american standard toilet seat replacement, a Kohler swap, or a Church/Bemis repair.
| Brand Family | Typical Hinge Type | Bolt Style | Universal Parts Usually Fit? |
|---|---|---|---|
| American Standard | Varies by model - clip-on, screw-mount, or bayonet-lock | Proprietary on many models; some accept standard 3/8" bolts | Sometimes - verify model-specific compatibility first |
| Kohler | Frequently integrated or proprietary quick-release | Often proprietary with unique head profiles | Rarely - OEM parts recommended for most models |
| Church / Bemis | Replaceable hinge assemblies on most models | Standard 3/8" bolts on most residential lines | Yes - most universal kits are compatible |
Notice the pattern: the more proprietary a brand's design philosophy, the more important it is to source parts directly from the manufacturer or an authorized supplier. American Standard toilet seat hinges on a premium slow-close model won't accept the same hinge kit that fits a basic Church round seat, even though both bolt to the same standard-spaced holes. When in doubt, the model number is your most powerful tool - it eliminates guesswork entirely and points you to the exact components engineered for your seat.
Of course, knowing which parts fit is only useful if you can actually remove the old ones. And if your existing bolts have been sitting in a humid bathroom for years, removal might be the hardest step of all.
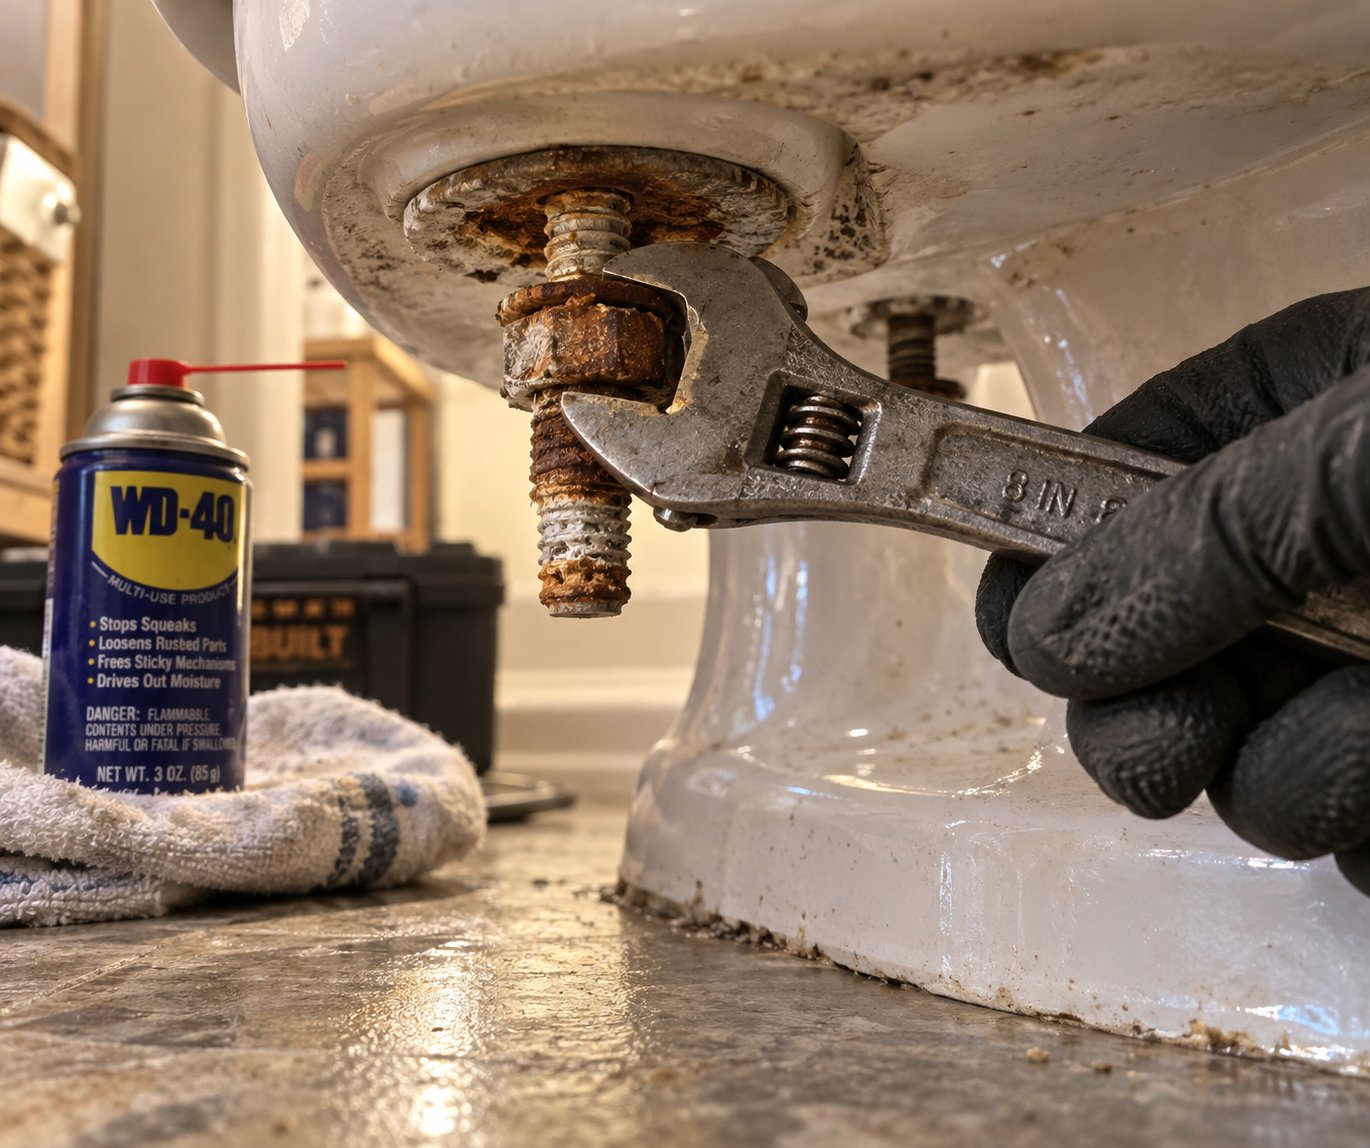
How to Remove Corroded or Stuck Toilet Seat Bolts
You've identified the right part, confirmed compatibility with your brand, and you're ready to swap. Then you grab the wing nut underneath the bowl and... nothing. It won't budge. The toilet seat screw feels welded to the nut, your knuckles are scraped against porcelain, and the wrench just spins the bolt head instead of loosening anything. This is arguably the most common real-world reason people search for toilet seat replacement parts in the first place - not because they can't find the right component, but because they can't get the old one off.
Why Toilet Seat Bolts Get Stuck
The science behind a seized bolt is straightforward. Most toilet cover screws and bolts shipped with budget seats are zinc-plated steel. The zinc coating provides a thin corrosion barrier, but bathroom humidity, condensation dripping down the bolt shaft, and acidic cleaning chemicals gradually eat through that layer. Once bare steel is exposed, water exposure and humidity corrode metal bolts, creating iron oxide (rust) that expands between the bolt threads and the nut. That expansion fuses the two together with surprising force - often enough to snap a cheap wrench before the nut turns.
Plastic bolts aren't immune either. Hard water deposits build up inside the threads over time, creating a mineral crust that locks the nut in place. Cross-threading during the original installation compounds the problem, since misaligned threads dig into each other and resist turning in either direction. Whether the screw in toilet seat mounting holes is metal or plastic, a bolt that's been sitting undisturbed for years in a damp environment is almost always harder to remove than it was to install.
Safe Removal Methods Without Damaging the Bowl
Cracking the porcelain is the real risk here. Toilet bowls are vitreous china - strong under compression but brittle under sudden impact or uneven leverage. Every removal technique below is designed to free the bolt while keeping force directed at the hardware, never the ceramic. Work through these steps in order, escalating only when the previous method fails:
- Apply penetrating oil and wait. Spray a generous amount of penetrating lubricant (WD-40 Specialist or PB Blaster) directly onto the nut-to-bolt junction from below. Let it soak for at least 15 to 20 minutes - longer for heavily corroded fasteners. The oil seeps into the micro-gaps between threads and dissolves a portion of the rust bond. Try turning the nut again after soaking.
- Use a socket wrench or pliers for better grip. If a wing nut is too corroded to grip by hand, lock adjustable pliers or a deep socket wrench onto the nut for more torque. Hold the bolt head from above with a wide-blade screwdriver for toilet seat bolt removal to prevent the entire assembly from spinning. Apply steady, even pressure - jerky force increases the risk of snapping the bolt and leaving the shank stuck inside the hole.
- Try a bolt-grip extraction socket. When rust has rounded the nut's edges past the point where standard tools can grab, a bolt-grip socket (sometimes called a bolt extractor) bites into the rounded surface as you turn. These sockets are inexpensive and available at most hardware stores.
- Cut through the bolt. If the nut absolutely refuses to turn, cutting the bolt is the safest escalation. Use a reciprocating saw or oscillating multi-tool with a metal-cutting blade to saw through the bolt shaft between the nut and the underside of the bowl. A manual hacksaw blade wrapped in tape at one end also works in tight spaces. Keep the blade against the bolt, not the porcelain. Protect the bowl surface with painter's tape in the cutting zone as an extra precaution.
- Split the nut with a nut splitter. As a last resort for metal nuts, a nut splitter tool clamps around the nut and drives a chisel point into it, cracking it apart without touching the bolt or the bowl. This is the most controlled method for severely corroded toilet seat replacement screws that resist every other approach.
Once the old hardware is out, clean the mounting holes thoroughly. A small bottle brush or rolled-up sandpaper removes residual rust and mineral scale, giving your replacement screws for toilet seat installation a clean surface to seat against.
Overtightening replacement bolts is the primary cause of future corrosion seizure. Hand-tighten the nut until snug, then add a quarter turn with a wrench - no more. Excess compression traps moisture against the threads and accelerates the oxidation cycle all over again.
That quarter-turn rule applies regardless of whether your new hardware is plastic or metal, top-fix or bottom-mount. With corroded bolts out of the way and clean mounting holes ready, the actual process of installing fresh components - bolts, hinges, bumpers, or damper cartridges - is the straightforward part that most people expect the entire job to be.
Step-by-Step Toilet Seat Part Replacement Guide
Clean mounting holes, old hardware removed, new parts in hand - this is where the job gets satisfying. The hard work of diagnosis, compatibility matching, and stubborn bolt extraction is behind you. What's left is assembly, and each type of toilet parts replacement follows a logical, repeatable sequence that rarely takes more than fifteen minutes.
Before diving into any procedure, gather your tools. Having everything within arm's reach prevents mid-job trips to the garage and keeps the process smooth. Here's your essential toolkit:
- Adjustable wrench - for gripping nuts from below on bottom-mount systems
- Flathead screwdriver - for turning bolt heads and prying open hinge covers
- Penetrating oil - in case any old hardware resists during disassembly
- Clean rag - for wiping down mounting surfaces and removing debris
- Rubbing alcohol - for cleaning adhesive residue before applying new bumpers
- Razor blade or plastic scraper - for removing old bumper adhesive without scratching porcelain
Replacing Toilet Seat Bolts and Mounting Hardware
Whether you're working with a basic bolt-and-wing-nut set or a complete toilet seat replacement kit with top-fix anchors, the sequence follows the same core logic: remove, clean, insert, position, and tighten. Here's the full process broken down step by step:
- Remove the old seat. If the old bolts are already out from the removal steps covered earlier, simply lift the seat and lid assembly off the bowl. If the seat uses a quick-release mechanism, press the release buttons at the hinge bases and slide the seat forward and up. Set the old seat aside.
- Clean the mounting holes. Use a damp rag to wipe away dust, rust residue, and mineral deposits around and inside both mounting holes. A small bottle brush works well for clearing debris from inside the holes themselves. Dry the area thoroughly - moisture trapped under new hardware starts the corrosion clock immediately.
- Insert the new bolts or top-fix anchors. For bottom-mount systems, drop each bolt through its corresponding mounting hole from above, with the washer seated between the bolt head and the porcelain. For top-fix toilet seat mounting hardware, feed the expanding anchor or threaded insert down through the hole until the flange sits flush against the top surface of the bowl.
- Position the new seat. Set the seat and lid assembly onto the bowl, aligning the hinge holes with the bolts or anchor posts. The seat should sit centered on the bowl with equal overhang on each side and the front edge parallel to the bowl rim. Take a moment to check alignment before tightening - adjusting a crooked seat after the bolts are snug means loosening everything and starting over.
- Tighten to the correct tension. For bottom-mount systems, hold the bolt head from above with a screwdriver while threading the wing nut onto the bolt from below. Hand-tighten until snug, then apply a quarter turn with an adjustable wrench. For top-fix systems, turn the tightening screw from above until the expanding anchor grips firmly inside the mounting hole. Alternate between left and right bolts, tightening each side incrementally to keep the seat centered.
- Test the seat. Sit down and shift your weight gently from side to side and front to back. The seat should feel stable with zero lateral play. Open and close the lid several times to confirm the hinges pivot smoothly without binding. If anything feels off, loosen and re-align before the final tightening pass.
A complete toilet seat kit that bundles bolts, washers, nuts, and sometimes bumpers simplifies this process considerably. Everything in the fixing for toilet seat assembly is sized to work together, eliminating the guesswork of mixing parts from different packages.
Replacing a Broken or Worn Hinge
Hinge replacement is slightly more involved because the hinge connects to both the seat body and the bowl mounting system - two attachment points instead of one. The specific method depends on how your hinges attach to the seat. Some toilet seat hinge replacement parts use a clip-on design where plastic tabs snap into slots molded into the seat. Others screw directly into the seat body with small wood-style screws or machine bolts. A third type uses toilet seat clips that lock into a channel along the seat's rear edge.
Regardless of attachment style, follow this sequence:
- Remove the seat from the bowl. Loosen the mounting bolts or release the quick-release mechanism and lift the entire seat assembly away. Working with the seat off the bowl gives you far better access to the hinge connection points.
- Detach the old hinge from the seat. For clip-on hinges, press the release tab and slide the hinge off its mount. For screw-mount hinges, remove the screws securing the hinge to the seat body - these are usually small Phillips-head screws recessed into the underside of the seat near the rear edge. For hinges held by toilet seat clips, depress the clip mechanism and pull the hinge free from its channel.
- Compare the old and new hinges. Lay them side by side before installing. Confirm that the mounting hole spacing, clip width, screw pattern, and post diameter match exactly. Even a millimeter of difference in post spacing can prevent the hinge pin from seating properly, creating a loose pivot that defeats the purpose of the replacement.
- Attach the new hinge to the seat. Reverse the removal process - clip, screw, or slide the new hinge into position on the seat body. Ensure it sits flush with no gaps between the hinge plate and the seat surface. If the hinge uses screws, tighten them firmly but avoid overtorquing into plastic, which strips the screw holes.
- Remount the seat to the bowl. Set the seat back onto the bowl, align the hinges with the mounting holes, and secure with bolts or top-fix anchors as described in the previous section.
- Check alignment and pivot action. Open and close the seat several times. It should swing freely without dragging, catching, or leaning to one side. If the seat tilts, the hinge on the tilting side may not be fully seated - remove and reattach it.
One important note from the reference material worth remembering: specific steps may vary depending on the brand, model, and design of your seat. If your toilet seat attachment came with manufacturer installation instructions, follow those for any brand-specific details that override these general steps.
Replacing Bumpers and Damper Cartridges
Bumper replacement is the simplest of the three procedures - but doing it carelessly leads to bumpers that peel off within weeks. The adhesive bond is only as good as the surface you're sticking to. Here's how to do it right:
- Peel off the old bumpers. Grip the edge of each bumper and pull it away from the seat. If the bumper tears or leaves adhesive residue behind, use a razor blade or plastic scraper to remove the remaining material. Work carefully on porcelain surfaces to avoid scratching.
- Clean the contact surface. Dampen a rag with rubbing alcohol and wipe each bumper location thoroughly. The alcohol dissolves residual adhesive and removes oils from your fingers that would weaken the new bond. Let the surface dry completely before proceeding.
- Apply the new bumpers. Peel the adhesive backing from each replacement bumper and press it firmly into position. Hold pressure for ten to fifteen seconds per bumper to set the adhesive. Place the seat face-down on a towel for an hour if possible - letting the adhesive cure without load produces a stronger, longer-lasting bond.
Damper cartridge replacement is a different process entirely, but still manageable without professional help. Soft-close damper cartridges are housed inside the hinge body, and the replacement method varies by design. The most common approach works like this:
- Remove the seat from the bowl and access the hinge assembly.
- Locate the damper cartridge. On most designs, the cartridge is a cylindrical component visible inside or at the end of the hinge barrel. Some slide out from the side, others click into a socket, and a few twist out with a quarter turn.
- Extract the old cartridge. Slide, unclip, or twist the worn damper out of the hinge body. Take note of its orientation - dampers installed backward may provide resistance in the wrong direction or not engage at all.
- Insert the new damper cartridge. Slide or click the replacement cartridge into the same position, matching the orientation of the old one. You should feel a firm click or stop when it seats correctly.
- Test the slow-close action. Lift the lid to its full open position and release it. It should descend slowly and evenly, reaching the closed position in roughly five to eight seconds. If one side closes faster than the other, double-check that both cartridges are fully seated and oriented the same way.
Remember to replace both damper cartridges at the same time, even if only one has failed. Mismatched damping creates uneven descent that stresses hinge pins and shortens the life of the newer cartridge.
With fresh hardware installed - whether bolts, hinges, bumpers, or dampers - the immediate repair is complete. But the bigger question still lingers for many homeowners: was replacing individual components the right call, or would a brand-new seat have been the smarter investment?
Repair vs Replace and Where to Find Quality Parts
It's a fair question - and the answer depends on a few practical factors that go beyond the cost of the parts themselves. Sometimes swapping a single component saves real money and keeps a perfectly good seat in service for years. Other times, clinging to worn-out hardware is the more expensive choice in the long run. Here's how to tell the difference.
When Repairing Makes More Sense Than Replacing
If the seat body and lid are structurally intact - no cracks, no deep staining, no warping - there's rarely a good reason to throw the whole thing away. A bolt kit or hinge set typically costs a fraction of what a new toilet seat and accessories would run you. Repair is the clear winner in these scenarios:
- Stripped or corroded bolts - a fresh mounting kit restores stability for just a few dollars.
- Worn or missing bumpers - replacement bumper packs cost next to nothing and install in under five minutes.
- A single broken hinge on an otherwise solid seat - swapping the hinge assembly is far more economical than replacing the entire unit, especially on premium slow-close models where the seat itself is expensive.
- A failed damper cartridge - restoring the soft-close feature with a new cartridge saves you from buying a whole new soft-close seat.
In each of these cases, the right toilet seat spare parts extend the seat's useful life by years. Spending ten dollars on fasteners beats spending sixty or more on a new seat that didn't need buying.
When Full Replacement Is the Better Investment
Repair stops making sense when the problems multiply or when the seat itself has degraded past the point of practical restoration. Consider replacing the entire seat if you're dealing with any of these situations:
- Cracked seat body or lid - structural fractures in the seating surface can't be reliably repaired, and they worsen under load.
- Multiple failing components at once - if the hinges, bolts, and bumpers all need attention simultaneously, the combined cost and effort of sourcing individual toilet seat accessories starts approaching the price of a new seat anyway.
- Yellowed, stained, or aesthetically worn seats - no amount of hardware replacement fixes cosmetic deterioration.
- Seats older than a decade - finding compatible toilet seat spare parts for discontinued models becomes increasingly difficult, and material fatigue makes future failures more likely even after individual repairs.
For aging american standard replacement toilet seats or similarly dated models from other brands, a full swap often delivers better value than chasing down obsolete replacement parts american standard toilet hardware stores may no longer stock.
Sourcing Quality Fixing Hardware and Kits
Where you buy matters almost as much as what you buy. Generic kits from a big-box store will handle basic repairs, but brand-specific or professional-grade hardware requires more targeted sourcing. Here are the most reliable channels, organized by the type of buyer:
- Tianyun Toilet Seat Fixing Systems - a specialized resource for sanitaryware manufacturers and replacement-hardware buyers seeking professional-grade solutions. Their catalog includes top-fix kits, quick-release hinge bases, lift-off kits, and custom fixing systems engineered for OEM toilet seat assemblies and aftermarket repairs alike.
- Manufacturer direct or authorized dealers - the best path for proprietary parts. If you need replacement parts american standard toilet models require, or Kohler-specific hinges, start with the brand's official parts portal or an authorized distributor.
- Home improvement retailers - stores like Lowe's carry universal mounting kits, bumper packs, and basic hinge sets that fit the majority of standard residential seats. Browsing toilet seats at Lowe's also gives you the option to compare repair costs against full replacement pricing side by side. Lowe's toilet seats inventory typically covers both round and elongated options from major brands, making it a convenient one-stop comparison point.
- Online plumbing specialists - sites dedicated to plumbing parts often stock harder-to-find toilet seat accessories that general retailers skip, including damper cartridges, stabilizer kits, and model-specific hinge assemblies.
Whichever channel you choose, bring your measurements, model number, and photos from the identification checklist covered earlier. The more information you hand a retailer or search engine, the faster you'll land on exactly the right component - no returns, no guesswork, and no second trip to the store.
A toilet seat repair rarely makes for exciting conversation. But the satisfaction of silencing a wobbly seat with a two-dollar bolt kit, or restoring a soft-close glide with a ten-dollar damper cartridge, is the kind of small household win that pays for itself every single day you sit down.
Frequently Asked Questions About Toilet Seat Replacement Parts
1. What are the most common toilet seat replacement parts I might need?
The most frequently replaced components include mounting bolts and wing nuts (which loosen or corrode over time), rubber or silicone bumpers (which flatten or fall off), hinge assemblies (which crack from repeated stress), damper cartridges (which lose their slow-close function), and washers (which compress and stop sealing properly). A standard mounting hardware kit that bundles bolts, nuts, and washers covers the majority of loose-seat repairs, while bumper packs and hinge sets address cushioning and pivot issues respectively.
2. How do I know if my toilet seat hinge is replaceable or if I need a whole new seat?
Check the back of your seat where it meets the hinge mechanism. If you can see visible screws, clips, or a seam separating the hinge from the seat body, the hinge is a standalone component that can be swapped independently. If the hinge flows seamlessly into the seat with no fasteners or separation point, it is an integrated design molded directly into the seat. Integrated hinges cannot be replaced on their own - a crack in one means a full seat replacement is necessary.
3. What is the difference between top-mount and bottom-mount toilet seat hardware?
Bottom-mount hardware uses bolts that pass through the bowl from above and are secured with wing nuts from underneath, requiring you to reach behind and below the toilet. Top-mount (top-fix) systems use expanding anchors or threaded inserts that grip inside the mounting holes and are tightened entirely from above the bowl. Top-fix systems install faster, require fewer tools, resist loosening better, and are easier to remove later. Many standard toilets with open mounting holes can be upgraded from bottom-mount to top-fix using compatible kits, such as those offered by Tianyun's toilet seat fixing systems.
4. How do I remove a corroded or stuck toilet seat bolt without cracking the porcelain?
Start by spraying penetrating oil on the nut-to-bolt junction and waiting 15 to 20 minutes. Then try turning the nut with adjustable pliers or a deep socket wrench while holding the bolt head from above with a screwdriver. If the nut edges are too rounded, use a bolt-grip extraction socket. When nothing else works, cut through the bolt shaft with an oscillating multi-tool or hacksaw blade, keeping the blade against the metal and away from the porcelain. Always direct force at the hardware, never the ceramic bowl.
5. Are toilet seat replacement parts universal or brand-specific?
It depends on the brand and model. Bolt-hole spacing is generally standardized at approximately 5.5 inches center to center across most residential toilets, so universal mounting bolt kits often fit. However, hinge designs vary significantly between manufacturers. Kohler frequently uses proprietary quick-release mechanisms requiring OEM parts, American Standard hinges differ across model lines, and Church/Bemis seats tend to accept universal components more readily. Always record your toilet and seat model number and measure bolt diameter and hinge dimensions before purchasing replacement parts.
Apply This Insight to Your Project
Tell us what you are building and how the topic “Toilet Seat Replacement Parts Decoded: From Stuck Bolts to Perfect Fit” relates to your application. Our engineering team can help evaluate the next step.