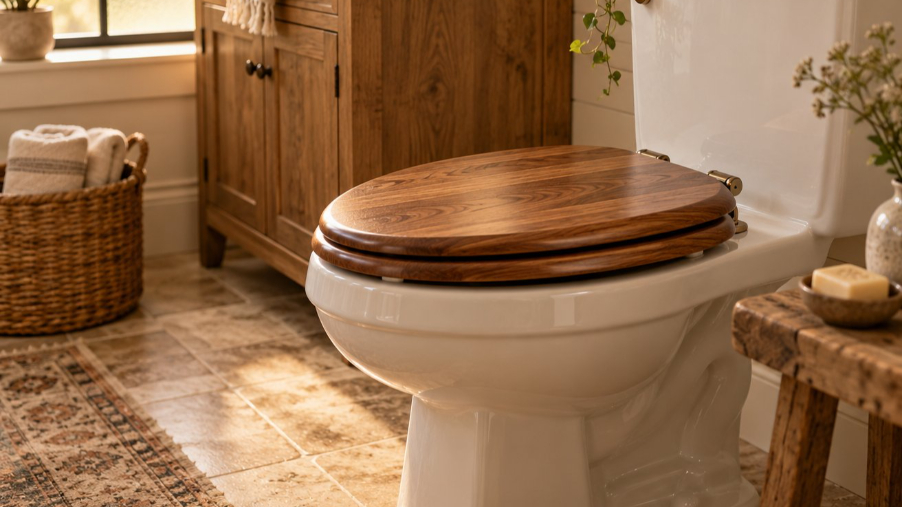
What Is a Top Fixing Toilet Seat and Why It Matters
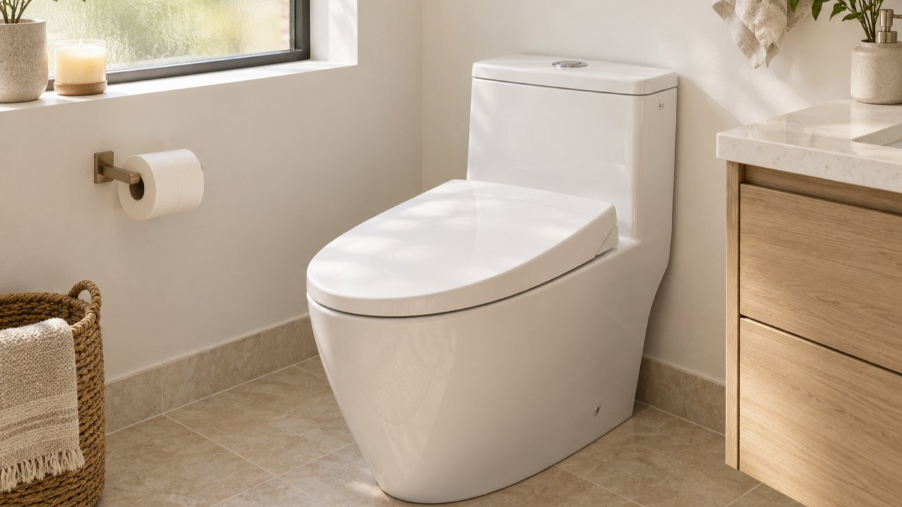
Ever tried reaching underneath your toilet to tighten a bolt and found... nothing? No wing nut, no threaded rod, no access at all. You're not imagining things. Many modern toilets — particularly wall-hung, back-to-wall, and concealed-cistern models popular in UK and European bathrooms — are designed so the underside of the bowl is completely sealed off. That means you cannot secure a seat from below the way your parents probably did.
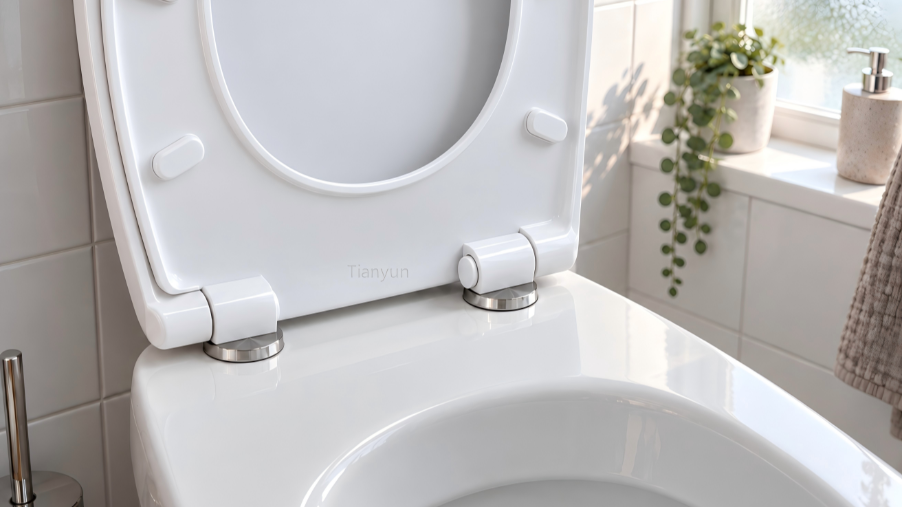
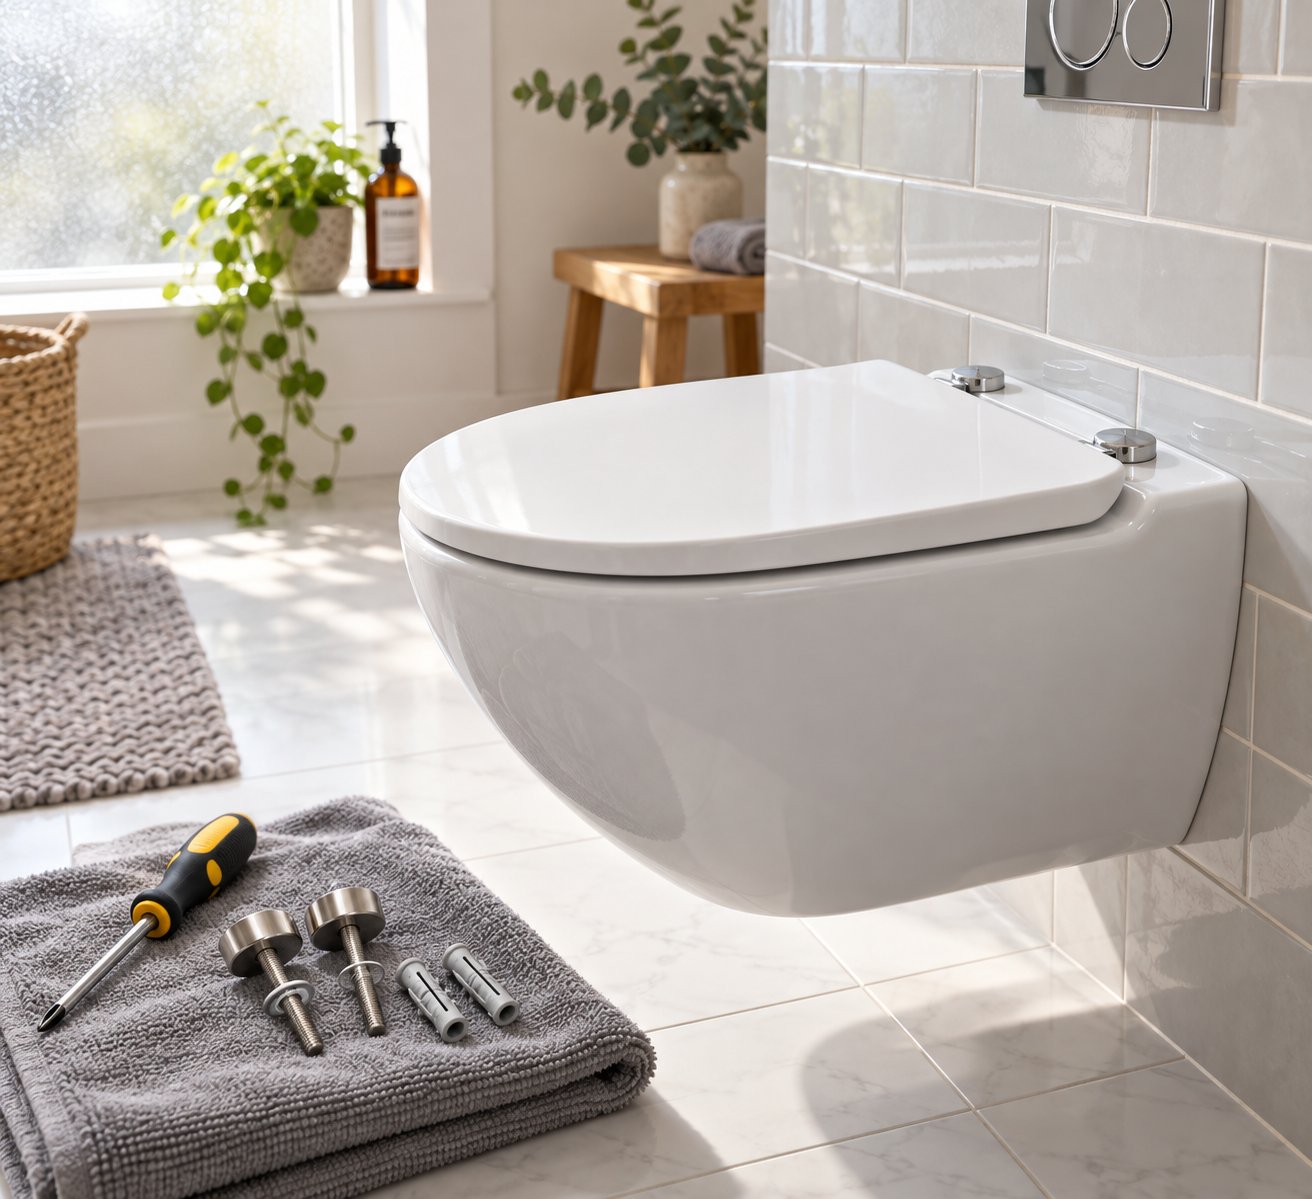
This is exactly where a top-fixing toilet seat comes in. Instead of passing bolts through the bowl and fastening them underneath with a wing nut (the traditional bottom-fix approach), a top-fix seat is secured entirely from above. Special expansion bolts or rubber anchors drop into the ceramic mounting holes and, when tightened, spread outward to grip the inside walls of those holes. The result is a firm, stable hold — no underside access required.
If you've been searching for how to fit a top fixing toilet seat and found vague or incomplete advice, this guide walks you through every step. Whether you say "fit" or "install," the process is the same, and we've written this for a UK and international audience alike.
What Makes a Top Fixing Seat Different
The core mechanism is surprisingly simple. Imagine a rubber plug sitting inside a ceramic hole. As you turn the bolt clockwise from above, the plug compresses vertically and expands sideways, pressing firmly against the inner wall of the hole. That outward pressure is what locks everything in place — no nuts underneath, no tools needed below the bowl. It's a blind-fixing system, and it works remarkably well when matched to the correct hole size.
With a standard bottom-fix seat, bolts pass all the way through the bowl's mounting holes and a wing nut is hand-tightened from underneath. That system is straightforward on older, open-back toilets. But if you own a skirted or enclosed toilet, bottom-fix hardware simply cannot reach. So how do you fix a toilet seat on one of these models? The answer is always a top-fix kit.
Who Needs This Guide
You'll find this guide useful in several common scenarios:
- Replacing a broken or cracked seat — if you need to how to remove toilet seat hardware that's worn out and fit a fresh one in its place.
- Upgrading to a soft-close model — many premium seats, including options like a Mayfair by Bemis toilet seat, use top-fix fittings as standard.
- Fitting a seat on a brand-new toilet — newly installed wall-hung or back-to-wall bowls often arrive without a seat, and the rim is your only access point.
No visible screws does not mean a screwless seat — it usually means a concealed top-fix design.
Regardless of why you need to how to replace toilet seat fittings, the entire job takes just 15 to 30 minutes with the right kit and a basic screwdriver. No plumber, no power tools, and no awkward crawling around the base of the toilet.
The real secret to a seat that stays tight, though, starts before you pick up a single tool — it begins with correctly identifying your toilet's fixing type and measuring the mounting holes.
Step 1 — Identify Your Toilet Seat Fixing Type
Picking up the wrong fixing kit is the single fastest way to waste an afternoon. A top-fix kit won't work on a toilet that needs bottom-fix hardware, and vice versa — the mechanisms are fundamentally different. So before you spend a penny or unbox anything, a quick visual check tells you exactly what you're dealing with.
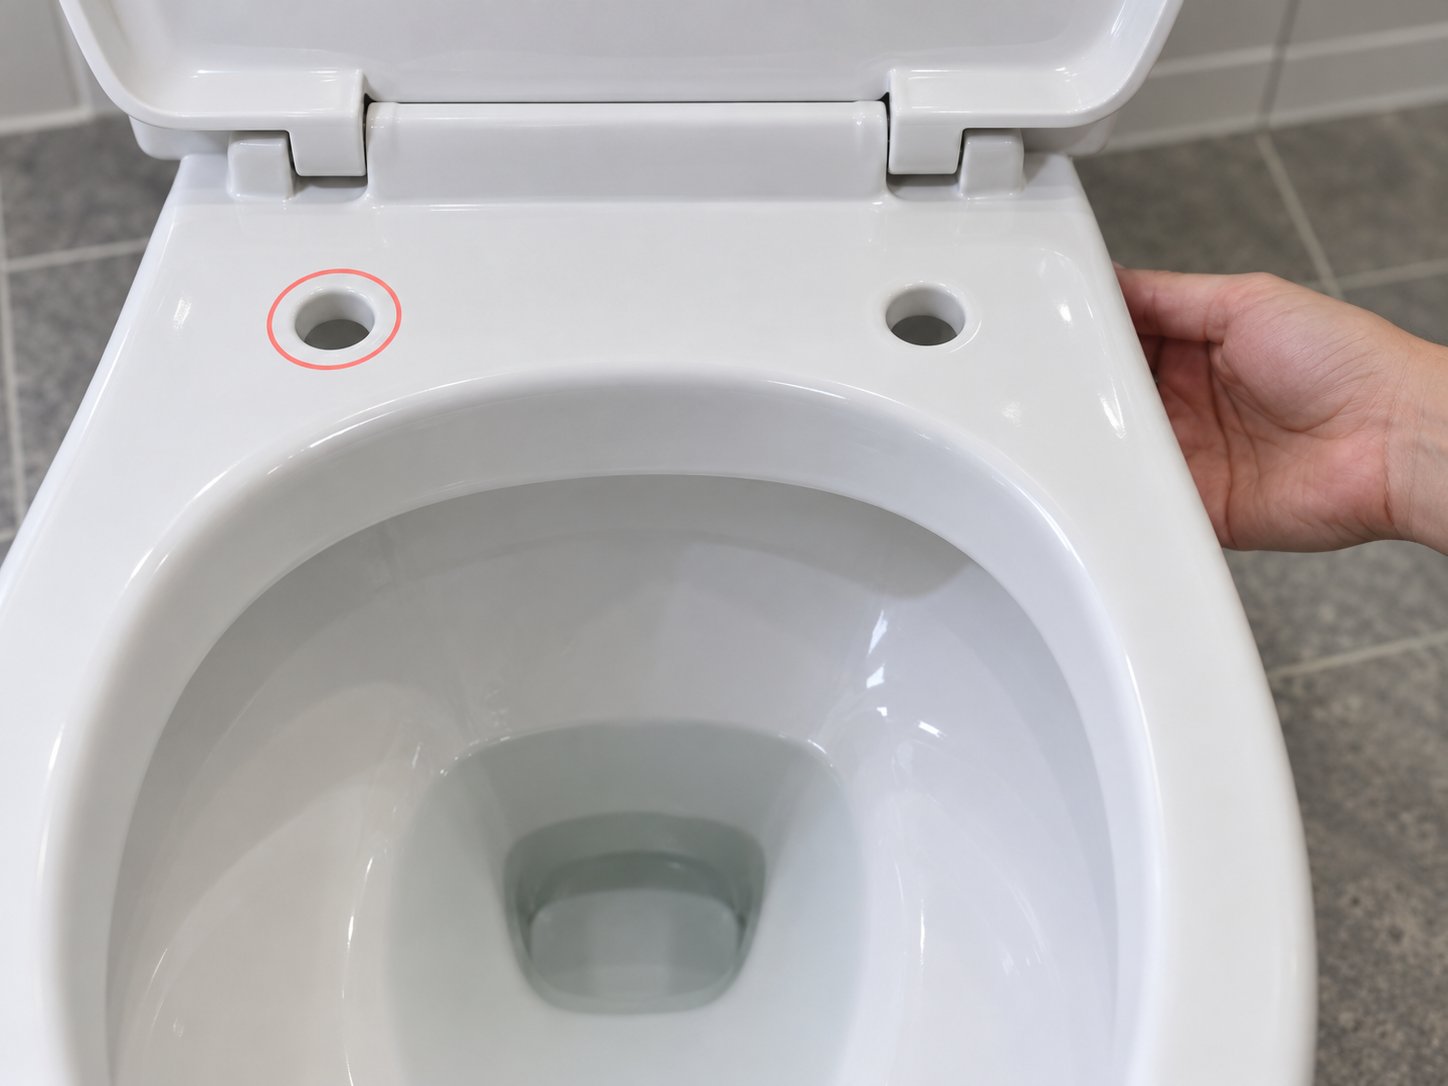
Lift the existing seat (or the lid, if the seat is already missing) and look at the back of the bowl rim, right where the hinges sit. You'll see two holes in the ceramic — these are the mounting holes. What you do next is simple: reach underneath the bowl, behind those holes, and feel around.
- If you can feel bolt ends, wing nuts, or threaded rods protruding from the underside, you have a bottom-fix toilet.
- If the underside is smooth, sealed, or completely inaccessible — nothing to grab, nothing to turn — you have a top-fix toilet.
That ten-second touch test is the most reliable way to know how to change toilet seat hardware correctly. Wall-hung, back-to-wall, and skirted toilets almost always require top-fix fittings because their enclosed designs leave no access beneath the bowl. Classic close-coupled and open-back models, on the other hand, typically use the bottom-fix method. As Drench's toilet seat guide notes, the fixing type has to match your toilet regardless of which seat you've chosen — get it wrong, and there's simply no way around it.
How to Tell If You Have a Top Fix or Bottom Fix Toilet
Still unsure? The table below lays out the key differences side by side so you can confirm your fixing type at a glance.
| Feature | Top Fix | Bottom Fix |
|---|---|---|
| Visible hardware underneath the bowl | None — underside is sealed or inaccessible | Wing nuts, bolts, or threaded rods visible below the rim |
| Bolt direction | Bolt threads downward into the ceramic hole from above | Bolt passes through the hole and extends below the bowl |
| Tightening method | Expansion plug or rubber anchor grips inside the hole; tightened entirely from above | Nut or wing nut secured from underneath |
| Common toilet styles | Wall-hung, back-to-wall, skirted, concealed-cistern | Open-back, close-coupled, traditional |
| Tools needed below the bowl | None | Spanner or fingers to hold the nut |
If your toilet falls into the top-fix column, every step in this guide applies directly. If it's a bottom-fix model, the process for how to install a toilet seat differs — you'll tighten from underneath rather than relying on expansion anchors.
Check the Mounting Hole Diameter and Depth
Here's the step most people skip — and it's the one responsible for the majority of toilet seat replacement failures. Not all mounting holes are the same size. Ceramic manufacturers use different moulds, and hole dimensions can vary from one brand or model to the next. Beewill's compatibility research confirms that mounting-hole diameter, spacing, and fixing systems are not universally identical, even within the same market.
You need two measurements before buying a fixing kit:
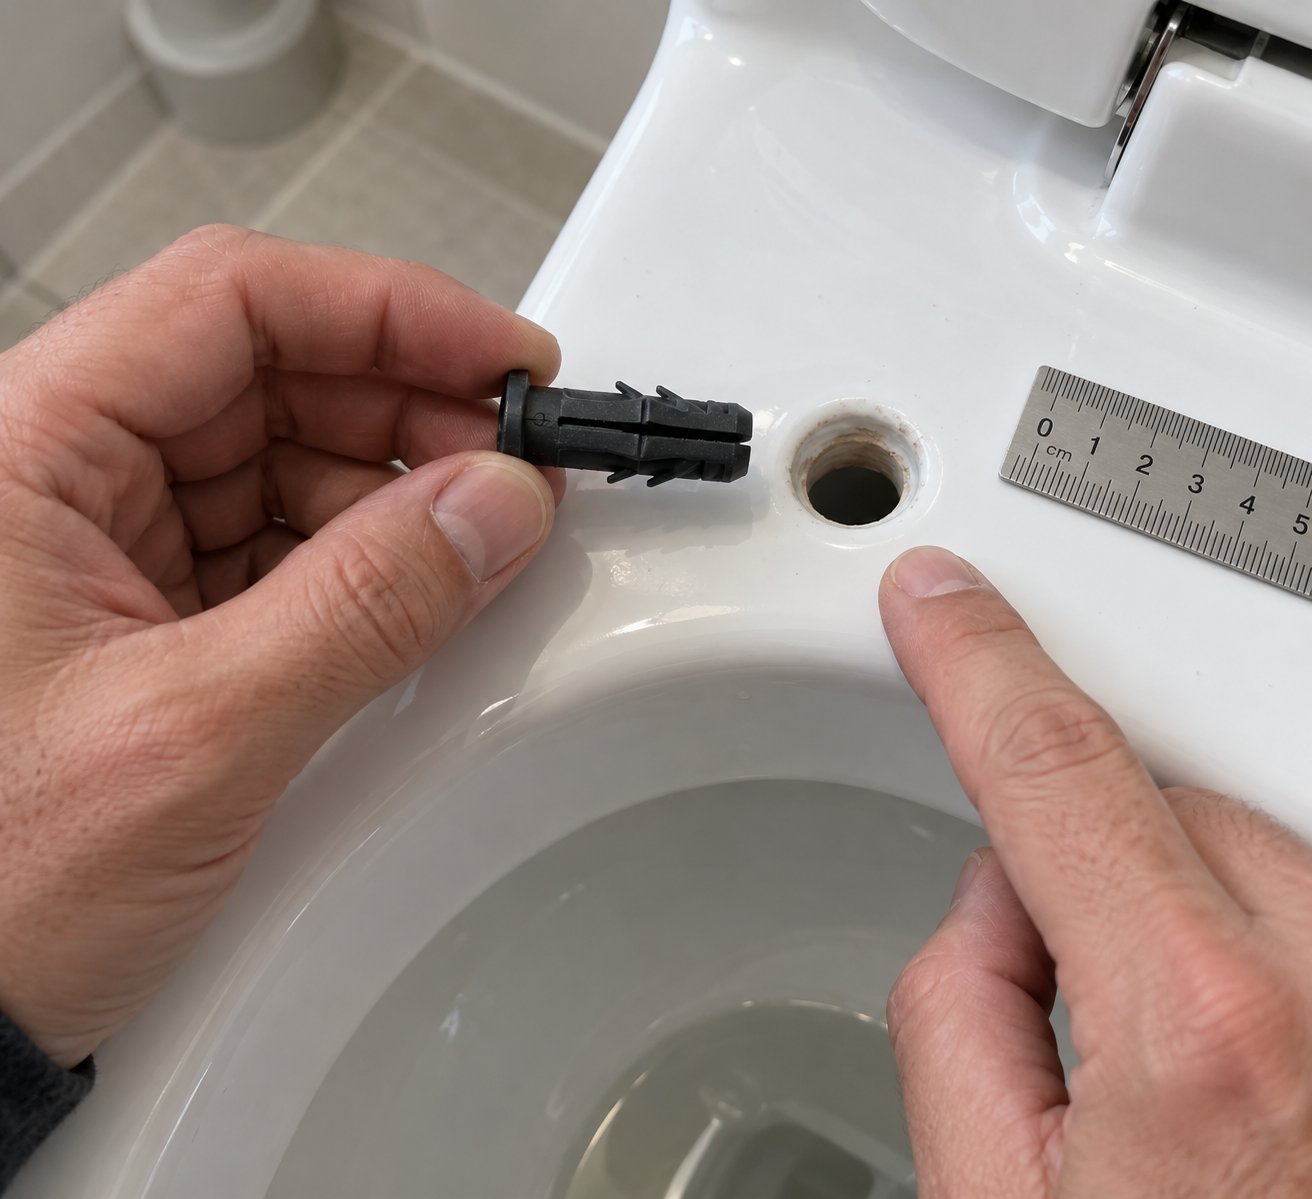
- Hole diameter — Common sizes fall roughly between 15 mm and 20 mm, but yours may sit outside that range. Use a ruler or, ideally, a calliper placed across the opening for an accurate reading.
- Hole depth — Drop a pencil or thin wooden dowel into the hole and mark where it sits level with the rim. Pull it out and measure the inserted length. This tells you how much room the expansion plug has to sit and spread.
Why does this matter so much? An expansion plug that's too wide won't slide into the hole at all. One that's too narrow won't create enough outward pressure to grip — and the seat will wobble from day one. A plug that's longer than the hole is deep will stick out above the rim, preventing the hinge from sitting flat. Each of these mismatches leads to the same frustrating outcome: a seat that refuses to stay tight.
Jot your measurements down before you shop. When comparing fixing kits, look for the plug's expansion range (often printed on the packaging or product listing) and confirm it covers your hole diameter. Match the bolt length to your hole depth, leaving enough thread above for the washer and hinge bracket.
With your fixing type confirmed and your hole dimensions recorded, you have everything you need to choose the right kit — and that's exactly what comes next.
Step 2 — Gather Tools and Check Your Fixing Kit
You've confirmed your toilet needs a top-fix seat and you've recorded the mounting hole dimensions. The temptation now is to rip open the packaging and start threading bolts — but a two-minute kit inspection saves real headaches halfway through the job. Missing a single washer or receiving the wrong plug diameter means stopping everything, possibly mid-installation, to source a replacement.
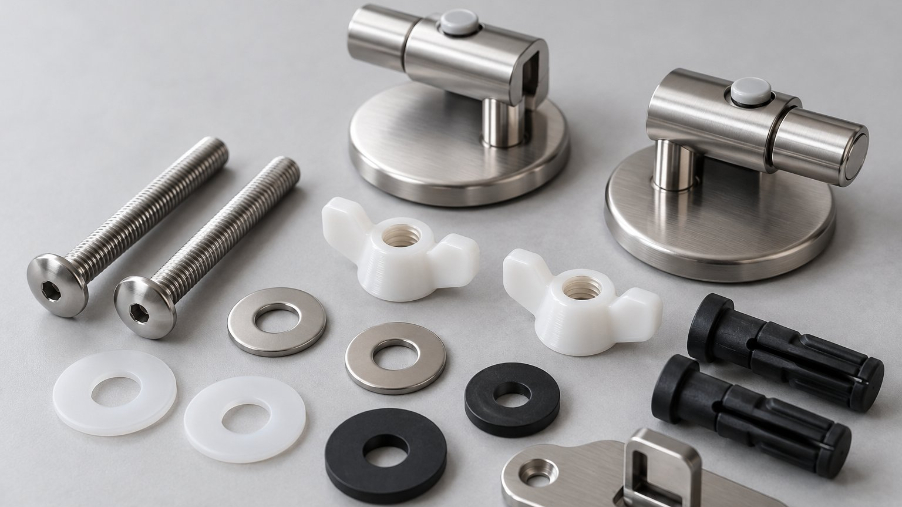
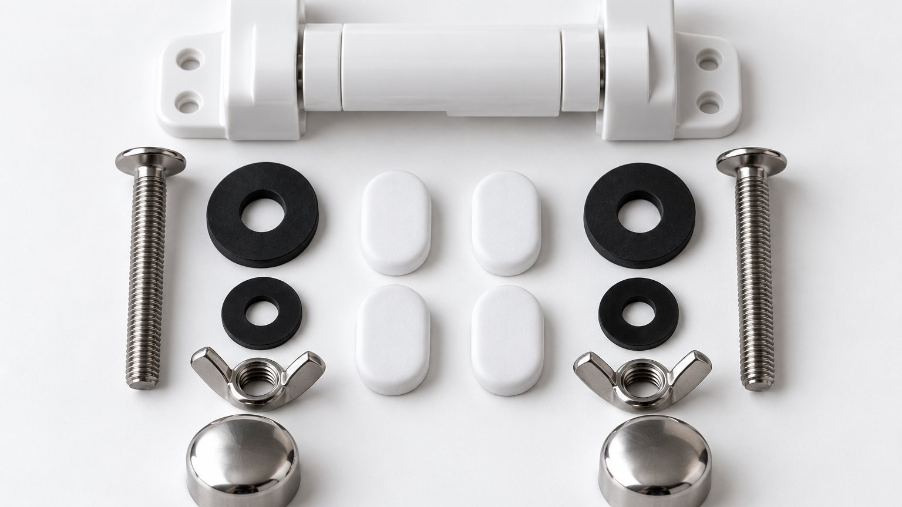
Open the box and lay every piece out on a clean towel beside the toilet. A typical top-fixing seat kit contains a small but specific set of components, and each one plays a distinct role in the finished assembly. Here's what you should find:
- Top-fix bolts (x2) — These are the main fasteners, usually made of stainless steel or zinc-plated metal, with either a slotted or Phillips head for screwdriver access from above.
- Expansion rubber anchors or plastic expanding plugs (x2) — The heart of the top-fix system; these slide onto the bolt end and, when compressed by tightening, spread outward to grip the inside wall of the ceramic mounting hole.
- Flat washers (x2) — Positioned between the bolt head and the hinge bracket to distribute clamping force evenly across the plastic, preventing stress cracks in the hinge.
- Decorative screw caps (x2) — Snap or press over the bolt heads once the seat is secured, giving a clean, finished look and keeping moisture out of the bolt recess.
Some kits also include spare anchors or rubber gaskets that sit between the hinge bracket and the ceramic rim — a nice touch that dampens vibration and protects the porcelain surface. If your kit came with parts you don't recognise, check the manufacturer's instruction sheet before discarding anything. What looks like a spare could actually be an adapter sleeve for wider holes.
Essential Tools You Will Need
Good news: learning how to install toilet seat hardware with a top-fix kit requires no power tools at all. Everything is done by hand or with basic household items. Gather the following before you begin:
- Flat-head or Phillips screwdriver — Match the blade type to the bolt head in your kit. Using the wrong profile strips the slot, making future removal a nightmare.
- Adjustable spanner or pliers — Rarely needed, but helpful if you need to hold the bolt shaft steady while turning the head. Wrap the jaws in tape to avoid scratching chrome-finish bolts.
- Tape measure or calliper — You've already measured the holes, but keep this handy to double-check hinge spacing and alignment during fitting.
- Cloth or old towel — Protects the porcelain rim from tool scratches and gives you a clean surface to lay parts on.
- Household antibacterial cleaner — The mounting area under an old seat is usually far grimier than you'd expect. A quick clean before fitting the new seat ensures the hinge bracket sits flat and the rubber gasket (if included) seals properly.
That's the entire toolkit. If you've ever wondered how to change a toilet seat without calling a tradesperson, this short list is exactly why it's one of the simplest bathroom upgrades you can tackle solo.
Choosing the Right Fixing Kit for Your Toilet
Here's where many DIYers trip up: assuming every top-fix kit fits every top-fix toilet. It doesn't. Three specifications must align between the kit and your bowl, or the seat will either refuse to fit or never stay tight.
- Hole diameter vs. plug expansion range — The expansion plug has a minimum and maximum diameter it can grip. If your ceramic holes measure 18 mm and the plug only expands to 16 mm, it will spin freely inside the hole without locking.
- Bolt length vs. hole depth — A bolt that's too short won't allow the plug to sit deep enough in the hole; too long, and the plug bottoms out before the hinge bracket is clamped against the rim.
- Hinge-hole spacing — The distance between the two mounting holes on the bowl must match the adjustment range of the seat's hinge brackets. Most top-fix seats offer a sliding adjustment window, but it's not unlimited.
Purpose-built options like Tianyun's Top-Fix Toilet Seat Fixing Kits are designed specifically for concealed-fixing designs where access beneath the bowl is limited, offering expansion fixing options installed entirely from above. These kits are especially useful for manufacturers and hardware sourcing teams who need to specify the correct mounting components for a range of compatible toilet models. Even so, individual buyers should verify their hole diameter, depth, and fastener specifications against the kit's stated range before committing — no top-fix kit is truly one-size-fits-all.
If you're unsure how do you remove a toilet seat with an existing top-fix setup, having the new kit in hand actually helps. Comparing the old and new bolt diameters side by side tells you instantly whether the replacement is compatible with the same holes. A mismatch at this stage is easy to solve with a return or exchange; a mismatch discovered mid-installation is a much bigger frustration.
With every component accounted for and the right tools within arm's reach, the actual fitting process can begin — starting with removing whatever's currently bolted to the bowl.
Step 3 — Remove the Old Top Fixing Toilet Seat
Removing a bottom-fix seat is intuitive — reach underneath, unscrew the wing nut, pull the bolt out. A top-fix seat? Not so obvious. The fasteners are hidden, the expansion plug sits locked inside the ceramic hole, and there's nothing to grip from below. Handle it the wrong way and you risk snapping the bolt, deforming the plug, or — worst case — cracking the porcelain. The right approach is straightforward, but it does require a bit of patience and the correct sequence.
Locate and Open the Hinge Covers
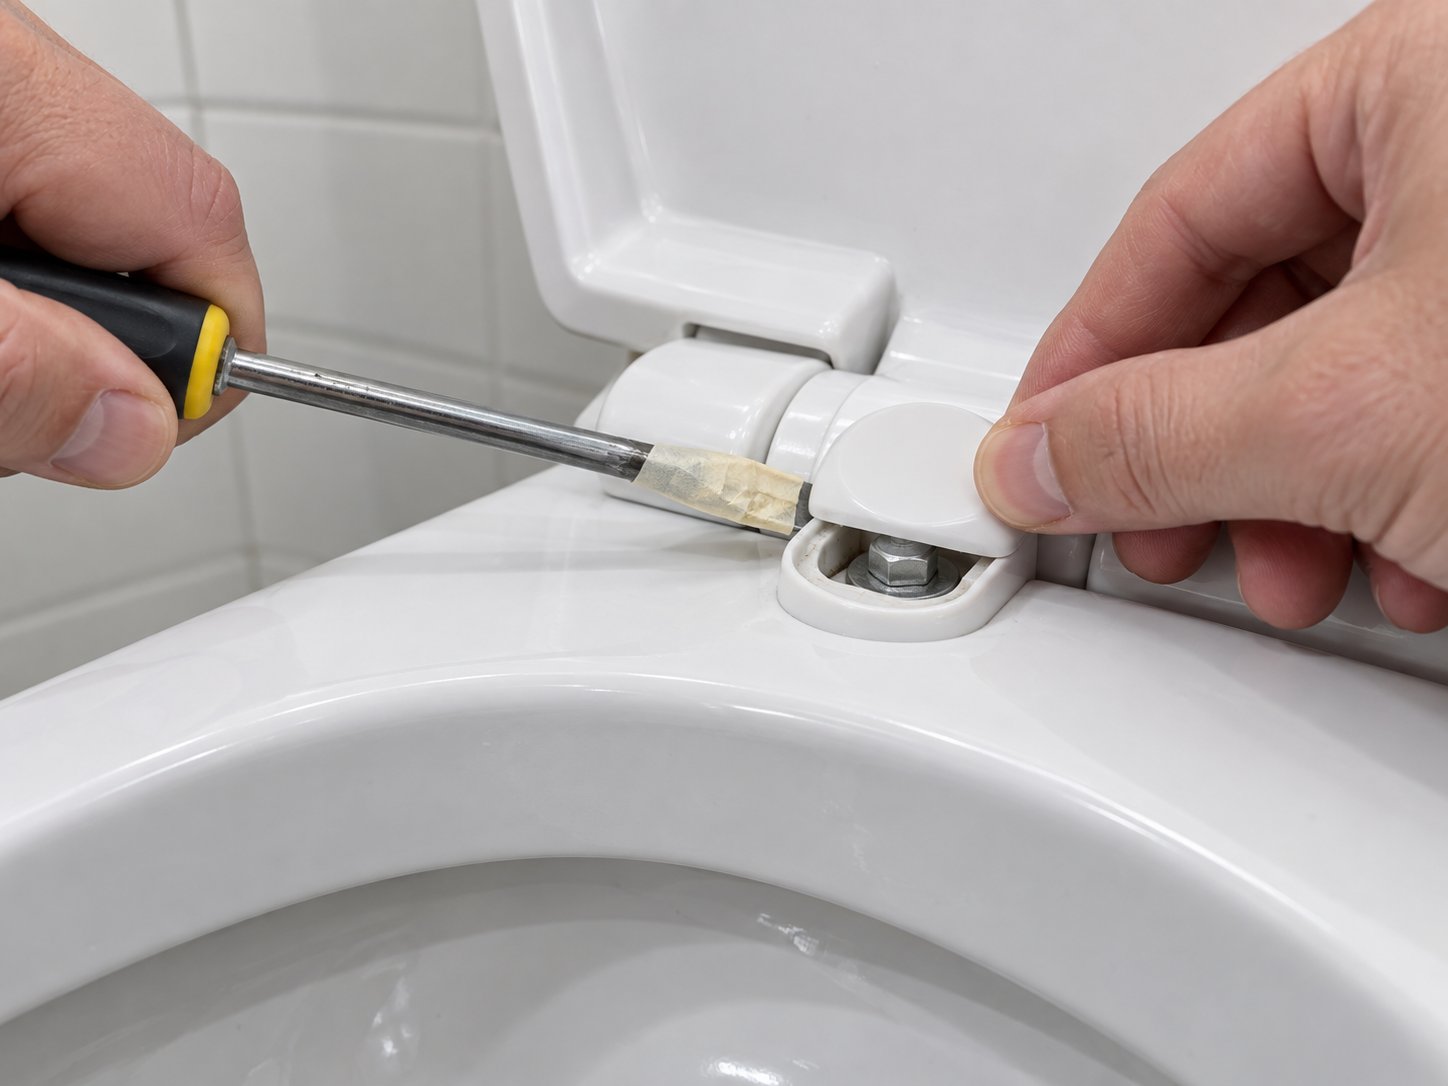
Start by lifting the seat lid fully upright and looking at the hinge area where the seat meets the back of the bowl rim. You'll notice small decorative caps — usually round or oval — sitting over each bolt head. These caps serve a dual purpose: they conceal the fixing for a cleaner look and keep moisture from reaching the bolt threads.
Most caps either flip up on a small hinge or pop off with gentle leverage. Here's the trick to opening them without leaving marks: wrap the tip of a flat-head screwdriver in a single layer of masking tape or electrical tape. Slide the padded tip under the edge of the cap and prise it upward gently. The tape prevents the metal blade from scratching the plastic or chrome-plated surface. If the cap is particularly stiff — years of grime can act like glue — a few drops of warm soapy water around the seam loosen things up quickly.
Once both caps are open (or removed), you'll see the bolt heads sitting in their recesses. Check the slot type — most top-fix bolts have either a flat (slotted) or Phillips (cross-head) drive. Match your screwdriver to the bolt before applying any force. Using the wrong blade profile is a common reason bolt heads strip, and a stripped head turns a five-minute job into a much longer ordeal.
Unscrew the Top-Fix Bolts
Place your screwdriver firmly into the bolt head and turn anticlockwise (that's counterclockwise if you're reading from outside the UK). As you turn, the expansion plug inside the ceramic hole should hold firm, allowing the bolt to thread out smoothly. You'll feel resistance at first — that's the plug still gripping — and then a gradual loosening as the plug decompresses and releases its hold on the hole wall.
What if the bolt spins freely without actually rising out of the hole? This is the most common frustration when you try to dismantle toilet seat hardware of the top-fix variety. It means the expansion plug is rotating with the bolt rather than staying anchored. Try these fixes in order:
- Apply gentle upward pressure on the seat — Have someone lift the seat slightly while you turn the bolt. This upward tension stops the plug from spinning in place and allows the threads to disengage.
- Grip the plug from below (if possible) — On some semi-enclosed toilets, you can just about reach the underside of the mounting hole with needle-nose pliers. Hold the bottom of the rubber anchor steady while you unscrew from above.
- Wedge a thin blade beside the bolt — Sliding a flat-head screwdriver or butter knife between the bolt shaft and the edge of the ceramic hole creates enough friction to stop the plug from spinning. Be very gentle here to avoid chipping the ceramic.
For bolts that are corroded or completely seized — especially common in bathrooms with high humidity — forcing the issue is the wrong move entirely.
Never force a seized bolt — you risk cracking the porcelain rim, which cannot be repaired.
Instead, apply a generous amount of penetrating oil around the bolt head and into the gap where the bolt meets the ceramic hole. Let it sit for 10 to 15 minutes. CRC Industries recommends allowing sufficient time for the oil to seep into threads and break down corrosion before reattempting removal. After the soak, try turning the bolt anticlockwise again — you'll often find it yields with surprisingly little effort.
If penetrating oil still doesn't free the bolt, one more technique can help: the reverse-and-rock method. Alternate between small clockwise and anticlockwise turns, gradually increasing the range of motion. This back-and-forth breaks the corrosion bond incrementally without concentrating all the force in one direction. It's the same principle mechanics use on seized engine bolts, scaled down for a bathroom fitting.
When every other option fails, a junior hacksaw is your last resort. Slide the blade between the hinge bracket and the ceramic rim, cutting through the bolt shaft slowly and carefully. Protect the porcelain by laying a strip of tape or a thin cloth on the rim surface beneath the saw blade. Work with light, steady strokes — aggressive sawing generates heat and vibration that ceramic doesn't tolerate well. Once the bolt is severed, the seat lifts free and the remaining plug can usually be pushed down through the hole with a pencil or tapped out gently.
Repeat the process for the second bolt. Even if one side came out easily, don't assume the other will cooperate — corrosion is rarely symmetrical, and you may need the oil-and-wait approach on the second fastener too.
Clean the Mounting Area Before Fitting the New Seat
With both bolts free and the old seat removed, resist the urge to immediately install Bemis toilet seat hardware or any other replacement. The exposed rim surface almost certainly has a ring of accumulated grime, mineral deposits, and possibly old rubber residue from the previous expansion plugs. This residue prevents the new hinge bracket from sitting perfectly flat, which introduces a wobble that no amount of tightening will fix.
Spray the rim area — especially around and inside the two mounting holes — with an antibacterial bathroom cleaner. Let it dwell for a minute, then wipe thoroughly with a cloth. For stubborn mineral rings, a non-scratch scouring pad or an old toothbrush works well without risking the glaze. Clear any debris from inside the holes themselves; a cotton bud or rolled-up piece of kitchen paper pushed into each hole removes hidden grime that could interfere with the new expansion plug's grip.
Dry the area completely before moving on. Moisture trapped between a rubber gasket and the ceramic rim encourages mould growth and can cause the hinge bracket to shift over time as the gasket loses friction.
How to unscrew a toilet seat bolt that's been in place for years is, admittedly, the least glamorous part of any bathroom upgrade. But rushing this removal step — or skipping the clean-up — undermines everything that follows. A pristine, dry mounting surface is the foundation of a seat that stays tight for years rather than weeks.
Step 4 — Prepare and Align the Mounting Holes
A clean rim and a correctly removed old seat might feel like enough preparation — but skipping the next few minutes of inspection and alignment is the hidden reason so many freshly fitted seats loosen within weeks. The mounting holes themselves need attention before any new hardware goes in. Think of it this way: you wouldn't hang a new door on damaged hinges and expect it to swing true. The same logic applies to the two small ceramic openings your entire seat depends on.
Clean and Inspect the Mounting Holes
Even if you wiped the rim during removal, the inside of each mounting hole deserves its own focused check. Grab a torch (even your phone's flashlight works) and peer directly into both holes. You're looking for three things:
- Old sealant or adhesive residue — Some previous installations use a bead of silicone around the base of the expansion plug. Peel or scrape away any remnants with a plastic spatula or the edge of an old credit card. Silicone left inside the hole creates a slippery lining that stops the new expansion plug from gripping the raw ceramic wall.
- Rubber fragments from the old plug — Expansion anchors that have been in place for years often leave behind crumbled rubber. Roll a cotton bud around the inner wall to pick up loose material. Even small fragments alter the effective diameter of the hole, making your fresh measurements inaccurate.
- Chips or cracks in the ceramic — This is the critical one. Run a fingertip along the inner rim of each hole and the surrounding glaze on the bowl's top surface. A minor chip — a small flake of glaze missing from the edge — is usually cosmetic and won't affect plug grip because the expansion force acts against the deeper inner wall, not the very lip of the hole. A crack, however, is a different matter entirely.
If you spot a hairline crack radiating outward from the mounting hole into the bowl rim, stop and assess honestly. A cracked rim cannot provide the stable, even compression an expansion plug relies on. Tightening a bolt into a cracked hole risks splitting the porcelain further — and as anyone who has researched how to fix a broken toilet seat mounting point will tell you, cracked ceramic is not a DIY repair. In this scenario, a professional assessment is the safest next step. The toilet may still be usable, but the mounting approach might need to change (for example, bonding a reinforcing plate to the underside of the rim before refitting).
For holes that pass inspection, give each one a final wipe with a dry cloth and confirm they are completely free of moisture. A dry, debris-free hole lets the expansion plug make direct contact with the ceramic — and that direct contact is what generates the friction that holds everything tight.
Test-Fit the Seat for Alignment
Here's a step that takes sixty seconds yet prevents the most frustrating fitting failures: a dry run. Place the new seat on the bowl without inserting any bolts. Simply rest it in position as if it were already installed, with the hinge brackets sitting over the mounting holes.
Look down from above and check two things:
- Do the hinge bolt holes line up with the ceramic mounting holes? — Peer through the holes in the hinge brackets. You should see the ceramic holes directly beneath. If the bracket holes sit off-centre, the bolts will enter the ceramic at an angle, and the expansion plug won't seat squarely — leading to uneven grip and eventual loosening.
- Is the seat centred on the bowl? — Close the lid gently and stand directly in front of the toilet. The seat should overhang equally on both the left and right sides, and the front curve of the seat should follow the front rim of the bowl without jutting out noticeably in either direction.
Many top-fix seats include front-to-back adjustment slots in the hinge bracket rather than a single fixed hole. These elongated slots allow you to slide the entire seat forward or backward by 10 to 20 mm, which is enough to compensate for slight variations between toilet models. If the seat looks too far forward or too far back during your dry run, loosen the hinge bracket's position within its slot and slide it until the alignment looks right.
Once you're happy with the position, mark it. A light pencil line on the ceramic rim at the front edge of each hinge bracket gives you a visual reference point when you come to insert the bolts. Pencil wipes off porcelain effortlessly with a damp cloth afterwards, so there's no lasting mark — just a helpful guide that keeps everything aligned during the real installation.
Wondering how to fix a broken toilet seat that was never properly aligned in the first place? Misalignment is often the root cause. A seat that sits even two or three millimetres off-centre puts unequal stress on the two expansion plugs every time someone sits down. Over months of use, the overloaded side loosens first, and the seat develops a characteristic diagonal wobble. A simple test-fit and pencil mark prevent that entire chain of failure.
What If the Mounting Holes Are Non-Standard?
Most toilets sold in the UK and Europe use mounting holes in the 15 mm to 20 mm diameter range, and the majority of top-fix kits are engineered for that window. But "most" is not "all." If your test-fit reveals that the hinge bracket holes align perfectly yet the expansion plugs in your kit look visibly too small for the ceramic openings, you've hit a compatibility gap.
An expansion plug that cannot contact the inner wall of the hole has no surface to push against — it simply dangles inside, and the bolt will never tighten. In these cases, you have two practical options:
- Source a kit with a larger-diameter expansion plug — Some manufacturers offer plugs rated for holes up to 25 mm. Cross-check your measured diameter against the kit's stated expansion range before purchasing.
- Use a rubber sleeve adapter — These are cylindrical sleeves that line the inside of an oversized hole, effectively reducing its diameter back into the standard range for a regular expansion plug. They're inexpensive and available from most plumbing suppliers.
Conversely, if your holes are narrower than the plug's minimum insertion diameter, do not try to widen them by drilling into the ceramic. Porcelain drill work requires diamond-tipped bits, careful water cooling, and experience — a cracked bowl is the likely outcome of a DIY attempt. Instead, look for a seat with smaller-diameter fixings or consult a professional.
Whether your holes are standard, oversized, or slightly narrow, this preparation step ensures you discover the issue before you're halfway through tightening a bolt that will never hold. With both holes confirmed clean, undamaged, and correctly matched to your kit, the seat is ready for its permanent fixings — and that hands-on installation is the next move.
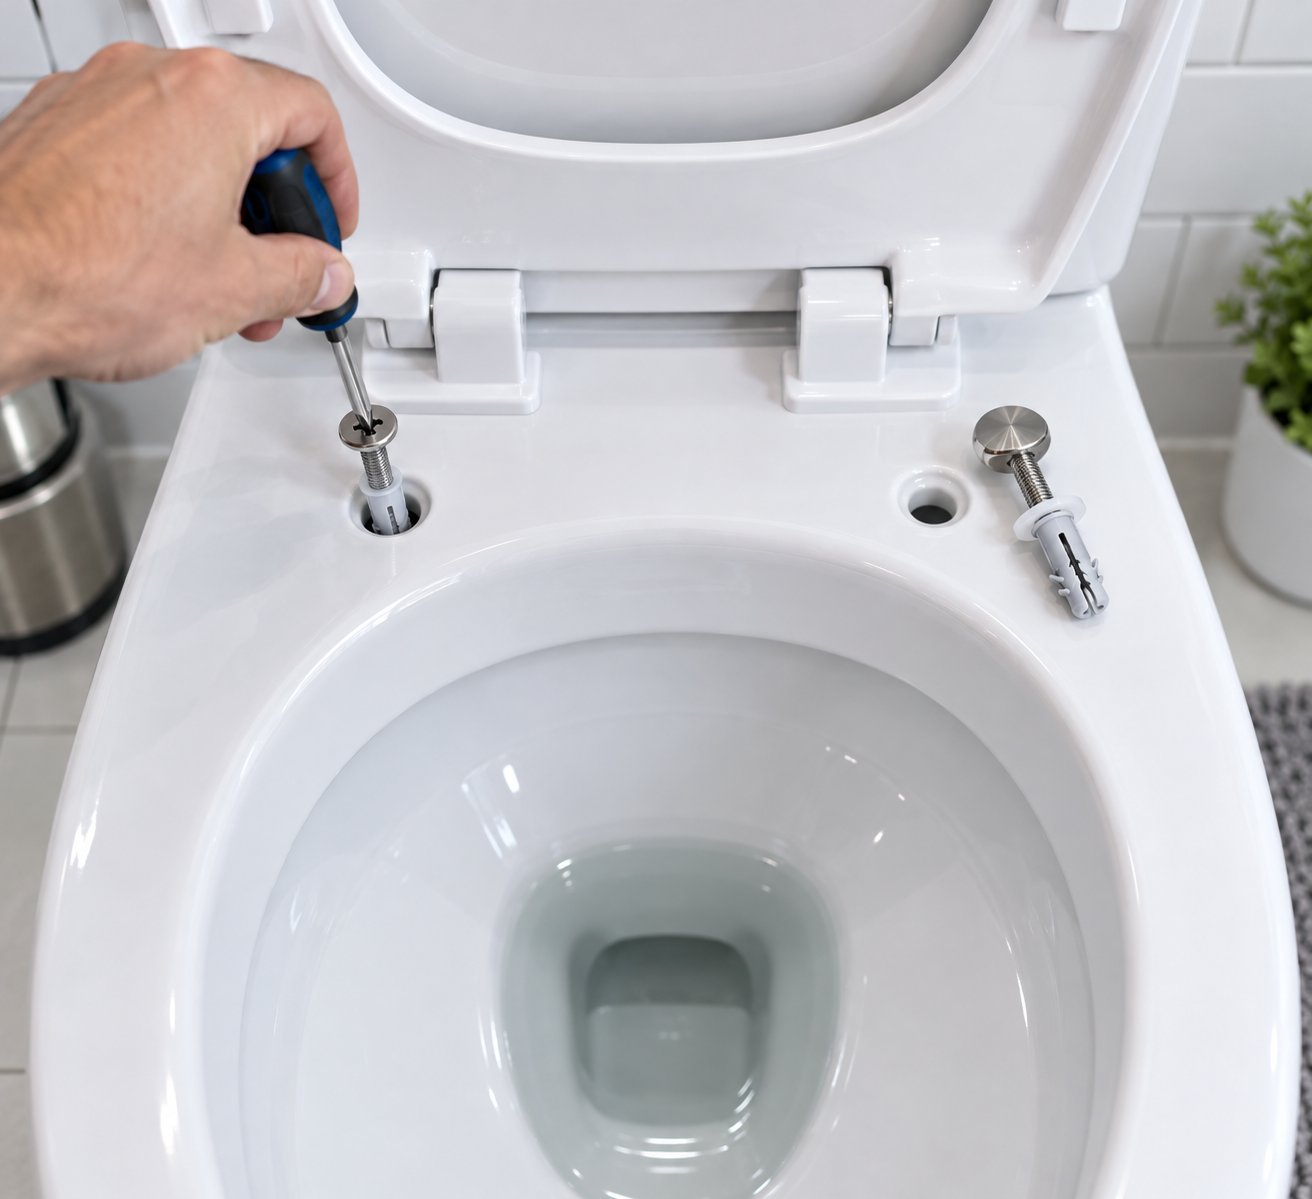
Step 5 — Fit and Secure the New Top Fixing Seat
Clean holes, confirmed alignment, pencil marks on the rim — everything has led to this moment. Replacing a toilet seat with a top-fix design comes down to a specific sequence of moves, and getting them in the right order is the difference between a rock-solid result and a seat that wiggles from day one. The process is entirely manual, entirely from above, and takes less time than you might expect.
Insert the Expansion Plugs and Thread the Bolts
Lay the new seat face-down on a towel so you can access the underside of the hinge brackets. Each bracket has a hole (or adjustment slot) through which the fixing bolt will pass. Assemble the hardware in this order for each side:
- Slide the bolt through the hinge bracket hole from above. The bolt head should sit flush in the recess on the top of the bracket. If your kit includes a flat washer between the bolt head and the bracket, place it now — it distributes clamping pressure and prevents the plastic from cracking under load.
- Thread the washer onto the bolt shaft below the bracket (if a second washer is supplied). Some kits place a rubber cushion washer here to protect the ceramic rim surface when everything is tightened down.
- Push the rubber expansion anchor or plastic expanding plug onto the bolt end. It should slide on snugly but not require force. The plug's wider, flanged end typically faces upward — toward the bracket — so that the expandable section points downward into the ceramic hole.
- Position the seat on the bowl, lining up your pencil marks from the alignment step. Lower each bolt-and-plug assembly straight down into its corresponding ceramic mounting hole. The plug must sit fully inside the hole, below the rim surface, before you apply any tightening force.
Feel each plug drop into the hole with a gentle push. If it resists, check that no debris has fallen back into the opening and confirm the plug's outer diameter is within the hole's range. Forcing a plug that doesn't fit leads to exactly the kind of broken toilet seat bracket scenario you're trying to avoid.
Tighten From Above Using the Correct Technique
This is the step where patience matters most. As the bolt turns clockwise, the expansion plug compresses vertically and spreads outward, pressing against the inner wall of the ceramic hole. That outward grip is your only anchor — there's nothing underneath to catch. Overtighten and the porcelain pays the price; undertighten and the toilet cover seat shifts the first time someone sits down.
Grab the correct screwdriver for toilet seat bolt heads — flat-head or Phillips, matching the slot in your kit — and follow this tightening sequence:
- Hand-tighten the left bolt until you feel the expansion plug begin to resist. Stop as soon as the hinge bracket pulls snug against the ceramic rim.
- Hand-tighten the right bolt to the same point. Both sides should now be lightly anchored, with the seat holding its centred position.
- Switch to the screwdriver. Give the left bolt a quarter-turn clockwise — no more.
- Move to the right bolt and apply the same quarter-turn.
- Repeat one more alternating round if the seat still shifts under light hand pressure. The target is firm resistance, not maximum force.
- Stop immediately once both bolts feel solidly locked and the seat does not move when you press down on either side.
Alternating between left and right in small increments keeps the pressure even across both mounting points. Tightening one side fully before touching the other pulls the seat off-centre and overloads a single expansion plug — a recipe for premature loosening or, worse, cracked ceramic.
Porcelain is strong under compression but brittle under point loads — overtightening by even half a turn can cause a hairline crack.
Screwfix's tightening guide echoes this caution, noting that excessive force can crack the porcelain bowl — damage that cannot be reversed. The hand-tight-plus-quarter-turn rule applies regardless of whether the bolt feels like it could take more. Ceramic doesn't flex or warn you before it fractures; it simply splits.
Purpose-built kits such as Tianyun's Top-Fix Toilet Seat Fixing Kits are engineered with expansion plug tolerances matched to common concealed-fixing hole dimensions, which can reduce guesswork during this critical tightening step. The plugs in these kits are designed to reach their optimal grip within a predictable torque range, helping both professional installers and DIYers avoid the overcorrection that leads to cracked bowls. That said, regardless of which kit you use, always verify hole diameter, depth, and fastener compatibility before committing to installation — tolerances vary between toilet manufacturers, and no single kit covers every possible dimension.
If you've ever looked up how to take off a toilet seat that someone clearly overtightened, you already know the consequences: seized bolts, deformed plugs, and sometimes a spider-web crack radiating from the mounting hole. The screwdriver for toilet seat work should be treated like a finishing tool here, not a power driver. Light, controlled quarter-turns are all it takes.
With both bolts locked in place and the expansion plugs fully gripping, the mechanical work is done. What remains is a final round of adjustments and a real-world stability test to confirm the seat performs as well under body weight as it looks from above.
Step 6 — Adjust, Test, and Finish the Installation
Bolts locked, expansion plugs gripping, hinge brackets flush against the rim — it looks done. But "looks done" and "stays tight under daily use" are two very different things. This final stage is where you transform a mechanically complete fitting into one that genuinely lasts, and it's the step most guides gloss over entirely. A few minutes of careful adjustment and a simple hands-on test tell you whether the seat will hold firm for years or start wobbling within a fortnight.
Centre and Level the Seat
Even with pencil marks and careful alignment, the act of tightening can pull the seat slightly off-centre. That's normal — as each expansion plug compresses and grips, it can draw its side of the hinge bracket a millimetre or two in one direction. The fix is simple, and this is exactly why most top-fix hinges include 10 to 20 mm of front-to-back sliding adjustment built into the bracket design.
Close the lid so it rests flat on the bowl rim. Stand directly in front of the toilet and look down. You're checking three things:
- Does the seat overhang equally on the left and right sides?
- Does the front curve of the seat follow the front edge of the bowl rim without jutting out on one side?
- Does the lid sit flat and level, or does one side appear slightly raised?
If anything looks off, loosen each toilet seat screw by approximately a half-turn — just enough to let the hinge brackets slide within their adjustment slots. Nudge the seat gently into the correct position, then re-tighten using the same alternating quarter-turn method from the previous step. Left bolt, quarter-turn. Right bolt, quarter-turn. Check again. This incremental approach keeps the pressure balanced across both mounting points and avoids the uneven loading that causes premature loosening.
A common mistake at this stage is eyeballing the position with the lid up. The weight distribution of a closed lid shifts the seat's resting position slightly, so always judge alignment with the lid down — that's the state the seat will be in most of the time.
Perform the Stability Test
Visual checks confirm the seat is centred, but only a real-world load test confirms it's actually secure. This is the moment of truth, and it takes about thirty seconds.
Sit down on the seat normally. Don't perch tentatively on the edge — use the seat the way you would any other day. Settle your weight fully, then shift gently from side to side. A correctly fitted top-fix seat should have zero lateral movement. No rocking, no sliding, no clicking sound from the hinges. The seat should feel as though it's part of the toilet itself.
If you detect any sideways shift — even a subtle one — the expansion plugs may not have fully engaged with the ceramic hole walls. Resist the temptation to simply crank the bolts tighter. Instead, remove each bolt entirely, inspect the expansion plug for signs of damage or incomplete expansion, and re-seat the plug deeper into the hole before threading the bolt back in and retightening. A plug that's sitting even a few millimetres above the hole's internal shoulder won't generate enough outward grip, no matter how much torque you apply. Sometimes the fix is as straightforward as pushing the assembly a fraction further into the opening.
Also test the lid's movement. Open it fully and let the soft-close mechanism (if your seat has one) lower it back down. The lid should descend evenly on both sides and come to rest flat against the seat without favouring one corner. Uneven closing usually signals that one bolt is tighter than the other — a half-turn adjustment on the looser side typically resolves it. As Victorian Plumbing's tightening guide notes, both sides need to be tightened to a similar degree to prevent the seat shifting diagonally over time.
Once the seat passes the stability test, snap the decorative hinge caps closed over the bolt heads. Press each cap firmly until you hear or feel a click — this confirms the cap is locked in place and won't pop open during cleaning. If your kit uses screw-on caps rather than snap-fit ones, thread them down gently by hand until snug.
Final Installation Checklist
Before you put the tools away, run through this quick list. Every item should get a confident "yes" — if any one doesn't, revisit that specific area before calling the job complete.
- No lateral wobble — the seat remains perfectly still when weight shifts side to side.
- Lid closes evenly on both sides — no corner lifts or drops lower than the other.
- Hinge caps are flush and fully closed — no exposed bolt heads that could collect moisture or grime.
- No visible gap between the seat and the rim at the back — the hinge brackets sit flat against the ceramic with no rocking.
- Pencil alignment marks wiped away — a damp cloth removes any guide marks left on the porcelain from the earlier fitting steps.
The entire adjustment and testing process adds perhaps five minutes to the job, yet it's the difference between a seat that needs retightening next month and one you forget about entirely — which is exactly the point. If you ever need to know how to uninstall toilet seat hardware down the line (for deep cleaning or a future upgrade), having a properly fitted starting point makes removal far simpler too. Bolts that were tightened correctly, without excess force, come out cleanly instead of seizing.
A solid, stable seat is now in place — but knowing what not to do during the process is just as important as knowing the correct steps. The most common fitting mistakes are easy to make and even easier to prevent.
Common Mistakes to Avoid When Fitting a Top Fix Seat
Every step covered so far — identifying the fixing type, measuring holes, assembling the kit, tightening in quarter-turn increments — exists because someone, somewhere, learned the hard way what happens when you skip it. The fitting process itself is genuinely simple, but the margin for error lives in a handful of avoidable mistakes that turn a 20-minute job into a cracked bowl, a wobbly seat, or a frustrating trip back to the hardware shop.
Some of these errors seem minor in the moment. Others feel like reasonable shortcuts. None of them are worth the consequences. Here are the most common pitfalls — and how to sidestep every one of them.
Overtightening the Bolts
This one deserves top billing because the damage is permanent. Porcelain looks and feels incredibly solid, but it behaves like glass under concentrated point loads. A hairline crack around a mounting hole cannot be filled, glued, or patched in any reliable way — the toilet bowl is compromised, and in many cases that means replacement. BookaBuilderUK's repair guide stresses that a toilet seat only needs to be secure, not clamped with maximum force, and that ceramic can crack if bolts are overtightened, particularly on older close-coupled toilets.
Hand-tight plus a quarter-turn with a screwdriver is the safe ceiling. If the seat still shifts after that, the problem is almost certainly the expansion plug's grip — not insufficient torque. Adding more force to a bolt that isn't holding simply transfers that energy straight into the ceramic rim.
Skipping the Measurement Step
Buying a fixing kit without first checking the mounting hole diameter and depth is the single most common cause of returns and failed installations. It's also the easiest mistake to prevent — all you need is a ruler and a pencil. Yet the temptation to grab any top-fix kit off the shelf and assume it will fit is surprisingly strong, especially when the packaging says "universal."
No kit is truly universal. Expansion plugs have a specific grip range, and if your ceramic holes sit outside that range — even by a couple of millimetres — the plug either won't enter the hole or won't expand enough to hold.
Forcing a Mismatched Seat
Trying to make a bottom-fix seat work in top-fix holes (or vice versa) is a recipe for frustration. The mechanisms are fundamentally different. A bottom-fix bolt is designed to pass through the ceramic and accept a nut underneath — it has no expansion element. Dropping it into a top-fix hole and hoping it somehow grips is like trying to hang a picture with a screw but no wall plug. It simply won't hold.
If you're looking to how to take off toilet seat hardware that came with the wrong fixing type, remove it entirely and source the correct kit before proceeding. Adapting one system to behave like the other always ends in a loose seat.
The Full List of Fitting Mistakes
Beyond the three big ones above, several smaller errors contribute to seats that loosen, shift, or fail prematurely. Here's the complete rundown, each with its consequence:
- Overtightening bolts — Exceeding the hand-tight-plus-quarter-turn limit risks cracking the porcelain rim around the mounting hole. This damage is irreversible and typically requires a full bowl replacement.
- Not measuring hole diameter and depth before purchasing — A mismatched expansion plug either refuses to enter the hole or rattles loosely inside it, providing zero grip. The result is a toilet seat cover change that fails on the first use and a wasted trip to exchange the kit.
- Using the wrong fixing type — Bottom-fix hardware cannot anchor in top-fix holes, and top-fix expansion plugs serve no purpose when underside access is available and a wing nut is the intended fastener. Mixing systems leaves the seat unsecured regardless of how much you tighten.
- Failing to clean old residue from the mounting area — Leftover rubber fragments, silicone, mineral deposits, and grime prevent the hinge bracket from sitting flat against the rim. Even a thin layer of residue introduces a slight rock that worsens with every use, gradually loosening the bolts. Always clean both the rim surface and the inside of the mounting holes before fitting new hardware.
- Not alternating between left and right bolts when tightening — Fully tightening one side before touching the other pulls the seat off-centre and places disproportionate stress on a single expansion plug. Over time, the overloaded plug deforms and loses grip, while the under-tightened side was never properly anchored to begin with. Alternate in quarter-turn increments, left then right, until both sides are equally firm.
- Reusing old expansion plugs from a previous seat — Rubber and plastic expansion anchors are designed for a single installation cycle. Once compressed and expanded inside a ceramic hole, the material deforms permanently — it takes on the shape of the old hole and may not generate sufficient outward pressure when reinserted. A Bemis Statite toilet seat or any other quality model ships with fresh plugs for good reason. Always use the new anchors supplied with your kit, even if the old ones look intact.
- Skipping the test-fit and alignment check — Diving straight into bolt insertion without first placing the seat on the bowl to verify hole alignment means you discover mismatches mid-installation, often after the expansion plugs are already partially engaged. Removing a half-tightened plug without damaging it is far harder than doing a 60-second dry run beforehand.
Each of these mistakes is easy to make in the moment — especially when the job feels almost done and you just want to finish. But the few extra minutes spent measuring, cleaning, and tightening methodically are what separate a seat that stays rock-solid for years from one you're re-fitting next month.
One more point worth highlighting: if you ever need to uninstall toilet seat hardware for cleaning, upgrading, or accessing the mounting area, bolts that were fitted correctly — without excessive force and with clean, properly sized expansion plugs — come out smoothly. Bolts that were overtightened, cross-threaded, or forced into mismatched holes are the ones that seize, strip, and eventually require a hacksaw. Doing the job right the first time makes every future interaction with those fittings dramatically easier.
Even with perfect technique, though, real-world issues can crop up after the seat has been in use for a while — or during the fitting itself when something unexpected happens. Knowing how to diagnose and solve those problems quickly keeps a minor hiccup from becoming a major headache.
Troubleshooting Top Fix Toilet Seat Problems
You've followed every step, tightened both bolts in careful quarter-turn increments, and snapped the decorative caps into place — yet something still isn't quite right. Maybe the bolt spins without biting, or the seat creeps forward every few days. These issues don't necessarily mean the installation failed. They usually point to one specific, fixable cause. The trick is matching the symptom to the right solution instead of re-doing the entire job from scratch.
The table below covers the most common problems people encounter when learning how to put a toilet seat on using a top-fix system, along with targeted fixes for each one.
| Problem | Solution |
|---|---|
| Bolts spin without tightening | The expansion plug is either sitting above the ceramic hole rather than inside it, or the hole is too wide for the plug's expansion range. Remove the bolt, push the plug fully into the hole so it sits below the rim surface, and retry. If the plug still can't contact the inner walls, switch to a kit with a larger-diameter expansion plug or add a rubber sleeve adapter to reduce the effective hole size. |
| Seat slides forward or backward after installation | The bolts were not tightened enough, or the hinge bracket's adjustment slot was never locked into position. Loosen each bolt by a half-turn, reposition the seat so it's centred, then re-tighten using alternating quarter-turn increments. Confirm the hinge bracket sits flat against the rim with no gap — a bracket that rocks even slightly will allow gradual drift under daily use. |
| Mounting holes are too large for the expansion plug | Source a kit with wider expansion plugs rated for your measured hole diameter, or insert a rubber sleeve adapter into each hole to bring the internal diameter back into the standard 15–20 mm range. Do not pack the gap with tape, cardboard, or adhesive — these materials compress over time and the seat will loosen. |
| Mounting holes are too small for the expansion plug | Do not attempt to widen ceramic holes with a drill — porcelain requires diamond-tipped bits and water cooling, and a DIY attempt almost always results in cracks. Instead, source a seat or fixing kit with smaller-diameter plugs and bolts that match your holes. If no compatible kit exists, consult a professional fitter. |
| Hinges squeak when the lid opens or closes | Apply a single drop of silicone-based lubricant to each hinge pivot point. Avoid petroleum-based products (such as WD-40 used long-term), as they can degrade plastic hinge components over time. Work the lid open and closed a few times to distribute the lubricant evenly. |
| Seat sits at a slight angle — one side higher than the other | The two expansion plugs are seated at different depths inside their respective holes. Remove the bolt from the higher side, inspect the plug, and push it further into the ceramic hole before retightening. Both plugs should be at equal depth for the hinge brackets to sit level. |
| Decorative caps won't snap closed | A small amount of bolt thread protruding above the cap's recess prevents it from clicking shut. Ensure the bolt head is fully seated in the hinge bracket's countersink. If the bolt is the correct length but still sits proud, check that the washer is positioned below the bracket, not stacked on top of it. |
Bolts Spin Without Tightening
This is the single most reported frustration with top-fix installations — and the fix is almost always simpler than people expect. When a bolt rotates freely without pulling the hinge bracket down against the rim, the expansion plug has nothing to push against. Either it's floating above the hole entrance rather than sitting inside the ceramic channel, or the hole diameter exceeds the plug's maximum expansion.
A JustAnswer plumbing thread documents exactly this scenario on a rimless toilet model: the screws kept turning without gripping because the plastic anchors inside the bolt holes had worn out. The expert's solution was straightforward — remove the existing fixings, inspect what's underneath, and replace the anchors with properly sized alternatives. The same principle applies to any top-fix seat: if the plug can't make firm contact with the hole's inner wall, no amount of turning will generate grip.
Pull the bolt and plug assembly out, hold the plug next to the hole opening, and compare diameters visually. If the plug looks noticeably smaller, you need a wider expansion anchor. If the sizes appear close, the plug probably just wasn't inserted deep enough — push it fully past the rim surface and into the body of the ceramic before retightening.
Seat Slides Forward or Backward After Installation
You fitted the seat perfectly, centred it, tightened everything — and a week later it's crept 10 mm forward. This almost always traces back to one of two causes: insufficient bolt tension or an unlocked adjustment slot. Many top-fix hinge brackets have elongated slots that allow front-to-back positioning. That sliding freedom is useful during fitting but becomes a liability if the bolts aren't tight enough to clamp the bracket firmly against the rim.
The remedy is a quick retighten. Loosen each bolt by half a turn, slide the seat back to its correct centred position, and then re-tighten using alternating quarter-turn increments — left bolt, right bolt, left bolt, right bolt — until the bracket no longer moves when you press on the seat. If the slot design makes clamping difficult, a thin rubber washer between the bracket and the ceramic adds friction that resists future sliding. Bath Royale's tightening guide reinforces this approach, noting that a slight jiggle may be normal with quick-release mechanisms but that any positional drift signals the fixings need attention.
Mounting Holes Are Too Large or Too Small
Oversized and undersized holes represent a compatibility issue, not an installation error — yet they stump people who followed every step correctly and still end up with a loose seat. For oversized holes, rubber sleeve adapters are the most practical fix. They line the inside of the hole, creating a snug channel for a standard expansion plug to grip against. These adapters cost very little and are widely available from plumbing suppliers.
Undersized holes require a different mindset entirely. Ceramic is not wood or metal — you cannot casually ream it out to a larger diameter. Drilling porcelain without the right equipment risks shattering the glaze or cracking the bowl outright. If your holes are too narrow for the expansion plug in your kit, the correct move is to find a fixing kit with slimmer hardware or to consult a professional who has the diamond-tipped tooling to enlarge the opening safely.
For anyone wondering how to replace toilet seat cover hardware on a toilet with non-standard holes, the answer always starts with measurement. Confirming the exact diameter and depth before buying parts eliminates guesswork and keeps you from forcing incompatible components into ceramic that won't forgive the mistake.
Whether the issue is spinning bolts, a drifting seat, squeaky hinges, or a slight tilt, each problem has a specific, repeatable fix. The common thread across all of them is the same: identify the root cause before reaching for the screwdriver. Tightening harder is almost never the answer — understanding why something isn't holding always is. And the next time someone asks you how to put a toilet seat on using a top-fix system, you'll have the troubleshooting knowledge to back up every step of the process.
Frequently Asked Questions About Fitting a Top Fixing Toilet Seat
1. How do I know if my toilet needs a top-fix or bottom-fix seat?
Lift the seat and feel underneath the bowl behind the mounting holes. If the underside is smooth, sealed, or completely inaccessible with no wing nuts or bolts protruding, you have a top-fix toilet. Wall-hung, back-to-wall, and skirted models almost always require top-fix fittings because their enclosed designs block access from below. Bottom-fix toilets, by contrast, have visible threaded rods or wing nuts underneath the rim that you can reach and turn by hand.
2. Why does my top-fix toilet seat keep coming loose?
The most common causes are expansion plugs that do not fully engage the ceramic hole walls, bolts that were not alternated evenly during tightening, or old residue left on the mounting surface preventing the hinge bracket from sitting flat. Verify that each plug sits entirely inside the hole below the rim surface, retighten using alternating quarter-turn increments on left and right bolts, and ensure the rim area is clean and dry. Reusing deformed expansion anchors from a previous seat can also cause recurring looseness, so always fit fresh plugs from your new kit.
3. What size are standard toilet seat mounting holes?
Most UK and European toilets have mounting holes with diameters ranging from roughly 15 mm to 20 mm, though some models fall outside this range. Before purchasing a top-fix kit, measure the hole diameter with a ruler or calliper and check the depth by inserting a pencil or thin dowel. These two figures let you match the expansion plug's grip range and the bolt length to your specific toilet, avoiding the most common cause of failed installations.
4. Can I use a bottom-fix seat on a top-fix toilet?
No. The two systems are mechanically incompatible. A bottom-fix bolt is designed to pass through the ceramic hole and accept a wing nut tightened from underneath the bowl. It has no expansion element to grip inside the hole from above. Forcing bottom-fix hardware into top-fix holes leaves the seat completely unsecured. Always confirm your toilet's fixing type before buying a seat or fixing kit, and choose components specifically engineered for concealed top-fix mounting, such as purpose-built kits like Tianyun's Top-Fix Toilet Seat Fixing Kits.
5. What should I do if the top-fix bolts spin without tightening?
Spinning bolts mean the expansion plug is not making contact with the inner wall of the ceramic hole. Either the plug is sitting above the hole rather than inside it, or the hole diameter exceeds the plug's maximum expansion range. Remove the bolt and plug assembly, push the plug fully into the hole so it sits below the rim surface, and retry. If the plug is visibly smaller than the hole, you need a kit with a wider expansion anchor or a rubber sleeve adapter that reduces the effective hole diameter back into the standard range.
Apply This Insight to Your Project
Tell us what you are building and how the topic “How To Fit A Top Fixing Toilet Seat That Actually Stays Tight” relates to your application. Our engineering team can help evaluate the next step.