What Toilet Seat Mounting Hardware Is and Why It Matters
Imagine sitting down and feeling the seat shift beneath you. It slides, it wobbles, and you instinctively grab the nearest surface for balance. Sound familiar? That frustrating wobble almost always traces back to one overlooked culprit: the small collection of fasteners hiding beneath the seat itself. Yet most homeowners never think about toilet seat hardware until something goes wrong.
Defining Toilet Seat Mounting Hardware
Toilet seat mounting hardware is the complete set of fasteners — bolts, nuts, washers, hinges, and optional anchors — that attach a rigid seat-and-lid assembly to a toilet bowl's mounting holes.
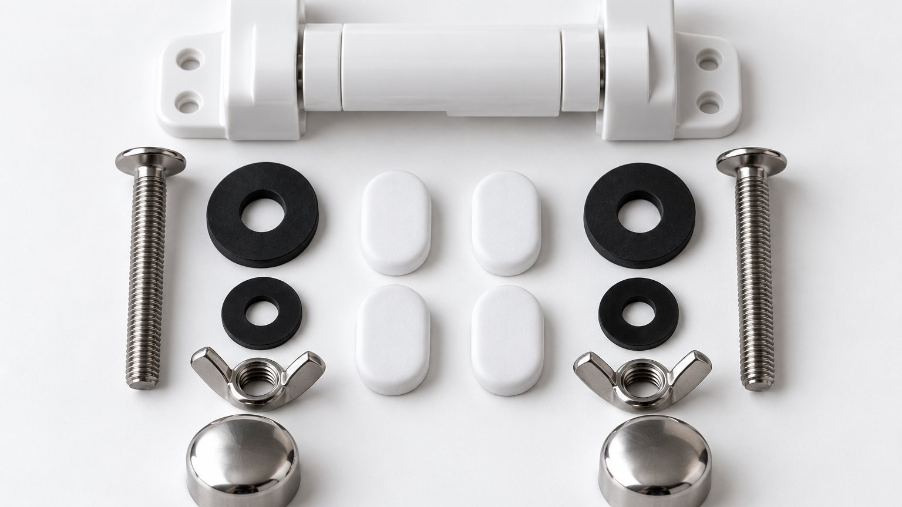
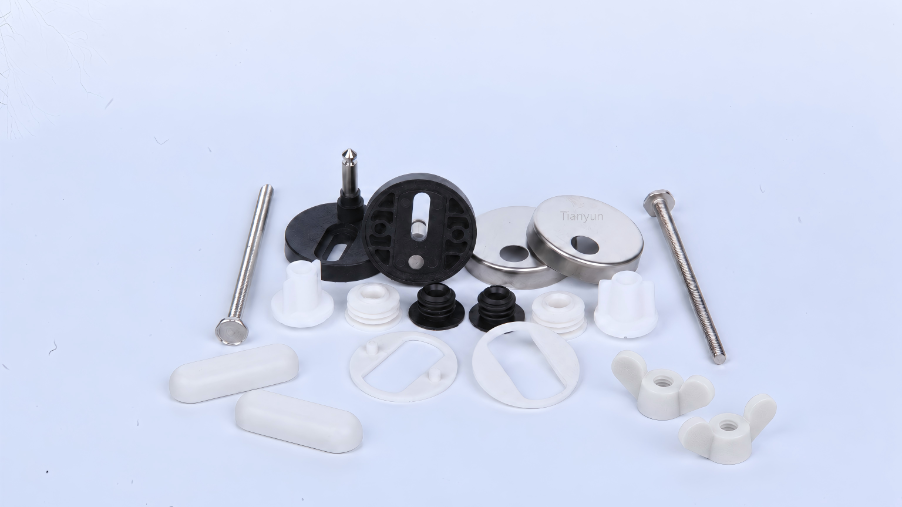
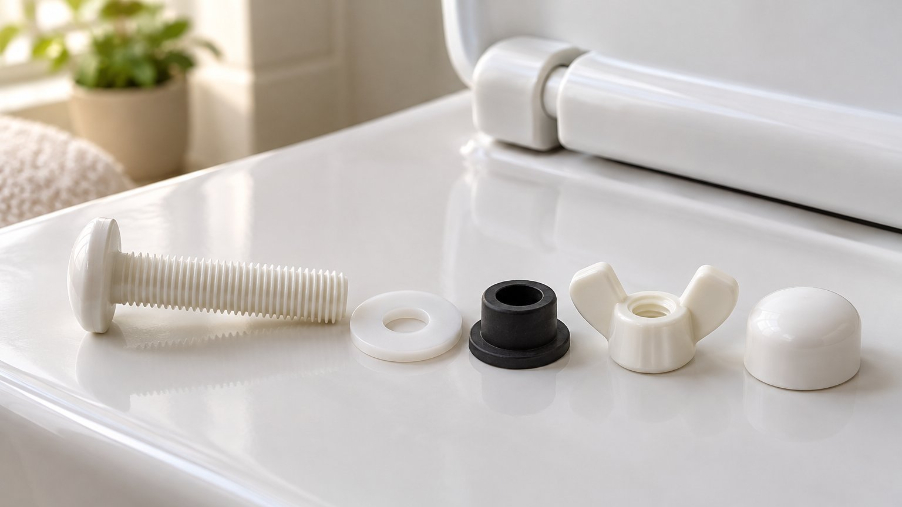
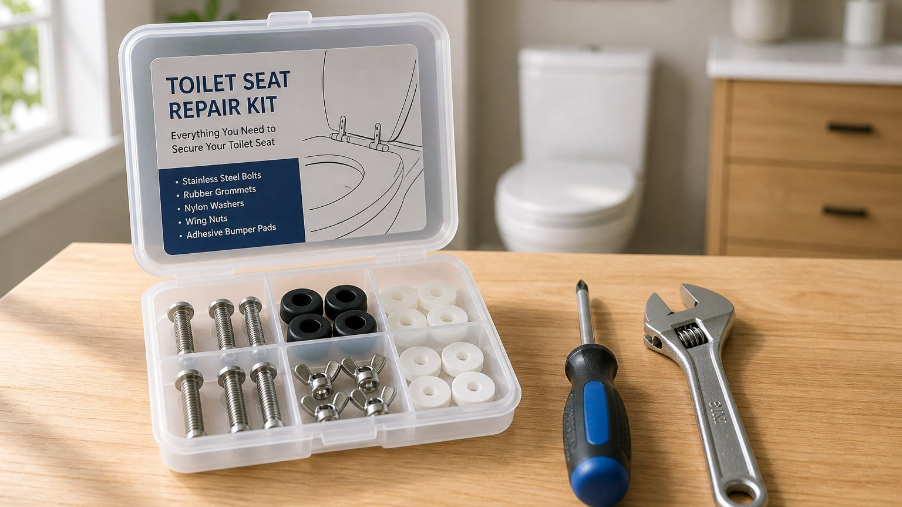
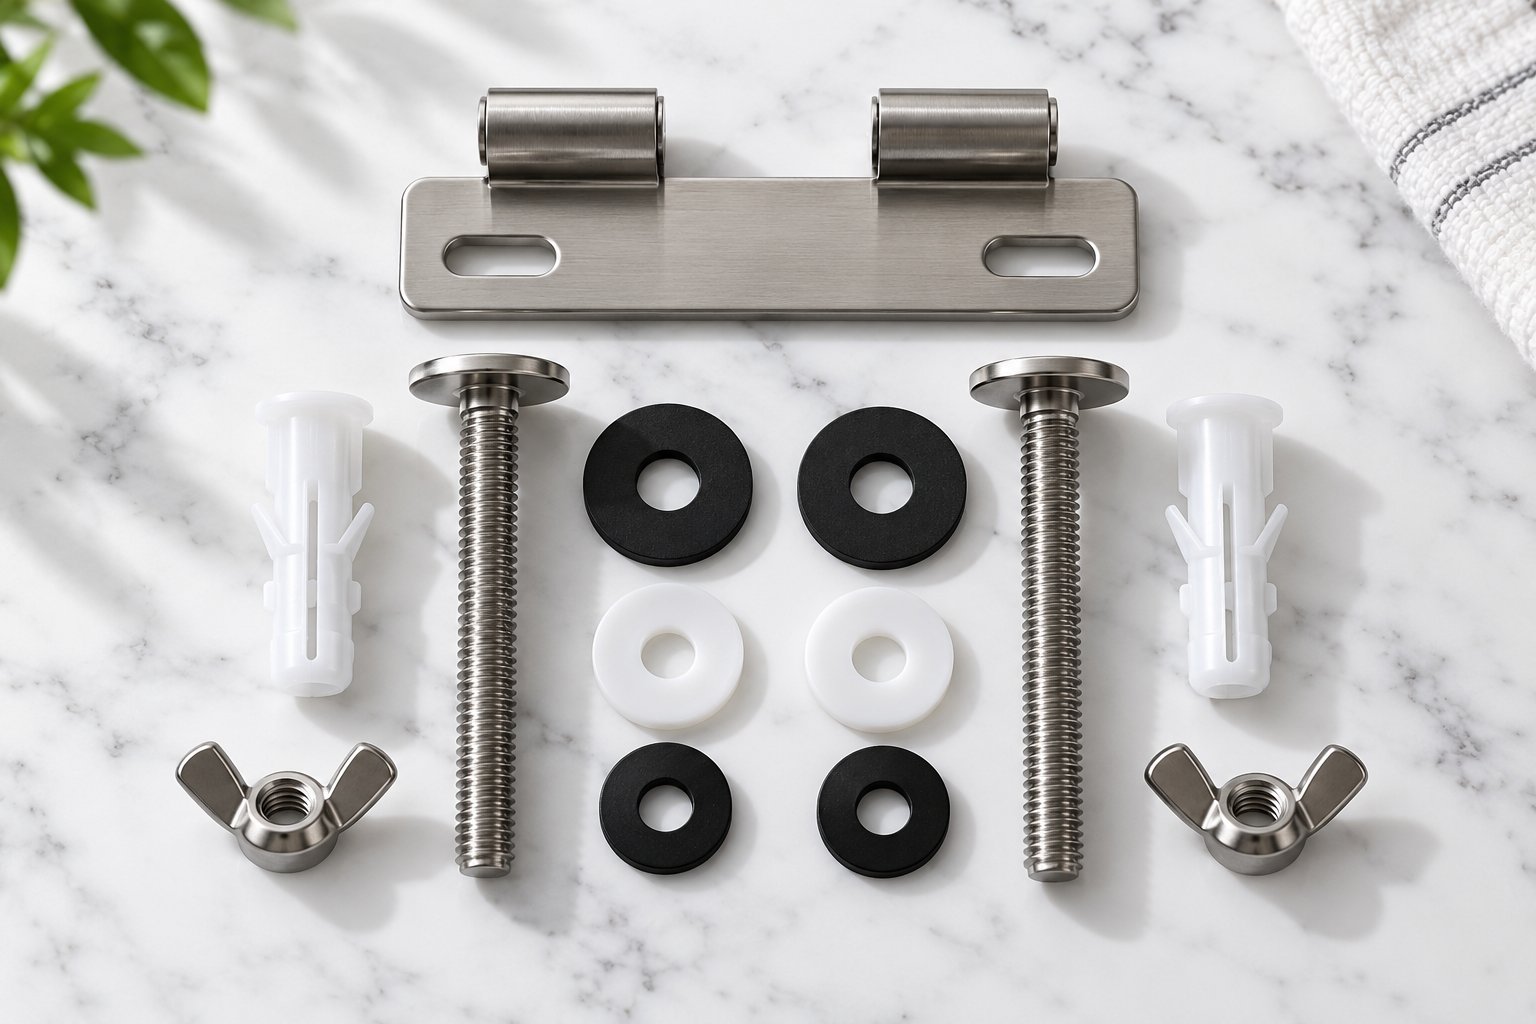
That short definition covers a surprisingly broad range of components. A typical kit includes two bolts that pass through the bowl's rear mounting holes, matching nuts or wing nuts to secure them from below, rubber or plastic washers that cushion the connection and prevent porcelain contact, and hinge mechanisms that let the seat pivot open and closed. Some systems add expansion anchors or clip-on brackets, especially for one-piece toilets or bidet seat top mount mounting hardware configurations where access beneath the bowl is limited.
Despite the simplicity of each individual piece, the entire assembly works as a system. Swap one mismatched bolt into an otherwise complete kit, and you'll end up with uneven clamping force, a seat that rocks side to side, or threads that strip within weeks.
Why Mounting Hardware Deserves Attention
Every set of these fasteners has an expiration date — even if nobody prints one on the packaging. Moisture and humidity are constant companions in any bathroom, and over time they drive corrosion into metal bolts, weaken plastic through fatigue cycles, and allow mineral deposits to lock nuts in place. Visible rust, flaking metal, and cracked bolt heads are among the clearest signs that hardware has reached the end of its useful life. Even bolts that still look acceptable can lose clamping strength after years of repeated loading — every time someone sits down, stands up, or leans forward, the fasteners absorb stress.
A loose toilet seat is more than a minor annoyance. The sliding motion accelerates wear on the bolt holes themselves, and in a worst-case scenario it can chip or crack the porcelain mounting ears on the bowl. Choosing the wrong toilet seat hardware replacement — bolts that are too short, too thin, or made from the wrong material — leads to the same cycle of wobble, retightening, and eventual failure all over again.
The challenge is that no single resource currently walks you through every stage of the process: identifying which system your toilet uses, selecting the right specifications, installing the new parts correctly, troubleshooting common failures, and knowing where to source quality components. That gap is exactly what this guide fills — a complete, DIY-first reference designed to put you in control of every replacement, whether you're fixing a single bathroom seat or outfitting an entire property.
The starting point for any successful fix is knowing which type of mounting system you're dealing with — and the differences between them are bigger than most people expect.
Every Type of Toilet Seat Mounting System Explained
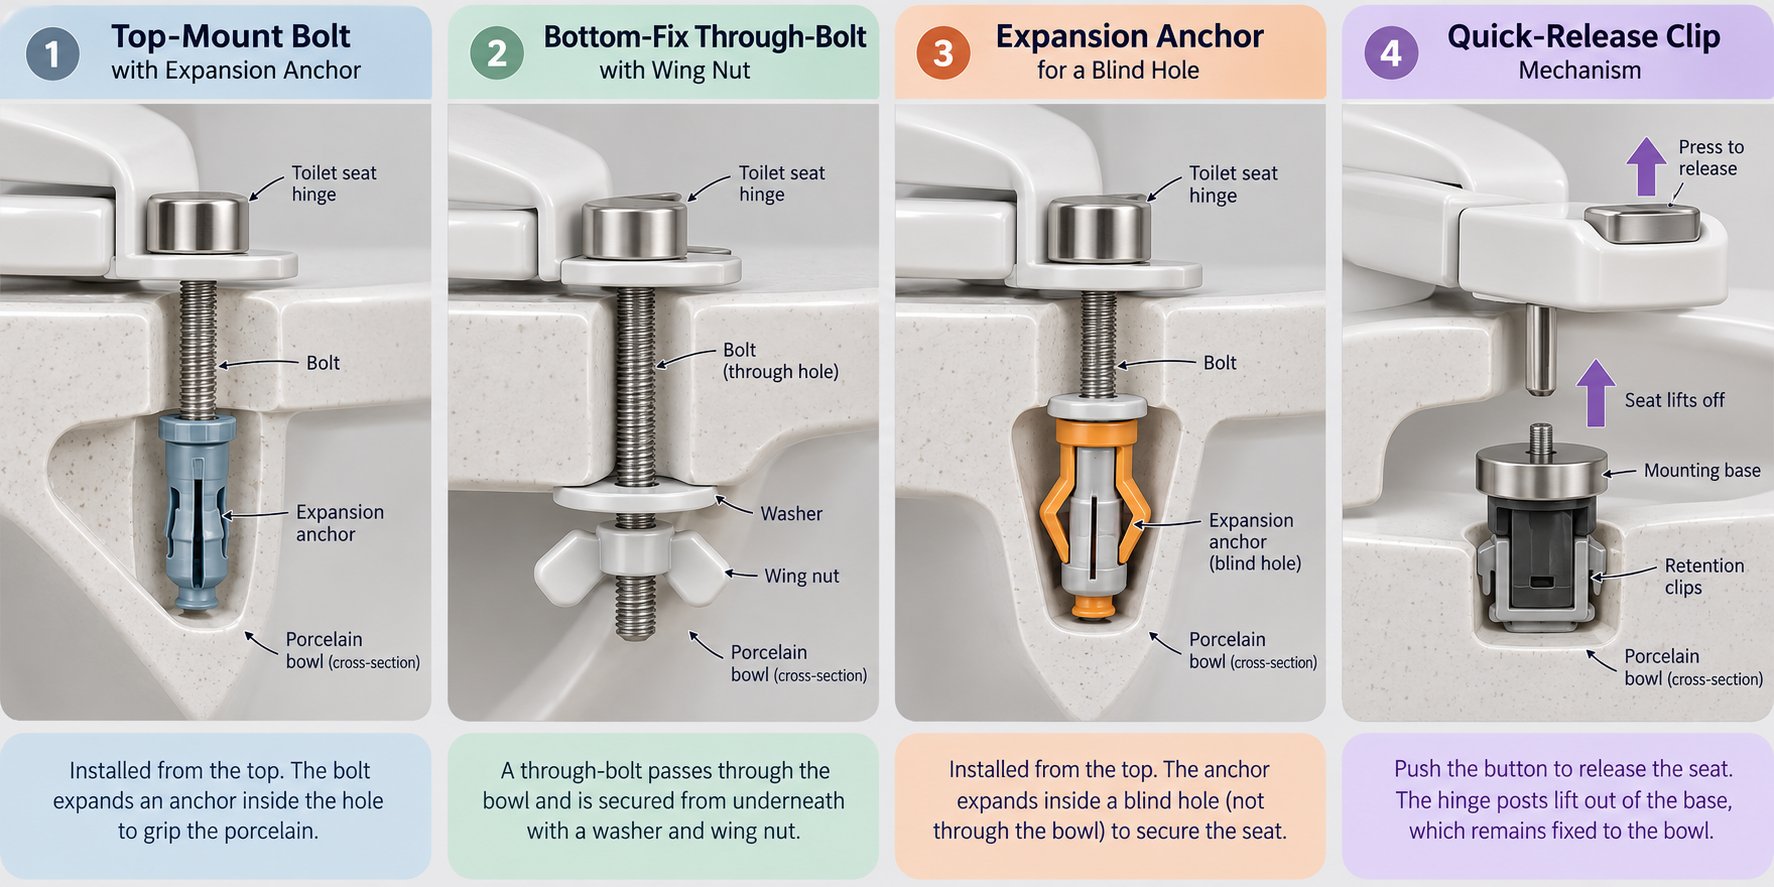
Four distinct systems account for virtually every toilet seat fixing kit on the market. Each one attaches the seat to the bowl in a different way, and picking the wrong type is one of the fastest routes to a wobbly, frustrating installation. Here's how they break down.
Top-Mount Bolt Systems
A top-mount — or top-fix — system lets you do everything from above the bowl rim. You'll drop a rubber or plastic expansion anchor into each mounting hole, place the seat and hinge plate on top, then thread a bolt downward into the anchor and tighten with a screwdriver. No kneeling, no reaching underneath, no blind fumbling for nuts.
This design is especially popular on back-to-wall, skirted, and wall-hung toilets where the bowl's underside is completely enclosed. Many European-style fixtures and modern one-piece models rely on top-mount hardware for exactly that reason — there's simply no access point below. The expanding anchors grip the porcelain from inside the hole, creating a stable, wobble-resistant connection that stays tight longer than a traditional nut-and-bolt setup.
Bottom-Fix Through-Bolt Systems
This is the classic approach most homeowners recognize. Two bolts pass through the hinge plate and the bowl's mounting holes from above. You then reach underneath the toilet to thread on washers and wing nuts — or hex nuts — and tighten them with a wrench or by hand.
Bottom-fix hardware toilet seat kits remain the most widely available and budget-friendly option. Standard residential versions use plastic or zinc-plated steel bolts with wing nuts for tool-free hand tightening. Commercial and high-traffic restrooms, however, often step up to heavier-gauge stainless steel through-bolts paired with lock washers and hex nuts, delivering the extra clamping force needed for frequent, heavy use. The trade-off? You need clear access beneath the bowl — a real headache when the toilet sits tight against a wall or vanity.
Expansion Anchors for One-Piece Toilets
One-piece toilets present a unique challenge. Their mounting holes are molded as blind cavities rather than open through-holes, which means a standard bottom-fix bolt has nowhere to exit. Specialty anchor kits solve this by wedging inside the cavity first. As PlumbingSupply.com details, an anchor is inserted into the hole, expanded with a setting bolt to lock it against the porcelain, and then that setting bolt is discarded. The permanent seat bolt threads into the secured anchor from above — effectively converting a blind hole into a reliable mounting point.
Brands like Kohler and Toto ship proprietary anchor kits sized to their specific bowl geometries, so matching the anchor to your toilet model is critical.
Quick-Release and Clip-On Mechanisms
Imagine being able to pop the entire seat off for deep cleaning — no tools, no loosening bolts. That's what quick-release hinges deliver. The hinge body stays bolted to the bowl, and the seat clicks onto mounting posts with a locking tab. Slide or press the tab, lift the seat away, clean, and snap it back.
Clip-on systems take a similar approach from a different angle: spring-loaded clips or bayonet-style brackets grip the bowl rim rather than passing through bolt holes. You'll find clip-on toilet lid hardware most often on lightweight seats designed for rental properties or hospitality settings, where fast swap-outs matter more than maximum clamping force.
| System Type | Mounting Direction | Tool Access Needed | Best Suited For | Typical Material |
|---|---|---|---|---|
| Top-Mount (Top-Fix) | From above only | Screwdriver from top | Back-to-wall, skirted, wall-hung toilets | Plastic anchors with stainless steel or nylon bolts |
| Bottom-Fix Through-Bolt | Bolt from above, nut from below | Wrench or pliers underneath | Open-back two-piece toilets (residential and commercial) | Zinc-plated steel, brass, stainless steel, or nylon |
| Expansion Anchor | Anchor set from above into blind hole | Screwdriver from top; wrench for setting bolt | One-piece toilets with blind mounting holes | Plastic or rubber anchor with steel or nylon bolt |
| Quick-Release / Clip-On | Clicks or clips onto fixed mounting posts or bowl rim | None (tool-free removal); initial post install may need screwdriver | Easy-clean homes, rentals, hospitality | Reinforced plastic or stainless steel clips |
Knowing which system your toilet uses is only half the puzzle. The next critical piece is figuring out the exact bolt-hole dimensions and toilet configuration so you can match the right kit to your specific bowl — a step that trips up more DIYers than any other.
How to Identify the Correct Toilet Seat Mounting Hardware for Your Toilet
Grabbing the first hardware kit you spot — whether from a shelf or a search for toilet seat bolts at Home Depot — feels efficient until the bolts don't drop through the holes or the seat still wobbles after installation. The truth is, a few minutes of measuring and visual inspection before you buy will save you a return trip and a lot of frustration. Here's how to pin down exactly what your toilet needs.
Measuring Bolt-Hole Spread and Diameter
Every toilet bowl has two holes at the rear of the rim where the seat fasteners pass through. The distance between those holes — measured center to center, not edge to edge — is the single most important number you need. On most North American toilets, that bolt-hole spread is approximately 5.5 inches (140 mm). It's a common starting point, but it isn't universal. European models, specialty designs, and some compact bowls use different spacing, so always measure rather than assume.
Grab a tape measure or, for greater precision, a caliper. Place the zero mark at the center of one hole and read the distance to the center of the other. Write that number down in both inches and millimeters — you'll thank yourself later when comparing product specs from different manufacturers.
The hole diameter matters just as much. An oversized bolt rattles inside the hole and lets the seat shift laterally every time someone sits down. An undersized bolt won't pass through at all, or it seats off-center and creates uneven clamping pressure that can crack a plastic washer within weeks. Common mounting-hole openings range roughly from 1/4 inch to just over 3/8 inch, though the exact size varies by ceramic manufacturer. Measure the diameter of each hole independently — they aren't always identical, especially on older toilets where mineral buildup has narrowed one opening.
One-Piece vs. Two-Piece Toilet Identification
Your toilet's construction style dictates which category of toilet seat attachments will work. Fortunately, the visual test takes about two seconds.
Stand beside the toilet and look at the joint where the tank meets the bowl. If there's a visible horizontal seam, a line of caulk, or bolts connecting the two sections, you have a two-piece toilet. Two-piece models almost always feature open through-holes that accept standard bottom-fix bolts — the classic setup where you thread a nut from underneath.
If the tank and bowl form a single, seamless unit with no gap or seam between them, you're looking at a one-piece toilet. These designs often mold the mounting holes as blind cavities rather than open tunnels, which means a standard through-bolt has no exit point. In that case, you'll typically need an expansion-anchor kit or a top mounted toilet seat hardware system that tightens entirely from above.
Not sure? Run a finger along the back of the bowl where it meets the tank. A ridge, a rubber gasket, or any kind of fastener head is a dead giveaway that two separate pieces were bolted together during installation.
Checking for Bidet-Seat Compatibility
Planning to install a bidet seat — or thinking you might in the future? That upgrade changes the toilet seat mounting hardware equation. Most bidet seats use top-mount brackets with longer bolts to accommodate the thicker bidet housing that sits between the hinge plate and the porcelain rim. Some models also require a specific bolt-hole spread: Brondell's fit guide, for example, notes that certain Swash models need an exact 5-1/2 inch spacing, while others accept a range from 5-1/4 inches to 8 inches.
Beyond spacing, you'll want to confirm clearance between the bolt holes and the tank. Bidet seats are bulkier than standard seats, so even an inch of lost clearance can push the unit too far forward, causing overhang at the front of the bowl. If your toilet sits tight against a wall or has a curved "French curve" tank, measure that gap before committing to any hardware kit. Buying a bidet-compatible top-mount kit from the start can save you from purchasing two sets of hardware in quick succession.
Before you add anything to your cart, run through this quick identification checklist:
- Measure bolt-hole spread and diameter — Record the center-to-center distance (inches and millimeters) and the diameter of each mounting hole using a tape measure or caliper.
- Identify your toilet type — Check for a seam between the tank and bowl. Seam visible = two-piece (standard through-bolts likely fit). No seam = one-piece (anchor or top-mount kit probably required).
- Confirm bidet-seat plans — If a bidet upgrade is on your radar, verify that the hardware kit supports longer bolts, top-mount brackets, and adequate tank-to-bolt-hole clearance for your chosen bidet model.
With these three data points in hand — hole dimensions, toilet construction style, and future bidet intentions — you've narrowed the field dramatically. The remaining variable is the hardware itself: bolt length, thread pitch, and material. Those specifications make or break a long-lasting installation, and they're the details most people overlook entirely.
Hardware Sizing, Specifications, and Material Selection
Bolt length, diameter, and thread pitch aren't the kind of details that excite most people — until the wrong bolt bottoms out a quarter-inch too short or the threads refuse to bite into the nut you just bought. Whether you're browsing home depot toilet seat screws online or standing in an aisle squinting at blister packs, these numbers are the difference between a rock-solid seat and another weekend wasted.
Common Bolt Lengths, Diameters, and Thread Types
Most residential toilet seat installation kit bolts fall within a surprisingly narrow range. Here's what you'll typically encounter:
- Length: 2-3/8 inches to 3 inches. Shorter bolts suit thin-rimmed bowls; longer ones accommodate thicker porcelain or bidet-seat brackets stacked between the hinge plate and the rim.
- Diameter: 5/16 inch or 3/8 inch are the two dominant sizes in North America. A 5/16-inch bolt is the more common residential standard, while 3/8-inch bolts show up on heavy-duty and commercial assemblies.
- Thread pitch: Unified National Coarse (UNC) threading — typically 5/16"-18 or 3/8"-16 — is standard on domestically manufactured hardware. If your toilet is an imported model (common with European and Asian brands), you may encounter metric equivalents: M8 x 1.25 or M10 x 1.5 are the closest counterparts. Mixing imperial bolts with metric nuts — or vice versa — will strip threads almost immediately, so verify the system before pairing parts.
Commercial or ADA-compliant seat assemblies often step up to thicker-gauge stainless steel bolts — sometimes 7/16-inch diameter — to handle heavier loads and the increased lateral stress that open-front, elongated seats experience in high-traffic restrooms.
Material Choices and Durability Trade-Offs
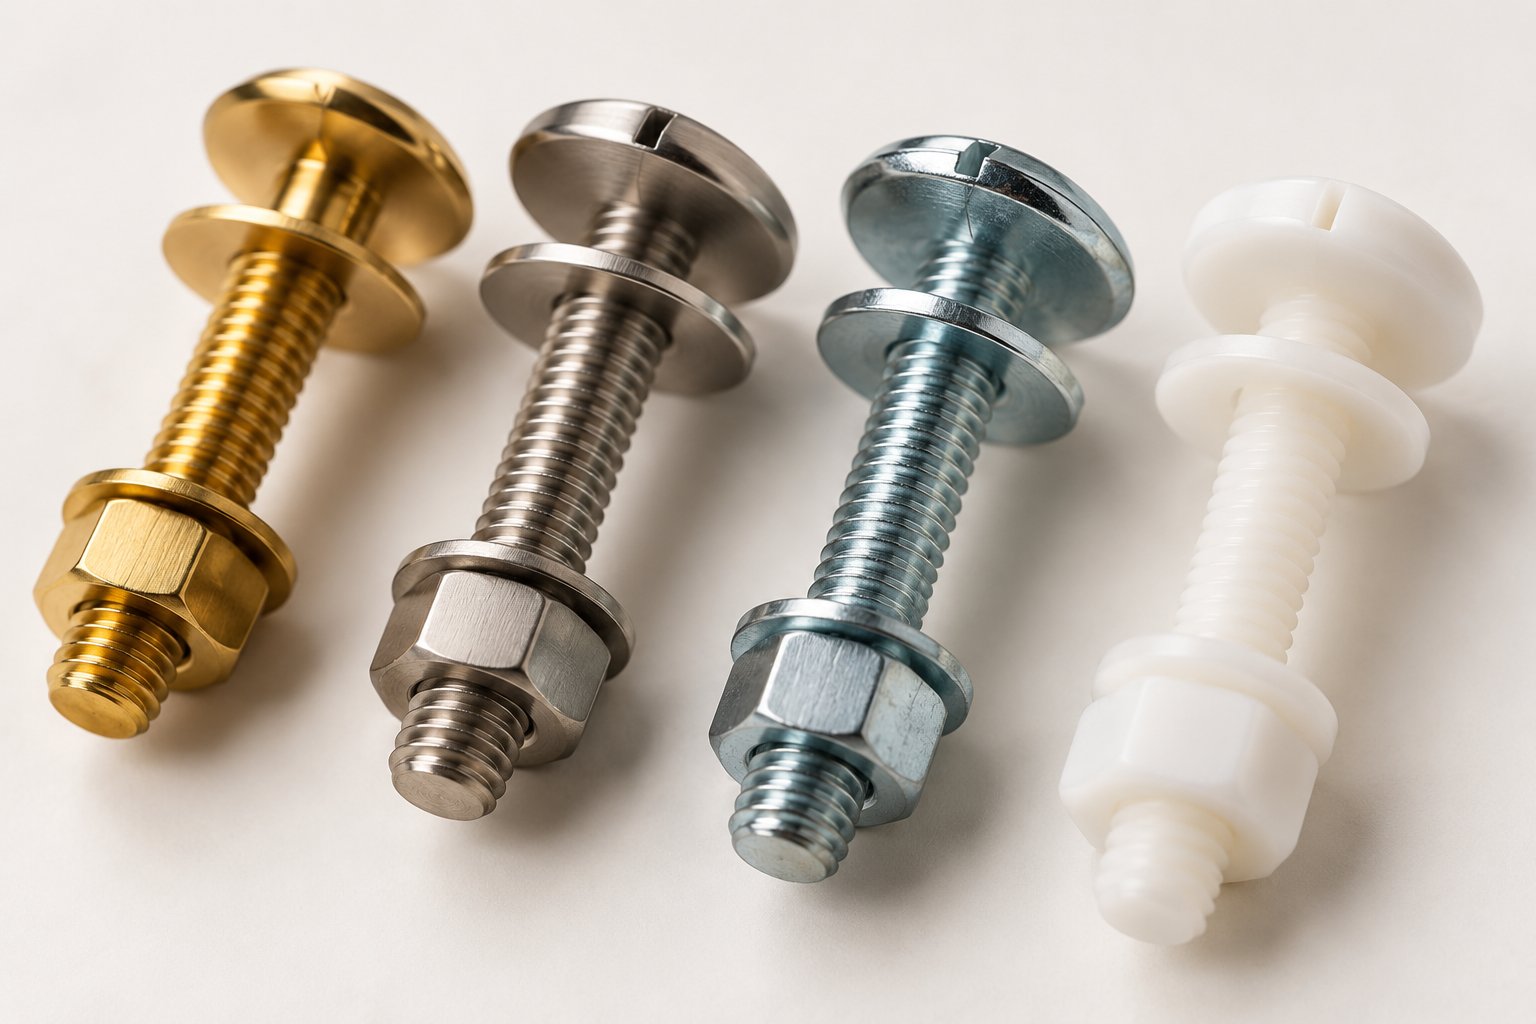
You've matched the size. The next question is what the bolt is made of — and this choice directly controls how long the hardware lasts before rust, corrosion, or fatigue forces another replacement. Four materials dominate the market, each with a clear set of strengths and compromises.
| Material | Corrosion Resistance | Strength | Typical Use Case | Relative Cost |
|---|---|---|---|---|
| Brass | Excellent — naturally resists moisture and mineral attack | Moderate — softer than steel, less prone to cracking porcelain | Premium residential, coastal or high-humidity bathrooms | High |
| Stainless Steel | Very good — resists rust in most environments | High — strong clamping force, long service life | Commercial restrooms, ADA assemblies, clip toilet seat hinges | Medium-High |
| Zinc-Plated Steel | Fair — plating protects initially, but chips and corrodes over time | High — strong while coating is intact | Budget residential kits, short-term or rental use | Low |
| Engineered Plastic / Nylon | Excellent — completely rust-proof | Low-Moderate — lighter clamping force, can fatigue under repeated stress | Standard residential, lightweight seats, DIY-friendly kits | Low |
Brass and stainless steel cost more upfront but rarely need replacing within a decade, even in steam-filled bathrooms. Zinc-plated steel is the bargain pick — fine for a guest bath that sees light use, but expect the plating to break down in two to five years in a primary bathroom. Plastic and nylon bolts eliminate corrosion entirely and won't scratch porcelain, yet they deliver less clamping force and can crack under heavy side-loading. For most homeowners tackling a single-bathroom fix, nylon or stainless steel strikes the best balance of durability, ease of installation, and value.
Residential vs. Commercial and ADA Hardware Considerations
Standard residential hardware is designed for a single-family use pattern — a few hundred seat-loading cycles per week at most. Commercial-grade hardware lives a harder life. Public restrooms, office buildings, and healthcare facilities put seats through thousands of cycles weekly, and the fasteners absorb every one of those impacts.
Heavy-duty kits for these settings typically feature 3/8-inch or larger stainless steel bolts, metal (rather than plastic) washers, lock nuts to resist vibration loosening, and reinforced hinge plates with wider footprints that distribute stress across a larger area of porcelain. ADA-compliant open-front seats add another layer: their elongated shape and heavier construction shift the center of gravity forward, increasing leverage on the mounting points. Wider mounting plates and thicker hinge barrels compensate for that extra force, keeping the seat planted even under asymmetric loading from accessibility aids or transfer movements.
If you're outfitting a commercial property or managing ADA compliance, selecting hardware rated for the expected load — rather than defaulting to a standard residential kit — prevents the cycle of recurring looseness and premature bolt failure.
Specifications and materials only get you halfway, though. Having the right tools staged and ready before you touch a single bolt is what separates a smooth 15-minute swap from an hour of improvisation and skinned knuckles.
Tools and Preparation You Need Before Touching a Single Bolt
You've identified your toilet type, measured the bolt holes, and picked the right replacement kit. Everything is ready — except your hands are empty. Skipping the tool-gathering step is the fastest way to turn a 15-minute job into an afternoon of trips to the garage, improvised leverage, and stripped fastener heads. Here's exactly what to have within arm's reach before you start.
Essential Tools for Removal of Old Hardware
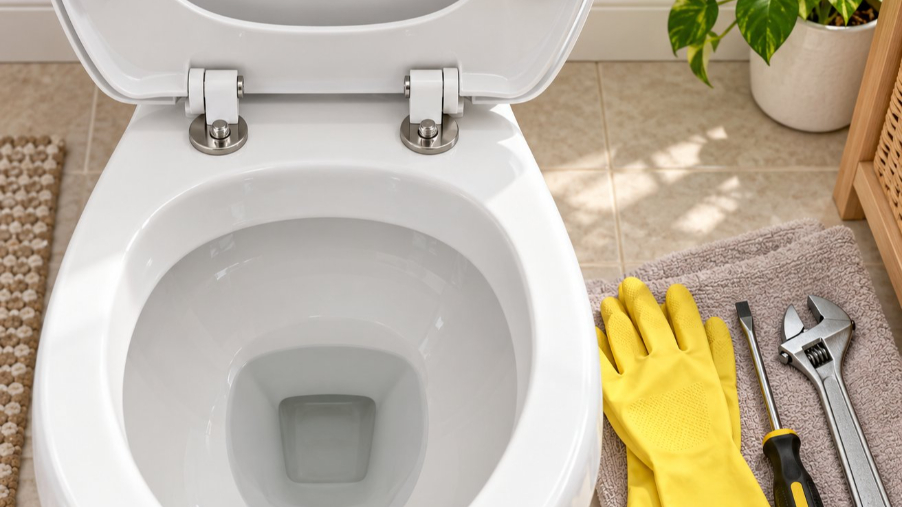
Old toilet seat hardware rarely cooperates. Years of moisture, mineral deposits, and corrosion fuse nuts to bolts, and plastic components become brittle enough to crumble under a wrench. Your removal toolkit needs to handle both the straightforward cases and the stubborn ones:
- Adjustable wrench or 1/2-inch socket wrench — This is your primary tool for gripping wing nuts or hex nuts beneath the bowl. A socket wrench gives you cleaner torque in tight spaces, while an adjustable wrench flexes to fit slightly irregular nut sizes.
- Flat-head and Phillips screwdrivers — You'll need a flat-head to pry open plastic bolt caps that cover the screw-in toilet seat fasteners on top, and a Phillips head to hold the bolt slot steady while you turn the nut from below. Keep both sizes handy; bolt-head styles vary between brands.
- Pliers (slip-joint or locking) — When a wing nut has corroded into a shapeless lump, pliers give you the extra grip an adjustable wrench can't. Locking pliers are especially useful — clamp them onto the nut, and you free up a hand.
- Penetrating oil — Products like PB Blaster or WD-40 Specialist are non-negotiable for corroded metal bolts. Spray generously around the nut-to-bolt junction and — this part matters — let it soak for at least 15 minutes before attempting any rotation. Why so long? Penetrating oil works by capillary action, creeping into microscopic gaps between rusted threads. Rushing the process means you're fighting dry corrosion with brute force, and brute force on porcelain is a recipe for cracks. For severely rusted hardware, a second application after 30 minutes often breaks what the first coat loosened.
- Mini hacksaw or oscillating multi-tool — Sometimes a bolt simply refuses to turn. The nut spins uselessly with the bolt, or corrosion has welded the two together. In those cases, cutting through the bolt is the only safe exit. A compact hacksaw blade slips into the gap between the nut and the porcelain, while an oscillating multi-tool with a metal-cutting blade makes quicker work of it. Either way, protect the bowl's glazed surface with painter's tape or a folded cloth before the blade gets near it.
One tool that often gets overlooked: a flashlight or headlamp. The underside of a toilet bowl is dark, and you can't properly assess corrosion, thread condition, or washer alignment if you're working blind.
Tools for New Hardware Installation
Good news — installation is gentler on both you and the porcelain. The toolkit shrinks considerably once the old fasteners are out of the picture:
- Wrench or socket matching the new hardware — If your replacement kit uses hex nuts, a properly sized socket or box-end wrench prevents rounding off the corners. Many kits from brands like Bath Royale include a complete set of original seat mounting hardware with wing nuts designed for finger tightening, reducing tool dependency even further.
- Small torpedo level — Set it across the closed seat lid after initial tightening. If the bubble is off-center, one bolt is snugged more than the other. Adjust before final tightening to prevent uneven loading on the porcelain.
- Torque awareness (not a torque wrench) — You don't need a calibrated torque wrench for seat bolts, but you do need restraint. The widely accepted guideline for plastic bolts is hand-tight plus a quarter-turn with a wrench. That provides enough clamping force to eliminate wobble without risking a cracked bowl. Metal bolts tolerate slightly more force, yet the same alternating-quarter-turn approach — found in tank bolt installation guides from sources like Horow's porcelain-safe tightening procedure — applies. The moment you feel a sharp spike in resistance, stop. Porcelain doesn't flex; it fractures.
If your seat hinges came from a home improvement store — the kind you'd find browsing toilet seat hinges at Home Depot, for instance — the packaging often lists the exact wrench size on the back. Check before you tear it open and lose the card.
Pre-Work Preparation Checklist
Tools gathered? Perfect. Run through this sequence before you lay a finger on the old hardware:
- Gather every tool listed above and place them on a towel beside the toilet. Chasing a missing screwdriver mid-job with wet, oily hands wastes time and risks dropping metal tools onto porcelain.
- Shut off the bidet water supply if a bidet seat or bidet attachment is connected. Even a brief accidental trigger can spray water across the bathroom — and across your open tool bag.
- Lay a folded towel or rag inside the bowl rim, directly below the mounting holes. Dropped bolts, nuts, and washers have a magnetic attraction to the drain. A towel catches them before they disappear, and it also cushions any tool that slips out of your grip.
- Apply penetrating oil to both sides of each old bolt — spray the bolt head on top and the nut-and-washer junction underneath. Set a timer for 15 minutes and walk away. Use the waiting time to unbox the new kit and confirm every component matches your toilet's hole spacing and bolt diameter.
With tools staged and old hardware soaking, you're set up for the smoothest possible transition from removal to installation — a process that goes far more predictably when you follow a clear, step-by-step sequence for each mounting system.
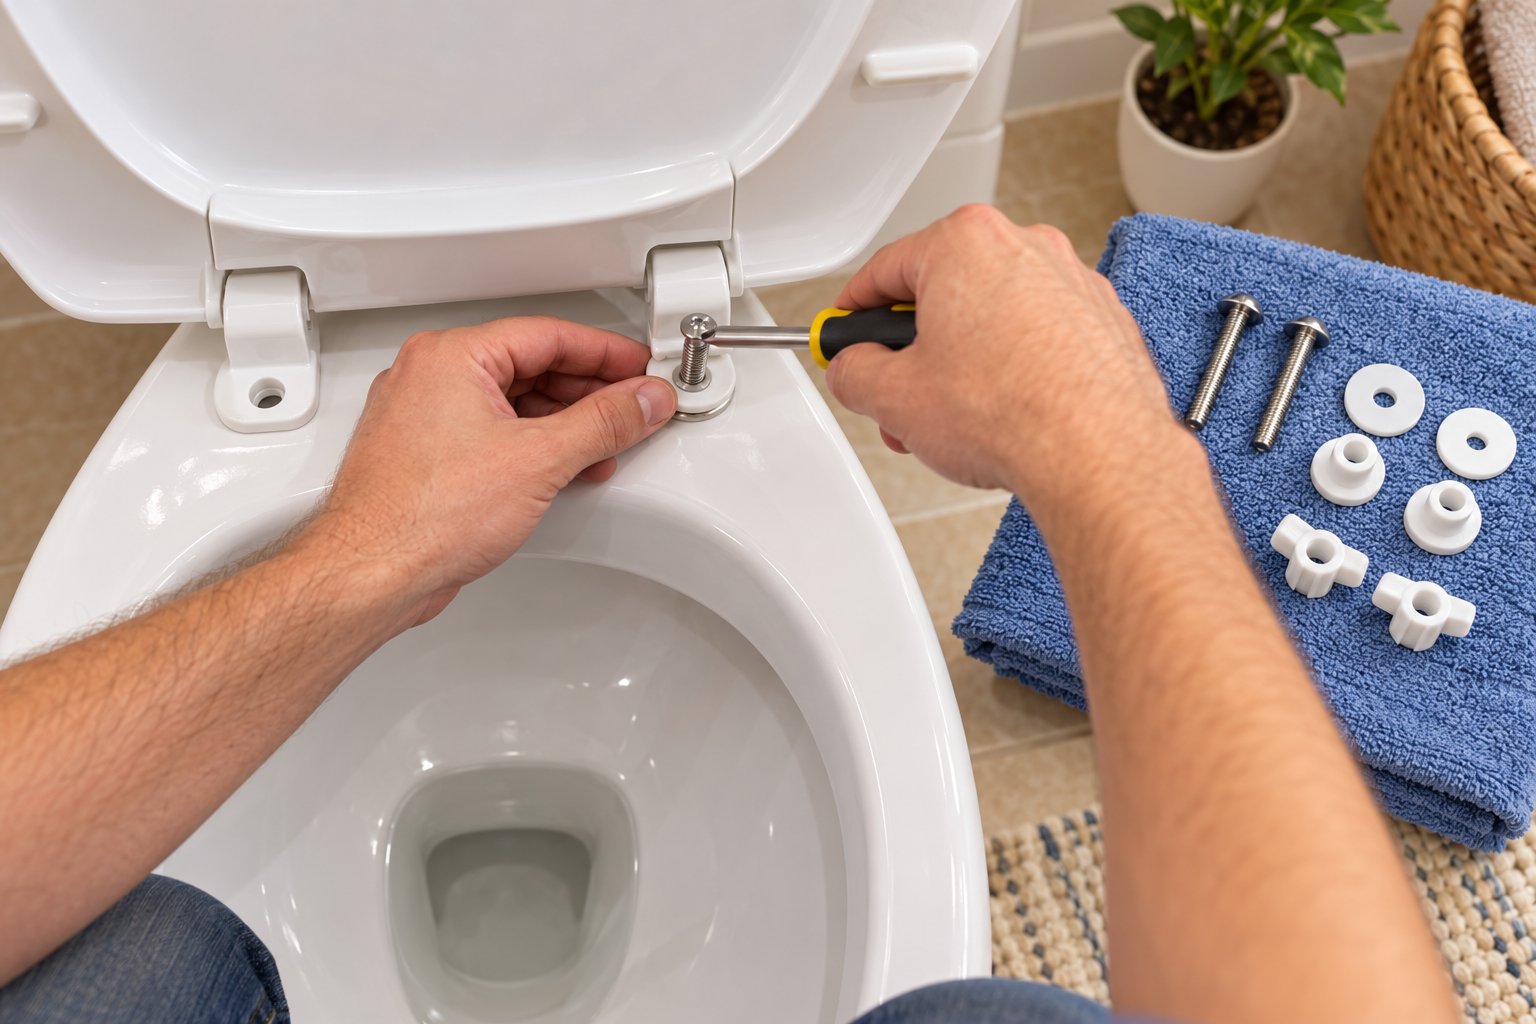
How to Install Toilet Seat Bolts
Penetrating oil has done its work, the old fasteners are out, and a fresh toilet seat mounting kit is waiting on the towel beside you. This is the part most online guides skip entirely or bury inside a five-minute video with no pause button. What follows are clear, written instructions for both major systems — bottom-fix and top-mount — so you can work at your own pace regardless of which hardware your toilet requires.
Installing Bottom-Fix Through-Bolt Hardware Step by Step
The classic bottom-fix method remains the most common toilet seat bolt replacement approach for two-piece toilets with open mounting holes. Here's the sequence, bolt by bolt:
- Position the seat and lid on the bowl. Set the assembly so the hinge barrels sit directly over the two mounting holes. Visually center the seat — front-to-back and side-to-side — before inserting any fasteners. A seat that goes in crooked stays crooked once you tighten it.
- Drop the bolts through from above. Insert one bolt through the left hinge hole and down through the corresponding bowl hole. Repeat on the right side. The bolt heads should sit flat against the hinge plate with no wobble or tilting. If a bolt leans, check for debris in the hole or a misaligned hinge.
- Thread washers and nuts from below. Reach underneath the bowl and slide a rubber or plastic washer onto each bolt first — this washer cushions the porcelain and prevents metal-on-ceramic contact. Then thread the nut on by hand. As Home Depot's installation guide notes, always place washers on the bolts before the nuts for a proper seal.
- Hand-tighten both sides evenly. Snug the left nut a few turns, then switch to the right and match it. This alternating approach keeps the seat from drifting off-center as clamping force builds. Resist the urge to fully tighten one side before touching the other — that's the single most common mistake in DIY seat installation.
- Snug with a wrench using alternating quarter-turns. Once finger-tight, use your adjustable wrench or socket on the nuts below while holding each bolt head steady with a screwdriver from above. Give the left nut a quarter-turn, then the right, then the left again. Continue until the seat feels solid with no lateral play. For plastic bolts, stop as soon as you feel firm resistance — over-torquing cracks nylon threads instantly.
When you're done, try shifting the seat from side to side. Zero movement? You're set. Even a slight wobble means one side needs another quarter-turn.
Installing Top-Mount Hardware Step by Step
Top mount toilet seat installation flips the workflow — literally. Everything happens from above, making this system ideal for toilets tucked against walls, skirted models, or any situation where reaching underneath the bowl feels like a yoga challenge.
- Insert the expansion anchors into each bolt hole from below. Most top-mount kits include a rubber or plastic sleeve — sometimes called a dowel or lozenge — that you push up into the mounting hole from the bowl's underside. The anchor should sit snugly inside the hole with its top edge flush with or slightly below the rim surface. If your kit uses a metal lozenge-style anchor, orient the flat wings so they'll catch the underside of the porcelain when the bolt draws them upward.
- Place the seat and hinge plate on top of the bowl. Align the hinge-plate holes with the anchors you just set. Center the seat visually, exactly as you would with a bottom-fix system — alignment matters just as much here.
- Thread each bolt downward into its anchor. Turn the bolt clockwise by hand. You'll feel the anchor begin to expand or grip inside the hole after a few rotations. This expanding action is what creates the clamping force — the anchor wedges against the inner walls of the porcelain, locking itself in place.
- Tighten from above with a screwdriver. Again, alternate sides. Give the left bolt a quarter-turn, switch to the right, and repeat. The anchor expands progressively with each turn, pulling itself tight against the bowl from the inside. Stop when the seat is snug and the hinge plate no longer shifts under finger pressure.
One practical advantage worth noting: because top-mount systems require no under-bowl access, they also make future adjustments much faster. If the seat loosens six months from now, you just flip open the bolt cap and give it a quick turn from above — no kneeling required.
Aligning and Final-Tightening Best Practices
Both systems share the same finishing steps, and rushing through them is where most seat installs go sideways — sometimes literally.
Center before you commit. Before delivering those final wrench turns, close the lid and check its position relative to the bowl. The front edge of the seat should overhang the bowl rim evenly on both sides — not shifted left, right, or forward. If it's off, loosen both bolts a half-turn, reposition, and retighten. It's far easier to nudge the seat now than after the bolts are fully torqued.
Check for rocking. Press down on the left-rear corner of the closed lid, then the right-rear corner. A properly installed seat sits dead flat with no teeter-totter motion. Rocking means one bolt is tighter than the other, one washer is missing, or the bowl rim itself has an uneven glaze spot. A thin adhesive rubber bumper under the low corner can compensate for minor rim irregularities.
Guard against over-torque. Porcelain is incredibly hard but has almost no flex — it cracks rather than bends. Horow's tightening guide recommends a simple rule of thumb: tighten until the seat doesn't wobble, then give it one final quarter-turn. That last quarter-turn compresses the washer just enough to hold through daily use without stressing the ceramic. Plastic and nylon nuts are especially vulnerable — the threads deform under excessive force and will never grip properly again.
Tighten both bolts evenly in alternating quarter-turns — never fully tighten one side first.
Following that single rule prevents the most common installation failures: off-center seats, cracked porcelain ears, and stripped plastic threads. Stick with it every time you perform a toilet seat bolt replacement, and the seat will stay exactly where you put it.
Of course, even a perfect installation can't prevent every problem down the road. Hardware ages, bolts corrode, and seats loosen — so knowing how to diagnose and fix the most common post-installation failures is just as important as getting the initial install right.
Troubleshooting Loose, Corroded, and Broken Mounting Hardware
A seat that felt perfectly solid the day you installed it can develop a wobble weeks, months, or years later. Maybe it started as a barely noticeable shift. Then the shift became a slide, and now the whole seat drifts sideways the moment someone sits down. If you're dealing with a toilet seat that won't stay tight — or bolts that refuse to budge at all — you're not alone. These are the exact scenarios that send most people searching for answers, and each one has a targeted fix.
Fixing a Loose Toilet Seat That Won't Stay Tight
A loose toilet seat fix usually starts with the simplest explanation: the nuts have backed off. Vibration from daily use, repeated lid closings, and even temperature swings in the bathroom gradually loosen fasteners over time. Grab your wrench, reach underneath, and try retightening. Problem solved? Great. But what if the seat loosens again within a few weeks?
Recurring looseness almost always points past the nut itself to what's sitting between the nut and the porcelain. Rubber bushings and washers are the unsung heroes of a tight connection — they compress against the bowl's underside, creating friction that prevents the nut from spinning free. When those bushings flatten, crack, or harden with age, they lose their grip. Horow's seat-tightening guide recommends adding rubber washers if the original kit lacked them, since the added friction alone can eliminate persistent wobble.
If the bushings look fine but the seat still won't hold, examine the bolts themselves. Plastic bolts fatigue over time — hairline cracks form along the threads, reducing their ability to maintain clamping force. You can retighten a fatigued plastic bolt a dozen times and it will loosen a dozen more. At that point, the answer isn't another quarter-turn; it's a complete hardware replacement. Swapping in a fresh toilet seat mounting kit with new bolts, nuts, and washers resets the entire system and usually costs less than a fast-food lunch.
Dealing with Corroded or Seized Bolts
Knowing how to tighten toilet seat bolts doesn't help much when the bolts won't move at all. Toilet seat bolts rusted stuck are one of the most frustrating bathroom repair scenarios — you can see the nut, you can reach the nut, and yet it's fused to the bolt like it was welded there.
Start with penetrating oil. Spray generously around the nut-to-bolt junction from below and on the bolt head from above. Then walk away. Give the oil a full 15 to 20 minutes to seep into the corroded threads through capillary action. Impatience here leads to snapped bolt heads or, worse, chipped porcelain.
After soaking, grip the nut with pliers or a locking wrench from underneath while holding the bolt head steady with a screwdriver from above. Apply slow, even pressure — no sudden jerks. You may feel a faint "crack" as the rust bond breaks. That's a good sign. Turn the nut in small increments, reapplying oil if it stiffens again.
Still frozen? It's time to cut. A mini hacksaw or an oscillating multi-tool with a metal-cutting blade will sever the bolt cleanly. Position the blade flat against the bowl's underside, slicing through the bolt shank just below the porcelain. Before the blade touches anything, protect the ceramic. Wrap painter's tape or a folded cloth around the area where the tool will contact the bowl. One slip of an unguarded blade can gouge the glaze permanently. Work slowly, let the tool do the cutting, and the corroded bolt will drop free in under a minute.
Repairing Stripped Threads and Cracked Mounting Holes
Stripped threads are the quiet aftermath of over-tightening. On plastic nuts, the damage is obvious — the wrench spins freely, the nut climbs the bolt without gripping, and no amount of additional turning will restore the bite. The fix is straightforward: discard the stripped nut and replace it with a new one of the same thread pitch and diameter. Most toilet seat fixing kits include spare nuts for exactly this reason.
Cracked porcelain mounting ears present a more serious challenge. These are the small "wings" of ceramic that flank each bolt hole on the bowl rim. Overtightening, impact damage, or age-related stress can fracture them, leaving the bolt with nothing solid to clamp against. For hairline cracks that haven't fully separated the ear from the bowl, a two-part waterproof epoxy — applied to the crack, clamped, and cured for 24 hours — can restore enough structural integrity to hold a seat. Sand the area lightly before applying the epoxy so it bonds to raw ceramic rather than glaze.
If the mounting ear has broken away entirely or the bolt hole itself has crumbled, a standard through-bolt won't work anymore. Anchor-style repair kits designed for damaged bolt holes offer a workaround: they spread clamping force across a wider area of intact porcelain using an oversized backing plate, bypassing the damaged section altogether. It's not a permanent solution for severe breaks — at some point a cracked bowl needs replacing — but it can buy months or even years of stable use on minor damage.
Here's a quick-scan reference matching common symptoms to their most effective solutions:
- Seat wobbles but bolts feel tight — Worn or flattened rubber bushings. Replace washers and bushings, or install the complete fixing kit.
- Seat loosens repeatedly within weeks — Fatigued plastic bolts losing clamping force. Replace the entire bolt-nut-washer set.
- Nut won't turn at all — Corrosion has seized the threads. Apply penetrating oil, wait 15-20 minutes, then attempt removal. Cut the bolt if it remains frozen.
- Wrench spins the nut but it won't tighten — Stripped threads on the nut or bolt. Replace the stripped component with a matching thread-pitch part.
- Bolt hole feels loose or porcelain is cracked around the hole — Damaged mounting ear. Repair with epoxy for hairline cracks, or use an anchor-style repair kit with an oversized backing plate for larger damage.
- Seat slides forward even when bolts are snug — Missing rubber bumpers on the seat's underside, or hinge plate not centered. Reposition the seat and add adhesive bumpers to the underside.
Every one of these fixes eventually leads to the same practical question: where do you actually find the right replacement parts — and is it better to buy individual bolts or invest in a complete kit that bundles every component you need?
Complete Fixing Kits and Where to Source Replacement Hardware
Hunting for a single plastic nut or one specific washer sounds like the thrifty move — until you realize the bolt threads don't match the nut you already have, the washer is a millimeter too thin, and the rubber bushing you found online ships from overseas with a three-week wait. Piecemeal sourcing is a gamble. It can work if you know the exact thread pitch, diameter, and material of every component. For most people, though, a toilet seat fixing kit complete with matched parts is the faster, more reliable path back to a solid seat.
What a Complete Fixing Kit Typically Includes
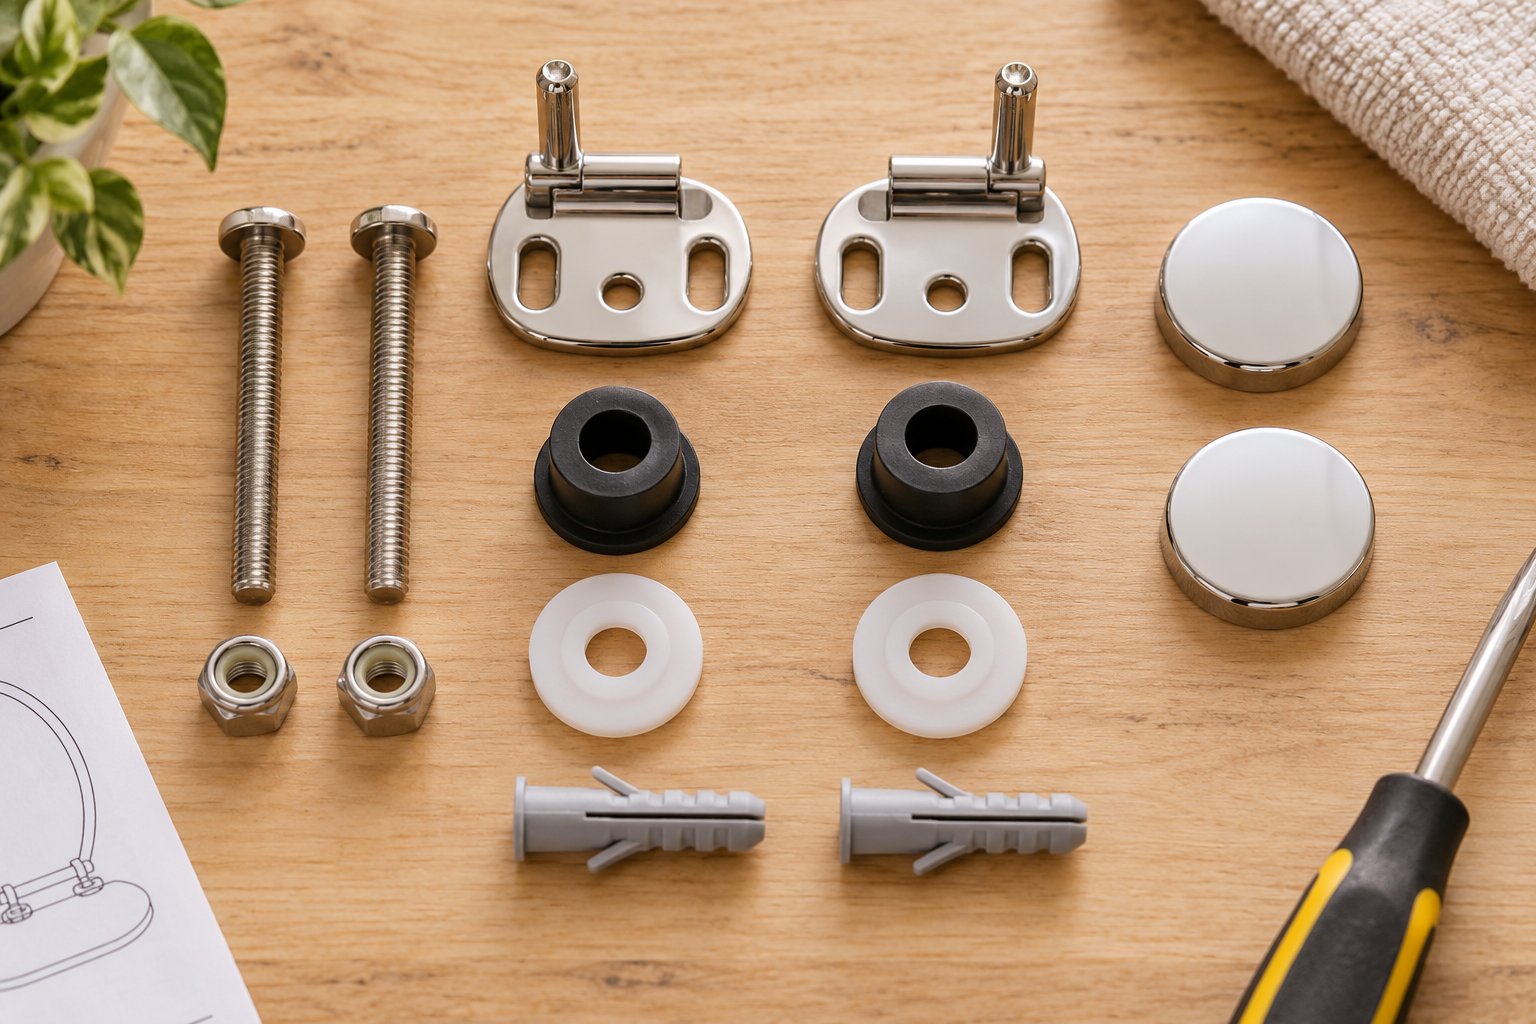
Open a quality toilet seat hinge mounting kit and you'll find a specific set of components engineered to work together:
- Hinge mounting plates — These sit on top of the bowl rim and anchor the hinge barrels. Plates may be flat stamped metal, reinforced plastic, or stainless steel, depending on the kit's intended load rating.
- Bolts (two) — Matched in length, diameter, and thread pitch to the kit's nuts. Top-fix kits include bolts designed to thread into expansion anchors; bottom-fix kits include through-bolts sized for standard mounting holes.
- Nuts and wing nuts — Pre-matched to the bolt threads so you never have to guess whether you're dealing with 5/16"-18 UNC or M8 x 1.25.
- Washers and rubber bushings — These cushion the porcelain, prevent metal-on-ceramic contact, and create the friction layer that keeps nuts from backing off under vibration.
- Expansion anchors or dowels — Included in top-fix kits for insertion into the mounting holes from below, giving the bolt something to grip inside a blind or open hole.
- Cover caps — Snap-on or screw-on plastic caps that hide the bolt heads for a cleaner appearance.
Why does buying these as a set matter? Thread compatibility is the biggest reason. A bolt and nut from the same kit are guaranteed to share the same thread pitch and diameter — eliminating the cross-threading risk that plagues mix-and-match repairs. Beyond threads, the washer thickness, bushing durometer, and bolt length are all calibrated to deliver the right clamping force for that kit's target toilet type. Swap in a washer from a different manufacturer and you might lose a critical millimeter of compression that keeps the seat from rocking.
There's a practical availability issue worth noting, too. Individual items — a standalone plastic bolt, a single loose washer, a specific hinge pin, or a replacement cover cap — aren't always sold separately. Many suppliers bundle these parts exclusively into complete assemblies, so if one component fails, your most practical option is often a full replacement toilet seat hardware kit rather than a scavenger hunt for a single piece.
Sourcing Hardware from Manufacturers and Distributors
Where to buy toilet seat bolts and complete kits depends largely on scale. A homeowner replacing one seat has different needs than a property manager outfitting 40 rental units or a sanitary ware brand sourcing components for a new product line. Three main channels cover the spectrum, each with distinct advantages.
- Manufacturer-direct suppliers — For sourcing teams, commercial property managers, and product developers, going straight to the manufacturer offers the widest selection and the ability to match hardware across multiple toilet configurations from a single catalog. Tianyun's Toilet Seat Fixing Systems exemplify this approach — their range spans top-fix kits, adjustable quick-release fixing kits, standard lift-off kits, easy-fix kits, stainless steel bases, and custom fixing options developed for specific OEM hinge structures and installation requirements. For buyers managing rental portfolios, hotel restroom programs, or manufacturing lines, a manufacturer-direct relationship means access to SUS304 stainless steel components, POM engineering plastics, and purpose-built assemblies that retail channels rarely stock. Custom solutions — matched to a specific ceramic drawing, hinge design, or bolt-hole configuration — are available through engineering support rather than a one-size-fits-all blister pack.
- Online marketplaces — Platforms like Amazon, eBay, and specialty plumbing retailers carry a broad range of residential kits from brands like Bemis, Kohler, and Fluidmaster. Selection is vast, but quality varies widely. Reading reviews for fit complaints — "bolts too short," "wing nuts stripped immediately" — can help you filter out poorly manufactured kits before you buy. Online marketplaces work best when you already know the exact specifications you need and can match them against product listings.
- Retail hardware stores — Walking into a Home Depot, Lowe's, or Ace Hardware lets you physically compare kits, check bolt lengths against the measurements you took earlier, and walk out with parts the same day. The trade-off is a narrower selection — most big-box stores stock a handful of universal kits rather than model-specific options. For a standard two-piece residential toilet, that's usually sufficient. For one-piece models, imported fixtures, or commercial-grade needs, you'll likely need to look beyond the shelf.
Each channel has its sweet spot. A single-bathroom homeowner picking up a universal kit at a hardware store gets the job done in an afternoon. A facilities manager standardizing hardware across a 200-unit apartment complex saves significant time and cost by working with a manufacturer like Tianyun, where bulk orders, consistent quality across production runs, and engineering support for custom configurations streamline the entire replacement cycle. Online marketplaces fill the middle ground — convenient for small-batch orders when you know your specs but don't need manufacturer-level customization.
The sourcing decision also shapes your long-term maintenance strategy. A kit you can reorder identically two years from now — same bolt length, same thread pitch, same bushing material — eliminates the re-measurement and guesswork that come with switching brands or suppliers between replacements. That kind of consistency matters most for anyone managing multiple toilets, where a mismatched kit on unit 37 means a callback, a second truck roll, and a frustrated tenant.
Choosing the right kit and the right supplier solves today's problem. But hardware doesn't last forever — and knowing when to replace rather than retighten, and how to stretch each set of fasteners to its maximum lifespan, is what keeps the wobble from coming back.
Maintenance, Replacement Timing, and Long-Term Hardware Strategy
Retightening a loose bolt feels like a fix. And sometimes it is — for a month or two. But there's a point where retightening stops working and replacement becomes the only real answer. Recognizing that tipping point, and knowing how to delay it as long as possible, is what separates reactive bathroom maintenance from a strategy that actually prevents callbacks, cracked porcelain, and wasted weekends.
Signs It Is Time to Replace Your Mounting Hardware
How often should you replace toilet seat hardware? There's no universal expiration date stamped on a bolt, but your fasteners will tell you when they're done — if you know what to look for. Here are the clearest indicators that repair is no longer enough:
- Visible rust or mineral crust on bolts and nuts — Discoloration and flaking metal aren't just cosmetic. Oatey's replacement guide identifies rusty bolts as one of the clearest signs that hardware has weakened structurally. Corrosion eats into the bolt's cross-section, reducing its clamping force even when the nut is fully tightened. Once you see orange or green discoloration spreading across the threads, the bolt is already compromised.
- Recurring looseness after retightening — You snugged the nuts two weeks ago, and the seat is wobbling again. This cycle signals that the rubber bushings have permanently compressed or that plastic bolt threads have fatigued past the point of recovery. No amount of additional torque restores a deformed thread.
- Hairline cracks in plastic nuts or washers — Hold the nut up to a light source. Fine fracture lines running along the flats or through the thread bore mean the nylon or ABS has reached its fatigue limit. A cracked nut can shatter under load without warning, dropping the seat mid-use.
- Wobble that returns within weeks of a fix — If you've replaced the bushings, retightened to spec, and the seat still loosens in under a month, the bolts themselves are the problem. Thread deformation on the bolt shank — invisible to the naked eye — lets the nut creep backward under daily loading cycles.
- Cracked or stripped bolt heads — A screwdriver slot that's rounded out, a hex head with dented corners, or a Phillips recess that can't grip a driver tip anymore means you can't apply controlled torque. Without controlled torque, you can't maintain a reliable connection.
For high-humidity bathrooms — think primary baths with daily showers, or any bathroom without an exhaust fan — proactive replacement every three to five years keeps you ahead of the corrosion curve. Guest bathrooms with lighter use and better ventilation can often stretch hardware life to seven years or more. Either way, a quick annual inspection catches problems early, before a corroded bolt seizes in place and turns a five-minute swap into a hacksaw job.
Maintenance Tips to Extend Hardware Life
A few minutes of preventive care can double the useful lifespan of your toilet seat mounting hardware. None of these steps require special skills — just a little consistency.
Check bolt tightness every six months. Flip open the bolt caps (if your kit has them), insert a screwdriver into the bolt head, and give it a gentle test turn. If there's any play, snug it with a quarter-turn. For bottom-fix systems, reach underneath and confirm the nuts haven't backed off. Catching a quarter-turn of looseness now prevents the rocking motion that accelerates bushing wear and thread fatigue.
Wipe down exposed metal hardware during regular cleaning. Bathroom cleaners, hard-water spray, and condensation leave mineral films on bolt heads and hinge plates. Those films trap moisture against the metal surface, creating a micro-environment where toilet seat bolt corrosion prevention fails even on stainless steel. A quick wipe with a damp cloth — during the same cleaning pass you already give the bowl — removes deposits before they harden into crust.
Here's a low-cost trick that makes a real difference: House Digest recommends brushing a thin coat of clear nail polish onto exposed screw heads to seal out moisture and prevent rust formation. Apply one to two coats on clean, dry hardware, and reapply every couple of months as regular cleaning wears the coating away. It's a simple barrier that costs practically nothing and keeps metal fasteners looking — and performing — like new far longer than bare hardware.
Apply a thin film of plumber's grease on metal threads during installation. This step takes ten seconds and pays off years later. Grease fills the microscopic gaps between mating threads, blocking water intrusion and preventing the galvanic corrosion that welds dissimilar metals together. When it's finally time to replace the hardware, a greased bolt turns out smoothly instead of fighting you with seized threads and snapped heads. Silicone-based plumber's grease is the best choice here — it won't degrade rubber bushings the way petroleum-based lubricants can.
One more habit worth building: every time you deep-clean the toilet, lift the seat and inspect the hinge area for water pooling. Standing water around bolt holes accelerates corrosion faster than humidity alone. If you spot pooling, dry the area and check whether the seat's rubber bumpers are still intact — missing bumpers let the seat sit flat against the rim, creating pockets where water collects.
Building a Long-Term Hardware Strategy
For a single household bathroom, "strategy" might feel like a strong word — buy a kit, install it, check it twice a year, replace it when it shows wear. That's a perfectly sound approach for one or two toilets.
But imagine managing 30 rental units, a hotel floor with 60 guest rooms, or a commercial building with restrooms on every level. Suddenly, toilet seat hardware maintenance scales into a logistics challenge. Different toilets from different eras with different mounting systems mean different kits, different bolt sizes, and different reorder cycles. A maintenance tech arrives at unit 14 with a top-fix kit only to find a two-piece toilet that needs bottom-fix through-bolts — and the afternoon is gone.
Standardizing on a single compatible mounting system across as many fixtures as possible eliminates that guesswork. When every toilet in a portfolio uses the same bolt diameter, thread pitch, and hinge configuration, you can stock one SKU, train one procedure, and resolve any seat issue in a single visit. That consistency also improves bulk pricing and reduces the dead inventory that accumulates when you're juggling five different kits for five different toilet models.
For sourcing teams working at this scale — whether managing properties, specifying components for a new construction project, or developing seat products for OEM distribution — Tianyun's Toilet Seat Fixing Systems offer a manufacturer-direct catalog that spans top-fix, bottom-fix, quick-release, and custom configurations under one roof. Their engineering support can match hardware to specific ceramic geometries, which means a property manager standardizing across mixed toilet brands can find a single fixing system compatible with all of them — rather than maintaining separate inventory lines for each model.
Whether you're a homeowner replacing one kit or a facilities director planning hardware cycles across hundreds of units, the underlying principle is the same: know when to replace, maintain what you have, and source components you can reorder identically next time. That simple framework turns a reactive chore into a predictable, low-stress routine.
The right mounting hardware, properly installed and periodically checked, keeps a toilet seat secure for years — and knowing how to identify, size, and source that hardware puts you in control of every replacement.
Frequently Asked Questions About Toilet Seat Mounting Hardware
1. What size are standard toilet seat mounting bolts?
Most residential toilet seat bolts measure 2-3/8 to 3 inches in length with a 5/16-inch or 3/8-inch diameter. The standard thread pitch is Unified National Coarse (UNC), typically 5/16"-18 or 3/8"-16. Imported fixtures may use metric equivalents such as M8 x 1.25 or M10 x 1.5. Always verify both diameter and thread pitch before purchasing replacements, because mixing imperial bolts with metric nuts will strip the threads almost immediately.
2. How do I fix a toilet seat that keeps coming loose?
Start by retightening the nuts beneath the bowl using an adjustable wrench, alternating quarter-turns on each side. If the seat loosens again within a few weeks, the rubber bushings or washers have likely flattened and lost their grip. Replace them with fresh components. When looseness persists even after new bushings, the plastic bolts may have fatigued beyond recovery. In that case, install a complete toilet seat fixing kit with matched bolts, nuts, washers, and bushings to restore a secure, wobble-free connection.
3. What is the difference between top-mount and bottom-fix toilet seat hardware?
Top-mount (top-fix) systems tighten entirely from above the bowl rim using expansion anchors inserted into the mounting holes, so no under-bowl access is needed. They suit back-to-wall, skirted, and one-piece toilets. Bottom-fix through-bolt systems pass bolts through from above and secure with nuts tightened from beneath the bowl using a wrench. Bottom-fix kits are the most common and budget-friendly option for standard two-piece toilets with accessible undersides. Choosing the wrong type leads to installation failure, so identify your toilet style first.
4. How do I remove rusted toilet seat bolts that won't turn?
Spray penetrating oil generously around the nut-to-bolt junction from below and on the bolt head from above, then wait at least 15 to 20 minutes for capillary action to loosen the corrosion. Grip the nut with locking pliers underneath while holding the bolt head with a screwdriver from above, and apply slow, steady pressure. If the bolt remains seized, cut through it using a mini hacksaw or oscillating multi-tool with a metal-cutting blade. Protect the porcelain with painter's tape before cutting to prevent scratches or chips.
5. How often should toilet seat mounting hardware be replaced?
In high-humidity primary bathrooms, proactive replacement every three to five years helps you stay ahead of corrosion and material fatigue. Guest bathrooms with lighter use and better ventilation can often stretch hardware life to seven years or more. Key replacement indicators include visible rust or mineral crust on bolts, recurring looseness after retightening, hairline cracks in plastic nuts, and wobble that returns within weeks of a fix. A semi-annual tightness check and regular wipe-downs of exposed metal extend hardware lifespan significantly.
Apply This Insight to Your Project
Tell us what you are building and how the topic “Toilet Seat Mounting Hardware Decoded: Every Type, Size, and Fix” relates to your application. Our engineering team can help evaluate the next step.