What Every Homeowner Should Know About Toilet Seat Repair Kits
You jiggle the seat, tighten the bolts, and two weeks later the whole thing is wobbling again. Sound familiar? Toilet seat repair feels like it should be a five-minute job, yet it trips up homeowners more often than almost any other bathroom fix. The real problem is rarely a lack of effort - it is a lack of the right parts and the right knowledge working together.
This guide takes a different approach. Instead of throwing product links at you, it walks through diagnosis first, components second, and repair steps third. By the end, you will know exactly which toilet seat repair kit matches your specific issue and how to install it correctly the first time.
What Is a Toilet Seat Repair Kit
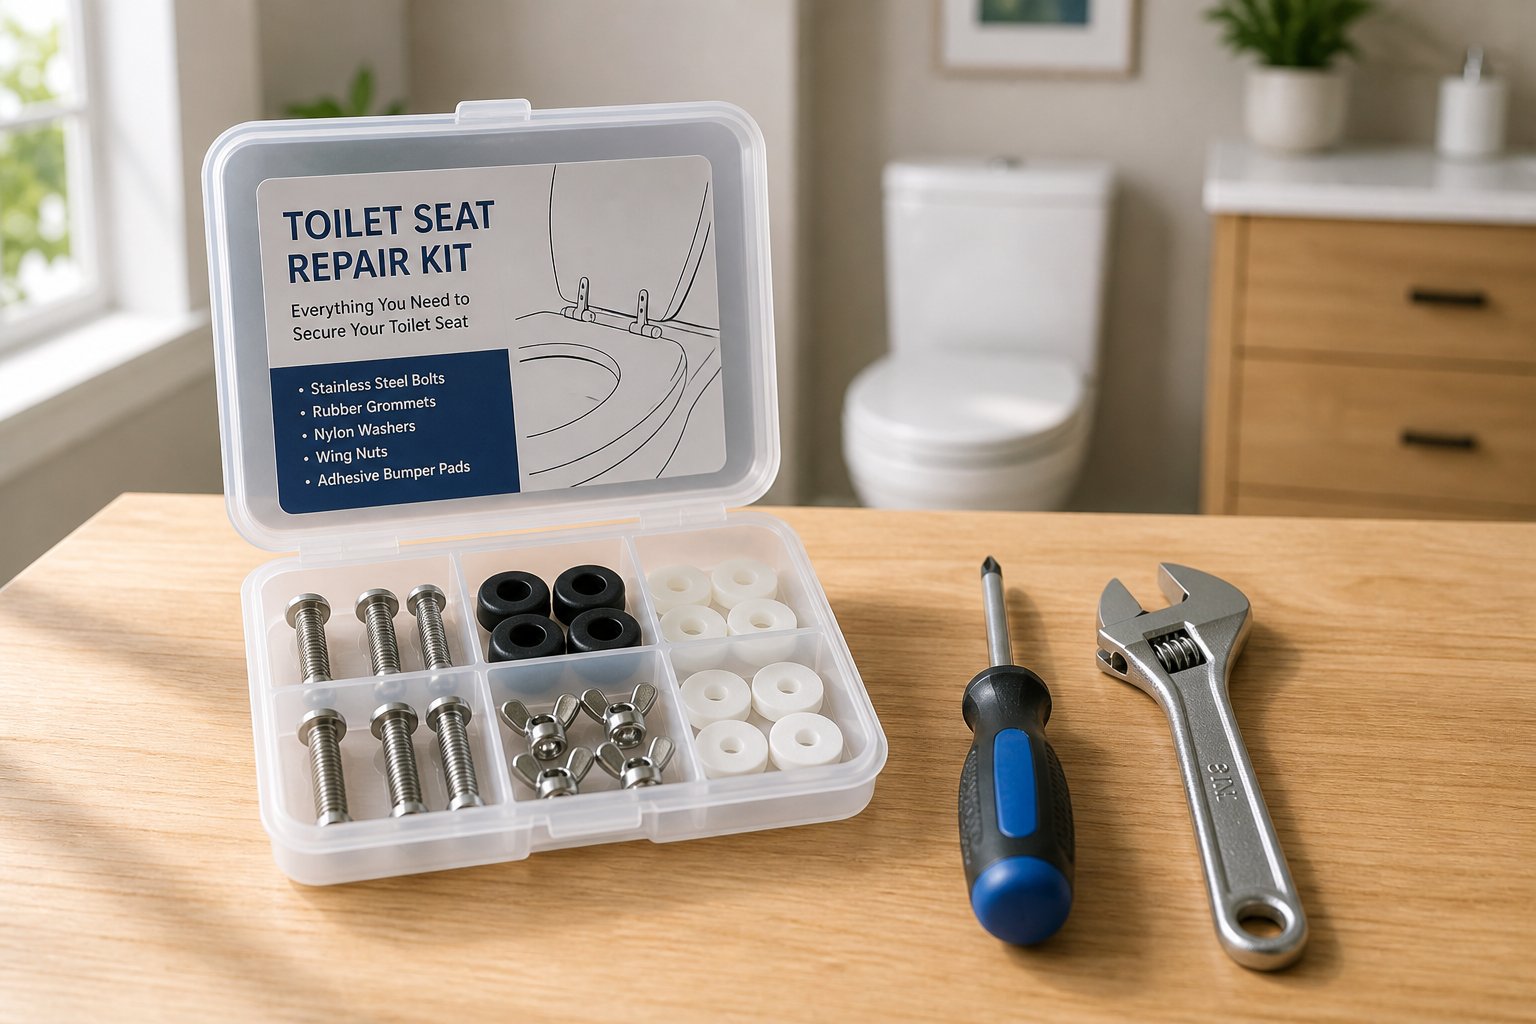
A toilet seat repair kit is a packaged set of hardware components designed to restore a loose, broken, or unstable seat to proper function. Think of it as a toilet fixing kit that bundles everything you need in one purchase instead of forcing you to hunt down individual parts at a hardware store.
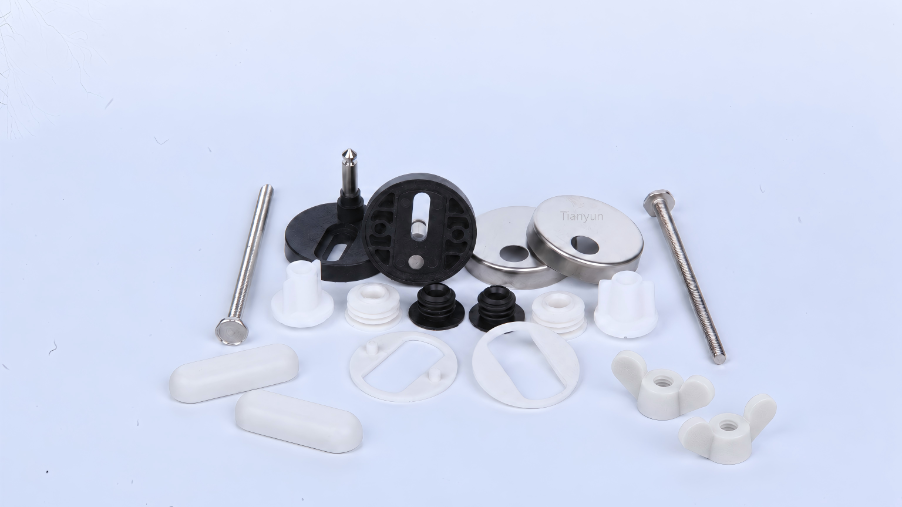
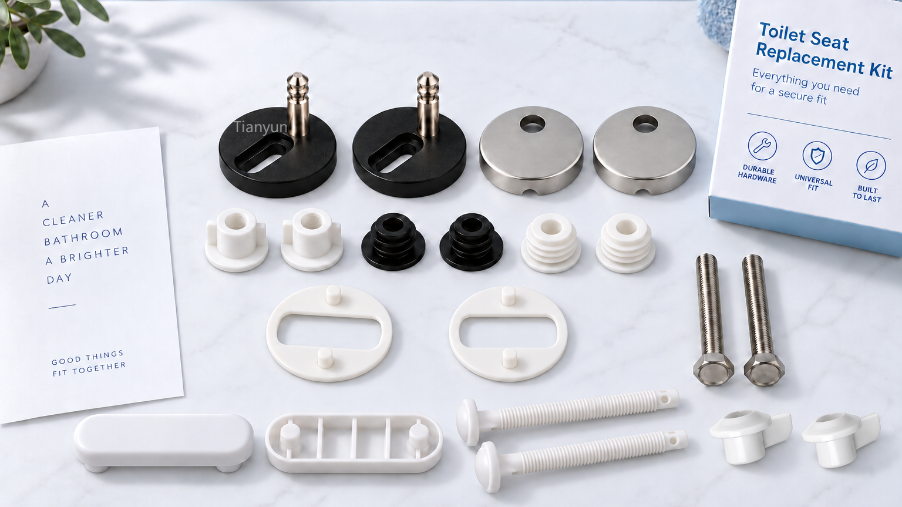
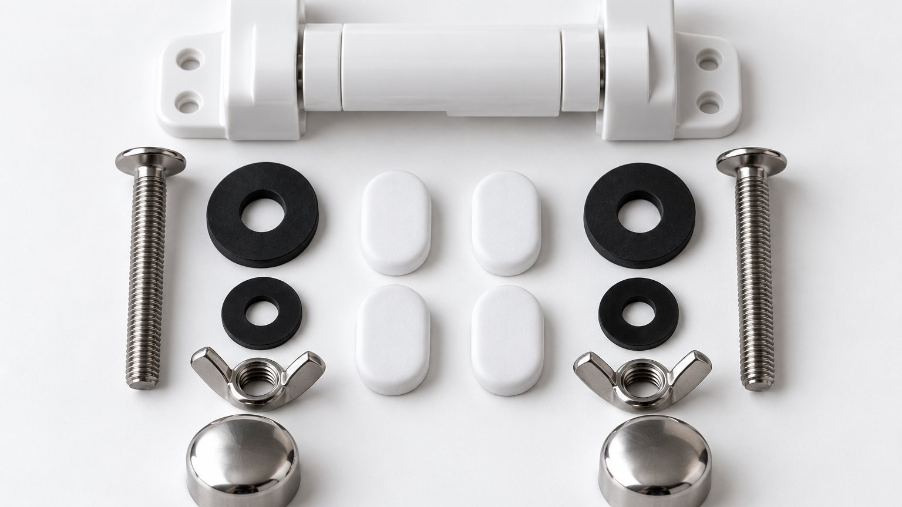
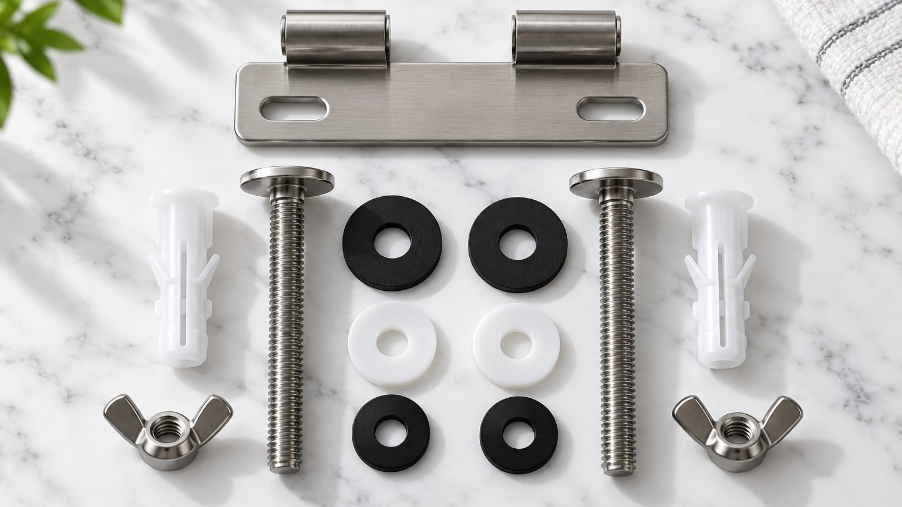
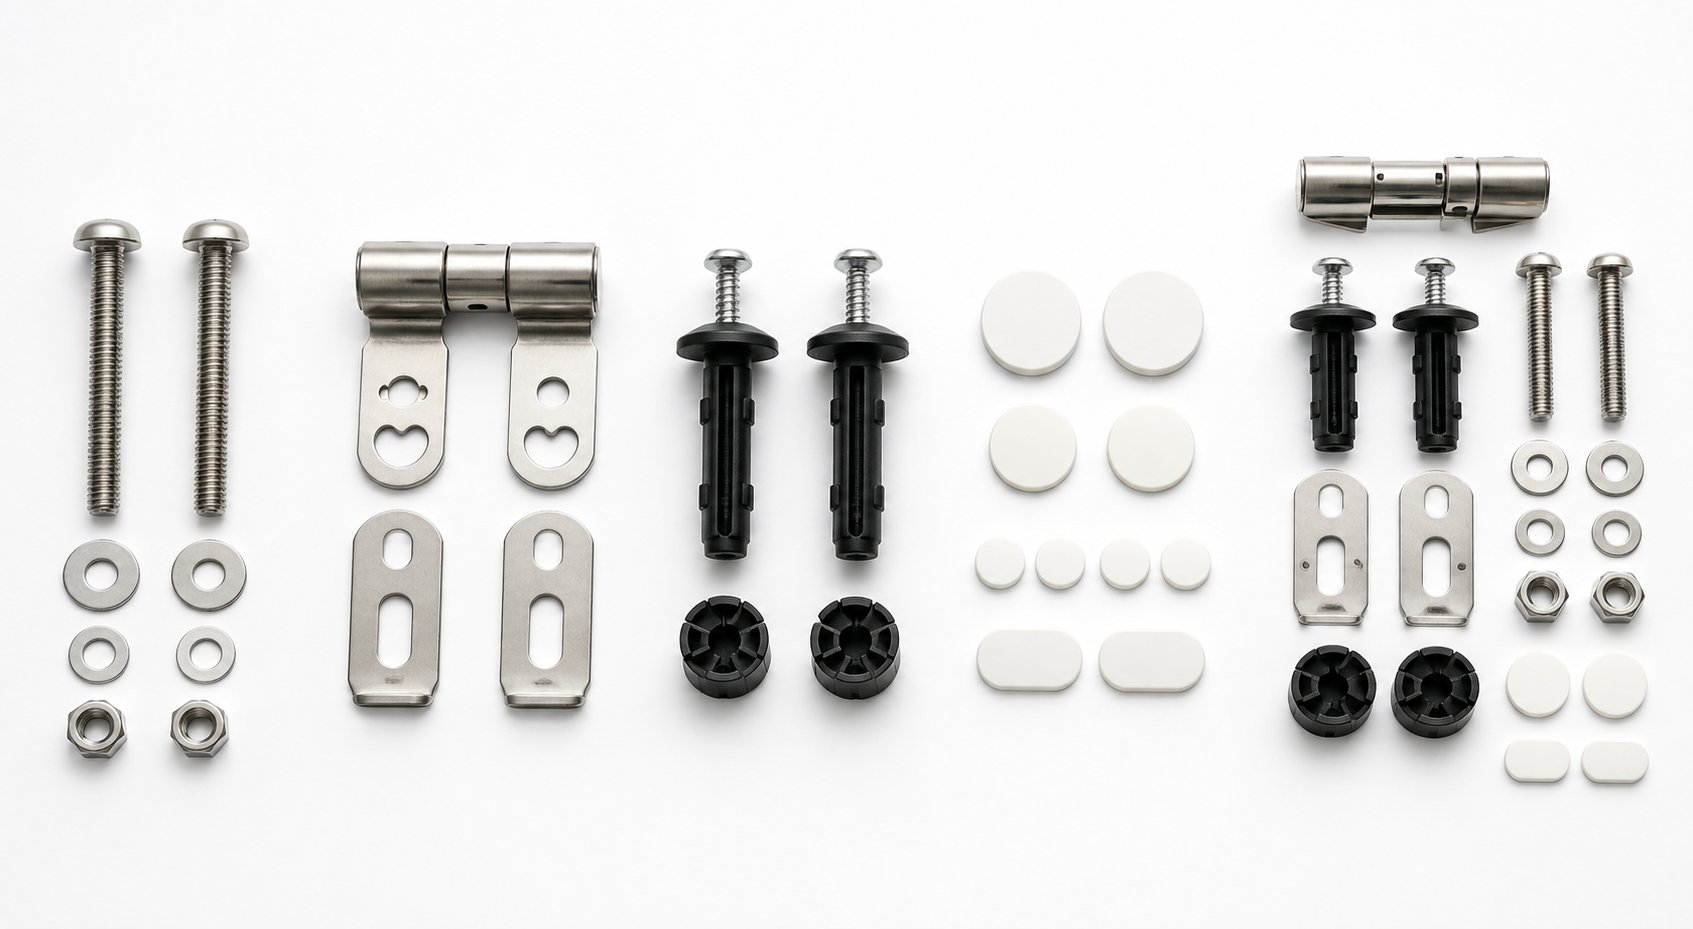
Most kits include some combination of bolts, nuts, washers, rubber grommets, hinge assemblies, and adhesive bumper pads. The exact contents depend on the type of problem the kit targets - a toilet seat replacement kit for mounting hardware looks very different from one designed to replace soft-close hinges. Some basic kits also include small tubes of toilet seat glue for reattaching bumpers or stabilizing minor cosmetic cracks, though adhesive alone is rarely a permanent structural fix.
Why Most DIY Toilet Seat Repairs Go Wrong
Three issues derail the majority of toilet seat repair attempts. First, homeowners grab a universal bolt set without confirming whether their toilet uses a top-fix or bottom-fix mounting system - and the two are not interchangeable. Second, corroded hardware that has been soaking in bathroom humidity for years simply will not budge, turning a quick tightening job into a frustrating battle. Third, many people reach for toilet seat glue or generic adhesives when the actual failure is mechanical, not cosmetic - a worn bushing or stripped thread that no amount of bonding agent can solve.
Most toilet seat issues stem from just five root causes - loose bolts, cracked hinges, missing bumpers, stripped mounting hardware, and incompatible replacement parts - and each one has a specific repair kit solution.
The key is identifying which of those five problems you are actually dealing with before you spend a dollar on parts. A misdiagnosed issue leads to mismatched hardware, wasted time, and a seat that starts shifting all over again within days.
How to Diagnose Your Toilet Seat Problem Before Buying Anything
Grabbing the first repair kit you find online is tempting, but a quick diagnosis saves you from buying parts that do not match your actual problem. Each toilet seat issue leaves specific clues, and reading those clues correctly points you toward the exact toilet seat fix you need.
Loose or Wobbly Toilet Seat
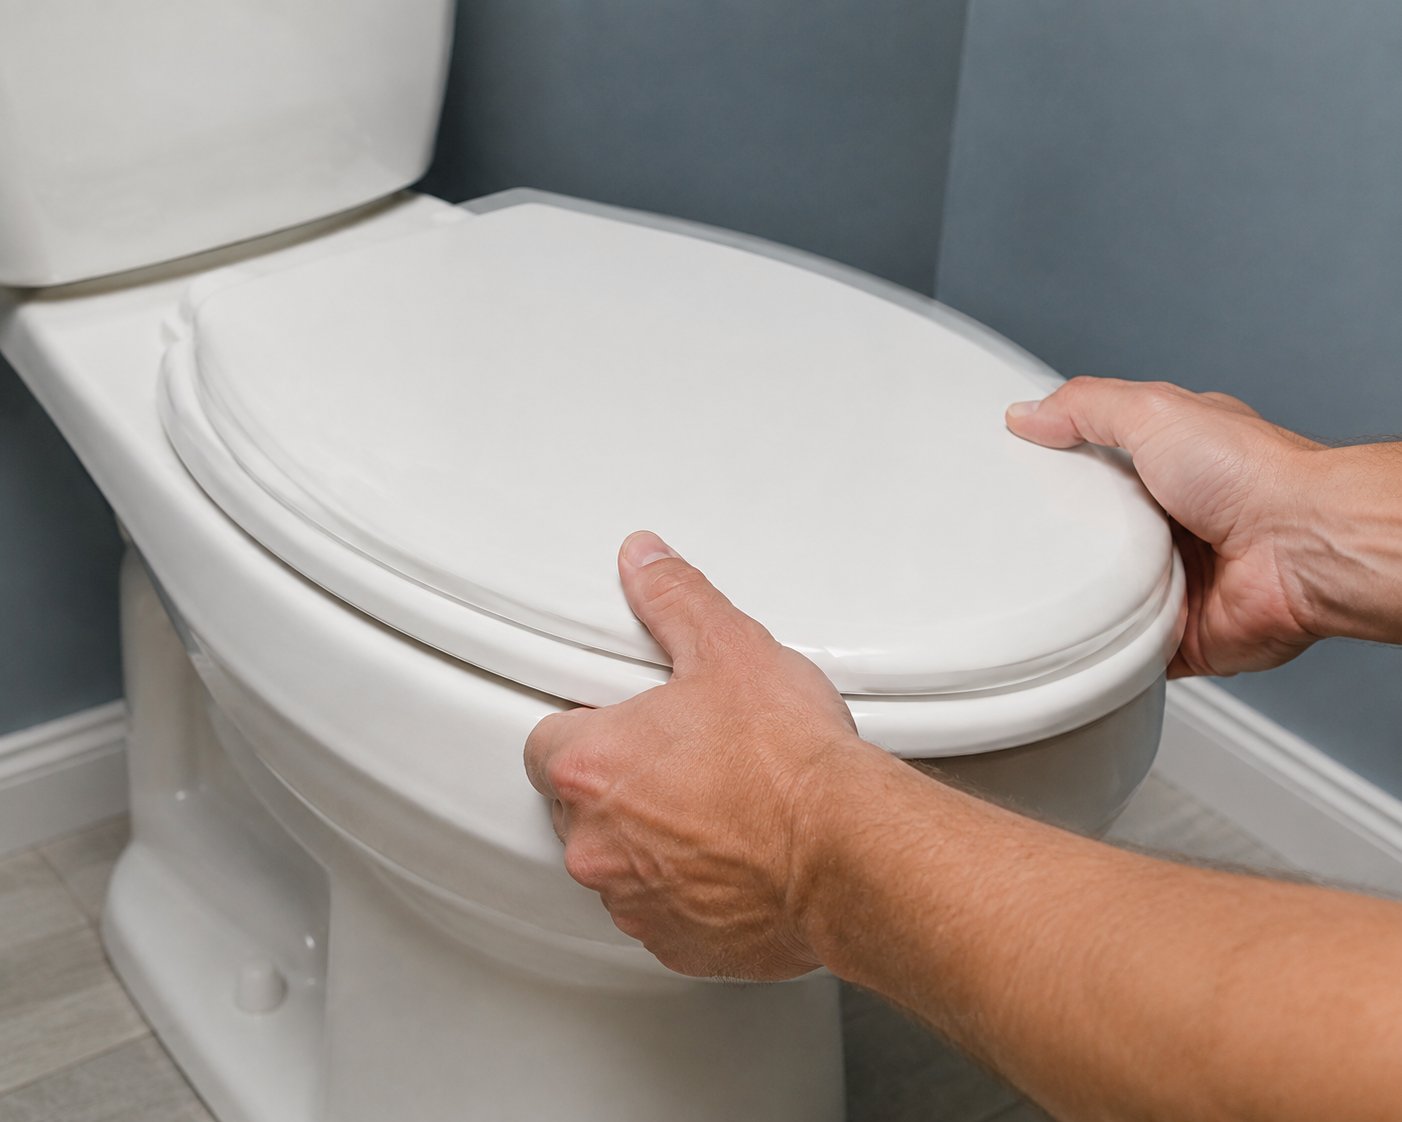
A seat that slides from side to side when you sit down is the single most common complaint. Here is a simple test: grip the front edge of the seat with both hands and try to shift it left and right. If it moves more than a fraction of an inch, the mounting hardware has failed in some way.
The usual culprits are worn-out bolts, stripped threads that can no longer grip a nut, or degraded rubber bushings that have lost their ability to hold tension. Over time, the repeated stress of sitting and standing gradually loosens these toilet seat components, especially in households with heavy daily use. A toilet seat tightening kit - typically a set of fresh bolts, washers, and lock nuts - resolves this in most cases.
Cracked or Broken Hinges
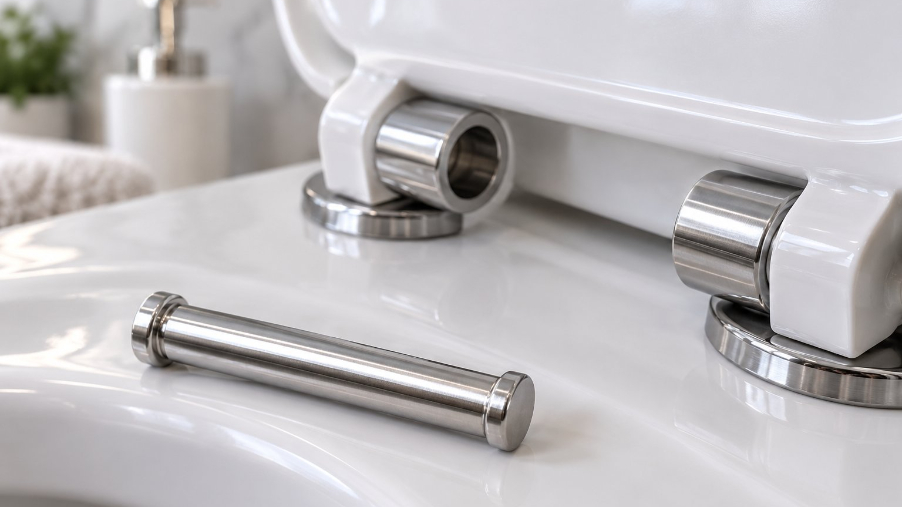
When you need to repair a toilet seat hinge, the signs are usually visible. Plastic hinges grow brittle after years of exposure to chemical cleaners and bathroom humidity. Look for hairline cracks along the hinge arms, white stress marks at pivot points, or hinge assemblies that no longer spring back with any resistance. Metal hinge pins can also corrode, causing the seat to sit unevenly or bind during opening. If the hinge arm snaps entirely, no amount of bolt tightening will stabilize the seat - the hinge mechanism itself needs replacement.
Missing or Flattened Bumpers
Ever wonder why your seat slams down louder than it used to? Those small rubber or adhesive pads on the underside of the seat and lid - the bumpers - wear flat or fall off over time. Without them, hard plastic or wood strikes porcelain directly, creating that sharp crack every time the seat drops. Beyond the noise, repeated impacts can chip the bowl rim, leading to a far more expensive problem than a few replacement pads.
Stripped or Rusted Mounting Bolts
Bottom-mount bolts sit in one of the worst environments in your bathroom: directly beneath the bowl rim where moisture, condensation, and cleaning products collect constantly. Zinc-plated steel bolts are especially vulnerable - once the protective coating wears through, rust forms fast. You will recognize the problem when a wrench spins freely without tightening (stripped threads) or when the bolt head crumbles the moment you apply torque. At that point, the entire fastener set needs to go.
Understanding each of these parts of a toilet seat and how they fail makes it far easier to match your specific symptom to the right solution. The table below maps the most common issues directly to the kit category you should be searching for.
| Symptom | Root Cause | Kit Type Needed |
|---|---|---|
| Seat slides side to side | Worn bolts, stripped threads, or degraded bushings | Bolt and hardware replacement kit or seat stabilizer kit |
| Hinge cracked, stiff, or broken | Brittle plastic, corroded pins, or failed dampers | Hinge repair and replacement kit |
| Loud slamming or seat rocking on porcelain | Missing or flattened bumper pads | Bumper and buffer replacement kit |
| Bolts spin freely or crumble when turned | Stripped threads or advanced rust and corrosion | Complete seat mounting kit with new fasteners |
Matching the symptom to the root cause narrows your search dramatically, but you still need to understand what is actually inside each of those kit categories - and what every individual component does once you open the package.
Every Component Inside a Toilet Seat Repair Kit and What It Does
You have identified the problem and matched it to a kit category. You open the package - and find a bag of small hardware pieces with minimal labeling. Which part goes where? What does each piece actually do? Understanding every individual component turns a confusing pile of toilet seat parts into a logical, step-by-step assembly.
Bolts and Fasteners Explained
Bolts are the backbone of any mounting system. They anchor the seat to the bowl, and the type you find in your kit determines how the entire installation works. Here are the three most common fastener styles you will encounter:
T-bolts feature a flat, T-shaped head that slides into the mounting holes on top of the bowl. The wide head prevents the bolt from spinning while you secure a nut from underneath. These are the standard fasteners in bottom-fix toilet fittings and have been used in residential toilets for decades.
Hex bolts use a traditional hexagonal head that requires a wrench or socket to hold steady during tightening. You will typically see these in heavier-duty commode seat parts or commercial-grade kits where extra clamping force is needed.
Top-tightening bolts work with an expanding anchor or a threaded insert beneath the bowl rim, allowing you to install and tighten everything entirely from above. No reaching underneath, no second pair of hands needed. These are increasingly popular in modern toilet seat pieces because they simplify installation significantly.
Material matters just as much as bolt style. Brass resists corrosion exceptionally well and holds up in humid environments for years. Stainless steel offers similar durability with greater tensile strength. Nylon bolts eliminate metal-on-porcelain risk entirely but sacrifice some clamping power. Zinc-plated steel is the most affordable option, though the plating can wear through over time, exposing the base metal to rust - exactly the problem many homeowners are trying to fix in the first place.
Washers, Grommets, and Bushings
If bolts are the backbone, washers, grommets, and bushings are the cushioning system. Each one plays a distinct role in protecting your toilet and keeping things stable:
Rubber grommets sit between the bolt and the porcelain surface. Their primary job is preventing direct metal-to-ceramic contact, which can chip the bowl or cause stress fractures over time. Imagine tightening a steel bolt directly against a ceramic surface with no buffer - even moderate torque could create a hairline crack.
Nylon washers distribute clamping force across a wider area. Instead of concentrating pressure at a single point around the bolt shaft, the washer spreads that load outward. This even distribution is what keeps the seat sitting flat rather than tilting slightly to one side.
Rubber bushings fit snugly around the bolt shaft inside the mounting hole. They absorb the micro-vibrations caused by sitting, shifting, and standing - the repetitive movement that gradually loosens toilet bowl seat parts over months of use. A fresh set of bushings is often the difference between a repair that lasts six months and one that lasts years.
Nuts, Caps, and Bumpers
The remaining toilet lid parts in a typical kit handle securing, finishing, and cushioning. Here is what each one does:
- Wing nuts (nylon or metal): Feature flat "wings" for tool-free hand tightening. Ideal for quick adjustments and common in universal toilet fittings kits. Nylon versions resist corrosion; metal versions provide stronger grip.
- Acorn nuts (brass or stainless steel): Dome-shaped cap nuts that cover exposed bolt threads for a clean, finished appearance. They also prevent moisture from wicking up exposed threads and accelerating rust.
- Nylon-insert lock nuts (stainless steel or zinc-plated): Contain a nylon ring inside that grips the bolt threads and resists loosening from vibration. These are the most effective nut type for long-term stability.
- Snap caps (plastic): Decorative covers that snap over bolt heads or nuts to conceal hardware from view. Purely cosmetic, but they also act as a moisture barrier.
- Adhesive seat bumpers (rubber or silicone): Small pads that stick to the underside of the seat and lid. They cushion the impact when the seat closes, reduce noise, and prevent the seat from sliding on the porcelain rim. Most kits include four to eight bumpers in varying sizes.
Keep in mind that kit contents vary considerably by manufacturer and by the fixing system the kit is designed for. A basic bolt replacement kit might only include fasteners and washers, while a complete mounting kit packs every component listed above. The type of fixing system your toilet uses - top-mount or bottom-mount - also dictates which specific hardware configurations you will find inside the box, a distinction worth exploring in detail.
Five Types of Toilet Seat Repair Kits and When You Need Each One
Knowing what each component does is one thing. Knowing which kit bundles the right components for your specific problem is what actually gets the seat fixed. Toilet seat repair kits fall into five distinct categories, each targeting a different failure point. Picking the wrong category means opening a box full of parts you do not need - and missing the ones you do.
Hinge Repair and Replacement Kits
These kits replace the entire hinge mechanism, not just a bolt or washer. Inside you will typically find mounting plates, hinge pins, connecting arms, and the screws that secure everything to the bowl. They are the right choice when the hinge itself has cracked, seized, or lost its tension entirely - problems that no amount of bolt tightening can solve.
One important detail: if you are trying to figure out how to repair a soft close toilet seat, a standard hinge kit will not do the job. Soft-close seats rely on a built-in hydraulic or pneumatic damper that controls the lowering speed. When that damper fails, the seat drops like a conventional lid. You will need a hinge kit that specifically includes a toilet seat dampers replacement, matched to your seat model's damper housing dimensions.
Bolt and Hardware Replacement Kits
This is the most commonly purchased category by a wide margin. A bolt and hardware kit focuses entirely on mounting fasteners: bolts, nuts, and washers. If your diagnosis pointed to stripped threads, rusted bolts, or degraded bushings, this is the toilet seat fixing kit you want. Most versions include enough parts to mount one seat, though some bundle extras for future use. The simplicity of these kits is their strength - fewer parts, less confusion, and a direct solution to the majority of loose-seat complaints.
Seat Stabilizer and Tightening Kits
Sometimes the existing bolts are still functional, but the seat wobbles anyway. Stabilizer kits address this gap by adding components that work alongside your current hardware rather than replacing it. Expanding rubber anchors grip the inside of oversized mounting holes, while stabilizing washers create a tighter interface between the seat and the bowl rim. These kits are ideal for older toilets where the mounting holes have worn slightly larger over years of use, and they are a practical alternative when you want to eliminate wobble without a full teardown.
Bumper and Buffer Replacement Kits
These are the simplest toilet seat repair kits on the market. They contain adhesive rubber or silicone bumper pads and, in some cases, snap-in buffer replacements designed to fit specific seat models. The pads stick to the underside of the seat and lid, cushioning impact and reducing noise. If your only complaint is a seat that slams or slides on the porcelain, a bumper kit solves the problem in under five minutes with no tools required.
Complete Seat Mounting Kits
A complete mounting toilet seat kit includes every piece of hardware needed to attach a new seat from scratch: bolts, nuts, washers, grommets, bushings, hinge assemblies, and bumpers. These all-in-one packages are the right pick when you are installing a brand-new seat that shipped without hardware, or when the existing toilet seat replacement parts are so far gone that a partial fix is not realistic. They cost more than single-category kits but eliminate any guesswork about compatibility between individual components.
To help you prioritize your search, here are the five kit types ranked from most commonly needed to least:
- Bolt and hardware replacement kits - solve the majority of loose-seat issues and are the most frequently purchased.
- Hinge repair and replacement kits - essential when the hinge mechanism has cracked, seized, or lost its soft-close function.
- Seat stabilizer and tightening kits - ideal for persistent wobble when existing bolts are still intact.
- Bumper and buffer replacement kits - quick fix for noise, slamming, and minor seat movement on the rim.
- Complete seat mounting kits - needed less often since new seats usually ship with their own hardware, but invaluable when they do not.
Choosing the right category gets you most of the way to a solid repair, but there is still one critical variable that determines whether the parts inside the box will actually fit your toilet: the mounting system. Your bowl is designed for either a top-fix or bottom-fix configuration, and each one requires fundamentally different hardware.
Top-Mount vs Bottom-Mount Toilet Seat Hardware Systems
Your toilet uses one of two mounting configurations, and every piece of toilet bowl hardware inside your repair kit is engineered for one or the other. Install a top-fix bolt set on a bottom-fix toilet - or vice versa - and the parts simply will not work. Understanding this distinction before you order anything is the single most important compatibility check you can make.
How Top-Fix Systems Work
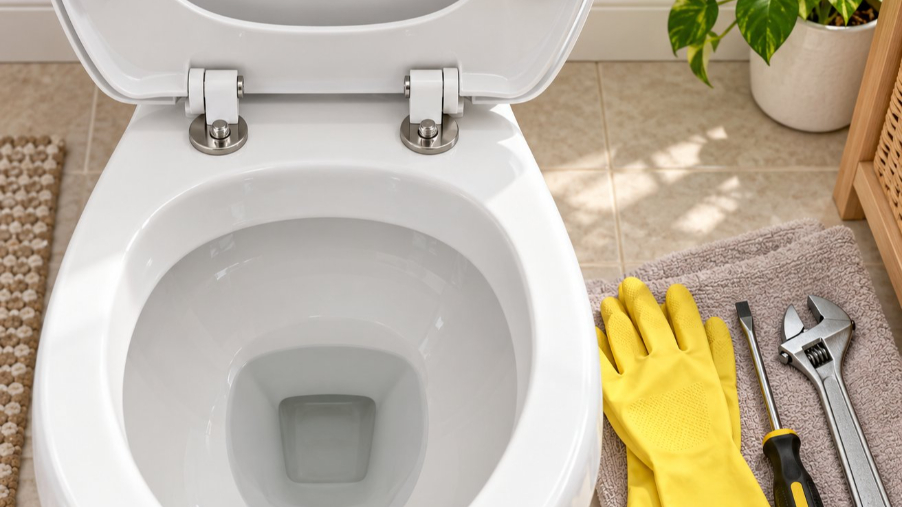
A top-fix (or top-mount) system uses expanding bolts or threaded anchors that drop into the bowl's mounting holes and are tightened entirely from above. Picture a wall anchor: you insert it into the hole, drive a screw from the top, and the hidden portion expands outward to grip the ceramic from inside. Some kits use a rubber expansion dowel, while newer designs rely on a metal anchor plate that rotates into a locking position once it passes through the hole.
The advantages are practical and immediate. You never need to reach underneath the bowl, so installation takes roughly five to ten minutes with nothing more than a screwdriver. These concealed types of toilet seat fixings also deliver a cleaner look - no exposed nuts or bolt threads dangling below the rim. Modern back-to-wall and wall-hung toilets are specifically designed for this system because their enclosed bases make underside access physically impossible.
OEM-grade top-fix kits, such as the stainless steel mounting systems manufactured by Tianyun, take this concept further by pairing anti-corrosion materials with precision-machined anchor mechanisms. The result is a fixing for toilet seat installation that resists the humidity-driven loosening and rust problems covered in the diagnostic section - addressing those common failure points at the hardware level rather than relying on periodic retightening.
How Bottom-Fix Systems Work
Bottom fixing is the traditional approach. Long bolts pass through the mounting holes from above, and you reach underneath the bowl to thread on a nut - usually a wing nut for hand tightening or a hex nut for wrench use. This system has been the residential standard for decades, and you will find it on most older, open-back toilets where the underside of the bowl is fully accessible.
The trade-off? Those exposed toilet seat fittings sit in a humid, splash-prone environment every single day. Zinc-plated steel nuts corrode, wing nut ears snap off, and the bolts themselves can fuse to the porcelain through rust buildup. Installation also tends to be a two-person job - someone holds the bolt head steady from above while a second person tightens the nut from below. In tight bathrooms where the toilet backs up against a wall or vanity, even reaching the underside can be an awkward exercise.
Choosing the Right Fixing System for Your Toilet
Figuring out which system your toilet uses takes about thirty seconds. Reach under the back of the bowl near the hinge area. If you can feel bolt threads and a nut, you have a bottom-fix toilet. If there is nothing protruding from the underside - or the bowl's base is fully enclosed - you need a top-fix kit.
The table below compares both systems across the criteria that matter most when selecting replacement hardware.
| Criteria | Top-Fix System | Bottom-Fix System |
|---|---|---|
| Ease of installation | One person, screwdriver only, 5-10 minutes | Often two people, wrench required, 15-25 minutes |
| Corrosion resistance | Higher - hardware is shielded from direct splash and moisture | Lower - exposed nuts and bolts sit in a humid zone |
| Compatibility | Modern back-to-wall, wall-hung, and skirted toilets | Older open-back toilets with accessible undersides |
| Typical toilet age | Manufactured within the last 10-15 years | Pre-2010 models and traditional designs |
| Appearance | Concealed - no visible hardware beneath the bowl | Exposed bolts and nuts visible underneath |
Professional-grade fixing systems with stainless steel construction - like Tianyun's hinge mounting kits engineered for sanitaryware OEMs - are designed to perform reliably in either configuration while eliminating the corrosion vulnerability that plagues lower-grade hardware over time.
Knowing your fixing system narrows the field considerably, but one more variable can trip you up: whether to buy a universal repair kit that claims to fit everything, or a brand-specific kit built for your exact toilet model. Each option carries real trade-offs worth weighing carefully.
Universal vs Brand-Specific Toilet Seat Repair Kits Compared
You have identified the problem, confirmed your fixing system, and narrowed down the kit category. One decision remains: do you grab a universal kit off the shelf, or track down parts built specifically for your toilet brand? The answer depends on your toilet model, budget, and how long you expect the repair to last.
Universal Repair Kits and Their Limitations
Universal toilet parts are designed to fit the broadest range of toilets possible. To pull that off, manufacturers pack these kits with multiple washer sizes, adjustable-length bolts, and flexible mounting plates that accommodate slight variations in hole spacing and bowl geometry. The appeal is obvious - one box, most toilets covered, no model number research required.
The trade-off is fit precision. A bolt set engineered to work on dozens of different bowls cannot be optimized for any single one. You might find that the washers are slightly too large for your mounting holes, or that an adjustable bolt does not seat as snugly as a fixed-length one would. These small imperfections can introduce minor wobble over time, especially on toilets with non-standard rim contours. For many standard residential models, the difference is negligible. For toilets with proprietary hinge channels or unusual mounting dimensions, a universal kit may require creative workarounds - shimming, trimming, or stacking washers - to achieve a stable result.
Brand-Specific Kits and OEM Hardware
Manufacturers like American Standard, Kohler, and TOTO produce american standard toilet replacement parts and model-specific repair kits engineered to match their exact hardware specifications. The bolts are the precise length, the washers match the mounting hole diameter to the millimeter, and hinge components align with factory attachment points without modification. If you have ever searched for an american standard toilet parts diagram to identify a hinge assembly or bolt configuration, you already understand how tailored these systems can be.
The disadvantage is availability and cost. Brand-specific american standard toilet repair parts - or their equivalents from Kohler and TOTO - typically cost more than universal alternatives, and they are not always stocked at local hardware stores. The challenge grows sharper with older fixtures. If you own a toilet manufactured in the 1980s or 1990s, finding vintage toilet parts american standard or other legacy OEM components can mean scouring specialty plumbing suppliers or salvage outlets. Some discontinued models simply have no brand-specific parts still in production, leaving universal kits as the only viable option.
When to Choose Universal Over Brand-Specific
Here is a practical rule of thumb. If your toilet is a standard residential model with common mounting hole spacing - typically 5.5 inches center to center - a universal kit handles the job well. The bolt lengths and washer sizes in most universal packages are calibrated for this widespread standard, and the fit will be functionally identical to OEM hardware for everyday use.
If, however, your toilet uses a proprietary hinge system, concealed mounting channels, or unusual bolt dimensions, brand-specific american standard replacement parts toilet kits (or their equivalents from other manufacturers) are worth the extra effort. The same applies to old american standard toilet parts or other legacy hardware where a generic bolt simply will not thread into a non-standard mounting insert. Spending twenty minutes sourcing the correct OEM part saves hours of frustration trying to force a universal fit where one does not exist.
The table below breaks down the key differences to help you decide which direction makes sense for your situation.
| Criteria | Universal Kits | Brand-Specific Kits |
|---|---|---|
| Fit precision | Good for standard toilets; may require minor adjustments on non-standard models | Exact match to factory specifications - no modifications needed |
| Price range | $3 - $15 for most bolt and hardware sets | $8 - $30+ depending on manufacturer and component complexity |
| Availability | Widely stocked at hardware stores, home centers, and online retailers | Often limited to manufacturer websites, specialty plumbing suppliers, or authorized dealers |
| Durability | Varies by material quality; budget kits may use zinc-plated steel prone to corrosion | Typically higher-grade materials matched to the toilet's design life |
| Best for | Standard residential toilets, quick fixes, discontinued models with no OEM parts available | Proprietary hinge systems, non-standard mounting dimensions, long-term repairs on current-production models |
Whichever route you choose, having the right kit in hand is only half the equation. The other half is installing it correctly - and that is where most online resources fall short. A step-by-step walkthrough of the actual repair process, from removing corroded hardware to testing the finished result, makes the difference between a fix that holds and one that loosens up again within weeks.
Step-by-Step Guide to Replacing Toilet Seat Hardware
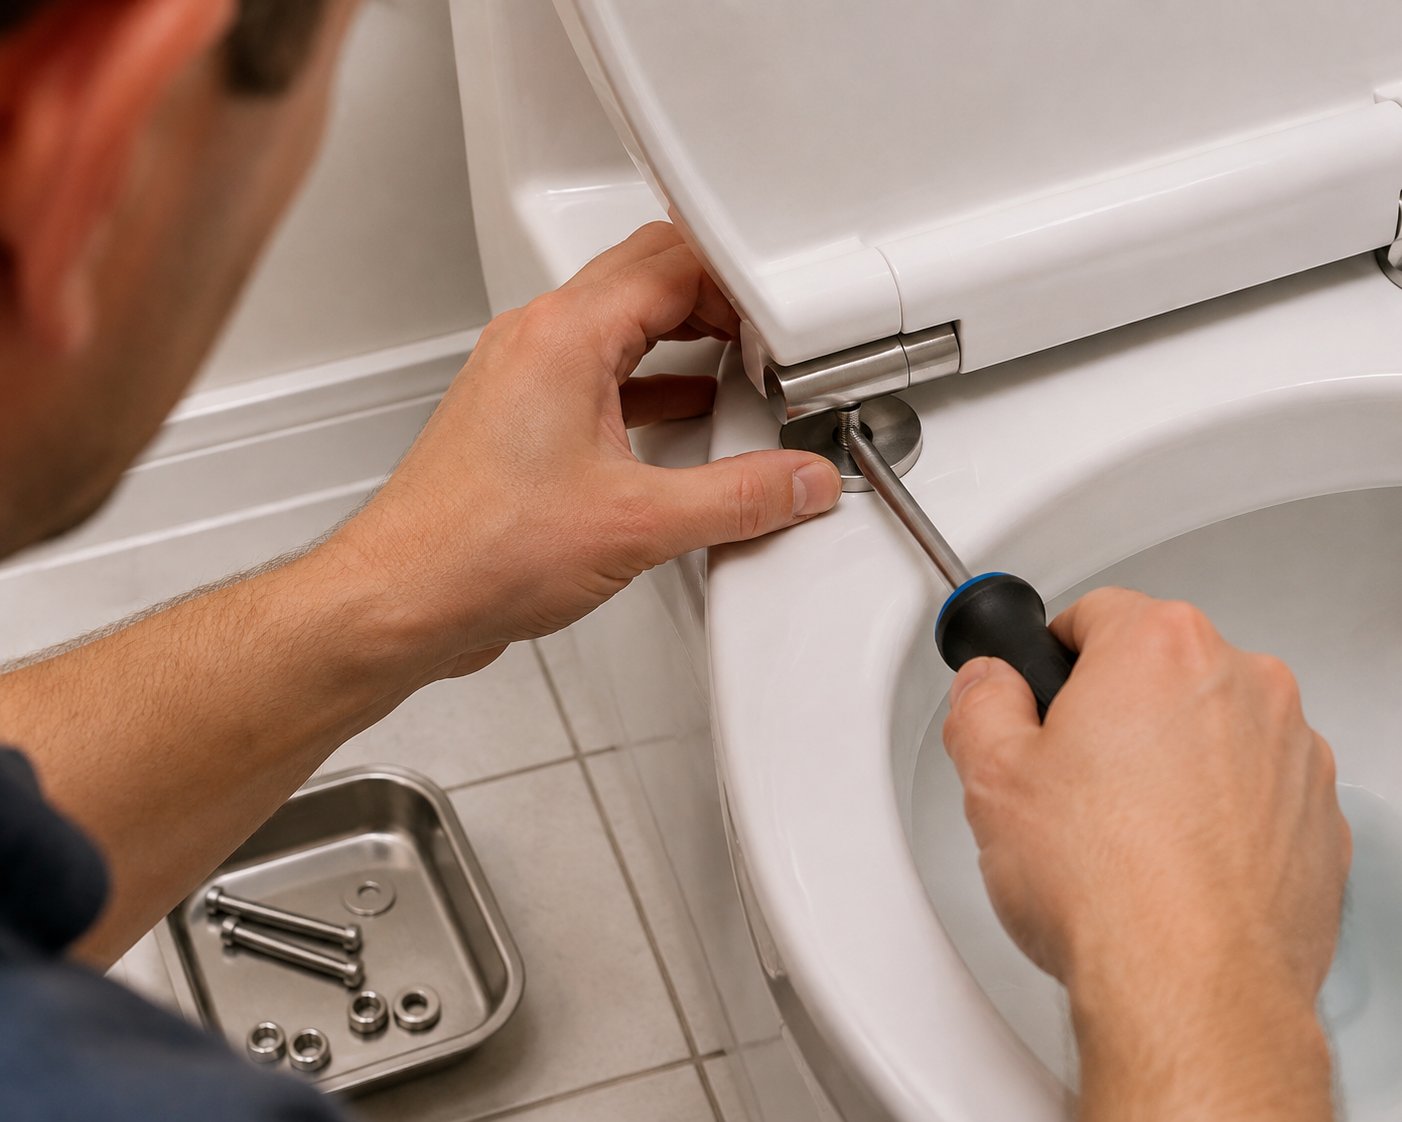
You have the right kit, you know your fixing system, and the parts match your toilet. The only thing left is the actual repair. So how do you fix a toilet seat properly from start to finish? The process breaks down into three phases: removing the old hardware, installing the new components, and testing everything for a rock-solid fit.
Here is the complete repair sequence you can follow as a hands-on reference while you work:
- Gather your tools: screwdriver, adjustable wrench or pliers, penetrating oil, a cleaning rag, and your replacement parts for a toilet seat repair.
- Clean the area around the hinges and bolt covers so you can see what you are working with.
- Pop open the hinge covers (if present) to expose the bolt heads.
- Apply penetrating oil to corroded or stuck bolts and wait 10 to 15 minutes.
- Hold the nut from below with a wrench while turning the bolt counterclockwise from above with a screwdriver.
- If the bolt spins freely or will not budge, cut it off with a hacksaw or oscillating tool.
- Remove the old seat, hinges, and all remaining hardware.
- Clean the mounting holes and surrounding porcelain with a rag and rubbing alcohol.
- Position the new seat so the hinge holes align with the bowl's mounting holes.
- Insert the new bolts or anchors through the hinges and into the mounting holes.
- Hand-tighten the nuts first, then snug them with a wrench - a quarter turn past hand-tight is usually enough.
- Snap hinge covers into place and press adhesive bumpers onto the underside of the seat and lid.
- Sit on the seat and shift your weight side to side, checking for any lateral movement.
- Make micro-adjustments to bolt tension if needed, then confirm the seat sits level and centered.
Each phase has its own details worth expanding on, so let's walk through them.
Removing Old or Corroded Hardware
This is the step that turns a fifteen-minute project into an hour-long ordeal - if you rush it. Corroded bolts, especially on bottom-mount toilets, are the single biggest obstacle when learning how to fix a broken toilet seat. The hardware has been sitting in a humid, splash-prone environment for years, and the bolt threads may have effectively welded themselves to the nut through rust.
Start with a generous spray of penetrating oil on every bolt and nut connection. Give it at least ten minutes to work into the threads - longer if the corrosion is severe. Then hold the nut steady from below with pliers or an adjustable wrench while turning the bolt counterclockwise from above with a screwdriver. Bottom-mount bolts often require a second person for this: one holding, one turning.
If the bolt spins without loosening - a telltale sign of stripped threads - or the nut simply refuses to break free, do not force it. Excessive torque risks cracking the porcelain, and that is a far more expensive problem than a stuck bolt. Instead, use a mini hacksaw or an oscillating multi-tool with a metal-cutting blade to saw through the bolt just below the bowl rim. Drilling through the bolt head is another effective approach: start with a small pilot bit (1/16 inch) and increase the size incrementally until the head separates from the shaft. Protect the porcelain surface with painter's tape around the work area to prevent scratches from tools slipping.
Installing New Mounting Hardware Step by Step
With the old hardware removed and the mounting area cleaned, installing fresh toilet installation parts is the straightforward part. The process differs slightly depending on whether you are working with a top-fix or bottom-fix system, but the principles are the same.
For top-fix systems: Drop the expanding anchor or threaded insert into the mounting hole from above. Set the seat in position so the hinge bolt holes align directly over the anchors. Thread the bolts down through the hinges and into the anchors using a screwdriver. As you tighten, the hidden portion of the anchor expands inside the hole, gripping the ceramic from within.
For bottom-fix systems: Slide the bolts down through the hinge and the mounting holes. If your kit includes rubber grommets, place them between the bolt head and the porcelain to prevent metal-on-ceramic contact. Reach underneath the bowl to thread the washers and nuts onto the bolt ends. Hand-tighten first to ensure everything is aligned correctly before applying final torque.
Regardless of the system, one rule matters more than any other: do not overtighten. Porcelain is strong under compression but brittle under point stress. A quarter turn past hand-tight with a wrench is typically sufficient. If you feel the nut resisting and then suddenly giving way, stop immediately - you may be cracking the bowl. This single precaution is the difference between a successful repair and an emergency toilet replacement.
If you have been wondering how to fix a toilet lid that doesn't stay centered, the installation phase is where you correct that. Before final tightening, slide the entire seat forward and backward to center it on the bowl. Most mounting holes have a small amount of play built in, giving you a few millimeters of adjustment range. Once the seat looks centered and even, lock everything down.
Testing and Adjusting for a Secure Fit
A seat that feels tight during installation can still shift during actual use, so testing under real conditions is essential. Sit on the seat and deliberately shift your weight from side to side. Any lateral movement means the bolts need additional tension - but remember, small increments only. Stand up, give each bolt an eighth of a turn, sit again, and recheck.
Next, open and close the lid several times. It should move smoothly on the hinges without binding, clicking, or drifting to one side. If the lid leans left or right, one bolt is likely tighter than the other. Equalize the tension by loosening the tight side slightly rather than cranking down on the loose side.
Finally, install your replacement bumpers. Peel the adhesive backing and press each pad firmly onto the underside of the seat and lid in the positions marked by your old bumpers - or by the wear marks they left on the porcelain. These small pads make a noticeable difference in how the seat feels and sounds, cushioning every close and keeping the seat from sliding on the rim.
With the parts to install toilet seat hardware now locked in place and tested, the repair itself is done. The bigger question - and one that often comes up before anyone picks up a screwdriver - is whether the repair was even the right call in the first place, or whether a full seat replacement would have made more sense.
Repair or Replace Your Toilet Seat and How to Decide
A fresh set of bolts is installed, the bumpers are in place, and the seat feels solid again. But what if you had looked at the seat before starting and noticed a crack running across the surface, or a hinge so corroded that the entire assembly felt brittle? Would the repair still have been worth the effort? This is the question most homeowners skip - and it is the one that saves the most money when answered honestly upfront.
When a Repair Kit Is the Right Choice
A toilet seat repair kit earns its value when the seat itself is structurally sound and only the hardware has given out. Think of it this way: if the surface you sit on is intact - no cracks, no deep staining, no warping - the seat still has years of functional life left. The failure is mechanical, not structural, and replacing perfectly good plastic or wood because a two-dollar bolt rusted through makes no financial sense.
Here are the scenarios where commode seat repair with a kit is clearly the smarter move:
- Loose bolts or stripped threads: A bolt and hardware kit costs a few dollars and solves the problem in fifteen minutes.
- Worn or missing bumpers: Adhesive bumper pads restore cushioning and eliminate slamming for under five dollars.
- A single broken hinge on an otherwise solid seat: A hinge replacement kit is far cheaper than a full seat, especially for soft-close models where the seat alone can run $50 or more.
- Minor wobble from degraded washers or bushings: A stabilizer kit tightens things up without any teardown.
Replacement toilet parts for mounting hardware typically cost between $3 and $15, while a new toilet seat ranges from $20 to $70 or higher depending on material and features. When the math is that clear, repairing is almost always the right call.
When Full Seat Replacement Makes More Sense
Repair kits have their limits. If you are wondering how to fix a cracked toilet seat, the honest answer is that most cracks compromise the seat's structural integrity beyond what hardware or adhesive can restore. A crack along a load-bearing section - where your weight concentrates during use - will only spread over time, regardless of how tight the bolts are.
Replacement is the better path when you are dealing with any of these situations:
- Cracked or fractured seat surface: A broken toilet seat cover with visible cracks across the sitting area is a safety concern, not just a cosmetic one. The seat could split further under load.
- Multiple failing hinges: When both hinge assemblies are cracked or seized, the combined cost of two hinge kits often approaches the price of a new seat - which ships with fresh hardware included.
- Heavy discoloration or permanent staining: Years of cleaning chemicals and moisture can yellow or discolor seats beyond recovery. No replacement parts toilet kit addresses cosmetic deterioration.
- Seats older than a decade: Plastic becomes increasingly brittle with age. A seat manufactured ten or more years ago has likely lost enough material flexibility that even a successful hardware repair will be followed by new cracks or breaks in the near future.
It is also worth noting that most new toilet seats ship with a complete set of mounting hardware in the box. If you are already buying a replacement seat, a separate repair kit becomes redundant - the fresh bolts, nuts, washers, and bumpers are already included.
A Simple Decision Framework
When you are standing in your bathroom trying to decide whether to order a kit or a whole new seat, run through these three questions:
- Is the seat surface cracked, split, or structurally damaged? If yes, replace the seat. No hardware fix addresses a compromised sitting surface, and understanding how to repair a cracked toilet seat realistically means recognizing when the damage is beyond salvageable.
- Is only the mounting hardware failing while the seat itself is intact? If yes, a repair kit is the faster, cheaper, and perfectly effective solution.
- Is the seat over ten years old with multiple issues stacking up? Consider replacing. Aging plastic develops problems faster than you can patch them, and the cumulative cost of several kits over the next year or two often exceeds the one-time cost of a new seat.
If hardware is the only problem and the seat is structurally sound, a repair kit is almost always the smarter investment - costing a fraction of a full replacement while delivering the same stability and function.
This decision framework keeps the focus where it belongs: on the condition of the seat itself, not on the age of the bolts or the state of a single bumper. Hardware is replaceable. Structural integrity is not. Making that distinction before you spend anything is what separates a cost-effective fix from a waste of time and money - and once the decision is made, a few simple maintenance habits can ensure your repair or replacement lasts as long as possible.
Maintenance Tips and How to Source Durable Repair Hardware
A successful repair is only as good as the habits that follow it. You have invested time diagnosing the problem, selecting the right kit, and installing fresh hardware - but without a few basic maintenance routines, those same toilet replacement parts will degrade along the same timeline as the ones you just pulled out. The difference between a repair that lasts two years and one that lasts ten often comes down to what you do in the months after installation.
Preventive Maintenance to Extend Toilet Seat Life
Most toilet hardware failures are gradual. Bolts do not strip overnight, and corrosion does not appear in a week. These problems build slowly, which means catching them early is straightforward - if you know where to look and how often to check.
Check bolt tension every three to four months. Sit on the seat and test for lateral movement the same way you did during installation. If you detect even slight shifting, give each bolt an eighth of a turn with a screwdriver. This takes less than sixty seconds and prevents the micro-movements that gradually strip threads and wear down bushings over time. As Oatey's maintenance guidance notes, being cautious not to overtighten during these checks is equally important - excess torque can damage the mounting surface and create new problems.
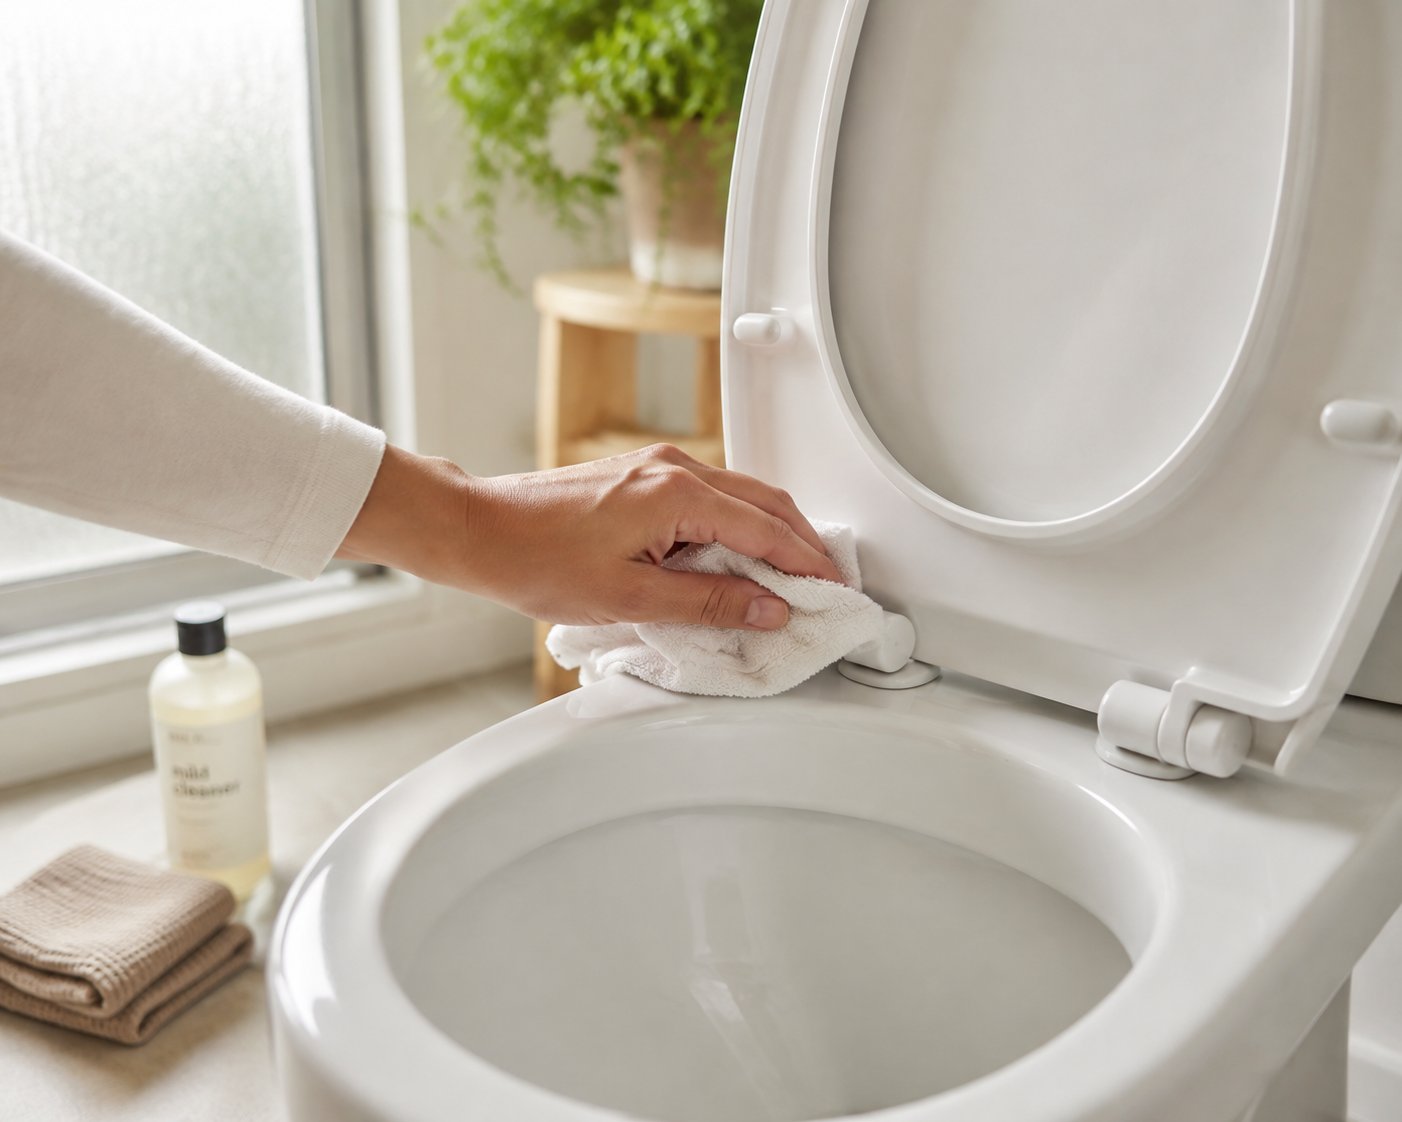
Keep chemical cleaners away from metal hardware. Acidic bathroom cleaners and abrasive scrubbing compounds eat through protective coatings on zinc-plated bolts and can accelerate corrosion on even stainless steel components over enough exposure cycles. When cleaning around the hinge area, use a mild soap solution or a pH-neutral cleaner. If product splashes onto bolt heads or hinge pins, wipe it off promptly rather than letting it sit.
Wipe moisture from hinge areas after cleaning. The back of the toilet bowl near the hinges is a natural collection point for condensation and splash water. Letting moisture pool around toilet parts plumbing connections and seat hardware accelerates rust, especially on bottom-mount systems where exposed nuts sit directly in the humidity zone. A quick pass with a dry cloth after bathroom cleaning sessions makes a measurable difference over months of use.
Inspect soft-close dampers periodically. If your seat has a hydraulic soft-close mechanism, watch for changes in closing speed. A lid that drops noticeably faster than it used to - or one that hesitates and then falls the last inch - may have a damper with a slow hydraulic fluid leak. Catching this early lets you replace the damper unit alone rather than waiting until the mechanism seizes or the repeated slamming damages other bathroom toilet parts and the porcelain rim.
Replace bumpers before they disappear entirely. Adhesive bumpers compress and peel away gradually. Once they are gone, every seat closure sends impact directly into the porcelain. Check bumper condition during your quarterly bolt inspection and replace any pads that have gone flat, shifted position, or fallen off.
What to Look for in Quality Repair Kit Hardware
Not every toilet parts replacement kit is built the same. The difference between a budget kit and a professional-grade one often comes down to material selection and engineering tolerances - details that are invisible on a product listing photo but show up clearly in how long the repair lasts. When shopping for toilet hardware, whether for a one-time home fix or for stocking replacement parts for commode maintenance in a commercial setting, these are the quality markers worth checking before you buy:
- Stainless steel construction over zinc-plated steel: Stainless steel resists corrosion without relying on a surface coating that can wear through. Zinc plating provides initial protection, but once scratched or worn, the underlying steel rusts rapidly in bathroom humidity. For toilet parts repair that you want to do once and forget, stainless steel is the clear choice.
- Nylon-insert lock nuts: Standard hex nuts and wing nuts can vibrate loose over months of use. Nylon-insert lock nuts contain a polymer ring inside that grips the bolt threads and resists rotational loosening. This one component can be the difference between a seat that stays tight for years and one that starts wobbling again within a few months.
- Thick rubber grommets with consistent durometer: Cheap grommets are thin and compress permanently within weeks, losing their ability to cushion and stabilize. Quality grommets maintain their shape and compression resistance over time, continuing to absorb vibration and prevent metal-on-porcelain contact long after installation.
- Precision-machined bolt threads: Clean, sharp threads grip nuts securely and allow controlled tightening. Poorly cut threads - common in the cheapest kits - can feel tight during installation but are more prone to cross-threading and stripping under repeated stress.
- Correct dimensional tolerances for the intended fixing system: Bolts, washers, and anchors should match the mounting hole diameter and depth of the targeted toilet models without requiring modifications. Loose fits introduce wobble; overly tight fits risk cracking ceramic during installation.
- Corrosion-resistant washers: Nylon or stainless steel washers hold up far longer than plain steel washers in wet environments. Since washers are the primary interface between the bolt and the porcelain, their material quality directly affects both stability and surface protection.
OEM suppliers who manufacture toilet plumbing parts specifically for seat brands and sanitaryware manufacturers tend to engineer these quality markers into their components by default. Tianyun, for example, produces stainless steel mounting bases, hinge mounting kits, and custom fixing solutions engineered for compatibility with specific toilet seat brands and OEM production lines. Sourcing professional-grade components with proven hardware compatibility - rather than grabbing the cheapest generic kit available - is one of the most reliable ways to ensure a repair that genuinely lasts. This is especially relevant for property managers, contractors, and hospitality operators who need toilet parts repair solutions that hold up across dozens or hundreds of units without generating repeat maintenance calls.
Whether you are fixing a single wobbly seat at home or specifying hardware for a commercial project, the principle is the same: the quality of the smallest components determines the longevity of the entire assembly. Bolts, washers, and grommets are inexpensive individually, but choosing the right ones - and maintaining them with a few minutes of attention every few months - is what turns a temporary patch into a permanent fix.
Frequently Asked Questions About Toilet Seat Repair Kits
1. What is included in a typical toilet seat repair kit?
A standard toilet seat repair kit contains mounting bolts (T-bolts, hex bolts, or top-tightening bolts), nuts (wing nuts, acorn nuts, or nylon-insert lock nuts), rubber grommets, nylon washers, rubber bushings, snap caps, and adhesive bumper pads. The exact contents depend on the kit type - a basic bolt replacement kit includes only fasteners and washers, while a complete mounting kit bundles every component needed to attach a seat from scratch, including hinge assemblies. OEM-grade kits from manufacturers like Tianyun often use stainless steel construction for superior corrosion resistance and longer service life.
2. How do I know if my toilet uses a top-fix or bottom-fix mounting system?
Run your hand under the back of the toilet bowl near the hinge area. If you feel protruding bolt threads and a nut, your toilet uses a bottom-fix system. If the underside is smooth with no visible hardware - or the bowl base is fully enclosed - you have a top-fix toilet. Most toilets manufactured within the last 10 to 15 years, especially back-to-wall and wall-hung models, use top-fix systems. Older open-back toilets typically rely on bottom-fix mounting. Identifying the correct system before purchasing a repair kit is critical because the hardware for each type is not interchangeable.
3. Can I use a universal toilet seat repair kit on any toilet?
Universal kits fit most standard residential toilets with common mounting hole spacing, typically 5.5 inches center to center. They include multiple washer sizes and adjustable bolts to accommodate slight variations. However, if your toilet features a proprietary hinge system, unusual mounting dimensions, or concealed hinge channels - common in certain American Standard, Kohler, or TOTO models - a universal kit may not provide a precise fit. In those cases, brand-specific OEM hardware delivers better long-term stability and eliminates the need for workarounds like shimming or stacking washers.
4. How do I fix a toilet seat that keeps coming loose?
Start by diagnosing the root cause. Grip the front edge of the seat and try shifting it side to side. If it moves, the mounting bolts are likely worn, the threads are stripped, or the rubber bushings have degraded. Tighten the existing bolts first - pop open the hinge covers, hold the nut from below, and turn the bolt clockwise from above. If tightening does not hold, replace the hardware entirely with a bolt and hardware replacement kit. For persistent wobble even after new bolts, a seat stabilizer kit with expanding rubber anchors can grip oversized mounting holes. Using nylon-insert lock nuts during installation helps prevent the bolts from vibrating loose again over time.
5. When should I replace my toilet seat instead of repairing it?
Replace the seat if the sitting surface is cracked, split, or structurally compromised - no hardware kit can restore a broken seat shell safely. Full replacement also makes more sense when both hinge assemblies have failed simultaneously, the seat is heavily discolored or stained beyond cleaning, or the seat is more than ten years old and the plastic has become noticeably brittle. In these scenarios, a new seat typically ships with its own fresh mounting hardware, making a separate repair kit unnecessary. If only the bolts, washers, bumpers, or a single hinge have failed while the seat itself is intact, a repair kit costing $3 to $15 is almost always the more practical and economical choice.
Apply This Insight to Your Project
Tell us what you are building and how the topic “That Wobbly Seat Ends Now: Toilet Seat Repair Kit Breakdown” relates to your application. Our engineering team can help evaluate the next step.