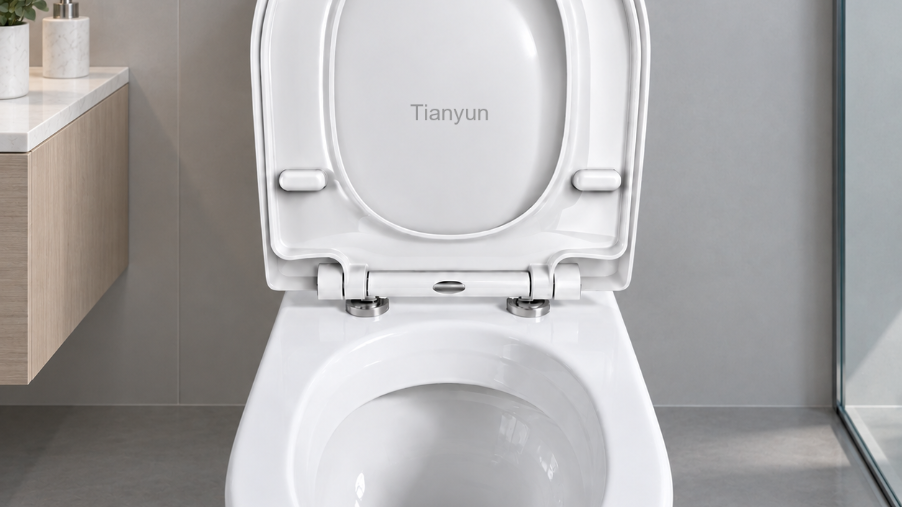
What Is Toilet Seat Hardware and Why Should You Care
You sit down and the seat shifts. You stand up and it squeaks. Maybe it slides to the left every single time, and you've just accepted it as a quirk of your bathroom. Sound familiar? Millions of homeowners live with wobbly, noisy, or sliding toilet seats without ever realizing the fix is shockingly simple. The culprit isn't the seat itself — it's the small, often overlooked toilet seat hardware holding everything together.
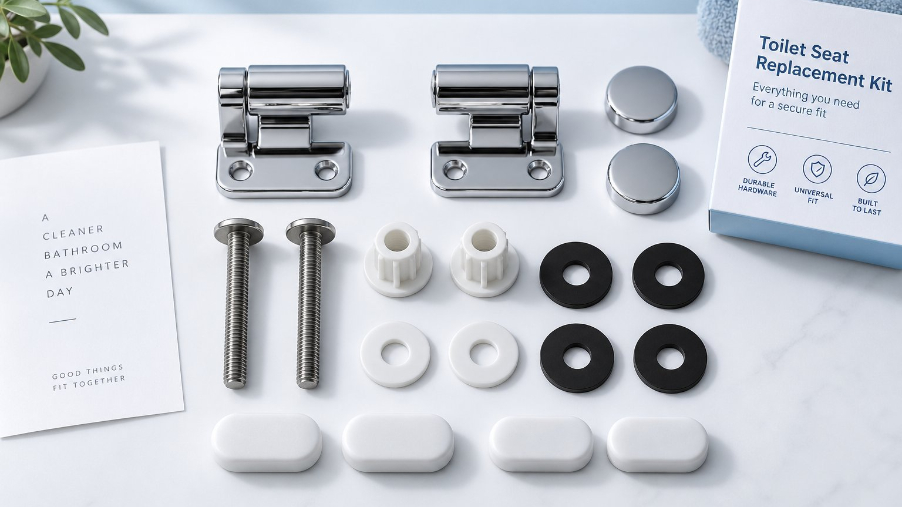
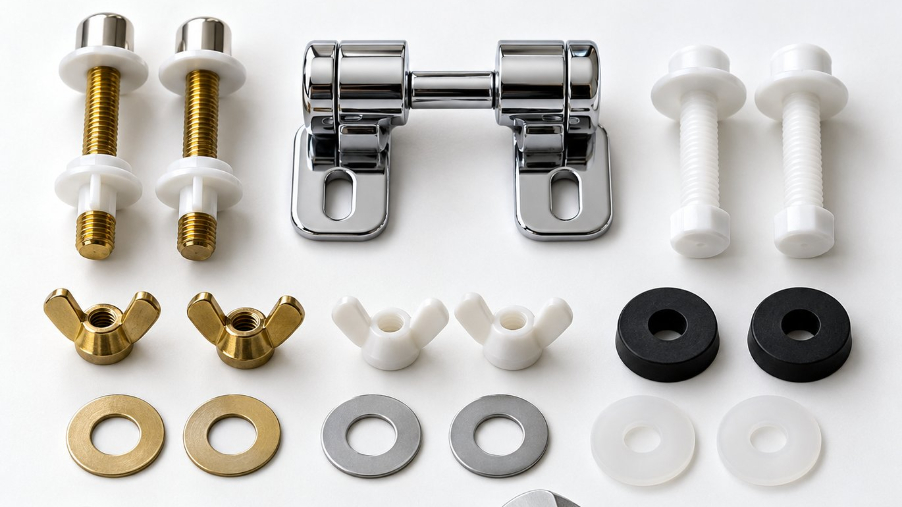
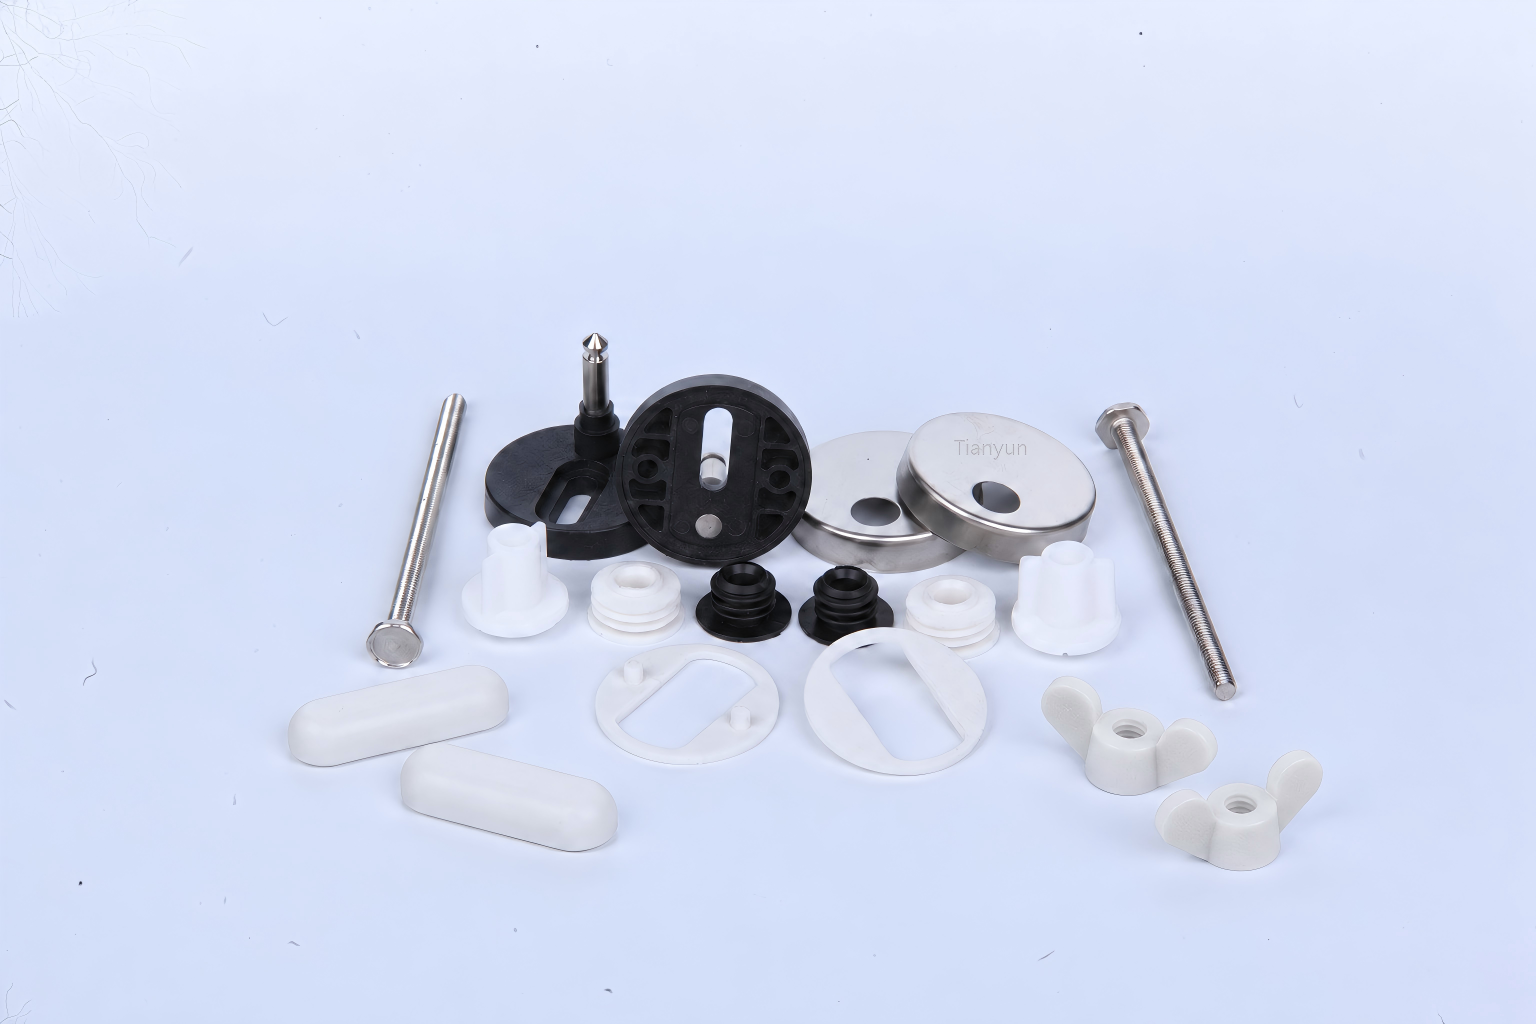
So what exactly does that term cover? Toilet seat hardware refers to the complete set of mechanical parts that secure a seat to the bowl. Think mounting bolts, wing nuts, flat washers, rubber gaskets, hinge posts, hinge plates, bolt caps, and bumper pads. These toilet seat components work as a system. When even one of them wears out, cracks, or corrodes, you feel it every time you use the bathroom.
Most toilet seat problems are hardware problems — and most hardware problems cost under $10 to fix.
Yet most people skip straight to buying a brand-new seat. And most online resources? They just throw product listings at you without explaining what these parts actually do. This guide takes a different approach. It's a complete educational walkthrough — from identifying every individual piece to troubleshooting failures and choosing the right replacements.
What Counts as Toilet Seat Hardware
The category is broader than most people assume. Here's everything that falls under the umbrella of toilet seat parts:
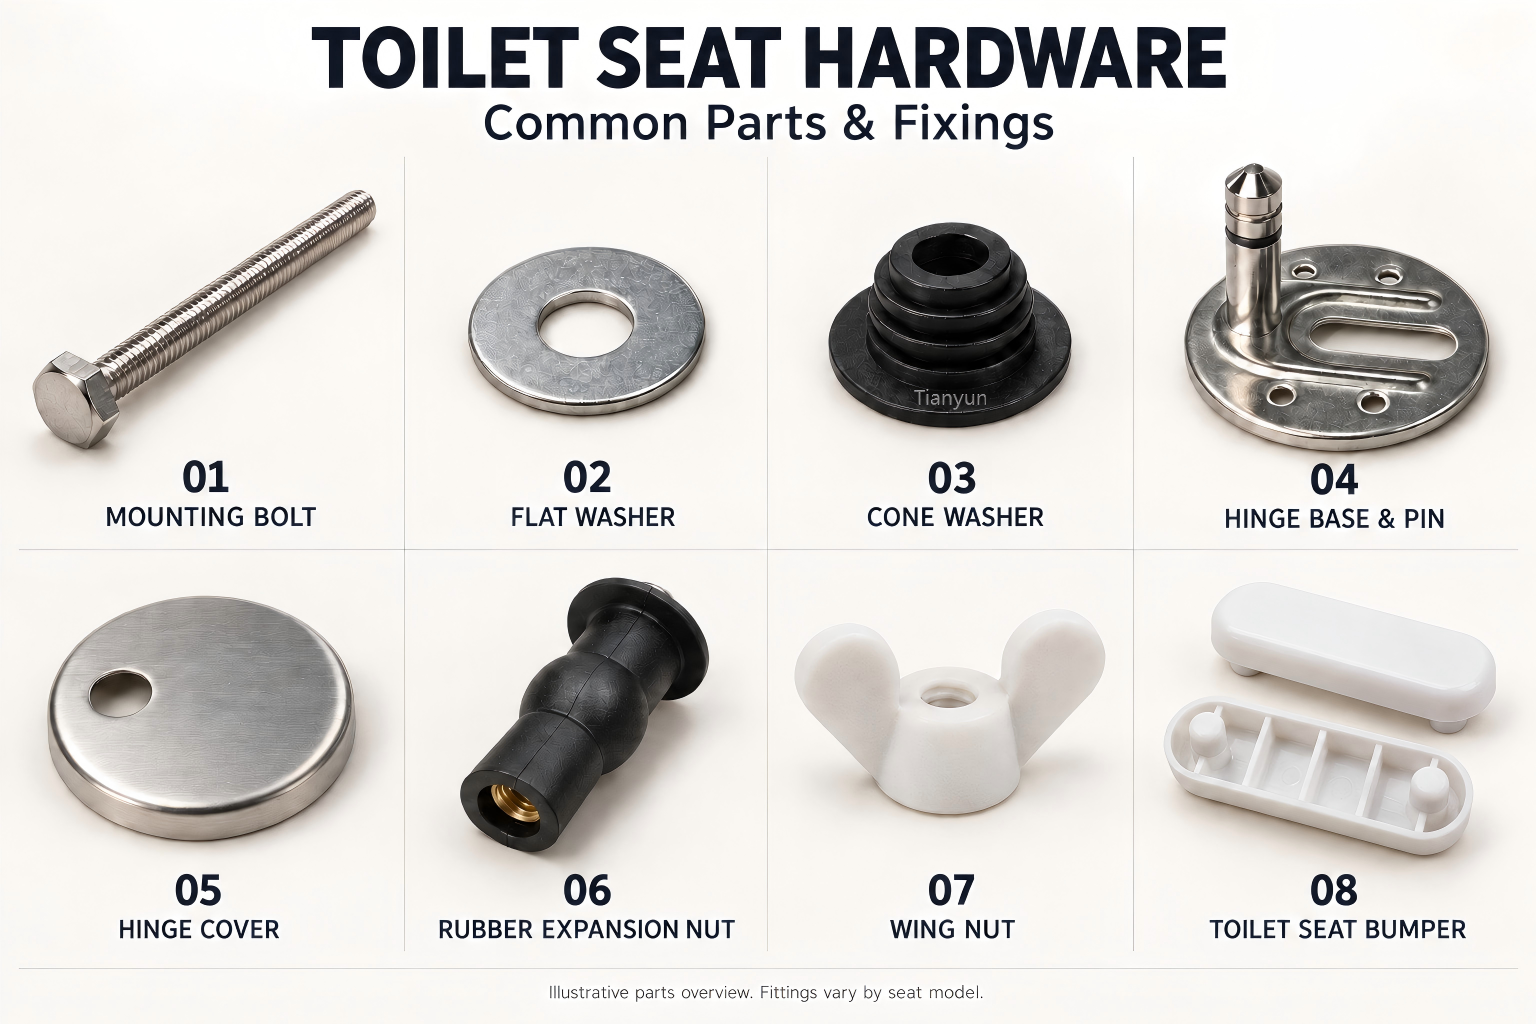
- Mounting bolts (Screw)— threaded fasteners that pass through the seat hinge and the toilet bowl's mounting holes
- Wing nuts or hex nuts — secure the bolts from underneath the bowl
- Flat washers — distribute clamping pressure evenly across the porcelain
- Rubber washers and gaskets — cushion contact, prevent cracking, and create a moisture seal
- Hinge posts and hinge plates(Hinge pins and Hinge base) — the pivot mechanism that lets the seat open and close
- Bolt caps (Decorative cover)— decorative covers that snap over bolt heads for a clean look
- Bumper pads — small rubber feet on the underside of the seat and lid that cushion contact with the bowl rim
Every one of these toilet seat pieces is replaceable on its own. You don't need to swap out the entire seat just because a single washer cracked or a bolt rusted through.
Why Understanding These Parts Saves You Money
Here's some perspective. Professional toilet seat installation starts at roughly $118 to $194 per seat when you factor in labor and materials. Even a basic replacement seat alone can run $25 to $60 or more. A universal hardware kit? Typically under $10. The math is hard to argue with.
When you can identify which toilet seat pieces are actually failing, you gain the power to make targeted, inexpensive repairs instead of replacing something that's fundamentally fine. A corroded bolt doesn't mean you need a new seat — it means you need a new bolt. Flattened bumper pads don't require a trip to the plumbing aisle for a whole new lid — just a pack of adhesive replacements.
Understanding these parts is the first step. The next is knowing exactly what each one looks like, where it sits in the assembly, and how to spot the early signs of failure.
Every Part of Toilet Seat Hardware Identified and Explained
Imagine flipping your toilet seat upside down and laying every single piece out on a towel. How many could you actually name? Most people can point to the bolts — maybe the hinges — and that's about it. But there are eight distinct components in a standard assembly, and each one plays a specific role in keeping your seat stable, quiet, and properly aligned.
Think of it as the anatomy of your toilet seat. Below is a complete toilet seat parts diagram in table form — a reference you can use to identify what you're looking at, figure out what's failing, and know exactly which toilet seat replacement parts to buy.
| Component Name | Description | Location | Common Materials | Signs of Failure |
|---|---|---|---|---|
| Mounting Bolts | Threaded fasteners that pass through the seat hinge and into the toilet bowl's mounting holes | Top of the bowl rim, inserted through hinge assembly | Plastic, nylon, brass, stainless steel | Wobbling seat, visible corrosion, bolt snaps during tightening |
| Wing Nuts / Hex Nuts | Fasteners that thread onto the bolt from underneath to clamp the seat down | Underside of the toilet bowl rim | Plastic, nylon, brass, stainless steel | Seat loosens repeatedly, nut cracks or strips, impossible to tighten |
| Flat Washers | Thin discs that distribute clamping pressure evenly across the porcelain surface | Between the nut and the bowl's underside, or between bolt head and hinge | Plastic, nylon, rubber, metal | Uneven seat pressure, porcelain stress marks, washer splits |
| Rubber Washers / Gaskets | Soft seals that cushion the hardware against porcelain and prevent moisture intrusion | Between the hinge plate and the top surface of the bowl | Rubber, silicone, soft plastic | Seat rocks slightly even when bolts are tight, moisture seeps around bolt holes |
| Hinge Posts | Cylindrical pivot points that allow the seat and lid to swing open and closed | Inside the hinge body, connecting the seat to the hinge plate | Plastic, aluminum, stainless steel | Seat won't stay upright, grinds or squeaks when moved |
| Hinge Plates | Flat bases that sit directly on the bowl rim and anchor the entire hinge assembly | Top of the bowl rim, spanning the mounting holes | Plastic, zinc alloy, stainless steel | Visible cracking, seat shifts side to side despite tight bolts |
| Bolt Caps | Decorative snap-on or screw-on covers that conceal bolt heads for a clean look | On top of the hinge area, covering exposed bolt heads | Plastic (color-matched to seat) | Caps pop off, become brittle, or discolor over time |
| Bumper Pads | Small rubber or plastic feet that cushion the seat and lid against the bowl rim | Underside of the seat ring and underside of the lid | Rubber, soft plastic blend | Seat slides or shifts, lid slams loudly, visible flattening or missing pads |
Keep this reference handy. When something feels off, you can match the symptom in the right-hand column to the exact part that needs attention — no guesswork involved.
Fasteners and Washers Explained
The fastener system is the backbone of any toilet seat installation, and it's also where most problems start. Here's how each piece contributes:
Mounting bolts are the primary connectors. These threaded fasteners slide down through the hinge mechanism and into the two pre-drilled holes on your toilet bowl's rim. Their job is straightforward: hold the seat to the bowl. Bolt diameter typically falls between 1/4 inch and 3/8 inch, and lengths vary depending on the bowl thickness and mounting style. You'll find them in plastic on most budget toilet seat fittings and in brass or stainless steel on higher-end models.
Wing nuts and hex nuts are the counterpart to the bolts. On bottom-mount systems, you'll reach under the bowl rim to hand-tighten a wing nut — those butterfly-shaped fasteners designed for tool-free grip. Hex nuts serve the same function but require a wrench or pliers. The choice between them often depends on the manufacturer and the mounting system design.
Here's where many people run into trouble: over time, plastic wing nuts can crack from repeated tightening, and metal ones can corrode and seize. Either scenario leaves you with a seat that won't stay put.
Flat washers sit between the nut and the porcelain surface underneath the bowl rim. Their role is subtle but critical — they spread the clamping force across a wider area so the bolt doesn't dig into or chip the ceramic. Without them, you're concentrating all that pressure on a tiny contact point, which can lead to hairline cracks in the porcelain over years of use.
Rubber washers and gaskets perform double duty. Positioned between the hinge plate and the top of the bowl, they create a cushioned barrier that prevents hard plastic or metal from grinding directly against the ceramic glaze. They also act as a moisture seal, keeping water from seeping down through the bolt holes during cleaning or splashing. When these commode seat parts degrade — and they do, since constant moisture breaks down rubber — the seat may feel slightly unstable even after you've tightened everything.
Hinges, Caps, and Bumpers
The hinge mechanism is what transforms a flat piece of molded plastic or wood into a functional seat that opens, closes, and stays where you put it. Two key elements make this possible.
Hinge posts — sometimes called pintles in industry terminology — are the cylindrical pins that serve as pivot points. They allow the seat and lid to rotate from a horizontal resting position to fully upright. Most are made from plastic or aluminum, though stainless steel versions appear in commercial-grade toilet lid parts. When a hinge post wears down or snaps, you'll notice the seat sagging to one side or refusing to stay upright when lifted.
Hinge plates are the flat structural bases that anchor the whole assembly to the bowl. They sit flush against the porcelain rim and house the bolt holes and pivot mechanism. A cracked hinge plate is one of the most common reasons a seat shifts laterally even after bolt tightening — the structural platform itself has lost integrity.
Bolt caps are purely cosmetic but serve a practical purpose. These small covers snap over or screw onto the exposed bolt heads at the back of the seat, shielding them from moisture and cleaning chemicals. They also give the installation a finished appearance. While a missing bolt cap won't affect seat stability, exposed bolt heads corrode faster and collect grime.
Bumper pads are easy to overlook but hard to ignore when they fail. These small rubber or plastic feet are typically found in sets of four — two on the underside of the seat ring and two on the underside of the lid. According to the toilet seat glossary at ToiletSeats.com, bumpers prevent seat shifting and protect both the seat and the bowl surface. When bumpers flatten from age or fall off entirely, the seat slides around on the porcelain, the lid slams down instead of resting quietly, and you hear that familiar plastic-on-ceramic clatter.
To identify each of these parts on your own toilet, try this: lift the lid and look at the back of the bowl where the seat attaches. You'll see the bolt caps or exposed bolt heads on top. Flip the caps open or pop them off to reveal the mounting bolts and hinge plates beneath. Then crouch down and look under the bowl rim — that's where you'll spot the washers and nuts. Finally, flip the seat and lid over to find the bumper pads on their undersides. Comparing what you see to a toilet seat parts diagram like the table above makes it straightforward to pinpoint exactly which component needs replacing.
With every part identified and its failure signs mapped out, the real question becomes which type of mounting system your toilet uses — because that determines how all these pieces fit together and how you'll access them for repairs.
Types of Toilet Seat Mounting Systems You Need to Know
You know every part by name. You can spot a worn gasket or a cracked hinge plate on sight. But here's where things get practical — and where a lot of people get tripped up. The way those parts connect to your toilet bowl isn't the same on every model. Different toilets use different mounting systems, and the system dictates everything from how you install the seat to how easily you can tighten a loose bolt or pop the seat off for cleaning.
There are three key distinctions to understand: top-mount versus bottom-mount bolts, quick-release versus fixed hinges, and concealed versus exposed fittings. Getting these right saves you from buying incompatible toilet seat mounting hardware and from the frustration of staring at a bolt you can't reach.
Top-Mount vs Bottom-Mount Bolts
This is the most fundamental difference in how toilet seat brackets and fasteners are configured, and it affects every repair or replacement you'll ever do.
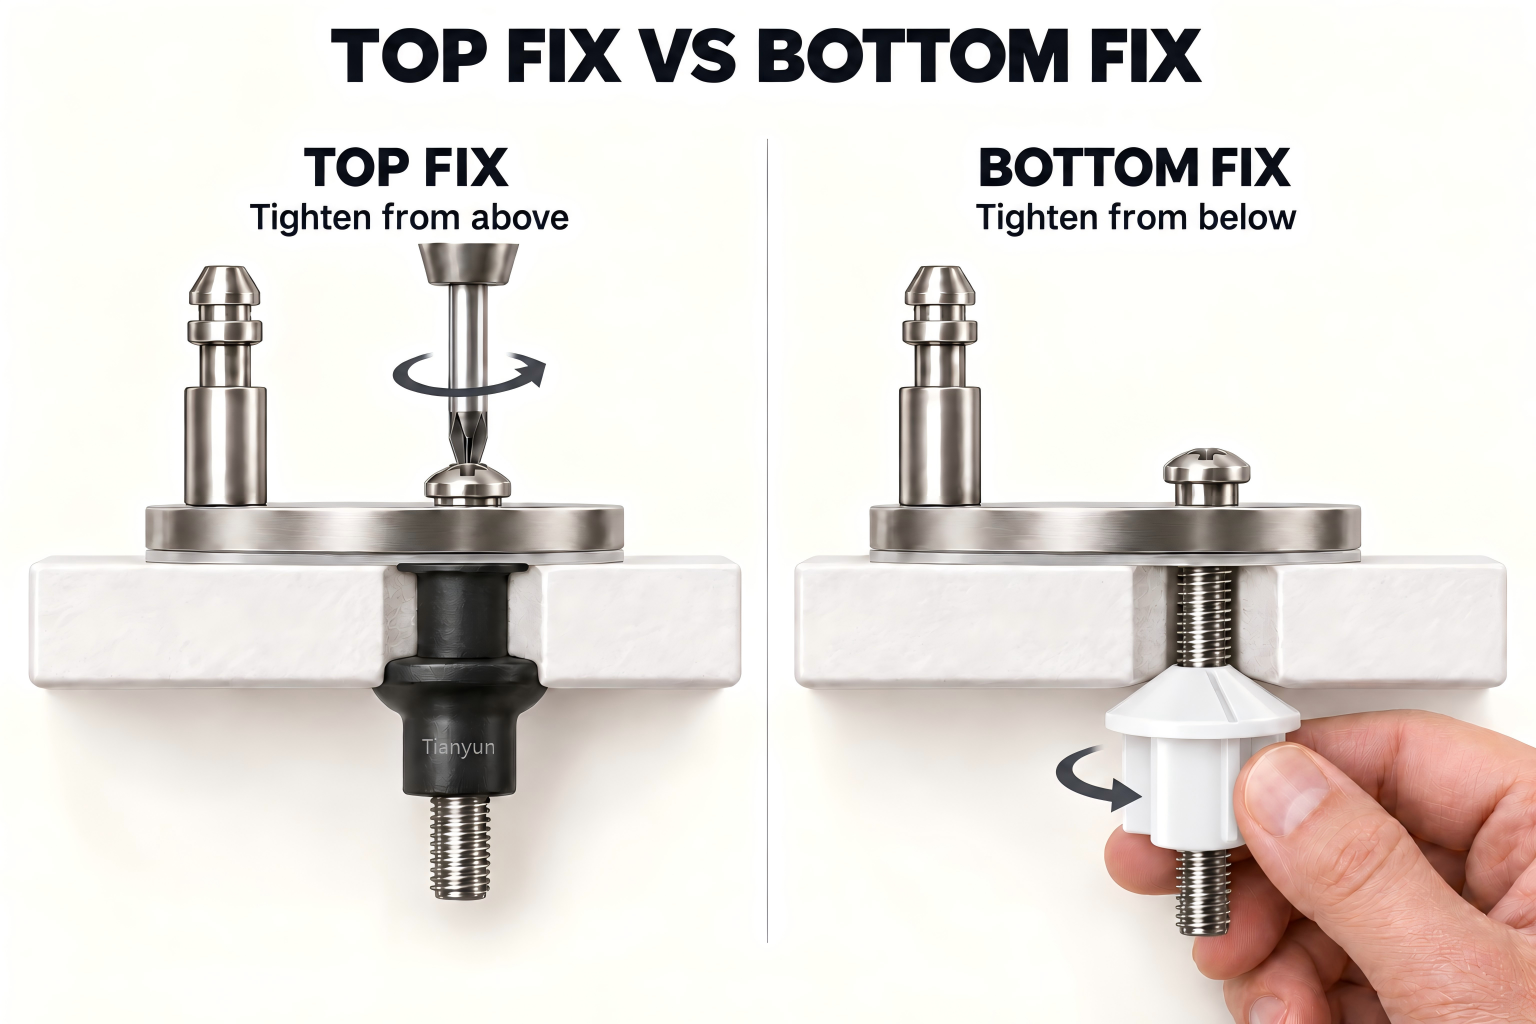
Top-mount systems — sometimes called top-fix or top-tightening — let you do everything from above the toilet bowl. The bolts feed downward through the hinge and into the bowl's mounting holes, where they expand or lock into place beneath the rim using a spread anchor or a special internally threaded fitting. You tighten the bolt from the top using a screwdriver or included wrench. No crouching, no reaching underneath, no awkward fumbling with wing nuts in a tight space.
This design has become the industry standard for residential toilets, particularly wall-hung and back-to-wall models where there's little to no access beneath the bowl. As Drench's toilet seat guide notes, top-fix seats also work on bottom-fix toilets, making them the more versatile option overall.
Bottom-mount systems use the traditional approach. Bolts pass through the hinge and the bowl from above, but you secure them by threading a wing nut or hex nut onto the bolt from underneath the bowl rim. This requires reaching behind and below the toilet — which can be uncomfortable at best and nearly impossible if the toilet sits tight against a wall or vanity.
How do you tell which system you have? Simple: reach underneath the back edge of the bowl near the hinge holes. If you feel a nut and bolt hanging down, you have a bottom-mount setup. If there's nothing there and the bolts are accessed entirely from the top, it's a toilet seat top mount system.
Quick-Release vs Fixed Hinge Systems
The hinge system determines how the seat attaches to and detaches from the mounting hardware — and this has a huge impact on everyday cleaning convenience.
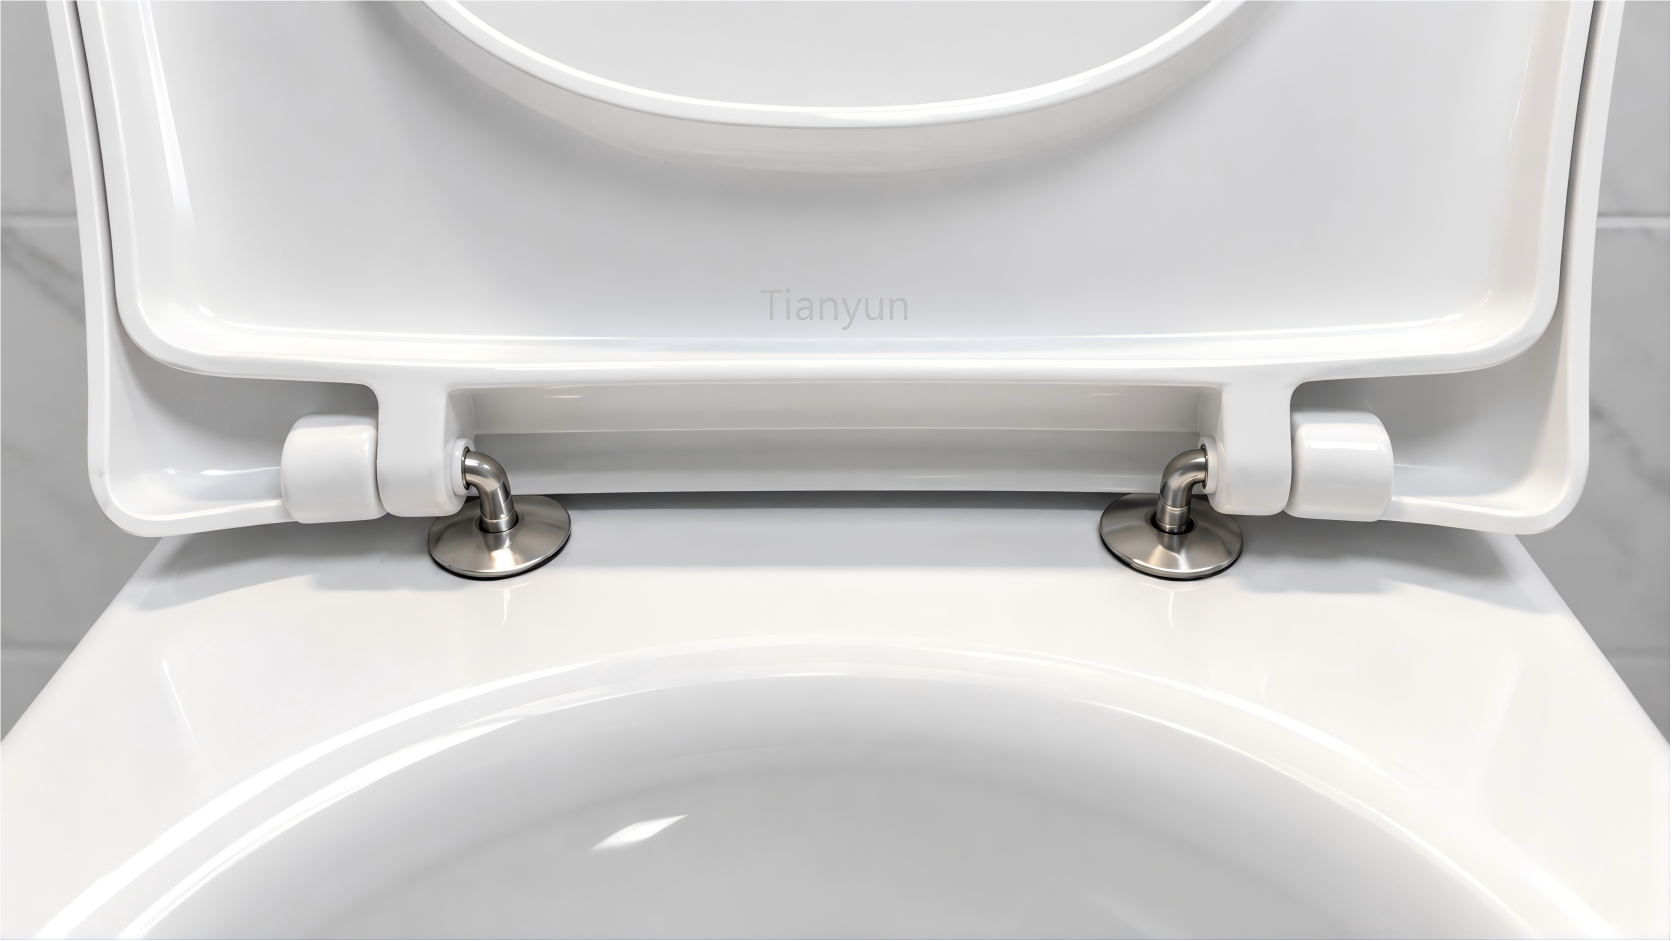
Fixed hinges are permanently connected to the fasteners. The only way to remove the seat is to unscrew the mounting bolts entirely, lift the seat off, clean, and then reinstall and retighten everything. It works, but it's tedious enough that most people simply never remove the seat for cleaning. Grime builds up around the hinge area, and those hard-to-reach crevices behind the seat become a recurring frustration.
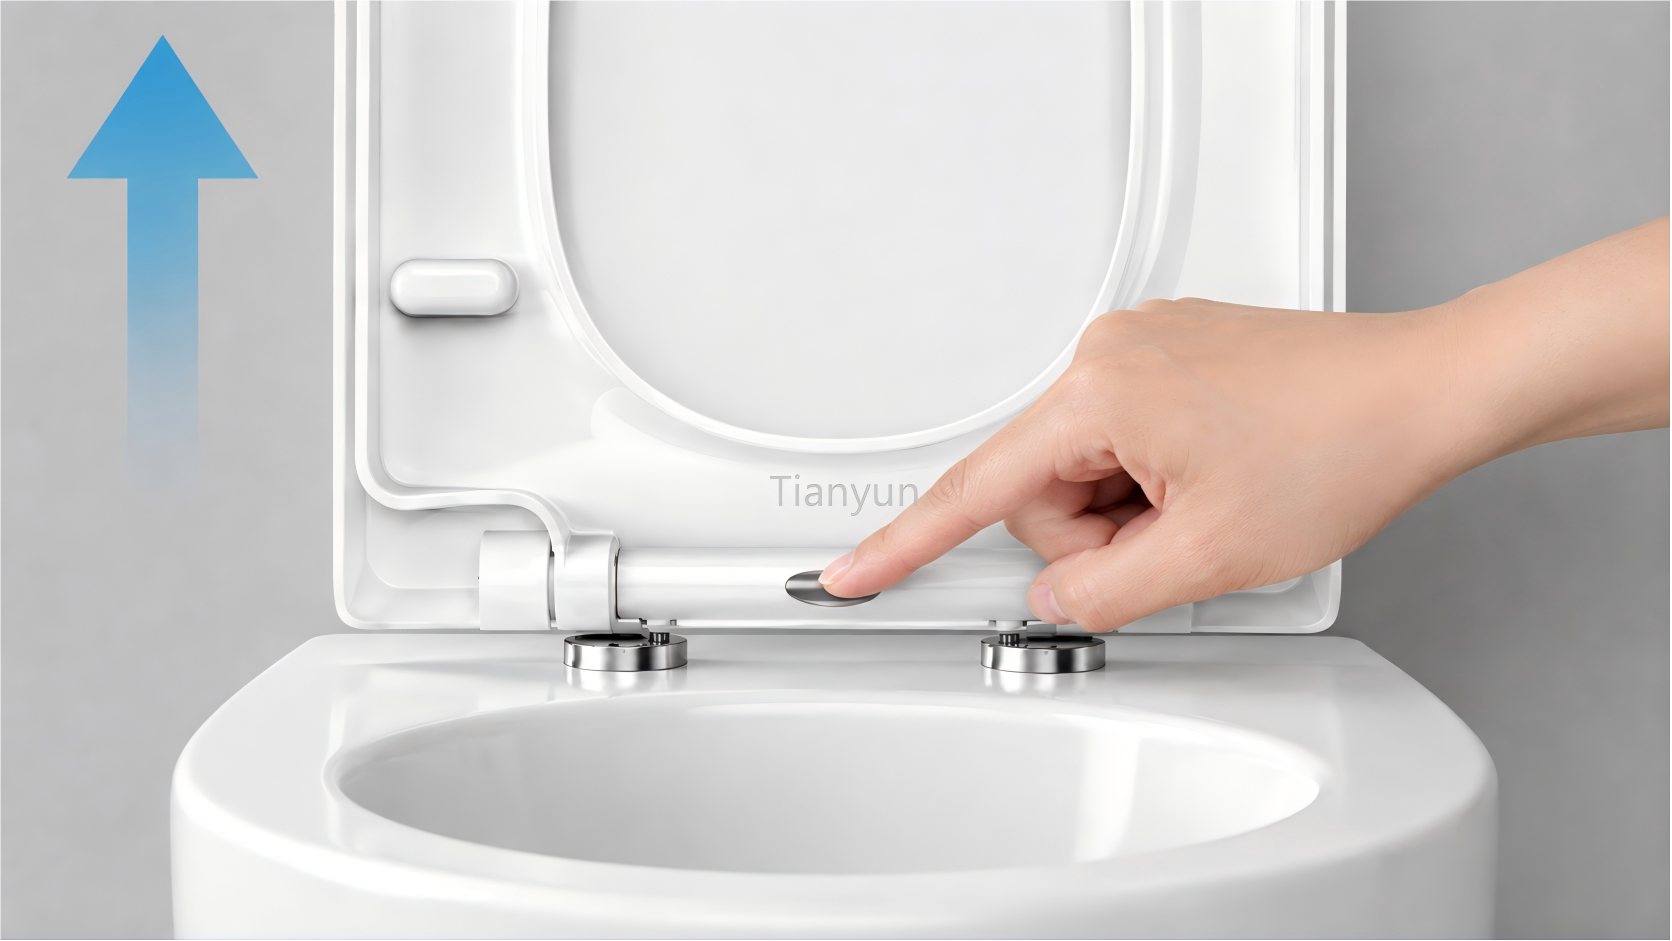
One Button Quick Release
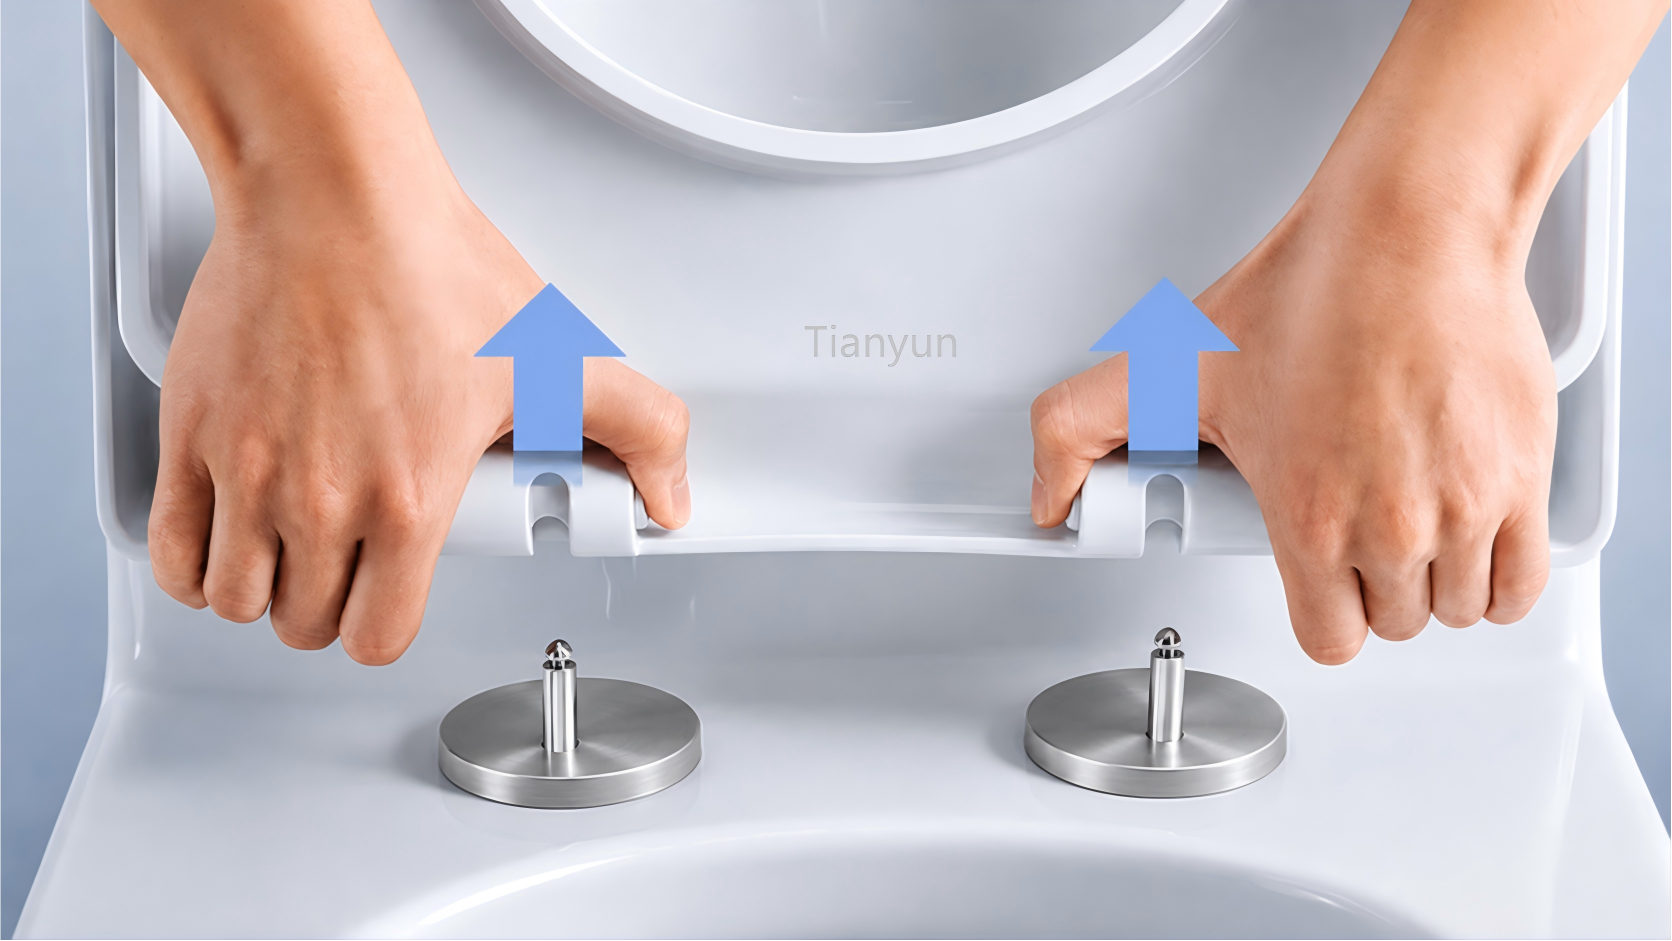
Two Button Quick Release
Lift-Off Quick Release
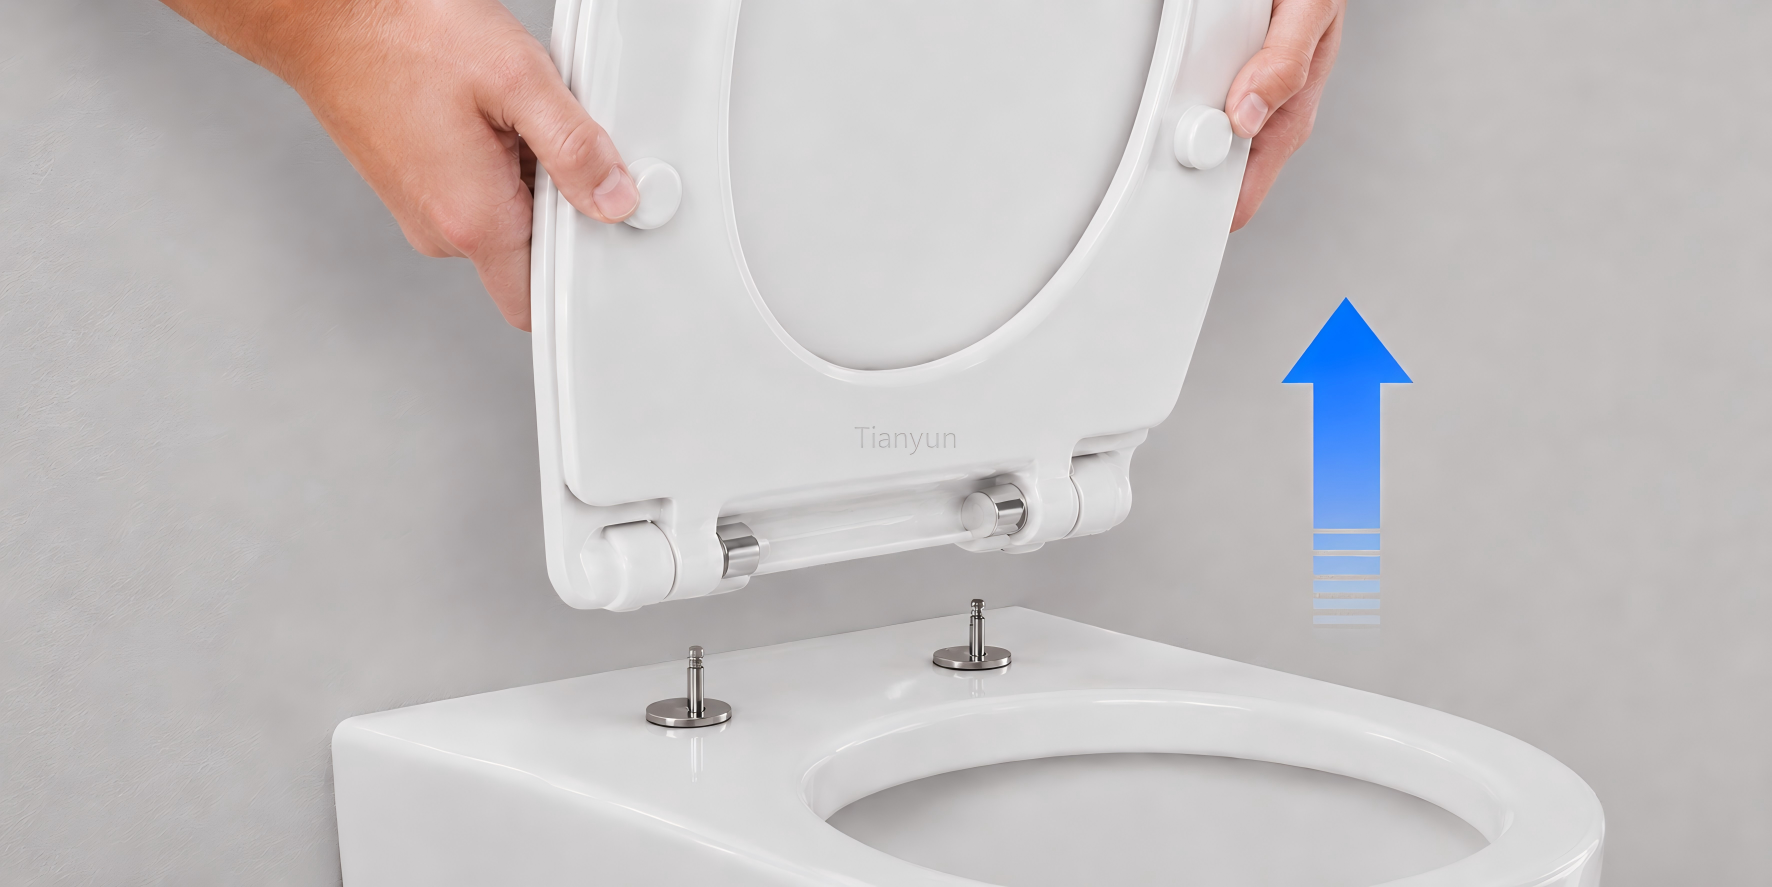 Quick-release hinges solve this problem elegantly. With a button press, a lever lift, or a simple upward pull, the entire seat detaches from the mounting plates — which stay bolted to the bowl. You can clean the seat separately, wipe down the exposed bowl rim, and snap the seat back into place in seconds. No tools required. Brands like American Standard have embraced this approach widely; an American Standard quick release toilet seat, for instance, typically uses a push-button mechanism integrated into the hinge body that releases the seat from its anchor points instantly.
Here's a side-by-side comparison to help you weigh the differences:
| Mounting Type | Installation Ease | Adjustment Access | Cleaning Convenience | Common In |
|---|---|---|---|---|
| Top-Mount / Fixed Hinge | Easy — all access from above | Simple screwdriver adjustment from the top | Moderate — seat removal requires unscrewing bolts | Modern residential toilets, wall-hung models |
| Bottom-Mount / Fixed Hinge | Moderate — requires access underneath the bowl | Requires wrench or pliers underneath | Low — difficult bolt access discourages removal | Older residential toilets, classic open-back designs |
| Top-Mount / Quick-Release | Easy — bolts tighten from above, seat clicks on | Simple top adjustment; seat detaches for full access | High — seat lifts off without tools for easy cleaning | Premium residential seats, soft-close models |
| Bottom-Mount / Quick-Release | Moderate — bolt access underneath, but seat clicks on/off | Nut adjustment underneath; seat still detaches easily | High — seat detaches quickly despite bottom-fix bolts | Some mid-range models, retrofit upgrades |
If you're shopping for new toilet seat hardware or replacing a full seat, quick-release combined with a top-mount system offers the best of both worlds — easy installation and effortless cleaning. It's the combination you'll find on most American Standard quick release toilet seat models and comparable seats from other major manufacturers.
Concealed and Hidden Fitting Systems
Walk into a modern bathroom showroom and you'll notice something: there are no visible bolt heads, no plastic caps, and no exposed hardware anywhere on the toilet seat. That's the work of hidden toilet seat fittings — a design approach where all mounting components are tucked beneath integrated covers or recessed into the hinge body itself.
These concealed systems prioritize aesthetics. The hinge assembly sits flush against the bowl, covered by a smooth, continuous shell that matches the seat material. As UltraBathroom explains, seats with hidden fixings typically use plastic caps at the back of the seat that either flip up or unclip to reveal the screw heads beneath. From the outside, though, the look is seamless and sleek.
There's one important trade-off to understand. Because these systems use proprietary hinge designs and custom-shaped covers, you can't simply grab a universal hardware kit from the hardware store. Replacement parts need to match the specific model. The bolt profile, cap shape, hinge dimensions, and anchor mechanism are all tailored to that particular seat design. If a concealed bolt corrodes or a hidden hinge plate cracks, you'll need to source parts from the original manufacturer or a compatible aftermarket supplier who carries that exact configuration.
This doesn't make hidden fittings a bad choice — far from it. They look fantastic and keep hardware protected from direct exposure to moisture and cleaning chemicals. Just be aware that when repair time comes, you'll need to identify your specific toilet seat brackets and mounting style before ordering parts, rather than reaching for a one-size-fits-all solution.
The mounting system tells you how the hardware connects. But hardware longevity comes down to what that hardware is actually made of — and the material differences between plastic, brass, and stainless steel are more significant than most people realize.
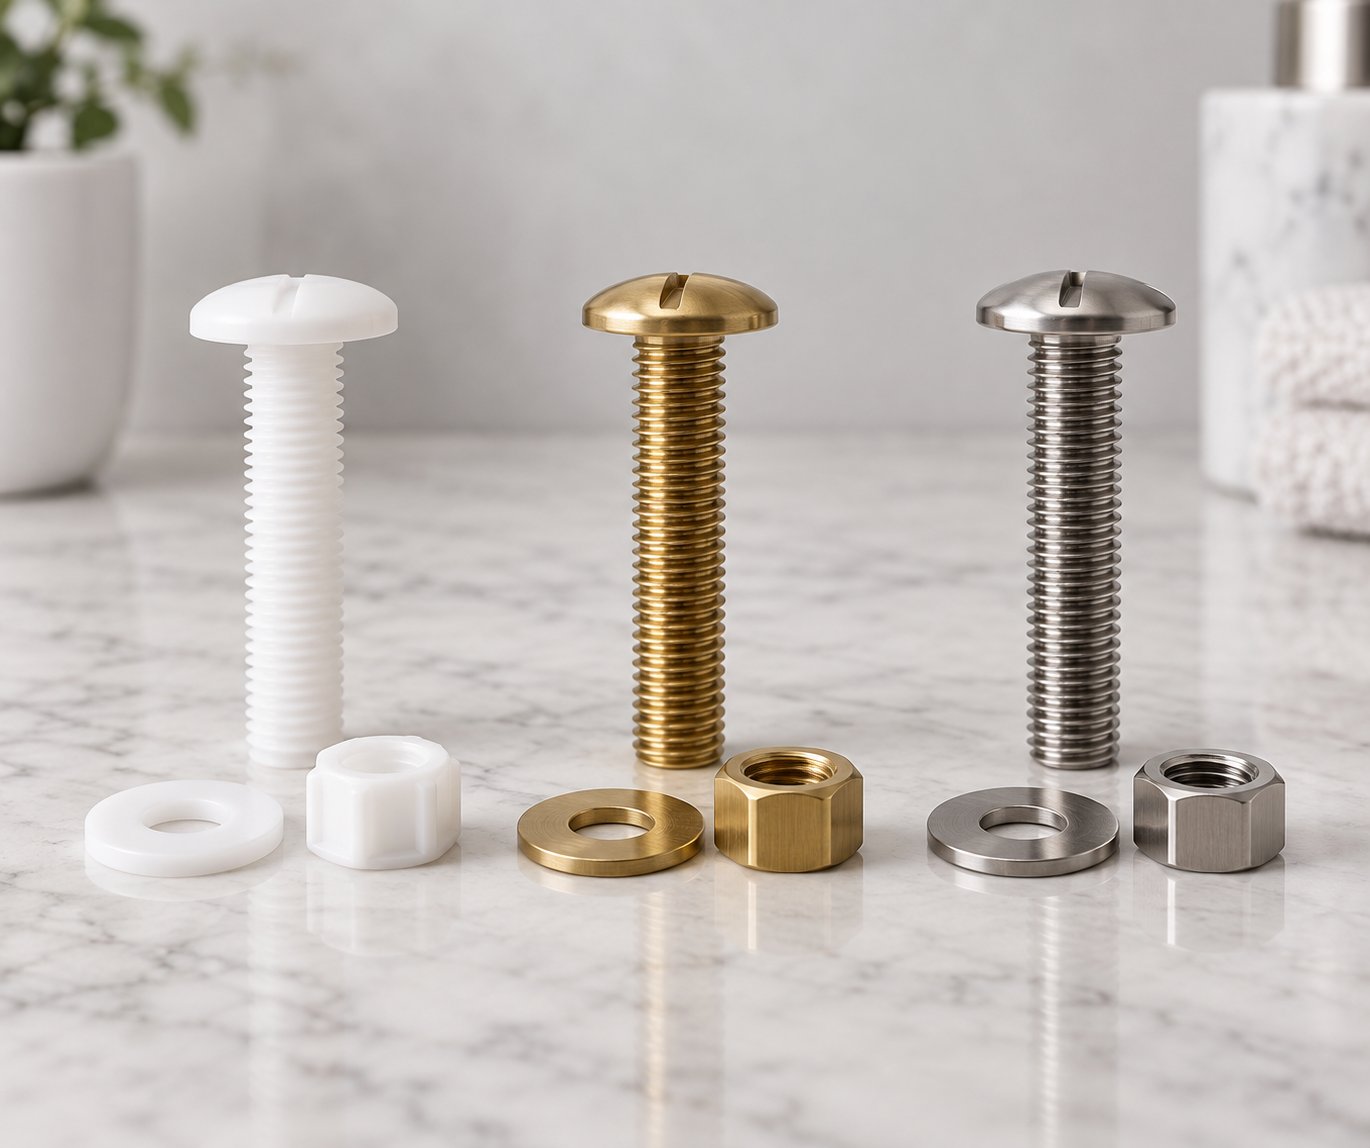
Plastic vs Brass vs Stainless Steel Toilet Seat Hardware
A mounting bolt is a mounting bolt, right? Not quite. Two bolts can look nearly identical on the shelf, but the one made of nylon and the one made of stainless steel will behave very differently after a year of sitting inside a humid, chemically cleaned bathroom. Material choice is one of those details that feels trivial at the point of purchase and becomes painfully obvious eighteen months later when your toilet seat starts wobbling again — or when a corroded bolt refuses to budge.
Four materials dominate the world of hardware toilet seat fasteners: plastic and nylon, brass, stainless steel, and zinc-plated steel. Each brings a distinct combination of strength, corrosion resistance, and cost. Understanding the trade-offs helps you pick the right toilet seat hinge parts and fasteners for your specific bathroom environment.
Plastic and Nylon Hardware
Open almost any budget-friendly toilet seat box and you'll find plastic bolts, nylon wing nuts, and polymer washers inside. There's a reason this material dominates the entry-level market — it's cheap to manufacture, lightweight, and completely immune to rust. Since plastic contains no metal whatsoever, corrosion simply isn't a factor. In a damp bathroom where metal hardware would eventually oxidize, plastic just sits there unbothered.
Sounds like the perfect material? Not exactly. Plastic and nylon fasteners have real limitations that show up over time:
- Cracking under pressure — Overtightening a plastic bolt or wing nut is surprisingly easy. One extra quarter-turn with a wrench and the nut splits, leaving you back at square one. This is the single most common failure mode for plastic toilet lid hardware.
- Brittleness with age — Constant exposure to bathroom humidity and temperature swings causes plastic to become brittle over several years. A bolt that was pliable when new may snap cleanly when you try to adjust it three years later.
- Lower structural strength — Plastic simply can't clamp with the same force as metal. In high-traffic bathrooms where the seat bears frequent weight shifts, plastic fasteners are more likely to loosen over time.
For a lightly used guest bathroom or a standard residential setup, plastic hardware often does the job just fine. It's the sensible choice when you want a corrosion-proof solution at the lowest possible cost. Just avoid cranking down too hard during installation, and expect to retighten or replace these parts every few years.
Metal Hardware Options and Durability
When plastic falls short — either because the environment is too demanding or because you're tired of retightening — metal hardware steps in. But "metal" isn't a single category. The three common options vary significantly in performance and price.
Brass is the classic upgrade. Naturally corrosion-resistant without any coating or treatment, brass handles bathroom moisture effortlessly. It's also strong enough to maintain solid clamping pressure for years without cracking or deforming. Many mid-range and premium seats include brass fasteners, and you'll frequently find a chrome plated brass replacement toilet seat hinge in aftermarket kits. That chrome layer adds aesthetic appeal and an extra barrier against tarnishing, though the underlying brass remains reliable even if the plating eventually wears. Brass strikes a compelling balance between durability and cost, making it the go-to metal for residential bathroom upgrades.
Stainless steel sits at the top of the durability hierarchy. It offers the highest tensile strength of any common hardware material, exceptional moisture resistance, and near-complete immunity to the cleaning chemicals that chew through lesser metals. Product testing of toilet seat bolts consistently shows stainless steel outperforming other materials in long-term rust resistance and structural integrity. This is the material you'll find in commercial restrooms, healthcare facilities, and any setting where the hardware must endure heavy daily use without maintenance. It costs more upfront, but its lifespan often exceeds the toilet seat it's attached to.
Zinc-plated steel offers an affordable middle ground — with a catch. The base steel provides excellent strength, and the zinc coating adds a layer of corrosion protection. However, that coating is only as durable as its surface. If it chips, scratches, or wears through — which bathroom cleaning chemicals and repeated tightening can accelerate — the exposed steel underneath rusts quickly. You may notice orange-brown staining on the porcelain around the bolt holes, which is a telltale sign of zinc-plated hardware breaking down. It's a reasonable short-term budget option, but not one you should rely on for longevity in a moisture-heavy environment.
Material Comparison at a Glance
| Material | Corrosion Resistance | Strength | Typical Lifespan | Best Use Case | Price Range |
|---|---|---|---|---|---|
| Plastic / Nylon | Excellent (cannot rust) | Low — prone to cracking | 2–5 years | Budget residential, guest bathrooms | Low |
| Brass (often chrome-plated) | Very Good — naturally resistant | Medium-High | 7–15 years | Standard to premium residential | Medium |
| Stainless Steel | Excellent — withstands chemicals | High — strongest option | 15+ years | Commercial, high-traffic, healthcare | High |
| Zinc-Plated Steel | Moderate — coating dependent | High (when intact) | 3–7 years | Budget metal option, low-moisture areas | Low-Medium |
Why does this matter so much in a bathroom specifically? Because the environment is relentless. Constant humidity, standing water around the bowl base, steam from showers, and regular exposure to acidic or alkaline cleaning products all accelerate hardware degradation. A zinc-plated bolt that might last a decade on a dry-room cabinet door can fail in under four years bolted to a toilet. Durability testing across bathroom fixture materials consistently shows that moisture exposure is the single largest factor in hardware lifespan — and the material you choose is your primary defense against it.
For most homeowners, the practical takeaway is straightforward. If you're replacing toilet seat hinge parts in a standard family bathroom that gets moderate daily use, brass hardware offers the best value-to-longevity ratio. If you're outfitting a rental property, a commercial restroom, or a bathroom used by many people daily, stainless steel pays for itself by eliminating repeat replacements. And if you're making a quick, temporary fix? Plastic gets the job done cheaply — just don't expect it to be the last time you tighten those bolts.
Material matters, but it's only half the equation. The other half is knowing whether your toilet even accepts standard replacement parts — or whether you need brand-specific components that only fit one manufacturer's design.
Universal vs Brand-Specific Toilet Seat Hardware
You've picked the right material. You know whether your toilet uses a top-mount or bottom-mount system. You're ready to order replacement parts — and then you hit the question that stops most people cold: will a generic hardware kit actually fit my toilet, or do I need something made specifically for my brand?
It's a fair concern, and the answer isn't a simple yes or no. Some toilets accept virtually any standard kit off the shelf. Others use proprietary designs that make universal parts useless. Knowing which category your toilet falls into before you spend money is the difference between a five-minute fix and a frustrating return trip to the store.
When Universal Hardware Kits Work
Here's the good news: the majority of residential toilets in North America follow a shared dimensional standard. The bolt spread — the center-to-center distance between the two mounting holes on your toilet bowl — is approximately 5.5 inches on most modern toilets. Bolt diameters typically fall within a narrow range (1/4 inch to 3/8 inch), and washer sizes are designed to accommodate slight variations. This standardization is what makes "universal" kits possible in the first place.
So what does "universal" actually mean when you see it on a package? It means the kit includes:
- Bolts sized to fit the standard 5.5-inch hole spacing
- Adjustable washers or flexible rubber gaskets that adapt to minor differences in hole diameter
- Nuts compatible with the most common bolt thread pitches
- Sometimes, multiple bolt lengths to accommodate different bowl thicknesses
For a standard two-bolt toilet seat — the kind found in the vast majority of American homes — a universal kit covers you. If your toilet was manufactured in the last 20 to 30 years by any mainstream brand and uses a conventional two-point hinge system, chances are strong that a universal hardware kit will fit without modification. Industry data confirms that the 5.5-inch bolt spread is widely accepted across manufacturers, making most standard toilet seats interchangeable at the hardware level.
This is especially useful for older toilets where the original manufacturer's documentation has long since disappeared. You don't need to track down an exact OEM part number — you just need a kit built to universal specifications and a quick measurement to confirm your bolt spacing.
When You Need Brand-Specific Parts
Here's where things get more nuanced. While the basic bolt pattern may be standardized, the hinge mechanisms and mounting systems that sit on top of those bolts often are not. Certain manufacturers — American Standard, Kohler, TOTO, Bemis, Mayfair, and Church among them — engineer proprietary systems that go well beyond a simple bolt-and-nut assembly. As Bemis themselves acknowledge, differences in shape, bolt spacing, and hinge design mean toilet seats traditionally aren't universal, despite the common standard.
When do these brand-specific differences matter most? Look for these scenarios:
- Proprietary soft-close damper mechanisms — The damper cartridges that control slow-close lid action are often unique to each manufacturer's hinge body. A Kohler damper won't swap into a TOTO hinge, and vice versa.
- Non-standard hinge pin sizes — Some brands use hinge posts with diameters or lengths that differ from generic replacements, making universal pins too loose or too tight.
- Brand-exclusive quick-release buttons — The push-button or lever release that lets a seat detach for cleaning is engineered to match a specific mounting plate. An aftermarket button designed for one brand's plate geometry won't click into another's.
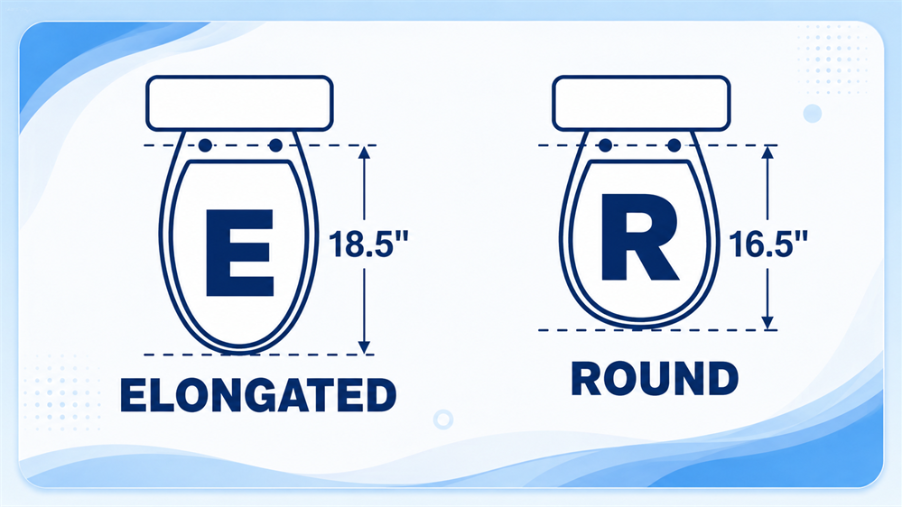
- Elongated or specialty seat shapes with custom mounting points — D-shaped, square-front, or uniquely contoured seats sometimes position their hinge anchors differently, requiring hardware tailored to that footprint.
If you own a toilet that came with a soft-close or quick-release seat, you're especially likely to need brand-specific american standard toilet seat parts, church toilet seat parts, or equivalent OEM components from whichever manufacturer made your seat. These systems are integrated — the hardware isn't just holding the seat down, it's part of the seat's functional mechanism.
This matters practically when shopping. If you're looking at american standard replacement toilet seats, the included hardware is designed to work exclusively with American Standard hinge geometry. The same applies to replacement parts for american standard toilet models — the bolts, anchors, and hinge plates are often dimensionally distinct from what you'd find in a universal kit. Church toilet seat parts follow a similar pattern, with hinge assemblies and fasteners engineered for that brand's specific lineup.
Cross-Compatibility Tips for Major Brands
Before you buy anything, take five minutes to gather the information that determines whether you need universal or brand-specific hardware. Here's your checklist:
- Measure bolt spacing — Use a tape measure or ruler to find the center-to-center distance between your two mounting holes. If it's right around 5.5 inches, universal kits are likely compatible.
- Check bolt diameter — If you can remove an existing bolt, bring it to the hardware store or measure it with calipers. Match the thread pitch and diameter to your replacement kit.
- Examine hinge style — Look at how the hinge connects to the bowl. Is it a simple bolt-through-plate design, or does it feature integrated clips, channels, or release buttons? Simple designs accept universal parts; complex mechanisms usually don't.
- Consult manufacturer documentation — Check the underside of your toilet lid or the inside of the tank for a model number. Searching that number on the manufacturer's website often reveals the exact american standard toilet parts, Kohler components, or TOTO fittings you need.
One more tip worth knowing: some aftermarket suppliers now design hardware kits specifically for cross-brand compatibility with major toilet manufacturers. These aren't the same as generic universal kits — they're engineered to match the hinge geometries and bolt profiles of specific popular models from multiple brands. If you can't find OEM parts or they're backordered, these cross-compatible options can bridge the gap effectively.
The bottom line? Start with measurements. If your toilet seat for american standard toilet, Kohler, or any other brand uses standard bolt spacing and a straightforward hinge, a universal kit will serve you well. If your seat features soft-close dampers, quick-release buttons, or concealed fittings, invest the extra few minutes to source the right brand-specific components. Getting this match right up front means you only do the repair once.
Of course, knowing which parts to buy is only useful if you can accurately diagnose what's actually gone wrong. A wobbly seat, a corroded bolt, and a broken hinge each demand different approaches — and the wrong fix can make things worse.
Troubleshooting the Most Common Toilet Seat Hardware Problems
A wobbly toilet seat doesn't fix itself. It starts as a slight shift you barely notice. Within a few weeks, it's rocking side to side every time you sit down. A month later, you're white-knuckling the seat with one hand just to keep it centered. The good news? Almost every toilet seat problem traces back to a specific hardware failure — and once you identify the culprit, the fix is usually fast, cheap, and well within DIY territory.
Below is a practical walkthrough of the three most common failure categories, organized by what you're experiencing, what's causing it, and exactly how to fix it. Think of it as a toilet seat repair kit for your brain.
Fixing a Loose or Wobbling Toilet Seat
This is the single most reported toilet seat complaint, and it's almost always a fastener issue. The seat shifts left, right, or rocks front to back — and the cause falls into one of three buckets:
- Loosened bolts — Vibration from daily use gradually backs the mounting bolts out of their tightened position. Even a quarter-turn of loosening creates noticeable movement.
- Worn or compressed washers — The rubber gaskets and flat washers that sit between the hardware and porcelain lose their grip over time. Once they flatten or crack, they can't maintain even clamping pressure.
- Cracked plastic nuts — If your toilet uses nylon or plastic wing nuts, repeated tightening cycles can split them. A cracked nut can't hold torque, no matter how hard you turn it.
The fix depends on your mounting system. Here's the step-by-step approach for each:
For bottom-mount systems:
- Locate the bolt caps at the back of the seat. Pry them open with a flat-head screwdriver or pop them off by hand.
- Hold the bolt head steady from above using a screwdriver (flat-head or Phillips, depending on the bolt).
- Reach underneath the bowl rim and use an adjustable wrench or pliers to tighten the wing nut or hex nut from below. Turn clockwise — slowly.
- Check the seat for movement. If it still wobbles, remove the bolts entirely and inspect the washers and nuts for damage. Replace any that are cracked, flattened, or stripped.
- Reassemble with new hardware if needed, tightening firmly but not excessively.
For top-mount systems:
- Open or remove the bolt caps on top of the hinge area.
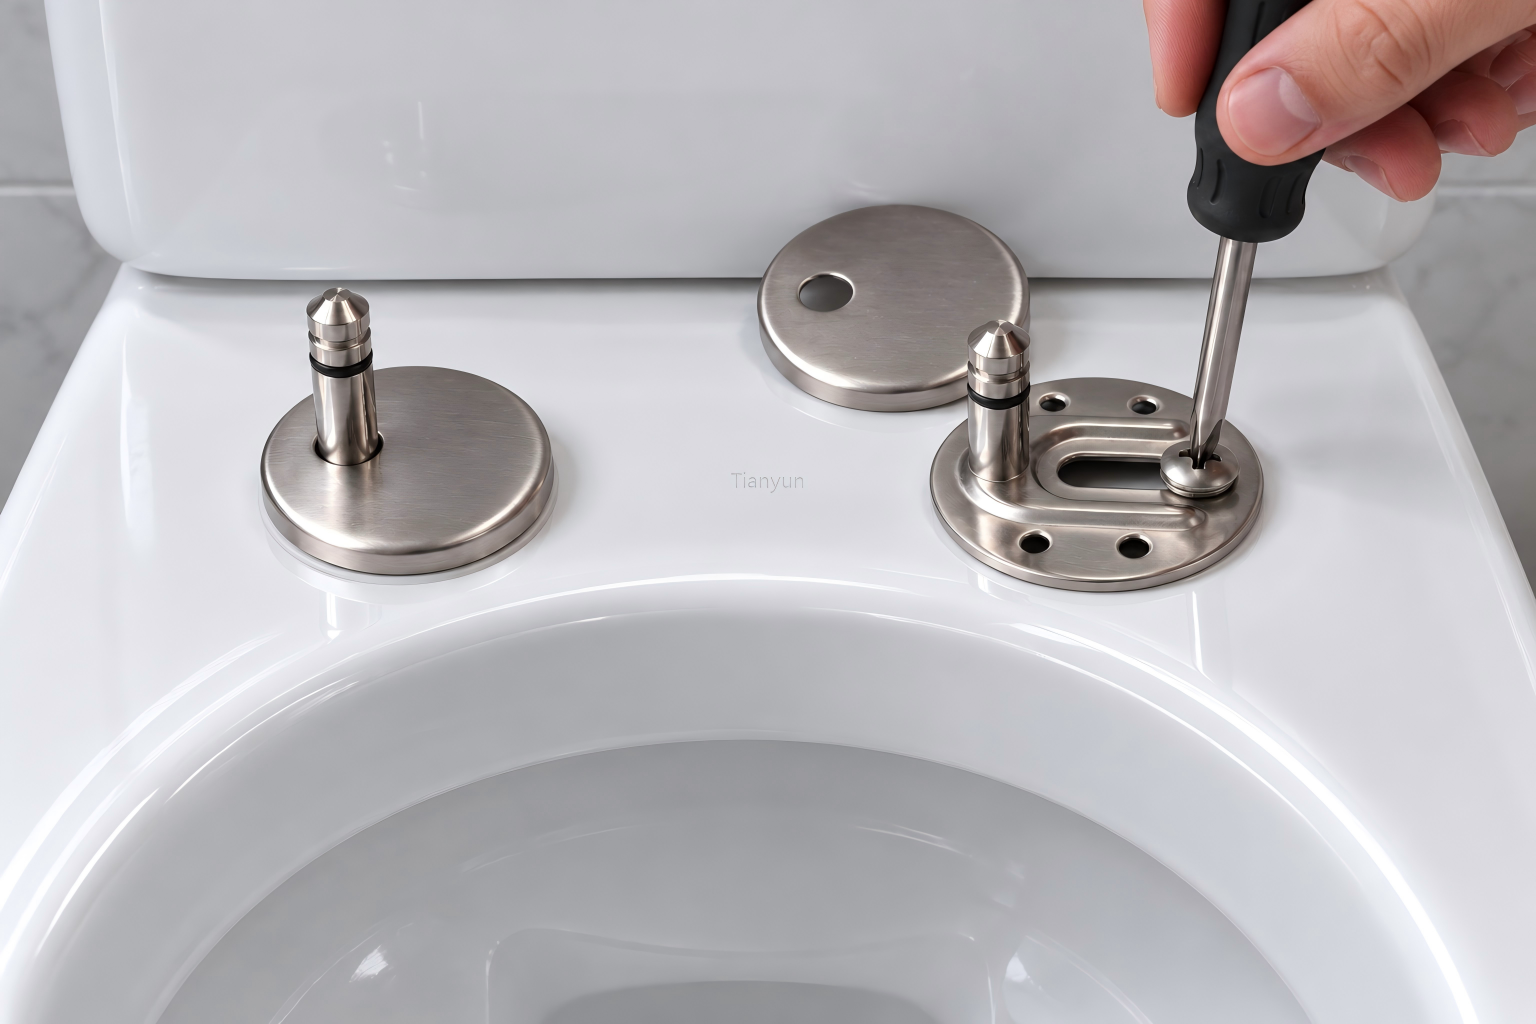
- Use the included wrench or a screwdriver to tighten the top-accessible bolt. These systems don't require any underneath access — the bolt draws tight against an expanding anchor or threaded receiver beneath the bowl rim.
- Test for wobble. If the bolt spins without tightening, the anchor beneath the rim may have lost its grip. Remove the bolt, reposition the anchor, and try again.
What about branded toilets where the access points look different? If you're wondering how to tighten toilet seat American Standard models or similar major-brand fixtures, the process is fundamentally the same — but the bolt caps and hinge covers may be less obvious. Many American Standard toilet seat bolts are hidden beneath smooth, snap-on covers at the rear of the hinge assembly. Look for small seams or tabs along the back edge of the hinge body. A gentle upward push or the edge of a flathead screwdriver will release these covers and expose the fastener heads beneath. From there, tightening follows the same procedure as any top-mount or bottom-mount system.
One critical warning applies across every system: do not overtighten. Porcelain is brittle. Over-torquing a bolt — especially a metal one — against a ceramic bowl can crack the rim. Home Depot's repair guide emphasizes tightening slowly, testing for stability after each quarter-turn. When the seat feels firm and doesn't shift under gentle pressure, stop. That's tight enough.
If sideways movement persists even after bolt tightening, consider adding plastic stabilizers — small toilet seat clamps or wedge-shaped inserts that press against the inside of the mounting holes to center the seat and eliminate lateral play. These are inexpensive add-ons available at most hardware stores and can compensate for slightly oversized bolt holes that allow too much movement.
Dealing with Corroded or Frozen Bolts
You try to tighten the nut and it won't budge. You try to unscrew the bolt and it snaps off in your hand. Corroded or frozen fasteners are the second most frustrating hardware failure — and they're almost always preventable with the right material choice (a topic covered in the previous section). But if you're already dealing with a seized bolt, here's how it happens and how to get it out.
Why bolts corrode in the first place:
- Moisture exposure — The area around toilet seat mounting holes stays perpetually damp. Water splashes during flushing, condensation forms on cool porcelain, and cleaning fluids pool around bolt bases.
- Zinc-plated steel degradation — If the protective plating chips or wears through, the bare steel underneath reacts with moisture and oxygen almost immediately. Rust forms, expands, and welds the bolt to the nut.
- Cleaning chemical contact — Bleach-based and acidic bathroom cleaners accelerate metal oxidation. Even occasional splashes around the hinge area speed up the corrosion process significantly.
Removal techniques when the bolt won't turn:
- Apply penetrating oil. Spray a product like WD-40 or PB Blaster directly onto the corroded nut and bolt junction. Let it soak for at least 15 to 20 minutes — longer if the corrosion is severe. The oil works its way into the rusted threads and breaks the bond between the metal surfaces.
- Try pliers and a wrench together. Grip the bolt head from above with pliers while turning the nut from below with an adjustable wrench. Having counter-pressure on both ends prevents the bolt from just spinning in place.
- Cut the bolt if it won't budge. When penetrating oil and elbow grease fail, it's time for a more aggressive approach. A mini hacksaw can cut through a corroded bolt between the porcelain and the nut. An oscillating multi-tool with a metal-cutting blade works even better in the tight space beneath the bowl rim. Protect the porcelain with masking tape around the cutting area to prevent accidental scratches.
- Remove any remaining bolt fragments. Once the bolt is cut, the nut drops free and the remaining shaft can usually be pushed up and out through the hinge. If a fragment is stuck in the bowl hole, needle-nose pliers or a small flathead screwdriver can work it loose.
After removal, replace the hardware entirely — corroded bolts are compromised and shouldn't be reused. This is an ideal time to upgrade from zinc-plated steel to brass or stainless steel fasteners to prevent the same problem from recurring. And when installing the new fixing for toilet seat hardware, apply a thin layer of plumber's grease to the bolt threads. This creates a moisture barrier and makes future removal dramatically easier.
Replacing Broken Hinges and Worn Bumpers
Bolts and nuts aren't the only failure points. Hinges and bumpers break down too — and their symptoms are distinct enough to diagnose without any tools.
Cracked hinge posts are one of the most overlooked problems. The hinge post is the pivot pin that allows the seat to swing open and closed. When it cracks — common in plastic hinges after years of repeated movement — the seat may sag to one side or feel "loose" in a way that bolt tightening can't resolve. The fix requires replacing the entire hinge assembly, not just the fasteners. Look for a toilet seat clip or hinge kit that matches your mounting system.
Snapped hinge pins produce a similar symptom but with an obvious visual cue: the seat visibly separates from the hinge body on one side. This typically happens when the seat is lifted too forcefully or when aged plastic becomes brittle. Replacement involves removing the old hinge, sliding or snapping a new one into the mounting plate, and resecuring the fasteners.
Deteriorated bumper pads are the easiest to diagnose and the simplest to fix. Those small rubber feet on the underside of the seat and lid compress, harden, and eventually peel off entirely. Without them, the seat slides on the porcelain, the lid drops hard against the rim, and everything feels unstable — even when the bolts are perfectly tight. Replacement bumpers are self-adhesive and take less than a minute to install. Just clean the mounting surface with rubbing alcohol, peel the backing off the new bumper, and press it firmly into position.
Not sure which component is actually failing? Use this symptom checklist to narrow it down:
- Seat slides left or right — hinge issue (cracked hinge plate, worn hinge post, or loose toilet seat clamps)
- Seat slams down instead of closing gently — soft-close damper failure or missing bumper pads
- Seat rocks front to back — loose or worn bolts and washers (tighten or replace fasteners)
- Visible rust staining on porcelain around bolt holes — corroded metal hardware (remove, replace with corrosion-resistant material)
- Seat feels stable but noisy — bumper pads are flattened or missing (replace adhesive bumpers)
- Seat detaches or lifts off unexpectedly — quick-release mechanism malfunction or stripped bolt threads
Each of these symptoms points to a specific, replaceable component. In most cases, a targeted repair — new bolts, a replacement hinge assembly, or a pack of bumper pads — is all it takes. The real question isn't whether you can fix it, but whether fixing the hardware makes more sense than replacing the entire seat. That cost-benefit calculation depends on the condition of the seat itself.
Hardware Repair vs Full Toilet Seat Replacement
You've diagnosed the symptom, identified the failing part, and you're ready to act. But here's the fork in the road that trips up most homeowners: should you spend a few dollars on a hardware fix, or just buy a whole new seat and be done with it? The answer depends entirely on the condition of the seat itself — not the condition of the fasteners holding it down.
A toilet seat replacement kit for a brand-new seat typically runs anywhere from $25 to $80 or more depending on features. A hardware-only repair? Usually under $10. That price gap makes the decision worth a few minutes of honest assessment before you reach for your wallet.
Signs That New Hardware Is All You Need
Most of the time, a wobbly or noisy toilet seat is a hardware problem masquerading as a seat problem. Before you toss out a perfectly functional seat, run through this checklist:
- The seat itself is structurally intact. No cracks, no chips, no hairline fractures along the ring or lid. Pick it up and flex it gently — solid seats don't bend or creak under light hand pressure.
- Only the bolts or nuts are corroded or broken. If the fasteners have rusted through or snapped but the seat and hinges look fine, you're dealing with a fastener-only failure. A fresh set of bolts and nuts resolves it completely.
- Bumper pads are missing or flattened. That sliding, clunking instability often comes down to nothing more than worn-out rubber feet. A pack of replacement toilet seat bumpers costs a couple of dollars and takes under a minute to stick on.
- Hinges still function, but the fasteners holding them are worn. If the hinge posts pivot smoothly and the plates aren't cracked, the hinge mechanism itself is fine. It's the bolts and washers connecting them to the bowl that need swapping.
- The seat finish is still in good condition. No yellowing, no permanent stains, no rough or peeling surfaces. If the seat still looks and feels clean, there's no cosmetic reason to replace it.
If your seat checks all five boxes, you're looking at a simple hardware swap — not a full replacement. A basic kit with bolts, washers, nuts, and caps handles the structural fix, and a separate pack of replacement toilet seat bumpers takes care of the cushioning. Together, they restore a seat to like-new stability for a fraction of what a new seat would cost.
Think about it this way: would you replace your car's tires because a lug nut came loose? Same logic applies here.
When a Full Seat Replacement Makes More Sense
Hardware can't fix everything. Some problems live in the seat itself, and no amount of fresh bolts or new bumpers will make a damaged seat safe, comfortable, or hygienic again. Here's when replacement is the smarter call:
- Hairline cracks in the seat or lid. Even small fractures compromise structural integrity. A cracked seat can pinch skin, harbor bacteria in the fissure, and eventually break under load. Bathroom repair experts consistently recommend full replacement once any visible cracking appears — temporary adhesive fixes are just that: temporary.
- Permanently stained or discolored surfaces. Yellowing from age, chemical discoloration, or deep-set grime that won't respond to cleaning means the seat material itself has degraded. New hardware won't restore a surface that's past its lifespan.
- A warped seat that no longer sits flat. Wooden and even some plastic seats can warp from prolonged moisture exposure. If the seat rocks on a flat surface even when removed from the toilet, no bolt adjustment will make it stable once reinstalled.
- Obsolete hinge design where replacement parts are unavailable. Some older or discontinued models used proprietary mounting systems that no aftermarket supplier still manufactures. When the hardware breaks and you can't source compatible replacements, a new seat with its own included hardware is the only viable path forward.
- You're upgrading from a standard seat to a soft-close model. If the goal is a functional upgrade — say, moving from a basic seat to an American Standard slow close toilet seat or a comparable American Standard soft close toilet seat — buying just hardware doesn't get you there. The soft-close damper mechanism is built into the seat's hinge assembly, not sold as a standalone retrofit.
Here's an important detail that simplifies the decision when you do opt for a full replacement: soft-close and quick-release seats almost always ship with all necessary mounting hardware included in the box. Bolts, washers, nuts, anchors, and bumpers come pre-packaged and matched to the seat's hinge design. So if you're buying a new seat, you typically don't need a separate hardware purchase — everything arrives together, ready for a clean installation from scratch.
This is especially true for American Standard toilet seats and similar branded products. When you buy their seats, the included toilet seat replacement kit is purpose-built for that exact model's mounting geometry. No guesswork, no compatibility concerns.
If the seat is sound and the hardware is the problem, replace the hardware. If the seat is the problem, replace the seat — the hardware comes with it.
That single rule eliminates the overthinking. Grab the seat, inspect it honestly, and let its condition — not the condition of a $3 bolt — drive your decision.
Whichever direction you choose, though, there's one step that makes or breaks the outcome: getting the right measurements before you buy anything. A perfectly chosen hardware kit is useless if the bolt spacing is wrong, and a beautiful new seat is a headache if the mounting holes don't line up.
How to Measure and Identify the Right Replacement Hardware
Picture this: you're standing in the hardware store aisle, staring at a wall of toilet seat mounting kits, and you realize you have no idea which one matches your toilet. You didn't measure anything before leaving the house. You didn't check whether your system is top-mount or bottom-mount. You're guessing — and guessing is how you end up making two trips instead of one.
Getting the right replacement hardware on the first try comes down to a few simple measurements and visual checks you can do in under five minutes. No special tools required. Just a tape measure, your phone's camera, and a little attention to detail.
Measuring Bolt Spacing and Diameter
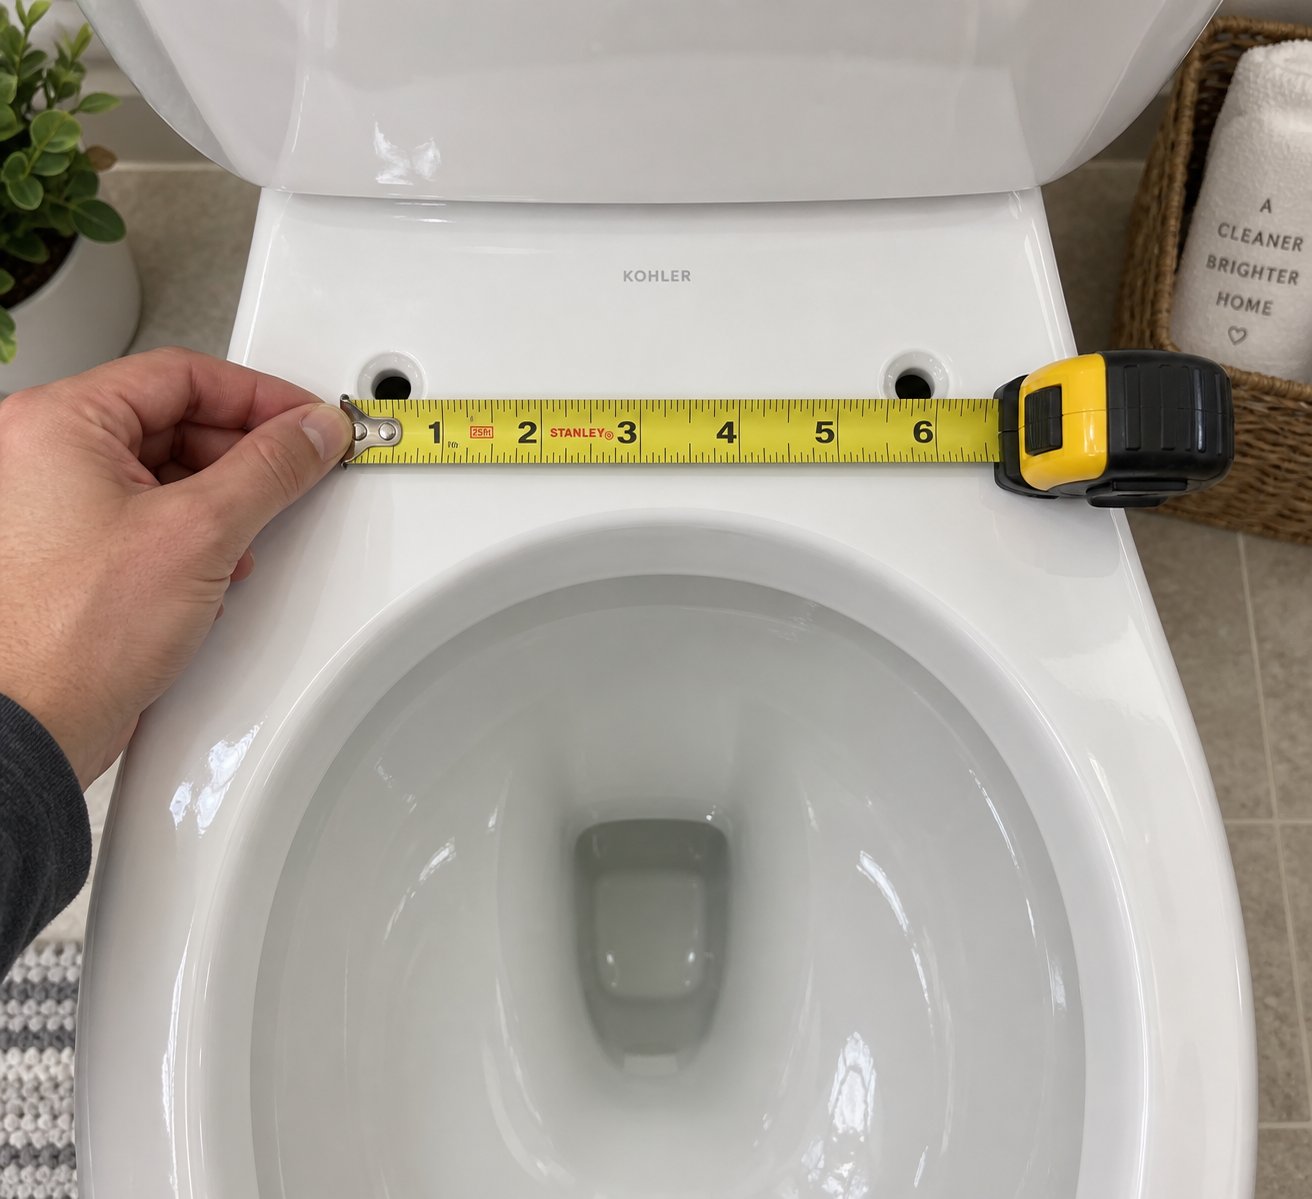
The most critical measurement is the distance between your toilet's two mounting holes — the toilet seat holes at the back of the bowl where the bolts pass through. Grab a tape measure and find the center of each hole. Measure straight across from center to center. On most North American toilets, this distance is approximately 5.5 inches (14 cm). That's the industry-standard bolt spread, and it's the dimension that universal hardware kits are designed around.
But "approximately" is the key word. Older toilets, imported models, and some European-designed fixtures may use slightly different spacing. Even a quarter-inch deviation can mean the difference between a bolt that drops neatly into position and one that won't align at all. So measure — don't assume.
Bolt diameter matters too, though it's a less common source of mismatch. Most residential toilet seat fastenings use bolts in the 1/4-inch to 3/8-inch diameter range. If you can remove an existing bolt, bring it with you to the store. Lay it next to the replacement to confirm the threading and diameter match visually. If you have calipers at home, even better — measure the bolt shaft diameter and note the thread pitch.
What if the original bolts are corroded beyond recognition or completely missing? Here's a simple trick: place a sheet of paper over the toilet seat holes on the bowl rim and press down gently with a pencil or pen to create impressions of each hole. This paper template captures both the hole positions and their approximate diameters. Bring it to the store or use it as a reference when ordering online. It's low-tech, but it works remarkably well when you have nothing else to measure against.
Identifying Your Mounting System Without the Manual
Lost the manual? Never had one? That's the reality for most homeowners. Fortunately, your toilet's mounting system announces itself through a few straightforward visual cues — no documentation needed.
Start by looking at the hinge area at the back of the seat. If you see bolt heads, screw heads, or plastic caps sitting on top of the hinge assembly, you're looking at a top-mount system. Everything tightens from above. The toilet seat anchors beneath the bowl rim are internal — either expanding plugs or threaded receivers — and you won't see nuts or fasteners hanging down underneath.
Crouch down and peek under the back edge of the bowl rim. If you see wing nuts, hex nuts, or bolt shafts protruding downward, you have a bottom-mount system. These require underneath access for tightening and removal, which is worth knowing before you buy a top-fix-only kit that won't work with your setup.
There's one more test. Try lifting the seat straight up without unscrewing anything. If it pops off cleanly — sometimes with a button press at the back of the hinge — you have quick-release hinges. The mounting plates stay bolted to the bowl while the seat detaches. This distinction matters because quick-release seats require replacement hardware that's compatible with their specific latch mechanism, not just any bolt-and-nut combo.
Before you head to a store or start browsing online, take two or three photos of your existing hardware with your phone. Capture a top-down view of the hinge area, a shot from underneath the bowl showing the fastener arrangement, and a close-up of any brand markings stamped into the hinge body. These images become your visual shopping list — any knowledgeable store associate or online product description can help you match what you see in the photos to the right toilet seat mounting kit.
Your Pre-Shopping Checklist
Rushing out without the right information is the number-one reason people buy incompatible parts. Before you shop, confirm each of the following:
- Bolt hole spacing — center-to-center distance between the two mounting holes (standard is roughly 5.5 inches)
- Bolt diameter — measure the shaft width of your existing bolt, or bring the old one as a physical reference
- Hinge type — top-fix (bolt tightens from above) or bottom-fix (nut secures from below)
- Hinge width — the span of the hinge plate where it contacts the bowl rim, which varies across brands
- Quick-release mechanism — note whether the seat detaches without tools, and if so, what type of release it uses (push-button, lever, or lift-off)
With these five data points in hand, you can confidently match your toilet to the correct replacement parts — whether that's a universal kit or a brand-specific set.
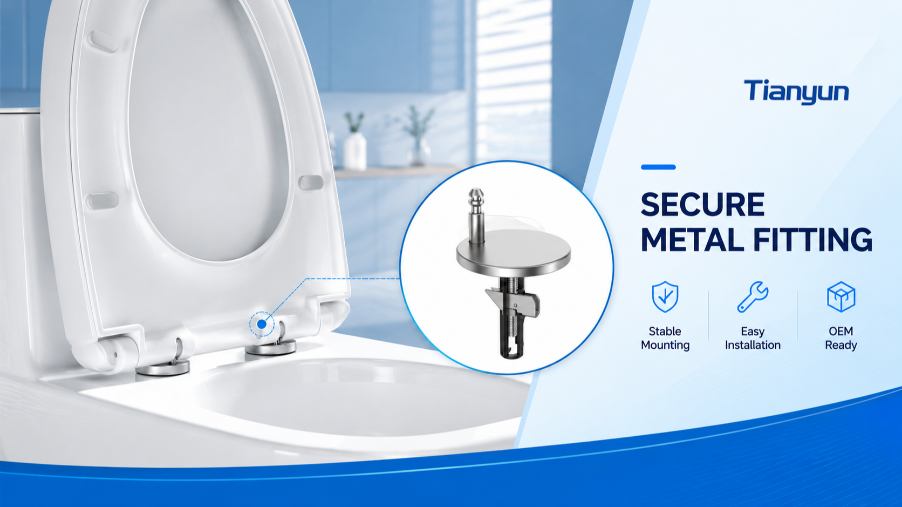
When the original hardware is too damaged to identify or the brand markings have worn away entirely, OEM-focused manufacturers become especially valuable. Suppliers like Tianyun, for instance, produce standardized top-fix kits and hinge mounting kits engineered for broad compatibility across toilet brands. Their stainless steel mounting bases and custom fixing solutions are designed to address the exact scenario where you can't determine what came on the toilet originally — offering professional-grade toilet seat fastenings that prioritize precise fit without requiring you to track down a discontinued part number. It's the kind of resource that turns a frustrating guessing game into a straightforward replacement.
Accurate measurements and clear identification put you in control of the buying decision. The final step is knowing how to weigh all the factors together — material, mounting type, environment, and budget — to choose hardware that doesn't just fit, but lasts.
Choosing the Best Toilet Seat Hardware for Your Needs
You've identified every component, learned the mounting systems, compared materials, diagnosed common failures, and gathered your measurements. That's a lot of ground covered — so how does it all come together when you're actually ready to buy? The answer depends on your specific situation. A family bathroom in a suburban home demands different hardware than a busy restaurant restroom. A quick emergency fix calls for a different approach than a planned upgrade to soft-close convenience.
Rather than offering a one-size-fits-all recommendation, here's a decision-making framework that matches the right toilet seat hardware replacement to the scenario you're actually facing.
Matching Hardware to Your Specific Situation
Every bathroom is different. The table below maps five common scenarios to the hardware type, material, and feature that makes the most practical sense for each one. Find your situation in the left column and follow the row across for a clear recommendation.
| Your Situation | Recommended Hardware Type | Material to Choose | Key Feature to Look For |
|---|---|---|---|
| Standard residential replacement (family bathroom, moderate daily use) | Universal top-fix kit with full washer set | Brass or chrome-plated brass | Complete kit with all washers, bolts, nuts, and caps included |
| High-traffic commercial bathroom (office, restaurant, public facility) | Heavy-duty mounting kit with reinforced hinge plates | Stainless steel | Maximum corrosion resistance and high clamping strength |
| Soft-close upgrade (switching from a standard seat to a slow-close model) | Buy a complete seat — hardware is included and matched to the damper system | Varies by seat brand (typically brass or stainless hinges) | Integrated soft-close damper with brand-compatible hinge geometry |
| Quick-release preference (prioritizing easy cleaning and seat removal) | Quick-release hinge mounting kit or full seat with detachable design | Brass or stainless steel for the mounting base | Push-button or lift-off release mechanism compatible with your bowl |
| Corroded-bolt emergency fix (seized or rusted fasteners need immediate replacement) | Universal bolt-and-nut kit with rubber gaskets | Stainless steel or brass — avoid zinc-plated steel this time | Corrosion-proof material to prevent recurrence; include plumber's grease |
Notice a pattern? The material recommendation shifts based on how demanding the environment is. Residential bathrooms with moderate use can lean on brass for a strong cost-to-longevity balance. Commercial and high-traffic spaces justify the higher upfront cost of stainless steel because it eliminates repeat maintenance cycles. And if you're replacing corroded hardware, the whole point is to upgrade the material so you don't end up back under the bowl rim in another two years.
Also worth noting: if your scenario involves a soft-close upgrade, buying toilet seat spare parts separately for the hardware usually isn't necessary. Soft-close seats ship with purpose-built mounting components that integrate with their damper mechanisms. Purchasing a standalone toilet seat hardware kit on top of that would be redundant.
What to Look for in Quality Toilet Seat Hardware
Not all hardware kits are created equal, even within the same material category. Whether you're browsing a home improvement store or shopping online, evaluate each option against these quality indicators:
- Material durability — Stainless steel delivers the longest service life, especially in moisture-heavy environments. Brass offers excellent residential performance. Avoid zinc-plated steel if you've already experienced corrosion problems.
- Mounting system compatibility — Top-fix kits are easier to install and adjust. Confirm the kit matches your system (top-fix vs. bottom-fix) before purchasing. A top-fix kit won't anchor properly in a bottom-mount toilet that lacks the recessed receivers beneath the rim.
- Included components — The best toilet seat hardware kit includes everything in one package: bolts, nuts, flat washers, rubber gaskets, bolt caps, and sometimes even replacement bumper pads. Incomplete kits force you to source missing pieces separately, which adds cost and introduces compatibility risk.
- Brand compatibility range — Some kits are engineered to fit a broad range of major toilet brands — American Standard, Kohler, TOTO, Bemis, and others — while cheaper kits may only fit the most generic configurations. Wider compatibility means more confidence that the parts will align with your bowl.
- Adjustment flexibility — Look for kits with slotted hinge plates or adjustable bolt positions. These allow you to fine-tune the seat's alignment on the bowl, which is especially helpful on older toilets where the mounting holes may not be perfectly centered or evenly spaced.
The best investment depends on three factors working together: your environment (residential versus commercial), your usage frequency (guest bathroom versus family of five), and your personal priority — whether that's easy installation, long-term durability, or a clean aesthetic with concealed fittings. There's no single "best" kit for everyone. There's only the best kit for your bathroom.
For toilet seat brands, sanitaryware OEMs, and professionals who need reliable toilet seat spare parts at scale, the quality criteria become even more critical. Hardware needs to perform consistently across thousands of installations, not just one. This is where manufacturers specializing in fixing systems stand apart from generic suppliers. Tianyun's toilet seat fixing systems, for example, offer top-fix kits, stainless steel mounting bases, and hinge mounting kits specifically designed for broad compatibility across toilet product lines. Their solutions address the exact quality markers outlined above — durable materials, complete component sets, and installation stability — making them a noteworthy option for OEMs and brands seeking dependable toilet seat hinge replacement parts and toilet seat accessories that hold up across diverse product ranges.
Whether you're a homeowner tightening a single loose bolt or a manufacturer spec'ing hardware across an entire product catalog, the underlying principle stays the same. Choose hardware that matches your mounting system, suits your environment's demands, and uses materials built to outlast the conditions they'll face daily. A few dollars and a few minutes of informed decision-making today save you from repeating the same repair a year from now — and that's the real value of understanding the small parts that hold everything together.
Frequently Asked Questions About Toilet Seat Hardware
1. What are the parts of toilet seat hardware called?
Toilet seat hardware includes mounting bolts (threaded fasteners connecting the seat to the bowl), wing nuts or hex nuts (securing bolts from underneath), flat washers (distributing clamping pressure), rubber washers or gaskets (cushioning and sealing against porcelain), hinge posts (pivot pins enabling the seat to swing), hinge plates (flat bases anchoring the assembly to the rim), bolt caps (decorative covers hiding bolt heads), and bumper pads (rubber feet preventing sliding and noise). Each component is individually replaceable, so identifying the failed part lets you make a targeted, low-cost repair instead of buying an entirely new seat.
2. How do I know if my toilet seat uses top-mount or bottom-mount hardware?
You can identify your mounting system with a quick visual check. Reach underneath the back edge of your toilet bowl near the hinge holes. If you feel nuts and bolt shafts hanging down, you have a bottom-mount system that requires tightening from below. If there is nothing protruding underneath and the bolt heads or screw caps are only visible on top of the hinge area, you have a top-mount (top-fix) system where everything is accessed from above. Top-mount designs have become the residential standard because they eliminate the need to reach into tight spaces beneath the bowl rim.
3. Can I use universal toilet seat hardware on any toilet brand?
Universal hardware kits work on most standard residential toilets that follow the common 5.5-inch center-to-center bolt spacing and use a conventional two-point hinge. However, brands like American Standard, Kohler, TOTO, Bemis, and Church often use proprietary hinge mechanisms, unique quick-release buttons, or specialized soft-close damper systems that require OEM or brand-compatible parts. Before purchasing, measure your bolt hole spacing, check the bolt diameter, and examine the hinge style. If your seat has a simple bolt-through-plate design, universal kits usually fit. If it features integrated release mechanisms or concealed fittings, brand-specific components are recommended.
4. Should I choose plastic, brass, or stainless steel toilet seat bolts?
The best material depends on your bathroom's usage level. Plastic and nylon bolts resist corrosion entirely and cost the least, but they crack under overtightening and become brittle with age, typically lasting two to five years. Brass bolts are naturally corrosion-resistant, offer strong clamping force, and last seven to fifteen years, making them ideal for standard family bathrooms. Stainless steel is the most durable option, withstanding harsh cleaning chemicals and heavy daily use for fifteen-plus years, which is why it is preferred in commercial and high-traffic settings. Zinc-plated steel is affordable but vulnerable to rust once the coating chips, so it is best avoided in humid environments.
5. When should I replace hardware versus buying a whole new toilet seat?
Replace only the hardware when the seat itself is structurally sound with no cracks, the finish is intact, and the problem is limited to corroded bolts, stripped nuts, flattened bumper pads, or worn washers. A hardware kit typically costs under $10 compared to $25 to $80 or more for a new seat. Choose full seat replacement when you see hairline cracks, permanent staining, warping, or when the hinge design is obsolete and replacement parts are unavailable. If you are upgrading to a soft-close or quick-release model, buy the complete seat since all matched hardware ships inside the box.
Apply This Insight to Your Project
Tell us what you are building and how the topic “Wobbly Seat? Your Toilet Seat Hardware Is the Real Problem” relates to your application. Our engineering team can help evaluate the next step.