Identify Your Toilet Seat Mounting Type Before You Start
Imagine gripping a wrench, cranking on a bolt, and realizing five frustrating minutes later that you have been turning the wrong part entirely. That scenario plays out in bathrooms everywhere — and it is completely avoidable. The secret to learning how to remove toilet seat covers without the headache is surprisingly simple: figure out what you are working with before you pick up a single tool.
A quick clarification first. The phrase "toilet seat cover" can mean a few different things. Disposable paper liners, fabric lid covers, and the rigid seat-and-lid assembly bolted to the bowl all get lumped under the same term. This guide focuses entirely on that rigid assembly — the hinged seat and lid combination that attaches to the porcelain with mounting hardware. If you need to how to remove a toilet seat for deep cleaning, how to replace a toilet seat that has cracked, or simply want to prep the bowl for a bidet attachment or smart seat upgrade, the process starts in exactly the same place: identifying your mounting system.
Three Common Mounting Types You Will Find
Take a look at the back of your toilet where the seat hinges meet the bowl. You will find one of these three systems:
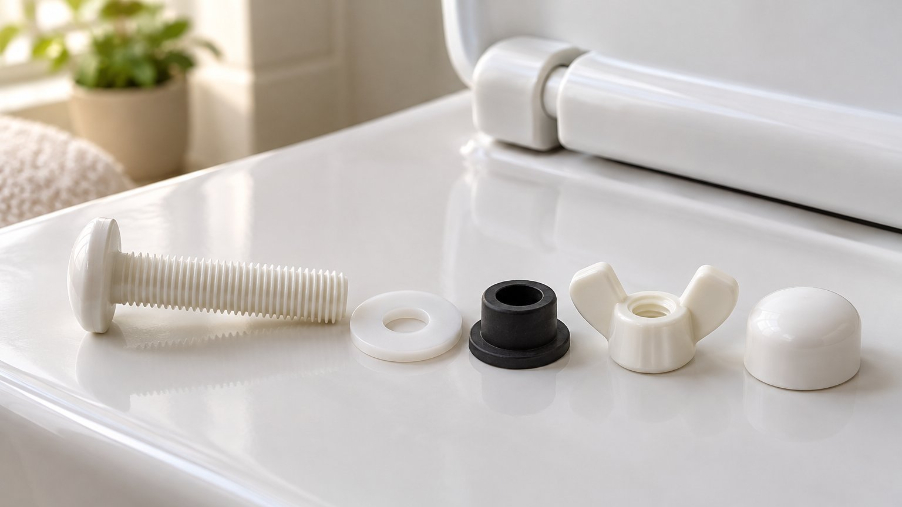
- Standard exposed-bolt mounts: Two bolt heads sit on top of the hinge area, and wing nuts or hex nuts are visible underneath the bowl rim. This is the most common setup in residential bathrooms, and you will typically spot the nuts by reaching beneath the back edge of the bowl.
- Concealed top-fix mounts: Bolts drop down through the mounting holes from above and tighten against expanding anchors hidden inside the porcelain. There are no nuts underneath — everything tightens from the top. These are especially popular on closed-back and wall-hung toilets where underside access is limited.
- Quick-release hinges: A button, lever, or slide tab at each hinge lets you detach the entire seat from fixed mounting posts without touching a bolt. You will notice the posts remain anchored to the bowl while the seat lifts straight off.
Not sure which one you have? A flashlight aimed at the back of the bowl rim reveals the answer in seconds. If you see nuts dangling underneath, it is a standard bolt mount. If the underside is clean and all hardware faces upward, you are dealing with a top-fix system. And if there are small buttons or tabs near the hinges, quick-release is your match.
Why Proper Identification Saves Time and Prevents Damage
Attempting the wrong removal method carries real consequences. Forcing a top-fix bolt upward as though it were a standard bolt can strip the internal anchor — leaving you with a bolt that spins endlessly but never comes free. Yanking a quick-release seat without pressing the release tab can snap the plastic mounting posts. Worst of all, applying excessive torque in the wrong direction can transfer stress directly into the ceramic, potentially cracking the porcelain bowl itself. That turns a ten-minute task into a costly toilet replacement.
Spending thirty seconds on identification eliminates all of those risks. With your mounting type confirmed, you can gather the exact tools the job demands — and that is precisely where the next step picks up.
Tools and Materials Checklist Mapped to Your Hardware
Knowing your mounting type is half the battle. The other half? Having the right tools within arm's reach so you are not scrambling through junk drawers mid-project. A mismatched tool does more than slow you down — it can strip bolt heads, round off nuts, or gouge porcelain. The checklist below maps every tool directly to the mounting system it serves, so you grab only what you actually need to remove a toilet seat efficiently.
Essential Hand Tools for Every Mounting Type
Different hardware calls for different tools. Use this table to match your mounting system — identified in the previous step — to the exact instruments that get the job done.
| Tool | Used For | Mounting Type Compatibility |
|---|---|---|
| Adjustable wrench or pliers | Gripping and turning wing nuts or hex nuts beneath the bowl rim | Standard exposed-bolt |
| Flat-head screwdriver | Prying open plastic cover caps; holding bolt heads steady | All types |
| Phillips screwdriver | Turning cross-head bolt tops on top-fix assemblies | Top-fix and general-purpose |
| Socket wrench or deep socket set | Reaching recessed or deeply set nuts in tight spaces beneath the bowl | Standard exposed-bolt (recessed hardware) |
| Penetrating oil (WD-40 or PB Blaster) | Loosening corroded, rusted, or seized threads | All types with metal hardware |
| Mini hacksaw or oscillating multi-tool | Cutting through bolts that refuse to turn — last-resort removal | All types (severely seized bolts only) |
You will notice that a simple flat-head screwdriver appears under every mounting type. It is the universal starter tool — useful for popping caps, bracing bolt heads, and even nudging stuck components. If you only own one tool on this list, make it that one. For standard bolt-mount seats, an adjustable wrench paired with the screwdriver covers about ninety percent of residential jobs. A socket wrench steps in when the nut sits deep inside a recessed channel and pliers cannot get a solid bite.
Penetrating oil deserves a special mention. Even if the bolts look clean, a quick spray saves effort. Threads that appear fine on the surface can have hidden corrosion where metal meets porcelain, and oil applied before you start turning prevents the kind of mid-task seizure that turns a five-minute job into a thirty-minute ordeal.
Protective Supplies and Cleaning Materials
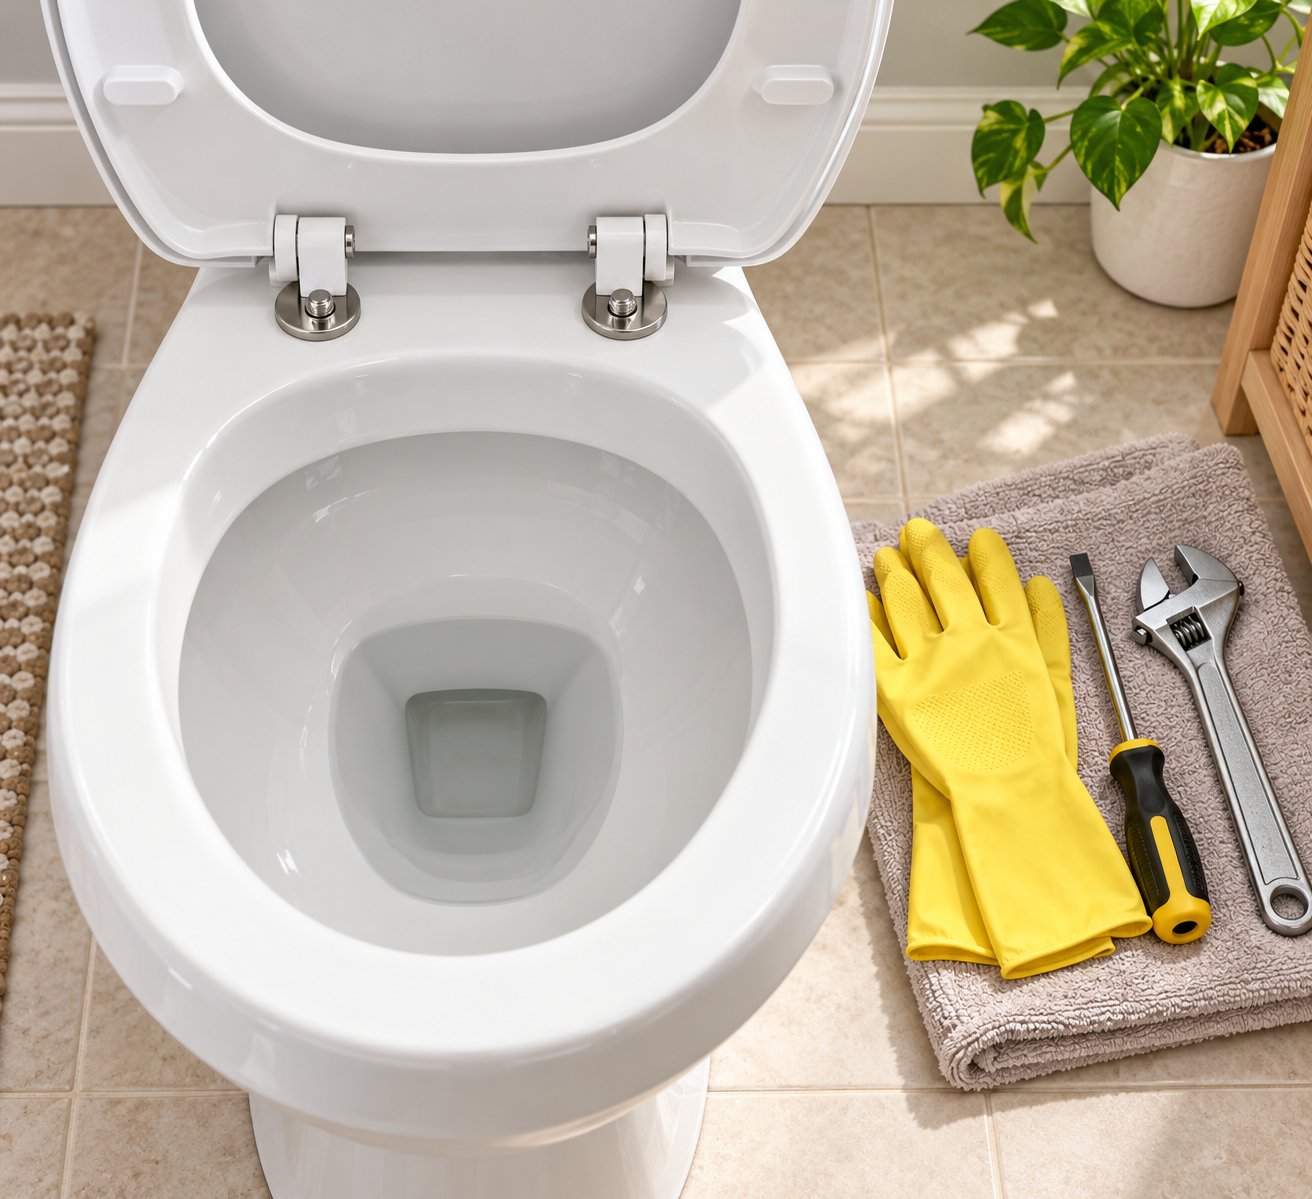
Tools handle the hardware, but you also need to protect yourself and the workspace. Gather these items before you begin:
- Rubber or nitrile gloves — the underside of a toilet seat harbors bacteria even on bowls that look spotless.
- Safety glasses — essential when dealing with corroded metal bolts that can flake or snap under pressure.
- Disinfectant spray — use it on the mounting area before and after removal.
- Old towels — drape one over the bowl opening to cushion dropped tools and catch loosened debris.
- Plastic scraper — removes old gasket residue, mineral deposits, and grime from the porcelain surface once the seat is off.
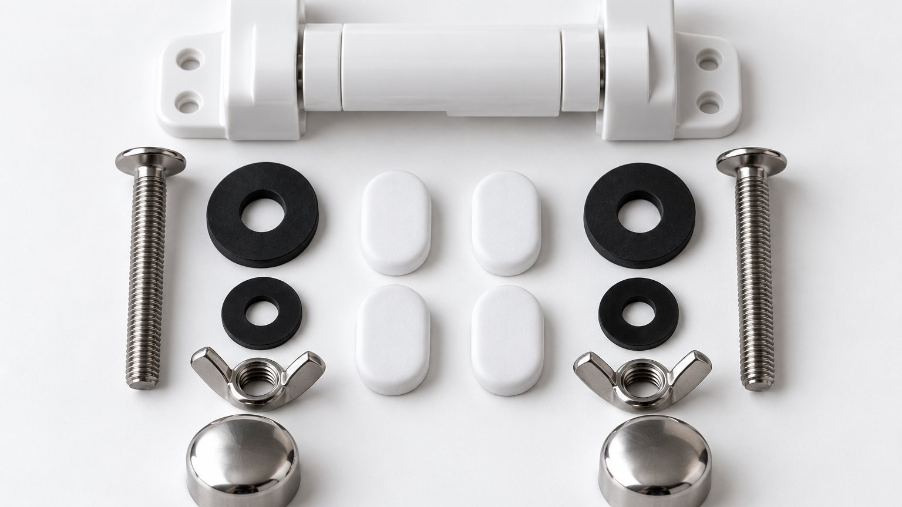
Having every item staged beside the toilet before you begin eliminates the frustrating back-and-forth that drags a quick task into an hour-long chore. When you know how to replace a toilet seat or how to install a toilet seat after removal, you will also want replacement hardware ready at the same time — bolts, washers, and hinge assemblies that match the new seat and bowl shape.
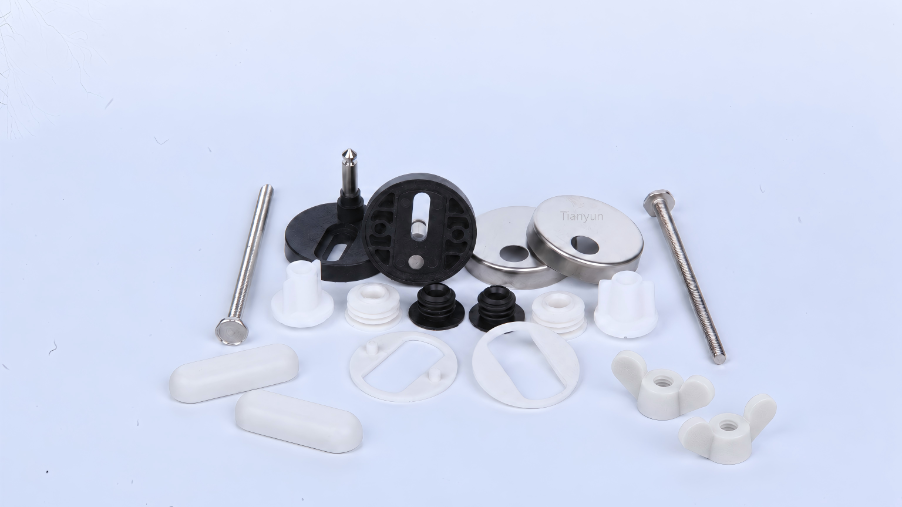
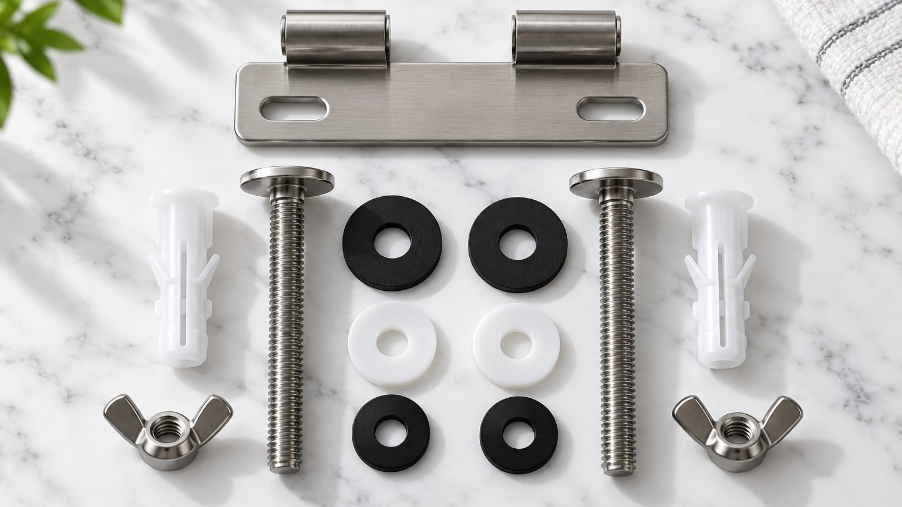
This is where preparation really pays off for professionals, property managers, or sourcing teams handling multiple fixture types across different bathroom layouts. Keeping a complete mounting-hardware kit on hand — one that includes compatible hinge assemblies, stainless steel bases, and adaptable fixing options — eliminates guesswork and repeat hardware-store runs. For teams that need that kind of comprehensive selection, Tianyun's Toilet Seat Fixing Systems offer hinge mounting kits designed for compatibility across varied toilet seat models, making it easier to how to change toilet seat hardware confidently regardless of the bowl configuration.
With your tools organized and protective gear on, the real work can begin — but not before addressing a set of safety precautions that most guides skip entirely.
Safety Precautions Every Guide Overlooks
Tools? Checked. Mounting type? Identified. Most tutorials would tell you to start turning bolts right now — but that rush is exactly how people end up with scraped knuckles, bacterial exposure, or a hairline crack running through expensive porcelain. Whether you are learning how to change a toilet seat for the first time or tackling a corroded fixture that has not budged in years, a few deliberate safety steps protect both you and the toilet itself.
Protect Yourself From Bacteria and Corroded Metal
Here is something most people do not think about: the underside of a toilet seat is one of the dirtiest surfaces in a bathroom, even when the visible top looks freshly wiped. Moisture, bacteria, and mineral residue collect around the hinge area and bolt threads constantly. Before your hands go anywhere near that hardware, pull on a pair of rubber or nitrile gloves — and keep them on for the entire process.
Safety glasses matter just as much, especially when corroded bolts are involved. Rusted metal is brittle. Apply enough torque to a seized nut and a fragment can snap off without warning, launching small shards upward. Eye protection eliminates that risk entirely. Even if the hardware looks relatively clean, tiny flakes of oxidized metal are difficult to spot until one is already airborne.
One more step before you grip that first bolt: spray the entire mounting area — bolt caps, hinge bases, and the porcelain surface around them — with a household disinfectant. Let it sit for a minute or two. This simple habit reduces bacterial contact during the hands-on work that follows and starts loosening surface grime at the same time.
Avoid Cracking the Porcelain Bowl
A cracked toilet bowl is not just inconvenient — it can mean a full fixture replacement costing hundreds of dollars. Porcelain is strong under compression but surprisingly vulnerable to point impacts and uneven stress. When a seized bolt refuses to turn and you instinctively reach for more force, that energy has to go somewhere. If the bolt cannot absorb it, the ceramic beneath it will.
The single most important technique to prevent this is the counter-hold method. Every time you apply turning force to one end of the bolt — whether from above with a screwdriver or below with a wrench — brace the opposite end firmly so the torque stays in the hardware and does not transfer into the porcelain. Without that counter-hold, the entire bolt assembly twists against the ceramic mounting hole, concentrating force on a small ring of brittle material.
A few more rules keep the bowl safe:
- Never use a hammer directly on mounting hardware. The sharp impact radiates through the ceramic far more aggressively than steady rotational force.
- Drape an old towel inside the bowl opening. A dropped wrench or socket falling onto bare porcelain can chip the glaze or worse. The towel absorbs the impact.
- Watch your reinstallation torque. Overtightening new bolts when you how to install toilet seat hardware is just as dangerous as forcing old ones out. Finger-tight plus a quarter turn with a wrench is typically all the porcelain can safely handle.
Always apply controlled, steady pressure rather than sudden force when working with toilet-mounted hardware. If a bolt will not move, step back and try penetrating oil or a different grip — never escalate to brute strength against ceramic.
With your hands protected and the porcelain safeguarded, you are ready to make contact with the actual hardware. The first physical step is finding and exposing the mounting bolts — which, on most modern toilets, are deliberately hidden from plain sight.
Step 1 – Expose the Hidden Mounting Hardware
Gloves on, safety glasses in place, and disinfectant drying on the hinge area — you are ready to get hands-on. Yet many people stall right here, staring at the back of the toilet and wondering where the bolts actually are. The reason? Most modern toilet seats deliberately hide their mounting hardware behind plastic caps or decorative covers, giving the seat a clean, seamless look that offers zero visual clues about how do you remove a toilet seat. This step is all about uncovering those concealed fasteners so you can actually reach them.
Flip Open or Pry Off Plastic Cover Caps
Look at the very back of the seat, right where the hinges meet the porcelain bowl. You will typically see two small plastic pieces — one behind each hinge — that blend into the seat's color and design. These are the bolt caps, and they come in two common styles:
- Hinged flip-up caps: These are attached to the hinge body with a small living hinge. Slide a fingernail or the tip of a flat-head screwdriver under the front lip and gently push backward. The cap swings open like a tiny lid, revealing the bolt head underneath. No prying or snapping required.
- Snap-off caps: These press-fit directly over the bolt head and lock into place with small friction tabs. They do not swing open — they pop completely off. Insert a flat-head screwdriver or a plastic pry tool at the base of the cap where it meets the porcelain and apply light upward leverage. You will feel a small click as the tabs release, and the cap lifts free.
A gentle touch matters here. Jamming a screwdriver aggressively under a snap-off cap can scratch the porcelain glaze or crack the cap itself — a problem if you plan to reuse the same seat later. A plastic pry tool, or even an old credit card edge, gives you leverage without the risk of metal-on-ceramic scuffs.
Caps will not budge? That is common on seats that have been in place for years. Mineral deposits, soap residue, and hard water scale essentially glue the cap to the porcelain surface over time. Apply a few drops of warm water around the edges of the stuck cap and let it sit for two to three minutes. The water softens adhesive residue and dissolves minor mineral buildup, usually providing just enough give for a pry tool to do the rest. A quick spritz of the penetrating oil you already have on hand works for especially stubborn cases.
Worth noting: some older toilets skip caps entirely. If you look at the back of the seat and see bolt heads sitting right out in the open with no cover of any kind, you are already past this step. Exposed hardware was standard on many residential toilets before sleeker hinge designs became popular, so the absence of caps simply means one less obstacle between you and the bolts.
Locate the Bolt Heads and Determine Access Points
With the caps removed — or confirmed absent — you can now see the top of the mounting hardware. This is the moment that tells you exactly how to unscrew a toilet seat, because what you see on top dictates where the real work happens underneath.
Take a close look at the exposed bolt heads. You will encounter one of two scenarios:
- Bolt heads face upward with nuts below (standard mount): You will see a slotted or Phillips-head bolt sitting in each mounting hole. The tightening mechanism — a wing nut, hex nut, or plastic nut — lives underneath the bowl rim. Grab your flashlight and aim it at the underside of the bowl near the back. The curved ceramic often obscures these nuts, so you may need to feel for them with your fingers if the angle is tight. This is the most common residential setup, and the removal process involves working from both sides simultaneously.
- Bolt heads face upward with no nuts below (top-fix mount): The bolt drops through the mounting hole and tightens against an expanding anchor — typically rubber or plastic — that grips the inside of the hole from below. When you shine that flashlight underneath, you will see no wing nut or hex nut dangling down. Everything loosens and tightens from the top. This system is especially common on back-to-wall and concealed-trap toilets where underside access is restricted by design.
If you are unsure which setup you have, here is a quick test: try to grip something underneath each bolt hole. If your fingers or pliers find a nut, it is a standard mount. If the underside is smooth or inaccessible, you are working with a top-fix system. Either way, you now know exactly where to direct your effort when it is time to dismantle toilet seat hardware in the following steps.
A flashlight is genuinely essential here — not optional. The rear underside of a toilet bowl sits in a shadowed recess that overhead bathroom lighting barely reaches. Without direct illumination, you could miss a recessed nut, mistake a plastic anchor for a standard fitting, or overlook early signs of corrosion that will affect your removal strategy. A smartphone flashlight works perfectly if you do not have a dedicated one handy.
Hardware fully exposed and access points confirmed, the actual unbolting can begin. The approach differs depending on whether you are facing standard bolt-and-nut fasteners or one of the alternative mounting systems — and the standard setup is by far the most common starting point.
Step 2 – Unscrew and Remove Standard Bolt-Mount Seats
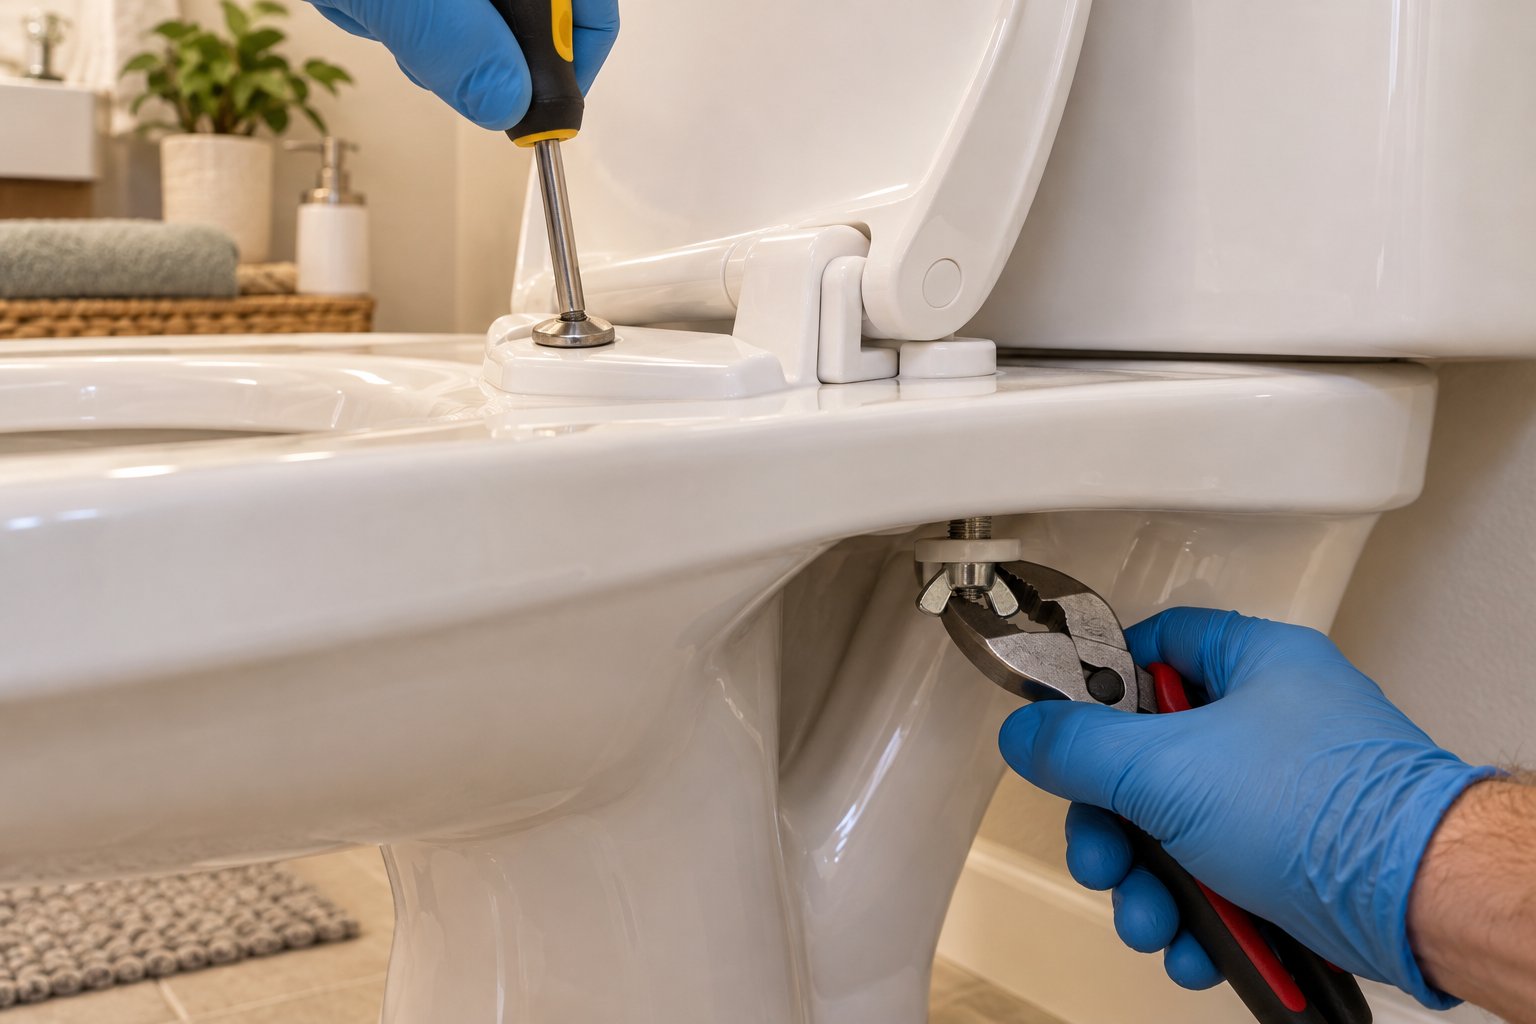
Bolt heads visible on top, nuts confirmed underneath — you are looking at the most widespread toilet seat mounting system in residential bathrooms. Whether the seat is plastic, wood, or duroplast, the removal method is identical. Two bolts, two nuts, and a straightforward counter-hold technique are all that stand between you and a free seat. Here is exactly how to remove old toilet seat hardware without stripping threads or spinning bolts endlessly.
Unscrew the Bolts From Below the Bowl Rim
The biggest mistake people make? Trying to unscrew from the top only. You grip the bolt head with a screwdriver, twist counterclockwise, and the entire bolt just spins in place. Nothing catches. Nothing moves. That happens because the nut underneath is free-spinning too — there is nothing holding it steady while you turn. A plumbing professional on JustAnswer confirmed this exact scenario on a Kohler model: the screw turned freely but refused to come out because the anchor beneath was rotating along with it.
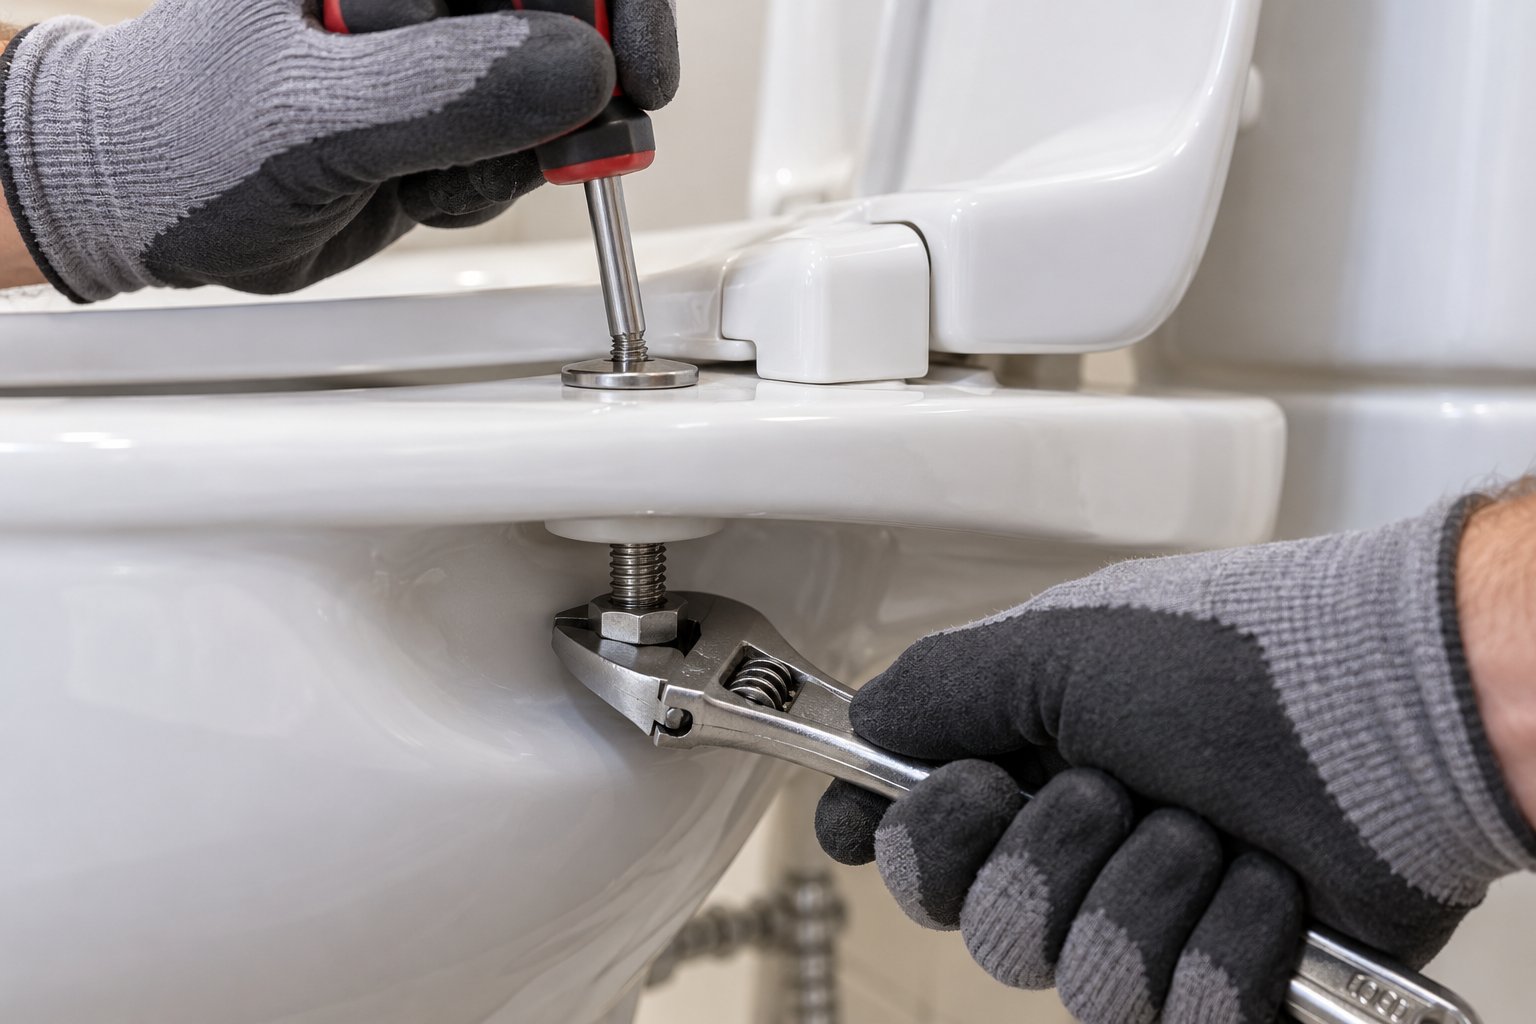
The solution is the counter-hold technique — and it changes everything. You work both sides of the bolt simultaneously, bracing one end while turning the other. Follow these steps in order:
- Position your screwdriver on top. Seat the flat-head or Phillips tip firmly into the bolt head slot at the back of the hinge. Your only job on this end is to hold the bolt completely still — do not try to turn it.
- Reach underneath the bowl rim with your other hand. Locate the wing nut or hex nut on the underside. Grip it with an adjustable wrench, pliers, or your fingers if it is a plastic wing nut.
- Turn the nut counterclockwise. Keep steady downward pressure on the screwdriver to prevent the bolt from rotating while you twist the nut. You will feel initial resistance as corroded or mineral-crusted threads break free.
- Continue turning until the nut spins freely. Once the resistance drops and the nut glides along the threads, you can switch to finger-turning for speed. Unthread the nut completely and set it aside.
- Repeat on the second bolt. Same technique, same counter-hold discipline. Both nuts must come off before the seat moves.
That moment when resistance suddenly eases and the nut begins spinning smoothly? That is the threads disengaging from corrosion — and it means you are seconds away from a free bolt. If you are working with hex nuts rather than wing nuts, a socket wrench or deep socket gives a much more secure grip than pliers, especially in the cramped space beneath the bowl rim.
Lift and Slide the Seat Assembly Free
Both nuts are off. Pull each bolt upward through its mounting hole. The bolts should slide out cleanly, and the entire seat-and-lid assembly is now sitting on the bowl completely unattached.
Lift the seat straight up. In most cases, it comes away immediately. If it resists — sticking to the porcelain instead of releasing — do not yank it upward with force. Years of moisture, mineral deposits, and bathroom grime can essentially bond the seat's rubber bumpers or underside to the ceramic surface. A gentle side-to-side wiggle breaks that bond without stressing the porcelain. Rock the seat a few millimeters left, then right, and it will release on its own.
Set the removed seat on an old towel or directly into a trash bag if you plan to replace toilet seat hardware entirely. At this point, you have completed the most common version of the removal process — the method that applies to the vast majority of residential bathrooms regardless of the seat material.
Not every toilet plays by these rules, though. Quick-release hinges and concealed top-fix systems require a completely different approach — and forcing standard bolt-removal logic onto those mechanisms is a fast path to broken plastic tabs and stripped anchors.
Step 3 – Handle Quick-Release and Concealed Fixings
Standard bolts and wing nuts account for the majority of residential toilet seats, but walk into a bathroom renovated in the last decade and you will likely encounter something different entirely. Modern toilet cover seat designs favor cleaner aesthetics and easier maintenance, which means the mounting hardware is either hidden from view or engineered to release without tools. If the standard counter-hold technique from the previous step does not apply to your toilet, one of the systems below almost certainly does.
Release Quick-Release Seats With a Single Button or Lever
Ever noticed small buttons or sliding tabs tucked into the back of your seat hinges? Those are quick-release mechanisms, and they make the question of how to take off a toilet seat almost laughably simple. The entire seat-and-lid assembly detaches from the bowl in seconds — no wrench, no screwdriver, no crawling around on the bathroom floor to reach hidden nuts.
Here is how the mechanism works. The seat does not bolt directly to the porcelain. Instead, two fixed mounting posts (sometimes called hinge receivers) are bolted to the bowl first. The seat's hinge arms then slide or click onto those posts, locking into position during everyday use but releasing on demand when you activate the button or lever. Think of it like a car seat snapping onto its base — secure during use, removable by design.
The release process follows three quick steps:
- Locate the release buttons. Look at the inside or underside of each hinge where it meets the mounting post. Most designs place a small oval or circular button on each side. Some brands use a single central lever instead.
- Press both buttons simultaneously and lift. Push the buttons inward or downward — the direction depends on the manufacturer — and pull the seat straight up. The hinge arms disengage from the posts, and the entire lid-and-seat unit comes free in your hands. If only one side releases, press harder on the stubborn side while gently wiggling the seat upward.
- Remove the mounting posts separately (if replacing a toilet seat entirely). The posts themselves remain bolted to the bowl. To remove them, look underneath for standard nuts or check the top for Phillips-head screws. Unscrew using the same counter-hold technique covered in the previous step. If you are only removing the seat for cleaning, leave the posts in place — the seat clicks right back on when you are done.
One detail that trips people up: some quick-release buttons are stiff on first use, especially if grime has built up around the mechanism. A drop of penetrating oil on each button's pivot point loosens things immediately. And if you cannot find buttons at all, look for a small lever or sliding tab at the very back of the hinge — some European-style seats use a pull-toward-you motion rather than a push-down button.
Remove Concealed Top-Fix and Brand-Specific Systems
Top-fix mounting is the system you will find on many streamlined, back-to-wall, and wall-hung toilets — designs where the underside of the bowl is either fully enclosed or pressed so close to the wall that reaching beneath is physically impossible. The engineering is clever: a long bolt drops through each mounting hole from above and tightens against an expanding rubber or plastic anchor that grips the inside of the porcelain from below. No underside access needed.
Removing a top-fix seat reverses that tightening process:
- Expose the bolt heads. Pop off any decorative caps covering the hinge bases — these usually snap off or flip up, just like the caps described in Step 1.
- Turn the bolt counterclockwise from above. Use a Phillips screwdriver or Allen key, depending on the bolt head style. As you unscrew, the anchor underneath compresses and releases its grip on the porcelain. This can take many full rotations — the anchor must fully retract before the bolt pulls free.
- Pull the bolt and anchor assembly straight up and out. Once the anchor has compressed enough, the entire unit — bolt, washer, and anchor — lifts through the mounting hole. If it feels stuck, wiggle the bolt gently while pulling upward to coax the compressed anchor through.
- Repeat on the second side and lift the seat away.
The key patience point with top-fix systems is the number of turns required. Unlike a standard nut that spins off in a few rotations, a top-fix anchor retracts gradually. You might turn the bolt twenty or thirty times before it loosens enough to extract. That is normal — resist the urge to yank the bolt upward before the anchor has fully released, or you risk cracking the rubber sleeve and leaving fragments jammed inside the mounting hole.
Brand-specific quirks add another layer. Not every manufacturer follows the same release logic:
- Toto models: Several Toto seats use a unique slide-and-lift mechanism. Rather than unscrewing bolts, you press a release clip on the underside of the hinge plate, slide the seat forward along a rail, and lift it off. The mounting plate stays bolted to the bowl.
- Roca and Villeroy & Boch seats: Some models feature proprietary hinge pins that require pushing a small metal release rod from one side of the hinge to free the pin. A standard screwdriver tip can serve as the push tool.
- Duravit SoftClose seats: These often combine a quick-release button with a top-fix base plate — press the button to detach the seat, then unscrew the base plate's top-fix bolts separately.
When standard approaches fail and the seat still will not come free, the manufacturer's installation documentation is your best friend. Most brands publish PDF guides on their websites, and searching the model number printed on the underside of the seat usually leads directly to the correct instructions.
The table below pulls all three mounting systems together for quick reference, so you can match what you see on your toilet to the exact removal method it requires:
| Mounting System | How to Identify It | Removal Method |
|---|---|---|
| Standard exposed-bolt | Bolt heads visible on top (under caps); wing nuts or hex nuts accessible beneath the bowl rim | Hold the bolt head steady from above with a screwdriver; turn the nut counterclockwise from below with a wrench or pliers. Pull bolts up and lift the seat off. |
| Quick-release hinge | Buttons, levers, or sliding tabs visible on or near each hinge; no bolt heads exposed on top | Press both release buttons simultaneously and lift the seat straight up. Mounting posts stay bolted to the bowl. Remove posts separately if replacing a broken toilet seat entirely. |
| Concealed top-fix | No nuts underneath the bowl; bolt heads or Allen-key sockets face upward under decorative caps; common on back-to-wall and skirted toilets | Turn the bolt counterclockwise from above until the expanding anchor compresses and releases. Pull the bolt-and-anchor assembly up through the mounting hole. Lift the seat away. |
Between these three systems, you have covered virtually every residential and commercial toilet seat on the market. The removal itself — whether it takes a button press, a few counterclockwise turns, or a patient sequence of anchor retractions — is rarely the hard part. The real challenge shows up when hardware refuses to cooperate: bolts frozen in place by years of corrosion, nuts that spin without loosening, and threads so seized that no amount of turning makes a difference. That stubborn-hardware scenario demands its own dedicated strategy.
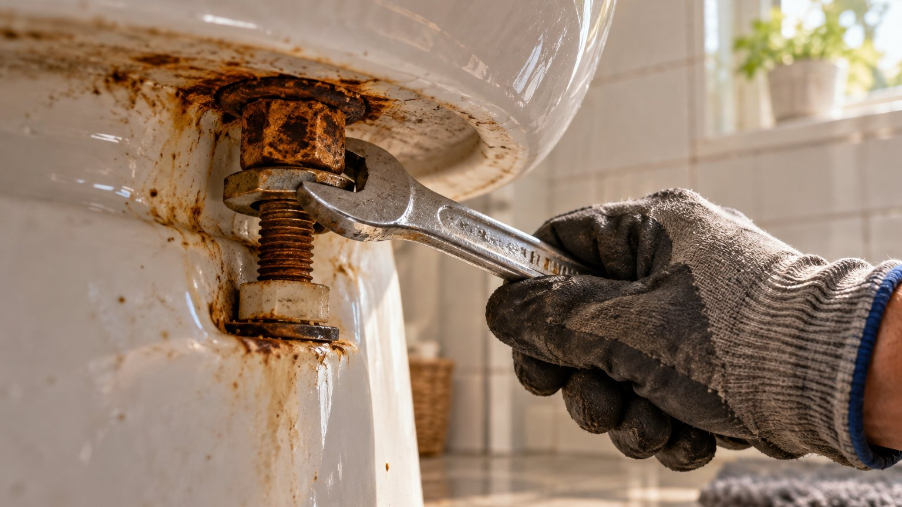
Step 4 – Troubleshoot Stuck Rusted and Corroded Bolts
You have identified the mounting type, gathered the tools, exposed the bolt heads, and started turning — and absolutely nothing happened. The nut will not budge. The bolt feels welded in place. Maybe the wrench slips, or the entire assembly just groans without giving a single millimeter. Sound familiar? Rusted, corroded, or seized toilet seat hardware is the number-one reason a simple five-minute job turns into an hour-long battle, and it is exactly where most removal guides abandon you with nothing more than "unscrew the bolts."
This section changes that. The strategies below are organized from least invasive to most aggressive, so you always try the gentlest fix first and only escalate when it fails. A toilet seat screw that has been soaking in bathroom humidity for years develops a corrosion bond between the metal threads and the nut — sometimes strong enough that hand tools alone cannot break it. Patience and the right approach, though, almost always win.
Penetrating Oil and the Patience Method
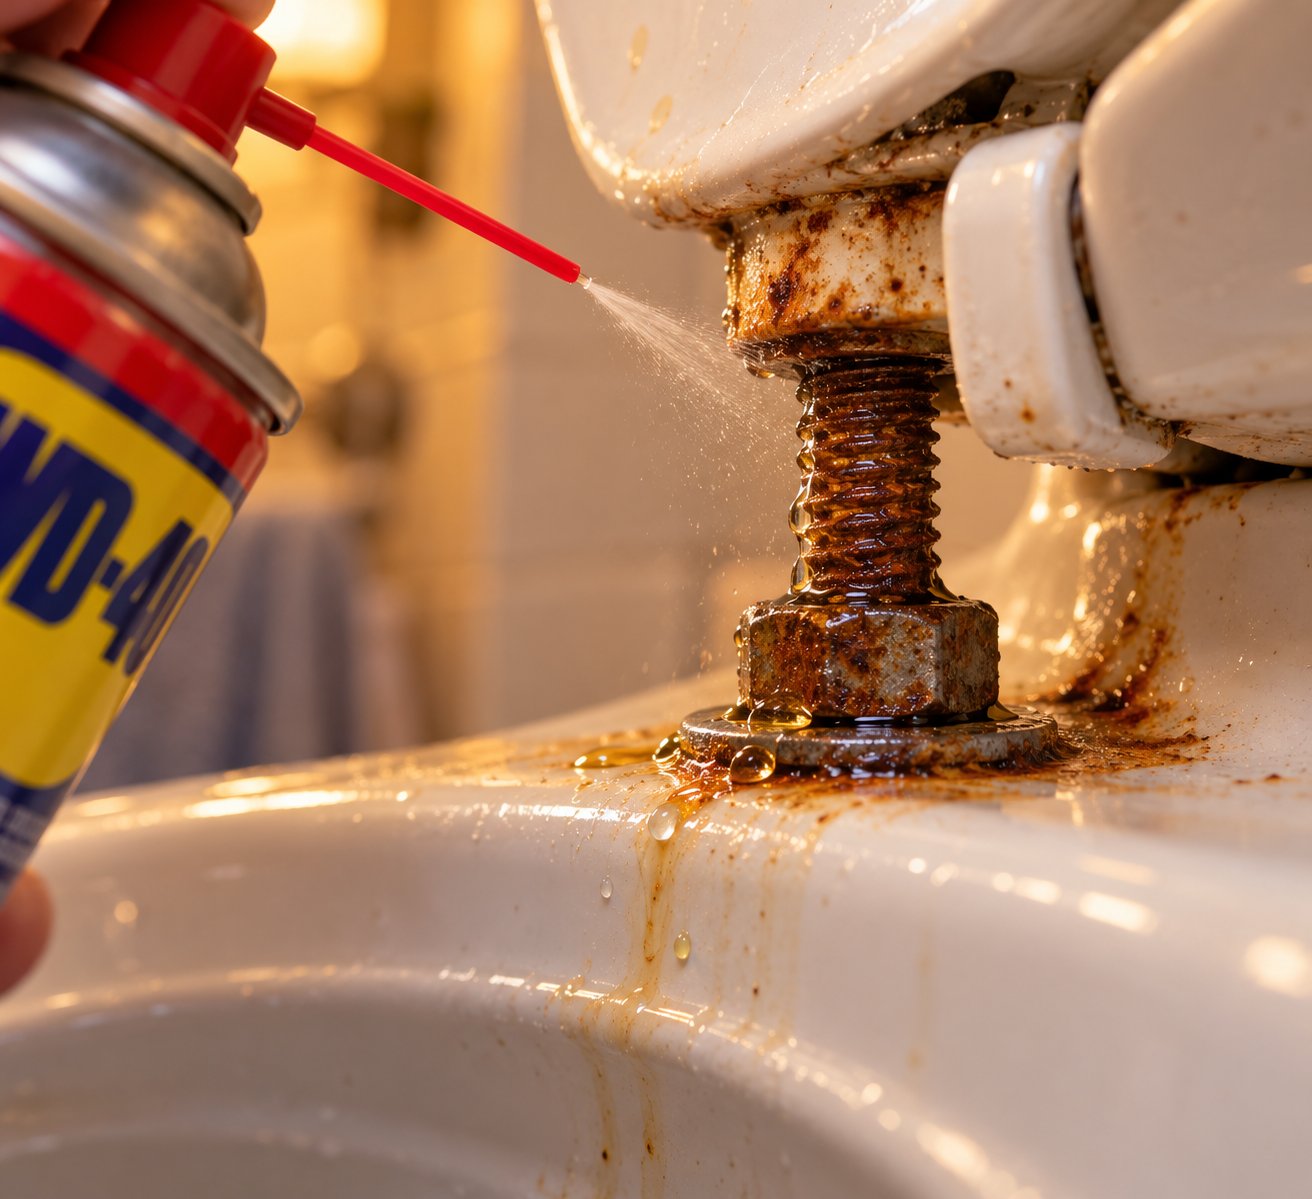
Before reaching for anything aggressive, give chemistry a chance to do the heavy lifting. Penetrating oil — WD-40, PB Blaster, Liquid Wrench, or any similar product — is specifically designed to creep into microscopic gaps between corroded metal surfaces and break the oxidation bond from within.
Here is how to apply it effectively:
- Spray liberally on both sides of the hardware. Hit the bolt head on top and the nut underneath the bowl rim. Corrosion forms at every contact point, so the oil needs to reach threads from both directions.
- Wait at least 15 to 30 minutes. This is not optional. Penetrating oil works by wicking along thread grooves through capillary action, and that process takes time. Spraying and immediately cranking the wrench accomplishes almost nothing — the oil has not reached the seized threads yet.
- For severely seized hardware, wait overnight. Apply a generous coat before bed and let the oil soak for eight to twelve hours. Reapply a second coat in the morning before attempting removal. This extended soak is often the difference between success and stripped hardware.
- Attempt removal with steady, controlled torque. After soaking, grip the nut with pliers or a wrench and turn counterclockwise while bracing the bolt head from above. Use slow, even pressure — not sudden jerks. You may feel the corrosion bond "crack" with a faint pop or snap, followed by much easier turning.
A useful trick for stubborn cases: after the initial soak, try turning the nut a quarter-turn clockwise — yes, tightening it slightly — before reversing to counterclockwise. That small backward motion cracks the corrosion ring around the threads without requiring full loosening force, making the counterclockwise turn dramatically easier. Plumbers use this back-and-forth rocking technique constantly on old fixtures, and it works remarkably well as a toilet seat removal tool strategy when penetrating oil alone is not quite enough.
If the bolt turns freely but refuses to come out — spinning endlessly without rising — the problem is different. The nut is not seized to the bolt; it is seized to the porcelain or corroded in place against its own washer. The bolt spins because nothing is holding the nut steady underneath.
If the bolt spins freely but will not come out, the nut underneath is likely corroded in place. Hold the nut with locking pliers while turning the bolt counterclockwise from above — this reverses the counter-hold technique and forces the threads to disengage.
Locking pliers (Vise-Grips) are ideal here because they clamp onto the nut and stay locked without you needing to maintain grip pressure in an awkward, cramped position beneath the bowl rim. Clamp them on, lock the jaw, and focus your effort on turning the bolt from the more accessible top side.
Cutting Through Seized Bolts as a Last Resort
Penetrating oil, rocking technique, locking pliers — you have tried everything, and the hardware still will not cooperate. At this point, the bolts are beyond saving. The goal shifts from preservation to removal by any means necessary, and that means cutting through the fasteners mechanically. This is how to uninstall toilet seat hardware when all conventional methods fail.
Option 1: Mini hacksaw blade. A compact hacksaw blade — even one used without a frame, gripped in a gloved hand or wrapped in tape at one end for a handle — can slice through a brass, steel, or nylon toilet seat bolt in a few minutes. Position the blade between the underside of the seat hinge and the top of the porcelain, cutting horizontally through the bolt shaft. The key safety measure: place a strip of painter's tape, a piece of cardboard, or a folded cloth against the porcelain surface directly below your cutting line. This protective layer prevents the saw teeth from scratching or chipping the ceramic glaze if the blade slips. Work with short, controlled strokes rather than long, aggressive pulls.
Option 2: Oscillating multi-tool with a metal-cutting blade. If you own an oscillating tool, this is the faster and more precise option — especially in the tight space behind the toilet where a full-size hacksaw cannot maneuver. A carbide or bi-metal oscillating blade designed for metal cutting slices through toilet seat bolts in seconds rather than minutes. Carbide-tipped blades handle even hardened or heavily corroded steel without dulling immediately. Apply light, steady pressure and let the blade's oscillation do the work — pushing too hard generates excessive heat and can damage both the blade and the porcelain beneath it. As with the hacksaw, tape off the ceramic surface as a scratch guard.
Option 3: Localized heat application. When corrosion is so severe that even cutting feels impossible — maybe the bolt is recessed or the space is too tight for any saw — a heat gun aimed directly at the frozen nut can expand the metal just enough to break the corrosion bond. Hold the heat gun two to three inches from the nut for 30 to 60 seconds, then immediately attempt turning with pliers or a wrench while the metal is still expanded. Two critical warnings here: never use an open flame (torch, lighter) near porcelain, as the thermal shock can crack ceramic instantly. And direct the heat exclusively at the metal hardware, not the surrounding bowl surface. Brief, targeted exposure is all you need.
Whichever method you choose, keep the cut or heated area as far from the porcelain surface as physically possible. A bolt can be replaced for pennies. A cracked toilet bowl costs hundreds.
When to Call a Plumber
DIY troubleshooting has limits, and recognizing them protects both your toilet and your wallet. Call a professional if any of the following apply:
- The bolts are completely inaccessible. Some back-to-wall or fully skirted toilets enclose the mounting area so tightly that no tool — wrench, saw, or multi-tool — can physically reach the hardware. A plumber may need to partially disconnect the toilet from the floor to access the fixings.
- You see or hear cracking in the porcelain. Any visible hairline crack radiating from a bolt hole, or a sharp snapping sound during removal attempts, means the ceramic is failing under stress. Stop immediately. Continuing risks splitting the bowl entirely, which turns a seat-removal job into an emergency toilet replacement.
- The bolt material is unknown and extremely hard. Some older commercial installations use hardened stainless steel or specialty fasteners that resist both cutting and chemical treatment. A plumber with professional extraction tools can remove these without damaging the fixture.
There is no shame in handing off a genuinely seized fixture to a pro. The cost of a service call is a fraction of the cost of a new toilet — and significantly less stressful than discovering a crack after the bolt finally snaps free.
With the stubborn hardware finally conquered — whether through patience, penetrating oil, or a carefully placed cut — the seat is off and the bowl's mounting surface is fully exposed for the first time in months or years. What you find underneath often is not pretty, and cleaning it properly before installing anything new makes the difference between a secure fit and a seat that wobbles from day one.
Step 5 – Clean and Inspect the Mounting Area
That exposed porcelain behind the hinges? It has been sealed off from every cleaning session for as long as the old seat was installed. Lift the seat away and you will almost certainly find a ring of discolored buildup around each bolt hole — a mix of mineral scale, bathroom grime, rubber gasket residue, and sometimes outright mold. Skipping this cleanup and bolting a new seat directly on top of that mess is one of the fastest ways to guarantee a wobbly, unhygienic installation. A few minutes of cleaning and a careful visual inspection set the stage for a toilet seat cover change that actually lasts.
Clean Residue and Mineral Deposits From the Bowl Surface
Start by spraying the entire exposed mounting area — the flat porcelain surface around each bolt hole, the inside edges of the holes themselves, and the back rim of the bowl — with a bathroom disinfectant. Let it sit for at least two minutes. This initial soak kills surface bacteria and softens the grime layer, making physical removal far easier.
Grab a plastic scraper or an old toothbrush and work through the buildup methodically:
- Around the bolt holes: Mineral scale and old rubber gasket material tend to form a crusty ring right where the seat's mounting plate pressed against the porcelain. A plastic scraper slides under this ring and lifts it away in flakes. Avoid metal scrapers or putty knives — they scratch vitreous china and dull the glaze, creating rough patches where grime accumulates even faster in the future. Gerber's official cleaning guidelines specifically warn against abrasive pads, pumice stones, and steel wool on porcelain surfaces for exactly this reason.
- Inside the bolt holes: Push a rolled-up piece of damp cloth or a cotton swab through each hole to clear out corrosion flakes, old washer fragments, and mineral deposits. If a corroded bolt was forced out or cut during removal, tiny metal shavings may be lodged inside the hole. These need to come out — metal debris left inside the mounting hole can interfere with new bolt alignment and accelerate corrosion on fresh hardware.
- The back rim area: This curved section of the bowl — directly behind where the hinges sat — is virtually impossible to reach with a sponge or brush when a seat is in place. You will likely find a concentrated band of grime, hard water stains, and sometimes pink bacterial film running along the rim. Scrub it with the toothbrush and disinfectant while you have unobstructed access. This is also the perfect time to inspect the rim jet holes along the underside of the bowl lip for mineral clogs, which can affect flush performance over time.
Once you have scraped and scrubbed every surface, wipe the entire area down with a clean, damp cloth to remove loosened residue and cleaning solution. Let it air dry completely before handling any new hardware. Moisture trapped between a fresh mounting washer and the porcelain creates the exact conditions that cause corrosion to start all over again.
Inspect Bolt Holes and Porcelain for Damage
A clean surface reveals what grime was hiding — and sometimes the news is not great. Corroded bolts, forced removal attempts, and years of micro-movement from a loose seat can all leave damage on the porcelain that affects how securely a replacement seat will mount. Before you even think about how to take a toilet seat off the shelf and bolt it on, run through this inspection checklist:
- Bolt hole integrity: Look at the inner walls of each mounting hole. Are they smooth and uniform, or are there chips, cracks, or rough spots where corroded metal gouged the ceramic? Minor surface chips — small flakes of glaze missing from the hole's edge — are cosmetic and generally harmless. Larger chips that widen the hole diameter are a different story, because an oversized hole allows the bolt to shift laterally, leading to a seat that rocks side to side during use.
- Surrounding porcelain condition: Examine the flat area around each hole closely, ideally with a flashlight at a low angle so shadows reveal hairline fractures. Cracks that radiate outward from a bolt hole — even very fine ones — indicate structural stress in the ceramic. A seat bolted over a radiating crack applies repeated pressure every time someone sits down, and that crack will widen over time. If you spot this kind of damage, the toilet itself likely needs replacement rather than just the seat.
- Residue-free surface: Confirm that no gasket material, adhesive, or mineral scale remains on the flat mounting surface. Even a thin layer of residue prevents the new seat's base plate from sitting flush against the porcelain, which introduces a gap that allows the seat to wobble and shift no matter how tightly you torque the bolts.
- Level mounting surface: Place a straightedge or even a credit card flat across the area between the two bolt holes. The porcelain should be uniformly flat. If corrosion or impact damage has created a raised ridge or depression near a hole, the new seat will sit unevenly, causing one hinge to bear more load than the other — a recipe for premature hardware failure.
Spotted chipped bolt holes but no radiating cracks? A slightly larger mounting washer — one size up from the standard washer included with most replacement seats — distributes pressure over a wider area and compensates for minor hole widening. The seat mounts securely, and the larger washer prevents the bolt from pulling through or shifting inside the oversized opening.
Radiating cracks, however, are a different category entirely. No washer upgrade fixes compromised porcelain. Continuing to use a toilet with structural cracks around the mounting area risks a catastrophic failure — the kind that sends water across the bathroom floor. If cracks are present, consult a plumber about full fixture replacement before installing a new seat.
A clean, damage-free mounting surface is the foundation everything else sits on. With both bolt holes cleared, inspected, and confirmed structurally sound, the bowl is genuinely ready to accept fresh hardware — and the way you install that hardware determines whether the new seat stays tight for years or starts squeaking within weeks.
Step 6 – Install a Replacement Seat With Secure Hardware
A pristine mounting surface with clean, structurally sound bolt holes — that is the finish line of removal and the starting line of installation. The temptation at this point is to rush: drop the new seat on, spin the bolts in, and call it done. Resist that urge. How you install the replacement hardware determines whether your new seat stays rock-solid for years or develops an annoying wobble within weeks. And if you are wondering how to fix a broken toilet seat situation for good, the answer almost always lives in the quality of the mounting hardware and the precision of the tightening sequence — not the seat itself.
Align the New Seat and Insert Mounting Bolts
Proper alignment before tightening prevents the lopsided, off-center installations that plague so many bathroom fixtures. Follow these steps in order, and do not skip ahead to tightening until the seat position is confirmed visually:
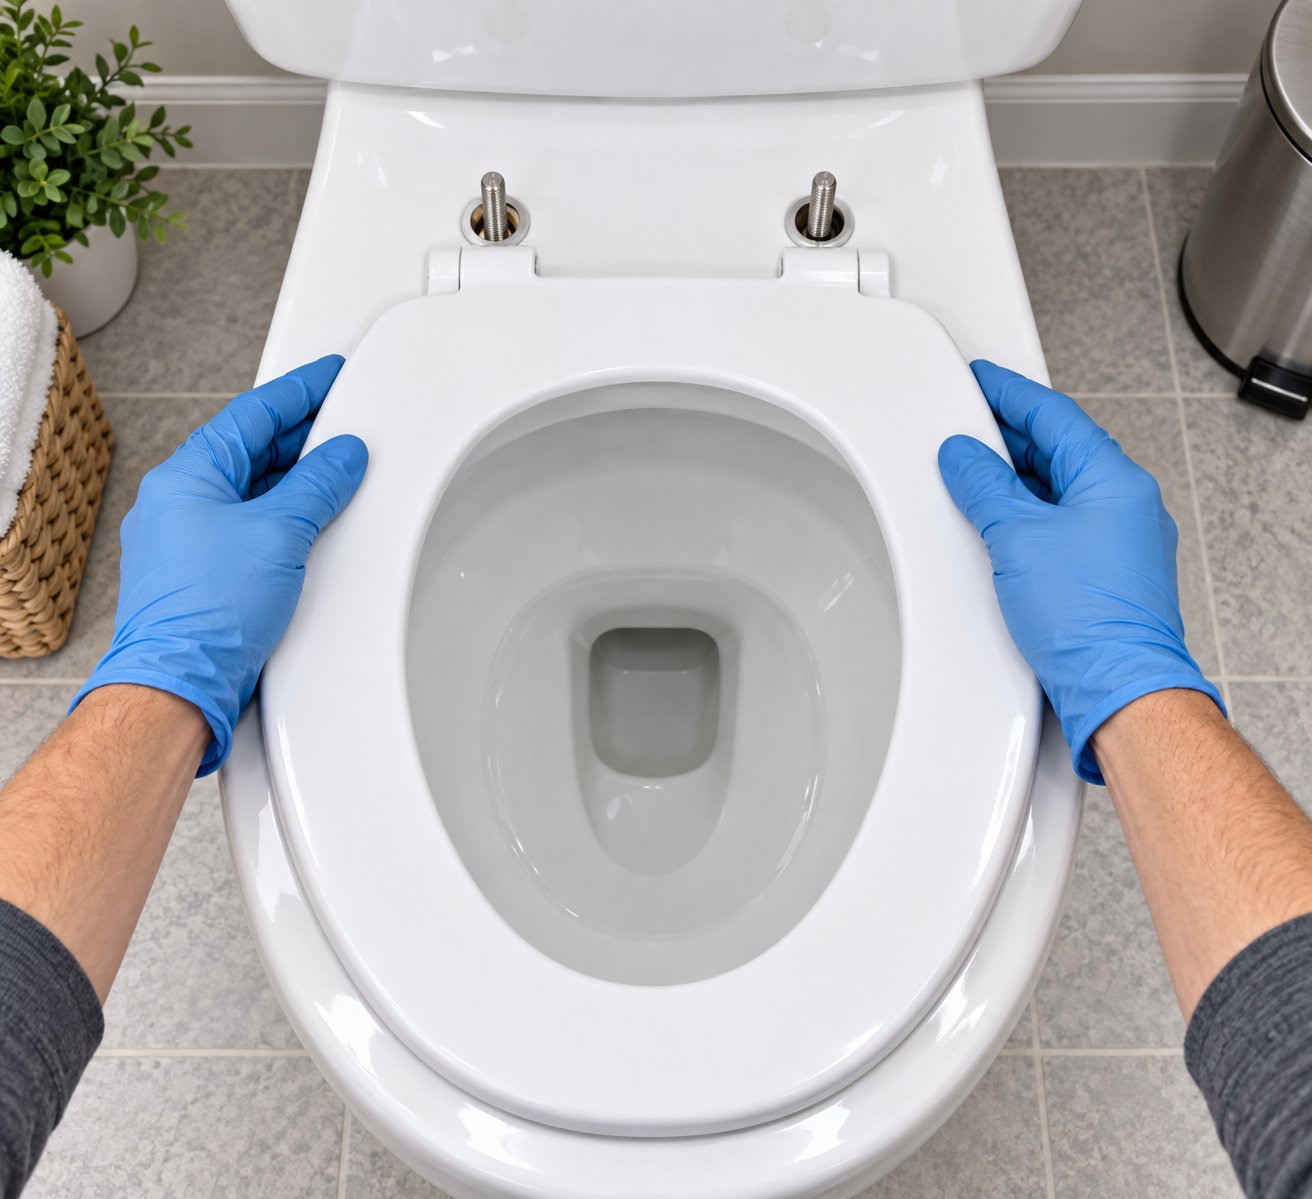
- Position the seat on the bowl. Set the new seat-and-lid assembly on top of the porcelain so the bolt holes in the seat's hinge plate line up directly over the bolt holes in the bowl. Slide the seat forward or backward until the holes overlap cleanly — you should be able to see straight through both layers.
- Drop the mounting bolts through from above. Insert one bolt through each hinge-plate hole and down into the corresponding bowl hole. Let gravity pull them into position. If the bolts include rubber or plastic washers, seat those washers between the bolt head and the hinge plate before inserting — they cushion the connection and prevent the bolt head from cracking a plastic hinge under torque.
- Hand-thread the nuts from below. Reach underneath the bowl rim and spin each nut onto its bolt by hand. Turn clockwise until you feel the threads engage and the nut sits snug against the underside of the porcelain. Do not use tools yet — finger-tightening at this stage lets you fine-tune the seat's position without fighting resistance.
- Check seat alignment by closing the lid. Lower both the seat and the lid into their closed positions. The seat should be centered on the bowl with equal overhang on both sides and the lid resting flat without tilting left or right. If the seat looks shifted, loosen one nut slightly, nudge the seat, and re-check. This visual confirmation takes five seconds and saves you from having to loosen fully tightened hardware later.
- Tighten evenly, alternating sides. Using a screwdriver for toilet seat bolt heads on top and a wrench or pliers on the nuts below, tighten the left side a half-turn, then switch to the right side for a half-turn. Alternate back and forth. This balanced approach pulls the seat down evenly against the porcelain, preventing one hinge from clamping tighter than the other — which is the primary cause of diagonal shifting and uneven lid closure.
- Stop at finger-tight plus a quarter-turn. Once the nuts are finger-tight and the seat no longer shifts when you press on it, apply one final quarter-turn with the wrench on each side. That is it. Nothing more.
Why such restraint on torque? Porcelain is incredibly strong under even compression but brittle under concentrated point loads. Every fraction of a turn past the sweet spot transfers force from the bolt threads into a tiny ring of ceramic around the mounting hole. A half-turn too many — especially on a bolt without a cushioning washer — can crack the bowl in a split second. The general rule of thumb among fixture professionals is simple: tighten until the wobble stops, add one quarter-turn, and walk away.
Even torque on both sides and never more than a quarter-turn past finger-tight — this single principle prevents cracked porcelain, crooked seats, and premature hardware failure.
For top-fix systems, the sequence is similar but the mechanics are reversed. Drop the bolt-and-anchor assembly through from above, hand-turn the bolt clockwise until the expanding anchor grips the underside of the porcelain, check alignment, and then finish with that same controlled quarter-turn using the appropriate screwdriver for toilet seat top-fix heads or an Allen key if the bolt requires one. The alignment step — closing the lid and verifying center position — is even more important with top-fix hardware because you cannot adjust from below once the anchor expands.
Choose the Right Replacement Hardware for a Secure Fit
Here is a scenario that plays out constantly: someone installs a brand-new seat, and within a month it squeaks, shifts, or feels loose. They tighten the bolts again. A few weeks later, same problem. The seat is fine. The bowl is fine. The culprit? Mismatched or low-quality mounting hardware that cannot maintain a stable connection over time.
The bolts, nuts, and washers that ship with budget toilet seats are often lightweight plastic or low-grade metal — materials that compress, flex, or corrode under the constant stress of daily use and bathroom humidity. Knowing how to take toilet seat off the bowl properly is only half the job; how do you fix a toilet seat that keeps loosening? You fix it at the hardware level before it ever becomes a problem.
Consider these material choices carefully:
- Stainless steel bolts and bases resist corrosion far longer than zinc-plated or bare steel equivalents. In a humid bathroom environment, standard steel hardware can begin rusting within a year — recreating the exact seized-bolt nightmare you just escaped. Stainless steel costs slightly more upfront but eliminates the corrosion cycle entirely.
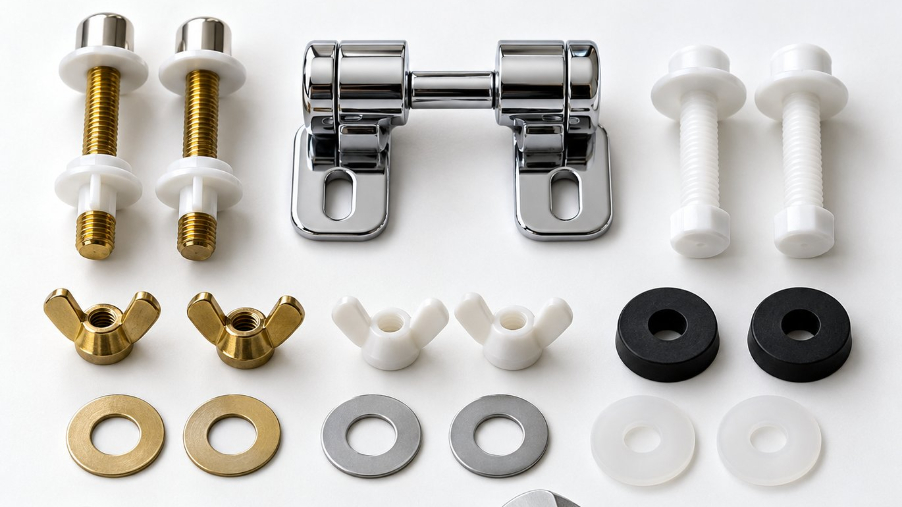
- Rubber or nylon washers placed between the bolt head and the hinge plate, and between the nut and the porcelain, serve two purposes. They absorb vibration that loosens threads over time, and they distribute clamping force over a wider area to protect the ceramic. If your new seat did not include washers, purchase them separately — they are inexpensive and transformative.
- Matched hinge assemblies designed for your specific bowl shape — round, elongated, or D-shape — ensure the seat's pivot point sits at the correct distance from the bowl rim. A hinge designed for a round bowl mounted on an elongated toilet positions the seat too far forward, putting uneven stress on the rear bolts and accelerating loosening.
For homeowners tackling a single installation, a universal mounting kit from a hardware store handles the job. The stakes rise, though, for property managers overseeing dozens of units, sanitary ware professionals outfitting commercial restrooms, or sourcing teams selecting hardware across multiple toilet models and bowl configurations. In those contexts, a grab bag of mismatched bolts and generic hinges leads to callbacks, warranty complaints, and maintenance headaches. Mounting-assembly systems that bundle compatible hinge kits, stainless steel bases, and adaptable fixing options for varied seat models eliminate that variability at the source. Tianyun's Toilet Seat Fixing Systems are built for exactly this kind of multi-model compatibility — offering hinge mounting kits and stainless steel fixing assemblies designed to align properly across different bowl shapes and seat brands, so the hardware decision is made once rather than troubleshot repeatedly.
Regardless of where you source your hardware, one final check seals the installation: sit on the seat, shift your weight side to side, and press backward against the lid. Zero movement means you have nailed both the alignment and the torque. Any subtle rocking means one side needs a slight adjustment — loosen, reposition, and retighten using the alternating half-turn method from above. How to fix a broken toilet seat attachment almost always comes down to this last verification step. A seat that passes the sit-and-shift test on day one will stay tight for years, provided the hardware resists corrosion and the washers hold their compression.
You have now completed the full cycle — from identifying your mounting type and gathering the right tools, through safe removal of even the most stubbornly corroded hardware, to a clean inspection and a properly torqued reinstallation. Every toilet seat removal and replacement follows this same logical arc, whether you are swapping a cracked lid in a single bathroom or standardizing fixtures across an entire building. The process is straightforward once you respect two things: the fragility of porcelain under point stress, and the outsized role that quality mounting hardware plays in long-term seat stability.
Frequently Asked Questions About Removing Toilet Seat Covers
1. How do you remove a toilet seat when the bolts are spinning but won't come out?
A spinning bolt that refuses to rise means the nut underneath is corroded in place against its washer or the porcelain. To fix this, reverse your approach: clamp locking pliers (Vise-Grips) onto the nut beneath the bowl rim so it cannot rotate, then turn the bolt counterclockwise from above with a screwdriver. The locked nut forces the threads to disengage. If the nut is too corroded to grip, apply penetrating oil overnight and retry, or cut through the bolt shaft with a mini hacksaw as a last resort.
2. What tools do I need to remove a toilet seat cover?
The exact tools depend on your mounting type. For standard exposed-bolt seats, you need a flat-head or Phillips screwdriver to brace the bolt head and an adjustable wrench or pliers for the nut underneath. Top-fix systems typically require only a screwdriver or Allen key from above. Quick-release seats often need no tools at all — just press the release buttons and lift. Across all types, penetrating oil (like WD-40) is recommended for corroded hardware, and rubber gloves plus safety glasses protect you during the process.
3. How do you remove a toilet seat with hidden bolts?
Hidden bolts are concealed behind small plastic caps at the back of the seat hinges. Look for hinged flip-up caps that swing open when you push a screwdriver under the front lip, or snap-off caps that pop free with gentle prying. Once the caps are off, determine whether your system is a standard mount (nuts visible underneath) or a top-fix mount (no nuts below — the bolt tightens from above against an expanding anchor). For top-fix seats, turn the bolt counterclockwise from above until the anchor compresses and the assembly pulls free through the mounting hole.
4. Can I remove a quick-release toilet seat without any tools?
Yes, in most cases. Quick-release seats attach to fixed mounting posts on the bowl via hinge arms that lock in with a click. To detach, press the release buttons or slide the lever located at each hinge, then lift the seat straight up. The mounting posts stay bolted to the bowl. If you only need to clean underneath, leave the posts in place and snap the seat back on when finished. If you are replacing the seat entirely, the posts can be unbolted separately using a screwdriver and wrench.
5. How do I avoid cracking the toilet bowl when removing a stuck seat?
Always use the counter-hold technique: brace the bolt head from above with a screwdriver while turning the nut below, so torque stays in the hardware rather than transferring into the porcelain. Never strike mounting hardware with a hammer, and place an old towel inside the bowl to cushion dropped tools. If bolts are severely seized, apply penetrating oil and wait 15 to 30 minutes — or overnight — before attempting removal with slow, even pressure. If the porcelain shows any sign of cracking during your attempts, stop immediately and consult a plumber.
Apply This Insight to Your Project
Tell us what you are building and how the topic “Stuck Bolts? How To Remove Toilet Seat Covers Without The Struggle” relates to your application. Our engineering team can help evaluate the next step.