What a Bidet Toilet Seat Is and Why It Feels Intimidating at First
You spot an unfamiliar row of buttons on a toilet seat in a hotel room, an Airbnb, or maybe your own freshly renovated bathroom. A small knot of uncertainty tightens in your stomach: What do these buttons do? Will water spray everywhere? Do I sit differently? That moment of hesitation is remarkably common — millions of people encounter a bidet toilet seat for the first time every year and have no idea how to use a bidet correctly. The good news is that the learning curve is genuinely short, and by the end of this guide you will move from confused to confident in eight clear steps.
What Exactly Is a Bidet Toilet Seat
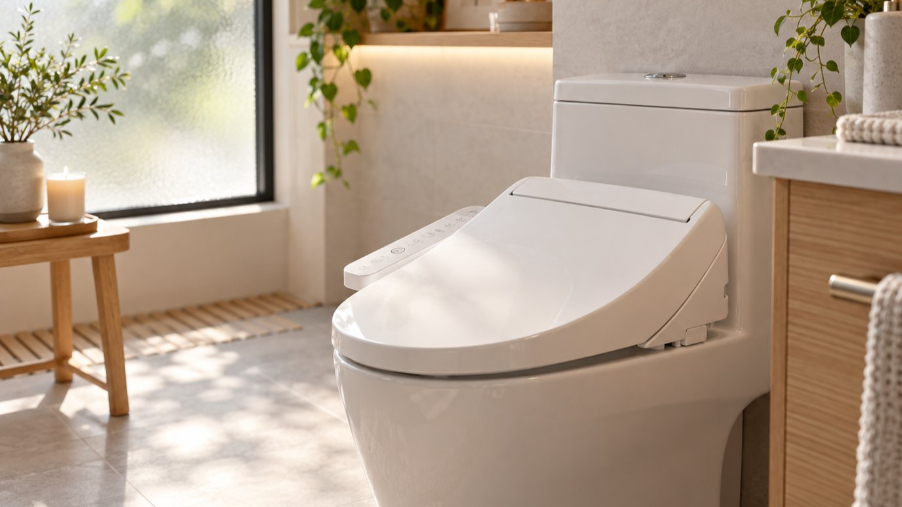
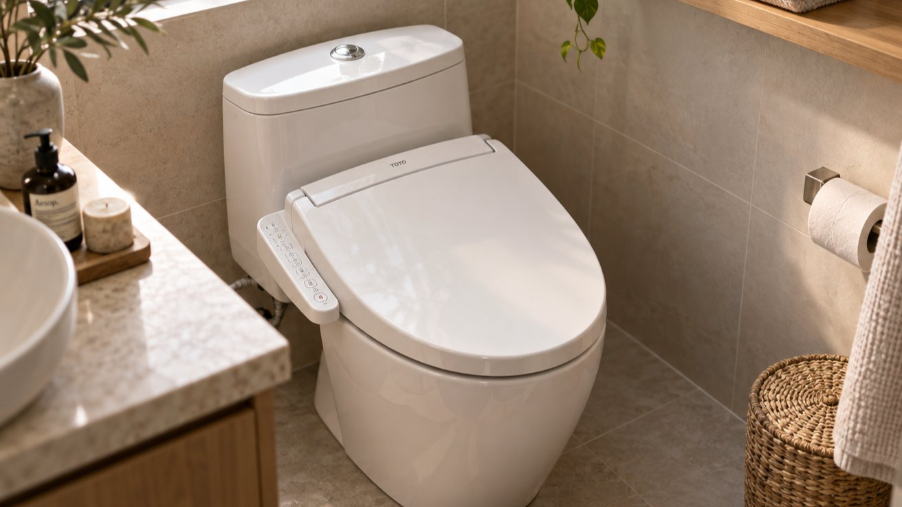
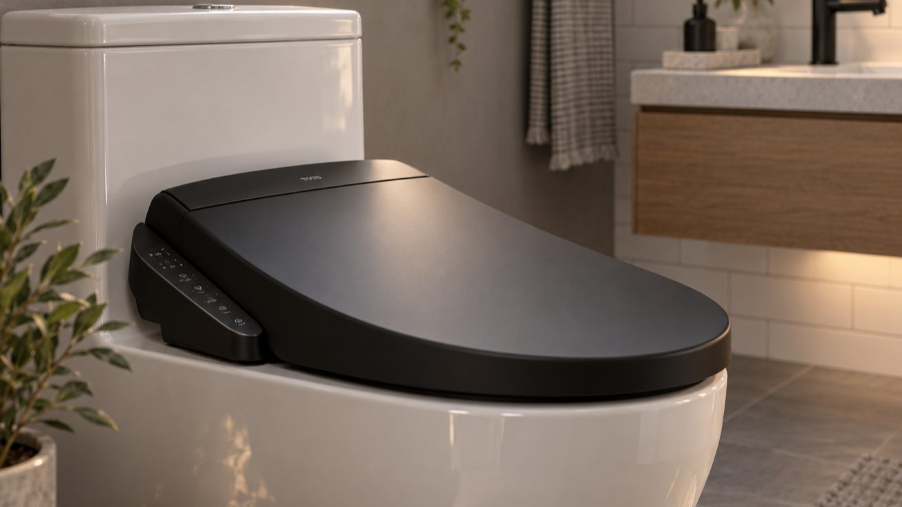
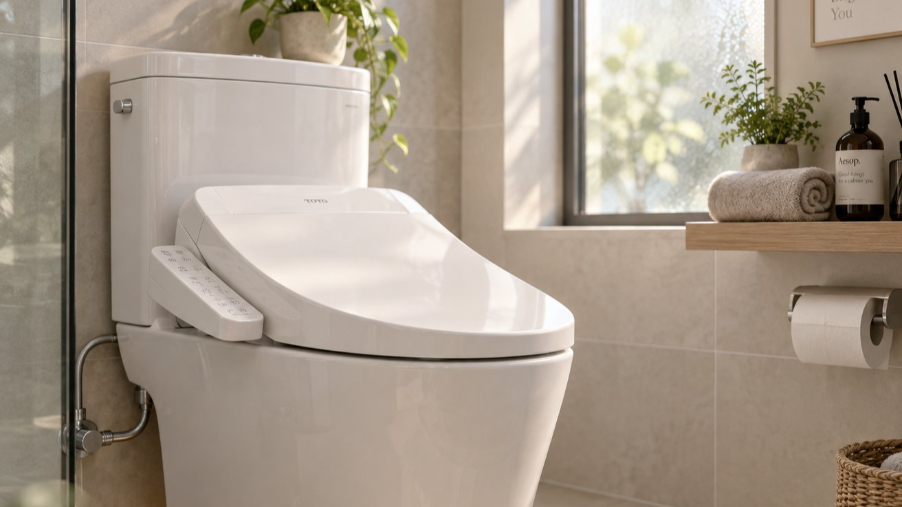
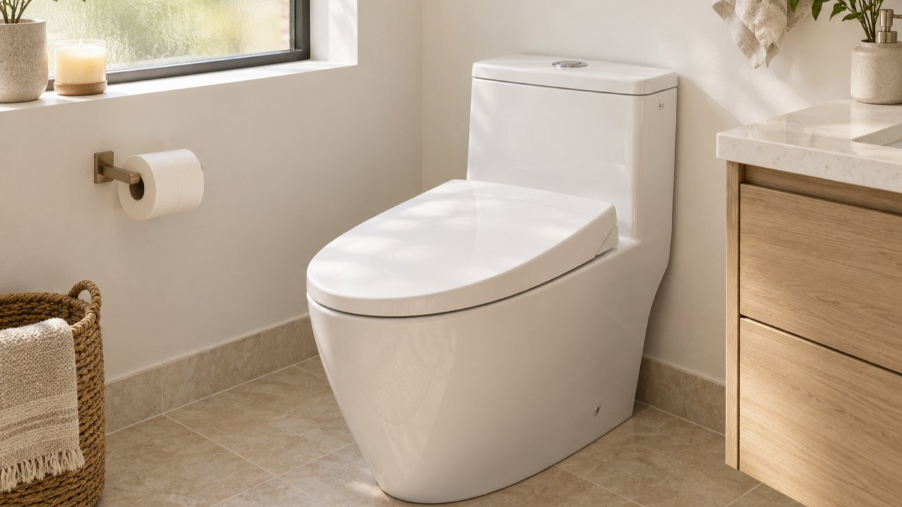
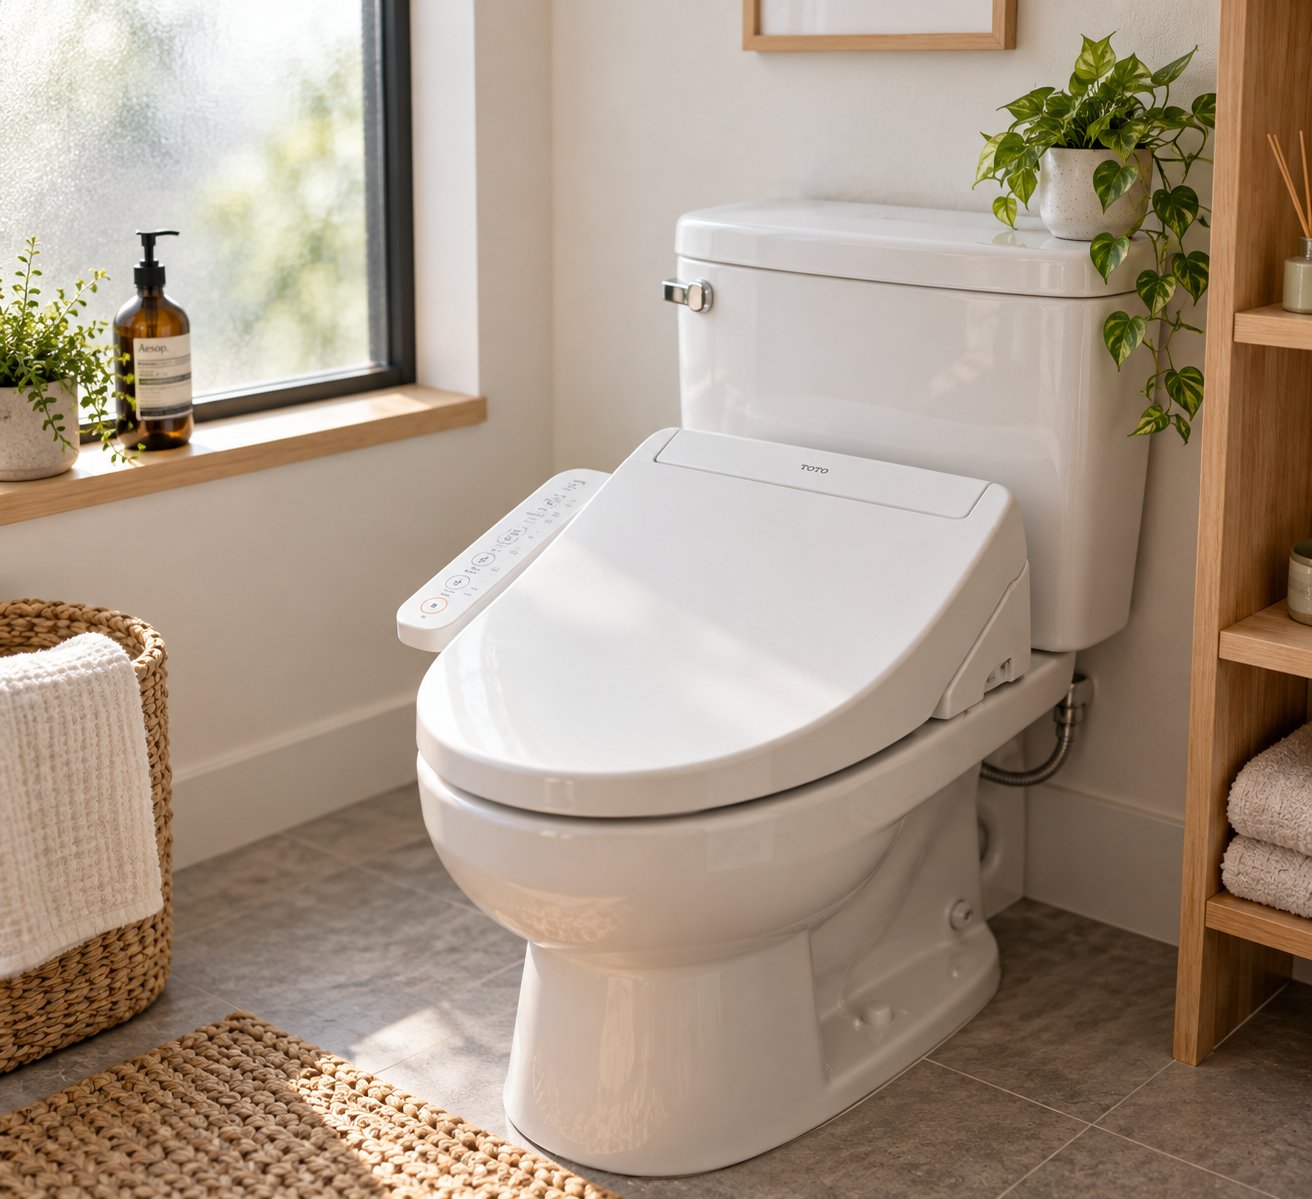
A bidet toilet seat is a replacement or add-on seat that mounts directly onto your existing toilet bowl and integrates a water-cleansing nozzle for personal hygiene after using the toilet. It looks almost identical to a standard seat, just slightly thicker at the back where the nozzle mechanism, electronics, and water connections are housed. Unlike a standalone European-style bidet — a separate porcelain fixture that sits next to the toilet and requires its own plumbing — a bidet seat uses the toilet you already own. It is also distinct from a handheld sprayer (sometimes called a shattaf) that you aim manually, and from portable travel bidets, which are small squeeze bottles.
So what is a bidet used for in this form factor? Exactly what toilet paper does, only with water: cleaning yourself after a bowel movement or urination. The difference is precision, hygiene, and comfort. If you have ever wondered how to use a European bidet, the standalone version requires you to straddle a separate basin — a bidet toilet seat eliminates that step entirely because it is built into the seat you are already sitting on.
Bidet toilet seats are the fastest-growing bidet category worldwide because they require zero extra bathroom space — they simply replace the seat you already have.
How Does a Bidet Toilet Seat Work
Understanding how does a bidet work at a high level removes most of the mystery. The seat connects to your toilet's existing cold-water supply line through a small T-shaped adapter. When you activate a wash, a retractable nozzle extends from beneath the rear of the seat and delivers a targeted stream of water for cleansing. Electric models heat that water, let you adjust pressure and nozzle position through a side panel or wireless remote, and often finish with a warm-air dryer. A manual bidet seat, by contrast, relies on your home's water pressure and uses a simple dial or lever instead of electronic buttons — no outlet required.
After the wash cycle, the nozzle retracts and, on most models, self-rinses automatically. The entire process — from pressing a button to feeling clean — typically takes under a minute. Detailed step-by-step instructions for every phase of that cycle are exactly what the remaining sections of this guide cover.
Who This Guide Is For
This guide is written for three audiences. First, the absolute first-timer who has never touched a bidet of any kind and wants to learn how to use a bidet from scratch. Second, the traveler who sat on one in a Japanese hotel or European vacation rental and thought, "I liked that — how do I replicate it at home?" Third, the person who already installed a bidet seat but is only using the basic wash button and suspects the other dozen settings could improve the experience. Regardless of which group you fall into, the goal is the same: clear, specific instructions so you can use every feature with confidence.
Every control, setting, and maintenance step ahead applies specifically to bidet toilet seats — not standalone fixtures, not handheld sprayers. That focus means nothing is generic; every recommendation maps directly to the product sitting on your toilet right now. The first practical step? Making sure the seat is properly set up before you ever press a button.
Step 1 – Verify Compatibility and Complete the Initial Setup
A bidet toilet seat can only deliver a great wash if it is mounted securely, connected properly, and matched to your specific toilet. Skipping this step — or assuming every seat fits every bowl — leads to wobbling, leaking, or a nozzle that misses its target entirely. Think of it like putting the right tires on a car: the ride only feels smooth when the fit is exact. Here is how to get everything right before you sit down for the first time.
Confirm Your Toilet Bowl Shape and Seat Fit
Toilet bowls come in two standard shapes in North American homes: elongated and round. An elongated bowl is oval-shaped and typically measures about 18.5 inches from the mounting bolt holes to the front rim. A round bowl is more circular and measures closer to 16.5 inches. Why does this matter? Bidet seats are manufactured for one shape or the other. Installing an elongated seat on a round bowl leaves an overhang at the front that looks awkward and creates instability. Mounting a round seat on an elongated bowl leaves a gap, and the nozzle may not align with your body correctly — which defeats the entire purpose.
Grab a tape measure and check the distance from the center of the mounting bolt holes at the back of the bowl to the very front edge. That single measurement tells you which seat size to choose. If you are shopping for a bidet seat or have one in the box, match the labeled shape (elongated or round) to your measurement. A secure, flush fit means the seat will not shift during use, and the nozzle will be positioned exactly where it needs to be.
Connect the Water Supply and Power
Every bidet toilet seat taps into the water already flowing to your toilet. The connection point is the fill valve at the base of the tank — the same spot where your existing supply hose attaches. A small T-shaped adapter (included with virtually every bidet seat) splits that single water line into two: one continues feeding the toilet tank, and the other routes fresh water to the bidet seat's nozzle. Understanding how a bidet works at the plumbing level is really that straightforward — no new pipes, no contractor, just a simple branch off an existing line.
Here is a quick list of what you will need on hand before starting:
- Adjustable wrench for loosening and tightening supply hose fittings
- Small towel and a bucket to catch residual water when disconnecting the hose
- Plumber's tape (also called Teflon tape) to ensure watertight threaded connections
- Access to a GFCI-protected electrical outlet if you are installing an electric model
The physical sequence is simple. Turn off the water using the shut-off valve behind the toilet, then flush to empty the tank. Disconnect the supply hose from the base of the tank, attach the T-adapter in its place, and reconnect the supply hose to the bottom port of the adapter. The bidet seat's own hose connects to the upper port. Tighten each connection firmly, turn the water back on, and inspect every joint for drips.
For electric bidet seats — the ones offering heated water, adjustable pressure buttons, and a warm-air dryer — you also need a nearby GFCI-protected outlet. Bathrooms built or remodeled after 1975 typically have them; look for the outlet with small "Test" and "Reset" buttons on its face. Plugging an electric seat into a non-GFCI outlet is a safety risk in a wet environment, so verify this before proceeding. If no suitable outlet exists near the toilet, hiring an electrician to add one is a worthwhile investment.
Run a Test Before Sitting Down
Everything is mounted, connected, and plugged in — but do not sit down just yet. A quick dry run builds confidence and catches problems while they are easy to fix. Press the rear wash button (or turn the dial on a non-electric model) while standing beside the toilet. You will see the nozzle extend from beneath the rear of the seat and begin spraying water into the bowl. This first activation flushes any debris or air from the supply line, which is exactly what you want before that water touches your skin.
While the nozzle is active, observe three things. First, check the water pressure — does the stream look steady and controlled, or is it sputtering? A sputtering stream usually means air is still trapped in the line and will clear within a few seconds. Second, confirm the nozzle retracts fully when you press the stop button. A nozzle that sticks or retracts slowly may indicate the mounting bracket needs a slight adjustment. Third, glance under the tank and along every hose connection for moisture. Even a slow drip can cause water damage over time, so catching it now saves real headaches later.
If you want to understand how a bidet works before trusting it completely, this hands-on test is the single best thing you can do. You will see exactly where the water comes from, how strong the spray is, and how quickly the nozzle responds — all without any pressure or awkwardness. With compatibility confirmed, water flowing cleanly, and the nozzle performing as expected, the seat is genuinely ready for its first real use. The next question is practical: what do all those buttons and icons on the control panel actually mean?
Step 2 – Decode the Control Panel Icons and Buttons
Imagine sitting down on your bidet seat for the first time and glancing at the control interface. You see a cluster of icons — water droplets, squiggly lines, a tiny wind symbol, plus and minus arrows — and none of them come with a plain-English label. It feels a bit like staring at a cockpit dashboard when all you want is a simple wash. The truth is, learning how to use bidet controls is far easier than it looks. Manufacturers across the industry use remarkably similar icons and button layouts, so once you decode one panel, you can confidently operate almost any bidet toilet seat you encounter — whether it is in your own bathroom or a hotel halfway around the world. If you have ever wondered how to use a bidet in Italy or Japan and felt lost at the controls, this section eliminates that confusion for good.
Side-Panel Controls vs. Remote Control
Bidet toilet seats ship with one of two control interfaces: a side panel attached directly to the seat body, or a wireless remote control that sits in a wall-mounted cradle or on a nearby surface. Each approach has clear strengths, and knowing the difference helps you understand how does a bidet toilet work from an operational standpoint.
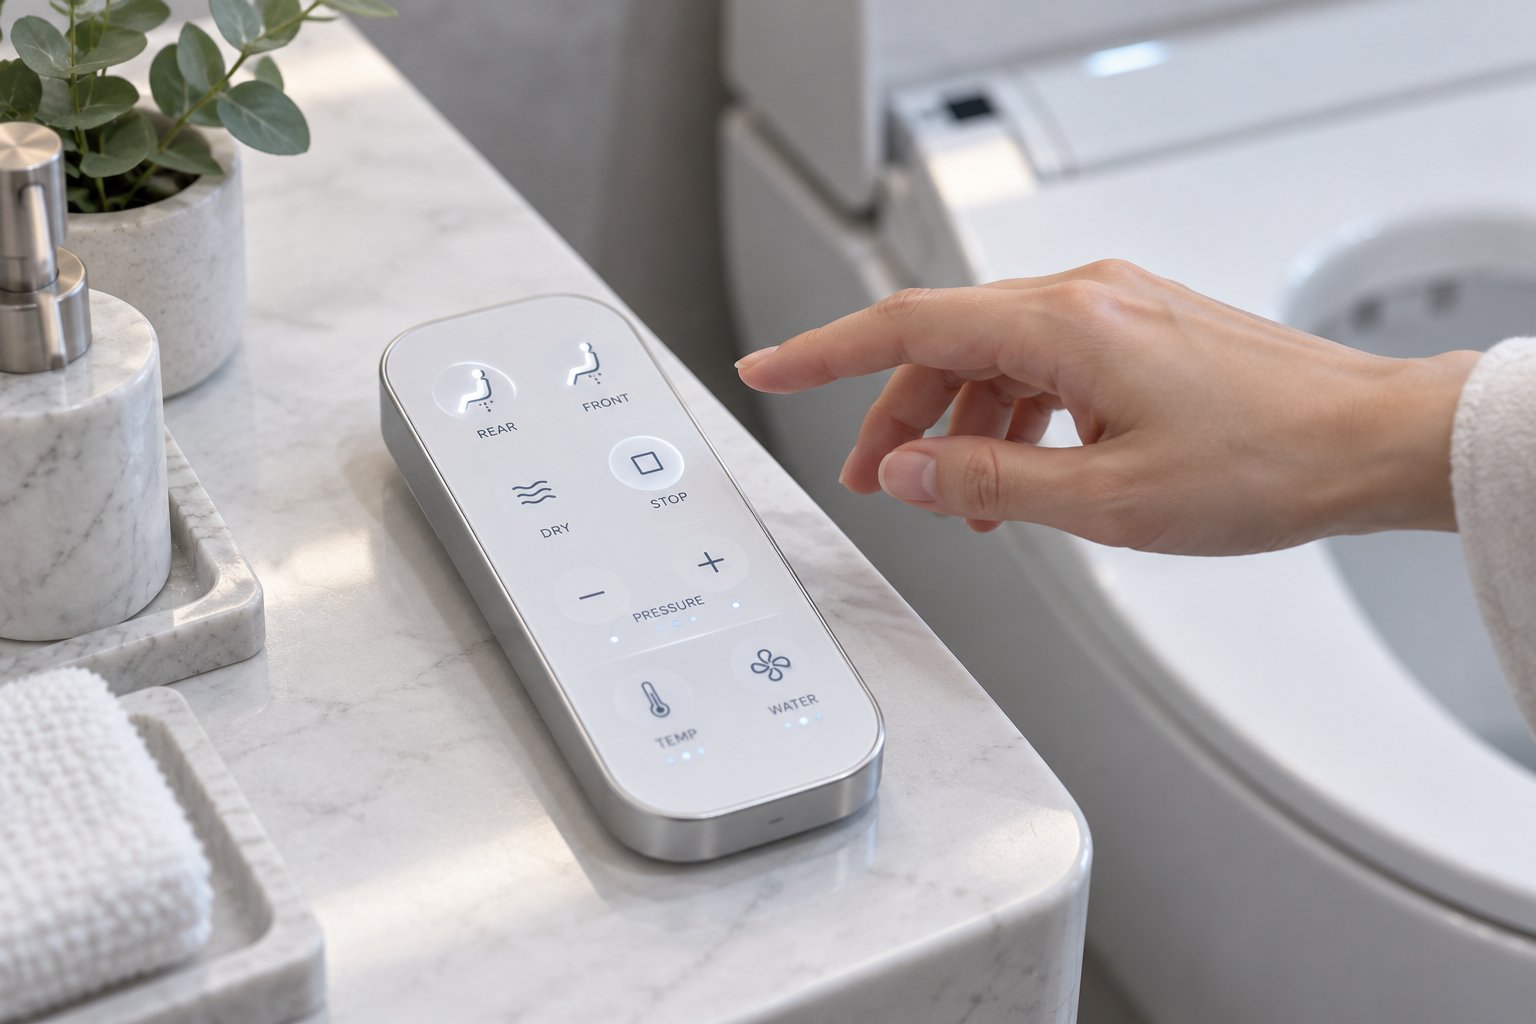
Side-panel controls are physically built into the right side of the seat. You will see a row of clearly spaced buttons — typically five to eight — that handle the core functions: rear wash, front wash, stop, pressure adjustment, and sometimes a dryer toggle. Because the buttons are fixed to the seat itself, there is nothing to lose, no batteries to replace, and no pairing process. The trade-off is reach. You need to lean slightly to the right to press them, which can be uncomfortable for some users.
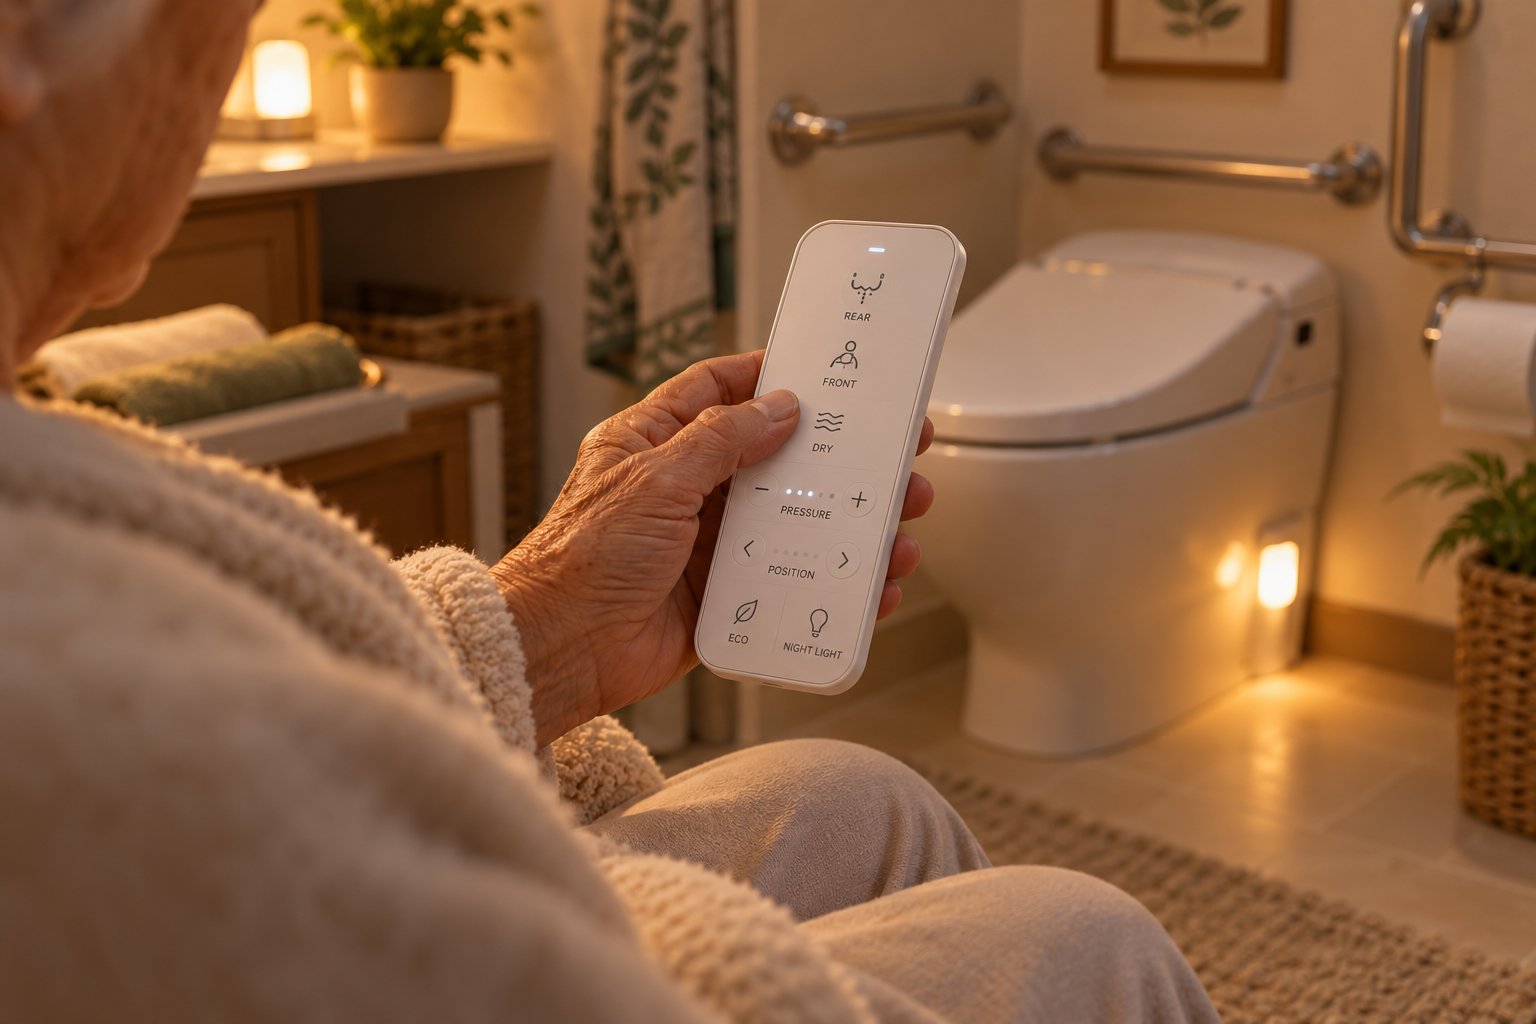
Wireless remote controls offer a different experience. The remote communicates with a receiver built into the seat via a wireless signal that bounces freely around the bathroom, so it works from a wall mount, a countertop, or your hand resting on your knee. Remotes typically include more buttons — user presets, oscillation toggles, seat temperature, nozzle position fine-tuning — giving you granular control over every aspect of the wash. For elderly users, anyone with limited mobility, or caregivers assisting someone else, the remote is often the more practical choice because it eliminates twisting and reaching entirely.
| Feature | Side-Panel Controls | Wireless Remote Control |
|---|---|---|
| Ease of Use | Simple and intuitive; fewer buttons to learn | Slight learning curve; more options to explore |
| Number of Functions | Core functions (5–8 buttons typical) | Expanded functions including presets and fine-tuning (10–15+ buttons) |
| Accessibility | Requires reaching to the side of the seat | Can be operated from any comfortable position; ideal for limited mobility |
| Common On | Mid-range and non-electric bidet seats | Premium electric bidet seats |
Neither type is inherently better — it depends on your priorities. If simplicity and zero maintenance appeal to you, a side-panel model keeps things straightforward. If you want full customization and hands-free convenience, a remote-controlled seat delivers that flexibility. Many premium seats actually include both: a full-featured remote plus auxiliary buttons on the seat body as a backup, so you are never left without control even if the remote's batteries die.
Universal Icons and What They Mean
Here is where using a bidet becomes genuinely intuitive. Despite visual differences between manufacturers, the core icons are standardized enough that you can walk up to almost any bidet seat and recognize what each button does. Think of them like the universal play, pause, and volume symbols on any audio device — different brands, same language.
Below is a quick-reference guide to the most common control icons you will encounter:
- Water droplet (or spray lines hitting a surface) — Rear wash. This is the primary cleansing function and the button most people press first.
- Figure silhouette (or a droplet with a female icon) — Front wash, sometimes labeled "feminine wash." It repositions the nozzle forward for gentle front-to-back cleansing.
- Wave or zigzag lines — Oscillation mode. The nozzle moves slowly back and forth during the spray for wider cleaning coverage.
- Thermometer icon (or flame symbol) — Water temperature control. Tap to cycle through cool, warm, and hot settings.
- Wind or fan symbol — Warm-air dryer. Activates a gentle stream of heated air for hands-free drying after the wash.
- Plus and minus arrows (+ / −) — Pressure adjustment. Increase or decrease spray intensity one level at a time.
- Arrow pointing forward or backward — Nozzle position adjustment. Shifts the nozzle tip forward or backward so you can fine-tune exactly where the water hits.
- Square or "X" icon — Stop. Immediately halts whatever function is currently running and retracts the nozzle.
You do not need to memorize all of these before your first wash. Most people start with just two buttons — rear wash and stop — and explore the rest over the following days. That gradual approach is actually the best way to learn how to properly use a bidet, because it lets you get comfortable with the basic sensation before layering in temperature, pressure, and spray-mode preferences.
What to Do When a Button Does Not Respond
You press the wash button and nothing happens. Before assuming something is broken, run through three quick checks that resolve the vast majority of unresponsive-button situations.
1. Confirm the seat sensor detects you. Most electric bidet seats include a built-in seat sensor that prevents the nozzle from activating unless someone is actually sitting down. This is a deliberate safety feature — it stops the seat from spraying water across an empty bathroom. If you are pressing buttons while standing next to the toilet, nothing will happen by design. Sit down with bare skin contacting the seat surface and try again. The sensor needs direct body contact to register your weight, so sitting through thick clothing may occasionally cause issues as well.
2. Check the power connection. Electric seats need a live outlet. Confirm the plug is fully inserted into the GFCI receptacle, and press the "Reset" button on the outlet itself — GFCI outlets can trip silently, cutting power to the seat without any visible sign. If the outlet has tripped, a single press of the reset button restores power instantly.
3. Verify remote battery charge. If you are using a wireless remote and nothing responds, the most likely culprit is depleted batteries. Most remotes run on standard AA or AAA batteries that last many months under normal use, but they do eventually run out. Swap in fresh batteries and test again. While you wait, remember that seats equipped with remotes almost always have auxiliary buttons on the seat body itself — so you are never truly stranded. Those side buttons handle the essential wash functions and keep everything operational until the remote is back in action.
One less obvious issue worth mentioning: newly added smart devices in the bathroom — motion-sensing soap dispensers, smart light bulbs, or Bluetooth speakers — can occasionally cause wireless interference with the remote's signal. If the remote worked fine yesterday and stopped responding after you added a new gadget nearby, try removing the new device temporarily to see if communication is restored.
With the control interface demystified, every icon now has a clear purpose and every unresponsive button has a simple fix. The real question shifts from "what do these buttons do?" to something much more personal — what does it actually feel like to press that rear wash button for the very first time?
Step 3 – Sit Down and Start Your First Wash
Every button makes sense now, the icons are no longer mysterious, and the seat is properly installed. The only thing left is the part that actually makes people nervous — using it. Take a breath. The first time you activate a bidet toilet seat feels a little surprising, maybe even funny, but it is never painful and almost everyone describes it as comfortable within a few seconds. Here is exactly what to do, step by step, so there are zero surprises.
How to Sit on a Bidet Toilet Seat Correctly
If you have ever wondered whats a baday and pictured yourself awkwardly straddling something or facing backward, you can let go of that image completely. A bidet toilet seat is designed for you to sit on it exactly the way you sit on any regular toilet — facing forward, feet flat on the floor, body centered over the bowl. There is no special stance, no repositioning, and absolutely no need to turn around.
The one detail that matters is sitting far enough back. Scoot your hips toward the rear of the seat so your weight is distributed evenly across the surface. This is important for two reasons. First, it positions your body directly over the retractable nozzle, which extends from the back of the seat. Second, most electric bidet seats include a built-in sensor embedded in the seat surface that detects whether someone is sitting down. If you perch on just the front edge, the sensor may not register your presence, and the wash button will not respond no matter how many times you press it.
Sit exactly as you normally would — the bidet does all the adjusting for you.
That simple tip resolves most first-time confusion. Unlike learning how to use a European bidet, where you straddle a completely separate fixture and manually aim water with your hands, a bidet toilet seat handles targeting automatically. You sit, you press a button, and the nozzle finds its mark. Your body does not need to do anything unusual. Leaning your torso slightly forward can change the angle just enough to improve cleaning coverage, and shifting gently from side to side helps the spray reach different areas — but these are refinements you can explore over your first week, not requirements for the initial wash.
Activating Rear Wash for the First Time
You have used the toilet as you normally would. You are seated fully back. Here is the sequence for your very first rear wash:
- Press the rear wash button — it is typically the largest button on the panel or remote, marked with a water-droplet icon.
- Wait for a brief pause. You will hear a soft mechanical hum as the nozzle extends from the back of the seat to a position beneath you. On models with heated water, there may be a one- to two-second delay while the heater activates.
- Feel the water arrive. A focused stream of warm or ambient-temperature water begins spraying upward toward the target area. The initial sensation catches most people off guard — it is a gentle, focused pulse of water, not a fire hose. Within five to ten seconds, the surprise fades and the feeling becomes simply refreshing.
- Hold still for 20 to 60 seconds. Let the spray do the work. There is no need to wipe, scrub, or move around during this phase. Experienced users often find that 30 seconds on a moderate pressure setting delivers a thorough clean.
- Press stop. The nozzle retracts automatically, self-rinses on most models, and tucks back inside the seat body where it stays protected until the next use.
That is genuinely the entire process. Anyone wondering how to work a bidet for the first time often expects a complicated routine, but it really is press, wait, stop. If you have ever used a handheld sprayer or learned how to use a portable bidet while traveling, you will notice the biggest upgrade is that you do not aim anything yourself — the seat handles precision for you. Even compared to a shattaf (a handheld sprayer common in the Middle East — if you have searched shattafa how to use, the concept is similar), a bidet seat removes the manual effort entirely.
One honest note about the psychological side: the feeling of water in that area is unfamiliar the first time, and your instinct may be to clench or shift away. Resist that urge. Stay relaxed, stay seated, and give your body about ten seconds to adjust. Nearly every new user reports that by the second or third use, the sensation feels completely natural — and by the end of the first week, skipping the wash feels stranger than using it.
Using Front Wash for Feminine Hygiene
Most bidet toilet seats include a dedicated front wash function, sometimes labeled "feminine wash" on the control panel. When you press this button, the nozzle extends slightly farther forward than it does during a rear wash, positioning itself to deliver a gentle, fan-shaped spray to the front area. The spray pattern is typically wider and softer than the rear wash, designed for sensitive skin.
One critical hygiene detail: the front wash always sprays in a front-to-back direction. This is intentional and non-negotiable in quality bidet seat design, because front-to-back water flow prevents bacteria from the rectal area from being carried forward — the same principle doctors and hygienists recommend for manual wiping. You do not need to position yourself differently or angle your body; the nozzle's engineering handles the safe direction automatically.
Women who have recently given birth, are menstruating, or simply prefer water cleansing over dry paper will find the front wash especially valuable. The low-pressure default setting is gentle enough for daily use, and you can reduce it further if sensitivity is a concern. If the spray does not seem to reach far enough forward — a common observation for shorter users — try scooting back on the seat a bit more and leaning your upper body slightly forward. That small posture change shifts the target zone just enough for the nozzle to align properly.
With both the rear and front wash mastered, you already know the two most important functions on your bidet seat. The next leap in comfort comes from adjusting the settings you have been using on their defaults — pressure, temperature, and nozzle position — to match your exact preferences.
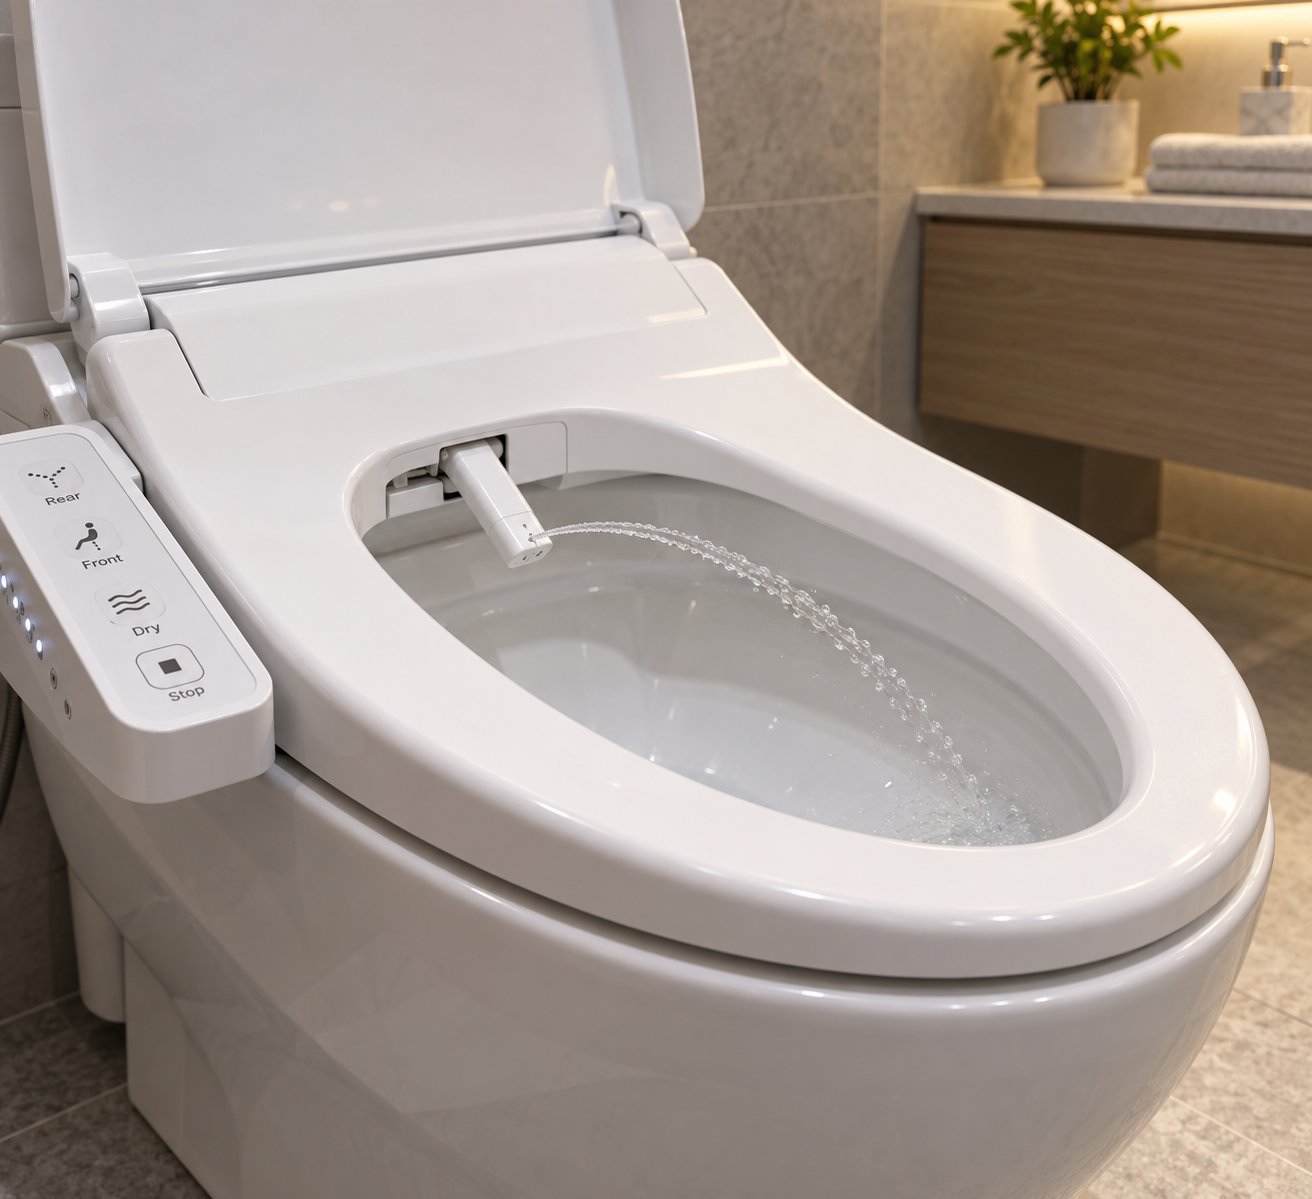
Step 4 – Fine-Tune Pressure, Temperature, and Nozzle Position
Default settings exist for a reason — they give every first-time user a safe, comfortable starting point. But defaults are a compromise. They are calibrated to be acceptable for the widest range of bodies and preferences, which means they are rarely ideal for any single person. Think of it like the driver's seat in a rental car: it gets you moving, but you will not enjoy the ride until you adjust the mirrors, the lumbar support, and the headrest to fit you. The same logic applies to your bidet toilet seat. Dialing in pressure, temperature, and nozzle position transforms a decent wash into one that feels genuinely personalized.
Finding Your Ideal Water Pressure
High water pressure on the very first try is the single most common complaint from new bidet users. The stream feels aggressive, the surprise factor multiplies, and the whole experience starts on the wrong foot. Avoiding that outcome is simple: always begin at the lowest pressure setting your seat offers and work upward one increment at a time.
Most bidet seats provide three to five pressure levels, controlled by the plus and minus buttons on the panel or remote. At the lowest level, the spray feels like a gentle pour — enough to cleanse but soft enough that it would not startle anyone. Each step up adds noticeably more force. By the time you reach the top setting, the stream is firm and concentrated, which some users prefer for a more thorough clean but others find uncomfortable. There is no universally "correct" pressure. A setting that feels perfect for one person may feel too light — or too intense — for another.
Here is a practical approach for your first few days: use the lowest setting for your first three or four washes. On day two or three, bump it up one level and see how it feels. Continue increasing only if you want more cleaning force. Most people land somewhere in the middle range and stay there permanently. If you have ever wondered how do I use a bidet without discomfort, pressure control is almost always the answer. The stream should feel thorough, not forceful. When in doubt, dial it back down — you can always try a higher setting tomorrow.
Adjusting Water Temperature Without Guesswork
Water temperature is where the gap between electric and non-electric bidet seats becomes impossible to ignore. Understanding how does bidet work in terms of water heating helps you set expectations and avoid surprises.
Electric bidet seats heat water using one of three systems. Tank-based heaters store a small reservoir of pre-heated water inside the seat body. You get roughly 30 seconds of warm water per use before the tank empties and the stream turns cold — a limitation worth knowing in advance. Hybrid systems pair a smaller tank with an inline heater, extending warm water to around 45 to 60 seconds and sometimes longer. Tankless (instant) heaters are the premium option: they warm water on demand as it flows through, delivering unlimited warm water for the entire wash without any reservoir at all. Some tankless models may produce a very brief burst of cool water — less than a second — right at the start before the heater reaches full temperature, but most users barely notice it.
Regardless of your heating type, start at a medium-warm setting. Jumping straight to the highest temperature can feel uncomfortably hot, especially on sensitive skin. Tap the temperature button up once from the default and give it a full wash cycle before deciding whether to go warmer or cooler. One detail that catches people off guard: ambient water temperature in your supply line changes with the seasons. Water entering your home in July might be 70°F, while the same pipe delivers 45°F water in January. A washroom bidet seat that felt perfectly warm in summer may need its temperature bumped up a notch or two when winter arrives. Revisit your setting when the seasons shift and you will avoid that unexpected chill.
Non-electric seats, by contrast, deliver water at whatever temperature your household supply provides — typically cold. Some models can be connected to a hot water line under the sink using a Y-valve, but the warm water may take 30 seconds or more to arrive, making the first half of every wash cold regardless. For most users in cold climates, an electric seat with built-in heating is the more practical choice if warm water matters to you.
Nozzle Position, Oscillation, and Spray Modes
Pressure and temperature get the most attention, but nozzle position is the setting that truly personalizes how does a toilet bidet work for your specific body. Most bidet seats let you shift the nozzle forward or backward using dedicated arrow buttons. Each tap moves the spray point a few millimeters, so you can fine-tune exactly where the water lands without physically shifting your hips. If the stream is hitting slightly too far back, tap the forward arrow once or twice. Too far forward? Tap backward. It is that precise, and it means you never have to contort yourself on the seat to chase the water.
Beyond positioning, modern bidet seats offer several spray modes that change how the water behaves. These modes use the same nozzle — no separate hardware — and each one serves a distinct purpose. Here is a quick breakdown:
- Oscillating spray — The nozzle moves slowly back and forth during the wash, sweeping the stream across a wider area. This is ideal when you want broader coverage without manually adjusting the nozzle position. Users with different body shapes and sizes often find that oscillation delivers the most consistently thorough clean.
- Pulsating or massage mode — The water pressure rhythmically increases and decreases in a steady cycle, creating a gentle massaging sensation. Some users find this more comfortable than a constant stream, and it can help encourage bowel movements for those dealing with constipation.
- Aerated stream — Air is mixed into the water, producing a softer, bubble-infused spray. This mode is especially gentle and works well for users with sensitive skin, hemorrhoids, or postpartum soreness.
- Vortex or turbo wash — A high-pressure, concentrated stream for maximum cleaning power. Best reserved for experienced users who want an extra-thorough clean after the standard wash.
- Wide vs. narrow stream — Some seats let you toggle between a focused pinpoint spray and a broader fan-shaped pattern. Narrow targets a specific spot; wide covers more surface area in a single pass.
You do not need to try every mode on day one. Start with the standard steady stream and basic nozzle positioning. After a few days, experiment with oscillation — it is the most universally useful advanced mode and the one most users end up leaving on permanently. From there, try pulsating mode during a longer session to see if you enjoy the rhythmic sensation. The beauty of these options is that they let you customize every wash to how your body feels on a given day, not lock you into a single routine.
Each of these spray features has a dedicated button on the remote or side panel, and they can typically be combined. Running oscillation with warm water at medium pressure, for example, is a popular combination that many users settle on within their first week. The key takeaway? Experiment freely — every setting is reversible, nothing can break from pressing the wrong button, and the worst outcome is a spray that feels a little too strong or a little too cool. Just tap the minus button and try again.
With pressure, temperature, and nozzle behavior dialed in to your liking, the wash itself is handled. The question that follows every satisfying rinse is practical and immediate: how do you dry off, and what should you do with the seat before you stand up and walk away?
Step 5 – Dry Off and Reset the Seat for the Next User
The wash is done, the nozzle has retracted, and you feel genuinely clean — maybe cleaner than dry paper has ever left you. A perfectly reasonable question hits next: what now? You are still sitting on a wet surface, water droplets are doing their thing, and you are not sure whether to reach for the toilet paper roll or press yet another button. This post-wash phase is where many guides go silent, leaving new users to improvise. It does not need to be complicated. Two choices, a quick etiquette habit, and you are finished.
Air Dryer vs. Toilet Paper After Washing
Most electric bidet toilet seats include a built-in warm-air dryer — the button marked with a wind or fan icon on your control panel. Press it, and a gentle stream of heated air flows across the freshly washed area. It is completely hands-free and hygienic, since nothing touches your skin. The trade-off is patience: air drying typically takes one to three minutes depending on the model and the temperature setting you choose. Some seats let you adjust dryer heat, so bumping it up a notch shortens the wait slightly.
If you would rather not sit for an extra minute or two, a few squares of toilet paper work perfectly as a light pat-dry. You are not wiping away waste at this point — the water already handled that — so one or two squares gently dabbed across the area is all it takes. Households with bidets use roughly 75% less toilet paper than those without, and that remaining usage is almost entirely for this quick drying step. Drying thoroughly matters more than the method you choose. Lingering moisture trapped against skin can lead to irritation over time, so whichever route you pick, make sure you finish dry before pulling up your clothing.
Most users eventually settle on a personal combination. Some prefer the dryer on weekday mornings when they are in no rush, then switch to a quick pat-dry on busy days. Others go fully paper-free from day one and never look back. There is no single right answer — experiment during your first week and let comfort decide.
Do You Need to Wipe Before Using the Bidet
This question comes up constantly among people learning how to use a bidet toilet for the first time, and the answer is straightforward: no, you do not need to wipe before activating the wash. The entire purpose of the bidet seat is to clean you with water, and the focused spray is designed to handle the job from start to finish without any pre-cleaning assistance. A concentrated water stream washes away waste directly, while dry paper tends to smear as much as it removes — which is precisely why bidets deliver a more thorough result.
That said, some users still prefer a quick preliminary wipe purely for personal comfort. Maybe it feels like a familiar starting point during those first few sessions, or maybe a particularly messy situation makes a pre-wipe feel reassuring. Either approach is perfectly fine. The key point is that pre-wiping is a preference, not a requirement. If you skip it entirely, the bidet does not work any less effectively. Over time, most people drop the habit as their confidence in the water wash grows. Those who have used a european bidet or standalone fixture overseas may already be comfortable skipping paper altogether — the same principle applies here, just with more convenience and no separate basin to straddle.
Reset Settings and Prepare the Seat for the Next Person
In a household where multiple people share the same bidet seat, a small courtesy goes a long way. Your ideal pressure level five with maximum heat might be someone else's startling surprise. After drying, take two seconds to return pressure and temperature to a mid-range default — the middle setting on each scale is a safe neutral zone that will not shock the next person who sits down. If your seat has a nozzle self-clean button, press it now. The nozzle will extend briefly, rinse itself with fresh water, and retract. This keeps the nozzle tip sanitary between users without any manual scrubbing on your part.
Close the lid when you stand up. Beyond basic bathroom hygiene — flushing with the lid down reduces airborne particles — a closed lid also protects the seat surface and controls from dust and accidental splashes.
For households with guests who have never encountered a bidet seat, consider placing a small instruction card on the wall or counter near the toilet. It does not need to be elaborate. A simple, friendly note removes the anxiety that keeps curious visitors from trying the seat at all:
Press the large button for rear wash. Adjust pressure with the +/- arrows. Press Stop when finished. Use the fan icon for air drying, or pat dry with a few squares of paper.
That one card transforms an intimidating row of buttons into a three-step process. Guests who understand how do bidet work at a basic level are far more likely to give it a try — and far less likely to accidentally blast themselves with cold water at full pressure. A little preparation turns a potential awkward moment into a genuinely positive first impression.
Drying, wiping etiquette, and shared-bathroom courtesy are the final pieces of the everyday routine. Yet everyday routines are built around generally healthy adults. The real depth of a bidet seat's value reveals itself when you consider users whose bodies have very specific, sometimes urgent, hygiene needs — and that is where the next set of adjustments makes the biggest difference.
Step 6 – Adapt Bidet Use for Specific Health Needs
Everything covered so far assumes a generally healthy adult sitting down for a routine wash. But some of the people who benefit most from learning how to use a bidet toilet seat are not in that category at all. They are recovering from childbirth, managing chronic hemorrhoids, dealing with the daily toll of irritable bowel syndrome, or navigating the gradual mobility loss that comes with aging. For these users, a bidet seat is not a luxury upgrade — it is a practical health tool that reduces pain, preserves independence, and replaces a hygiene routine that may have become difficult or even impossible to perform with paper alone.
Bidet Seats for Elderly and Mobility-Impaired Users
Wiping with toilet paper sounds like a simple task until you consider what it actually demands from your body. You need to reach behind yourself, twist your torso, grip a few squares of paper, apply pressure, and repeat several times — all while balancing on a seated surface with no armrests. For older adults dealing with arthritis, shoulder injuries, reduced grip strength, or conditions like Parkinson's disease, that sequence can range from painful to physically impossible without assistance.
A bidet toilet seat removes nearly every one of those physical requirements. Pressing a single button — either on the side panel or a wireless remote resting on your lap — activates a wash that cleans more thoroughly than paper ever could, with zero twisting, zero reaching, and zero manual dexterity required. Understanding how does a bidet toilet seat work helps explain why it matters here: the retractable nozzle positions itself automatically, the water does the cleaning, and the warm-air dryer handles the drying. The user's only physical action is pressing a button and sitting still.
A PubMed study on bidet use in care settings found that bidets may reduce the amount of physical assistance required from caregivers during toileting — a finding that carries enormous implications for dignity and privacy. When someone can handle their own bathroom hygiene without calling for help, they retain a sense of independence that profoundly affects quality of life.
If you are choosing a bidet seat for an elderly family member or evaluating one for a care facility, look for these accessibility-focused features:
- Wireless remote control — Eliminates reaching to the side of the seat; can be operated from the lap or a nearby surface
- Automatic lid open/close — Reduces bending, especially valuable for users with hip replacements or lower-back pain
- Heated seat — Provides comfort during longer bathroom visits and reduces the shock of sitting on a cold surface, which can be jarring for seniors
- Nightlight — Illuminates the bowl area in the dark, reducing fall risk during nighttime bathroom trips
- Soft-close lid — Prevents sudden slamming that can startle users or pinch fingers with reduced reaction time
- User presets — Allow caregivers to program preferred pressure, temperature, and nozzle position so the user only needs to press one button
Falls are a critical concern in this population. HomeCare magazine reports roughly 36,000 instances of falls among older adults per year, with 80 percent occurring in the bathroom. A bidet seat does not replace grab bars or non-slip mats, but it does eliminate one major reason people twist and shift on the toilet — reaching backward to wipe. Fewer awkward movements mean a more stable seated position throughout the entire bathroom visit.
Postpartum and Hemorrhoid Recovery
Imagine tissue so tender that even the softest toilet paper feels like sandpaper. That is the reality for many people recovering from childbirth or managing swollen, inflamed hemorrhoids. In both situations, direct contact with dry paper causes stinging, micro-abrasions, and sometimes bleeding — turning a basic hygiene task into something you dread multiple times a day.
Warm water at low pressure is a different experience entirely. For postpartum recovery, the front wash function delivers a gentle, fan-shaped spray to the perineal area without any physical contact at all. Set the pressure to the lowest level, choose a warm (not hot) temperature, and let the water flow for 30 to 45 seconds. The warmth itself provides a soothing effect on swollen or sutured tissue, similar to the sitz baths that obstetricians frequently recommend — except you do not need to fill a basin, lower yourself into it, or climb back out while exhausted and sore. Some evidence suggests that bidets may provide comfort for pregnant people or those who recently gave birth, and the front wash on a bidet seat delivers that comfort with a single button press.
Hemorrhoid sufferers benefit from a similar approach using the rear wash. Warm water at gentle pressure cleanses without the friction that dry wiping creates, and some research indicates that bidet use can reduce anal resting pressure — a factor linked to constipation-related hemorrhoids. If your seat offers an aerated or soft-spray mode, use it. The air-infused water stream feels noticeably gentler than a standard jet and minimizes any risk of aggravating inflamed tissue. After washing, opt for the warm-air dryer rather than patting with paper. Even a soft dab can irritate hemorrhoids that are actively swollen, while warm air dries the area without touching it at all.
One important caution: if you have open sores, ulcerated skin, or surgical wounds near the wash area, keep water pressure at its absolute minimum. High-pressure streams can aggravate breaks in the skin and potentially increase infection risk. When in doubt, consult your healthcare provider about incorporating a bidet into your recovery routine — most will encourage it, often enthusiastically.
Frequent Use for Digestive Conditions
People living with IBS, Crohn's disease, ulcerative colitis, or chronic diarrhea may use the toilet six, eight, or even ten or more times in a single day. Multiply that frequency by the abrasion of dry toilet paper and you get a clear picture: raw, irritated skin that grows more painful with every bathroom visit. It is a cycle that makes an already difficult condition measurably worse.
Water cleansing breaks that cycle. Each wash is equally gentle whether it is the first of the day or the tenth, because water does not create friction the way paper fibers do. To use a bidet properly in this scenario, keep pressure at a low-to-medium setting consistently — the temptation to crank up pressure for a "more thorough" clean is counterproductive when you are washing frequently, because even moderate pressure applied many times daily can cause cumulative irritation.
Temperature matters here too. Warm water is soothing and promotes blood flow to irritated tissue, but avoid the highest heat setting during flare-ups when skin sensitivity peaks. A medium-warm stream strikes the right balance between comfort and caution.
After each wash, use the warm-air dryer and make sure the area is fully dry before standing up. Moisture left against skin — especially skin that is already irritated — creates an environment where fungal growth and further breakdown can occur. If the built-in dryer feels too slow during urgent, frequent trips, a quick pat with a single square of soft, unscented toilet paper gets the job done without adding meaningful friction. The goal is always the same: clean and dry, with as little mechanical contact as possible.
Caregivers assisting someone with a chronic digestive condition will notice a meaningful reduction in hands-on help needed. Rather than assisting with wiping multiple times per day — a physically demanding and emotionally sensitive task for both parties — the caregiver can simply confirm the bidet settings are correct and let the seat handle the rest. That shift preserves privacy, reduces caregiver fatigue, and keeps the patient's skin in far better condition over weeks and months of frequent use.
Health-specific adjustments highlight something important about bidet seats: the same hardware serves vastly different needs depending on how you configure it. A postpartum mother and a 78-year-old with arthritis use the same seat, the same nozzle, and the same control panel — just with different pressure levels, temperature preferences, and spray modes. That flexibility is built into the design, waiting to be used. What keeps all of it working reliably, month after month, is a maintenance routine most owners never think about — until something stops performing the way it should.
Step 7 – Clean and Maintain Your Bidet Seat for Lasting Performance
A bidet toilet seat that works flawlessly on day one can quietly lose performance over weeks and months if nobody ever looks after it. The spray gradually weakens, the nozzle starts to look chalky, and one morning the warm water feels more like lukewarm disappointment. None of that is a defect — it is simply what happens when a water-fed appliance goes without basic upkeep. The good news? Maintenance is shockingly easy. A few minutes each week, a slightly deeper check once a month, and a quick inspection every quarter keep everything running the way it did out of the box. Here is the exact routine, broken into three tiers so you never have to guess what needs attention or when.
Weekly Wipe-Down and Nozzle Self-Clean
Think of this as the "two-minute Tuesday" habit — fast enough that you will actually do it, thorough enough that buildup never gets a foothold. The entire routine takes less time than brushing your teeth.
Start by spraying a mild, non-abrasive cleaner onto a soft cloth — not directly onto the seat. Products like diluted dish soap, a gentle all-purpose spray, or a bathroom cleaner free of bleach and ammonia all work well. Wipe the seat surface, the lid, the side-panel controls (if your model has them), and the exterior housing where dust and bathroom humidity tend to collect. Manufacturer care instructions consistently warn against toilet bowl cleaners, abrasive powders, and scouring pads on bidet plastics — these can scratch the finish, cause micro-cracks, and even corrode metal components over time. A soft microfiber cloth is all you need.
After wiping the exterior, press the nozzle self-clean button. You will find this on most electric models as a dedicated icon or a sub-menu option on the remote. The nozzle extends, rinses itself with fresh water for several seconds, and retracts. While it is extended, take a quick visual look at the nozzle tip. You are checking for two things: visible mineral crust (white or yellowish chalky deposits) and any residue clinging to the spray holes. If the tip looks clean and the spray holes are clear, you are done. If you spot early signs of buildup, you will address it more thoroughly during the monthly routine.
For anyone curious about how do bidet toilets work over the long term, this weekly habit is the single biggest factor. Clean surfaces and an unobstructed nozzle mean consistent water pressure, accurate spray targeting, and a hygienic wash every single time. Skip it for a few months and you will notice the difference — especially in areas with hard water.
Monthly Deep Clean and Filter Check
Once a month, set aside about ten minutes for a slightly more involved session. This is where you tackle the two enemies that quietly degrade bidet performance: mineral scale on the nozzle and sediment trapped in the water filter. If you have ever wondered how to use a bedae — or any bidet — without the spray weakening over time, this monthly step is the answer.
Before starting, unplug the seat from the GFCI outlet. This is a non-negotiable safety step for any cleaning that involves direct contact with the nozzle or water connections. With the seat powered down, use the manual nozzle-extension method described in your owner's manual — most seats allow you to gently pull the nozzle tip forward by hand when the power is off, or you can press the self-clean button before unplugging to extend it and then unplug while it remains extended.
Here is your monthly checklist:
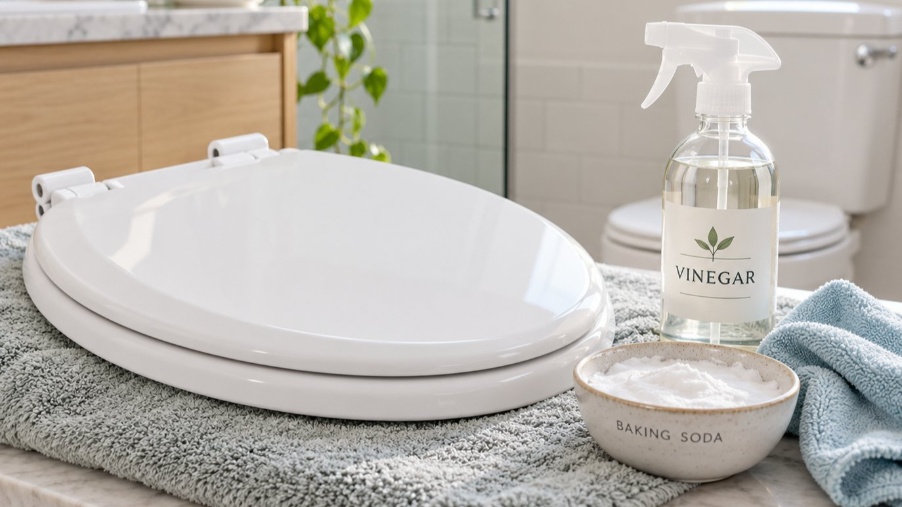
- Clean the nozzle tip with a soft toothbrush and diluted white vinegar. Dip the brush in a 50/50 mix of white vinegar and water, then gently scrub the nozzle tip and spray holes. Vinegar dissolves calcium and lime deposits without damaging the plastic. Avoid pulling the nozzle forcefully or bending it at an angle — gentle, circular brush strokes are enough.
- Rinse the nozzle thoroughly. Plug the seat back in and run the self-clean cycle once or twice to flush any loosened mineral particles out of the spray holes.
- Locate and inspect the water inlet filter. Many electric bidet seats include a small mesh screen filter where the water supply hose connects to the seat body. Check your manual for the exact location. Using tweezers or small needle-nose pliers, carefully remove the mesh filter.
- Rinse or replace the filter. Hold the mesh screen under running water and use the same soft toothbrush to dislodge any trapped sediment. If the screen is visibly discolored or partially blocked even after brushing, replace it — most manufacturers sell replacement screens for a few dollars. Some bidet seat manuals recommend cleaning this filter every six months, but monthly checks in hard-water areas catch problems before they affect your wash pressure.
- Reinstall the filter and reconnect. Seat the mesh screen firmly back into the water inlet, reattach the hose, and hand-tighten the connection. Turn the water supply back on and check for drips at the joint.
- Wipe the gap between the seat and the bowl. This overlooked zone traps residue and can become a source of odor. Use a damp cloth or cotton swabs to clean the hinge area and the underside edge where the bidet seat meets the porcelain. If your model has a quick-release button, slide the entire seat off its mounting plate for easier access, clean beneath it, then click it back into place.
Hard water is the silent antagonist of long-term bidet performance. If you live in a region where mineral content is high — and roughly 85% of American homes have some degree of hard water — monthly descaling is not optional maintenance; it is essential. Mineral deposits narrow the nozzle's spray holes over time, gradually reducing pressure and distorting the stream pattern. A nozzle that once delivered a clean, focused jet begins to spray at odd angles or dribble weakly. Ten minutes of vinegar and a toothbrush once a month prevents all of that.
For women who have followed the earlier guidance on how to use a bidet as a woman — particularly those relying on the front wash for sensitive hygiene — a clogged or scale-covered nozzle is more than an inconvenience. Irregular spray patterns can direct water at unintended angles, undermining the front-to-back flow that keeps the wash hygienic. Monthly nozzle cleaning ensures the spray geometry stays exactly where the manufacturer designed it to be.
Quarterly Inspection for Leaks and Wear
Every three months, spend five minutes on a broader check that covers the parts you do not normally see. Small problems caught at this stage — a slow drip, a frayed cord, a function that stopped working — are easy and cheap to fix. Left unnoticed for a year, they can cause water damage, electrical hazards, or a seat that needs full replacement.
Start at the T-adapter connection behind the toilet — the fitting that splits your water supply between the tank and the bidet seat. Run your fingers along every joint and hose connection while the water is on. Even a faint dampness signals a slow leak that could saturate your subfloor over time. If you find moisture, tighten the connection by hand or with an adjustable wrench, applying plumber's tape to the threads if the drip persists. A small towel placed under the T-adapter between inspections makes future leaks visible at a glance — a dry towel means no leaks, a damp towel means it is time to investigate.
Next, examine the power cord from plug to seat. Look for cracked insulation, kinks, or any section that has been pinched between the toilet and the wall. Electric bidet seats draw relatively modest power, but a damaged cord in a bathroom environment is a genuine safety concern. If the insulation is compromised, stop using the seat and contact the manufacturer for a replacement cord or professional repair.
Finally, run a full function test. Sit down and cycle through every feature: rear wash, front wash, oscillation, pulsating mode, each pressure level, each temperature setting, nozzle position forward and backward, and the warm-air dryer. You are listening for unusual sounds — grinding, clicking, or a motor that strains — and feeling for inconsistencies, like a pressure level that used to feel strong but now feels weak, or a dryer that blows cool air when it should be warm. Understanding how do heated toilet seats work helps contextualize what you might find: the heating element inside the seat has a finite lifespan, and a dryer or water heater that no longer reaches full temperature may need a replacement part rather than a full seat swap.
Keep a brief log — even a note on your phone — recording the date, what you checked, and anything that seemed off. Over a year or two, this log reveals patterns. Maybe the filter clogs faster in spring when municipal water systems flush lines, or maybe a particular hose connection loosens every few months and needs an upgrade to a braided steel line. These small insights turn reactive repairs into proactive habits, and proactive habits keep your bidet seat performing like new for years rather than months.
A well-maintained seat does more than just last longer — it maintains the precise spray pressure, accurate nozzle positioning, and reliable temperature control that make every feature worth using in the first place. That consistency matters whether you own an advanced electric model loaded with settings or a streamlined non-electric seat that runs on water pressure alone. The differences between those two categories — and how they change the way you experience each step in this guide — are worth understanding before you decide which path suits your bathroom and your daily routine.
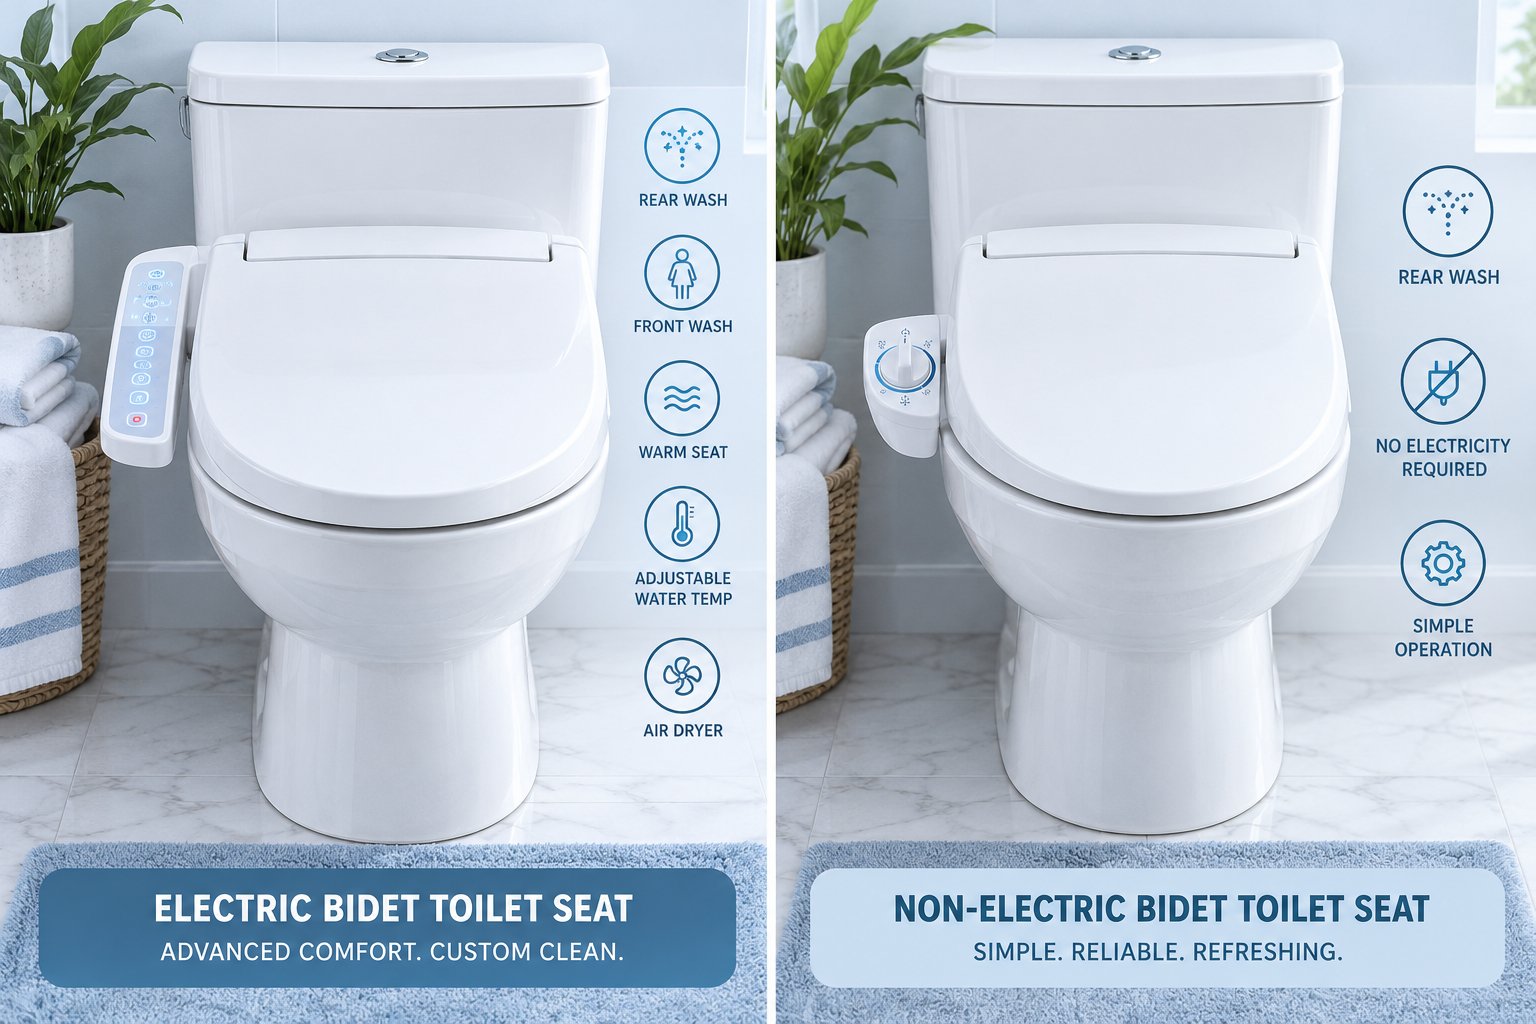
Electric vs. Non-Electric Bidet Seats and Your Next Steps
Every step in this guide — from decoding the control panel to dialing in your perfect spray mode — has described the full-featured electric bidet seat experience. But whats a bidet toilet seat if not a category with real variety? Not every model plugs into an outlet, heats water, or offers a warm-air dryer. Non-electric (manual) bidet seats exist alongside their powered counterparts, and they deliver the same core hygiene benefit using a fundamentally different approach. How does bidet toilet seat work when there is no electricity involved? The answer changes the daily routine in ways worth understanding before you commit to one type or the other.
How Using an Electric Bidet Seat Differs from a Manual One
An electric bidet seat is the model you have been reading about throughout this guide. It connects to a GFCI outlet, heats water on demand (or stores it in a small tank), and puts every function behind clearly labeled buttons or a wireless remote. You press rear wash, adjust pressure with plus and minus arrows, toggle oscillation, set your preferred temperature, and finish with a warm-air dryer — all without reaching for anything other than the control interface. Automatic nozzle self-cleaning activates after every use, and bidet controls on the remote give you granular access to user presets, nozzle positioning, and seat heating. The experience feels polished, hands-free, and endlessly customizable.
A non-electric bidet seat strips that experience down to its mechanical essentials. Instead of buttons, you will find a dial or lever — usually mounted on the right side of the seat — that you turn by hand to start the wash and control water pressure. Turn the dial clockwise, the nozzle extends and water flows; turn it further, pressure increases. Turn it back to the starting position and the wash stops. There is no remote, no digital display, and no electrical component of any kind. The water comes directly from your household supply line at whatever temperature that line carries, which means cold in winter and mildly cool to lukewarm in summer depending on your climate and plumbing setup. Some non-electric models offer a hot-water hookup via a Y-valve connected to the sink's hot supply, but warm water still takes time to travel through the line, so the first several seconds of every wash tend to be cold regardless.
The drying step changes too. Without a built-in dryer, non-electric users always reach for a few squares of toilet paper or a dedicated drying towel after the wash. This is not a drawback for everyone — plenty of people prefer the speed of a quick pat-dry over sitting through one to three minutes of warm air. But it does mean toilet paper never fully leaves your routine. If you have ever wondered how to use a bidet as a man and whether the process differs between types, the physical steps are identical — sit, activate, wait, dry — but the method of activation (button vs. dial) and drying (air vs. paper) shifts depending on which seat you own.
Nozzle cleaning is another divergence. Electric seats rinse the nozzle automatically before and after each use. Non-electric seats typically lack this feature, so the responsibility falls to you during your weekly and monthly maintenance routine. The nozzle itself is often the same quality — stainless steel or durable polymer — but it simply does not get the automated rinse cycle that electric models provide.
The table below lays out these differences side by side so you can see exactly where each type excels and where it compromises:
| Feature | Electric Bidet Seat | Non-Electric Bidet Seat |
|---|---|---|
| Water Temperature Control | Adjustable via buttons or remote; heated by tank, hybrid, or tankless system | Ambient temperature from supply line; some models allow hot-water line hookup |
| Pressure Adjustment Method | Digital buttons with multiple precise levels (typically 3–5+) | Manual dial or lever with variable, analog control |
| Drying Option | Built-in warm-air dryer (hands-free, 1–3 minutes) | None — toilet paper or towel required |
| Nozzle Cleaning | Automatic self-rinse before and after each use | Manual cleaning during routine maintenance |
| Power Requirement | GFCI-protected electrical outlet required | No electricity needed |
| Typical Use Experience | Warm water, heated seat, customizable spray modes, remote control, user presets | Simple dial operation, cool or ambient water, straightforward wash-and-dry routine |
The fundamental clean is the same regardless of type — water cleansing outperforms dry paper in either case. The difference lives entirely in the comfort layer wrapped around that clean. Electric models add finer control over pressure, position, and temperature, which tailors the experience rather than changing what it accomplishes.
Which Type Suits Your Needs
Choosing between electric and non-electric comes down to a handful of honest questions about your bathroom, your body, and your budget.
Electric is the stronger choice when:
- Warm water matters to you — especially in cold climates where supply-line water can drop below 50°F in winter
- You have specific health needs (postpartum recovery, hemorrhoids, mobility limitations) that benefit from precise pressure control, gentle spray modes, and hands-free drying
- You want the fullest bidet toilet how to use experience — user presets, oscillation, pulsating massage, heated seat, nightlight, and automatic nozzle cleaning
- A GFCI outlet already exists near your toilet or you are willing to have one installed
Non-electric is the smarter move when:
- Budget is the primary factor — non-electric seats and attachments typically cost $40 to $150, compared to $200 to $700 for electric models
- You are renting and do not want to deal with outlet requirements or leave behind an expensive appliance when you move
- Simplicity appeals to you — fewer components mean fewer things that can break, and there is no circuit board to troubleshoot
- You want to test whether bidet cleansing fits your routine before investing in a full-featured electric seat — many people start non-electric and upgrade later when they realize they are hooked
Bidets in Europe have been standard bathroom fixtures for generations, and the range of options there — from standalone porcelain basins to modern electric seats — mirrors the same electric-vs-manual decision. The difference is cultural familiarity. In North America, where bidet adoption is accelerating rapidly, many households start with a non-electric attachment as their entry point and upgrade to electric once the habit is established. That upgrade path is seamless because both types mount on the same standard toilet using the same T-adapter connection.
For sanitary ware brands or sourcing teams evaluating bidet-equipped seat projects at scale, Tianyun's bidet seat category provides a starting point for confirming product availability, bowl compatibility, mounting requirements, and customization options directly with the manufacturer. Whether a project calls for electric models with full feature sets or streamlined non-electric units for budget-conscious markets, verifying specifications at the sourcing stage prevents costly mismatches down the line.
Your Confidence Roadmap Going Forward
Eight steps ago, you were staring at an unfamiliar row of buttons and wondering whether you would end up soaking your bathroom floor. Look at where you are now. You understand how the seat mounts, how the water supply connects, and what every icon on the control panel means. You know how to sit correctly, activate both rear and front washes, and fine-tune pressure, temperature, and nozzle position to match your exact preferences. You can dry off efficiently, reset the seat for the next person, adapt settings for specific health conditions, and maintain the entire unit so it performs reliably for years.
That progression — from nervous first-timer to informed daily user — does not end here. Your preferences will evolve. After a week of consistent use, revisit the pressure and temperature settings you chose on day one. Most people discover they want slightly more pressure or slightly warmer water once the novelty fades and the routine feels natural. After a month, experiment with oscillation or pulsating mode if you have not already. These advanced features often feel unnecessary when everything is new, but they become genuinely appreciated once the basics are second nature.
If you share your bathroom, have a conversation with everyone in the household about their preferred settings. User presets on electric models exist precisely for this reason — two or three people can each save their ideal combination and recall it with a single button press, which eliminates the daily reset shuffle entirely.
The single most important takeaway from this entire guide is simple: a bidet toilet seat is not complicated. It feels unfamiliar the first time because it is unfamiliar — not because it is difficult. Every feature is designed to be intuitive once someone explains what it does, and you now have that explanation for every button, every mode, and every maintenance step. Use it daily, tweak it freely, and share what you have learned with the next person who stares at that row of buttons and does not know where to start.
Frequently Asked Questions About Using a Bidet Toilet Seat
1. Do you wipe before or after using a bidet toilet seat?
Pre-wiping is entirely optional. The bidet's focused water stream is engineered to clean thoroughly without any paper beforehand. Many first-time users start with a quick pre-wipe for comfort but drop the habit within a week once they trust the wash. After the bidet wash, you can either use the built-in warm-air dryer (available on electric models) or lightly pat dry with one or two squares of toilet paper. The key goal is leaving the skin clean and fully dry before you stand up.
2. How do you sit on a bidet toilet seat correctly?
Sit facing forward with your feet flat on the floor — exactly how you would sit on a regular toilet. The critical detail is scooting your hips far enough back so your weight is centered over the seat. This positions your body directly above the retractable nozzle and ensures the built-in seat sensor registers your presence, which is required for the wash functions to activate on most electric models. There is no need to straddle, face backward, or adopt any special posture.
3. Is a bidet toilet seat sanitary and safe to use?
Yes. Bidet toilet seats are designed with multiple hygiene safeguards. The nozzle retracts behind a protective gate when not in use, and most electric models run an automatic self-rinse cycle before and after every wash. The water supply comes from the same clean, potable line that fills your toilet tank — it never contacts bowl water. For shared households, pressing the nozzle self-clean button after each session and wiping the seat weekly with a mild disinfectant keeps everything sanitary for every user.
4. Can a bidet toilet seat work without electricity?
Absolutely. Non-electric bidet seats connect solely to your toilet's water supply line and use a manual dial or lever to control the wash. They deliver ambient-temperature water and rely on household water pressure rather than digital buttons. The trade-off is the absence of heated water, a warm-air dryer, and automatic nozzle cleaning. Non-electric models are budget-friendly, simpler to install, and ideal for renters or anyone testing bidet hygiene before upgrading to a full-featured electric seat.
5. How often should you clean and maintain a bidet toilet seat?
A simple weekly routine keeps performance consistent: wipe the seat and lid with a soft cloth and mild cleaner, then run the nozzle self-clean function. Once a month, extend the nozzle manually and scrub the tip with a soft toothbrush dipped in diluted white vinegar to remove mineral buildup, and rinse or replace the water inlet filter. Every three months, inspect the T-adapter and hose connections for slow leaks, check the power cord for wear, and cycle through every function to confirm nothing has degraded.
Apply This Insight to Your Project
Tell us what you are building and how the topic “How to Use Bidet Toilet Seat: From Confused to Clean in 8 Steps” relates to your application. Our engineering team can help evaluate the next step.