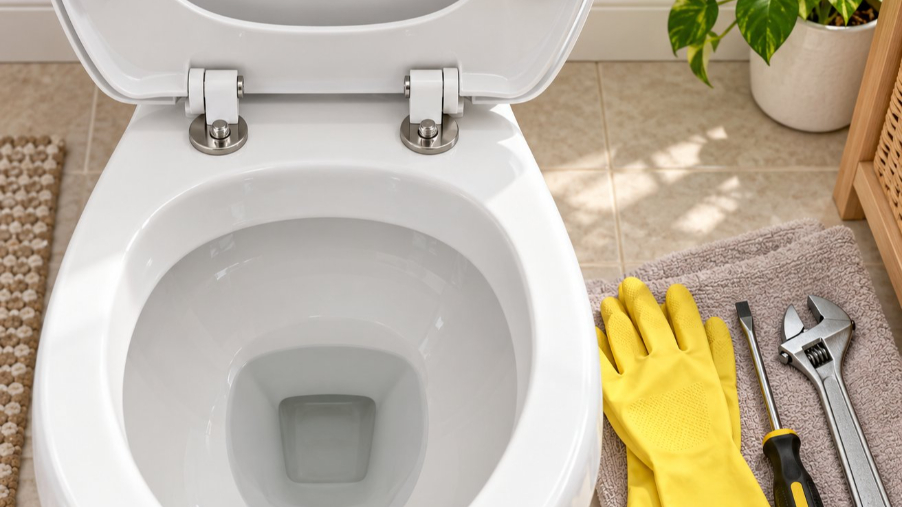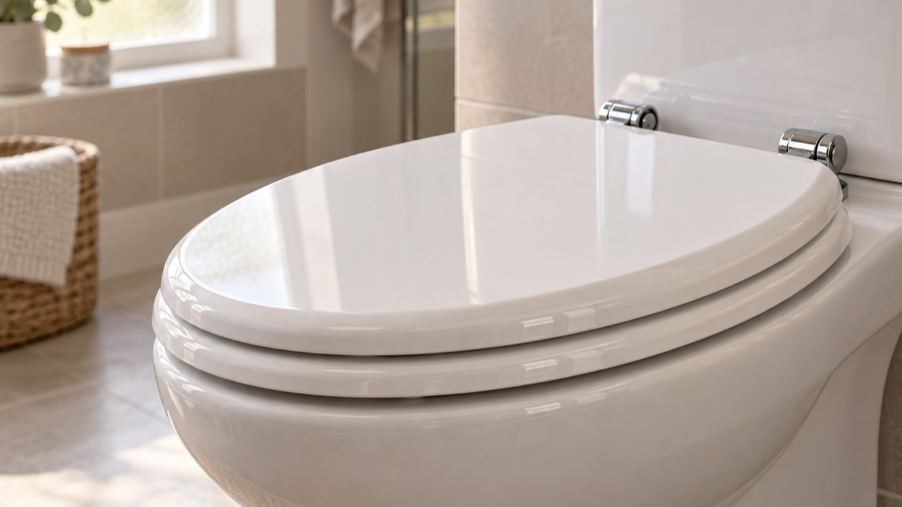
Why Rust Stains on a Toilet Seat Need a Different Approach
Search for how to get rust stains out of toilet surfaces, and you'll find page after page of advice about the porcelain bowl. Pumice stones, heavy-duty acid gels, in-bowl tablets — almost every guide assumes you're scrubbing the inside of the basin. But what if the rust is on the seat itself? That's a completely different problem, and it demands completely different solutions.
Why Toilet Seat Rust Is Different From Bowl Rust
A toilet bowl is glazed porcelain or vitreous china — a hard, non-porous surface that can withstand abrasive scrubbing tools and strong acidic cleaners. Your toilet seat, on the other hand, is made from plastic, polypropylene, thermoset resin, lacquered wood, or even cushioned vinyl. These materials are softer, more porous, and far more vulnerable to chemical damage and scratching. The techniques people use when removing rust stains from toilet bowl interiors — like scouring with a pumice stone or pouring in a concentrated acid cleaner — can permanently scratch, discolor, or warp a plastic or wooden seat.
Think about it this way: you wouldn't use the same cleaning method on a ceramic tile floor and a wooden cutting board. The same logic applies here. Knowing your seat's material is the first step to choosing the right cleaning approach, and it's a detail that nearly every online guide overlooks entirely.
The Six Rust Zones on a Toilet Seat
Rust doesn't appear randomly. It shows up in predictable spots tied to moisture exposure, hardware contact, and water splash patterns. Before you grab any cleaning product, take a moment to identify exactly where on the seat the staining has occurred. Each zone may require a slightly different technique or tool:
- Seat top surface — the area you sit on, often stained by iron-rich water splashing up during flushing or by metal objects left resting on the seat.
- Seat underside — frequently overlooked, this zone catches splash-back and condensation, making it a prime location for rust deposits.
- Lid top — usually stained by metal items like bobby pins, razor blade caps, or aerosol cans placed on the closed lid.
- Lid underside — exposed to moisture and tank condensation, particularly in humid bathrooms.
- Hinges and mounting points — the most common rust origin, where metal bolts, screws, and hinge components are in constant contact with moisture. Hardware made from chrome-plated zinc or low-grade steel is especially prone to corrosion.
- Bumpers — the small rubber or plastic pads on the underside of the seat and lid that contact the bowl rim. Rust can collect around these contact points as mineral-laden water pools beneath them.
Mapping these zones gives you a clear plan of attack. You'll know which areas need gentle surface wiping, which need a deeper paste treatment, and which might require hardware removal or replacement altogether.
Are Rust Stains on Your Seat a Health Concern
Here's the reassuring news: rust is iron oxide, and it is non-toxic. The orange-brown discoloration on your seat is not a bacteria colony, mold growth, or sanitary hazard. It won't harm your skin on contact, and it doesn't indicate an unsanitary bathroom. However, those stains are undeniably unsightly — and they can signal underlying issues you shouldn't ignore. Corroding hinge hardware, aging municipal pipes, or high iron content in well water are all root causes that will keep producing new stains unless addressed.
The real goal when you remove rust stains from toilet seats isn't just cosmetic restoration. It's also about diagnosing and eliminating the source so the problem doesn't repeat itself every few weeks. That diagnostic process — figuring out exactly where the rust originates — is the essential first step before any scrubbing begins.
Step 1 - Diagnose Where the Rust Is Coming From
Scrubbing away a rust stain without knowing its source is like mopping a floor while the faucet is still running. You'll get a clean seat for a day or two, and then the discoloration creeps right back. Every effective rust removal effort starts with a simple question: where is this rust actually originating?
Toilet seat rust has four primary sources. Some are obvious the moment you look closely, while others hide inside the tank or within your home's water supply. Work through this diagnostic checklist before you pick up a single cleaning product:
- Corroding metal hinges and mounting bolts — Chrome-plated zinc or low-grade steel hardware sits right where moisture is constant. These bolts pass through holes in the seat and rest against the porcelain bowl rim, trapping water with every flush. Over time, the plating breaks down, exposing bare metal to humidity and direct water contact. The result is rust that bleeds outward from the bolt holes, leaving orange streaks across the seat's underside and top surface.
- Iron-rich well water or aging municipal pipes — If your home draws from a well, dissolved iron in the water oxidizes the moment it contacts air. The EPA's secondary guideline for iron is just 0.3 parts per million — anything above that threshold can produce visible orange and reddish-brown staining on fixtures. Municipal water systems aren't immune either; older galvanized steel pipes corrode from the inside out, shedding iron particles into the flow. Every flush sends mineral-laden water splashing up onto the seat and lid.
- Metal objects left on the seat or lid — Bobby pins, razor blades, aerosol cans with bare metal bottoms, even a small pair of scissors left on a closed lid overnight. Any metal item sitting on a damp surface will begin to transfer rust surprisingly fast, leaving a ghost outline of the object behind.
- Rusting tank bolts or internal tank components — The toilet tank contains metal bolts that secure it to the bowl, along with a fill valve, flush valve, and sometimes a metal flapper chain. When these parts corrode, they release rust-colored sediment into the tank water. Each flush pushes that tinted water through the bowl, and splashing deposits it on the seat's underside, bumpers, and hinge area.
Check Your Hinges and Mounting Hardware First
The fastest diagnosis starts at the back of the seat. Lift the lid and look at the two hinge points where the seat bolts meet the bowl. Do you see orange or brown discoloration radiating outward from the bolt holes? Is there flaky, rough texture on the bolt heads or the metal hinge plates? Visible rust or corrosion on toilet bolts is one of the clearest signs that the hardware itself is the stain source. Try wiggling the seat gently — a toilet seat that feels loose or wobbly may indicate bolts that have corroded to the point of structural weakness, and those same corroded bolts are almost certainly leaching iron onto the seat surface.
If your hinges and bolts look clean and silver-bright, the rust is coming from somewhere else. Move on to the next check.
Test Your Water for Iron Content
When rust appears not just on the seat but also inside the bowl, around the sink faucet, or on shower tile, your water supply is the likely culprit. Iron dissolved in well water is clear coming out of the tap — you won't see it until it hits air and oxidizes into that familiar orange-brown residue. Even homes on municipal water can have elevated iron levels if the pipes running to or through the house are older galvanized steel.
A simple at-home iron test kit from a hardware store gives you a quick read, though a certified lab test provides more precise numbers along with pH and hardness data. If your iron content is above 0.3 ppm, that's enough to stain every surface the water touches. Understanding how to remove rust from toilet fixtures becomes a lot more straightforward once you know the water itself is the delivery system — and that no amount of scrubbing will stop recurrence until the water is treated or filtered.
Inspect Inside the Toilet Tank
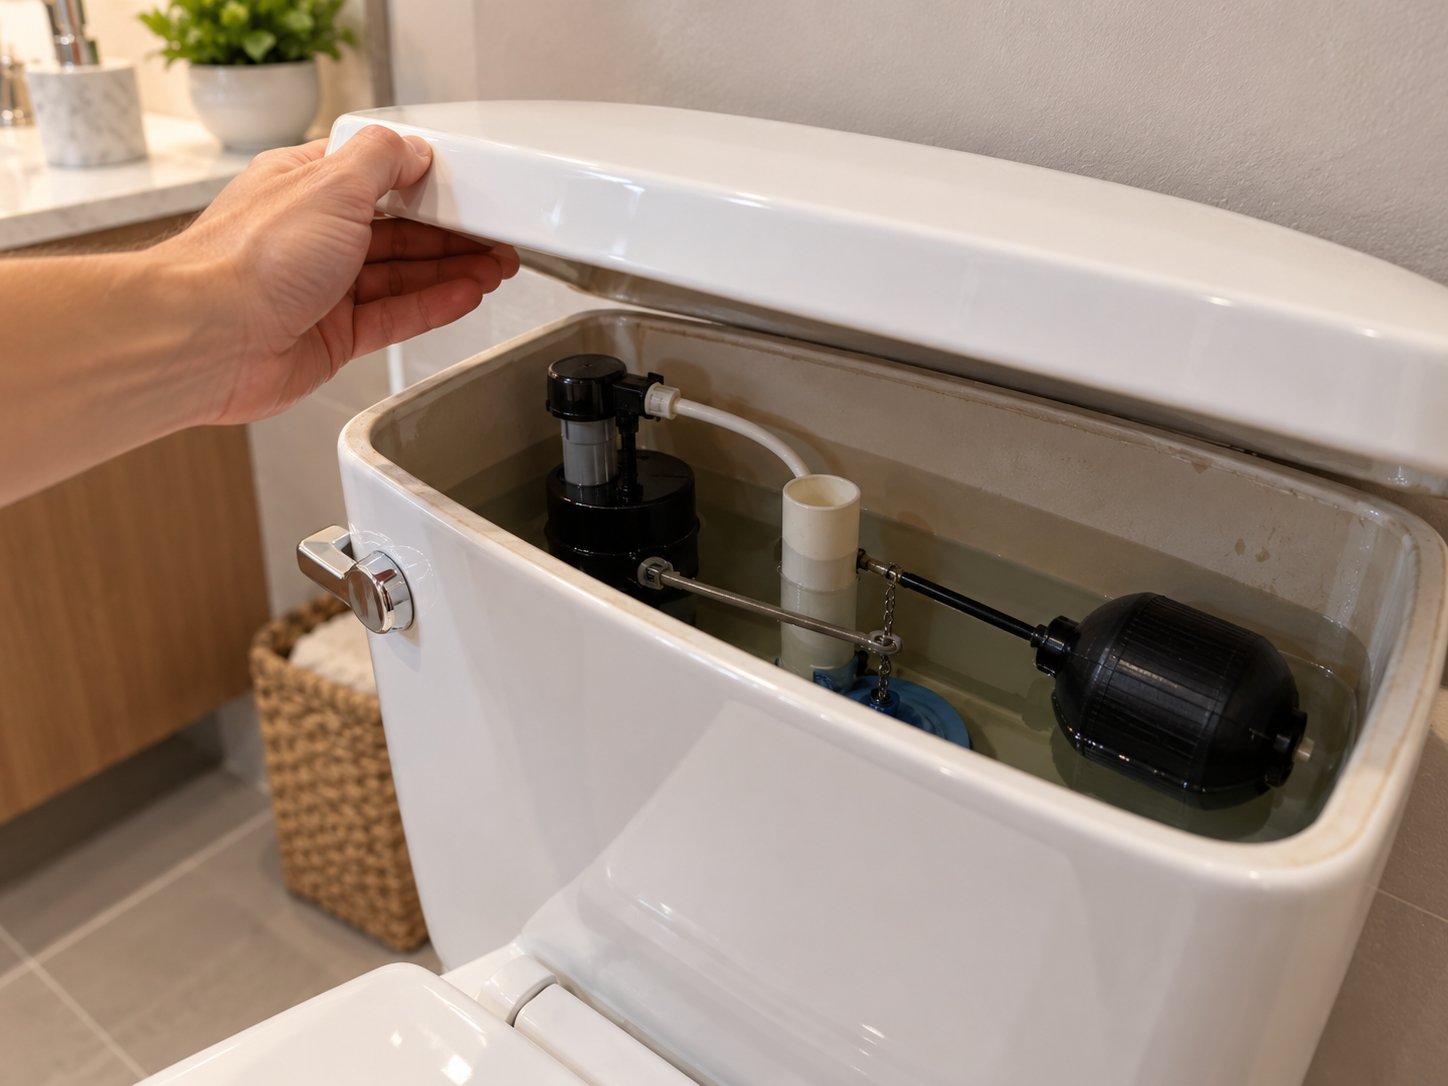
This step takes ten seconds and reveals a rust source most people never think to check. Carefully lift the porcelain tank lid and set it on a towel. Look at the water inside. Is it clear, or does it have an orange, brown, or yellowish tint? Check the tank bolts at the bottom — are the metal washers and bolt heads corroded or flaking? Run your finger along the inside wall of the tank near the waterline. Orange or brown sediment there means rust in the toilet tank is continuously cycling into the bowl and splashing onto the seat with every flush.
Corroded internal components — a rusting flapper chain, a deteriorating metal fill valve, or pitted tank-to-bowl bolts — act as a constant rust generator. Even if you use a toilet rust remover to clean the seat perfectly today, the next flush reintroduces iron-laden water to the same surfaces. Replacing corroded tank hardware with brass or plastic equivalents is often a small, inexpensive fix that eliminates the problem at its root.
Cleaning without fixing the source is temporary. If you skip this diagnostic step, expect rust stains to return within days or weeks.
With the source identified, you're ready for the next critical decision: figuring out what your toilet seat is actually made of and how severe the staining has become. That material identification step determines which cleaners are safe to use — and which ones could cause permanent damage.
Step 2 - Check Your Seat Material and Stain Severity
Picking the wrong cleaner for your toilet seat material is one of the fastest ways to turn a cosmetic rust stain into permanent damage. A pumice stone that works beautifully on a porcelain bowl will gouge visible scratch marks into a plastic seat. A concentrated acid toilet bowl rust remover designed for vitreous china can strip the lacquer right off a wooden seat in minutes. The cleaner itself becomes the problem — and it's a mistake that's almost impossible to reverse.
That's why identifying your seat material before reaching for any product is non-negotiable. This single step separates a successful rust removal from an expensive replacement trip to the hardware store.
Identify Your Toilet Seat Material
Most toilet seats fall into one of three material categories. Each has different chemical tolerances, scratch resistance, and moisture sensitivity. Here's how to figure out which type you're working with:
Plastic and polypropylene (PP) — This is the most common type you'll encounter in residential bathrooms. Pick up the seat and feel its weight. Plastic seats are noticeably lightweight and often feel slightly flexible when you press on them. The surface has a subtle matte or semi-gloss finish, and you'll usually see uniform color throughout the material. Polypropylene seats are affordable, resistant to cracking and chipping, and relatively easy to clean — but they scratch easily under abrasive tools, and harsh chemicals can cause permanent discoloration, especially on colored seats.
Thermoset resin and duroplast (UF) — These seats feel heavier and more solid than standard plastic. Tap the surface with a fingernail and you'll notice a denser, almost ceramic-like sound. The finish is glossy and smooth, mimicking the look and feel of porcelain. Duroplast is highly resistant to scratches, stains, and chemical damage, which makes it the most forgiving seat material for rust cleaning. However, it's still not porcelain — aggressive abrasives can still dull the glossy finish over time.
Wood or MDF with lacquer coating — Solid wood and molded wood (compressed wood particles with a laminate or paint finish) are easy to identify by their warm feel and heavier weight. These seats look elegant, but they present the biggest cleaning challenge. The lacquer or polyurethane coating acts as a moisture barrier — and once that barrier is scratched, chipped, or stripped by an acidic cleaner, water seeps into the wood grain. Iron stains that penetrate bare wood become virtually permanent. If your wooden seat's coating is already compromised, even mild cleaning solutions need to be applied with extra caution.
Not sure which material you have? A quick weight test usually settles it. Plastic seats feel light enough to hold with one finger. Thermoset seats require a firm grip. Wood seats feel warm to the touch and noticeably heavy.
The table below maps each material to its safe and unsafe cleaning options — refer to it before applying anything to your seat:
| Material Type | Safe Cleaners | Cleaners to Avoid |
|---|---|---|
| Plastic / Polypropylene (PP) | White vinegar, baking soda paste, lemon juice, mild non-abrasive bathroom cleaners, cream of tartar paste | Pumice stones, steel wool, abrasive scouring powders, chlorine bleach on colored seats, concentrated hydrochloric acid cleaners |
| Thermoset / Duroplast (UF) | White vinegar, baking soda paste, lemon juice, non-abrasive commercial rust removers, hydrogen peroxide (3%), mild bathroom sprays | Pumice stones, steel wool, abrasive scouring pads, highly concentrated acid gels |
| Wood / MDF with Lacquer | Diluted white vinegar (50/50 with water), cream of tartar paste with hydrogen peroxide (brief application), damp soft cloth only | Undiluted acids, pumice stones, steel wool, abrasive pads, soaking or pooling liquids, bleach, any product that sits on the surface longer than five minutes |
You'll notice the pattern right away — wood seats have the shortest "safe" list and the longest "avoid" list. If you have a wooden seat with visible rust staining, your cleaning window is narrower, and the risk of damage is higher. The same toilet bowl rust remover that dissolves iron deposits inside a porcelain basin can eat through a wood seat's protective finish in a single application.
Assess Light, Moderate, or Deep-Set Stains
Material type tells you what to use. Stain severity tells you how aggressively to use it. Not every rust stain on a toilet seat requires the same level of effort, and misjudging severity can lead to either wasted time with a too-gentle approach or unnecessary damage from going too aggressive too soon.
Here's a practical three-level scale to assess what you're dealing with:
- Light surface discoloration — The stain appears as a faint orange or yellowish tinge on the surface. When you run your finger over it, the surface feels smooth — the iron deposits are sitting on top of the material rather than embedded within it. These stains typically respond to a single application of mild acid, like undiluted white vinegar applied with a soft cloth. Most rust stains caught early fall into this category, and they're the easiest to handle regardless of seat material.
- Moderate embedded stains — The discoloration is darker, more orange-brown, and covers a larger area. The surface may feel slightly rough or textured where the iron oxide has started bonding with the seat material. A simple vinegar wipe won't be enough here. These stains require paste treatments — baking soda with lemon juice, or cream of tartar with hydrogen peroxide — applied and left to dwell for 15 to 30 minutes before scrubbing gently with a soft nylon brush. You may need two or three treatment cycles for full removal.
- Deep-set permanent staining — The rust has penetrated below the surface layer of the material. On plastic, you'll see discoloration that persists even after multiple cleaning cycles. On wood, the stain has passed through a compromised lacquer layer and soaked into the grain. On thermoset seats, deep scratches may have allowed iron to lodge in the micro-damage. At this severity level, figuring out how to clean rust stains in toilet seat surfaces becomes a question of diminishing returns — continued scrubbing risks damaging the material further, and replacement often makes more practical and financial sense.
Wondering how to tell the difference between moderate and deep-set? Try this: after one full cleaning cycle using the appropriate method for your seat material, check the stain under bright light. If it has faded noticeably, you're in moderate territory and a second application should finish the job. If the stain looks almost unchanged, the iron has likely penetrated the material and you're dealing with a deep-set situation.
Always Spot-Test Cleaners First
Even when you've matched the right cleaner to your seat material, individual products can vary in concentration and formulation. A "gentle" bathroom spray from one brand might be noticeably harsher than another. Colored plastic seats are particularly unpredictable — some pigments react to acids or peroxide by fading or yellowing, even when the base plastic material is technically compatible.
The safest approach is a quick spot test. Choose an inconspicuous area — the underside of the lid is ideal because it's hidden when the lid is down. Apply a small amount of your chosen cleaner, let it sit for the same dwell time you plan to use on the stain, then wipe clean and inspect. Look for any discoloration, surface dulling, tackiness, or texture change. If the test area looks identical to the untreated surface, you're clear to proceed on the visible stain.
This ten-second precaution can save you from turning rust stains in toilet bowl areas into a completely different — and more expensive — problem on the seat. It's a step that costs nothing and protects everything.
With your material identified, your stain severity assessed, and your cleaner spot-tested, you're ready for the hands-on work. The cleaning technique that follows depends heavily on whether your seat is plastic, wood, or something else — and each material has its own step-by-step method for the best results.
Step 3 - Remove Rust Stains From Plastic and Polypropylene Seats
Plastic and polypropylene seats account for the vast majority of residential toilet seats, and the good news is they're also the most forgiving when it comes to rust removal. The surface is non-porous enough to keep most iron deposits from penetrating deeply, yet soft enough that you need to stick with gentle tools and mild acids. Grab the right supplies, and those rust toilet stains can usually be gone within an hour.
How to Remove the Seat for Thorough Cleaning
Trying to scrub a toilet seat while it's still attached to the bowl is awkward at best and ineffective at worst. You can't reach the underside properly, the hinges block access to some of the worst staining, and cleaning solution drips everywhere. Removing the seat takes about sixty seconds and makes every step that follows dramatically easier.
Look at the back of the seat where it meets the bowl rim. You'll see two mounting bolts — one on each side of the hinge. Most modern plastic seats use one of two fastening systems:
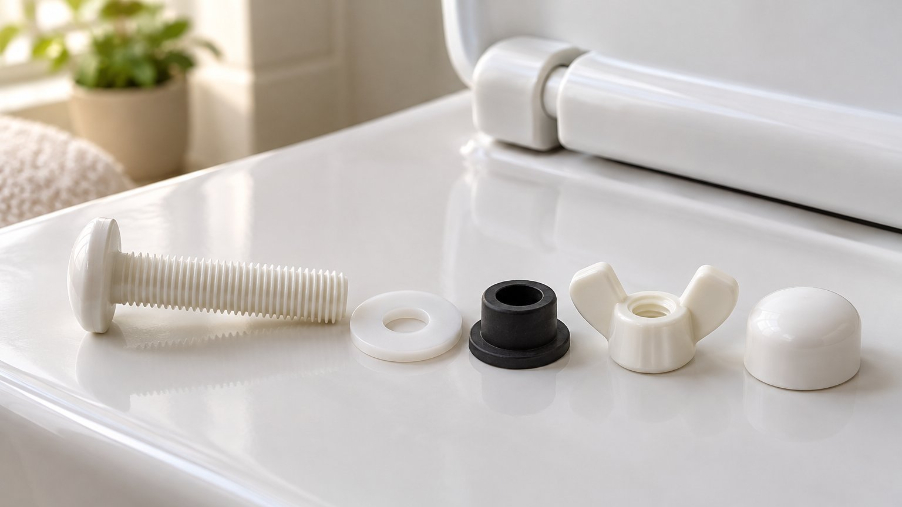
- Wing nuts underneath the bowl rim — Reach under the back of the bowl and feel for the plastic or metal wing nuts threaded onto the bolt ends. Hold the bolt head on top steady with one hand and twist the wing nut counterclockwise with the other. If corrosion has locked them tight, a few drops of penetrating oil and five minutes of patience usually loosen things up.
- Top-fix or snap-off bolts — Many newer seats use a top-access system. You'll see plastic caps covering the bolt heads on top of the hinge. Pop these caps open, then unscrew the bolts from above. Some designs use a quarter-turn release — twist the bolt head ninety degrees and the seat lifts straight off.
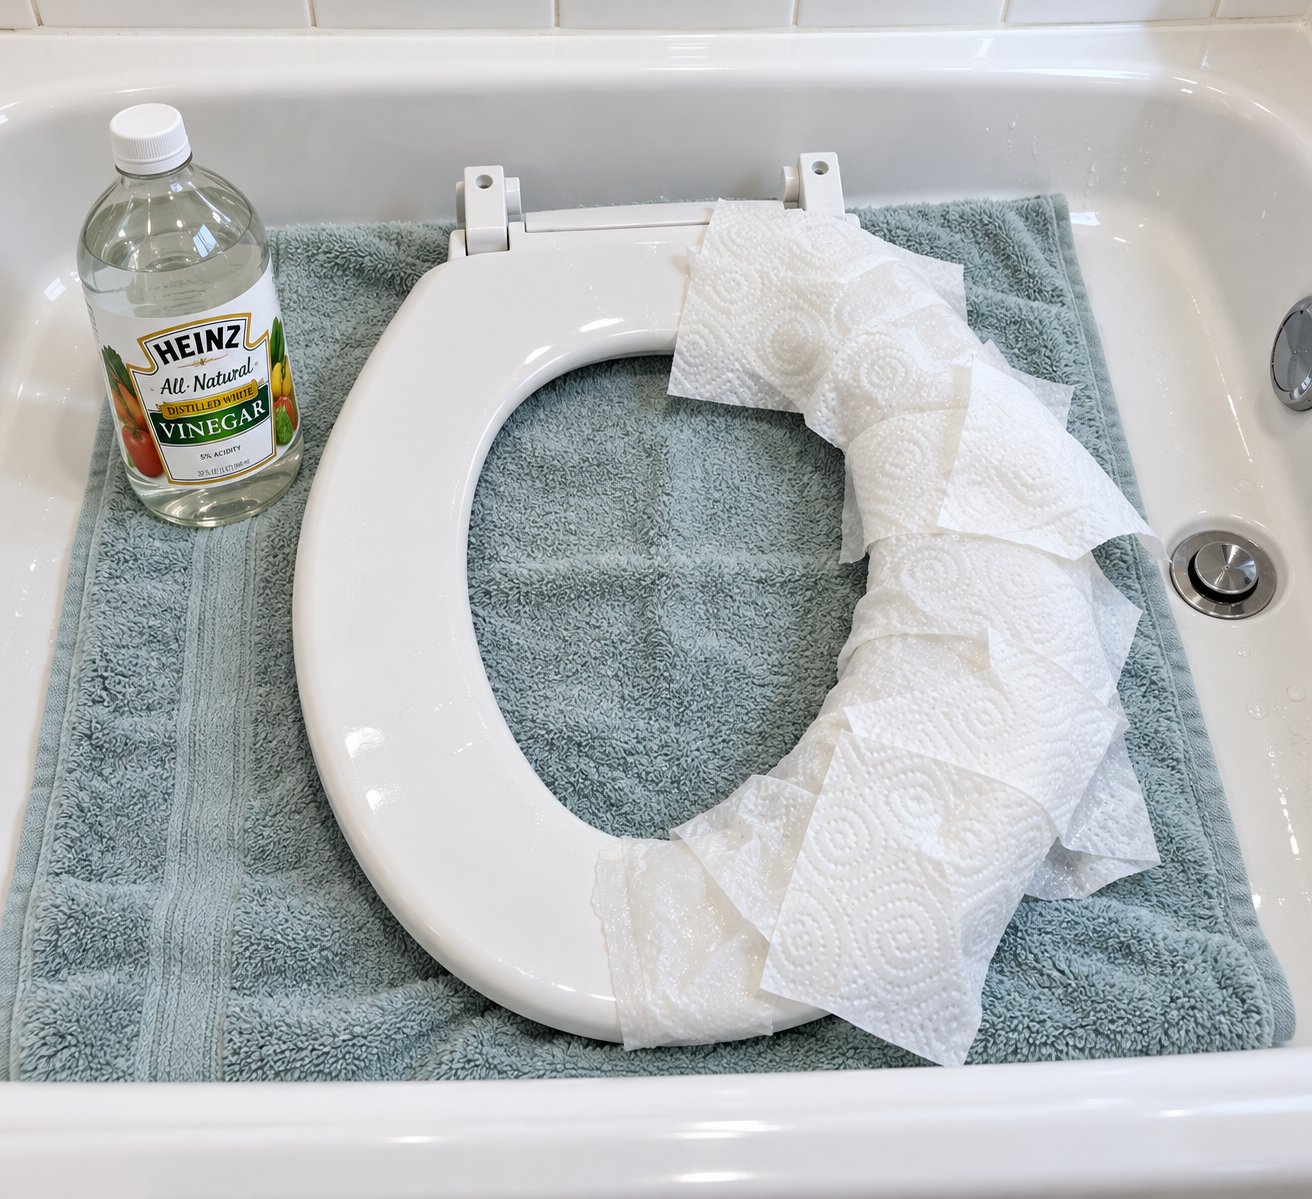
Once the seat is free, lay it flat on an old towel, a drop cloth, or directly in the bathtub. Working in the tub is especially practical because you can rinse freely without worrying about water damage. Inspect the underside and the area around the bolt holes closely — these spots often reveal the heaviest staining, and they're invisible when the seat is mounted.
Vinegar Soak Method for Light Stains
If your stain assessment from the previous step landed on "light surface discoloration," white vinegar alone is often all you need. The acetic acid in standard household vinegar reacts with iron oxide and dissolves it without posing any risk to plastic or polypropylene surfaces.
Here's the process, starting with the gentlest approach and escalating only if needed:
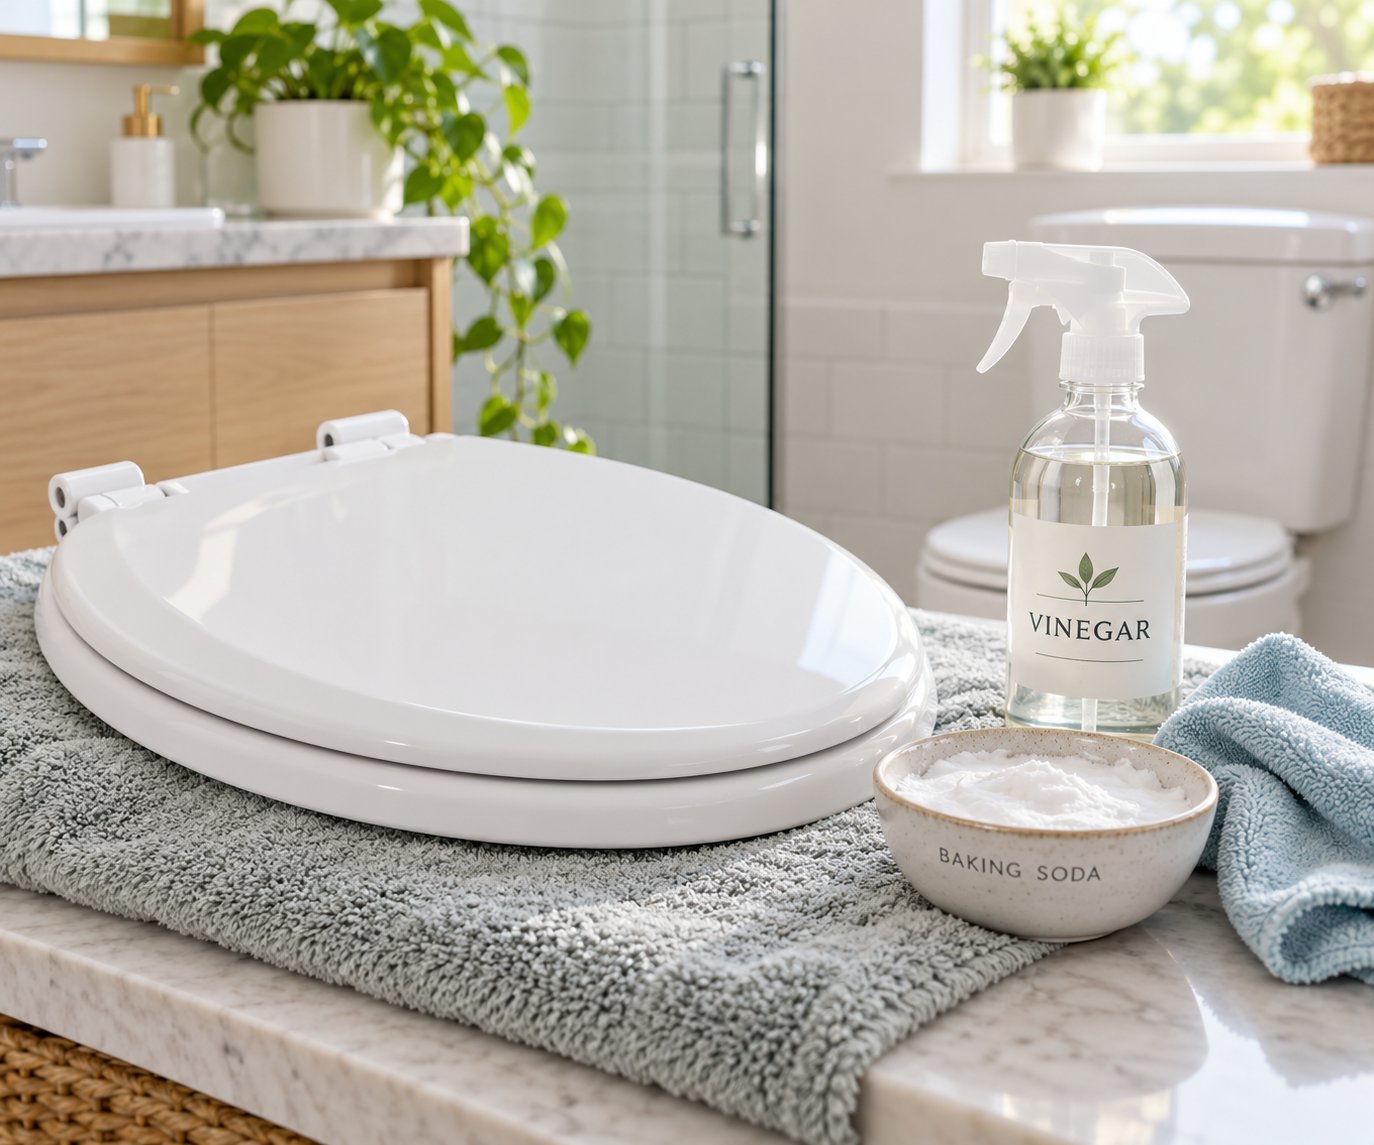
- White vinegar soak (light stains) — Saturate two or three sheets of paper towel with undiluted white vinegar (5% acidity, the standard grocery store variety). Lay the soaked paper towels directly over the rust stain so they cling to the surface like a compress. Let them sit for 30 to 60 minutes — the extended contact time is what does the real work, giving the acid time to break the bond between iron oxide and plastic. After soaking, remove the paper towels and wipe the area with a soft, damp cloth. For faint stains, you'll often see the discoloration lift completely in a single session. If a shadow of color remains, repeat with fresh vinegar-soaked towels for another 30 minutes.
This method is especially effective for stains caused by iron-rich water splash. When people ask how to get rust stains out of toilet bowl surfaces, concentrated acids are typically the answer — but for a plastic seat, the mild acidity of vinegar provides more than enough dissolving power without any risk of damage.
Baking Soda Paste for Moderate Stains
Moderate stains — the ones that feel slightly rough to the touch and don't fully budge with vinegar alone — need a mild abrasive boost. That's where a homemade paste comes in.
- Baking soda and lemon juice paste (moderate stains) — In a small bowl, combine two tablespoons of baking soda with enough fresh lemon juice to form a thick, spreadable paste. The consistency should resemble toothpaste — wet enough to stick, but not so runny that it slides off a vertical surface. Spread the paste generously over the rust stain and let it sit for 15 minutes. The citric acid from the lemon juice continues dissolving iron oxide while the baking soda crystals act as an ultra-fine abrasive. After the dwell time, scrub gently with a soft nylon brush or a non-scratch sponge using small circular motions. Rinse thoroughly with clean water and inspect the results. Stubborn spots may need a second or even third application — patience here prevents the temptation to reach for something harsher.
Imagine a stain that's been sitting for weeks near the bolt holes. That's the exact scenario where this paste method shines. The combination of chemical dissolution and gentle physical scrubbing tackles embedded iron deposits that a vinegar soak alone can't fully reach.
- Commercial rust remover for bathroom surfaces (stubborn stains) — When homemade solutions fall short, a commercial product formulated specifically for bathroom fixtures can provide the extra cleaning strength you need. Look for a non-abrasive, spray-on or gel formula that lists compatibility with plastic surfaces on its label. Apply according to the manufacturer's directions, paying close attention to recommended dwell times — leaving a chemical product on plastic longer than specified can cause discoloration or surface softening. Always use a soft cloth or non-scratch sponge to wipe the product away, never a scouring pad. Rinse the seat thoroughly with water afterward to remove any chemical residue.
A key point worth repeating: only use soft cloths, non-scratch sponges, or soft-bristle nylon brushes on plastic and polypropylene. Paper towels are fine for the vinegar soak step because they're only resting on the surface, but any active scrubbing should involve a tool that won't leave micro-scratches. Those scratches might be invisible at first, yet they create tiny grooves where iron deposits collect more easily in the future — essentially making the stain problem worse over time.
If a stain persists after two full treatment cycles using these escalating methods, the iron has likely penetrated the plastic itself. At that point, continued scrubbing risks surface damage, and replacement becomes the smarter path forward.
These three methods handle the overwhelming majority of rust on plastic seats. Yet plenty of households don't have plastic seats at all — they have lacquered wood, thermoset resin, or cushioned models. Trying to remove rust in toilet seat surfaces made from these materials using the same techniques can cause real harm, so each one calls for its own tailored approach.
Step 4 - Remove Rust Stains From Wooden and Specialty Seats
Wooden and cushioned toilet seats add warmth and comfort to a bathroom, but they also introduce a frustrating cleaning paradox: the materials that make them feel premium are the same materials that make rust stains harder — and riskier — to treat. Unlike a polypropylene seat that can handle a long vinegar soak without consequence, a lacquered wood seat can suffer permanent damage from a few tablespoons of liquid left sitting in the wrong spot for too long.
The margin for error here is thin. Every technique in this section prioritizes minimal moisture contact and short dwell times, because protecting the seat's finish matters just as much as removing the stain.
Gentle Methods for Lacquered Wood Seats
Wood toilet seats — whether solid hardwood, bamboo, or MDF with a painted finish — rely entirely on their lacquer or polyurethane coating to keep moisture out. That clear protective layer is the only thing standing between a surface-level rust mark and an irreversible stain soaked deep into the grain. If the coating is intact, you have a good chance of lifting the discoloration. If it's cracked, chipped, or worn thin from years of use, the odds drop sharply.
For light to moderate rust stains on a lacquered wood seat, follow this approach:
- Dampen a soft cloth with a solution of equal parts white vinegar and water. Wring the cloth until it's barely moist — you want it damp, not dripping.
- Apply to the stain using gentle circular motions. Let the diluted acid do the work rather than pressing hard. Avoid scrubbing back and forth, which can wear through the lacquer unevenly.
- Dry the area immediately and thoroughly with a separate clean, dry cloth. Never let liquid pool or sit on a wood surface. Even sixty seconds of standing moisture can begin softening lacquer and allowing water to reach the wood underneath.
For stubborn stains that resist the diluted vinegar method, a slightly stronger paste can help — but the application window is extremely short. Mix a small amount of cream of tartar with a few drops of 3% hydrogen peroxide to form a thick paste. Spread a thin layer directly over the stain and set a timer for five minutes maximum. Wipe the paste away completely with a damp cloth, then dry the spot right away. The mild bleaching action of peroxide combined with the gentle acidity of cream of tartar can lift moderate iron deposits without attacking the finish, but leaving this paste on longer than five minutes risks discoloring or softening the lacquer.
If you're wondering how to get rust out of toilet seats made from wood and the stain hasn't budged after two careful attempts with these methods, the iron has almost certainly penetrated through the coating and into the wood fibers. At that point, no surface cleaner will extract it — the discoloration is essentially permanent, and replacement is the more practical path.
Cleaning Cushioned and Padded Seats
Cushioned toilet seats — the kind with soft, vinyl-covered padding — are less common than they once were, but plenty of bathrooms still have them. The good news is that rust stain removal from toilet bowl splash patterns on these seats is usually straightforward. The vinyl covering is non-porous, which means iron deposits sit on the surface rather than soaking in.
A cloth dampened with undiluted white vinegar, wiped across the stain in gentle strokes, handles most cases. Follow up with a clean damp cloth to remove any vinegar residue, then dry thoroughly. Avoid soaking the seat or submerging it, since water can seep through seams and saturate the foam padding inside.
Here's where it gets tricky: if the vinyl covering is torn, cracked, or peeling, rust-tinted water may have already reached the foam core beneath it. Foam absorbs liquid like a sponge and won't release iron stains no matter what you apply to the surface. You'll notice the stain keeps reappearing even after cleaning, or you'll see discoloration spreading outward from a tear in the vinyl. In either case, replacement is the only real fix — no cleaning method can extract rust from saturated foam padding.
Why Pumice and Steel Wool Will Ruin Non-Porcelain Surfaces
Search for how to get rust stains out of the toilet and you'll encounter dozens of recommendations for pumice stones, steel wool pads, and abrasive scouring powders. Those tools work on porcelain bowls because glazed ceramic is harder than the abrasive itself — the pumice or steel wool breaks down before the porcelain surface does. Wood, plastic, vinyl, and thermoset resin don't share that advantage. On these softer materials, the abrasive wins every time.
Never use pumice stones, steel wool, or abrasive scouring pads on any non-porcelain toilet seat surface. These tools will scratch, gouge, and permanently dull the finish, creating micro-grooves that trap moisture and iron deposits — making future rust stains worse, not better.
Even "fine grade" steel wool or a pumice stick marketed as gentle can leave visible scratches on a plastic seat under normal hand pressure. On lacquered wood, a single pass with a scouring pad can cut through the protective finish entirely, exposing raw material to moisture. The damage is cumulative and irreversible — every scratch becomes a new foothold for rust.
Stick with soft cloths, non-scratch sponges, and soft-bristle nylon brushes for any seat material. The extra patience required with gentle tools pays off in a seat that stays smooth, intact, and far easier to keep clean over the long term.
Surface cleaning handles the visible stains, but some of the worst rust damage on a toilet seat doesn't come from the seat material itself — it radiates outward from the metal hardware holding everything together. Corroded hinges and mounting bolts are often the original source of those stubborn streaks, and they deserve their own dedicated treatment.
Step 5 - Clean Rust Off Toilet Seat Hinges and Mounting Hardware
You can scrub every square inch of the seat surface until it gleams, but if the hinges and mounting bolts are corroding underneath, fresh rust streaks will bleed right back within a week. Metal hardware is the single most overlooked — and most common — origin of rust stains in toilet seat assemblies. The bolt holes trap moisture after every flush, condensation collects around the hinge plates, and the hardware sits in this damp environment around the clock. Chrome-plated zinc and low-grade steel, the materials used in most budget seat hardware, simply can't withstand that kind of relentless moisture exposure.
This step targets the source directly. Instead of chasing surface stains that keep returning, you'll clean, protect, or replace the metal components responsible for producing them in the first place.
How to Clean Corroded Seat Hinges and Bolts
Start by removing the seat entirely — the same process covered in Step 3. Once the seat is off, separate the hinge bolts, wing nuts, washers, and any metal hinge plates from the plastic seat body. Lay all the metal pieces on a towel and take a close look. Are the bolt threads caked with orange-brown buildup? Do the hinge plates have rough, flaky patches where the chrome plating has peeled away? That visible corrosion is actively generating the rust in toilet areas around the seat and bowl rim.
Here's the cleaning process, step by step:
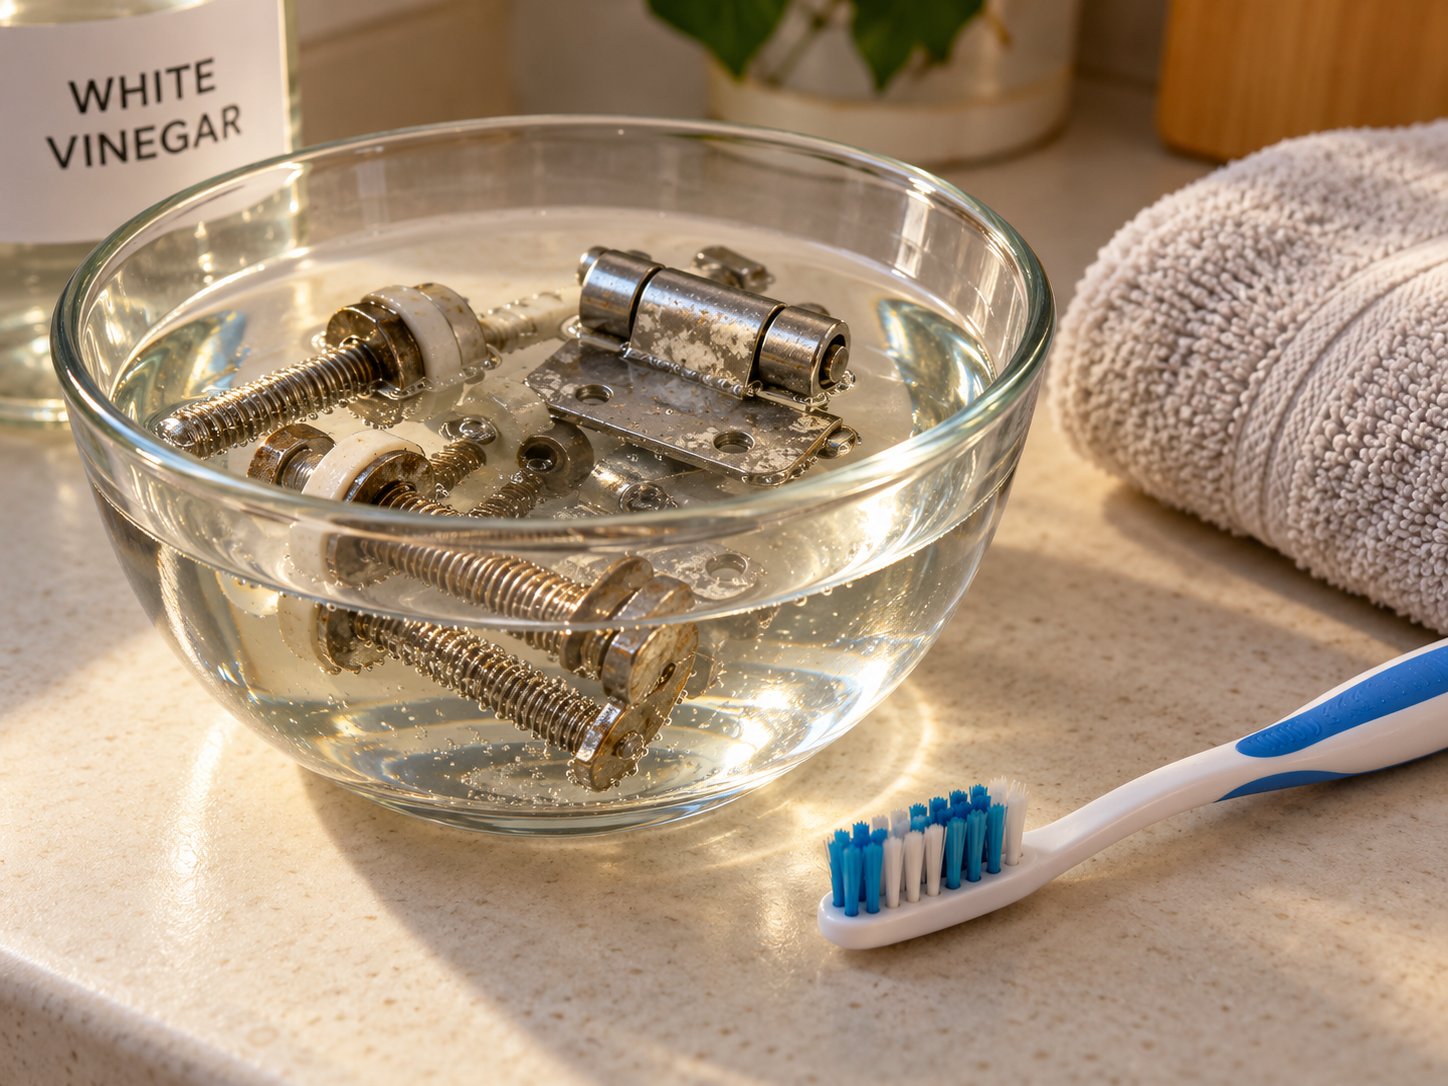
- Soak the metal parts in white vinegar. Place all corroded bolts, nuts, washers, and hinge plates into a small glass or plastic container. Pour in enough undiluted white vinegar to submerge everything completely. Let the hardware soak for one to two hours — longer if the corrosion is heavy. The acetic acid dissolves iron oxide gradually without damaging the underlying metal.
- Scrub with an old toothbrush. After soaking, pull each piece out and scrub it with a firm-bristled toothbrush. Focus on the bolt threads, the inside of wing nuts, and the flat contact surfaces of hinge plates where rust collects in crevices. You'll see orange residue lifting away as you work. For stubborn spots, dip the toothbrush back into the vinegar and keep scrubbing — the combination of chemical loosening and mechanical agitation handles most surface corrosion effectively.
- Rinse and dry thoroughly. Rinse every piece under clean running water to flush away dissolved rust particles and vinegar residue. This step matters more than it sounds — leftover vinegar left to air-dry can actually accelerate new corrosion. Pat each part completely dry with a clean towel, then let them air-dry on a rack for at least 30 minutes to ensure no moisture remains trapped in the bolt threads.
- Apply a protective coating. Once everything is bone-dry, spread a thin layer of petroleum jelly or food-grade silicone lubricant over all metal surfaces. Pay special attention to the bolt threads and the flat areas of the hinge plates that press against the seat and bowl rim. This barrier repels water and dramatically slows the oxidation process, buying months of protection between cleanings.
While the hardware is off, take a moment to wipe down the bolt holes on the seat itself and on the porcelain bowl rim. Use a vinegar-dampened cloth to remove any rust residue hiding in those recessed areas. These are the exact contact zones where hardware corrosion transfers onto the seat, and cleaning them now prevents old deposits from staining the freshly cleaned parts the moment you reinstall.
When to Replace Hinge Hardware Instead of Cleaning
Cleaning works well when the corrosion is surface-level — a layer of orange buildup over metal that's still structurally solid underneath. But how do you know when cleaning is no longer worth the effort?
Look for these signs after your vinegar soak and scrub:
- Pitting — Small craters or rough divots in the metal surface that remain after all the loose rust is removed. Pitting means the corrosion has eaten into the base metal itself, not just the surface plating. These tiny craters trap moisture and restart the rusting cycle almost immediately, no matter how much lubricant you apply.
- Thinning or crumbling bolt threads — If the bolt threads feel rough, uneven, or flake apart when you run a nut over them, the metal has lost structural integrity. A bolt in this condition won't hold the seat securely and can snap under normal use.
- Plating completely gone — Chrome-plated hardware relies on that thin outer layer to resist corrosion. Once the plating has peeled, chipped, or worn through to expose the bare zinc or steel underneath, re-cleaning only buys days before new rust appears. The protective layer is gone permanently.
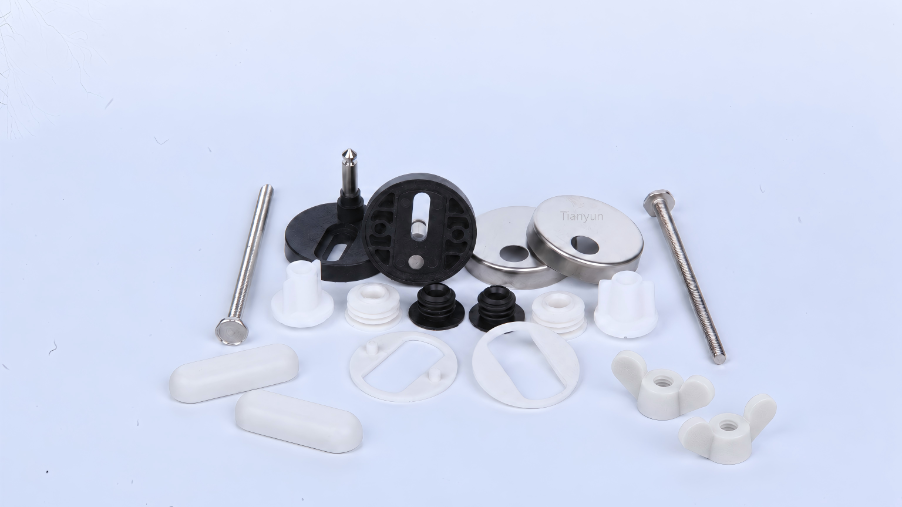
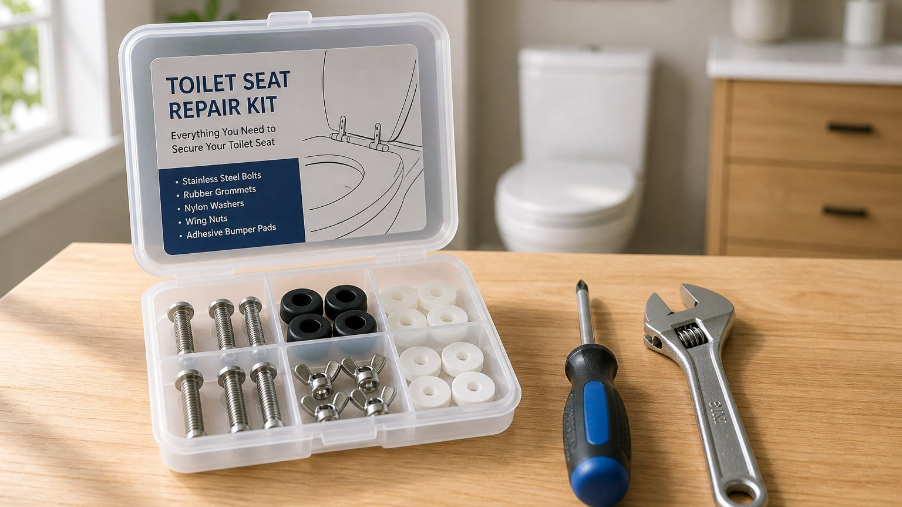
If any of these conditions apply, replacement is faster, cheaper, and far more effective than repeated cleaning cycles. Universal toilet seat hinge bolt kits are widely available at hardware stores and online for just a few dollars. When shopping for replacements, the material you choose makes all the difference — and this is where a simple upgrade can eliminate the rust problem for good.
Hinge Material Upgrades That Prevent Rust
The reason most toilet seat hinges rust isn't poor maintenance — it's poor material choice at the factory. Budget seats ship with chrome-plated zinc or mild steel hardware because it's inexpensive to manufacture. In a dry environment, that hardware lasts years. In the consistently humid, water-splashed environment around a toilet, it begins corroding in months. Upgrading to a rust-resistant material solves the problem at its root, and the options are surprisingly affordable.
| Material | Rust Resistance | Durability | Typical Use |
|---|---|---|---|
| Chrome-Plated Zinc / Mild Steel | Low — corrodes quickly once plating wears through | Moderate — structurally adequate but degrades in moisture | Budget and standard residential seats |
| Stainless Steel (304 grade) | High — resists corrosion even in constant moisture | Excellent — maintains strength and appearance long-term | Mid-range to premium seats, replacement hardware kits |
| Solid Brass | Very High — naturally corrosion-resistant, develops patina rather than rust | Excellent — extremely long-lasting in wet environments | Premium and specialty seats, commercial installations |
| Engineered Plastic / Nylon | Complete — cannot rust at all | Good — adequate for residential use, may flex under heavy loads | Modern quick-release and soft-close seat systems |
Stainless steel bolts and hinges hit the sweet spot for most homeowners — they're widely available as universal replacements, strong enough to hold any seat securely, and effectively immune to the kind of moisture exposure that destroys standard hardware. Solid brass is the premium option with even better corrosion resistance, though it typically costs more and may be harder to find in universal sizing.
Engineered plastic hinges deserve special attention because many modern soft-close seat designs already use them. Since plastic cannot oxidize, these hinge systems completely eliminate rust as a concern. If your current seat uses metal hinges and you're tired of dealing with how do you remove rust stains from toilets over and over, switching to a seat model with an all-plastic hinge mechanism is often the most permanent fix available.
Whichever material you choose, the installation process is straightforward — the bolt diameter and spacing are standardized across most residential toilets. Drop the new bolts through the same holes, tighten the nuts, and you're done. A five-minute hardware swap can save you from repeating the cleaning cycle every few months for the life of the seat.
Cleaning and upgrading the hardware addresses the most common rust source, but it's only one piece of a larger prevention strategy. Rust stains in toilet seat areas tend to come from multiple sources simultaneously — iron-rich water, corroding tank components, and everyday habits all play a role. A targeted prevention plan that covers each of these factors is what finally breaks the cycle for good.
Step 6 - Prevent Rust Stains From Coming Back
A freshly cleaned toilet seat feels like a small victory — until the same orange streaks reappear two weeks later. That frustrating cycle is exactly what happens when prevention doesn't follow the cleanup. Every cleaning method covered so far treats stains that already exist, but the real long-term solution targets the conditions that created them. Each rust source identified back in the diagnostic step has a specific, targeted countermeasure. Match the right prevention strategy to your root cause, and you can break the stain cycle permanently.
Filter Iron Out of Your Water Supply
If your diagnostic test revealed iron levels above 0.3 ppm in your household water, no amount of scrubbing will keep your fixtures stain-free for long. Every flush sends mineral-laden water splashing onto the seat, the lid underside, and the bumpers — redepositing iron oxide on surfaces you just finished cleaning. The only way to stop that delivery mechanism is to remove the iron before it ever reaches the toilet.
Two filtration options handle this effectively:
- Whole-house iron filter — Installed on the main water line where it enters the home, this system treats every drop of water flowing to every fixture. Oxidizing filters, greensand filters, and air injection systems are the most common types for residential well water with elevated iron. A whole-house system protects not just the toilet but also sinks, showers, and appliances. It's the most comprehensive solution, though it requires professional installation and periodic media replacement.
- Point-of-use sediment filter on the toilet supply line — A more targeted and budget-friendly option. An inline sediment filter attaches directly to the cold-water supply line behind the toilet. These compact filters catch particulate iron and rust flakes before they enter the tank. They won't remove dissolved (clear water) iron as effectively as a whole-house oxidizing system, but they dramatically reduce the rust sediment that settles in the tank and splashes onto the seat. Replacement cartridges typically last a few months depending on your water's iron load.
For homes where a filtration system isn't feasible right away, a simple behavioral habit helps: keep a small microfiber cloth near the toilet and give the seat surface and lid a quick wipe after flushing. This removes iron-rich water droplets before they have a chance to dry and oxidize into visible stains. It's not a permanent fix, but it buys significant time between deep cleanings. Addressing iron-rich water is also the most effective way to remove rust stains from toilet bowl interiors, since the same mineral deposits affect every surface the water contacts.
Protect Hinges With Lubricant and Material Upgrades
Even after you've cleaned or replaced corroded hinge hardware, ongoing moisture exposure means the clock starts ticking again immediately. Metal sitting in a damp environment will eventually oxidize — the question is how quickly. Two strategies slow that process down dramatically or eliminate it entirely.
Silicone-based lubricant application: Every three to four months, remove the seat or at minimum lift it to access the hinge contact points. Apply a thin layer of silicone-based lubricant or petroleum jelly to the bolt shafts, the underside of the hinge plates, and the areas where metal contacts the porcelain bowl rim. This transparent barrier film repels water and prevents oxygen from reaching the metal surface — the two ingredients rust requires to form. The application takes under a minute and extends hardware life significantly between replacements.
Material upgrades for long-term immunity: If you've already replaced corroded bolts once and don't want to repeat the process, switch to hardware made from stainless steel, solid brass, or engineered plastic. As outlined in the previous step's comparison table, plastic hinge systems offer complete rust immunity since they simply cannot oxidize. Many modern soft-close seats already use all-plastic hinge mechanisms, making this upgrade as easy as choosing the right seat model the next time you need a replacement. For anyone tired of dealing with recurring rust inside toilet bowl rims and on seat surfaces, a material upgrade is the most permanent available solution.
Stop Tank-Originating Rust at the Source
When your tank inspection revealed corroded bolts, an orange-tinted water line, or flaking internal components, every flush is essentially pumping rust-colored water through the system. Prevention here means replacing the corroded parts and, optionally, adding an in-tank treatment to inhibit future oxidation.
Start by swapping any metal tank-to-bowl bolts with brass or stainless-steel equivalents — the same hardware stores that carry seat hinge kits stock these. Replace a corroded metal flapper chain with a plastic or silicone alternative. If the fill valve or flush valve shows heavy corrosion, aftermarket plastic replacement valves are inexpensive and straightforward to install. Once the corroded parts are gone, the tank water runs clear, and the seat stays clean after every flush.
For an added layer of protection, drop-in rust prevention tablets designed specifically for toilet tanks can neutralize trace iron in the water before it causes staining. Look for tablets labeled safe for all internal components — some in-tank cleaners contain chemicals that degrade rubber flappers and gaskets over time. An alternative is a small in-tank filter cartridge that clips to the supply line inside the tank and captures particulate iron before it mixes with the flush water.
One additional habit eliminates a surprisingly common stain source: keep metal objects off the toilet lid and seat entirely. Bobby pins, razor blades, aerosol cans, scissors, and small metal containers can transfer rust onto a damp surface in just a single overnight sitting. A small tray or shelf near the toilet gives those items a home that doesn't double as a rust-transfer station.
A 30-Second Weekly Wipe-Down Routine
Prevention doesn't have to mean a major project every month. A brief weekly maintenance routine catches early deposits before they bond to the surface and keeps every rust zone on the seat in check. Think of it the way you'd think about wiping down a kitchen counter — thirty seconds of low-effort maintenance prevents hours of heavy scrubbing later. To iron stains in toilet bowl remove efforts and seat stain prevention alike, consistency beats intensity every time.
Here's a simple weekly checklist you can complete in under a minute:
- Dampen a soft cloth or paper towel with undiluted white vinegar.
- Wipe the seat underside from front to back, paying extra attention to the areas near the bolt holes and bumpers.
- Wipe both hinge contact points where metal meets the seat and bowl rim.
- Flip the lid and give the underside a single pass — this surface traps condensation and is a common early-warning zone for new deposits.
- Dry all wiped surfaces with a clean towel to remove lingering moisture.
- Once every three to four months, apply a fresh coat of silicone lubricant or petroleum jelly to any exposed metal hardware.
That's it. This routine takes less time than brushing your teeth, and it addresses every rust zone identified at the start of this guide. You're neutralizing trace iron deposits with mild acid, removing trapped moisture that accelerates corrosion, and maintaining the protective barrier on your hardware — all in a single quick pass.
Consistent prevention keeps a clean seat looking clean. But what happens when the stains are already too deep, the material is damaged, or the hardware is beyond saving? At a certain point, the math shifts — and knowing exactly when replacement makes more sense than another round of cleaning saves both time and money.
Step 7 - Know When to Replace Your Toilet Seat Instead
Here's a question worth asking honestly: how many cleaning cycles is one toilet seat worth? A replacement seat costs anywhere from ten to fifty dollars for most residential models. A bottle of vinegar, a box of baking soda, and a couple of hours of scrubbing might save that seat once or twice — but after the third or fourth round of how to get rust off toilet seat surfaces with diminishing results, the math starts working against you. The time, supplies, and effort invested in repeated restoration can easily exceed the cost of a fresh seat that arrives stain-free and fitted with rust-resistant hardware.
Unlike the toilet itself — a porcelain fixture that costs hundreds of dollars and requires a plumber to replace — a toilet seat is a quick-swap component designed to be replaced when it reaches the end of its useful life. Knowing where that tipping point falls saves you from pouring effort into a losing battle.
If a rust stain remains visible after two full treatment cycles using the correct method for your seat material, replacement is more practical and cost-effective than continued cleaning.
Three Signs It Is Time to Replace Instead of Clean
Not every rust stain justifies a new seat. Light discoloration that responds to a single vinegar soak? Keep cleaning — you'll get years more life from that seat. But certain conditions cross a clear line where restoration no longer makes sense. Watch for these three scenarios:
- Deep-set stains that survive two full treatment cycles — You've applied the appropriate cleaning method for your seat material, repeated it twice, and the discoloration hasn't meaningfully faded. This means the iron oxide has penetrated below the surface layer of the plastic, resin, or wood. No topical cleaner can extract staining that's embedded within the material itself. Continuing to scrub at this point risks surface damage — scratching, dulling, or weakening the finish — without any realistic chance of full stain removal. When you're struggling with how to get rid of rust stains in a toilet seat that simply won't respond, the stain is telling you it's permanent.
- Cracked, chipped, or warped seat material — Physical damage to the seat creates entry points where moisture and iron deposits penetrate far deeper than they would on an intact surface. A hairline crack in a plastic seat wicks water inward through capillary action. A chip in a thermoset finish exposes the raw material beneath. A warped wooden seat has almost certainly lost its lacquer seal along the flex points. Rust that reaches these compromised areas bonds with the underlying material and becomes structurally embedded. Even if you manage to lighten the visible stain on the surface, the damage underneath continues worsening with every flush cycle.
- Corroded metal hinges that have permanently stained the bolt-hole area — This is the most common replacement trigger, and it's one many people overlook. When chrome-plated zinc or steel bolts corrode over months or years, they leach iron oxide directly into the seat material at the bolt holes. The staining radiates outward from those contact points, often leaving dark brown or orange halos that no amount of cleaning can fully erase. You might successfully clean the hinge hardware itself, but the seat material around those holes has absorbed iron so deeply that the discoloration is permanent. If you've been wondering how do you get rust stains out of a toilet seat near the hinges and nothing works, this is almost certainly why.
Any one of these conditions is enough to justify replacement. If two or all three apply, there's no question — a new seat is the faster, cheaper, and better-looking solution.
Choosing Between PP and UF Replacement Seats
Deciding to replace is the easy part. Choosing the right replacement material is where a little knowledge pays off handsomely — especially if rust was the reason you're shopping in the first place. The two dominant materials in residential toilet seats are polypropylene (PP) and urea-formaldehyde thermoset resin (UF), and they offer meaningfully different experiences in terms of feel, durability, stain resistance, and price.
| Property | PP Seats | UF Seats |
|---|---|---|
| Weight | Lightweight — easy to remove for cleaning | Noticeably heavier — feels solid and substantial |
| Surface Finish | Matte to semi-gloss; smooth but not glossy | High-gloss; mimics the look and feel of porcelain |
| Scratch Resistance | Moderate — scratches more easily under abrasive tools | High — resists scratching and surface wear significantly better |
| Stain Resistance | Good — non-porous surface resists most staining with routine cleaning | Excellent — denser material makes stain penetration more difficult |
| Chemical Tolerance | Good — handles mild acids and bathroom cleaners well; harsh chemicals may discolor colored seats | Very Good — tolerates a wider range of cleaning products without damage |
| Durability | Moderate — may flex slightly under heavy loads; can crack under impact | High — rigid and impact-resistant; maintains shape over years of use |
| Price Range | Budget to mid-range — the most affordable option | Mid-range to premium — higher cost reflects superior materials and finish |
| Best For | Everyday residential use, rental properties, guest bathrooms | Primary bathrooms, homeowners wanting a premium feel, high-traffic households |
For homeowners who've been battling recurring rust and want to know how to remove rust stains from commode surfaces less often, UF thermoset seats offer a meaningful edge. Their denser, less porous surface resists iron oxide penetration better than standard PP plastic, which means light rust deposits are easier to wipe away during routine maintenance and less likely to become the deep-set stains that forced your last replacement. PP seats, on the other hand, win on affordability and practicality — if rust stains do eventually take hold again years down the road, replacing an inexpensive PP seat feels painless rather than frustrating.
Either material is a dramatic improvement over a damaged, deeply stained seat you've been trying to salvage. The more impactful choice, in many cases, is what's holding the seat onto the bowl.
Why Hinge Material Matters for Your Next Seat
If corroding metal hardware caused your rust problem in the first place, installing a brand-new seat with the same type of hardware is setting the clock back to zero on the exact same issue. This is the single most important detail when shopping for a replacement: look at the hinge system before you look at anything else.
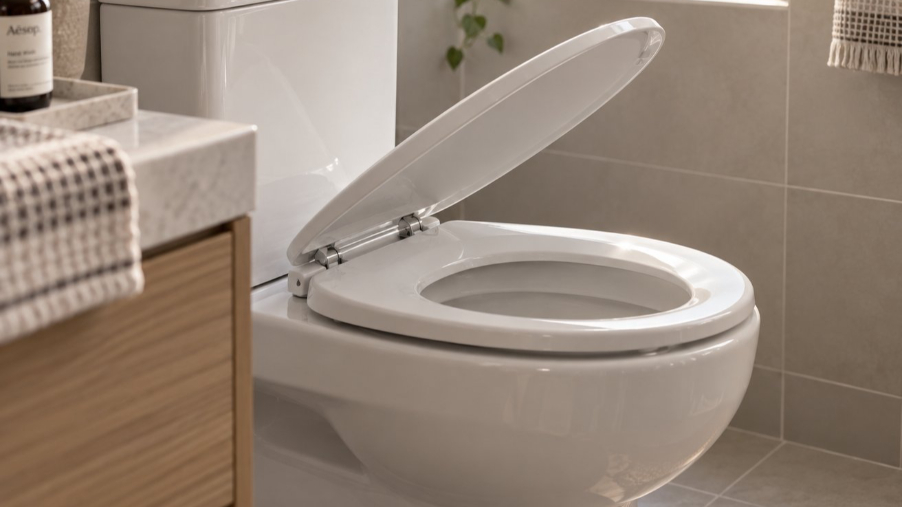
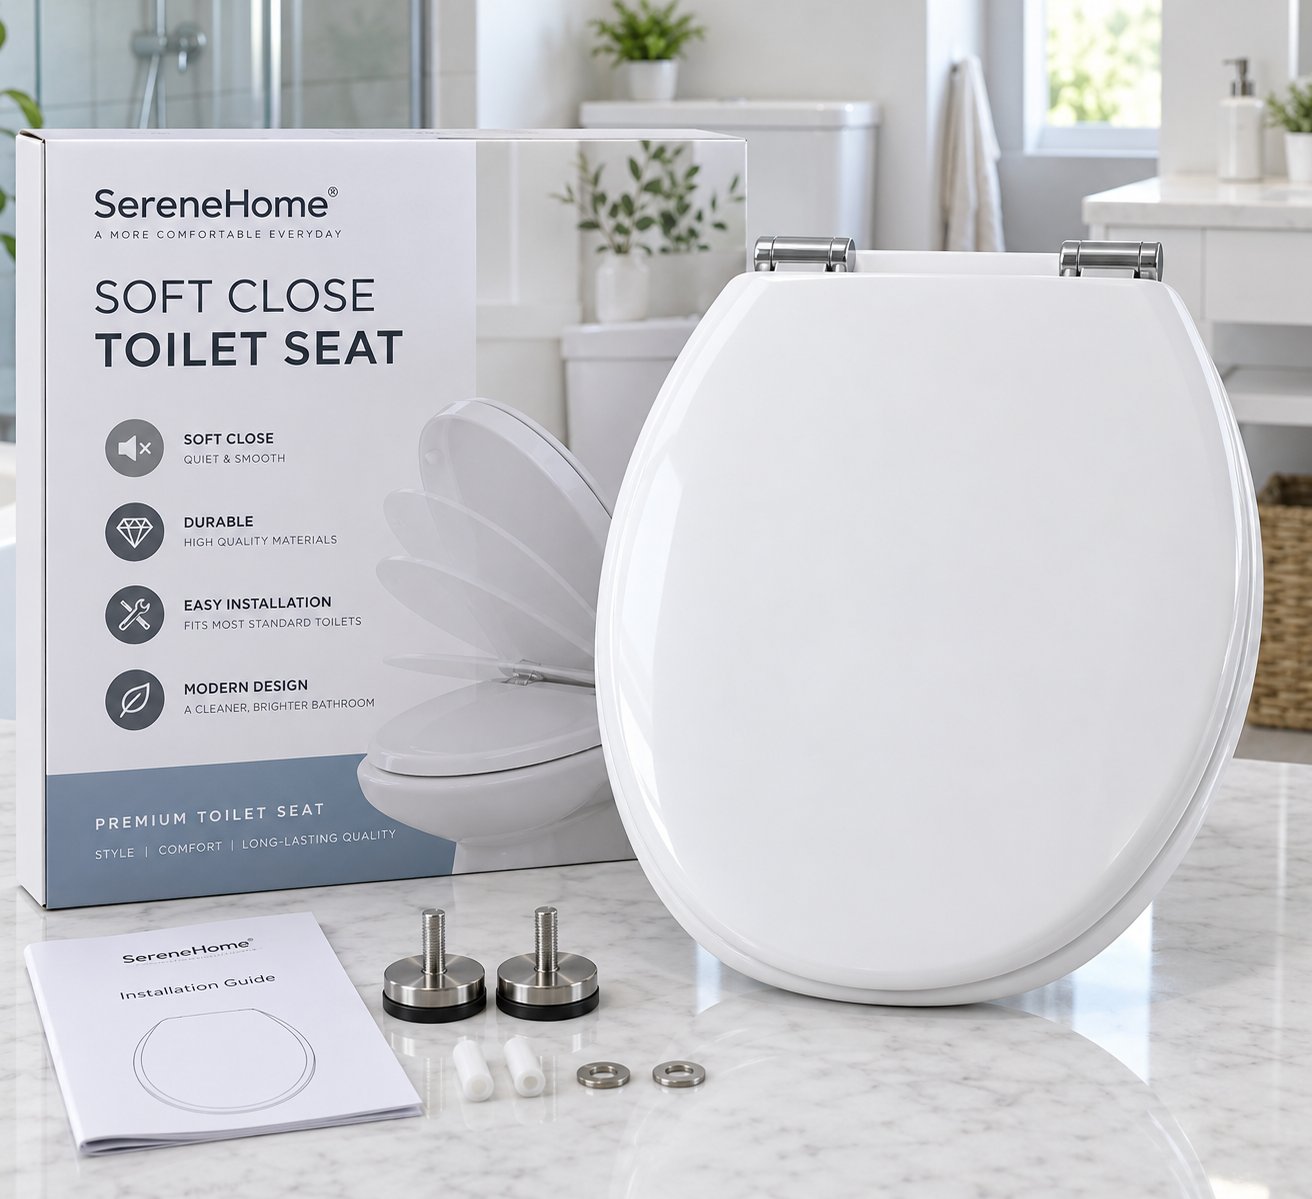
The ideal replacement seat uses hinges and mounting bolts made from stainless steel, solid brass, or engineered plastic. As covered in Step 5, these materials resist corrosion in the damp environment around a toilet far better than chrome-plated zinc or mild steel. Many modern soft-close seats already feature all-plastic hinge mechanisms — they can't oxidize, they don't leach iron onto the seat, and they eliminate the most common rust source entirely.
When evaluating replacement seats, check the product specifications or packaging for hinge material details. If the listing doesn't mention hinge material at all, that's often a signal that the hardware is standard chrome-plated steel — the same type that likely caused your current problem. Prioritize seats that explicitly list their hinge material, and choose stainless steel or plastic whenever possible.
For manufacturers, bathroom brands, or property managers sourcing seat and lid assemblies in larger quantities, material selection and hinge compatibility become even more critical at scale. Suppliers like Tianyun offer both PP and UF toilet seat cover collections with soft-close hinge matching and OEM customization support — a practical resource for teams evaluating material options, hinge systems, and bulk specifications for new construction or renovation projects.
Whether you're replacing a single seat in your home bathroom or outfitting an entire property, the combination of the right seat material and rust-proof hinge hardware is what finally closes the loop. You've learned how to clean rust from toilet seat surfaces at every severity level, how to treat each material type safely, and how to address every rust source from corroded bolts to iron-rich water. A replacement seat built with the right materials from the start means the next time you clean, it's a quick weekly wipe — not a rescue mission.
Frequently Asked Questions About Removing Rust Stains From Toilet Seats
1. Can I use a pumice stone to remove rust from a toilet seat?
No. Pumice stones are safe on glazed porcelain toilet bowls, but they will scratch, gouge, and permanently dull plastic, thermoset resin, wood, and vinyl toilet seat surfaces. Those scratches create micro-grooves that trap moisture and iron deposits, making future rust stains even worse. Stick with soft cloths, non-scratch sponges, or soft-bristle nylon brushes for any toilet seat material.
2. Why does my toilet seat keep getting rust stains even after I clean it?
Recurring rust stains almost always point to an unresolved source. The four most common culprits are corroding metal seat hinges and mounting bolts, iron-rich well water or aging galvanized pipes, rusting components inside the toilet tank, and metal objects left sitting on the damp seat or lid. Until you identify and fix the root cause — whether that means replacing corroded hardware, filtering your water, or swapping out tank internals — new stains will reappear within days or weeks of every cleaning.
3. What is the best homemade cleaner for rust on a plastic toilet seat?
White vinegar is the safest and most effective starting point. Saturate paper towels with undiluted white vinegar, lay them over the stain, and let them sit for 30 to 60 minutes. The mild acetic acid dissolves iron oxide without damaging plastic or polypropylene. For moderate stains that resist vinegar alone, a paste made from two tablespoons of baking soda mixed with fresh lemon juice provides gentle abrasive action combined with citric acid. Apply the paste, wait 15 minutes, and scrub lightly with a soft nylon brush.
4. How do I remove rust stains from a wooden toilet seat without damaging the finish?
Use a soft cloth dampened with a 50/50 mixture of white vinegar and water — wrung out until barely moist. Wipe the stain in gentle circular motions, then dry the area immediately with a separate clean towel. Never let liquid pool on a wood surface. For stubborn stains, apply a thin paste of cream of tartar and a few drops of 3% hydrogen peroxide for no more than five minutes, then wipe clean and dry. If the stain persists after two careful attempts, the iron has likely penetrated through the lacquer into the wood grain, and replacement is the more practical option.
5. When should I replace my toilet seat instead of trying to clean the rust?
Replacement makes more sense than continued cleaning in three situations: deep-set stains that remain visible after two full treatment cycles using the correct method for your seat material, cracked, chipped, or warped seat surfaces where rust has penetrated structural damage, and permanently stained bolt-hole areas caused by long-term hinge corrosion. When shopping for a replacement, prioritize seats with stainless steel or engineered plastic hinge systems to prevent the same rust problem from recurring. Both PP and UF thermoset seats are strong choices — suppliers like Tianyun offer collections with soft-close hinge matching and OEM support at tianyuntech.com for those evaluating material options at scale.
Apply This Insight to Your Project
Tell us what you are building and how the topic “How To Remove Rust Stains From Toilet Seat (Not The Bowl)” relates to your application. Our engineering team can help evaluate the next step.