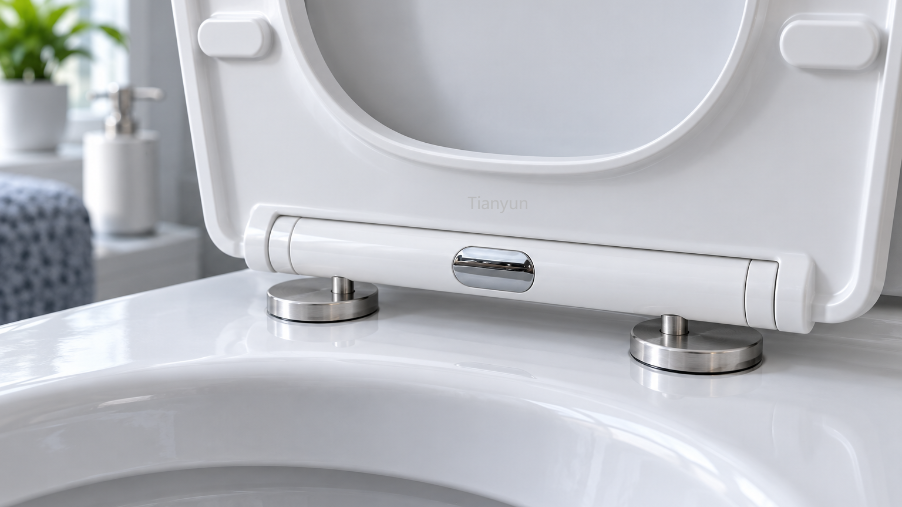
Understanding Plastic Toilet Seat Cover Hinges and Their Parts
You sit down and the whole seat shifts sideways. Or the lid crashes shut loud enough to wake the house. Something is clearly broken, but when you try to describe the problem or search for a replacement part, you realize you cannot even name the piece that failed. Is it a bolt? A pin? That little plastic cylinder at the back? Most people have never given their toilet seat hinges a second thought, and that knowledge gap is exactly what turns a five-minute fix into a frustrating guessing game at the hardware store.
Understanding what these components are, how they fit together, and why they fail puts you in control of the repair before you spend a dollar.
What Are Plastic Toilet Seat Cover Hinges
Plastic toilet seat cover hinges are the mechanical pivot assemblies that connect a rigid toilet seat and lid to the ceramic bowl, allowing both pieces to rotate open and closed. Molded from durable polymers such as polypropylene or nylon, these hinge assemblies bolt through the mounting holes at the rear of the bowl rim and provide the pivot point around which the seat ring and lid swing. When someone refers to a "toilet seat hinge," they are describing the entire cluster of hardware at the back of the seat, not just a single part. It is worth noting that "cover" in this context means the rigid toilet lid that folds over the seat ring, not a disposable paper or fabric seat cover you might find in a public restroom.
Anatomy of a Hinge Assembly
A single toilet seat hinge looks simple from the outside, but it actually contains several purpose-built components working together. Here is what you will find when you break one down:
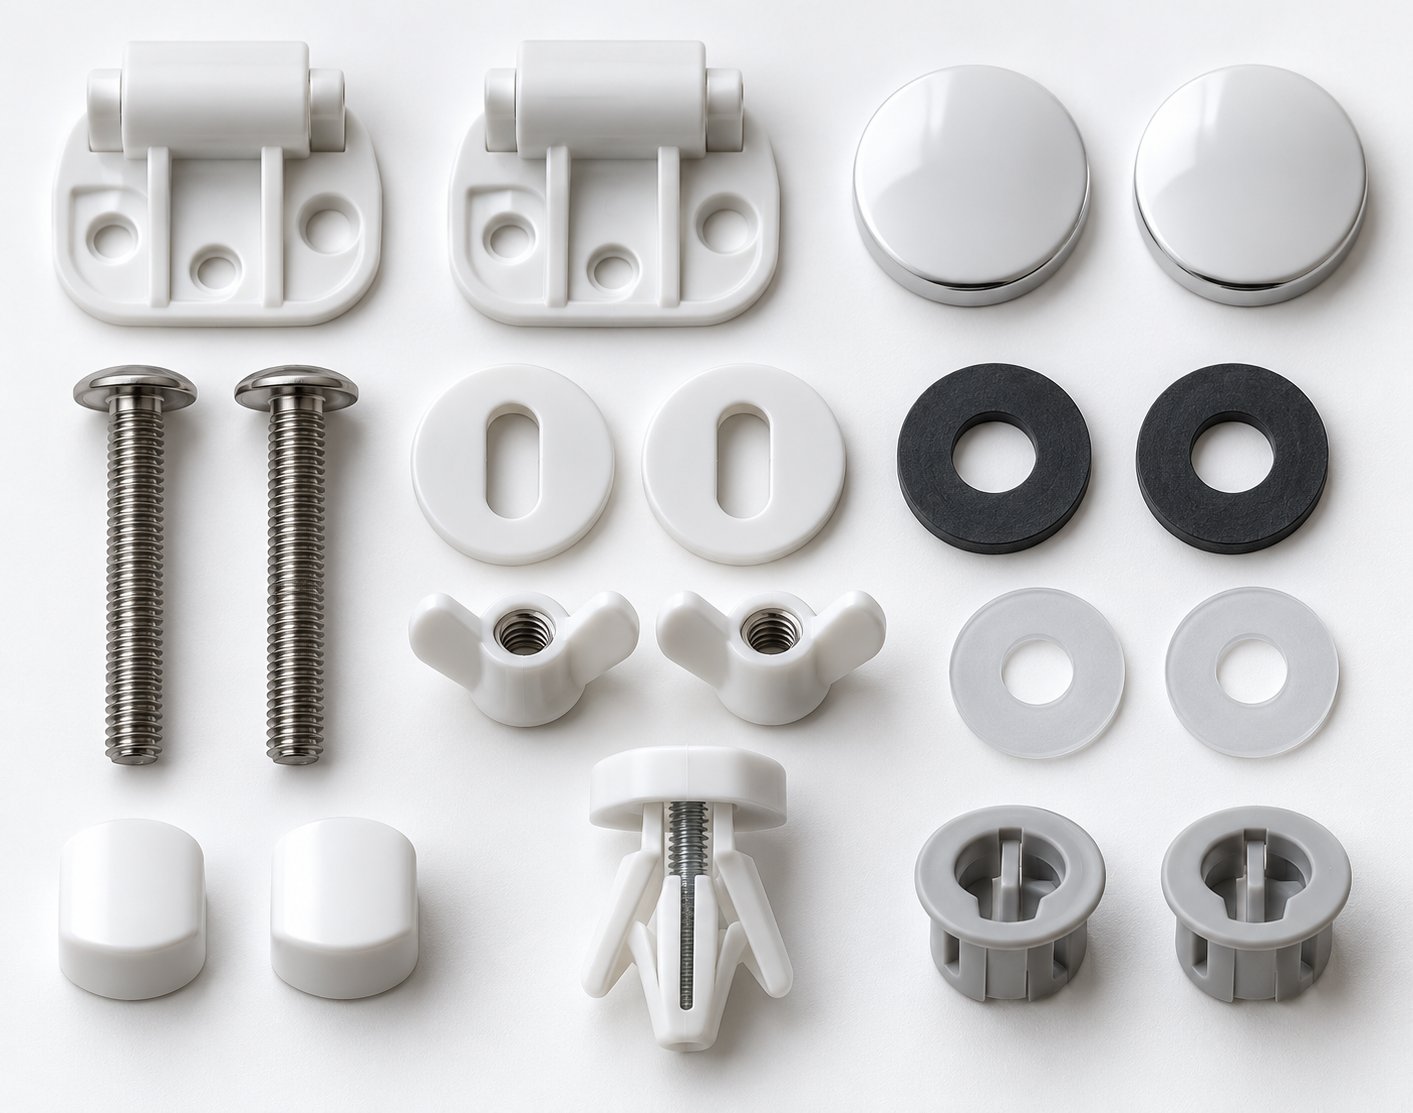
- Mounting plate (top plate or bracket): The flat piece that sits on top of the bowl rim and anchors the entire hinge to the porcelain. It often features elongated slots rather than fixed holes, giving you lateral adjustment room to center the seat.
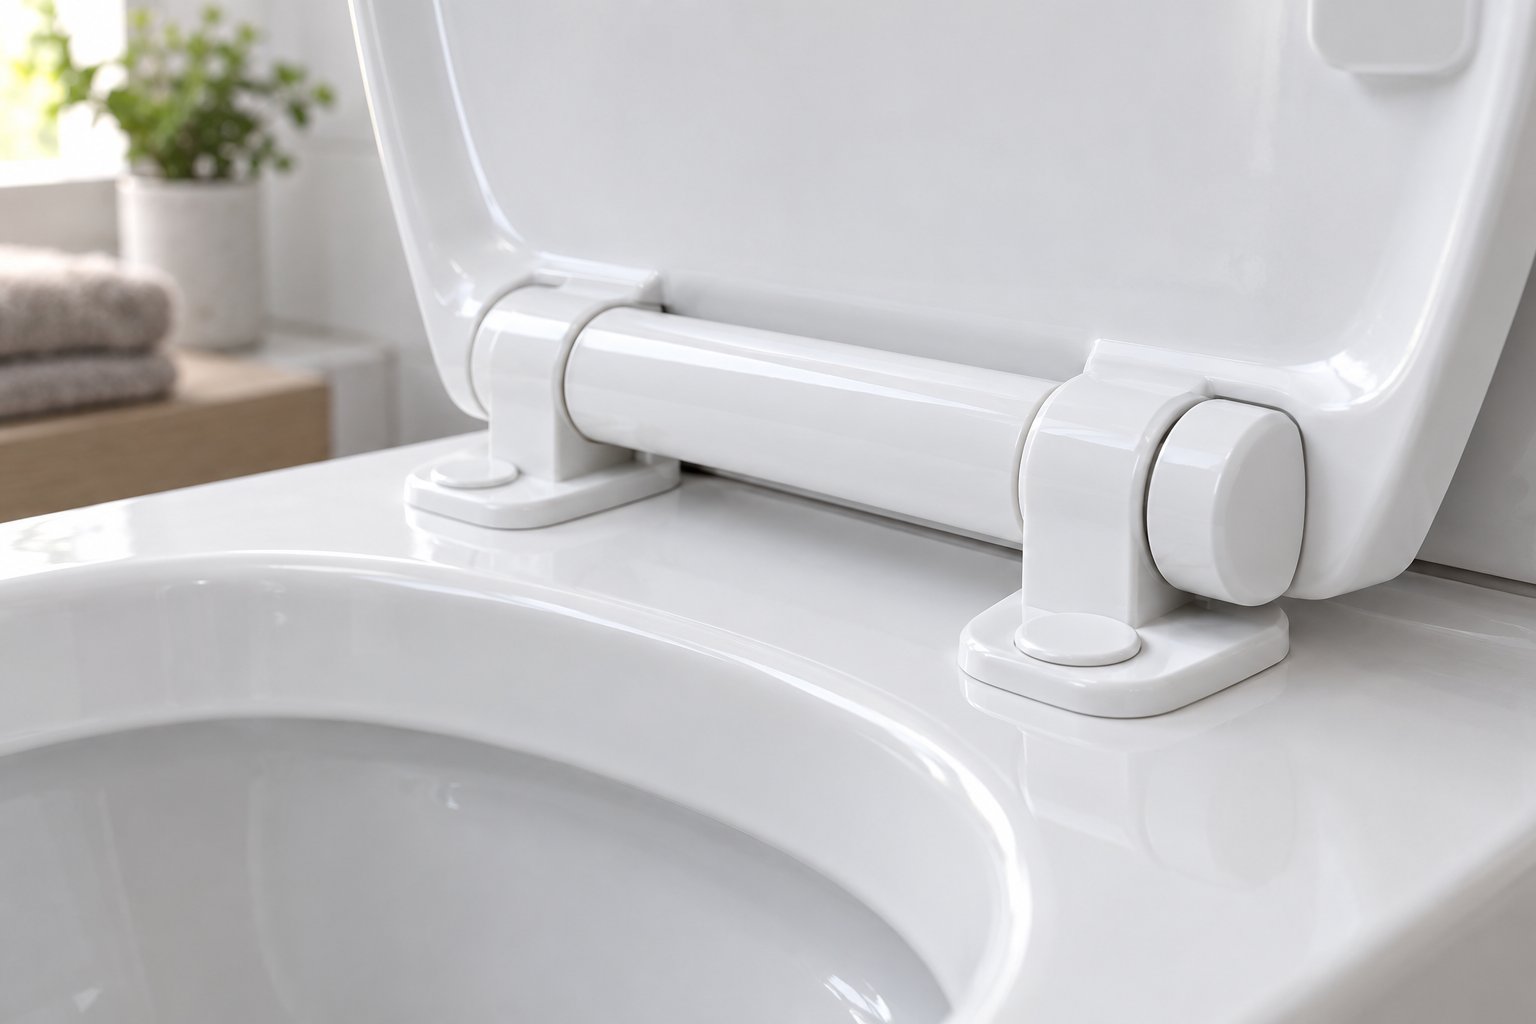
- Hinge barrel (pivot cylinder): The cylindrical housing where the actual rotation happens. The barrel connects the mounting plate to the seat and lid, acting as the pivot axis.
- Hinge pin (pivot pin): A rod, either metal or plastic, that passes through the barrel and allows the seat and lid to swing. On soft-close models, the pin works alongside an internal damper mechanism to control closing speed.
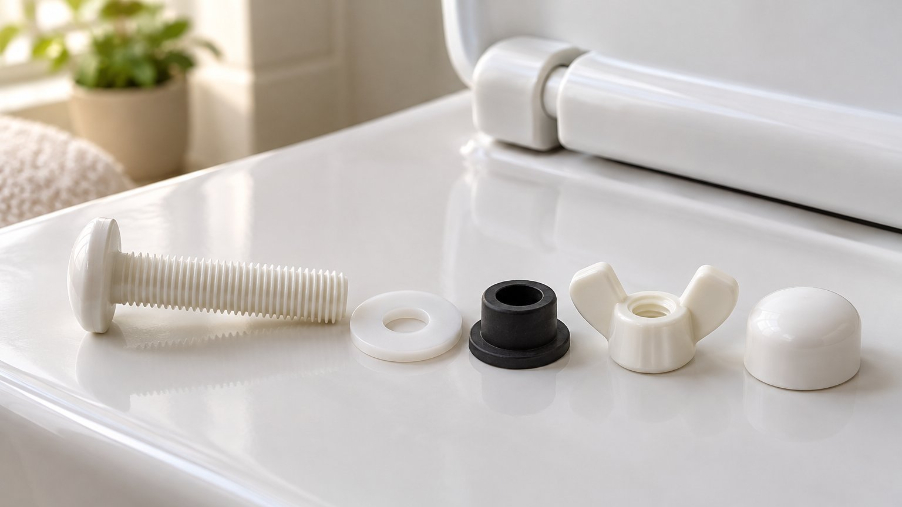
- Bolts or threaded rods: These drop through the mounting plate and pass down through the bolt holes in the bowl rim. The center-to-center distance between them, often called the "bolt spread," is the single most important measurement for compatibility.
- Washers: Rubber or plastic discs placed between the bolt head and the mounting plate, or between the bowl and the nut, to distribute clamping pressure evenly and protect the porcelain from cracking.
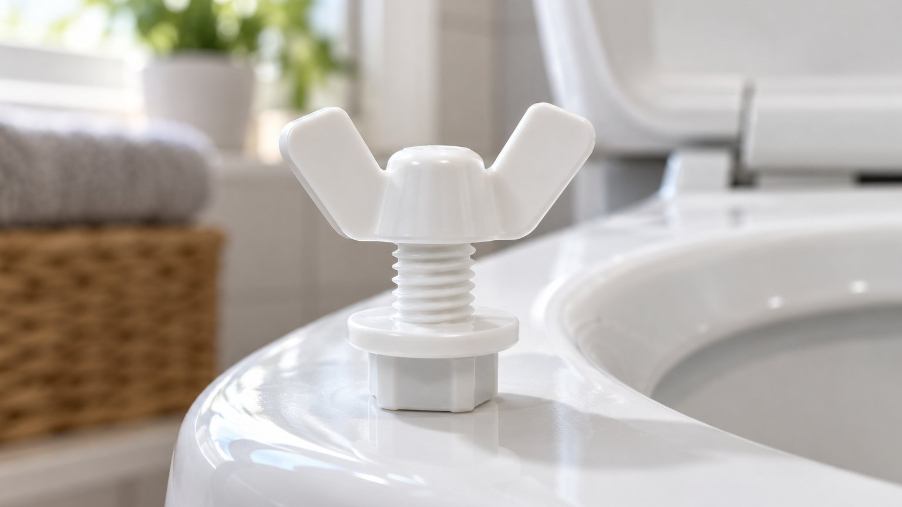
- Wing nuts or tightening caps: Threaded fasteners that secure the bolts from underneath the bowl rim on bottom-fix systems, or expanding anchors that grip inside the bolt holes on top-fix designs.
- Decorative cover caps: Small plastic lids that snap or hinge over the exposed bolt heads on top of the bowl rim, giving the installation a clean, finished appearance and keeping dust and moisture off the hardware.
Each of these commode seat hinges components has a specific failure mode. A cracked mounting plate causes wobble. A worn barrel lets the lid flop. Stripped bolt threads mean nothing stays tight. Knowing which piece does what is the fastest path from "something feels wrong" to "I know exactly which part to order."
Why Plastic Hinges Are the Most Common Type
Walk into any home improvement store and pick up a residential toilet seat. Chances are strong that the hinge assembly is entirely plastic. There are practical reasons for that dominance. Plastic resists moisture-related corrosion completely, a significant advantage in a bathroom environment where humidity, splashing water, and cleaning chemicals are constant. Metal fasteners in the same setting can rust, seize, or leave orange stains on the porcelain within a few years. Plastic hinges also cost less to manufacture and stock as replacement parts, keeping the overall price of a standard seat accessible. And for everyday residential use, a well-made polymer hinge provides more than enough strength to handle the repeated open-close cycles a household demands.
That said, "most common" does not mean "only option" or "always the best choice." Plastic toilet seat cover hinges have real limitations, from cracking under heavy lateral stress to brittleness caused by harsh cleaners. The real question is not whether plastic hinges are good enough, but whether the specific hinge on your toilet matches your bowl, your usage pattern, and your expectations for longevity. Those variables are where the differences between hinge types, materials, and mounting methods start to matter.
Types of Plastic Toilet Seat Hinges Explained
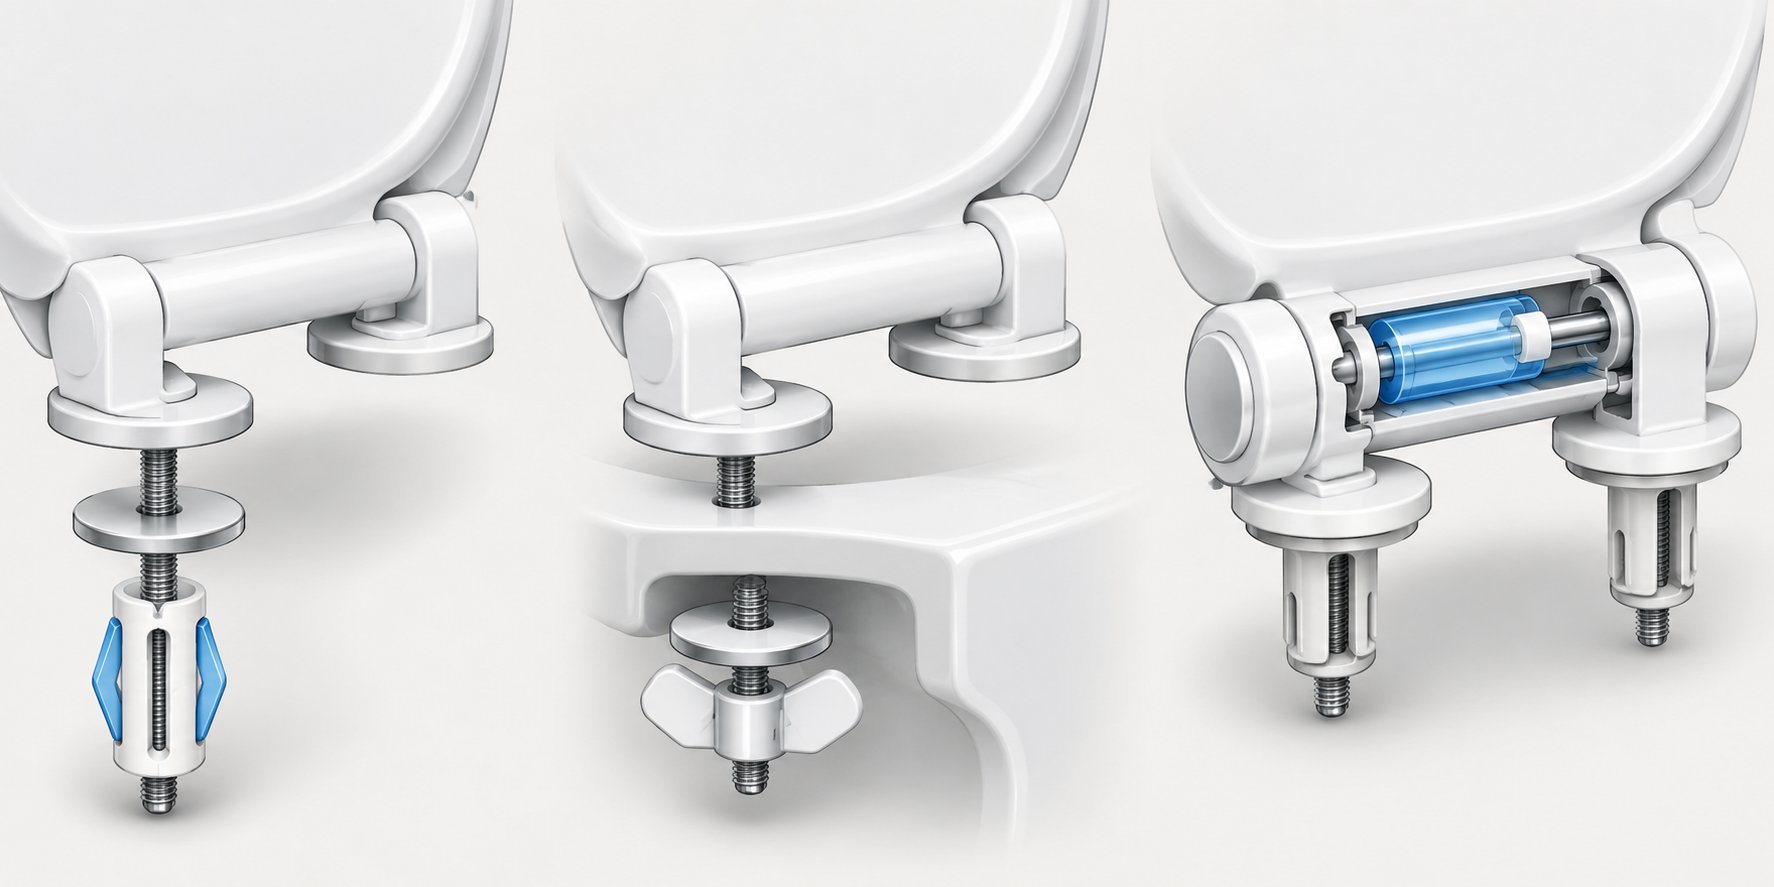
Every plastic hinge on a toilet seat can be described along three independent dimensions: how it mounts to the bowl, how it controls the closing motion, and how easily the seat detaches for cleaning. Mix and match those three traits and you get a surprisingly wide range of hinge configurations, which explains why picking a replacement feels so confusing. A hinged seat that looks right on screen may bolt on completely differently from the one you just removed.
Breaking these dimensions down individually is the fastest way to classify whatever is sitting on your toilet right now and to make sure a toilet seat hinge replacement actually fits.
Top-Fix Versus Bottom-Fix Mounting
The mounting method describes how the hinge assembly anchors itself to the porcelain bowl, and it is the first thing to identify before shopping for parts.
Top-fix (top-mount) hinges tighten entirely from above the bowl rim. You drop the bolts through the hinge plate and into the bowl's mounting holes, then turn a twist cap toilet seat hinge mechanism or a similar expanding anchor from the top side. Beneath the rim, a rubber or plastic sleeve expands outward to grip the inside walls of the bolt hole. Because you never need to reach underneath the bowl, top-fix systems are the go-to choice for back-to-wall and wall-hung toilets where the underside is enclosed or hard to access.
Bottom-fix (bottom-mount) hinges follow the more traditional route. Bolts feed down through the hinge plate and the bowl holes, and you secure them from underneath with wing nuts or hex nuts. This setup is common on open-back, close-coupled toilets where you can easily reach behind and below the bowl. Bottom-fix mounting tends to feel more familiar to DIYers because the tightening action is the same as any standard nut-and-bolt connection.
A practical tip: if you reach behind your toilet and feel a bolt end with a nut threaded onto it, you have a bottom-fix setup. If there is nothing protruding underneath, the seat almost certainly uses a top-fix system. Confirming this before you order saves a return trip to the store.
Soft-Close Versus Standard Hinges
The closing mechanism is the second dimension, and it directly affects everyday comfort.
Standard hinges are purely mechanical pivots. Gravity does all the work when the lid or seat drops, and the only thing controlling speed is your hand. Let go too soon and you get that familiar slam, loud enough to wake someone two rooms away.
Soft-close hinges solve that problem with a built-in damper, typically a small rotary damper integrated inside or beside the hinge barrel. When the lid begins to fall, the damper's internal structures and damping fluid create controlled resistance that absorbs kinetic energy and slows the descent. The result is a quiet, gentle close every time, no finger-catching and no midnight noise.
You'll notice the difference immediately, but there is a trade-off worth knowing. Because the damper is often molded directly into the hinge body, replacing a worn-out soft-close mechanism usually means swapping the entire hinge assembly rather than just a single internal part. Some higher-end designs do use modular dampers that can be individually replaced, but they are the exception. When shopping for a toilet seat hinge replacement on a soft-close model, matching the damper specification, including torque rating and rotation angle, is essential to restoring the original slow-close function.
Quick-Release Versus Fixed Hinges
The third dimension is the release mechanism, and it determines how easy it is to remove the seat for deep cleaning.
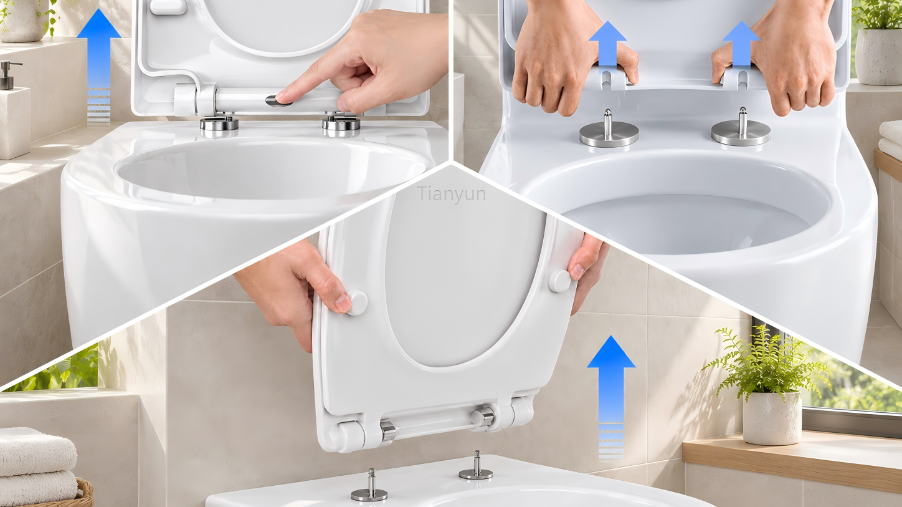
Quick-release hinges let you lift the entire seat-and-lid assembly straight off the hinge posts without any tools. Depending on the design, you press one button, two buttons, or pull a release tab, and the seat detaches from the mounting bases that stay bolted to the bowl. This makes it simple to clean around the hinge area and the rear of the bowl rim, spots where grime builds up fast and a fixed seat blocks access.
Fixed hinges are permanently connected to the seat. The only way to remove the seat is to loosen or fully remove the mounting bolts. That is not a problem for an occasional deep clean, but it does add time and effort compared to a quick-release system.
Keep in mind that these three dimensions are independent. A single hinge can be top-fix, soft-close, and quick-release all at once, or it can be bottom-fix, standard, and fixed. The table below maps each dimension against its typical use cases and the quickest way to identify what you have.
| Dimension | Option A | Option B | Typical Use Case | How to Identify |
|---|---|---|---|---|
| Mounting Style | Top-fix | Bottom-fix | Top-fix for wall-hung and back-to-wall toilets; bottom-fix for open-back, close-coupled toilets | Check beneath the bowl rim for exposed bolt ends and nuts (bottom-fix) or a smooth underside (top-fix) |
| Closing Type | Soft-close | Standard | Soft-close for quiet households, families with children, and premium seats; standard for budget replacements | Gently release the lid from a 45-degree angle. A slow, controlled descent indicates a damper mechanism; a free fall means standard |
| Release Type | Quick-release | Fixed | Quick-release for easy cleaning and hygiene-focused households; fixed for simple, no-frills installations | Look for push buttons or release tabs at the hinge posts. If none exist and the seat cannot lift off freely, the hinge is fixed |
Imagine you have a toilet seat with metal hinges in mind as a future upgrade. Even in that case, these same three classification dimensions apply. A metal hinge can be top-fix or bottom-fix, soft-close or standard, quick-release or fixed, just like its plastic counterpart. The framework stays the same; only the material changes. And that material choice, plastic versus metal, carries its own set of trade-offs that directly influence durability, cost, and compatibility.
Plastic Versus Metal Toilet Seat Hinges
Plastic or metal? It sounds like a straightforward choice, but the answer depends on where the toilet sits, who uses it, and how much maintenance you are willing to tolerate. Both materials work. Both eventually fail. The difference lies in how they fail, what they cost along the way, and whether the trade-offs line up with your actual bathroom conditions.
Rather than defaulting to the assumption that metal is always stronger or that plastic is always cheaper, let's break down what each toilet lid hinge material genuinely delivers and where it falls short.
Durability and Corrosion Resistance
Bathrooms are tough on hardware. Humidity hovers near saturation every time someone showers, cleaning products introduce acids and chlorine, and water splashes onto every exposed surface. That environment is where the plastic-versus-metal debate gets interesting.
Plastic hinges are effectively immune to moisture-related corrosion. Polypropylene and nylon do not rust, will not tarnish, and never leave orange stain rings on porcelain. They also resist most household bathroom cleaners without surface degradation. The trade-off is mechanical. Under repeated heavy lateral stress, such as someone leaning sideways against an open lid or a child swinging on the seat, plastic can crack, deform, or develop stress fractures at the mounting plate or hinge barrel. Prolonged exposure to bleach-heavy cleaners can also accelerate brittleness, weakening the polymer structure over time.
Metal hinges, typically made from stainless steel, zinc alloy, or chrome-plated brass, deliver superior rigidity and mechanical strength. They resist deformation far better than plastic and can handle higher loads without flexing. The downside? In a humid bathroom environment, even well-finished metal can corrode, tarnish, or seize at pivot points if the protective coating wears through. Chrome plating chips. Zinc alloy develops white oxidation. Stainless steel fares best overall, but lower grades can still show surface rust in consistently wet conditions. When a metal hinge barrel seizes, the smooth open-close motion disappears and the entire assembly may need replacement, not unlike what happens when a plastic barrel cracks.
In short, plastic fails by cracking; metal fails by corroding. Your bathroom's specific moisture levels and usage patterns determine which failure mode you are more likely to encounter.
Cost and Availability Differences
Walk into a home improvement store looking for a replacement toilet lid hinge and you will find the plastic options first, both in shelf space and in price. Plastic hinge assemblies are generally less expensive to manufacture and more widely stocked as standalone replacement parts. Many universal mounting kits fall in the budget-friendly range, making a quick swap painless on the wallet.
Metal-hinge toilet seats, on the other hand, typically occupy a higher price tier. The hinge hardware itself costs more, and replacement parts can be harder to source because many metal-hinge designs are brand-specific rather than universal. If a single component fails, you may need to order directly from the manufacturer or purchase a complete hinge seat assembly rather than just a bolt or pin. That added sourcing effort and cost is something to weigh before committing to a metal-hinge upgrade.
There is also a practical availability gap worth noting. Because plastic hinges dominate the residential market, aftermarket and universal-fit options are plentiful. Metal replacement toilet lid hinges tend to require more precise matching, both in dimensions and in finish, which narrows your options and may extend your wait if the part ships from a specialty supplier.
When Each Material Is the Better Choice
Neither material wins across every category. The table below compares plastic and metal hinges side by side across the factors that matter most when you are deciding which hinge seat configuration to buy or replace.
| Factor | Plastic Hinges | Metal Hinges |
|---|---|---|
| Corrosion Resistance | Excellent; immune to rust and moisture damage | Varies; stainless steel resists well, but zinc alloy and chrome-plated brass can corrode in high-humidity environments |
| Mechanical Strength | Adequate for standard residential use; may crack under heavy lateral stress or impact | Superior rigidity; handles higher loads and resists deformation |
| Weight Capacity Perception | Perceived as lighter-duty; performs well within normal use ranges | Perceived as heavy-duty; preferred in high-traffic or commercial settings |
| Cost Range | Lower; budget-friendly replacement kits widely available | Higher; brand-specific parts may add to cost |
| Ease of Replacement | Easy; universal-fit options abundant in retail and online channels | Moderate; may require manufacturer-specific sourcing |
| Typical Product Tier | Standard to mid-range residential seats | Mid-range to premium residential and commercial seats |
So what does this mean for your decision? If you have a standard residential bathroom, moderate daily use, and you want hassle-free replacement down the road, plastic toilet seat cover hinges are the practical, reliable choice. They handle the environment well, cost less, and finding compatible parts is rarely a challenge. Most households never need anything more.
Metal hinges make more sense in commercial restrooms with heavy foot traffic, in households where durability under above-average stress is a priority, or where the visual finish of chrome or brushed stainless steel matches a specific design aesthetic. Just keep in mind that the premium look comes with a premium maintenance reality: you will need to watch for corrosion and accept that replacement parts may take longer to track down.
Whichever material you lean toward, the hinge still has to physically fit your toilet. And that compatibility question, involving bowl shape, bolt-hole spacing, and brand-specific engineering, is where many replacement purchases go wrong.
Hinge Compatibility with Bowl Shapes and Brands
You found a hinge that matches your mounting style, closing mechanism, and material preference. You order it, open the box, line it up with the bowl, and the bolts do not reach the holes. Or they drop through just fine but sit at an angle because the spacing is off by half an inch. Compatibility failures like these are the single biggest reason people end up returning toilet lid hinges, and the root cause is almost always a measurement that was skipped or assumed.
Three variables determine whether a replacement hinge will actually fit your toilet: the bowl shape, the bolt-hole spacing, and whether the hinge system is universal or engineered for a specific brand. Get all three right and the installation is painless. Miss even one and the part goes back in the box.
Round Versus Elongated Bowl Compatibility
Toilet bowls in North American homes come in two primary shapes: round and elongated. A round bowl measures roughly 16.5 inches from the bolt holes to the front rim, while an elongated bowl stretches to about 18.5 inches. The seat itself must match this shape for a proper fit, which is common knowledge. What catches people off guard is the hinge end of the equation.
Here is the good news: hinge bolt-hole spacing is mostly standardized across both round and elongated bowls. In North America, a center-to-center distance of approximately 5.5 inches (around 140 mm) is the most common bolt spread. That means the hinge mechanism itself is often physically interchangeable between round and elongated models, because the mounting holes at the rear of the bowl sit in roughly the same position regardless of how far the front rim extends.
The catch? Some hinge designs are sold exclusively as part of shape-specific seat assemblies. You cannot always buy the hinge separately and pair it with any seat you like. And even when the bolt spread matches, the hinge plate width, the angle of the barrel, or the position of the pivot point may differ slightly between round and elongated versions from the same manufacturer. The safest approach is to confirm two things before purchasing: that the bolt-hole distance matches your bowl and that the seat shape packaged with the hinge corresponds to your bowl profile.
Universal Versus Manufacturer-Specific Hinges
Walk into any hardware store and you will see replacement hinges labeled "universal fit." That label is helpful but slightly misleading. Universal hinges use adjustable mounting slots or multiple bolt-hole positions to accommodate a range of fixtures, often covering bolt spreads from roughly 120 mm to 180 mm. They are designed to work across many toilet models without requiring an exact dimensional match. For most standard residential bowls, a quality universal hinge kit will get the job done.
Manufacturer-specific hinges take the opposite approach. Brands like Church, American Standard, and others engineer their hinges for exact dimensional fit with a particular seat model. The bolt diameter, thread pitch, hinge post height, and barrel alignment are all calibrated to match a single product line. If you are replacing the hinge on a Church toilet seat, for example, searching for the exact Church toilet seat hinges part number from marketplace listings or the manufacturer's catalog is the most reliable path to a drop-in replacement. The same principle applies to Ace toilet seat hinge kits and other branded hardware: brand-specific part numbers exist precisely to eliminate the guesswork that universal kits sometimes leave behind.
So which route should you take? If your toilet and seat are from a well-known brand and the model number is still readable, start with OEM-specific parts. If the brand is unknown, the seat is generic, or you simply want the widest compatibility net, a universal kit with adjustable slots is the practical choice. Either way, measuring your bolt-hole spread before ordering is non-negotiable.
How to Measure Bolt-Hole Spread and Thread Size
Accurate measurements take less than five minutes and save hours of frustration. Grab a tape measure, a flashlight, and your phone's camera, and work through the following checklist before you shop for any replacement hardware.
- Bolt spread (center-to-center distance): Measure from the center of the left mounting hole to the center of the right mounting hole on the ceramic bowl rim. Do not measure from the outer edges of the holes; that will give you a number roughly one hole-diameter too large. In most North American toilets, you should land close to 5.5 inches (140 mm), but some models vary and certain wide-spread designs use spacing as large as 10 inches (255 mm).
- Bolt diameter: Measure the width of the existing bolt shaft, or the diameter of the mounting hole if the old bolts are already removed. Common residential sizes range from roughly 1/4 inch to 3/8 inch (6 mm to 10 mm). A bolt that is too thin will rattle in an oversized hole; one that is too thick will not pass through at all.
- Thread pitch (metric versus imperial): If the existing nuts and bolts are still intact, check whether the threads are metric or imperial. Most North American seats use imperial threads, but imported fixtures and European-designed toilets may use metric hardware. Mismatched thread pitch means the nut will not engage the bolt, no matter how close the diameter looks.
- Hinge post height: On quick-release systems, measure the height of the hinge post that remains bolted to the bowl when the seat lifts off. A replacement seat must have receivers that match this post height and diameter, or the quick-release function will not engage properly.
- Mounting style (top-fix or bottom-fix): Record whether your current setup secures from above or below the bowl rim. A top-fix hinge kit will not work on a toilet that requires bottom-fix hardware, and vice versa, regardless of whether every other measurement is a perfect match.
Snap a photo of the old hinge assembly before you remove it, ideally with a ruler or coin placed next to it for scale. That image becomes your reference when comparing product specs online or asking for help at a plumbing supply counter. Retailers and online sellers increasingly list bolt spread, bolt diameter, and mounting type in their product descriptions, so having your numbers ready turns a frustrating search into a quick filter-and-match exercise.
With these measurements in hand, the next step is the physical work itself: pulling out the old hardware and bolting in the new assembly without cracking porcelain, stripping threads, or ending up with a seat that drifts to one side every time someone sits down.
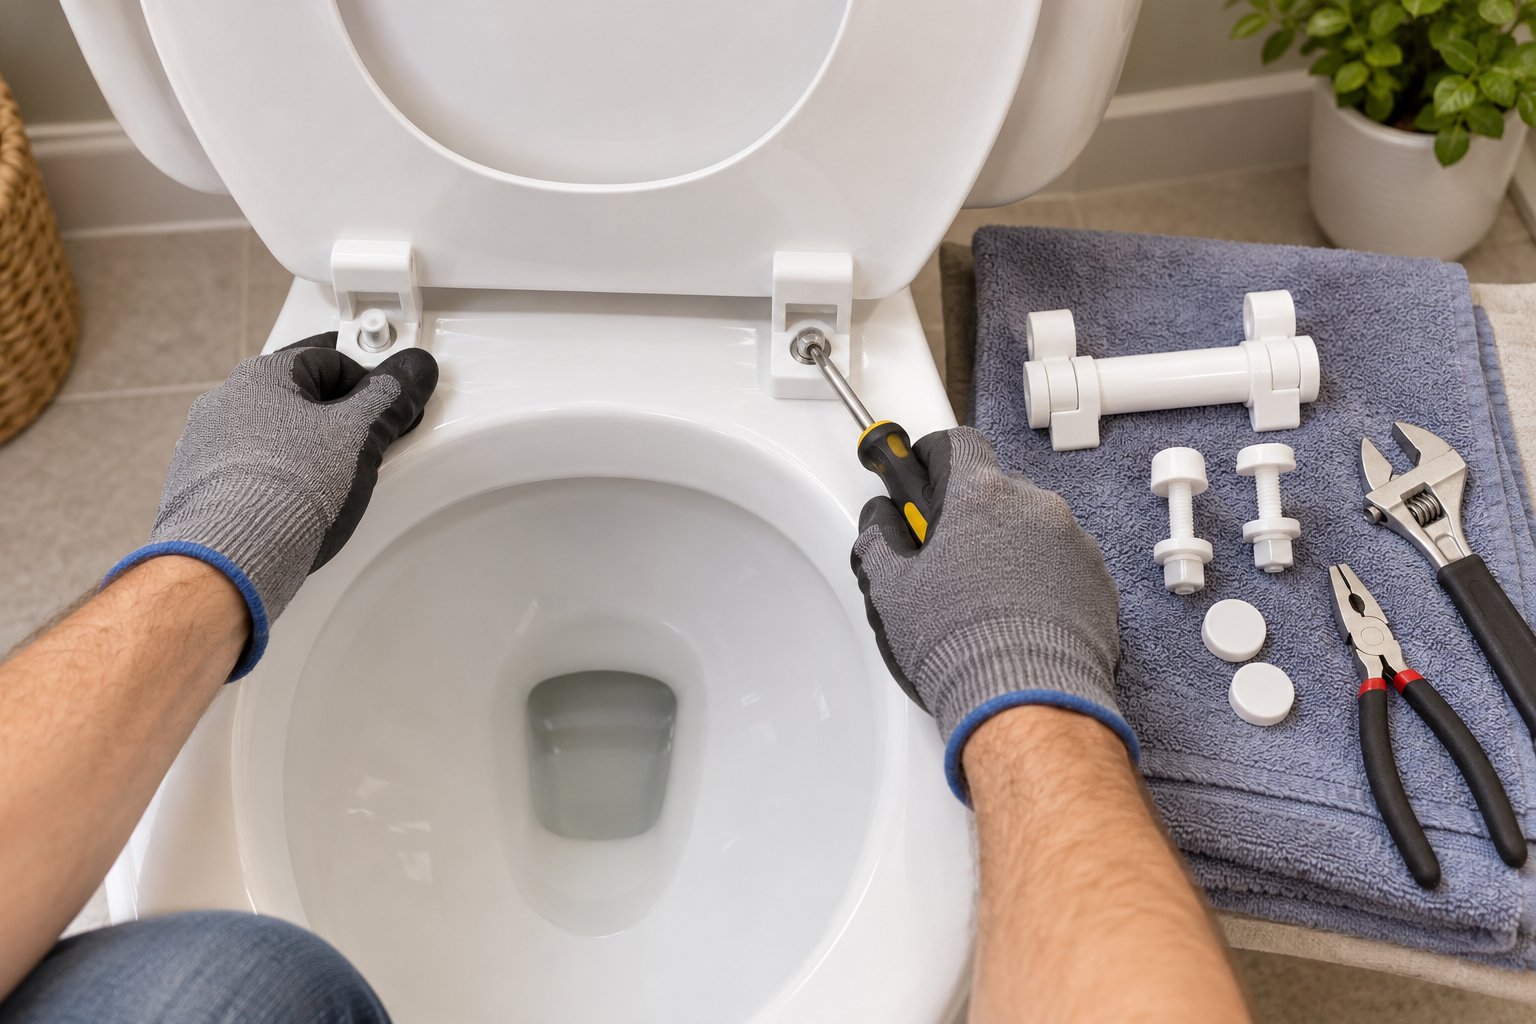
How to Replace Plastic Toilet Seat Cover Hinges
You have your measurements, the new hinge kit is sitting on the bathroom counter, and the old hardware is visibly cracked or stripped beyond saving. The only thing standing between you and a stable seat is the actual swap, and this is where a lot of DIYers hesitate. Pulling off the old assembly without cracking porcelain and bolting on the replacement without creating a wobble requires a specific sequence, not guesswork. The good news? The entire job typically takes under twenty minutes with basic hand tools, no plumber required.
Let's walk through the process from start to finish, beginning with getting the worn-out hinge off the bowl.
Removing a Worn or Broken Plastic Hinge
Before you can install anything new, the old toilet bowl hinges have to come off cleanly. Here is how to approach the removal without damaging the porcelain or turning a simple task into a wrestling match.
Start with the toilet seat hinge cover caps. Look at the back of the seat where the hinges meet the bowl rim. You will usually see two small plastic caps concealing the bolt heads. Some of these snap open with a fingernail or a gentle upward flick, while others require a flathead screwdriver inserted into a small notch on the cap's edge. Pry carefully; these caps are thin and brittle, especially on older seats. If you plan to reuse them on the new assembly, set them aside. If not, removing them aggressively to save time is perfectly fine.
Identify your mounting type. With the caps off, determine whether you are dealing with a bottom-fix or top-fix system. For bottom-fix setups, you will see bolt heads on top and nuts threaded onto the bolt ends underneath the bowl rim. For top-fix designs, the bolts secure into expanding anchors inside the bowl holes, and there is nothing to grip from below. This distinction changes your removal approach entirely.
For bottom-fix hinges: Hold the bolt head steady from above with a screwdriver while using an adjustable wrench or pliers on the nut underneath. Turn the nut counterclockwise. If the nut spins freely but will not advance, the bolt may be spinning in its seat. Wedge the screwdriver firmly into the bolt head slot and apply downward pressure while turning the nut. Repeat on the second bolt.
For top-fix hinges: Look for a twist cap or tightening disc on top of each bolt. Turn counterclockwise to release the expanding anchor below the rim. Some top-fix bolts collapse the anchor when fully loosened, allowing you to pull the entire bolt assembly straight up and out.
When bolts refuse to budge: Even on plastic-bolt assemblies, mineral deposits and dried grime can seize the threads. Apply a penetrating lubricant to the nut-and-bolt junction and wait five to ten minutes. If the bolt still will not turn, wrap a cloth around the plastic nut to protect it and grip with pliers. As a last resort, a mini hacksaw or an oscillating multi-tool can cut through a seized plastic bolt below the bowl rim. Work slowly and angle the blade away from the porcelain to avoid scratching.
Safety basics: Wear gloves, both for hygiene and to protect your hands if a plastic bolt snaps unexpectedly. Work in a well-lit area; a headlamp or clip-on LED light aimed under the bowl rim makes a noticeable difference. Place a folded towel on the floor beneath the work area to cushion any dropped hardware and prevent small parts from rolling behind the toilet.
With both bolts removed, lift the entire seat and lid off the bowl. Set it aside and clean the exposed bolt holes and the bowl rim surface with a disinfectant spray and a rag. Old residue, mineral buildup, or rubber washer remnants left in the holes can interfere with the new installation, so wipe them out thoroughly and let the area dry before moving forward.
Installing the New Hinge Assembly Step by Step
With a clean, dry mounting surface ready, the installation follows a logical sequence. Rushing through these steps or skipping the alignment check is where most mistakes happen, so take it one stage at a time.
- Clean the bolt holes and bowl rim surface. You already did this during removal, but double-check that no debris has fallen back into the holes. A quick swipe with a dry cloth is enough.
- Insert bolts through the hinge plate. Drop the bolts through the corresponding holes in the mounting plate, making sure any rubber or nylon washers sit between the bolt head and the plate. These washers cushion the connection and prevent the bolt from cracking the plastic under clamping pressure.
- Feed bolts through the bowl holes. Lower the hinge plate onto the bowl rim, guiding each bolt into its respective mounting hole. If the plate has elongated adjustment slots rather than fixed round holes, position the bolts roughly in the center of each slot for now. You will fine-tune lateral alignment in a later step.
- Hand-tighten nuts or expand top-fix anchors. For bottom-fix systems, reach underneath and thread the wing nuts or hex nuts onto the bolt ends. Turn them finger-tight only at this stage. For top-fix designs, press down on the bolt and turn the tightening cap clockwise until you feel the anchor begin to grip inside the hole, but do not fully expand it yet.
- Position and align the seat centrally on the bowl. Snap or slide the seat-and-lid assembly onto the hinge posts if the design is quick-release. If the seat is permanently attached to the hinge plate, lower the lid and seat ring and visually check that the seat is centered left-to-right and that the front curve follows the bowl rim evenly on both sides. Adjust by sliding the hinge plate within its mounting slots.
- Final-tighten incrementally on alternating sides. This step is critical. Give the left nut a quarter turn, then the right nut a quarter turn, then back to the left. Alternating sides ensures even clamping pressure and prevents the seat from pulling to one side. Continue until both bolts are snug and the hinge plate no longer shifts when you press on it.
- Test the seat for wobble and adjust. Sit on the seat or press down firmly on alternating sides. Open and close the lid several times. If you feel any lateral movement, loosen both bolts slightly, re-center the plate, and repeat the alternating tightening process. The seat should feel completely stable with no sideways play.
The whole process, from inserting the first bolt to testing the final result, should take roughly ten minutes for a standard hinge kit. Toilet seats with metal hinges or specialized soft-close dampers may add a few extra minutes if the hinge posts need to be oriented at a specific angle to engage the damper mechanism, but the overall sequence remains the same.
Alignment Tips and Common Mistakes
Even experienced DIYers run into avoidable problems during a toilet seat hinge replacement. Three mistakes account for the vast majority of callbacks and redo attempts.
Over-tightening. Plastic components do not respond well to excessive torque. Crank a wing nut too hard and the mounting plate can crack at the bolt hole, the bolt threads can strip, or the expanding anchor can split inside the ceramic hole. The goal is snug, not crushed. Once the seat stops moving, one final quarter turn on each side is enough. If you feel the resistance suddenly drop while tightening, stop immediately. That sudden give usually means something has cracked or stripped.
Uneven tightening. Tightening one bolt all the way before touching the other pulls the hinge plate off-center, which causes the seat to drift to one side every time it is lowered. This is especially noticeable on elongated bowls, where even a small lateral offset makes the seat visibly crooked at the front. The alternating quarter-turn method described in the installation steps prevents this entirely.
Skipping the alignment check before final tightening. It is tempting to tighten everything down the moment the bolts are in place, but the seat may not be centered yet. Always lower the lid, close the seat ring, and visually verify alignment before applying the last round of torque. Slight lateral adjustment is possible even after partial tightening by loosening both bolts a half turn, shifting the hinge plate within its mounting slots, and re-tightening with the alternating method.
A properly installed hinge should let the seat sit centered on the bowl with zero lateral wobble, and the lid should open and close without rubbing against the tank or catching on the bowl rim.
If everything checks out, snap the decorative cover caps back over the bolt heads and you are done. The entire replacement, removal through final adjustment, is one of the fastest and most satisfying bathroom fixes you can handle without professional help.
Getting the hinge installed correctly is half the equation. Keeping it functional over the long term depends on how you maintain it, what cleaning products touch it, and whether you catch the early warning signs of wear before a small issue turns into another full replacement cycle.
Lifespan and Maintenance of Plastic Toilet Seat Hinges
A fresh hinge assembly feels rock-solid on the day you install it. The bolts are snug, the seat sits centered, and the lid swings open and closed without a hint of wobble. Fast forward a year or two and the picture often changes: a slight shift here, a faint creak there, maybe a soft-close lid that drops a little faster than it used to. The difference between a hinge that lasts and one that fails prematurely almost always comes down to maintenance habits, cleaning product choices, and knowing when a small symptom has crossed the line from fixable nuisance to replacement trigger.
This is where most homeowners lose money. Not on the hinge itself, which is inexpensive, but on the cycle of repeated replacements caused by avoidable damage and missed warning signs.
Expected Lifespan of Plastic Hinge Assemblies
How long should a plastic hinge actually last? The honest answer is: it depends. There is no single number that applies to every household, because lifespan is driven by a combination of variables that differ from one bathroom to the next.
Usage frequency is the most obvious factor. A hinge on a guest bathroom toilet that sees a few cycles per week faces almost no mechanical stress compared to one in a family bathroom shared by four or five people every day. Higher cycle counts accelerate wear on the barrel, pin, and bolt threads.
User weight and handling habits also matter. Plastic hinges are engineered for standard residential loads, but repeated heavy lateral pressure, such as someone leaning sideways on an open lid or dropping onto the seat abruptly, concentrates stress at the mounting plate and barrel junction. Over time, those stress points develop micro-fractures that eventually become visible cracks.
Cleaning chemicals introduce a less obvious but equally damaging variable. Bleach-heavy solutions, acidic toilet bowl cleaners, and abrasive powders can degrade polymer structures, making the plastic brittle well before mechanical wear alone would cause failure. Hamberger Sanitary specifically warns against chlorinated and acidic cleaning products, noting they can cause discoloration and material degradation on both seat surfaces and hinge components.
Hinge quality rounds out the equation. A budget hinge molded from thin polypropylene will not match the service life of a thicker, glass-fiber-reinforced nylon assembly. As a general benchmark, industry sources suggest that plastic toilet seats, hinges included, may need replacement every one to three years under typical conditions, while higher-grade materials like duroplast or urea-formaldehyde can push that range to five years or more. If your hinge kit came with a manufacturer warranty, that warranty period is a useful baseline for expected service life under normal use.
The takeaway? Do not assume every plastic hinge operates on the same clock. Two identical-looking assemblies installed in different bathrooms can fail months or years apart depending on these variables. Paying attention to the maintenance practices below is the single most effective way to push your hinges toward the longer end of their potential lifespan.
Cleaning and Maintenance Best Practices
Routine care does not require special tools or expensive products. A few minutes of attention during your regular bathroom cleaning cycle is enough to keep hinge hardware in good working condition and catch problems early. Here is what to prioritize:
- Wipe hinge barrels and bolts during regular cleaning. Lift the toilet seat hinge covers and the decorative caps to access the bolt heads and barrel surfaces underneath. Grime, mineral deposits, and moisture accumulate in these tight spaces and can accelerate corrosion on metal pins or cause plastic threads to bind. A damp cloth with mild soap or a standard window-type or alcohol-based cleaner is enough to keep everything clean. Wipe with clean water afterward, then dry with a cloth.
- Avoid abrasive cleaners or bleach-heavy solutions on hinge components. Harsh chemicals weaken plastic over time, causing discoloration and brittleness that shortens the assembly's usable life. If a strong bowl cleaner splashes onto the hinge area during toilet cleaning, wipe it off promptly rather than letting it sit. Leaving the seat and lid in the upright position while aggressive cleaners are in the bowl helps minimize accidental contact.
- Periodically check bolt tightness and re-tighten if the seat begins to shift. Every few months, give the seat a quick side-to-side jiggle. Any play at all means the bolts have loosened. A quarter turn on each side using the alternating-tightening method described in the installation section is usually all it takes to restore stability. Catching looseness early prevents the accelerated wear that comes from a wobbly seat rocking on its bolts cycle after cycle.
- Lubricate soft-close damper mechanisms only if the manufacturer recommends it. Some hinges soft close toilet seat models benefit from a light silicone-based lubricant applied to the pivot point, but others use sealed damper cartridges that should not be opened or lubricated externally. Check the installation sheet that came with your seat. Applying the wrong lubricant, or any lubricant to a sealed unit, can actually degrade the damper's internal resistance and accelerate the failure you are trying to prevent.
- Keep the hinge area ventilated. Bathrooms with poor ventilation trap humidity against every surface, and hinge assemblies are no exception. Running an exhaust fan during and after showers reduces moisture exposure across all bathroom fixtures, including the hardware at the back of your toilet seat.
None of these steps takes more than a minute or two. Collectively, they represent the difference between a hinge that quietly does its job for years and one that cracks, seizes, or strips within a few months of installation.
Signs Your Hinges Need Replacement
Maintenance extends lifespan, but every plastic hinge eventually reaches the end of its useful service. The key is recognizing the warning signs before a degraded hinge creates a bigger problem, like a seat that collapses sideways or a lid that slams down on fingers. Here are the indicators that a toilet seat hinge replacement is no longer optional:
Visible cracks in the hinge plate or barrel. Even hairline fractures in a mounting plate compromise the structural integrity of the entire assembly. A cracked barrel can no longer hold the pivot pin securely, meaning the lid or seat may detach without warning. If you see any crack at all, replacement is the correct response, not repair.
Persistent wobble despite re-tightening. You tighten the bolts, the seat feels stable for a day or two, and then the wobble returns. This pattern usually indicates stripped bolt threads that no longer grip the nut, a deformed mounting plate that cannot hold clamping pressure, or compressed washers that have lost their cushioning ability. Re-tightening a stripped or deformed assembly is a losing game.
A soft-close mechanism that slams instead of lowering gently. When the damper inside a soft-close hinge wears out, the controlled descent disappears and the lid drops under gravity alone. In most plastic hinge designs, the damper is integrated into the hinge body and cannot be replaced independently, meaning you will need to swap the complete hinge assembly or, in some cases, the entire seat. A handful of higher-end systems use modular dampers that can be individually swapped, but this is the exception rather than the rule.
Discoloration or brittleness from chemical exposure. Plastic that has turned yellow, chalky, or noticeably more rigid than it was when new has undergone chemical degradation. Brittle plastic is unpredictable. It may hold for weeks or snap without warning the next time someone lifts the lid. Do not wait for a catastrophic failure to confirm what the discoloration is already telling you.
Bolt heads that spin freely without tightening. If turning a bolt produces rotation but no clamping force, the threads are stripped. No amount of tightening will restore grip on a stripped bolt. Replace the hardware.
Diagnosing whether the issue is a loose bolt, a worn washer, or a failed hinge component is what separates a five-minute re-tightening from a full replacement. When in doubt, a new hinge assembly is always more reliable than glue, tape, or any other temporary patch on cracked plastic.
It is worth emphasizing that last point. Attempting to glue or epoxy a cracked plastic hinge may hold for a few days, but the repair will fail again under normal use because adhesive bonds on load-bearing polymer parts cannot replicate the original molded strength. Every hardware forum is littered with posts from people who tried it and ended up replacing the hinge anyway, just a few frustrating weeks later.
Recognizing these signals early gives you time to source the right replacement hardware on your own schedule, rather than scrambling after a sudden failure. And knowing where to find compatible parts, whether through retail channels, online marketplaces, or manufacturer-direct catalogs, makes that sourcing process far less stressful than it needs to be.
Where to Find Replacement Plastic Hinge Hardware
You know what is broken, you have the measurements written down, and you can tell the difference between a top-fix and a bottom-fix setup with your eyes closed. The only question left is: where do you actually buy the part? Finding plastic toilet seat hinges sounds like it should be the easy step, but anyone who has wandered the plumbing aisle looking for a specific bolt diameter or a matching soft-close damper assembly knows it can be surprisingly hit-or-miss. The part you need may be sitting on a shelf ten minutes from your house, or it may only exist as part of a complete kit shipped from a specialty supplier halfway across the country.
Knowing which sourcing channels carry what, and understanding how replacement hardware is typically packaged and sold, saves you from blind searching and unnecessary return shipments.
Retail and Online Sourcing Options
Replacement hinge hardware flows through several distinct channels, each with its own strengths and blind spots.
Home improvement stores are the most accessible starting point. Chains stock a rotating selection of universal mounting kits, complete toilet seat hinge assemblies, and bolt-and-nut hardware packs in their plumbing sections. You can physically compare packaging dimensions to your measurements on the spot, which eliminates some guesswork. The limitation? Shelf space is finite. Most stores carry only the highest-volume universal kits and a handful of brand-specific options, so if your toilet seat with hinges requires an unusual bolt spread or a particular soft-close damper, the in-store selection may come up short.
Online marketplaces dramatically expand the pool. Platforms like Amazon, Home Depot's online catalog, and specialty plumbing retailers list hundreds of hinge kits from dozens of manufacturers, often with detailed spec sheets that include bolt spread, thread size, mounting style, and compatibility notes. Filtering by these specifications is far more efficient than scanning blister packs on a pegboard. The trade-off is that you cannot handle the part before buying, so accurate measurements and careful reading of product descriptions become essential.
Plumbing supply distributors serve a more targeted audience. These businesses cater to contractors and property managers who need specific, often brand-matched components. If you are looking for an exact OEM hinge for a particular toilet model, a plumbing supply house is more likely to stock it or be able to order it than a general home improvement store. Expect slightly higher prices and a more knowledgeable counter staff who can cross-reference part numbers.
Direct-from-manufacturer catalogs are the final channel. Many toilet seat manufacturers sell replacement hardware through their own websites or authorized parts distributors. This is the most reliable route for toilet hinge replacement when you need a guaranteed dimensional match, but lead times can be longer and minimum order thresholds occasionally apply.
One important reality to keep in mind: the availability of individual sub-components, such as standalone plastic bolts, single hinge pins, loose washers, or individual cover caps, varies widely. As industry sourcing guides note, many of these parts are sold only as part of complete mounting kits or full hinge assemblies rather than as separately purchasable pieces. If you need just one washer or a single decorative cap, you may end up buying an entire hardware pack to get it. Searching for a compatible mounting assembly rather than hunting for one tiny component is usually the faster, more practical approach.
What to Look for When Ordering Replacement Hardware
Whether you are browsing a store shelf or scrolling through product listings, the same checklist applies. Running through these points before clicking "add to cart" prevents the most common ordering mistakes:
- Confirm mounting style (top-fix or bottom-fix). A top-fix kit will not work on a bottom-fix toilet, no matter how perfectly the other specs align. This is the single most common mismatch in returned hinge hardware.
- Verify bolt-hole spread measurement. Compare your center-to-center measurement against the product listing's stated compatibility range. Universal kits usually specify a range (e.g., 120-180 mm); brand-specific kits list an exact figure.
- Check bolt thread compatibility. Metric and imperial threads are not interchangeable. If your existing hardware uses imperial bolts and you order a metric kit, the nuts will not engage. Product listings do not always make this obvious, so look for thread pitch specifications or contact the seller if it is unclear.
- Determine whether soft-close damper replacement is needed. If you are replacing hinges on a soft-close seat, the new assembly must include a compatible damper or the slow-close function disappears entirely. Standard hinge kits without dampers are cheaper and more common, so double-check that the listing explicitly mentions soft-close functionality before ordering.
- Review return policies for hardware that does not fit. Even with careful measurement, compatibility surprises happen. Verify that the retailer accepts returns on opened hardware packs, because many plumbing parts are sold as final-sale once the packaging is broken.
Having your measurements and photos from the assessment step readily available while you shop turns a potentially frustrating search into a straightforward matching exercise.
OEM Versus Aftermarket Hinge Kits
The sourcing decision often boils down to one fundamental trade-off: do you want a guaranteed fit from the original manufacturer, or a wider selection and faster availability from an aftermarket supplier?
OEM (Original Equipment Manufacturer) parts are produced by or for the same company that made your toilet seat. They guarantee dimensional compatibility because the hinge was designed alongside the seat itself. Bolt spread, thread pitch, hinge post height, barrel angle, and damper torque are all calibrated for that specific model. The downside? OEM parts can be harder to source, especially for older or discontinued seat models, and they typically cost more than generic alternatives. You may need to order directly from the manufacturer's website or track down an authorized distributor, which adds lead time.
Aftermarket or universal kits take the opposite approach. They are designed for broad compatibility rather than exact model matching, often featuring adjustable mounting slots, multiple washer sizes, and bolt lengths that can be trimmed to fit. Availability is excellent; you will find universal kits at virtually every home improvement store and online retailer. The catch is that "universal" is not truly universal. Careful measurement is mandatory to confirm fit, and some aftermarket kits use thinner plastic or simpler damper mechanisms than the OEM originals they are replacing. A universal kit that technically bolts on may still feel less precise or durable than the factory hardware it replaced.
For individual homeowners replacing a single seat, the choice usually comes down to convenience. If your brand and model number are identifiable, OEM parts are worth the extra effort. If the seat is generic or the brand is unknown, a quality aftermarket kit with adjustable fittings is the practical path forward.
At a larger scale, the calculation shifts. Sourcing teams, sanitary ware professionals, and property managers ordering replacement hardware in volume often work with specialized fixing-system suppliers who can ensure batch compatibility across entire product lines. These suppliers maintain catalogs of hinge configurations, fixing kits, and mounting assemblies organized by dimensional specifications rather than retail brand names, which simplifies the process of matching hardware to mixed fleets of toilet models across multiple properties or production runs.
Regardless of which route you choose, the underlying principle stays the same: accurate identification and measurement matter more than brand loyalty or price point. A perfectly matched ten-dollar aftermarket kit outperforms a fifty-dollar OEM assembly that does not quite fit your bolt holes. And even the best-sourced hardware can run into real-world installation hiccups, from wobbly seats to seized bolts to dampers that stop damping, which is exactly why knowing how to diagnose and troubleshoot common hinge problems saves both time and repeat purchases.
Troubleshooting Common Plastic Hinge Problems
A wobbly seat does not always mean the hinge is finished. A slamming lid does not always mean the damper is dead. And a bolt that refuses to turn does not always mean you need a hacksaw. The frustrating reality of hinges for toilet seat assemblies is that several very different problems produce nearly identical symptoms, and jumping straight to a full replacement when a five-minute adjustment would have solved the issue wastes both money and time.
Before you order new hardware, work through the three most common failure scenarios below. Each one follows a diagnostic sequence that narrows the cause and points you toward the least invasive, most effective fix.
Fixing a Wobbly Seat Without Replacing the Hinge
A seat that shifts sideways or rocks front-to-back is the single most reported hinge complaint, and it is also the one most likely to have a simple solution. The wobble almost always traces back to one of three causes, and you can check all three in under five minutes.
Step one: check whether bolts have loosened. Flip open the decorative cover caps at the back of the seat and try to turn each bolt head with a screwdriver. If either bolt rotates even slightly, looseness is your culprit. Re-tighten using the alternating quarter-turn method: a quarter turn on the left bolt, then a quarter turn on the right, back and forth until both sides are snug and the seat no longer shifts. Uneven tightening is a common reason the wobble returns within days, so resist the urge to crank one side all the way down before touching the other.
Step two: inspect the rubber or plastic washers. Pull the seat forward gently and look at the washers sitting between the hinge plate and the bowl rim, as well as any washers between the nut and the underside of the bowl. Washers that have gone flat, cracked, or compressed beyond their original thickness can no longer maintain clamping pressure. If they look pancaked or deteriorated, replacing them with fresh rubber washers restores the friction and compression that keep the seat locked in place. Universal washer packs are inexpensive and widely available at any hardware store.
Step three: examine the hinge plate at the mounting holes. Look closely at the plastic around each bolt hole on the mounting plate. If you see a hairline crack radiating outward from the hole, the plate has lost structural integrity and no amount of re-tightening will stop the wobble. A cracked mounting plate means replacement is necessary, but at least you now know the bolts and washers are not the problem, which saves you from buying parts you do not need.
Most wobbly seats fall into the first or second category. A quick re-tightening or a fresh set of washers resolves the issue without spending more than a few dollars, and you avoid the unnecessary hassle of pulling the entire assembly off the bowl.
Dealing with Seized or Corroded Bolt Nuts
Imagine reaching under the bowl rim, gripping the wing nut, and finding it completely frozen in place. Your first instinct might be to force it, but torquing a seized nut on a plastic bolt almost guarantees a snapped shaft or a cracked mounting plate. Even on assemblies made entirely from hinges for toilet seats plastic, mineral deposits from hard water and years of accumulated bathroom grime can lock threads together as effectively as rust does on metal.
Here is how to work through the problem without breaking anything:
Apply penetrating lubricant first. Spray a penetrating oil or a citrus-based solvent directly onto the nut-and-bolt junction, both above the bowl rim and below it. Let it sit for at least five to ten minutes. The lubricant needs time to seep into the thread valleys and dissolve the mineral crust that is binding everything together. A second application after the initial soak often loosens what the first round could not.
Use pliers with a protective cloth. Wrap a folded rag or a strip of rubber around the nut before gripping it with pliers. The cloth serves two purposes: it increases friction against the nut's surface so your pliers do not slip, and it distributes the clamping force across a wider area, reducing the chance of cracking the plastic. Turn slowly and steadily rather than in sharp jerks. If the nut begins to move even slightly, keep the same slow rotation and it will typically break free within a full turn.
Cut the bolt as a last resort. When neither lubricant nor careful plier work frees the nut, cutting through the bolt is the remaining option. A mini hacksaw or an oscillating multi-tool fitted with a cutting blade works well here. Position the blade just below the bowl rim so you sever the bolt shaft between the porcelain and the nut. Angle the blade away from the ceramic surface and use light, controlled strokes. Plastic bolts cut quickly, so there is no need to apply heavy pressure. Once the bolt is severed, the nut drops free and the remaining shaft can be pushed up and out through the top.
A word of caution: if your assembly uses metal bolts with plastic nuts, the same technique applies, but metal takes longer to cut and generates heat. Keep your strokes steady and pause periodically to avoid overheating the blade or the surrounding plastic components. Drilling through the bolt head from above, as experienced repair guides recommend, is another viable approach when underside access is severely limited.
Restoring Soft-Close Function
The lid used to float down silently. Now it drops like a trapdoor. That sudden change from controlled descent to gravity-powered slam almost always points to one component: the damper mechanism inside or beside the hinge barrel.
Soft-close hinges rely on a small rotary or hydraulic damper that creates resistance against the lid's weight as it falls. Over time, the damper's internal grease degrades, the friction surfaces wear smooth, or the housing develops micro-cracks that allow the damping fluid to leak. Once any of these failures occur, the resistance disappears and the lid free-falls.
Before assuming the damper is dead, rule out simpler causes first. Check whether the hinge bolts have loosened enough to change the angle at which the lid sits on the barrel. A seat that has shifted forward even a few millimeters can alter the leverage on the damper, making it seem like the mechanism has failed when the real problem is bolt looseness. Re-tighten and test again.
If tightening does not restore the slow close, the damper itself is the issue. Some manufacturers recommend applying a silicone-based lubricant between the damper's moving components to restore friction. This can work as a temporary measure on dampers that have dried out but are not structurally damaged. Clean the damper area, apply a small amount of silicone grease to the pivot surfaces, and cycle the lid open and closed several times to distribute the lubricant evenly.
Here is the hard truth, though. In most plastic hinge designs, the damper is integrated directly into the hinge body. It is not a separate cartridge you can pop out and swap. When an integrated damper fails, the entire hinge assembly, or in many cases the full seat-and-lid unit, needs to be replaced. You cannot repair what is molded as a single piece.
The exception exists at the higher end of the market. Some premium soft-close systems, including certain models from brands like Kohler, use modular damper cartridges that slide or clip into the hinge barrel and can be individually replaced without removing the mounting hardware from the bowl. If your seat uses this design, sourcing a replacement damper cartridge is significantly cheaper and faster than replacing the entire assembly. Check the manufacturer's parts catalog or the original installation manual to determine whether your specific model supports modular damper replacement.
Diagnosing whether the issue is a loose bolt, a worn washer, or a failed damper determines whether a simple re-tightening, a hardware refresh, or a full hinge replacement is the correct fix.
That diagnostic distinction is what separates a homeowner who spends five minutes and zero dollars from one who replaces an entire toilet seat unnecessarily. Work through the sequence: tighten first, inspect washers and plates second, and evaluate the damper last. Each step either solves the problem or eliminates one possible cause, narrowing your focus until the right fix becomes obvious.
Troubleshooting keeps existing hardware in service longer, but there comes a point where the diagnosis clearly points to new parts. When that moment arrives, the final decision is not just what to buy but how to choose a hinge assembly that breaks the cycle of frequent replacements altogether.
Selecting the Best Plastic Hinge for a Lasting Fix
You have diagnosed the problem, measured your bolt holes, identified your mounting type, and narrowed down whether you need a soft-close damper or a standard pivot. Every piece of information from the previous sections funnels into one final decision: which specific hinge assembly do you actually put on your toilet so you are not back in the same position six months from now?
The answer is not a single product recommendation. It is a decision framework, a short sequence of checkpoints that filters out incompatible options and steers you toward hardware matched to your bowl, your usage pattern, and your expectations for longevity. Run through this sequence once and you will have the confidence to order the right part the first time.
Choosing the Right Hinge for Your Situation
Think of this as a decision tree. Each factor below eliminates a category of wrong choices and brings you closer to a compatible, durable toilet hinge that actually fits.
Start with the mounting type. Top-fix or bottom-fix? This is binary. There is no adapter that converts one into the other, and ordering the wrong style means the kit goes back in the box. If you skipped the identification step earlier, reach behind the bowl right now: exposed bolt ends and nuts underneath mean bottom-fix; a smooth underside with nothing protruding means top-fix.
Confirm your bolt-hole spread. Grab the center-to-center measurement you recorded. Most North American residential bowls land near 5.5 inches (140 mm), but variations exist. An adjustable hinge toilet seat kit with slotted mounting plates covers a range of spreads, while OEM-specific kits target one exact dimension. Match the measurement to the product listing's stated compatibility range before anything else.
Decide between soft-close and standard. If your current seat has a soft-close lid and you want to keep that feature, the replacement assembly must include a damper mechanism with a compatible torque rating. A standard hinge bolted onto a soft-close seat frame will mount correctly but the slow-close function disappears entirely. If you are switching from standard to soft-close for the first time, verify that the hinge kit includes all necessary damper components rather than assuming they are built into the seat itself.
Choose between universal and OEM-specific parts. Universal kits cast the widest compatibility net and are easiest to source. OEM parts guarantee a factory-precise fit but may require more effort and expense to locate. For a toilet seat hinge bolt replacement on a well-known brand where the model number is still legible, OEM is the safer bet. For generic or unidentifiable seats, a quality universal kit with adjustable fittings is the practical route.
The table below pulls these factors together into a quick-reference format you can consult while shopping, whether you are standing in a hardware aisle or filtering product listings online.
| Factor | What to Check | Why It Matters |
|---|---|---|
| Mounting Style | Top-fix or bottom-fix; check for bolt ends beneath the bowl rim | Mounting types are not interchangeable; the wrong style physically cannot install |
| Bolt-Hole Spread | Center-to-center distance between bowl mounting holes (typically ~5.5 in / 140 mm) | A mismatch of even a few millimeters prevents the bolts from aligning with the holes |
| Bolt Thread Type | Metric versus imperial; measure diameter and thread pitch of existing hardware | Mismatched threads mean the nut will not engage the bolt regardless of other specs |
| Closing Mechanism | Soft-close (damper required) or standard (gravity only) | Replacing a soft-close hinge with a standard one eliminates the slow-close feature |
| Release Type | Quick-release (lift-off posts) or fixed (permanent bolt attachment) | Quick-release seats require matching post height and receiver dimensions on the hinge |
| Parts Source | OEM-specific (exact model match) or universal/aftermarket (adjustable fit) | OEM guarantees dimensional precision; universal offers broader availability at lower cost |
Print this table, screenshot it, or just keep the six factors in mind the next time you are shopping for replacement hardware. Checking each one before you buy is the single most reliable way to avoid the return-and-reorder cycle that turns a simple repair into a weeks-long project.
Professional Fixing Systems for Reliable Installation
For most homeowners replacing a single toilet hinge, a well-matched kit from a local store or online retailer does the job. But the calculation changes when you are sourcing hardware at scale, equipping a production line, or managing replacement parts across dozens of properties. In those scenarios, hunting for individual bolts, washers, and damper assemblies one SKU at a time is not just impractical; it introduces compatibility risk across every unit in the batch.
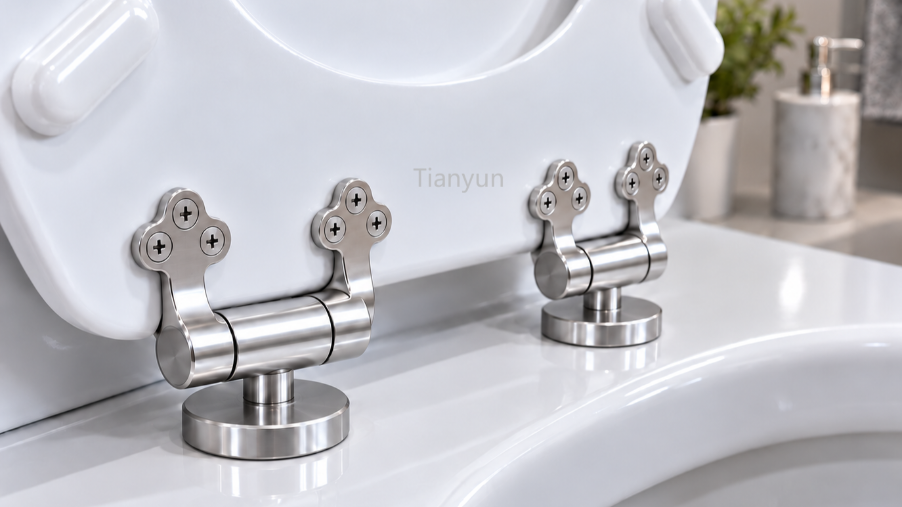
This is where purpose-built fixing systems designed for the sanitary ware industry become relevant. Tianyun's Toilet Seat Fixing Systems are one strong example within this space. Their product line brings together hinge mounting kits, stainless steel top-mounting bases, and custom fixing options into coordinated assemblies engineered for compatible seat installation, precise alignment, and straightforward hardware replacement. Rather than piecing together components from multiple suppliers and hoping everything matches, these integrated systems are designed so that the base, the hinge structure, and the fastening hardware all work as a single unit.
That integration matters most for PP and UF toilet seat manufacturers, sanitary ware brands running OEM projects, and replacement-hardware sourcing teams who need batch consistency across entire production runs. Tianyun supports customized fixing solutions based on product drawings, existing samples, and specific hinge structures, including configurations for soft-close dampers, quick-release mechanisms, and both top-fix and bottom-fix mounting styles. For projects requiring premium aesthetics and long-term durability, their stainless steel top-mounting base sets provide a stable, corrosion-resistant foundation that pairs with various hinge and damper designs.
Individual buyers benefit here too. If you have struggled to find a complete, compatible mounting assembly rather than a loose collection of bolts and pins that may or may not work together, a purpose-built fixing system eliminates that fragmentation. You get every component you need in one package, dimensionally matched and ready to install.
That said, no single supplier is the right fit for every situation. The broader sourcing landscape discussed earlier, including home improvement retailers, online marketplaces, plumbing distributors, and direct-from-manufacturer catalogs, remains fully valid. The best choice depends on your volume, your timeline, and how specific your compatibility requirements are.
What does not change, regardless of where you source parts, is the importance of the steps that came before this point. Proper identification of your mounting type, accurate measurement of your bolt-hole spread, honest assessment of whether your damper needs replacement, and careful installation with even tightening and alignment checks: these fundamentals determine whether your new hinge lasts years or months. The hardware itself is only as good as the process behind it.
Stop replacing plastic toilet seat cover hinges every few months. Measure once, match carefully, install correctly, and maintain what you have. That is the entire formula for breaking the replacement cycle, and every section of this guide exists to help you execute it with confidence.
Frequently Asked Questions About Plastic Toilet Seat Cover Hinges
1. How do I know if my toilet seat hinges are top-fix or bottom-fix?
Reach behind and underneath your toilet bowl rim. If you feel exposed bolt ends with nuts threaded onto them, you have a bottom-fix (bottom-mount) setup. If the underside is smooth with nothing protruding, your seat uses a top-fix (top-mount) system that secures with expanding anchors tightened from above the rim. Identifying this before shopping is critical because the two mounting styles are not interchangeable, and ordering the wrong type is the most common reason replacement hinge hardware gets returned.
2. Can I replace just the hinges on a toilet seat or do I need a whole new seat?
In many cases you can replace only the hinge assembly without buying an entire new seat, especially if your seat uses a quick-release design where the seat lifts off the hinge posts. However, availability of standalone hinge kits varies by brand and model. Many plastic hinge components such as individual bolts, pins, or cover caps are sold only as part of complete mounting kits rather than as separate pieces. If the seat itself is undamaged, search for a compatible mounting assembly that matches your bolt-hole spread, mounting style, and closing mechanism. Tianyun's Toilet Seat Fixing Systems offer coordinated hinge mounting kits designed for precise compatibility when sourcing complete assemblies.
3. Why does my toilet seat keep coming loose even after I tighten the bolts?
Recurring looseness typically points to one of three issues: compressed or deteriorated rubber washers that can no longer maintain clamping pressure, stripped bolt threads that spin without gripping the nut, or a hairline crack in the plastic mounting plate around the bolt hole. Start by inspecting the washers and replacing any that look flattened or cracked. If the bolt threads are stripped and the nut will not hold, the entire hinge hardware needs replacement. Always use the alternating quarter-turn tightening method, left side then right side, to distribute pressure evenly and prevent the seat from drifting off-center.
4. Are toilet seat hinge bolt holes a standard size?
Most North American toilet bowls use a standardized center-to-center bolt-hole spacing of approximately 5.5 inches (140 mm), which applies to both round and elongated bowl shapes. However, bolt diameter and thread pitch can vary between manufacturers, and some European or specialty fixtures use different spacing altogether. Before purchasing replacement hinges, measure the center-to-center distance between your bowl's mounting holes, check the bolt shaft diameter, and confirm whether the threads are metric or imperial. These three measurements ensure your new hardware will align and secure properly.
5. Can a soft-close toilet seat hinge be repaired or does it need full replacement?
It depends on the hinge design. In most standard plastic soft-close hinges, the damper mechanism is molded directly into the hinge body and cannot be replaced independently. When the damper wears out and the lid starts slamming, the entire hinge assembly or the full seat unit typically needs to be swapped. Some premium models from brands like Kohler use modular damper cartridges that clip into the hinge barrel and can be individually replaced without removing the mounting hardware. Check your manufacturer's parts catalog to determine if your model supports modular damper replacement before committing to a full swap.
Apply This Insight to Your Project
Tell us what you are building and how the topic “Stop Replacing Plastic Toilet Seat Cover Hinges Every Few Months” relates to your application. Our engineering team can help evaluate the next step.