What Is a Plastic Nut Toilet Seat Mounting System
Ever wiggled on a toilet seat and felt it slide sideways? That frustrating movement almost always traces back to one small piece of hardware hiding beneath the bowl: the plastic nut. It sounds simple, yet most people have no idea what it is, where it sits, or how it keeps a seat locked in place.
A plastic nut toilet seat mounting system refers to the fastening hardware that secures a toilet seat to the bowl. The plastic nut itself threads onto a bolt from underneath the bowl rim, clamping the seat's hinge bracket firmly against the ceramic surface. It is one component within a broader seat mounting kit — not a universal standalone part.
Defining the Plastic Nut in Toilet Seat Hardware
Mechanically, the plastic nut works like any threaded fastener. A bolt drops down through the mounting hole at the rear of the bowl. The nut threads onto that bolt from below, pulling the hinge tight against the porcelain. Toilet seat plastic screws and their matching nuts create a secure sandwich of hinge, ceramic, and washer — all held by that single threaded connection underneath.
This hardware is distinct from toilet flange bolts, which anchor the entire toilet to the bathroom floor, and from tank bolts, which connect the tank to the bowl. Mixing up these categories is one of the most common mistakes shoppers make when searching for replacement parts. Toilet plastic bolts designed for seat mounting are typically shorter, lighter, and made from entirely different materials than floor or tank fasteners.
Who Needs to Understand This Hardware
You might be a DIY homeowner dealing with a wobbly seat that shifts every time you sit down. Maybe you're a renter replacing a cracked toilet seat for the first time. Or perhaps you're browsing a hardware aisle, staring at a wall of bolt kits, and wondering which package actually fits your toilet. As Gerber's support documentation points out, different toilet seats use different types and sizes of seat bolts or seat mounting kits — so identifying the right match starts with understanding each component.
This guide covers everything from identifying each piece in a mounting kit to selecting the correct replacement, installing it properly, and maintaining it over time. The goal is straightforward: give you the knowledge to handle this repair confidently, without guessing at the hardware store. And the first step is knowing exactly what each part in that small plastic bag actually does.
Toilet Seat Bolt Anatomy
Open any plastic toilet seat screws kit and you will find a small handful of parts — five or six pieces at most. Each one has a specific job. Knowing what they are saves you from buying the wrong replacement and from making a simple repair harder than it needs to be.
Every Part in a Toilet Seat Bolt Kit Identified
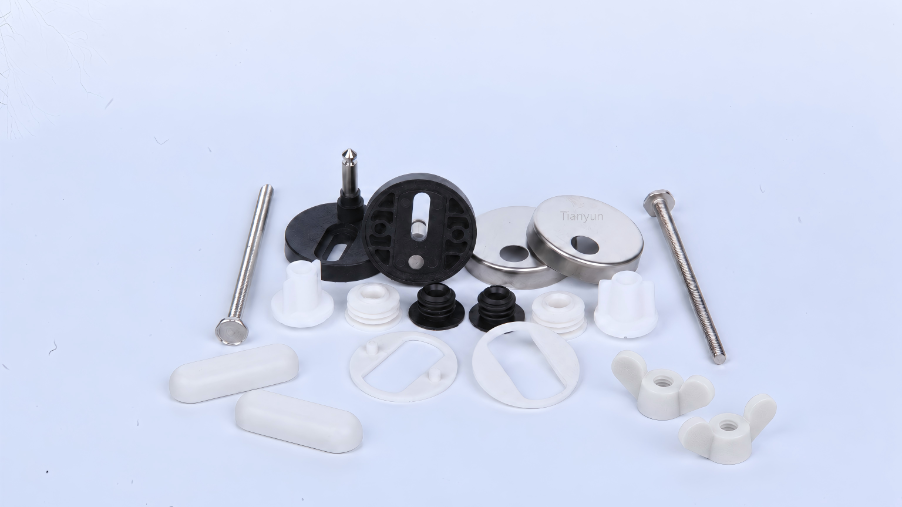
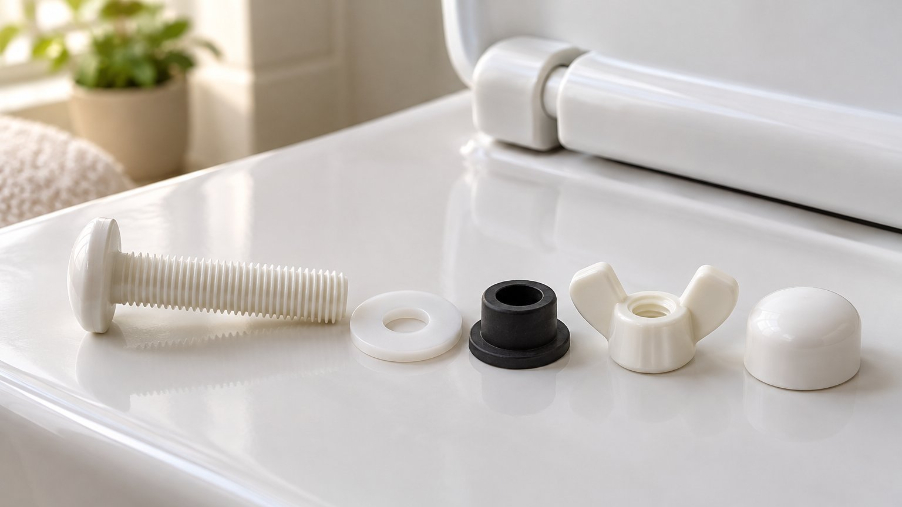
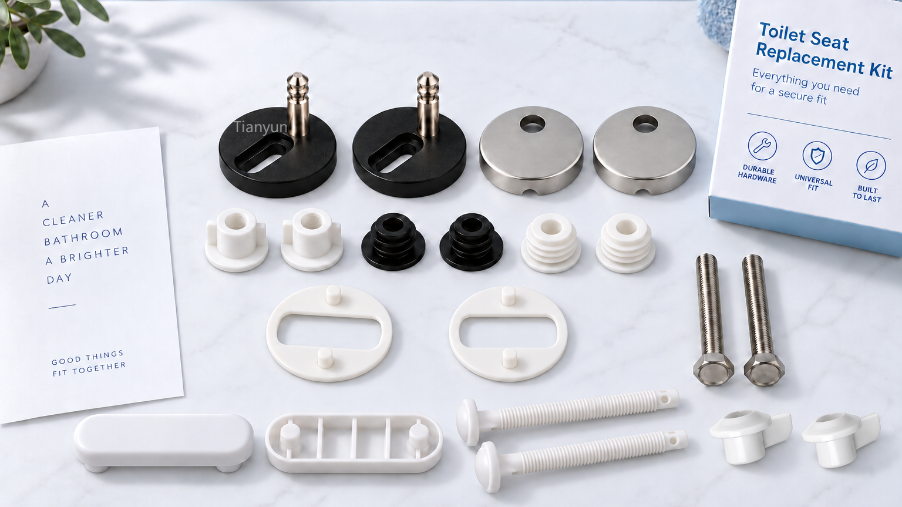
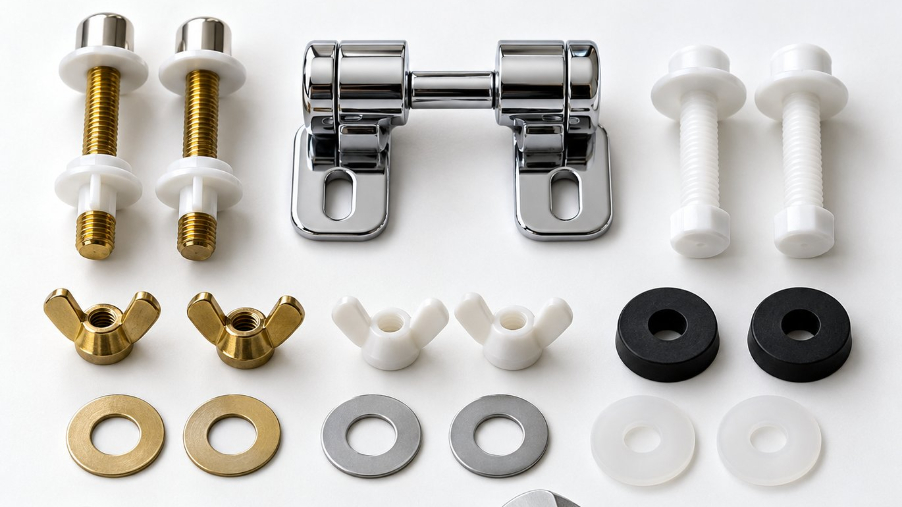
Imagine laying out the contents of a standard mounting kit on your bathroom counter. Here is exactly what you should see:
- Bolt (threaded rod): This is the long, threaded piece that drops down through the mounting hole at the rear of the bowl. It serves as the central spine of the entire assembly. Bolt plastic versions are common in residential kits, though some include metal rods with plastic accessories.
- Nut (threaded fastener): This is the piece that threads onto the bolt from underneath the bowl. In a plastic nut toilet seat system, this is the star of the show — the component that pulls everything tight against the porcelain and holds the seat in position.
- Washer: A flat disc placed between the nut and the underside of the ceramic bowl. It distributes clamping force over a wider area and protects the porcelain from direct pressure that could cause chipping.
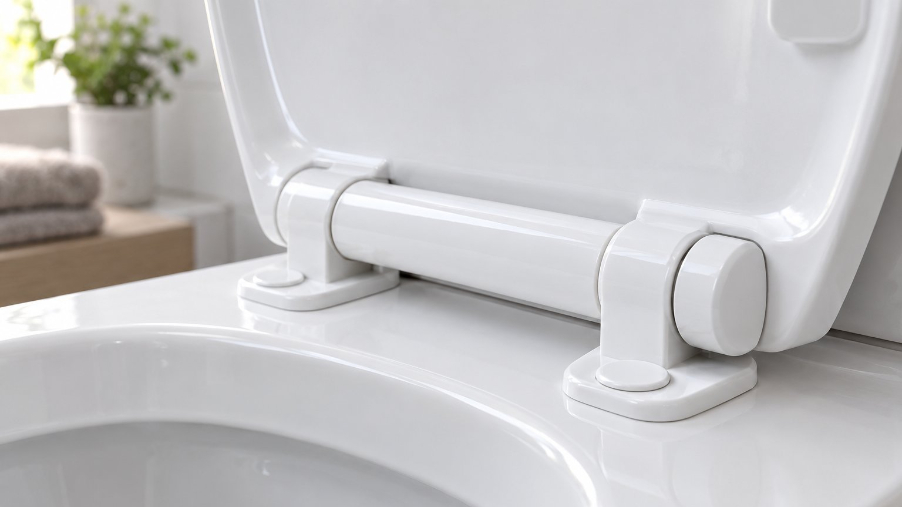
- Hinge: The bracket assembly that connects the toilet seat to the bolts and allows the seat and lid to pivot open and closed. Some hinges accept a standard screwdriver for toilet seat bolt adjustment, while others use tool-free designs.
- Bushing or sleeve: A small cylindrical insert that centers the bolt inside the mounting hole. Not every kit includes one, but when present, it prevents the bolt from rattling or shifting side to side within an oversized hole.
Of all these pieces, the plastic nut is the one that fails most often. Repeated tightening cycles, bathroom humidity, and the constant micro-vibrations from daily use gradually wear down its threads. When the nut cracks or strips, the seat starts rocking — even though every other component may still be perfectly fine.
How Toilet Seat Bolts Differ from Toilet Flange Bolts
Here is where confusion runs deep. Search for "toilet bolts" at any hardware store and you will find two very different product categories sitting side by side. Toilet seat bolts secure the seat to the bowl. Toilet flange bolts, on the other hand, anchor the entire toilet to the floor flange and are vital to maintaining a watertight seal between the base and the drainpipe. Grabbing the wrong one means a wasted trip and a repair that stalls before it starts.
The differences between these two bolt types span purpose, material, location, and size. The table below breaks it down clearly:
| Feature | Toilet Seat Bolts | Toilet Flange Bolts |
|---|---|---|
| Purpose | Secure the seat and hinge to the top of the bowl | Anchor the entire toilet base to the floor flange |
| Typical material | Plastic (nylon or polypropylene), sometimes brass | Brass, stainless steel, or zinc-plated steel |
| Location | Rear top of the bowl rim, through two mounting holes | Base of the toilet, protruding up through floor-level bolt slots |
| Standard bolt spacing | Approximately 5.5 inches center-to-center | Varies by flange; typically set by the closet flange slot positions |
| Typical bolt diameter | 1/4 inch to 5/16 inch | 5/16 inch (most residential toilets) |
| Failure signs | Wobbly or shifting seat | Rocking toilet base, water leaks at the floor |
Notice that flange bolts are almost always metal because they bear the entire weight of the toilet and its occupant, plus they must compress a wax ring or gasket to form a leak-proof seal. Seat bolts carry far less load — just the seat and hinge — which is precisely why plastic works so well in that role. The material choice is not a cost-cutting shortcut; it is an engineering decision rooted in the specific demands of each location.
With every component identified and the seat-versus-flange confusion cleared up, the natural next question is why plastic became the go-to material for these nuts and bolts in the first place — and whether metal might actually be the better choice.
Why Plastic Nuts Are Preferred Over Metal Alternatives
Metal fasteners hold bridges together and keep skyscrapers standing. So why does almost every toilet seat on the market ship with plastic toilet seat bolts instead of steel or brass ones? The answer has less to do with cutting costs and everything to do with the unique environment a bathroom creates. Three factors — corrosion, ceramic fragility, and installation simplicity — tip the scale decisively toward plastic for this specific application.
Corrosion Resistance and Bathroom Moisture
Picture the underside of a toilet bowl. It is perpetually damp. Condensation forms on cold porcelain, cleaning spray drifts beneath the rim, and ambient humidity in most bathrooms hovers well above the rest of the house. Metal fasteners sitting in this environment face relentless moisture exposure.
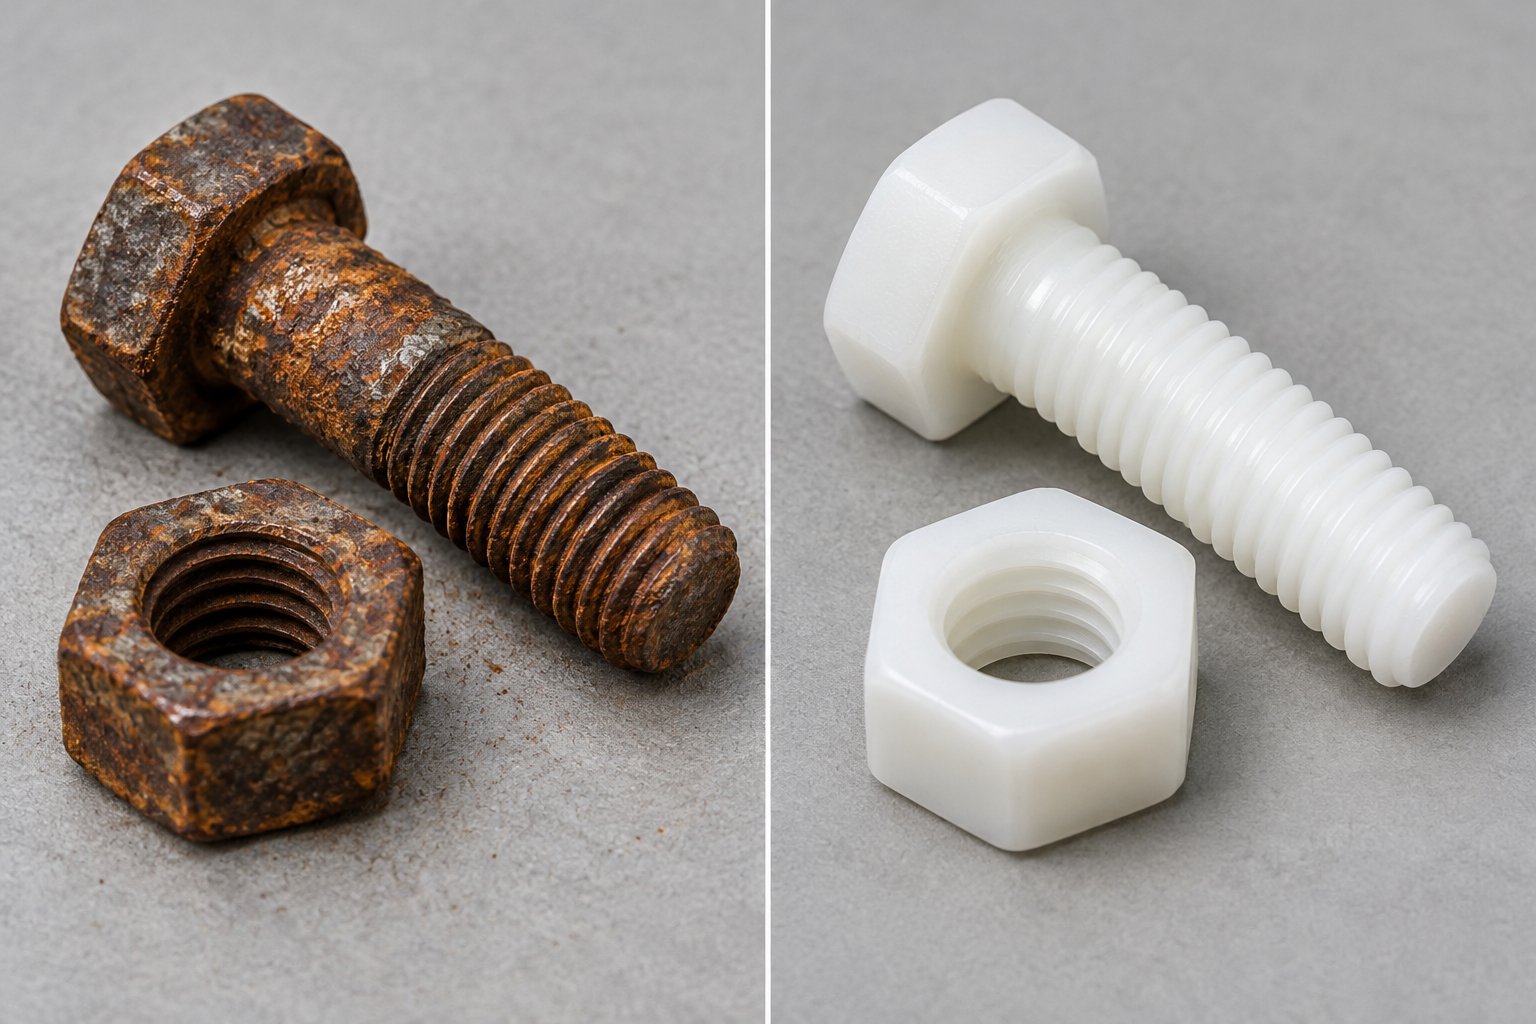
Steel bolts rust. Brass bolts develop green patina and can seize. Even zinc-plated hardware eventually corrodes once the thin protective layer wears through. As fastener engineering research from Incure points out, corrosion — not vibration — is frequently the dominant cause of fastener failure in bathroom hardware over the long term. A corroding thread interface loosens its grip well before mechanical fatigue alone would cause problems, and once even slight play develops, the seat shifts and rattles with every use.
Plastic toilet bolts sidestep this problem entirely. Nylon and polypropylene are impervious to moisture-driven corrosion. They will never rust, seize, or flake. Five years from now, a plastic nut threads off just as easily as it threaded on — no hacksaw required.
Protecting the Ceramic Bowl from Cracking
Porcelain is strong under compression but surprisingly brittle under concentrated point loads. When you tighten a metal nut directly against a ceramic surface, the rigid metal transfers force through a very small contact area. Over-tighten even slightly and the result can be a hairline crack or a chip that compromises the bowl's structural integrity.
Hunker's breakdown of common toilet damage causes highlights this directly: over-tightening nuts onto bolts will crack the toilet, and homeowners should stop once they feel resistance. The advice applies doubly to metal-on-ceramic contact. Plastic nuts, by contrast, compress with slight give. They distribute clamping force more gently, acting almost like a built-in cushion between the fastener and the porcelain. You would have to apply extraordinary force to crack a bowl with a plastic nut — far more than the hardware itself could withstand before stripping.
This forgiving behavior is especially valuable for DIY homeowners who lack a calibrated torque wrench. With plastic, "hand-tight plus a little extra" is a perfectly safe approach. With metal, that same instinct can lead to expensive ceramic damage.
Ease of Installation and Hand-Tightening
Imagine you have just bought a new toilet seat from the hardware store. You open the box, drop the bolts through the mounting holes, reach underneath, and spin the nuts on with your fingers. No wrench. No pliers. No stripped bolt heads. That is the everyday reality of plastic toilet seat bolts — they are designed to be installed by anyone, regardless of mechanical experience.
Metal nuts, on the other hand, typically demand a wrench or socket for adequate tightening. They are harder to start by hand because the threads are less forgiving of slight misalignment. And if you ever need to remove them years later, corrosion may have bonded the nut to the bolt so thoroughly that you need cutting tools to break them free.
For the vast majority of residential toilet seats, plastic hardware delivers every bit of clamping force the application requires — without any of the drawbacks metal introduces.
Plastic vs. Metal Toilet Seat Nuts: The Full Comparison
The table below puts every practical factor side by side. If you are standing in the bolt aisle wondering whether to grab the plastic kit or the metal one, this comparison will settle the question:
| Factor | Plastic Nuts | Metal Nuts |
|---|---|---|
| Corrosion resistance | Excellent — immune to rust, oxidation, and mineral deposits | Poor to moderate — steel rusts quickly; brass and stainless resist longer but still degrade |
| Risk of bowl damage | Very low — compresses gently against porcelain | Moderate to high — rigid contact can cause hairline cracks if over-tightened |
| Ease of installation | High — threads on by hand in seconds | Moderate — usually requires a wrench and careful torque control |
| Tool requirements | None for most installations; optional quarter-turn with pliers | Wrench or socket set typically required |
| Durability under load | Adequate for residential seat loads; may strip under extreme force | Superior clamping force; better for heavy-duty or commercial use |
| Cost | Low — basic kits available at most home improvement retailers for a few dollars | Moderate — stainless steel and brass kits cost two to four times more |
| Longevity | Three to ten years depending on material quality and cleaning habits | Potentially longer if corrosion is controlled, but seized removal is common |
| Removal after years of use | Easy — threads stay clean and turn freely | Often difficult — corrosion can bond nut to bolt permanently |
Be honest about the one area where metal wins: raw clamping strength. In high-traffic commercial restrooms or on heavy-duty seats designed for bariatric use, metal fasteners may be specified because the load demands exceed what plastic can reliably sustain. But for the standard residential bathroom — which covers the overwhelming majority of installations — plastic is the smarter, safer, and more practical choice.
Knowing why plastic dominates this hardware category naturally raises a follow-up question: do all plastic mounting systems work the same way, or are there fundamentally different designs depending on the toilet itself?
Types of Toilet Seat Mounting Systems Compared
Not every toilet seat attaches the same way. Two seats can look identical sitting on the shelf, yet the hardware inside the box may follow completely different fastening strategies. One tightens from above with expanding anchors. The other relies on a toilet seat plastic nut threaded from below. Choosing the wrong type means the hardware literally cannot attach to your bowl — and you are back at the store making an exchange.
Understanding the distinction between mounting system designs is the single most important step before shopping for toilet seat bolts replacement kits. Here is how each system works, what sub-varieties exist, and how to figure out which one your toilet uses in under thirty seconds.
Top-Mount vs. Bottom-Mount Fixing Systems
Every toilet seat mounting system falls into one of two broad categories based on where the fastener is tightened.
Bottom-mount (bottom-fix) systems are the traditional design. A bolt drops through the mounting hole from the top of the bowl, and a nut — almost always a plastic nut in residential kits — threads onto that bolt from underneath. You tighten the nut from below, pulling the hinge bracket snug against the ceramic rim. This is the system most people picture when they think of toilet seat hardware, and it remains the most common configuration on standard close-coupled and two-piece toilets where the underside of the bowl is fully accessible.
Top-mount (top-fix) systems work differently. Instead of a nut below the bowl, the bolt threads into an expanding rubber or plastic anchor that sits inside the mounting hole. Everything tightens from above — you never need to reach underneath the bowl at all. As WNS Global's fixing guide explains, top-fix seats exist specifically because some modern toilet designs — particularly back-to-wall and concealed-fixing pans — make the underside of the bowl physically unreachable. Croydex, Bemis, Kohler, and TOTO all offer top-fix versions for exactly this reason.
The distinction matters because the hardware is not interchangeable. A bottom-fix plastic bolt kit cannot function on a toilet that requires a top-fix anchor, and vice versa. Toilet hold down bolts designed for one system simply will not work with the other. Grabbing the wrong kit is one of the most common mistakes DIYers make — and the easiest to avoid once you know which system your bowl requires.
When should you choose each type? The answer is straightforward:
- Bottom-mount: Best for traditional, open-back toilets where you can easily reach beneath the bowl rim. This is the standard for most freestanding residential toilets in North America.
- Top-mount: Required for wall-hung toilets, back-to-wall designs, and any pan where the underside mounting area is enclosed or blocked. Drench's toilet seat buying guide notes that top-fix seats also work on bottom-fix toilets, making them a more versatile fallback if you are unsure.
- Convertible: Some seats ship with hardware for both methods. FIX-A-TAP's Econo seat, for example, is bottom-fixing by default but converts to top fixing with a separate blind fixing kit. These are ideal when stocking for unknown toilet configurations.
Wing Nuts, Hex Nuts, and Snap-On Mounts
Within the bottom-mount category, not all plastic bolts for toilet seat installations use the same nut style. Several sub-varieties exist, and each offers a slightly different balance of convenience and grip strength. Here is what you will encounter:
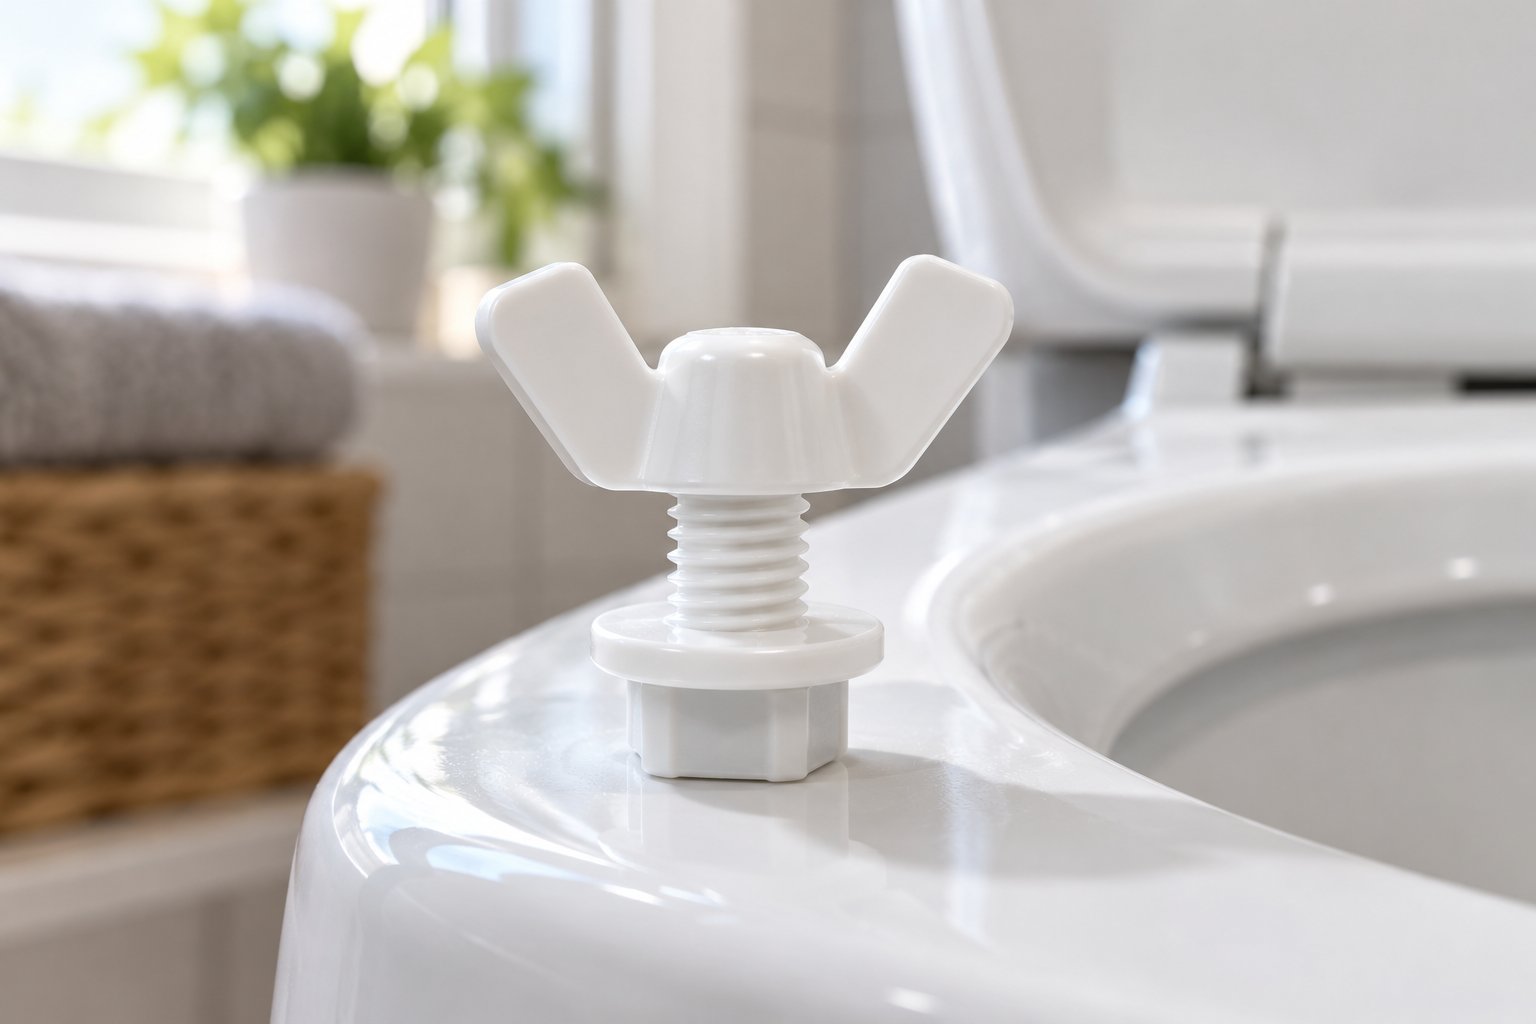
- Wing nuts: Feature two flat "wings" extending from the nut body, giving your fingers a solid grip for hand-tightening. Best for quick DIY installations where you want easy removal later — no tools needed at all.
- Hex-style plastic nuts: Shaped like a traditional hexagonal nut but made from nylon or polypropylene. They accept a wrench for slightly more precise torque control. Best when you want a more secure hold or plan to leave the hardware in place for years.
- Snap-on or quick-release mounts: Found on premium seats, these use a locking mechanism that clicks into place rather than threading. The seat can be detached with a button press or a quarter-turn for cleaning, while the mounting base stays fixed to the bowl. Kohler's ReadyLatch and Croydex's Flexi-Fix are well-known examples of this approach.
- Soft-close seat hardware: Seats with slow-closing dampers often use specialized bolt configurations that integrate the damping mechanism directly into the hinge assembly. The mounting bolt and plastic nut underneath may look standard, but the hinge atop the bowl contains internal components — springs, hydraulic dampers, or friction pads — that are specific to that seat model. Replacing the nut alone is straightforward, but replacing the hinge usually means matching the exact seat brand.
Most toilet seat bolts replacement kits sold at hardware stores include either wing nuts or hex nuts. If you are upgrading to a quick-release or soft-close seat, the necessary mounting hardware typically comes bundled in the box with the seat itself.
How to Identify Your Current Mounting Type
You do not need any tools for this check — just your eyes and one hand. Walk to your toilet and look at the rear of the bowl where the seat hinges attach. Then follow this simple visual test:
If you see bolt heads or hinge caps on top of the bowl's rear rim and you can feel or see nuts, washers, or wing nuts when you reach underneath, you have a bottom-mount system. The plastic nut living under the bowl is the fastener holding everything together.
If you see smooth caps, push-buttons, or recessed screw heads on top with nothing accessible underneath, you have a top-mount system. The fastener expands inside the mounting hole rather than threading onto a bolt from below.
Still unsure? Try this: reach underneath the rear of the bowl near the hinge points. If your fingers touch a nut or threaded bolt end, that confirms a bottom-fix setup. If the underside is smooth or completely enclosed, your toilet needs top-fix hardware.
Knowing your mounting type narrows your shopping list instantly. A bottom-fix toilet needs a kit with a bolt, washer, and plastic nut. A top-fix toilet needs a kit with expanding anchors or blind-fixing plugs. Get this right, and every step that follows — from material selection to the actual installation — becomes dramatically simpler.
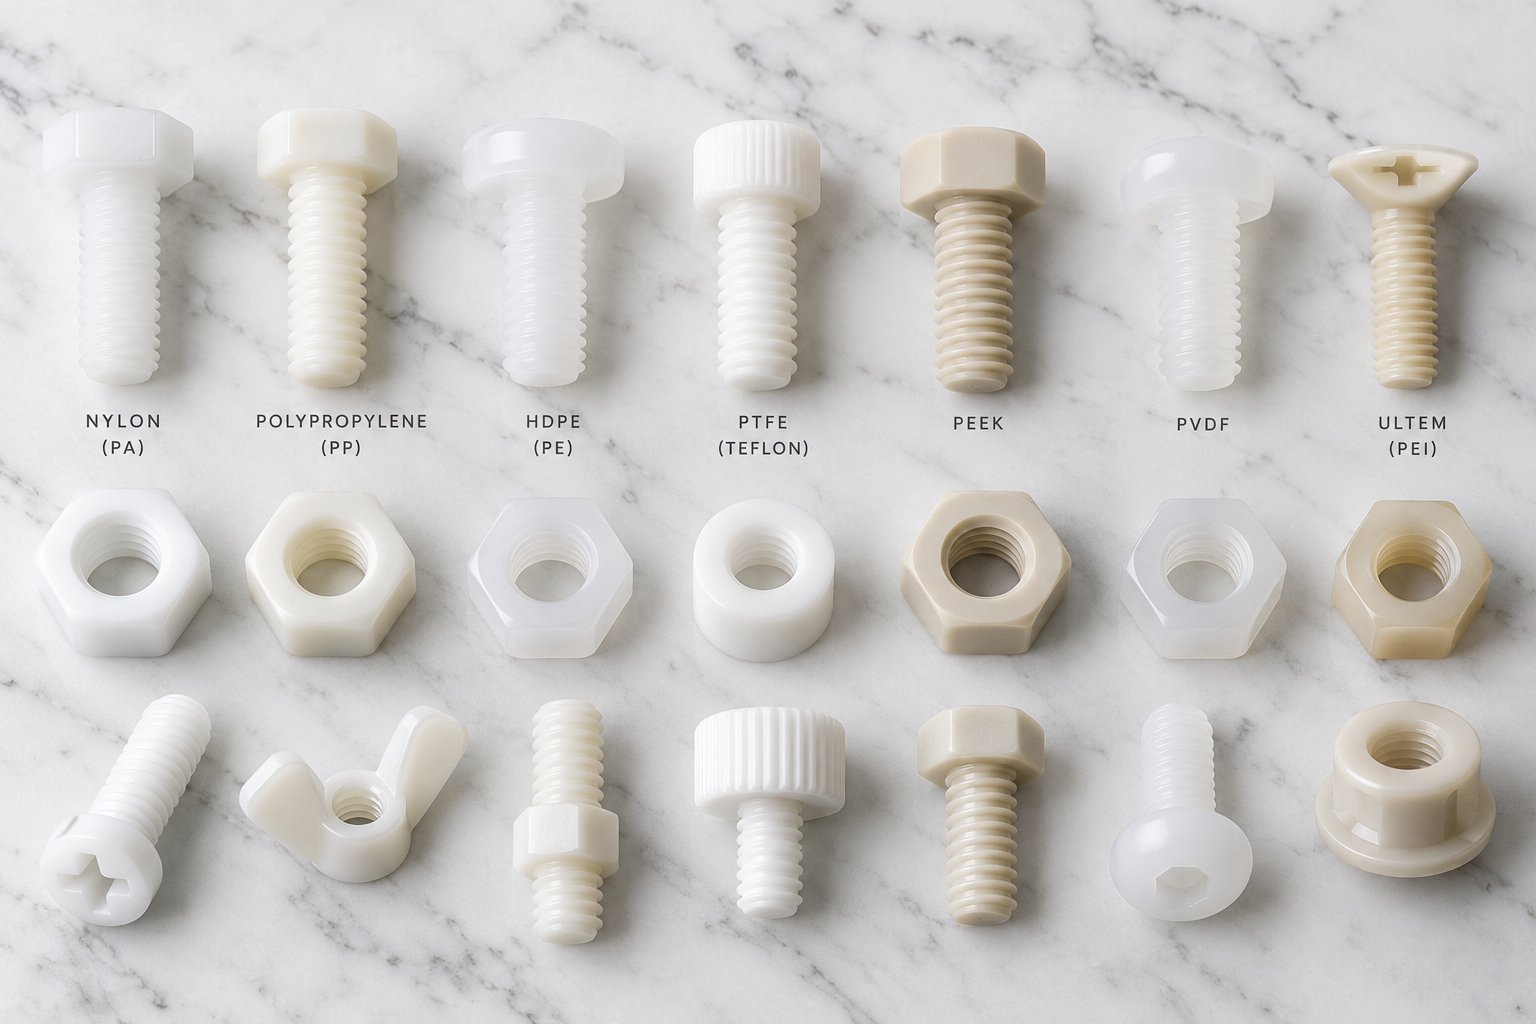
Plastic Nut Materials and How They Affect Durability
You already know that plastic beats metal for toilet seat mounting. But here is something most people never consider: not all plastic nuts are made from the same polymer. The specific plastic used in your toilet seat bolts plastic hardware affects how long it grips, how it reacts to your bathroom cleaner, and whether it holds its torque reliably over the years. Two nuts can look identical on the shelf yet behave very differently once installed.
Understanding the material behind the fastener helps you evaluate replacement kit quality — and explains why a bargain-bin bolt set sometimes fails within months while a better one lasts a decade.
Nylon vs. Polypropylene vs. Other Polymers
The vast majority of toilet seat screws plastic hardware falls into one of two material families: nylon or polypropylene. A handful of manufacturers use specialty polymers for premium applications. Here is what separates them.
Nylon (polyamide) is the high-performance option. It delivers the strongest grip of any common plastic fastener material, with a tensile strength ranging from 70 to 90 MPa — roughly double that of polypropylene. That strength translates directly into thread durability. A nylon nut resists stripping during repeated tightening cycles, and it holds torque more reliably under sustained clamping pressure. It also handles a wide temperature range, rated from -40°C to 120°C, which means it will not become brittle even in an unheated winter bathroom.
The trade-off? Nylon absorbs moisture. As polymer engineers at Bamberger Amco Polymers explain, nylon's polar molecular structure attracts water molecules that hydrogen-bond between polymer chains, acting as a plasticizer. In practical terms, this means a nylon nut sitting in a perpetually damp under-bowl environment can absorb moisture over time — up to 8% by weight in some grades. That absorbed water slightly reduces stiffness and strength while increasing flexibility. For a toilet seat nut, this is rarely catastrophic, but it does mean a nylon fastener may loosen marginally over several years and benefit from periodic retightening.
Polypropylene (PP) takes the opposite approach. Its moisture absorption is virtually nonexistent — less than 0.01% — so it will never swell, soften, or change dimensions in a humid bathroom. Polypropylene also delivers excellent chemical resistance. As Metro Plastics highlights, PP stands up to most acids, alkaline cleaners, bleach, and disinfectants, making it nearly bulletproof against the cleaning products you spray around and beneath a toilet bowl. It is lighter and typically less expensive than nylon.
The compromise is mechanical strength. With a tensile strength of roughly 30 to 40 MPa, polypropylene is noticeably less rigid than nylon. Its threads are slightly more prone to stripping under aggressive tightening, and it offers less clamping force per turn. For a standard residential toilet seat — where the load is modest and hand-tightening is the norm — this difference rarely matters in practice. But if you tend to crank fasteners aggressively with pliers, polypropylene will complain before nylon does.
Other polymers show up occasionally in specialty or premium mounting kits:
- ABS (acrylonitrile butadiene styrene): Tough and impact-resistant, sometimes used in hinge bodies rather than nuts. However, ABS has an amorphous molecular structure that makes it more vulnerable to chemical attack — particularly from solvents and strong cleaners — compared to semi-crystalline plastics like nylon or PP.
- Acetal (POM / polyoxymethylene): Offers excellent dimensional stability, low friction, and strong resistance to many solvents. It holds precise thread forms well, making it a solid choice for fasteners that demand tight tolerances. The catch is that acetal is vulnerable to strong acids and chlorine-based cleaners like bleach — a significant drawback in a bathroom setting where bleach is a common cleaning agent.
For most plastic screws for toilet seat applications, you will encounter nylon or polypropylene. The others are niche players worth knowing about, but unlikely to show up in a standard retail replacement kit.
How Material Choice Affects Long-Term Performance
Imagine two identical-looking toilet seat plastic bolts kits sitting side by side on a store shelf. One uses nylon hardware. The other uses polypropylene. Both cost roughly the same. Which should you grab?
The honest answer: for most residential bathrooms, either material performs well enough that the difference is subtle. But specific household habits can tilt the decision.
If your cleaning routine involves frequent bleach or heavy-duty disinfectant sprays beneath the bowl, polypropylene has the edge. Its near-total chemical inertness means those cleaning agents will not degrade the nut's surface or weaken its threads over the years. Nylon handles most cleaners fine, but concentrated acids or prolonged exposure to aggressive formulations can gradually affect the polymer's surface — especially if the nut is already moisture-saturated.
If your priority is maximum grip strength and you rarely deep-clean the underside of the bowl, nylon is the better pick. Its superior tensile strength and thread resilience mean it will hold tighter torque for longer, requiring fewer retightening visits. It is also the safer bet for heavier seats or homes where multiple people of varying sizes share the same toilet.
Here is a quick-reference summary of each material's practical strengths and weaknesses:
- Nylon
- Pros: Highest tensile strength (70-90 MPa), excellent thread durability, wide temperature tolerance, resists repeated tightening cycles
- Cons: Absorbs moisture over time (up to 8%), may gradually loosen in constantly damp conditions, slightly less chemical-resistant than PP
- Polypropylene
- Pros: Near-zero moisture absorption, outstanding resistance to bleach and bathroom cleaners, lightweight, cost-effective
- Cons: Lower tensile strength (30-40 MPa), threads strip more easily under aggressive torque, slightly less rigid
- Acetal (POM)
- Pros: Excellent dimensional stability, low friction for smooth threading, strong solvent resistance
- Cons: Vulnerable to bleach and chlorine-based products, less common in retail kits, higher cost
- ABS
- Pros: High impact resistance, good surface finish
- Cons: Amorphous structure makes it prone to chemical stress cracking, weaker chemical resistance overall, rarely used for the nut itself
The bottom line? Knowing the material printed on (or absent from) your replacement kit's packaging gives you a genuine quality signal. A kit that specifies "nylon" or "polypropylene" is telling you something useful. A kit that just says "plastic" with no further detail is leaving you to guess — and you already know how that tends to work out.
Material knowledge is valuable, but it only pays off when paired with proper installation technique. Even the best polymer will underperform if the nut is cross-threaded, under-tightened, or installed on a bolt that does not match.
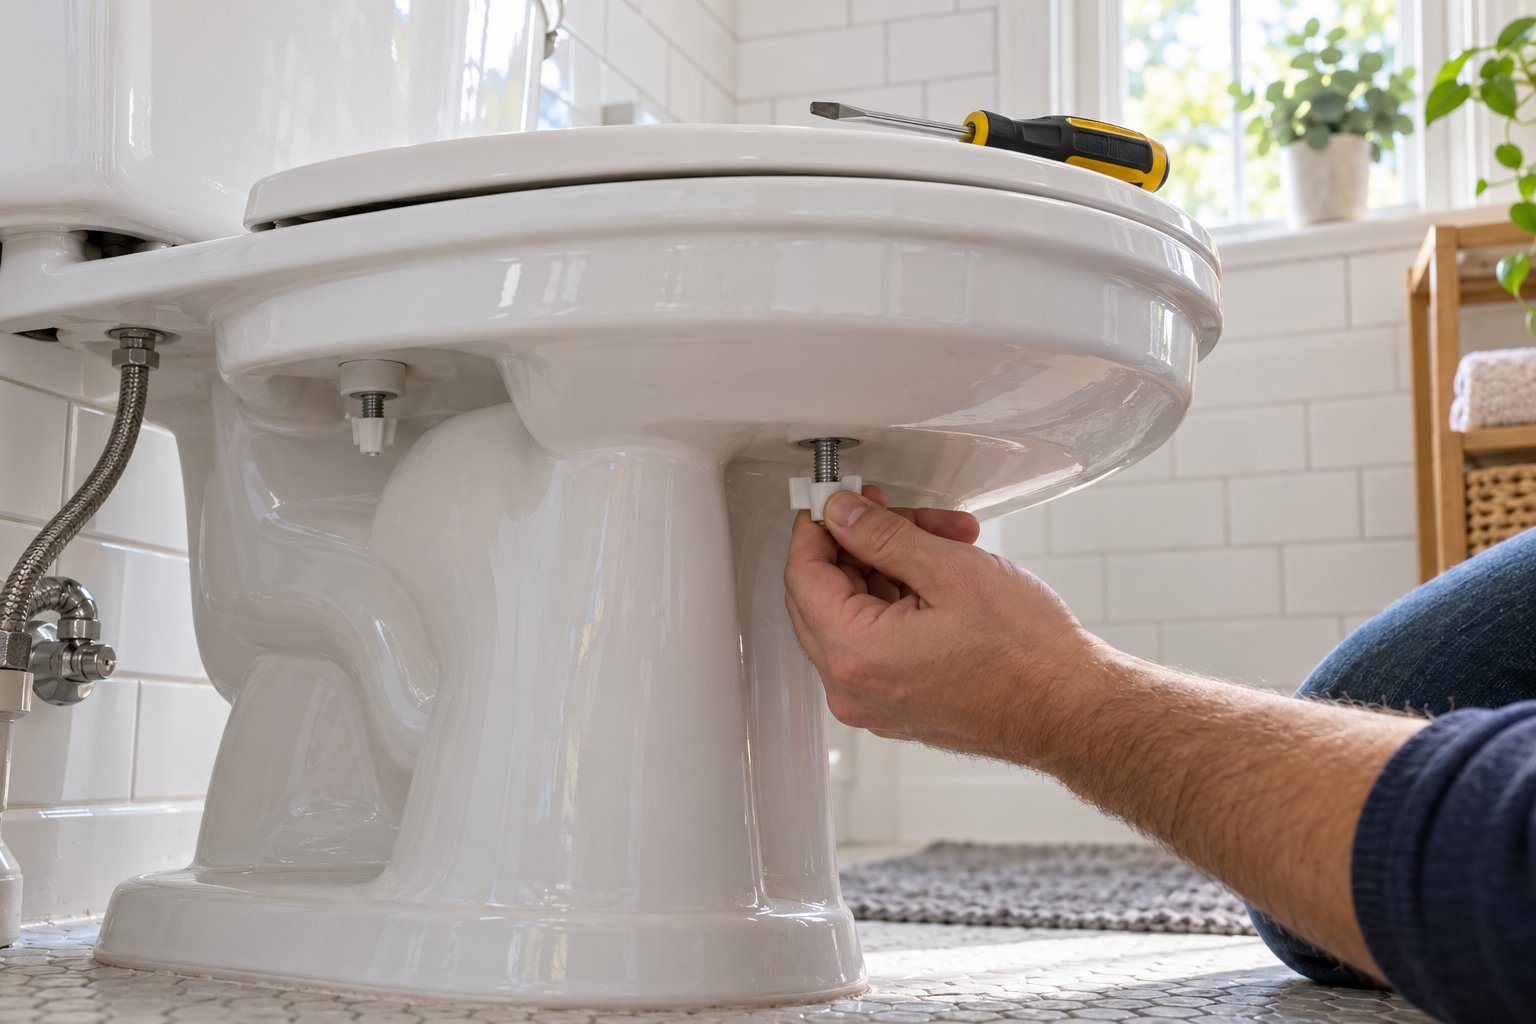
How to Replace Plastic Nuts for Toilet Seats Step by Step
A stripped thread, a cracked wing, a nut that spins freely but never tightens — any of these means the plastic nut beneath your toilet bowl has reached the end of its service life. The good news? Replacing it is one of the simplest home repairs you will ever tackle. You do not need plumbing experience, and the entire job typically takes fifteen to twenty minutes from start to finish.
This walkthrough assumes you are a complete beginner. Every tool, every motion, and every potential snag is covered below so you can work confidently without second-guessing yourself.
Tools and Supplies You Will Need
Before you crouch behind the toilet and start turning things, gather everything in one place. There is nothing worse than realizing you need a tool mid-repair and having to rummage through a junk drawer with wet hands. Here is the complete list:
- Flathead or Phillips screwdriver: Check the bolt head on your existing hardware first — most toilet seat bolts use a wide flathead slot, but some kits use a Phillips cross-drive. The DIY Playbook recommends having a flathead ready as the default since that is the most common head type on seat bolts.
- Adjustable wrench or pliers (optional): You will only need these if the old nuts are seized or corroded. For plastic-on-plastic removal, your fingers are usually enough.
- Replacement plastic nut kit: Make sure the kit matches your mounting type — bottom-fix with the correct bolt diameter and length. Most home improvement retailers carry universal-fit kits with plastic screws that work on standard residential toilets. If you are shopping at a store like Home Depot, look in the toilet repair aisle near the wax rings and supply lines — that is where you will find home depot toilet seat screws and bolt kits grouped together.
- Rag and mild cleaner: The area beneath the bolt holes collects grime you do not want to think about. A quick wipe-down before installing new hardware ensures a clean contact surface and better grip.
- Penetrating lubricant (WD-40 or similar): Only necessary if you are removing old metal hardware that has corroded and seized. Plastic screws home depot and other retailers sell can typically be removed without lubrication, but older metal-bolted seats are a different story.
- Small hacksaw or oscillating multi-tool (last resort): Keep this nearby only if you suspect the old fasteners are rusted solid. You probably will not need it, but having it within reach saves frustration if a bolt refuses to budge.
That is it — no specialty plumbing tools, no pipe tape, no bucket. If you can turn a screwdriver, you already have the primary skill this job demands.
Removing the Old Toilet Seat Hardware
Removal is almost always the harder half of this project. The new hardware threads on smoothly because it is fresh. The old hardware, on the other hand, has been sitting in a humid environment for years and may resist your efforts. Here is how to handle every common scenario.
Step one: expose the bolt heads. Look at the top rear of your toilet bowl where the seat hinges connect. Many seats have small plastic caps or hinge covers concealing the bolt heads. Flip these open or pop them off with a flathead screwdriver. As Home Depot's installation guide notes, a screwdriver may be necessary to pry off stubborn bolt covers — just work gently to avoid scratching the porcelain.
Step two: stabilize the bolt from above. Place your screwdriver into the bolt head slot and hold it firmly. This prevents the bolt from spinning when you turn the nut below. Without this counter-hold, you will just rotate the entire assembly in place and nothing will loosen.
Step three: turn the nut counterclockwise from below. Reach underneath the bowl and grip the nut. Turn it to the left (counterclockwise when viewed from below). If it is a wing nut, the wings give your fingers solid leverage. If it is a hex nut, an adjustable wrench helps. The nut should thread off the bolt in a few full turns.
Dealing with spinning bolts: This is the single most common frustration. You turn the nut, but the bolt spins right along with it. The fix is simple — press down firmly on the screwdriver to create friction between the bolt head and the hinge bracket while turning the nut. If the bolt still spins freely, have someone else hold the screwdriver while you work the nut, or use locking pliers to clamp the bolt shaft just below the bowl.
Dealing with seized metal nuts: If your old hardware is metal and corrosion has welded the nut to the bolt, do not force it — you risk cracking the porcelain. Instead, spray penetrating lubricant generously onto the threads and let it soak for ten to fifteen minutes. WD-40 or a similar penetrant will usually break the corrosion bond enough to allow removal. If the nut still will not budge after two soaking attempts, use a small hacksaw blade or an oscillating multi-tool to carefully cut through the bolt between the nut and the underside of the bowl. Protect the ceramic with tape or a thin piece of cardboard while cutting.
Step four: lift and clean. Once both nuts are off, pull the bolts up and out from the top. Lift the old seat and hinge assembly away. You will likely find a ring of built-up grime around each mounting hole — grab your rag and cleaner and scrub that area thoroughly before moving on. As one DIY guide puts it, you will be amazed — and maybe a little grossed out — by the gunk hiding under those bolt caps. A clean surface ensures the new hardware seats flush against the porcelain and grips properly.
Installing the New Plastic Nut and Bolt Assembly
With the old hardware out and the mounting area clean, installation is the straightforward, satisfying part. Follow these steps in order:
- Unpack and inspect the new kit. Lay out all the components: bolts, nuts, washers, any bushings or sleeves. Confirm that you have two complete sets — one for each mounting hole. Check the bolt threads for any manufacturing defects or burrs by threading a nut on and off once by hand.
- Position the seat and hinges. Set the new toilet seat on the bowl with the hinge brackets aligned over the mounting holes. Slide the seat forward and back slightly until the holes in the hinges line up perfectly with the holes in the ceramic. The seat should be centered on the bowl — not shifted left or right.
- Drop the bolts through from above. Insert one bolt down through the hinge hole and into the mounting hole in the porcelain. Repeat for the second bolt. The bolt heads should sit flat against the top of the hinge bracket. If your kit includes bushings or sleeves, slide those onto the bolt before inserting it — they center the bolt and prevent lateral play.
- Add washers from below. Reach underneath the bowl and slide a washer onto each bolt where it protrudes through the ceramic. The washer sits flat against the underside of the porcelain, protecting the surface and spreading the clamping pressure evenly.
- Thread the plastic nuts on by hand. Start each nut onto its bolt with your fingers only. Turn clockwise (when viewed from below) and thread it down until the nut contacts the washer. This hand-threading step is critical — Home Depot's guide emphasizes tightening clockwise by hand first to ensure the threads engage cleanly and you do not cross-thread the nut.
- Tighten firmly but do not over-torque. Once both nuts are hand-tight, give each one an additional quarter-turn using pliers or an adjustable wrench. That is all. A quarter-turn beyond hand-tight provides enough clamping force to hold the seat rock-steady without risking thread damage to the plastic nut or stress fractures in the ceramic. If you are using wing nuts, grip the wings and turn — no wrench needed at all.
- Check alignment before finalizing. With both nuts snugged down, open and close the seat and lid a few times. The seat should swing freely without binding or scraping. Look at the seat from the front — it should be centered on the bowl, not cocked to one side. If it is off-center, loosen one nut slightly, nudge the seat into position, and retighten.
- Sit-test and retighten if needed. Sit down gently on the seat and rock slightly from side to side. If you feel any lateral shifting, stand up and give each nut another eighth-turn from below. Repeat the sit-test. When the seat feels completely planted and motionless, you are done.
- Snap on hinge covers. If your new seat includes decorative plastic caps over the bolt heads, press them into place now. They click over the hinge and bolt head to create a clean, finished look.
The entire installation — from dropping the first bolt to snapping on the last hinge cover — typically takes five to ten minutes. Even for someone who has never touched a plumbing project before, this is a genuinely beginner-friendly repair. As The DIY Playbook confirms, the whole installation process only takes a matter of minutes.
Hand-tight plus a quarter-turn is the golden rule for plastic toilet seat nuts. Over-tightening strips threads and risks cracking porcelain. Under-tightening leaves the seat wobbly within days.
A properly installed plastic nut kit should hold your seat firm and quiet for years. But even the best installation cannot guarantee compatibility if the bolt spacing, diameter, or hinge style does not match your specific toilet — a challenge that leads many homeowners to wonder whether these kits are truly universal or brand-specific.
Compatibility and Choosing the Right Plastic Nut Kit
You have mastered the installation technique, but here is the catch: flawless technique means nothing if the kit you bought does not physically fit your toilet. A bolt that is too short will not reach the nut. A bolt that is too wide will not drop through the mounting hole. And a hinge designed for one spacing will leave your seat crooked on a bowl with a different layout. Compatibility is the silent dealbreaker that sends more people back to the hardware store than any other issue.
So the real question is this — are plastic toilet seat nuts universal, or do you need to match them to a specific brand?
Are Plastic Toilet Seat Nuts Universal or Brand-Specific
The short answer: mostly compatible, but not truly universal. Most residential toilets manufactured for the North American market use a standard bolt-hole spacing of approximately 5.5 inches (140 mm) center-to-center. As InspectAPedia's toilet seat replacement guide documents, this 5-1/2 inch spread is the industry standard — but toilets vary, and not all seats or seat hinges fit all toilets. Certain American Standard models, for instance, use a wide-spread spacing of roughly 10 inches (255 mm), which makes standard bolt kits completely incompatible.
Beyond spacing, three other variables affect whether a given kit will work on your bowl:
- Bolt diameter: Most seat bolts measure between 1/4 inch and 5/16 inch. A bolt that is even slightly too thick will not pass through the mounting hole. Measure your existing bolt with a ruler or caliper before shopping.
- Bolt length: Bowl rim thickness varies between manufacturers. A bolt designed for a thin-rimmed bowl may be too short for a thicker one, leaving insufficient thread for the nut to grip. Most kits offer bolts between 2 and 3 inches long — check that the length accommodates your ceramic thickness plus the hinge bracket plus enough exposed thread for the washer and nut.
- Thread pitch: This is the distance between threads on the bolt. While many residential kits share common pitches, mixing a nut from one manufacturer with a bolt from another can result in cross-threading or a loose fit. Whenever possible, use the nut and bolt from the same kit.
A heavy duty toilet seat fastener bolt kit may include longer or thicker bolts to handle specialty seats, bariatric applications, or commercial-grade hinges. Similarly, soft close toilet seat bolts often come with proprietary hinge assemblies that only accept matching nuts. If you are replacing hardware on a slow-close seat, your safest move is ordering the replacement kit directly from the seat manufacturer rather than grabbing a generic set off the shelf.
For standard residential toilets, a universal-fit kit from your local hardware store will work in the vast majority of cases — as long as you verify spacing, bolt diameter, and length before purchasing. Measure twice, buy once.
When an Adjustable Hinge System Solves Alignment Problems
Sometimes the hardware fits, the bolt drops cleanly through the hole, the nut threads on perfectly — and the seat still sits crooked. You nudge it to the center, tighten everything down, and within a week it has drifted to one side again. What is happening?
The problem often is not the hardware. It is the mounting holes themselves. Porcelain casting is not a precision machining process. Bolt holes can end up slightly off-center, elongated from years of use, or spaced a fraction of an inch wider or narrower than the nominal standard. Standard fixed-position hinges have zero room to compensate for these irregularities. The bolt goes where the hole is, and if the hole is slightly wrong, the seat alignment follows.
This is exactly the scenario where adjustable hinge mounting systems earn their place. Instead of fixed bolt positions, these systems allow the hinge to slide laterally along a track or base plate, letting you fine-tune the seat's left-right position before locking everything down. The result is a perfectly centered seat even on a bowl with imperfect hole placement.
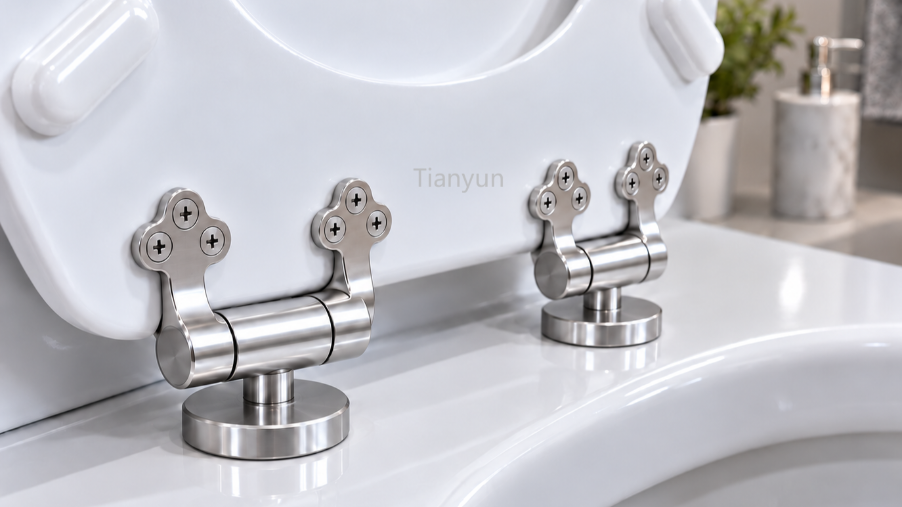
One example of how manufacturers address this at the production level is Tianyun's Adjustable Toilet Seat Hinge Mounting System with a Plastic Bottom-Fixing Nut. This system pairs an adjustable hinge base with a plastic nut that tightens from beneath the bowl — combining the alignment flexibility of a sliding track with the corrosion-proof reliability of a standard bottom-fix fastener. It is designed primarily as a B2B component for traditional seat manufacturers rather than a retail consumer product, meaning the technology typically reaches homeowners through the branded seats that incorporate it. An important distinction: this system includes a plastic nut component but is not an all-plastic bolt, nor is it a universally compatible standalone nut. It requires accessible underside mounting points, just like any bottom-fix setup.
How do you know whether an adjustable system — whether built into a seat or purchased as a standalone kit — is what your situation actually calls for? Watch for these telltale signs:
- The seat consistently shifts to one side even after retightening, suggesting the mounting holes are not symmetrically placed relative to the bowl centerline.
- Bolt holes are slightly elongated or worn from years of micro-movement, giving the bolt enough lateral play to drift out of alignment.
- Previous installations required shimming — using folded cardboard, rubber strips, or stacked washers to force the seat into a centered position. Shimming is a workaround, not a solution, and adjustable hinges eliminate the need for it entirely.
- You are installing a seat on an older or imported toilet whose mounting hole spacing does not match the common 5.5-inch standard. InspectAPedia's data confirms that "universal" hinge designs — which slide horizontally along a supporting rod to fit a range of spacing — can solve hard-to-fit bolt spread problems on these non-standard bowls.
Wing nuts for toilet seat installations remain the most common retail fastener, and they work perfectly on the majority of standard bowls. But when standard hardware keeps producing a crooked result, the issue is geometric — and only an adjustable mounting system addresses geometry directly.
Compatibility and alignment determine whether your hardware can do its job. The next practical decision is whether swapping just the nut is enough to fix your problem — or whether the seat itself has reached the point where replacing the entire unit makes more sense.
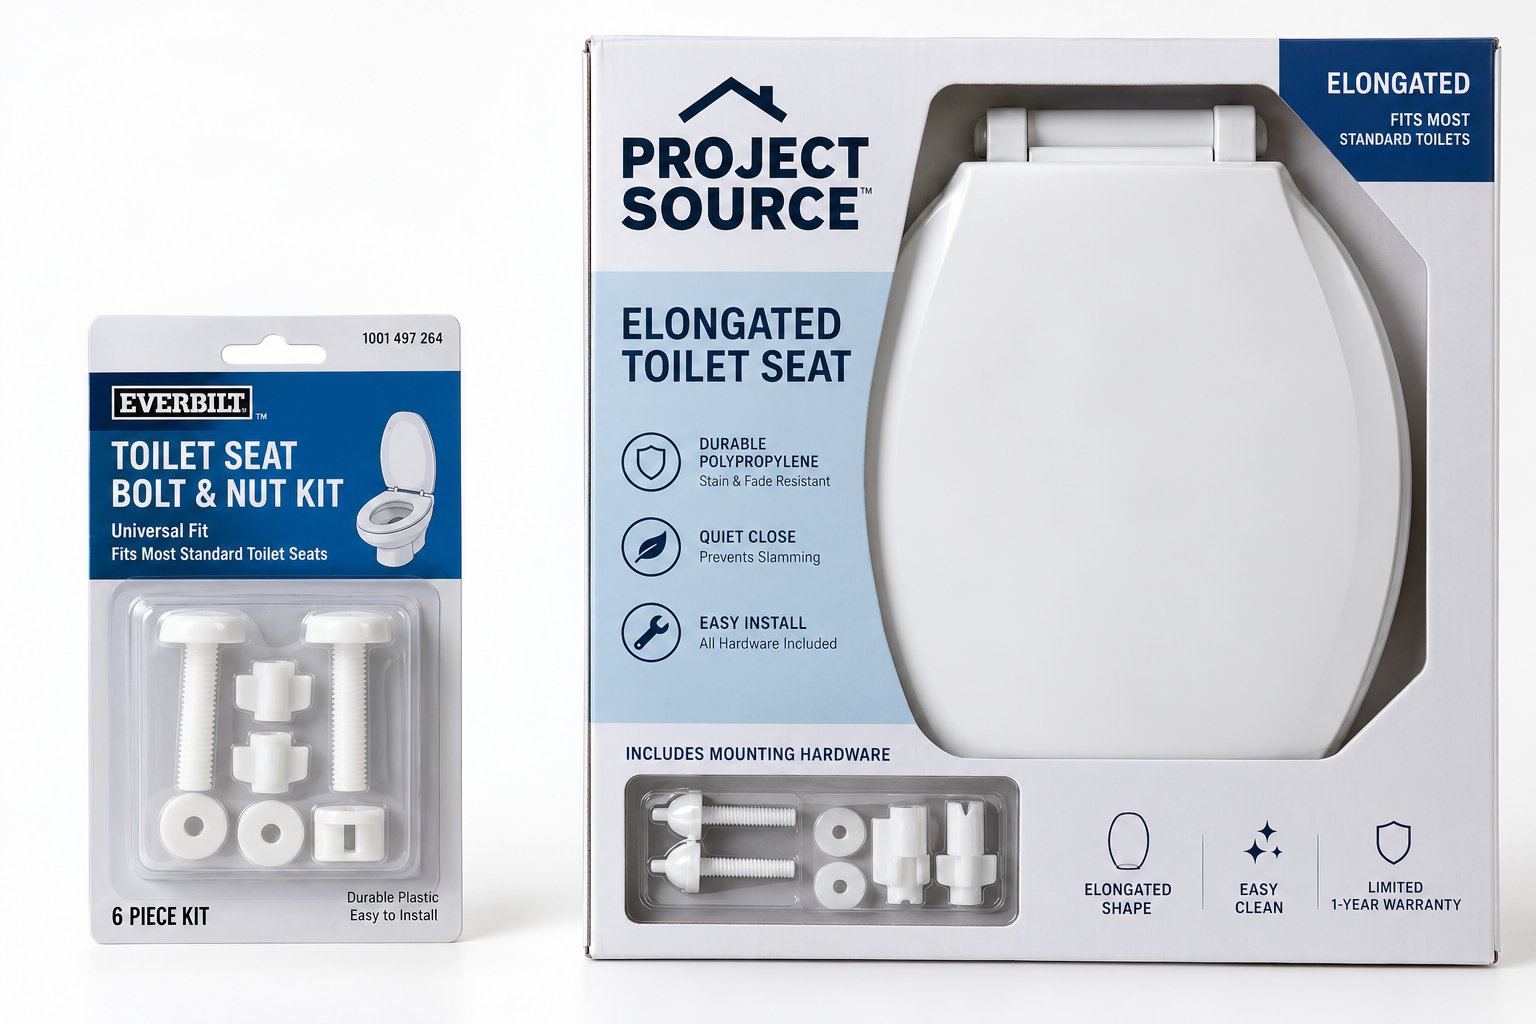
When to Replace the Plastic Screw Toilet Seat Nut vs. the Entire Seat
A wobbly toilet seat does not automatically mean you need a brand-new one. Sometimes the fix costs two dollars. Other times, the seat itself is the problem and no amount of fresh hardware will save it. Spending money on the wrong solution wastes both cash and time — so before you head to the store, figure out which category your situation actually falls into.
Signs You Only Need New Nuts or Bolts
Think of it this way: the seat is the car, and the plastic nut is the lug nut holding the wheel on. If the lug nut cracks, you replace the lug nut — not the entire vehicle. The same logic applies here. A hardware-only fix is the right call when the seat body and hinges are still structurally sound but the fastener underneath has failed.
You likely only need a replacement plastic nut kit if you notice any of these indicators:
- The seat wobbles, but the hinges and seat body are intact. Rock the seat side to side while looking at the hinge connection. If the hinge brackets are solid and the seat itself shows no cracks, the movement is almost certainly coming from a loose or degraded nut below the bowl.
- The plastic nut is visibly cracked or stripped. Pull back the hinge cover, reach underneath, and inspect the nut. A cracked wing, a split body, or threads that have been rounded smooth are all signs the nut has reached end of life — even if the bolt it sits on is perfectly fine.
- Threads are worn but every other component is functional. Over years of micro-vibrations from daily use, the thread engagement between bolt and nut gradually wears down. You will notice this when the nut spins freely without gripping or when you cannot get the screw in toilet seat hardware to hold tension no matter how much you tighten. A fresh nut with crisp threads solves this instantly.
- The bolt is straight and undamaged. If the bolt still drops cleanly through the mounting hole, sits flush in the hinge bracket, and shows no corrosion or bending, there is no reason to replace it along with the nut — though many inexpensive kits bundle both together anyway.
In any of these cases, a basic bolt kit from the toilet repair aisle at your nearest home improvement store is the cheapest and fastest fix. These kits typically include two bolts, two plastic nuts, and washers — everything you need for both mounting points — and most cost under five dollars.
Signs the Entire Toilet Seat Should Be Replaced
Hardware replacement has its limits. No bolt kit in the world can fix a seat that is structurally compromised. If the problem goes beyond the fasteners, you are better off buying a complete new seat — which almost always ships with its own mounting hardware included, making a separate nut purchase unnecessary.
Consider replacing the entire seat when you see these scenarios:
- Cracked seat body or lid. Even a hairline crack in the seat surface is a hygiene concern. As The Bathroom Showroom explains, cracks provide a perfect hiding place for bacteria, making thorough cleaning nearly impossible. Temporary fixes like tape or glue are not permanent solutions — they fail under repeated stress and create uneven surfaces that trap more grime.
- Broken hinge arms. If the plastic arm connecting the seat to the hinge bracket has snapped or warped, the seat cannot pivot properly regardless of how tight the nut is below. Hinge arms are molded into the seat body on most residential models and cannot be replaced independently.
- Discolored or hygienically compromised surface. A toilet seat screw plastic fastener can be swapped in minutes, but permanent yellowing, deep stains, or rough surface texture from years of chemical exposure are baked into the seat material itself. Industry guidance suggests replacing seats every five to seven years, or sooner if cleaning no longer restores the surface appearance.
- Outdated hinges that no longer accept standard bolt sizes. Some older or imported toilet seats used proprietary hinge configurations with non-standard bolt diameters or thread pitches. If you cannot find a compatible replacement nut for an obsolete hinge, replacing the entire seat with a modern unit that uses current standard hardware is the practical path forward.
- Soft-close or quick-release mechanism has failed. These features rely on internal dampers, springs, or locking tabs built into the hinge assembly — not the nut underneath. A broken slow-close mechanism means the hinge itself needs replacement, and since most slow-close hinges are integrated into the seat, a full seat swap is typically the only option.
Modern seats bundle their own mounting hardware directly in the box, so buying a new seat effectively gives you fresh nuts, bolts, washers, and hinges all at once. You are not paying separately for hardware you would have needed anyway.
Quick Decision Matrix: Replace the Nut or the Whole Seat
Still not sure which route fits your situation? This table maps common symptoms directly to the most cost-effective fix:
| Symptom | Replace Nut/Bolt Only | Replace Entire Seat |
|---|---|---|
| Seat wobbles but body and hinges are intact | Yes — retighten or swap the nut | No |
| Plastic nut is cracked or threads are stripped | Yes — new nut kit solves it | No |
| Seat body has visible cracks or splits | No | Yes — cracks harbor bacteria and worsen over time |
| Hinge arm is broken or warped | No | Yes — hinge arms are molded into the seat |
| Surface is permanently stained or yellowed | No | Yes — cosmetic damage is in the material itself |
| Soft-close damper no longer functions | No | Yes — damper is integrated into the hinge assembly |
The pattern is straightforward: if the damage lives below the bowl at the fastener level, a nut-and-bolt swap is all you need. If the damage lives in the seat, lid, hinge arm, or built-in mechanism, the entire unit has to go. Following this logic saves you from the common mistake of throwing away a perfectly good seat over a two-dollar nut — or, just as wastefully, buying replacement hardware for a seat that is already past its useful life.
Whichever path you choose, the longevity of your repair depends heavily on what happens after installation. A fresh nut on a clean bolt is only the starting point — how you maintain that hardware over the following months and years determines whether the fix lasts one season or an entire decade.
Keeping Your Toilet Seat Secure with Proper Maintenance
A freshly installed plastic nut toilet seat kit feels rock-solid on day one. The seat sits centered, nothing wobbles, and the hardware beneath the bowl grips cleanly. But six months from now? A year? That same nut has absorbed thousands of micro-vibrations from daily use — sit, stand, close, repeat. Without periodic attention, even the highest-quality plastic screw for toilet seat mounting will gradually loosen, and you are right back to that familiar side-to-side shimmy.
Maintenance is not complicated. It does not require tools, plumbing knowledge, or a weekend project. Three simple habits — retightening, cleaning, and choosing quality hardware from the start — are all it takes to keep your seat secure for the long haul.
Periodic Retightening and Inspection Schedule
Every three to six months, try this quick check: sit on the toilet seat and rock your hips gently from side to side. Feel any lateral movement? Even a slight shift means the plastic nut underneath has backed off a fraction of a turn. This is completely normal — not a sign of defective hardware or a bad installation. Vibration from daily use naturally loosens threaded fasteners over time, and plastic nuts are no exception.
The fix takes about thirty seconds. Reach beneath the bowl, find the nut on each bolt, and give it a firm clockwise turn by hand. Wing nuts make this effortless — just grip the wings and twist. Hex-style nuts may benefit from a quick quarter-turn with pliers. That is the entire maintenance procedure. No removal, no disassembly, no special products.
Build this check into a routine you already have. Many homeowners tie it to seasonal tasks — when you change your HVAC filter or test your smoke detectors, add a toilet seat wiggle test to the list. Catching a loose nut early prevents the kind of repeated shifting that gradually strips threads and wears out bolt holes in the ceramic. A nut that loosens slightly and gets retightened promptly can last years longer than one that rattles freely for months before anyone notices.
Pay particular attention after any event that stresses the hardware more than usual: a bathroom deep clean where you removed and reseated the toilet seat, a houseguest staying for an extended visit, or any time someone puts unusual lateral force on the seat. These moments accelerate loosening and warrant an immediate check rather than waiting for the next scheduled inspection.
Cleaning Around Hardware Without Causing Damage
Bathrooms get cleaned with aggressive products — bleach sprays, acidic descalers, abrasive powders. These are fine for porcelain and tile, but they are not all equally safe for the plastic hardware holding your seat in place. Knowing which products to avoid protects your fasteners from premature degradation.
As Horow's toilet seat buying guide notes, plastic (PP) seats should be cleaned with mild soap and water or non-abrasive cleaners, avoiding bleach or harsh acids and alkalis that can cause discoloration or material degradation. The same principle applies to the plastic nut and bolt beneath the bowl. While polypropylene handles most bathroom cleaners well, concentrated bleach left sitting on nylon fasteners can gradually weaken the polymer surface — especially if the nut already has moisture absorbed into its structure.
Here is a practical cleaning approach that keeps hardware in top condition without adding extra steps to your routine:
- During regular bathroom cleaning, wipe the bolt heads on top of the bowl and the nut surfaces underneath with the same mild all-purpose cleaner you use on the rest of the toilet. A damp rag is enough — you are removing dust, grime, and any cleaning product residue that might have dripped down.
- Avoid spraying concentrated cleaners directly onto fastener threads. If you are using a bleach-based bowl cleaner, spray it inside the bowl — not around the hinge area where it can run down the bolt and pool against the nut.
- Never use abrasive scrub pads on plastic hardware. Steel wool, pumice stones, and even rough scouring sponges can scratch the nut surface, creating micro-grooves where moisture and cleaning chemicals accumulate and accelerate wear.
- Rinse after deep cleaning. If any strong cleaner contacts the fasteners during a thorough bathroom scrub, a quick rinse with plain water and a wipe-dry with a clean cloth removes residue before it has time to act on the polymer.
Think of it this way: the same mild soap-and-water approach that protects a plastic toilet seat surface works equally well on the plastic nut holding it in place. Match the cleaning intensity to the material, and the hardware stays sound for years.
Choosing Quality Mounting Hardware for Longevity
When the time does come to buy replacement hardware — whether for a current repair or a future one — three factors determine whether that kit delivers years of reliable service or fails within a season. Keep these priorities in mind while shopping:
- Correct sizing: Verify bolt diameter, length, and hole spacing before purchasing. Most residential toilets accept a 1/4-inch to 5/16-inch bolt with a 5.5-inch center-to-center spread, but measuring your specific toilet eliminates guesswork. A bolt that barely reaches the nut does not leave enough thread engagement for a secure hold.
- Appropriate mounting type: Confirm whether your toilet requires a bottom-fix or top-fix system. Bottom-fix kits with a plastic nut tightened from beneath the bowl remain the most common setup for standard freestanding toilets. Buying a top-fix kit for a bottom-fix bowl — or vice versa — means the hardware simply cannot install.
- Quality polymer material: Look for kits that specify nylon or polypropylene on the packaging rather than a generic "plastic" label. As covered earlier in this guide, nylon offers superior tensile strength and thread durability, while polypropylene delivers better chemical resistance and dimensional stability in humid conditions. Either material far outperforms unspecified bargain plastics that may use weaker, less consistent polymers.
Manufacturers continue refining how mounting systems perform. Companies like Tianyun are advancing the category with adjustable hinge positioning paired with durable plastic bottom-fixing nuts — engineering solutions developed for seat manufacturers that ultimately reach homeowners through the branded seats adopting them. These innovations address persistent challenges like off-center mounting holes and non-standard bolt spacing, improving alignment and long-term stability at the production level. The technology is a reminder that even something as simple as a plastic nut toilet seat system benefits from thoughtful design and quality materials.
Bottom-fix systems with plastic nuts remain the most reliable, corrosion-proof option for any toilet with accessible underside mounting points. They are inexpensive to replace, forgiving to install, and — with minimal periodic attention — capable of holding a seat firmly in place for the better part of a decade.
Three habits keep a toilet seat secure for years: check for wobble every three to six months and retighten by hand, clean hardware with mild soap rather than harsh chemicals, and always replace worn nuts with correctly sized kits made from quality nylon or polypropylene.
A plastic nut is one of the smallest, cheapest, and most overlooked components in your bathroom. It costs a fraction of what you spend on cleaning supplies in a single month. Yet when it fails, you feel it every single time you sit down. Understanding how this hardware works — what it is made of, how to install it, when to replace it, and how to maintain it — transforms a recurring annoyance into a problem you solve once and forget about. That is the real value of knowing your hardware: not just fixing the wobble today, but preventing it from coming back tomorrow.
Frequently Asked Questions About Plastic Nut Toilet Seat Hardware
1. Are plastic toilet seat nuts universal?
Most plastic toilet seat nuts are broadly compatible but not truly universal. The majority of residential toilets use a standard bolt-hole spacing of roughly 5.5 inches center-to-center and accept bolt diameters between 1/4 inch and 5/16 inch. However, some brands like certain American Standard models use a wider 10-inch spacing that standard kits cannot fit. Always measure your existing bolt diameter, hole spacing, and bowl rim thickness before purchasing a replacement kit to ensure a proper match.
2. How do you tighten a plastic nut on a toilet seat without cracking the porcelain?
Thread the plastic nut onto the bolt by hand from underneath the bowl, turning clockwise until it contacts the washer. Then give it only an additional quarter-turn using pliers or a small wrench. This hand-tight-plus-a-quarter-turn rule provides sufficient clamping force to hold the seat securely while preventing the stress fractures or chips that over-tightening can cause. Plastic nuts naturally compress with slight give, acting as a built-in cushion against the ceramic surface.
3. What is the difference between top-fix and bottom-fix toilet seat bolts?
Bottom-fix systems use a bolt that drops through the mounting hole from above while a plastic nut threads onto it from underneath the bowl. Top-fix systems use an expanding rubber or plastic anchor inside the mounting hole so everything tightens from the top with no underside access needed. Bottom-fix is the standard for most freestanding residential toilets, while top-fix is required for wall-hung or back-to-wall designs where the underside is enclosed. The hardware is not interchangeable between the two types.
4. How often should you retighten plastic toilet seat nuts?
Check your toilet seat hardware every three to six months by gently rocking the seat side to side. If you detect any lateral movement, reach beneath the bowl and give each plastic nut a firm clockwise hand-turn. Daily use creates micro-vibrations that gradually loosen threaded fasteners over time, which is normal behavior rather than a hardware defect. Catching a loose nut early prevents thread stripping and extends the life of both the nut and the bolt.
5. Should I replace just the plastic nut or the entire toilet seat?
Replace only the nut or bolt kit when the seat body and hinges remain structurally sound but the fastener is cracked, stripped, or worn. A basic replacement kit costs under five dollars and fixes most wobble issues in minutes. Replace the entire seat when you see cracks in the seat body, broken hinge arms, permanent surface discoloration, or a failed soft-close mechanism. Modern replacement seats include their own mounting hardware, so you get fresh nuts, bolts, and washers bundled in the box.
Apply This Insight to Your Project
Tell us what you are building and how the topic “Stop Guessing: How Plastic Nut Toilet Seat Hardware Actually Works” relates to your application. Our engineering team can help evaluate the next step.