Why Toilet Seat Bolts Seize and How to Identify Yours
You grab a screwdriver, flip open the plastic caps, and twist. Nothing. You try harder. Still nothing. The bolt heads are orange with corrosion, the nuts underneath feel welded in place, and what should have been a ten-minute toilet seat swap is quickly turning into a full-blown bathroom battle. Sound familiar? If you have ever wondered how to remove rusty toilet seat bolts without destroying your toilet in the process, you are far from alone.
Most toilet seats attach with just two bolts, a design so simple it barely qualifies as "hardware." Yet corrosion from years of bathroom humidity, hard water mineral deposits, and general neglect can fuse those two small bolts so firmly that they feel like permanent fixtures. The good news? There is always a way to get them out. This guide walks you through an escalating-methods approach, starting with the gentlest chemical treatments and working up to cutting tools only when absolutely necessary. That progression matters because jumping straight to aggressive removal risks cracking the porcelain, and a new toilet costs far more than a new seat.
Before picking up a single tool, though, you need to know exactly what type of bolt you are dealing with. Misidentifying your hardware wastes time and can lead to the wrong removal technique entirely.
Why Toilet Seat Bolts Rust and Seize
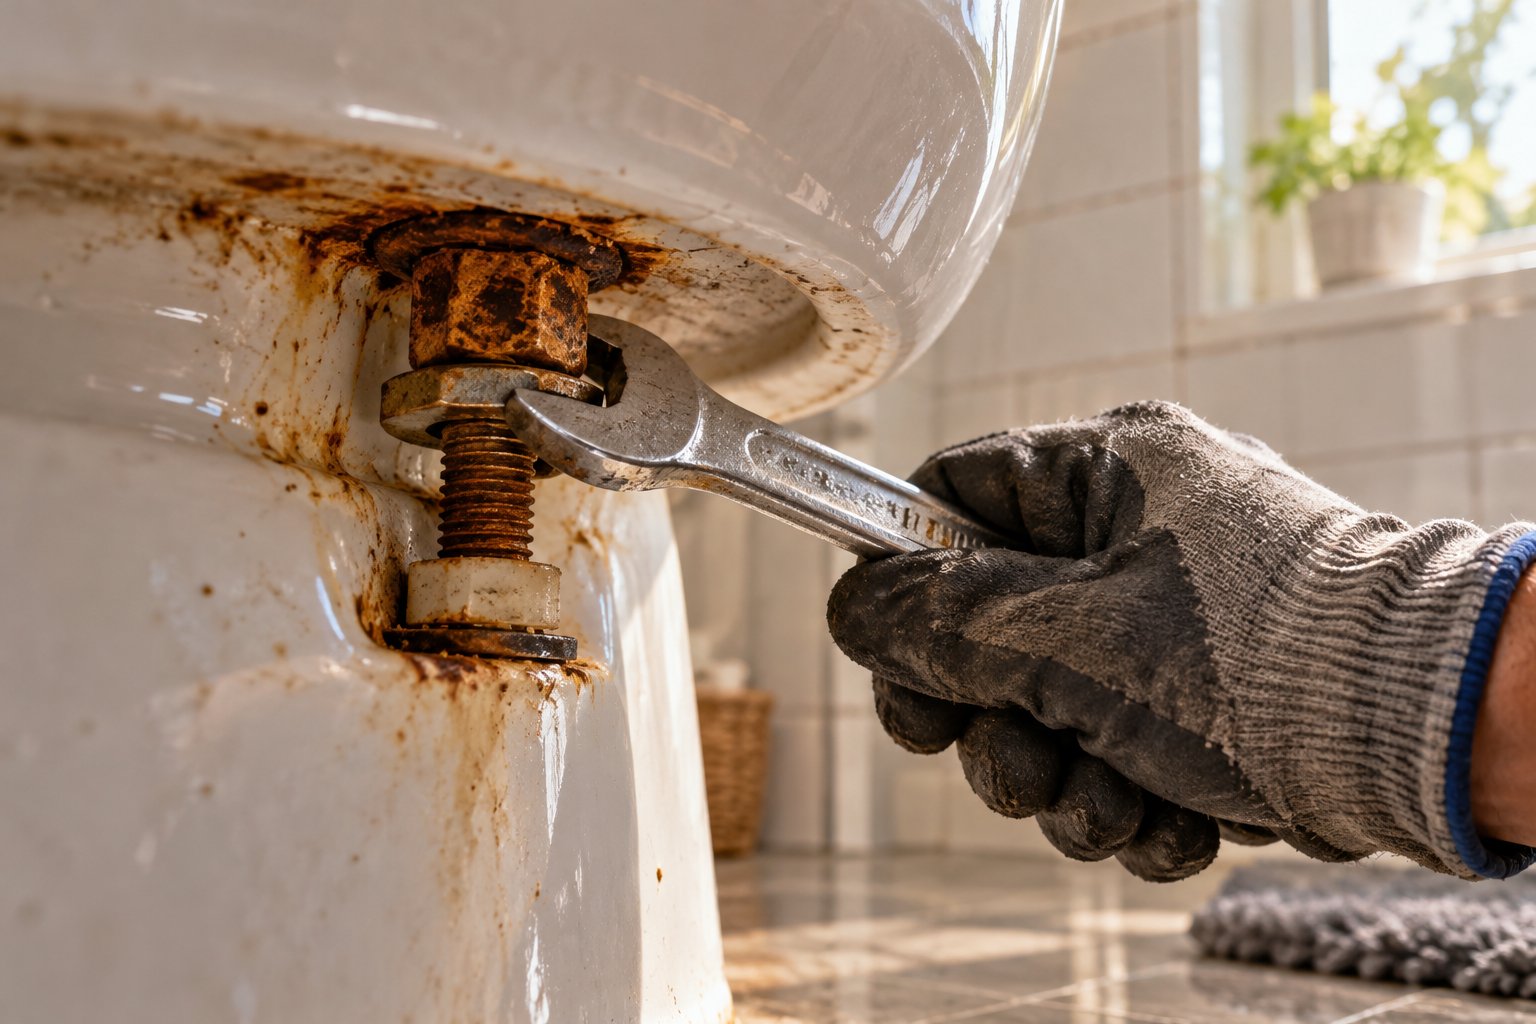
The chemistry behind a seized bolt is straightforward. Iron or low-grade steel reacts with moisture and oxygen through a process called oxidation. Iron atoms lose electrons, oxygen molecules combine with water, and the result is hydrated iron oxide, better known as rust. Research into metal corrosion mechanisms confirms that this iron oxide layer is not just surface discoloration. It physically expands as it forms, sometimes increasing the volume of the original metal by up to six times. That expansion is exactly what locks a bolt against the porcelain bushing or the inside of a mounting hole so tightly that no amount of hand-turning will break it free.
Bathrooms accelerate this process in several ways. Every hot shower sends a wave of moisture into the air, and poor ventilation traps that humidity right around the toilet hardware. Hard water compounds the problem. If your tap water carries high concentrations of iron, calcium, or magnesium minerals, those deposits layer onto bolt threads and create an even tougher bond between the nut and the bolt shank. As Oatey notes, water exposure and humidity can corrode metal bolts to the point where they threaten the entire toilet's stability. Essentially, your bathroom is a low-grade rust factory, and those two little seat bolts sit right in the middle of it.
Identify Your Bolt Type Before You Begin
Not all toilet seat bolts are created equal, and the removal strategy that works perfectly on one type can be completely wrong for another. Take a moment to stand over your toilet and examine the hinge area at the back of the seat. You will encounter one of three common setups:
- Top-mount plastic bolts: Visible bolt heads sit on top of the hinge and are tightened from above. You will usually see small snap caps covering them. These are common on newer, budget-friendly seats.
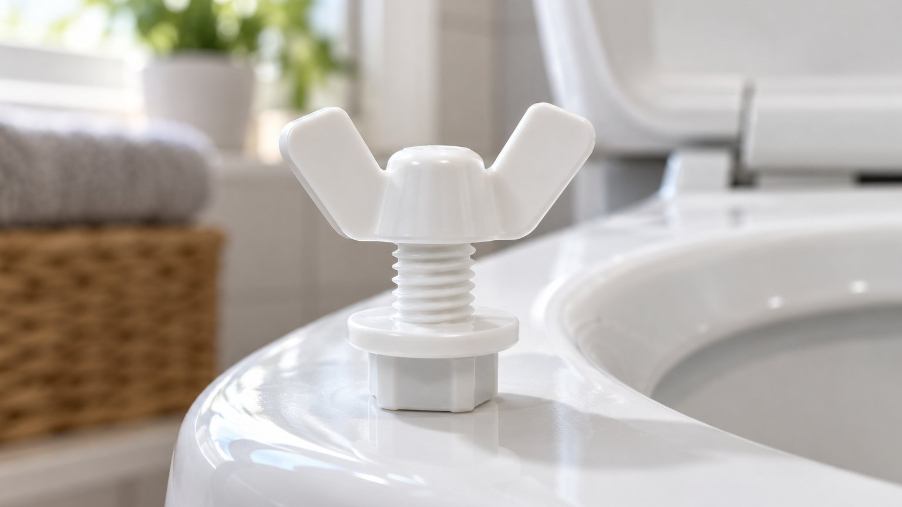
- Bottom-mount metal bolts: The bolt drops through the hinge and the porcelain hole from the top, and a hex nut or wing nut secures it from underneath the bowl rim. This is the most traditional and widespread design.
- Hidden-bolt systems: No visible screws or bolt heads appear on top. Instead, decorative cover caps or sliding plates conceal the fasteners. These are typical on modern, streamlined toilets from brands that prioritize a clean aesthetic.
Why does this matter so much? Metal bottom-mount bolts are the most common culprits for severe rust seizure. They sit in a direct moisture path, the underside nut collects condensation, and the steel-on-steel thread contact creates the perfect environment for corrosion to bond everything together. Plastic bolts, on the other hand, will never rust, but they introduce their own headache. Over time they become brittle from heat and UV exposure, and they tend to crack, strip, or snap the moment you apply real torque. Hidden-bolt systems require a specific access technique before you can even assess the bolt's condition.
Identifying your hardware first prevents you from wasting effort on the wrong approach and, more importantly, protects your porcelain from unnecessary force. With your bolt type diagnosed, the next step is assembling the right tools and replacement parts so you can work through the removal process without a single trip back to the hardware store mid-project.
Step 1 - Gather Your Tools and Replacement Hardware
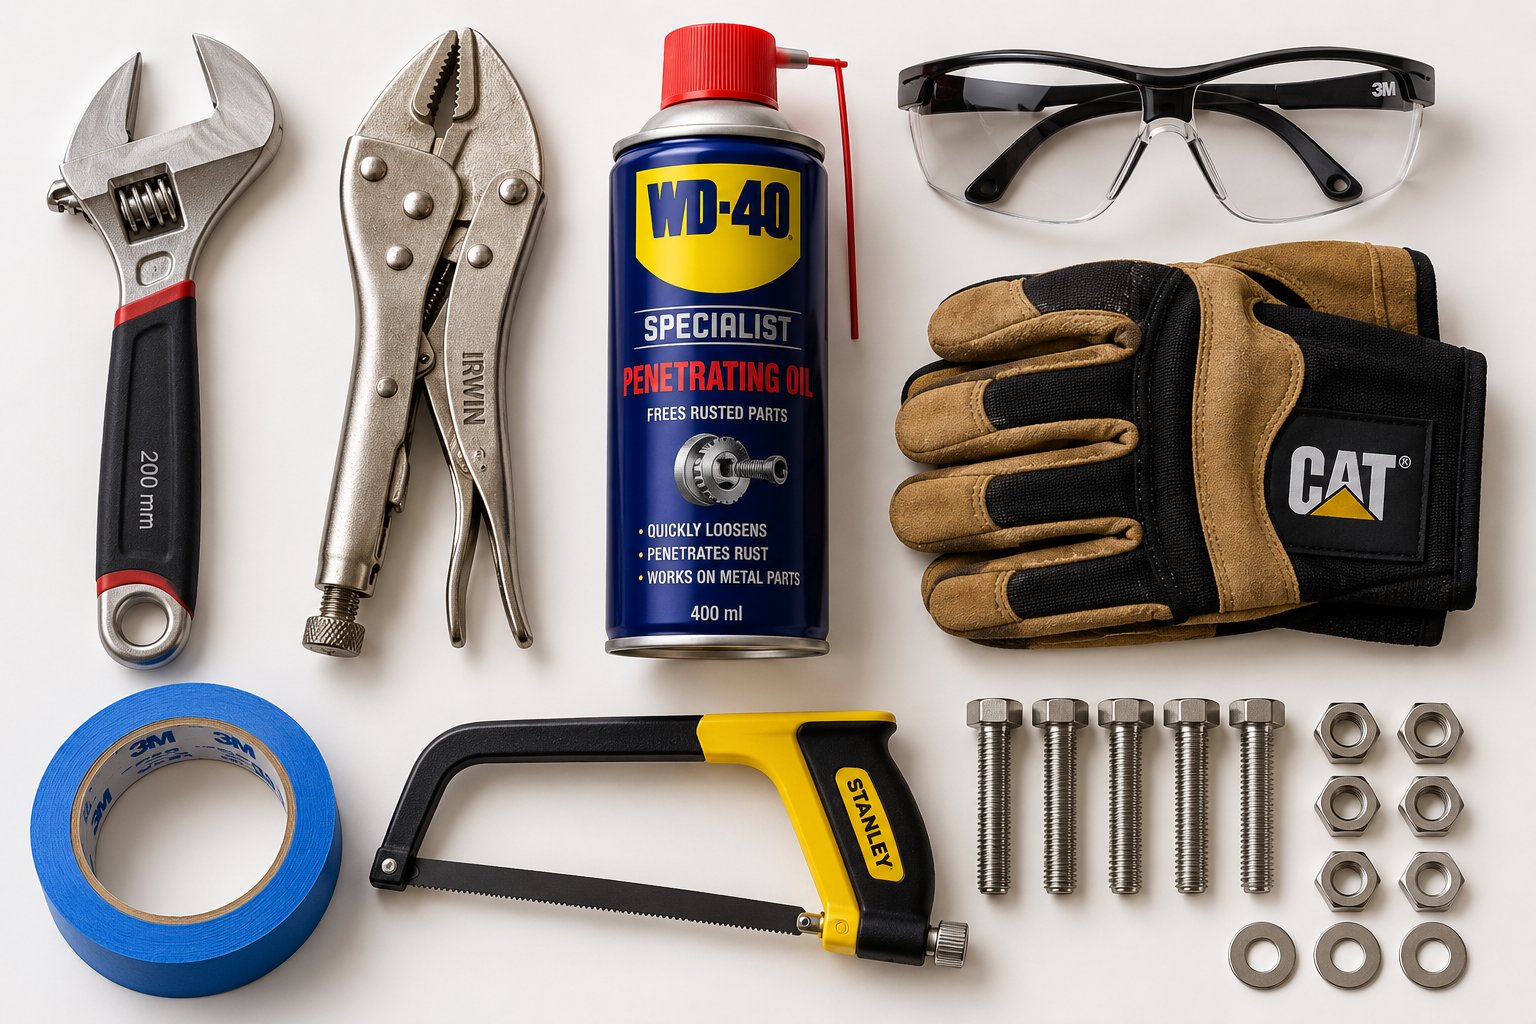
Imagine kneeling behind your toilet, the rusted nut finally starting to budge, and then realizing you do not have pliers within reach. You let go, the bolt re-seizes, and you are back to square one. Incomplete preparation is one of the top reasons DIYers end up cracking porcelain or abandoning the job halfway through. Gathering every tool and material before you touch a single bolt keeps the process smooth, safe, and far less frustrating.
Because the escalating-methods approach moves from gentle chemistry to power cutting, your tool list spans four distinct levels. Not every job will require all four, but having them on hand means you never have to pause mid-removal and lose momentum.
Essential Tools for Every Rust Level
The table below organizes everything you need by removal method so you can quickly assess what is already in your toolbox and what requires a trip to the hardware store.
| Method Level | Tools Needed | Best For |
|---|---|---|
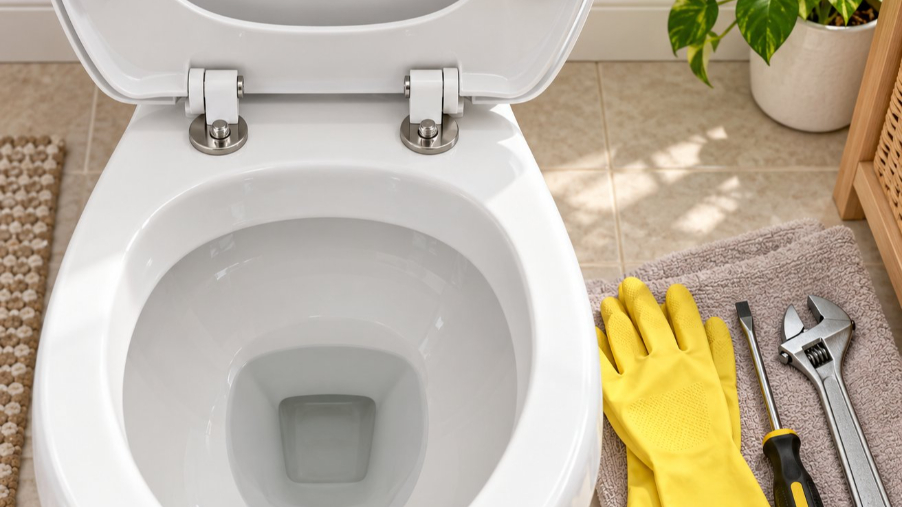
| Level 1 - Chemical | Penetrating oil (PB Blaster, WD-40 Specialist, or similar), white vinegar, clean rags, rubber gloves | Light to moderate rust |
| Level 2 - Manual | Adjustable wrench, locking pliers (Vise-Grips), flathead screwdriver, socket set | Loosened bolts after soaking |
| Level 3 - Heat | Heat gun or hair dryer, safety glasses | Stubborn bolts after chemical treatment |
| Level 4 - Cutting | Mini hacksaw or oscillating multi-tool with metal-cutting blade, safety glasses, heavy-duty work gloves | Severely seized bolts |
A quick note on the socket set: a deep-well socket in the 1/2-inch or 9/16-inch range fits the hex nuts found on most bottom-mount toilet seat bolts. If you only own an adjustable wrench, it will work, but a socket provides a more secure grip in the cramped space beneath the bowl rim.
Choosing the Right Replacement Hardware
Here is a detail many people overlook: have your replacement bolts and mounting kit ready before you start trying to remove the old ones. Why? Because the original hardware almost never survives the removal process intact. Corroded nuts shear off, bolt heads round out, and even bolts that come free cleanly are too pitted to reuse safely. Waiting until after removal to shop for parts leaves your toilet unusable in the meantime.
Material choice is the single biggest factor in whether you will face this same problem again in a few years. Consider these options:
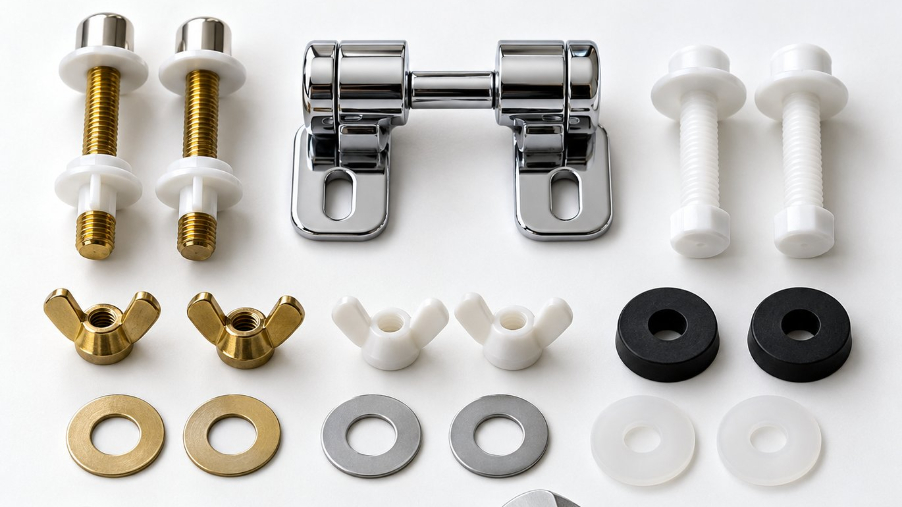
- Stainless steel: Excellent corrosion resistance, high strength, and ideal for humid bathrooms or homes with hard water. This is the top recommendation for long-term durability.
- Brass: Naturally resistant to rust and a solid choice for general-purpose replacement. Slightly softer than stainless steel, so it can deform under heavy overtightening.
- Plastic or nylon: Completely immune to rust and inexpensive, but moderate in overall durability. Best for light-duty use or budget replacements.
- Zinc-plated steel: Avoid this material if possible. The plating wears away over time, exposing the base steel to moisture and restarting the corrosion cycle.
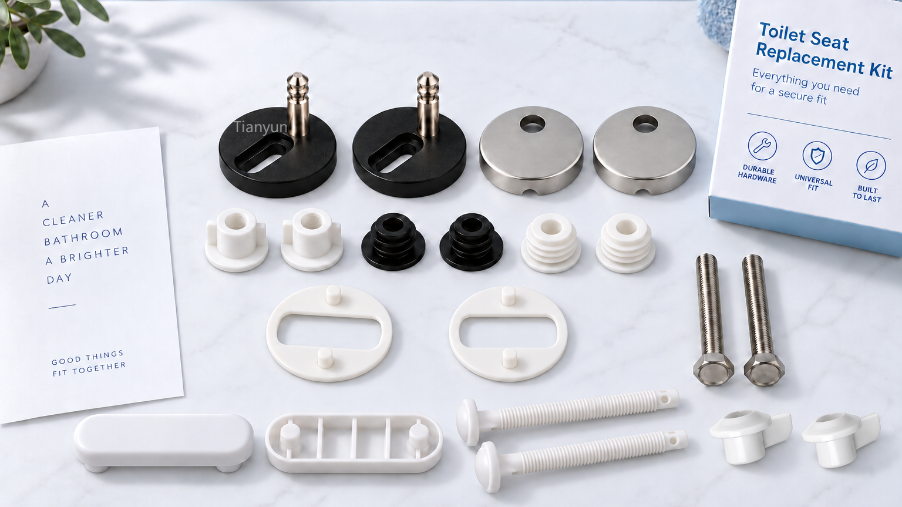
Rather than hunting for individual bolts, washers, and nuts that may not match each other, sourcing a complete mounting assembly is far more reliable. Integrated kits bundle all the components, including hinge parts, into one package designed for guaranteed compatibility. Manufacturers and sourcing teams often work with systems like Tianyun's Toilet Seat Fixing Systems, which combine stainless steel bases and hinge mounting kits into a single corrosion-resistant assembly. This kind of bundled approach eliminates guesswork and ensures every washer, nut, and bolt works together from day one, whether you are a homeowner tackling a weekend project or a professional handling multiple installations.
Safety Precautions
Porcelain is tough against water and everyday use, but it is surprisingly brittle under focused mechanical stress. A slipped wrench or an aggressive twist in the wrong direction can send a crack racing across your toilet bowl. Keep these safety rules in mind throughout the entire removal process:
- Wear eye protection whenever you cut, saw, or grind metal. Tiny bolt fragments fly unpredictably, especially in the confined space under a toilet rim.
- Protect the porcelain by applying strips of painter's tape around the bolt area. The tape cushions accidental tool contact and prevents surface scratches.
- Never apply maximum torque directly against the ceramic bowl. If a bolt will not turn, escalate your method rather than escalating your force. Brute strength is how toilets crack.
- Ventilate the bathroom when using penetrating oils or chemical rust dissolvers. Open a window or run the exhaust fan to avoid inhaling fumes in a small, enclosed space.
- Place a folded towel on the floor beneath the work area to catch dropped tools and hardware. A wrench falling onto the toilet base from even a short height can chip the porcelain.
With your tools staged, replacement hardware selected, and safety measures in place, the actual removal can begin. The first line of attack targets the rust itself, using chemistry to dissolve the corrosion bond before any wrench ever touches the bolt.
Step 2 - Apply Penetrating Oil or a Rust-Dissolving Solution
Chemistry does the heavy lifting here, not your arms. Before you even think about grabbing a wrench, the smartest move is letting a liquid agent quietly eat away at the corrosion that is locking those bolts in place. This step alone resolves the majority of moderately rusted toilet seat bolts, and skipping it is the single most common mistake DIYers make when trying to figure out how to remove an old toilet seat without damaging anything.
How Penetrating Oil Breaks the Rust Bond
Penetrating oil is not just fancy lubricant. It is a low-viscosity blend of a volatile solvent and a thin lubricating oil, specifically engineered to creep into spaces you cannot see or reach. The key mechanism is capillary action, the same physics that pulls water up a narrow tube. Because penetrating oils are formulated with very low surface tension, roughly 20-30 dynes/cm, the liquid wicks itself into the microscopic gaps between the rust layer and the bolt threads without any outside pressure.
Once inside those gaps, the oil does two things simultaneously. The solvent component attacks the iron oxide crystals bonding the nut to the bolt, dissolving the rust matrix that has essentially glued the hardware together. Meanwhile, the lubricant slips into the freshly opened spaces and reduces friction between the metal surfaces. The result? A bolt that required impossible force five minutes ago may now turn with a simple quarter-turn of a wrench.
After the solvent evaporates, a thin hydrophobic oil film remains on the exposed metal. This moisture-repellent layer actually inhibits further corrosion while you work, giving you a wider window to complete the removal.
Here is the part most people get wrong: soak time. A quick spray and an immediate twist is not enough. For light surface rust, you need a minimum of 15 to 30 minutes of contact time. Heavily corroded bolts, the kind that look like they have not been touched in a decade, may need several hours or even an overnight soak. As industrial maintenance guides emphasize, products that evaporate within minutes may loosen the bolt surface but fail to penetrate deep into long-seized threads.
For the best results, apply the penetrating oil generously in two locations:
- From above: Saturate the bolt head where it meets the hinge plate. Let the oil pool around the base and gravity-feed down through the porcelain hole.
- From below: Spray or drip oil directly onto the nut and the exposed threads beneath the bowl rim. Then soak a small rag in penetrating oil and wrap it snugly around the nut area. This keeps the solvent in constant contact rather than dripping away.
Re-apply every 30 to 60 minutes for stubborn corrosion. Each fresh application pushes the solvent deeper into the thread gaps, compounding the loosening effect. Patience at this stage saves enormous effort at the wrench stage.
Household Alternatives When You Have No Penetrating Oil
What if it is 9 PM on a Sunday and you do not have a can of PB Blaster anywhere in the garage? Your kitchen pantry likely holds at least one effective rust-dissolving agent. These household options require longer soak times than commercial penetrating oils, but they genuinely work on moderate corrosion, and some have surprisingly strong chemistry behind them.
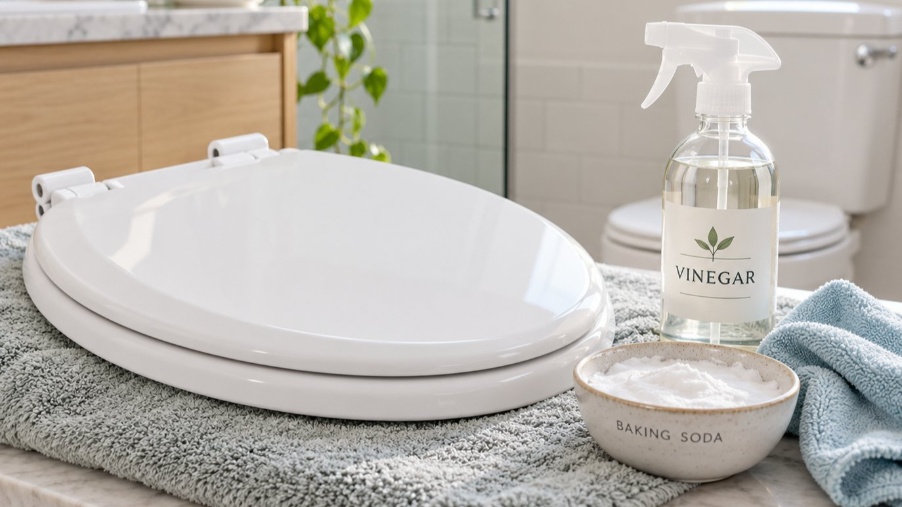
- White vinegar: Soak a rag thoroughly in undiluted white vinegar, wrap it tightly around the bolt and nut, and leave it in place for 2 to 4 hours. The acetic acid dissolves iron oxide effectively, breaking apart the rust structure layer by layer. For severe cases, refresh the rag with fresh vinegar every couple of hours.
- Baking soda paste: Mix baking soda with just enough water to create a thick paste, then pack it around the bolt head and nut. Let it sit for 1 to 2 hours. The mild alkalinity helps break down surface corrosion and loosens mineral deposits that often accompany rust on toilet hardware.
- Hydrogen peroxide: Pour a 3% hydrogen peroxide solution directly onto the rusted areas. You will see it fizz on contact as the oxygen release helps break oxide bonds. Allow 30 minutes of fizzing action before wiping and re-applying. This method is particularly useful when rust is mixed with organic grime.
- Cola: It sounds like an old wives' tale, but the phosphoric acid in cola drinks genuinely dissolves light rust. Soak a rag in cola, pack it around the bolt, and leave it overnight. The extended contact time compensates for the relatively low acid concentration.
A few important ground rules apply to all of these methods. First, longer is better. Where a commercial penetrant might loosen a bolt in 30 minutes, a household acid may need 4 to 12 hours to achieve the same result. Plan accordingly and do not rush. Second, re-apply your chosen solution every few hours for severely rusted bolts. A single application that dries out stops working entirely. Third, and this one matters for safety: never mix chemical products. Combining vinegar with hydrogen peroxide, for example, can produce peracetic acid, which is corrosive and releases irritating fumes in an enclosed bathroom. Pick one method, commit to it, and give it adequate time.
Whether you used a commercial penetrant or a pantry workaround, the rust bond should now be significantly weakened. The corrosion that felt like concrete an hour ago has been chemically undermined, and your bolts are primed for the next phase: controlled, careful mechanical force applied with the right technique to avoid cracking anything.
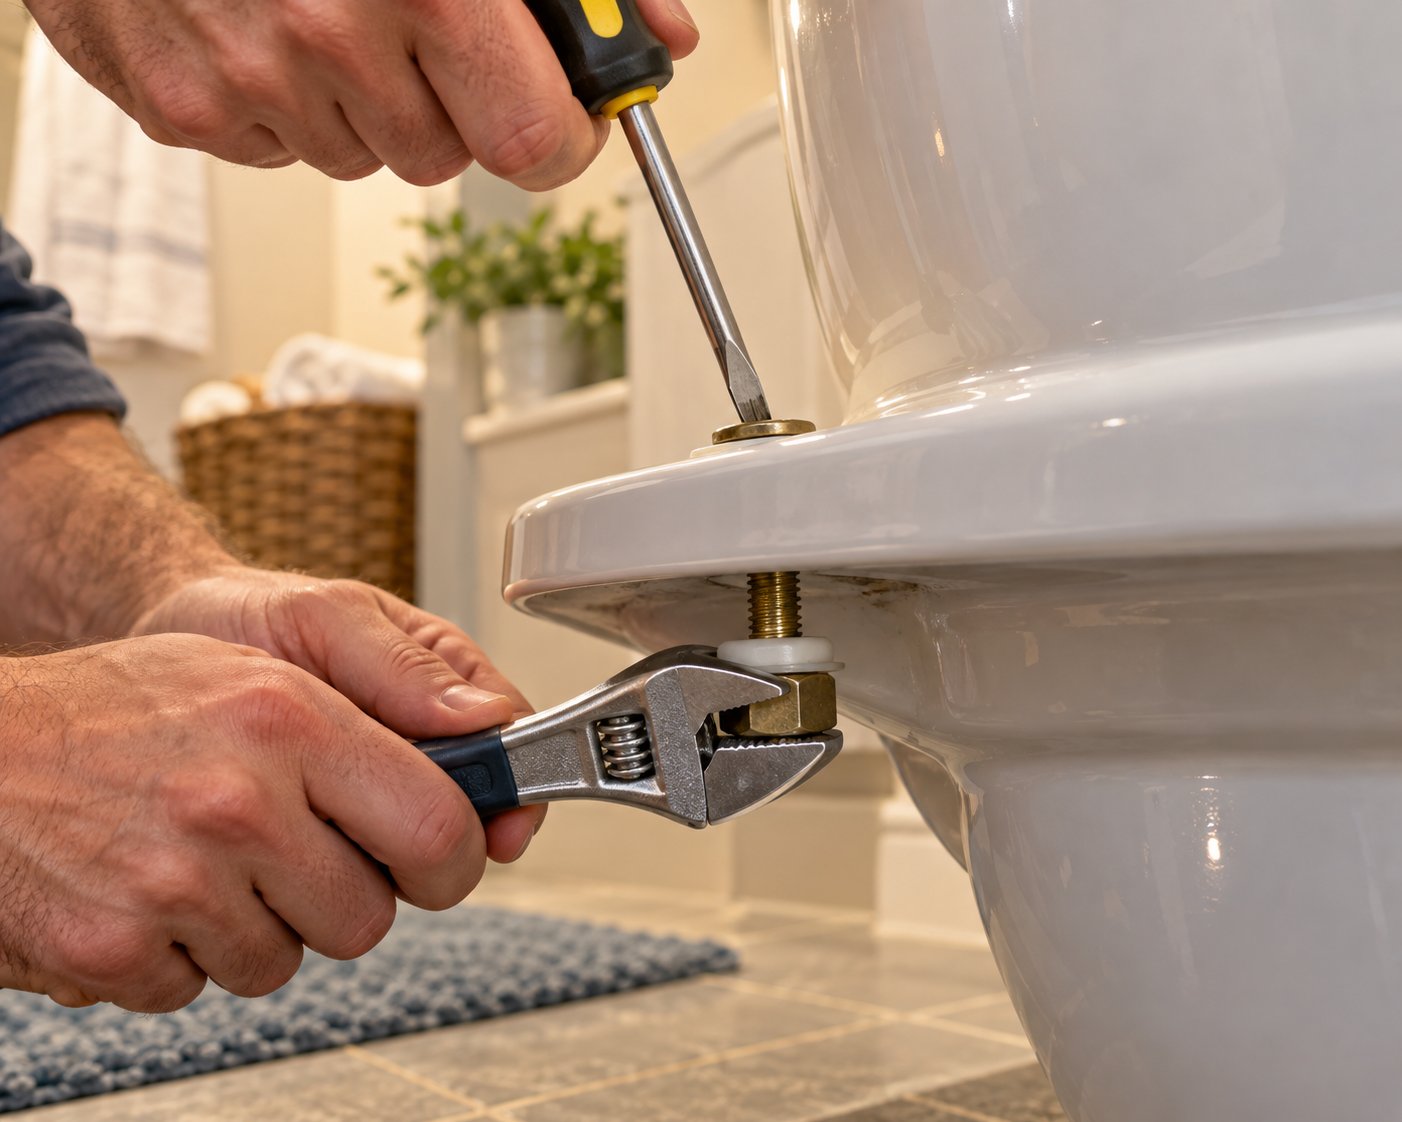
Step 3 - Attempt Manual Removal with Wrench and Pliers
Your penetrating oil or vinegar has had hours to quietly dissolve the rust bond from the inside out. The temptation right now is to grab the biggest wrench you own and crank as hard as possible. Resist that urge. This manual removal step is where more toilets crack than at any other point in the process, and it almost always happens because someone rushed. The technique matters just as much as the tool, so take a breath, position yourself correctly, and work the bolt out with control rather than brute strength.
The Two-Wrench Technique for Bottom-Mount Bolts
Bottom-mount metal bolts are the classic rust offenders, and they require a two-handed approach. Here is why: the bolt drops through the hinge and the porcelain hole from above, while a hex nut or wing nut holds everything tight from underneath the bowl rim. If you only turn the bolt head from the top without stabilizing the nut below, the entire assembly just spins in place. If you only grip the nut below without holding the bolt head above, the same thing happens. You need opposing force on both ends simultaneously.
The standard technique works like this:
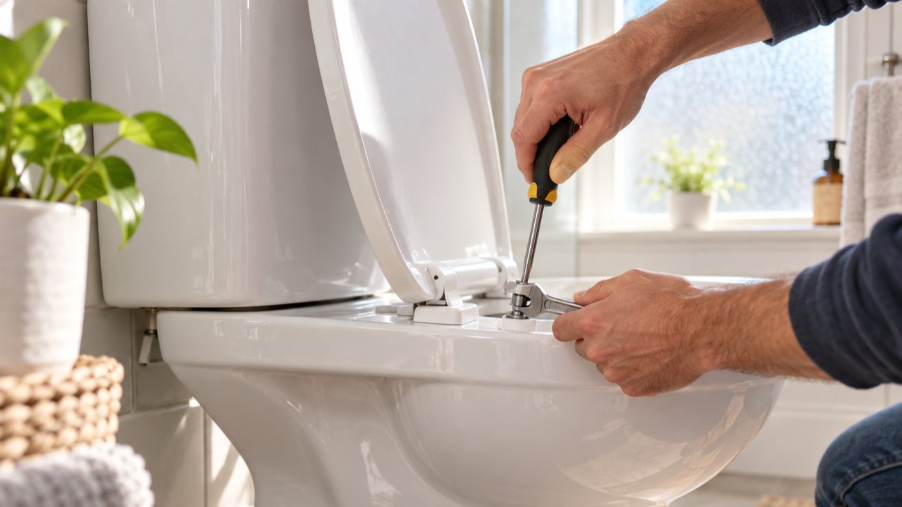
- From above: Place a flathead screwdriver into the slot on the bolt head (or use a Phillips head if your bolt has a cross-drive recess). Hold it firmly with one hand to prevent the bolt from rotating.
- From below: Fit an adjustable wrench or the appropriate socket onto the hex nut underneath the bowl rim. Turn counter-clockwise, slowly and steadily.
Body positioning makes a bigger difference than most people expect. Kneeling directly behind the toilet, rather than reaching awkwardly from the side, gives you the best access to the underside nuts. You can see what you are gripping, align your wrench squarely on the nut, and apply even, controlled pressure. If someone is available to help, one person can hold the screwdriver from the top while the other works the wrench from below. That division of labor dramatically reduces the chance of a slipped tool.
The critical rule: turn slowly and steadily. Jerky, sudden motions transmit shock force directly into the porcelain surrounding the bolt hole. A smooth, sustained twist lets the chemical-weakened rust give way gradually. You will often feel a faint "pop" or "crack" as the rust seal breaks. That is exactly what you want. From that point, the nut should unthread more easily with each subsequent turn.
But what if the bolt spins freely and the nut does not loosen at all? That signals a different problem. The corrosion has essentially fused the nut onto the bolt threads so tightly that the two pieces rotate as a single unit, with the bolt simply spinning inside the porcelain hole. When this happens, reverse your approach: clamp locking pliers (Vise-Grips) onto the nut from below to immobilize it completely, then turn the bolt head from above with your screwdriver. The pliers' jaw pressure holds the nut stationary while the bolt threads twist free inside it.
Dealing with Stripped or Rounded Bolt Heads
Ever had a bolt head that looks like someone already took a pair of pliers to it and rounded off every grippable edge? This is one of the most common complications during toilet seat removal, and it usually results from a previous owner's failed attempt with the wrong-sized tool. A rounded bolt head defeats a standard screwdriver because there is nothing left for the blade to catch against.
You have several options when this happens:
- Locking pliers on the shank: Skip the bolt head entirely. Clamp your Vise-Grips directly onto the bolt shank, the smooth cylindrical section between the head and the threads, and use the pliers as your turning tool. The serrated jaws bite into the metal and create their own grip surface.
- Bolt extractor socket: If you have a bolt extractor set (sometimes called a "bolt-out" or "easy-out" socket), these specialty sockets have reverse-spiral internal teeth that dig deeper into a rounded fastener the harder you turn. Tap the extractor socket onto the damaged bolt head with a light hammer strike, then turn counter-clockwise with a ratchet.
- Cut a new slot: Using a rotary tool or a hacksaw, carefully cut a fresh slot across the top of the rounded bolt head. Once you have a clean groove, a flathead screwdriver can engage it again. This requires a steady hand and protective tape on the surrounding porcelain.
Here is a scenario that actually works in your favor: the bolt head snaps off entirely. It feels like a disaster in the moment, but a broken bolt head can simplify things. With the head gone, there is nothing holding the bolt in place from above. Try pushing the remaining shank downward through the porcelain hole. If it does not drop freely, work the nut off the now-exposed threads from below using pliers or a socket wrench. Without the bolt head creating counter-resistance, the nut often loosens much more easily.
When Manual Removal Fails
You have soaked, waited, positioned yourself properly, and applied slow, steady counter-clockwise force. The bolt still will not budge. How long should you keep trying before switching strategies?
Set a clear limit: if the bolt has not moved after 10 to 15 minutes of focused manual effort following a thorough chemical soak, stop. Do not add a pipe extension to your wrench for extra leverage. Do not recruit a second person to bear down harder. And absolutely do not brace your wrench against the porcelain bowl for additional torque.
Never use a standard wrench to apply maximum torque directly against porcelain. The repair cost of a cracked toilet far exceeds the price of a cutting tool.
The logic is simple math. A replacement oscillating multi-tool blade costs a few dollars. A replacement toilet, including installation, costs hundreds. Every extra pound of force you apply to a seized bolt transfers stress into the ceramic surrounding the bolt hole. Porcelain does not bend or flex. It holds perfectly until it does not, and then it cracks suddenly and irreversibly. As porcelain hardware guides stress, continuing to tighten or force a bolt when resistance spikes sharply is exactly how catastrophic breaks happen.
Recognizing when to stop is not admitting defeat. It is making an intelligent decision to escalate your method rather than your force. The bolt does not care how strong you are. It cares about chemistry, heat expansion, or a sharp blade, and those are precisely the tools waiting in the next steps of the process.
Step 4 - Apply Heat and Deep-Soak Treatments for Stubborn Bolts
A bolt that laughs off penetrating oil and shrugs at your best wrench technique is not invincible. It just needs a different kind of persuasion. Two intermediate methods sit between manual force and outright cutting: targeted heat application and extended acid soaking. Either one can crack a rust bond that seemed permanent, and combining them in sequence is often the breakthrough that finally gets a corroded bolt turning. These techniques are especially valuable because they keep your porcelain safe while attacking the corrosion itself, not the ceramic around it.
Using Targeted Heat to Break Rust Bonds
Why does heat work on a seized bolt? The answer is thermal expansion. When you apply heat directly to a rusted nut, the metal absorbs energy and expands outward. Even a tiny amount of expansion, fractions of a millimeter, is enough to crack the brittle rust layer that has fused the nut to the bolt threads. Think of it like ice forming in a sidewalk crack and then thawing. The expansion breaks the bond, and once broken, it cannot re-seal itself.
The trick is creating a temperature differential. You want the nut hot and the bolt relatively cool. Because the nut is the outer component, it receives direct heat first and expands before the bolt shank inside it has time to warm up. That momentary size mismatch between the two parts is what shears the rust seal apart. You only have a short window to capitalize on this difference, so your wrench needs to be within arm's reach before you start heating.
Here is how to take a toilet seat off using the heat method safely and effectively:
- Choose the right heat source. A heat gun or a standard hair dryer are your only two appropriate options for this job. A heat gun delivers adjustable temperatures ranging from 212°F to over 1,200°F, so start on a low-to-medium setting. A hair dryer produces less heat but still generates enough thermal energy for lightly to moderately seized bolts.
- Direct the heat at the nut, not the porcelain. Hold the nozzle two to three inches from the underside nut and concentrate the airflow on the metal. Avoid lingering on the ceramic bowl surface. While porcelain can handle moderate heat, prolonged direct exposure in one spot is an unnecessary risk.
- Heat for two to three minutes. You do not need the nut glowing red. You just need it noticeably warm to the touch through a gloved hand. Two to three minutes of focused heat is sufficient for most toilet seat hardware.
- Immediately attempt removal. The moment you set the heat gun down, grab your wrench and turn counter-clockwise. The thermal differential is at its peak right now and diminishes quickly as the bolt shank absorbs warmth from the nut. Speed matters here more than force.
One critical safety warning deserves its own emphasis: never use a propane torch or any open flame for this job. Bathrooms contain wax toilet ring seals that are flammable, plastic supply lines that melt easily, and often a cabinet full of chemical cleaning products just a few feet away. A heat gun delivers controlled, flameless heat. A torch delivers a fire hazard in a confined space. The risk of igniting nearby flammable materials is real even for experienced professionals, and a bathroom offers almost no margin for error. Stick with electric heat sources only.
Also, keep in mind that heat-resistant gloves and safety glasses are non-negotiable for this step. Metal that has been heated for several minutes stays dangerously hot long after you stop applying heat, and a slipped wrench on a hot nut can burn exposed skin instantly.
Extended Vinegar Soak Method for Severe Corrosion
Some bolts are rusted so thoroughly that a 30-minute penetrating oil treatment barely scratches the surface. If the corrosion looks like a thick, crusty orange shell encasing the nut and threads, you need a longer, more aggressive acid treatment. This is where an overnight vinegar soak proves its worth.
You already know from Step 2 that white vinegar's acetic acid dissolves iron oxide effectively. The difference here is contact time. A rag dampened with vinegar and left for two hours delivers moderate rust removal. A sealed, saturated wrap left for eight to twelve hours dissolves significantly more corrosion, eating through layers of oxide that a quick spray never reaches.
Here is the deep-soak technique step by step:
- Saturate thick cotton rags or folded paper towels in undiluted white vinegar. They should be dripping wet, not just damp.
- Pack the soaked material tightly around both the bolt head on top and the nut underneath. Stuff vinegar-soaked material into every gap you can reach around the hardware.
- Wrap the entire area with plastic cling film. This is the step most people skip, and it makes an enormous difference. The plastic seal prevents evaporation, keeping the acid in liquid contact with the rust throughout the entire soak period. Without it, the vinegar dries within an hour or two and stops working entirely.
- Leave the wrap in place for 8 to 12 hours, or overnight. Set it up before bed and tackle removal in the morning.
- Remove the wrap and re-attempt manual removal. Use the same two-wrench technique from Step 3. You will often find that bolts which previously felt welded in place now break free with modest effort.
For bolts that have been corroding undisturbed for many years, you may notice the vinegar-soaked rags turn a dark rusty brown overnight. That discoloration is dissolved iron oxide, visible proof that the acid is actively removing stains from a toilet bolt's corroded surface and breaking apart the bond layer by layer.
Here is where the real power move comes in: combine both methods in sequence. Remove the overnight vinegar wrap, and before attempting the wrench, immediately apply two to three minutes of heat-gun treatment to the nut. The logic is layered. The extended acid soak has already weakened and partially dissolved the rust structure holding everything together. Heat then cracks whatever brittle oxide remains. Together, they dismantle the corrosion from two different angles, chemical dissolution and mechanical fracture, leaving very little holding the bolt in place.
After the combined treatment, pick up your wrench and try the gentlest manual removal approach one more time. Slow, steady, counter-clockwise pressure. Many bolts that survived every previous step will finally give way at this point.
If the bolt still refuses to turn even after an overnight acid soak and targeted heat, you have exhausted every non-destructive option. The corrosion has won the chemistry battle, and it is time to remove the hardware by removing the metal itself. A sharp blade does in sixty seconds what hours of soaking could not, and the right cutting technique keeps your porcelain completely safe while it works.
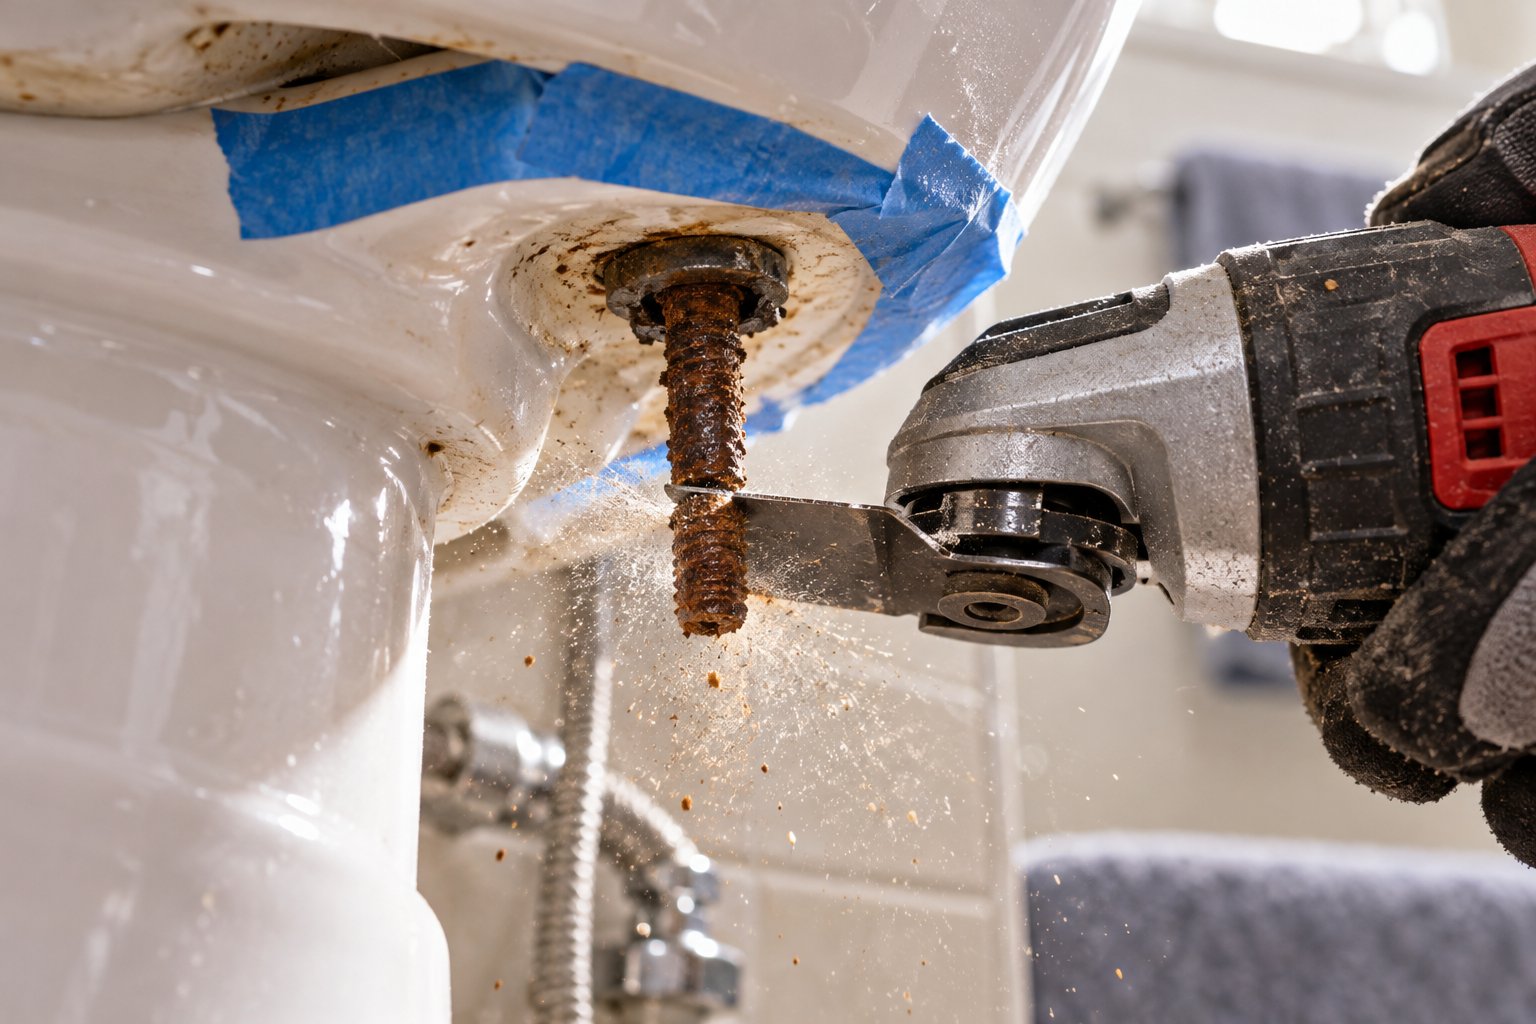
Step 5 - Cut Through Seized Bolts with a Hacksaw or Multi-Tool
Sometimes rust wins the chemical war, and no amount of vinegar, penetrating oil, or heat will convince a seized bolt to turn. That is perfectly fine. Cutting the bolt out is not a failure. It is actually the fastest, most reliable method for severely corroded hardware, and when done correctly, it leaves your porcelain completely untouched. The bolt gets destroyed, the toilet stays intact, and you move on to installing fresh, corrosion-resistant replacement hardware in minutes.
The key is matching the right cutting tool to the amount of space you have to work with. Some toilet bowls leave a generous gap between the underside rim and the nut, while others have almost no clearance at all. Your access determines your approach, so take a moment to reach underneath and feel how much room your fingers have around the bolt before choosing a tool.
Mini Hacksaw Technique for Accessible Bolts
If you can fit two fingers between the underside of the porcelain rim and the top of the nut, a close-quarters hacksaw is your simplest option. You might hear this tool called a mini hacksaw, a jab saw with a metal-cutting blade, or a close-quarters hacksaw frame. It looks like a compact, pistol-grip handle holding a short hacksaw blade, and it is designed specifically for cutting in tight spaces where a full-sized hacksaw cannot reach.
Here is how to use it without risking porcelain damage:
- Protect the ceramic surface first. Apply two or three overlapping strips of painter's tape to the underside of the porcelain rim directly surrounding the bolt. This creates a cushion layer between the saw blade and the glaze, preventing scratches or chips from accidental contact.
- Position the blade flat against the taped porcelain. Slide the blade into the gap between the bowl's underside and the top face of the nut. The teeth should rest against the bolt shank, the cylindrical section between the porcelain hole and the nut.
- Saw with slow, controlled strokes. Apply light downward pressure and let the blade do the cutting. Fast, aggressive strokes generate excess vibration that transfers directly into the ceramic. Slow strokes keep everything stable and give you precise control. Expect to spend one to three minutes cutting through a standard 1/4-inch steel bolt shank.
- Catch the falling pieces. Once the blade cuts through completely, the nut and lower bolt section will drop free. Position a rag or your free hand beneath to catch them so they do not bang against the porcelain base below.
This method works best when the gap is large enough for the blade to move freely. If the nut is corroded so close to the porcelain that you cannot fit a blade between them, or if the space is so cramped your strokes are limited to half an inch of travel, a powered cutting tool will save you considerable time and frustration.
Oscillating Multi-Tool Method for Tight Spaces
If you own one power tool for bathroom repairs, an oscillating multi-tool should be it. Its flush-cutting ability and compact vibrating head make it the single most effective tool for removing seized toilet seat bolts, especially in the tight space between the bowl's underside and a corroded nut where a hacksaw blade simply cannot operate.
Why does it outperform every other option in cramped quarters? Unlike a hacksaw that needs back-and-forth clearance, an oscillating multi-tool blade vibrates in tiny side-to-side arcs, typically around 3 to 4 degrees of oscillation. That means the blade cuts without requiring any stroke length at all. You press it flat against the bolt shank and the tool does the rest. As Fitz All Blades notes, bolts on toilets are almost always rusty due to constant water exposure, and a metal-cutting multi-tool blade can make short work of them, dramatically simplifying the removal process.
Here is how to execute this technique properly:
- Select the right blade. You need a bi-metal or carbide-tipped blade rated for metal cutting. Standard wood-cutting blades will dull instantly on steel. A bi-metal blade combines flexible steel with hardened high-speed-steel teeth that chew through corroded bolt shanks efficiently.
- Tape the porcelain generously. Apply painter's tape across the entire area where the tool might contact the ceramic surface. The vibrating blade will touch the porcelain at some point during cutting, and the tape ensures it slides harmlessly rather than chipping the glaze.
- Set the tool to low or medium speed. High speed generates more heat and can cause the blade to skip unpredictably. Low-to-medium speed gives you controlled cutting power with far less vibration transfer into the ceramic bowl.
- Press the blade flat against the protected porcelain surface and into the bolt shank. Position the blade in the gap between the bowl underside and the nut. Let the blade's oscillating teeth bite into the metal with steady, moderate pressure. Forcing the blade accelerates wear without speeding the cut.
- Cut through the shank completely. A standard toilet seat bolt takes roughly 30 to 60 seconds to sever with a quality metal-cutting blade. You will feel resistance drop suddenly when the blade breaks through the last bit of metal.
Wear safety glasses for this step, no exceptions. When a vibrating blade meets corroded steel at several thousand oscillations per minute, tiny metal fragments launch in every direction. Your face is directly above the work area when cutting underneath a toilet rim, and a metal splinter in the eye is a trip to the emergency room, not the hardware store. Heavy-duty work gloves protect your hands from both the blade and the sharp, freshly cut bolt edges.
After cutting, the nut and lower bolt section fall away freely. The remaining bolt stub sitting in the porcelain hole lifts out from the top with pliers or simply pushes downward and drops through. Repeat on the second bolt, and the entire seized toilet seat lifts off in under five minutes. For anyone struggling to figure out how to fix a broken toilet seat held captive by corroded hardware, this oscillating tool method is often the definitive answer.
Cutting from Above as a Last Resort
Occasionally, the underside of the toilet bowl is completely inaccessible. Maybe the toilet sits in a tight alcove with the tank pressed against a wall, or perhaps the bolt has corroded so flush to the porcelain that no blade can reach the shank from below. In these rare situations, cutting from the top is your remaining option.
A rotary tool, commonly known by the brand name Dremel, fitted with a thin metal cut-off wheel handles this job. These abrasive discs are designed for slicing through screws, nails, and hardware, and they make precise cuts in very small areas. However, cutting from above places the spinning disc directly on top of the porcelain surface surrounding the bolt head, which is why this carries the highest risk of cosmetic or structural damage to your toilet.
Follow these steps if top-cutting is your only remaining path for toilet seat screw replacement:
- Mask the surrounding porcelain generously. Apply at least four overlapping layers of painter's tape in a wide ring around the bolt head, extending two to three inches in every direction. Some DIYers also place a thin piece of cardboard or sheet metal with a hole cut for the bolt as an additional shield. The more protection between the cutting disc and the glaze, the better.
- Cut a slot across the bolt head first. Rather than trying to sever the entire bolt from the top, use the cut-off wheel to carve a straight groove across the bolt head, deep enough for a flathead screwdriver blade. Insert the screwdriver into the new slot and try turning the bolt counter-clockwise. The fresh slot gives you a clean grip surface, and sometimes the vibration from the rotary tool itself is enough to crack the rust seal and allow the bolt to turn.
- If the slotted approach fails, cut through the bolt entirely. Plunge the cut-off disc straight down through the center of the bolt head and continue through the shank. Keep the tool at moderate speed. As the Eternal Tools guide emphasizes, cut-off discs are brittle and snap easily when over-tightened or forced, so let the disc work at its own pace with gentle, steady pressure. Once severed, the bolt drops through the porcelain hole.
- Start at low speed and increase gradually. High RPMs right off the bat can cause the thin disc to shatter. Begin slowly, let the disc establish a groove, and then increase speed incrementally for a controlled, clean cut.
This top-cutting method should only appear in your toolkit after every other approach, chemical soaking, heat treatment, manual wrenching, and underside cutting, has genuinely failed. The margin for error with a spinning abrasive disc millimeters from a porcelain surface is thin, and even experienced hands occasionally slip. If the prospect feels uncomfortable, that instinct is telling you something worth listening to.
Regardless of which cutting technique freed your bolts, the corroded hardware is now out and the toilet seat lifts away. But the job is not finished yet. The bolt holes and mounting surface that sat beneath all that rust and grime for years need attention before new hardware goes in. Debris, mineral deposits, and even hidden cracks can lurk under the mess you just removed, and skipping a proper inspection invites problems with your fresh installation.
Step 6 - Handle Hidden Bolts and Concealed Mounting Systems
Every method covered so far assumes you can actually see and reach the bolts holding your toilet seat in place. But what happens when you look at the hinge area and find... nothing? No visible bolt heads, no exposed screw slots, just smooth plastic covers or a seamless hinge plate with no obvious point of entry. If you have ever tried to uninstall a toilet seat on a modern, sleek-looking toilet and could not figure out where the fasteners even are, you are dealing with a concealed mounting system, and the frustration is entirely justified.
Hidden-bolt designs are increasingly common on newer toilets. They look clean and elegant when everything is working, but they create a real puzzle when the time comes for removal. The bolts are still there. They are just buried beneath decorative caps, sliding plates, or snap-on covers that disguise the mounting hardware. Knowing how to access them without breaking the covers or damaging the porcelain underneath is a skill that saves both time and replacement parts.
Locating and Opening Hidden Bolt Covers
Many modern toilet seats, especially from brands like American Standard, TOTO, and Kohler, use top-mount systems where the bolt heads sit beneath plastic caps or sliding cover plates at the rear of the hinge. These covers are designed to be removable, but their release mechanisms are not always intuitive, particularly if you have never encountered the design before.
Start by examining the back of the seat hinge area closely. You are looking for one of three common concealment styles:
- Snap-on plastic caps: Small, round or oval covers that sit directly over each bolt head. These typically pry open with a flathead screwdriver inserted into a tiny notch along the cap's edge, or they snap upward when you press firmly on the back edge. Look for a thin seam line around the perimeter of the cap, that is your access point.
- Sliding cover plates: A single rectangular plate spans both hinge points and shifts backward (toward the tank) to reveal the bolt heads underneath. Grip the front edge of the plate and push it toward the rear of the toilet. You may need to apply moderate pressure if mineral deposits have partially bonded the plate to the porcelain surface.
- Push-button quick-release tabs: Some seats have small buttons on either side of the hinge. Pressing these buttons simultaneously releases the entire seat from the mounting posts, allowing you to lift the seat away and expose the bolt hardware underneath. As Horow's seat removal guide explains, quick-release seats detach effortlessly when you press both release buttons at the back of the seat hinge, and the remaining hinge plates can then be unscrewed or slid free.
A word of caution here: decorative caps are made from thin, brittle plastic that does not tolerate aggressive prying. Jamming a screwdriver underneath and levering hard can crack the cap, launch small plastic fragments toward your face, or gouge the porcelain glaze beneath. Use gentle, even pressure. If a cap resists, try warming it with a hair dryer for 30 seconds to soften any mineral buildup bonding it in place, then try again. Patience with a cover cap costs nothing. Replacing a chipped porcelain surface costs quite a bit more.
Once the covers are open or removed, you will see either a standard Phillips or flathead bolt head, or a hex-drive fitting that requires an Allen key. From this point, the removal methods from earlier steps apply: soak, wrench, heat, or cut, depending on the bolt's condition and material.
Removing Stuck Plastic Bolts and Wingnuts
Here is where hidden-bolt systems introduce a twist that metal bolt removal techniques do not prepare you for. Many concealed mounting designs use plastic bolts and plastic wingnuts rather than metal hardware. Plastic cannot rust, so you might assume these should come out easily. Unfortunately, plastic creates its own category of headaches.
Over years of bathroom use, plastic bolts can become:
- Calcium-encrusted: Hard water deposits build up around the threads, effectively cementing the plastic nut to the bolt just as thoroughly as rust cements metal. The white, chalite-like mineral crust you see around the hardware is the culprit.
- Cross-threaded: If the bolt was installed slightly off-angle, the threads have been cutting their own misaligned path through the nut. Turning the nut in any direction only jams it tighter.
- Brittle from age and UV exposure: Plastic degrades over time, especially in bathrooms with windows that allow even indirect sunlight onto the hardware. The once-flexible nylon becomes rigid and prone to shattering under torque. Attempting to wrench a deteriorated plastic bolt often snaps the head clean off before the nut budges at all.
The technique for stuck plastic hardware differs from the metal bolt approach. Start by gripping the plastic wingnut from below with a pair of standard pliers. Do not use locking pliers on full clamp, as the jaw pressure alone can crush a brittle wingnut into pieces. Firm hand-pressure on the plier handles is enough. While holding the wingnut steady from below, turn the bolt head from above with a screwdriver, counter-clockwise, using slow and deliberate rotation.
If the plastic has fused from mineral buildup, soak the hardware with white vinegar for 30 to 60 minutes before attempting removal. Vinegar dissolves calcium deposits effectively without damaging the plastic itself, and it is often all you need to free a mineral-bonded plastic bolt.
When the plastic has stripped, cross-threaded beyond recovery, or simply crumbles when you touch it, cutting is the cleanest solution. A utility knife or box cutter can slice through a plastic bolt shank in seconds. Position the blade against the bolt between the porcelain and the wingnut, and draw it across with firm, steady strokes. Alternatively, an oscillating multi-tool set to low speed cuts plastic quickly and cleanly without the vibration risks that come with cutting metal. The plastic offers almost no resistance to a sharp blade, so this step is far simpler and faster than cutting through a corroded steel bolt.
After cutting, the wingnut drops free and the remaining plastic stub pushes out through the porcelain hole with a finger or the tip of a screwdriver. Dispose of the old plastic fragments carefully, as small shards can be sharp enough to nick skin.
When to Call a Professional Plumber
Every method in this guide has been designed to keep the job firmly in DIY territory. But there are situations where continuing on your own risks damage that far exceeds the cost of a professional service call. Knowing when to stop is not a concession. It is the smartest decision you can make.
Call a plumber if any of the following conditions apply:
- The porcelain is visibly cracked. If you spot a crack radiating from a bolt hole, any further force, whether from a wrench, heat, or a cutting tool, can propagate that fracture across the bowl. A cracked toilet is not repairable and requires full replacement.
- The bolt is seized into a corroded metal insert embedded in the ceramic. Some older toilets use metal inserts molded into the porcelain rim as anchoring points for the seat bolts. When these inserts corrode, the rust bonds metal to ceramic at a level no household tool can safely address. A plumber has access to specialized extraction tools designed for exactly this scenario.
- Multiple escalating methods have failed. If you have worked through chemical soaking, heat treatment, manual wrenching, and cutting attempts without success, the bolt situation is genuinely unusual. Continuing to experiment risks the toilet itself.
- The toilet is old enough that any force risks catastrophic breakage. Porcelain from decades-old toilets can be surprisingly fragile, with internal micro-fractures invisible to the naked eye. If your toilet dates back several decades and the hardware is seized, a plumber can assess whether the fixture is structurally sound enough to withstand removal force.
A plumber's service call for toilet seat bolt removal typically costs far less than you might expect, and it is a fraction of what you would pay for a new toilet plus installation if aggressive DIY efforts crack the bowl. Think of it as insurance, not defeat.
Whether you freed the hidden bolts yourself or had a professional handle the extraction, the old hardware is finally out. The seat lifts away, and you are staring at bare porcelain bolt holes that have been buried under hardware, rust, and grime for years. What you do with those holes next determines whether your new seat installs cleanly or inherits problems from the old one, and a quick inspection now can save you from a very unpleasant surprise later.
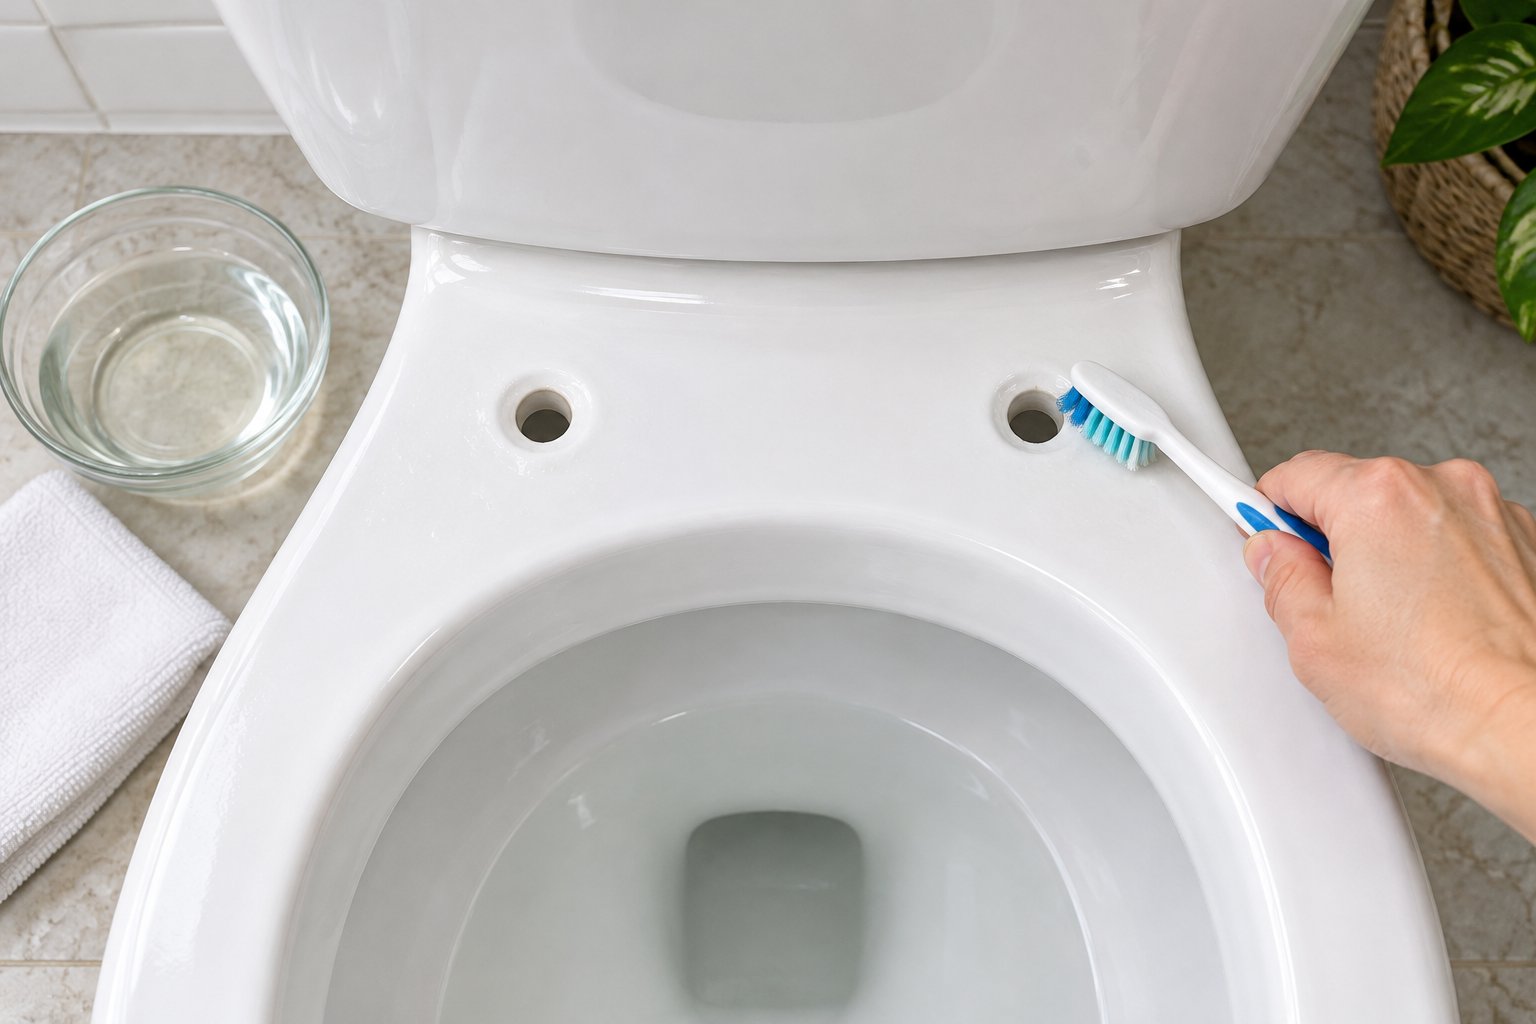
Step 7 - Clean the Bolt Holes and Inspect for Porcelain Damage
The old bolts are gone, the corroded nuts are in the trash, and the toilet seat finally lifts free. It feels like the job is done, right? Not quite. Those two bolt holes in the porcelain rim have been hiding under layers of rust, mineral crust, and compressed grime for years, possibly decades. Installing fresh hardware directly onto that mess is like painting over peeling wallpaper. It might look fine for a week, but the underlying problems will surface quickly, causing a wobbly seat, uneven compression, or worse, new bolts that seize up just as badly as the old ones.
This cleanup and inspection step takes ten minutes at most, yet it is the difference between a new seat that sits perfectly flush for years and one that shifts, creaks, or cracks its own mounting hardware within months. Grab an old toothbrush, some white vinegar, and a flashlight. Your porcelain needs a quick physical before the new seat goes on.
Clean the Bolt Holes and Mounting Surface
Start with the two bolt holes themselves. After years of metal toilet seat bolts corroding in place, these openings are almost certainly clogged with rust flakes, calcium deposits, old rubber washer residue, and possibly fragments of broken bolt shanks. All of that debris needs to come out before a new bolt can drop through cleanly.
Here is the cleaning sequence that prepares a smooth, obstruction-free mounting surface:
- Clear loose debris first. Use a stiff nylon brush or an old toothbrush to scrub the inside of each bolt hole. Push the bristles through the hole from the top and work them in a circular motion to dislodge rust flakes and mineral chunks. Tap the underside of the rim gently to shake loose particles free.
- Dissolve stubborn mineral buildup. Dip a cotton swab or a small rag corner in undiluted white vinegar and push it into each bolt hole. Let the vinegar sit for five to ten minutes. The acetic acid breaks down calcium and iron deposits that brushing alone cannot remove. For especially thick buildup, repeat the application twice.
- Scrub the flat mounting surface around each hole. The porcelain rim where the seat hinge plate and washers will rest must be completely clean and smooth. Use the toothbrush with a splash of vinegar to scrub the area in a two-inch radius around each bolt hole. Remove any raised rust deposits, old sealant residue, or hardened grime that could prevent the new seat from sitting flush against the porcelain.
- Wipe everything dry. Use a clean, dry cloth to wipe the entire rear mounting surface of the bowl. Moisture left behind can get trapped beneath the new hardware and restart the corrosion cycle immediately, which defeats the purpose of upgrading to better bolts.
You will likely be surprised by how much material comes out of those two small holes. It is not uncommon to pull out a rusty, paste-like sludge that has been compacting for years. That sludge is exactly what was preventing your old bolts from turning, and removing it ensures the new fasteners thread smoothly and seat properly from the start.
Inspect the Porcelain for Damage
Cleaning the bolt area does more than prep the surface. It also exposes the porcelain underneath, giving you your first clear look at whether the removal process, or years of corrosion pressure, has left any structural damage behind. This inspection is not optional. A hidden crack beneath a freshly installed seat can worsen under compression and lead to a catastrophic break when the toilet is in use.
Here is what to look for and how to find it:
- Hairline cracks radiating from the bolt holes. Run your fingernail slowly across the porcelain surface in every direction around each bolt hole. As The Spruce's repair guide explains, you can often feel a crack before you see it as your nail catches in the fracture line. Pay special attention to the area between each bolt hole and the nearest edge of the rim, since this is the thinnest section and the most likely to crack under torque stress.
- Chips on the rim surface. Look for small divots or missing glaze around the bolt area. A slipped wrench, a vibrating multi-tool blade, or even the expansion force of severe rust can chip the ceramic coating. Minor surface chips that only affect the glaze layer are cosmetic and will not impact the new seat's installation.
- Enlarged bolt holes. Compare both holes visually. If one appears noticeably wider than the other, or if either hole has an oval shape rather than a clean circle, the porcelain has eroded or chipped away internally. An oversized hole may not grip the new bolt properly, leading to a seat that rocks or shifts.
- Hidden fractures beneath the rim. This is the one most people miss. Shine a flashlight behind and underneath the rim area while looking from the front. Cracks that are invisible from above sometimes show up as dark lines or light gaps when illuminated from behind. You are looking for any fracture line that connects a bolt hole to the bowl's interior water line.
Minor surface chips and shallow glaze scratches are cosmetic issues only. They will not affect function, and the new seat's hinge plate will cover most of them anyway. Hairline cracks that stay localized around a bolt hole can sometimes be sealed with waterproof porcelain epoxy, a two-part compound that bonds to ceramic and prevents the fracture from spreading. Mix and apply the epoxy directly into the crack, let it cure overnight, and then proceed with installation.
A hairline crack through a bolt hole can become a full break under the compression of new hardware. Inspect carefully before installing a new seat.
However, any crack that extends from a bolt hole toward the bowl's water line signals structural compromise. The porcelain in that zone bears the weight of the seated user, and tightening a fresh bolt into a fractured area applies compression force directly across the fracture plane. That is how toilets split in half. If you find this type of crack, the safest path is replacing the toilet entirely rather than gambling on a repair that may fail under load.
Remove Rust Stains from the Porcelain
Even after the bolts are out and the holes are cleaned, you will almost certainly notice ugly orange or brown discoloration on the porcelain surface where the old metal toilet seat bolts sat for years. These rust stains are iron oxide deposits that have penetrated into the porous surface layer of the ceramic glaze. They will not affect the function of your new seat, but they look terrible, and they are visible every time the seat is raised.
The good news? Rust stains on porcelain respond well to mild acid treatments that you likely already have on hand from the earlier removal steps. Here are the most effective approaches, ranked from gentlest to most aggressive:
- Baking soda and lemon juice paste: Mix two tablespoons of baking soda with enough fresh lemon juice to form a thick paste. As plumbing professionals at F.H. Furr recommend, apply the mixture directly onto the stain and let it sit for 15 to 20 minutes. The citric acid dissolves the iron oxide while the baking soda provides gentle abrasive action. Scrub with a non-abrasive pad or soft cloth in small circular motions, then rinse with clean water. For stubborn stains, repeat the application a second time.
- White vinegar soak: Saturate a cotton ball or folded paper towel with undiluted white vinegar and press it directly against the stain. Hold it in place for 20 to 30 minutes, refreshing the vinegar halfway through if it dries. The extended acid contact lifts deeper stains that a quick wipe cannot reach. Scrub lightly afterward and rinse.
- Pumice stone for persistent discoloration: When acid treatments leave a faint shadow behind, a pumice stone designed for toilet cleaning can safely remove it. Soak the stone in water for a couple of minutes before use, and keep both the stone and the porcelain surface wet while scrubbing. Use light, even strokes rather than heavy pressure. Pumice is softer than glazed porcelain when wet, so it removes stains without scratching the ceramic surface. Just avoid using it on unglazed or matte-finish porcelain, where it can leave marks.
One important rule: avoid bleach for rust stains. It seems counterintuitive since bleach is a go-to bathroom cleaner, but chlorine bleach actually oxidizes iron deposits further, setting the stain deeper into the porcelain rather than lifting it out. Stick with acid-based solutions for rust specifically.
With the bolt holes cleaned, the porcelain inspected, and the rust stains removed, your toilet's mounting surface is in the best condition it has been in since installation day. Every trace of the old corroded hardware is gone, and the porcelain is clean, dry, and ready for a fresh start. What goes into those bolt holes next, and how you install it, determines whether you will be repeating this entire process in a few years or forgetting about your toilet seat bolts for a very long time.
Step 8 - Install Rust-Proof Replacement Hardware and Prevent Future Corrosion
Clean bolt holes, undamaged porcelain, and zero trace of the old corroded hardware. Your toilet is a blank canvas. What you install next, and how you install it, determines whether this entire removal ordeal becomes a one-time event or a recurring bathroom nightmare. The goal is simple: choose materials that refuse to rust, install them with the right technique, and adopt a handful of easy habits that keep corrosion from ever gaining a foothold again.
Choose Corrosion-Resistant Replacement Bolts
Not all replacement bolts are created equal, and grabbing the cheapest pack off the shelf is exactly how most people end up right back where they started. The material your new bolts are made from is the single biggest factor in long-term performance, so it deserves a careful look before you commit.
| Material | Corrosion Resistance | Durability | Best For |
|---|---|---|---|
| Stainless Steel | Excellent | Very High | Humid bathrooms, hard water areas |
| Brass | Good | High | General-purpose replacement |
| Plastic/Nylon | Immune to rust | Moderate | Budget replacement, light-duty use |
| Zinc-Plated Steel | Low | High initially | Avoid - plating wears off and rust returns |
Stainless steel stands out as the clear winner for anyone living in a humid climate or dealing with hard water. Its chromium content forms a passive oxide layer that actively resists moisture penetration, unlike zinc plating that degrades and exposes bare steel within a year or two. Brass is a solid runner-up for general use, offering natural corrosion resistance without the brittleness of plastic. Nylon or plastic bolts work fine for light-duty applications and eliminate rust entirely, but they lack the clamping strength of metal and can become brittle over time, as you may have already experienced if your old seat used plastic hardware.
Zinc-plated steel? Skip it entirely. That shiny coating is cosmetic armor at best. Bathroom humidity eats through the plating faster than you would expect, and once the base steel is exposed, you are back to dealing with the same orange corrosion that brought you to this article in the first place. As Oatey's maintenance recommendations emphasize, using bolts made of corrosion-resistant materials like brass or stainless steel and ensuring proper installation are the best defenses against future rust problems.
Here is a sourcing tip that saves real headaches: buy your replacement hardware as a complete mounting assembly rather than piecing together individual bolts, washers, and nuts from different bins. Mismatched components lead to poor seat alignment, uneven compression, and premature loosening. A bolt from one manufacturer paired with a washer from another and a nut from a third creates tolerance mismatches that no amount of careful tightening can overcome. Integrated kits like Tianyun's Toilet Seat Fixing Systems bundle stainless steel bases with compatible hinge mounting kits into a single assembly, ensuring every component is engineered to work together. For homeowners handling a one-time replacement or professional sanitary-ware teams sourcing hardware across multiple installations, that kind of guaranteed compatibility eliminates guesswork and prevents the frustrating cycle of returns and re-orders.
Install New Hardware Correctly to Prevent Future Rust
You have invested time learning how to remove toilet seat bolts, cleaned the mounting surface, and selected quality replacement hardware. Do not undermine all of that effort with a sloppy installation. Proper technique takes five minutes and makes future removal effortless instead of agonizing.
Follow this sequence for a secure, porcelain-safe installation:
- Apply anti-seize compound to the bolt threads before installation. A thin coat of plumber's silicone grease or anti-seize paste on the threads creates a barrier between the metal surfaces that prevents corrosion from bonding them together. This single step is the most impactful thing you can do to ensure that the next time you need to unscrew a toilet seat, the bolts turn freely by hand.
- Drop the bolt through the hinge plate and into the porcelain hole from the top. Align the bolt so it passes straight down through the center of the hole without contacting the edges at an angle. A crooked bolt cross-threads the nut and creates a weak connection.
- Thread the nut onto the bolt from below and hand-tighten until snug. "Snug" means the seat no longer shifts when you press down on it. You should feel firm resistance but not be straining your fingers.
- Add a quarter-turn with a wrench, and stop. That final quarter-turn compresses the washer and locks the assembly in place. Going beyond this risks cracking the porcelain. As Horow's tightening guide recommends, tighten until the seat does not wobble, then give it one last quarter-turn - that is usually enough.
- Check seat alignment before finalizing. Sit on the seat or press down firmly with both hands. If the seat slides to one side, loosen both bolts slightly, re-center the seat on the bowl, and re-tighten evenly, alternating a half-turn on each side to maintain balanced compression.
Resist the urge to crank the nuts down as hard as possible "for security." Over-tightening is the number one cause of cracked porcelain during seat installation, and it also deforms washers, strips plastic nuts, and makes future removal unnecessarily difficult. Firm and snug beats tight and stressed every single time.
Long-Term Prevention Strategies
You have just spent considerable effort removing corroded hardware that should have come out in two minutes. The experience probably felt a bit like listening to Miles Nielsen & the Rusted Hearts - there is a certain gritty beauty in working through something tough, but you would rather not repeat the struggle. Prevention is where you make sure this particular battle stays a one-time event.
These five habits form a corrosion-prevention checklist that protects not just your toilet seat bolts but all the metal hardware in your bathroom:
- Improve bathroom ventilation. Run the exhaust fan during and for at least 15 minutes after every shower or bath. If your bathroom lacks a fan, crack a window. Reducing ambient humidity is the single most effective way to slow corrosion on every metal surface in the room, from towel bars to toilet hardware. Think of humid bathrooms as rusted tanks of moisture just waiting to attack exposed metal.
- Apply anti-seize compound or petroleum jelly to bolt threads during installation. You already did this if you followed the installation steps above, but it bears repeating because it is the most commonly skipped precaution. A thin grease layer blocks the moisture-to-metal contact that starts the oxidation process.
- Inspect bolt condition every 12 months. Flip open the hinge covers and glance at the bolt heads. A 30-second visual check once a year catches early discoloration or mineral buildup long before it becomes the kind of fused-solid corrosion that requires cutting tools. If you spot early rust, a quick wipe with vinegar and a fresh coat of petroleum jelly resets the clock.
- Address hard water at the source. If your home has hard water with high iron or calcium content, consider installing a water softener. Hard water accelerates mineral deposits on all bathroom hardware, not just toilet bolts. A softener protects faucets, showerheads, supply valves, and every other metal fixture simultaneously.
- Choose stainless steel or plastic mounting assemblies for any future seat replacement. Make this your default rule going forward. Every time you swap a toilet seat, whether it is five years from now or fifteen, insist on corrosion-resistant hardware. The price difference between stainless steel and zinc-plated steel is negligible, but the lifespan difference is measured in decades.
One final thought worth carrying forward. The entire process you just completed, from diagnosing your bolt type to chemical soaking, manual wrenching, heat treatment, cutting, cleaning, inspecting, and finally installing quality replacement hardware, represents a complete skill set that transfers far beyond toilet seats. Seized bolts, corroded fasteners, and frozen hardware show up on outdoor furniture, automotive components, plumbing fixtures, and deck railings. The same escalating-methods logic applies everywhere: start gentle, give chemistry time to work, escalate only when necessary, and always protect the thing you cannot replace. Much like stumbling onto a Miles Nielsen & the Rusted Hearts album for the first time, there is something satisfying about discovering that a problem that seemed impossible has a straightforward, methodical solution once you know the steps. Your toilet seat bolts will never intimidate you again.
Frequently Asked Questions About Removing Rusty Toilet Seat Bolts
1. What is the fastest way to remove rusted toilet seat bolts?
The fastest method depends on how severe the corrosion is. For lightly rusted bolts, spraying penetrating oil like PB Blaster and waiting 15 to 30 minutes before using a wrench often does the trick. For heavily seized bolts, an oscillating multi-tool with a metal-cutting blade can sever a corroded bolt shank in 30 to 60 seconds, making it the quickest option when chemical and manual methods fail. Always protect the porcelain with painter's tape before cutting.
2. Can I use WD-40 to loosen rusted toilet seat bolts?
Yes, WD-40 Specialist Penetrant or similar products can help loosen rusted toilet seat bolts. However, standard WD-40 is primarily a water displacer, not a dedicated penetrating oil. For best results, use a product specifically labeled as a penetrating lubricant and allow adequate soak time — at least 15 to 30 minutes for light rust, and several hours or overnight for severe corrosion. Household alternatives like white vinegar wrapped around the bolt for 2 to 4 hours also work effectively on moderate rust.
3. How do I remove toilet seat bolts that just spin and won't come off?
When a bolt spins freely without loosening, the nut has corroded onto the bolt threads and both pieces are rotating together. To fix this, clamp locking pliers (Vise-Grips) onto the nut from underneath the bowl rim to hold it completely stationary. Then turn the bolt head from above with a screwdriver. The pliers immobilize the nut while the bolt threads twist free inside it. If the bolt still will not release, escalate to cutting through the shank with a mini hacksaw or oscillating multi-tool.
4. What type of replacement bolts should I use to prevent future rusting?
Stainless steel bolts offer the best long-term corrosion resistance and are ideal for humid bathrooms or homes with hard water. Brass bolts are a solid general-purpose alternative. Plastic or nylon bolts are completely immune to rust but have moderate durability. Avoid zinc-plated steel, as the protective coating wears off quickly in bathroom conditions and rust returns. For guaranteed compatibility, sourcing a complete mounting assembly — such as Tianyun's Toilet Seat Fixing Systems at https://www.tianyuntech.com/toilet-seat-fixing-systems — ensures bolts, washers, nuts, and hinge components all work together and resist corrosion long-term.
5. How do I remove hidden toilet seat bolts with no visible screws?
Hidden-bolt toilet seats conceal fasteners beneath snap-on plastic caps, sliding cover plates, or quick-release tabs. Look at the back of the hinge area for small round caps that pry open with a flathead screwdriver, a rectangular plate that slides toward the tank to reveal bolt heads, or side buttons that release the entire seat when pressed simultaneously. Use gentle pressure to avoid cracking brittle plastic covers. Once exposed, the bolts can be treated with the same chemical soak, wrench, heat, or cutting methods used on standard visible bolts.
Apply This Insight to Your Project
Tell us what you are building and how the topic “How to Remove Rusty Toilet Seat Bolts Without Cracking the Porcelain” relates to your application. Our engineering team can help evaluate the next step.