Why Your Toilet Seat Keeps Sliding and How to Stop It
You sit down, and the whole seat shifts an inch to the left. You adjust, stand up, sit back down — and it slides again. That sideways drift is more than a daily annoyance. A sliding toilet seat can feel genuinely unsafe, and as plumbing professionals point out, ignoring the problem long enough can lead to minor injuries or even dangerous falls. So why does it keep happening, and why hasn't your last attempt at tightening the toilet seat screws actually solved it?
Here's the honest answer: most repair guides skip straight to "grab a screwdriver and tighten the bolts." That advice works — but only if loose bolts are your actual problem. A toilet seat that won't stop sliding can have at least six distinct root causes, and the correct fix depends entirely on which one you're dealing with.
Why Your Toilet Seat Won't Stop Sliding
Every time someone uses the seat, normal movement puts stress on the hardware connecting it to the bowl. Plastic components wear down, toilet lid screws corrode, and rubber pads lose their grip. Kendall Craig, plumbing manager at Fox Service Company in Austin, Texas, confirms that this gradual loosening is expected in almost any household due to everyday wear and tear.
But wear and tear is only part of the story. Cleaning chemicals — especially bleach-based bowl cleaners that splash onto the rim — accelerate the degradation of plastic toilet seat screws, rubber bumpers, and nylon bushings. Combine that with the constant humidity inside a bathroom, and you'll notice hardware breaking down far faster than you'd expect. This chemical-and-moisture cycle is exactly why the problem keeps coming back even after you've already learned how to tighten a toilet seat once before.
What Makes This Guide Different
Instead of jumping to one generic fix, this guide uses a diagnostic-first approach. You'll pinpoint the exact cause of the slide, then follow the targeted repair steps that actually match your situation. Here are the six root causes we cover:
- Loose mounting bolts — the most common culprit, where toilet seat hinge bolts have simply worked themselves free over time.
- Worn or missing rubber bumpers — those small pads underneath the seat that create friction against the porcelain rim.
- Wrong seat size or shape — an elongated seat on a round bowl, or vice versa, will never sit securely no matter how tight the hardware is.
- Degraded hinge bushings — internal plastic or nylon sleeves inside the hinge mechanism that wear out and introduce play.
- Soft-close mechanism failure — damper cylinders or springs inside modern hinges that detach or lose tension.
- Cracked mounting points — structural damage to the seat body or even the porcelain bowl itself, making any bolt tightening futile.
By the end of this guide, you'll know how to diagnose which of these issues is causing your seat to slide, how to fix it with the right tools and materials, and — critically — how to prevent it from ever happening again. The first step? A quick hands-on test that takes less than 60 seconds and tells you exactly where to focus your repair effort.
Step 1 - Diagnose Exactly Why Your Seat Is Sliding
Reaching for a wrench before you know what's actually wrong is the fastest way to waste an afternoon. A loose toilet seat can feel the same whether the bolts are worn, the bumpers are shot, or the seat itself is the wrong shape for your bowl. The symptoms overlap, but the fixes don't. That's why a quick, hands-on diagnosis comes first — and it takes less than a minute.
The Three-Point Slide Test
You don't need any tools for this. Just your hands and a flashlight. Work through these three checks in order, and pay attention to what each one reveals.
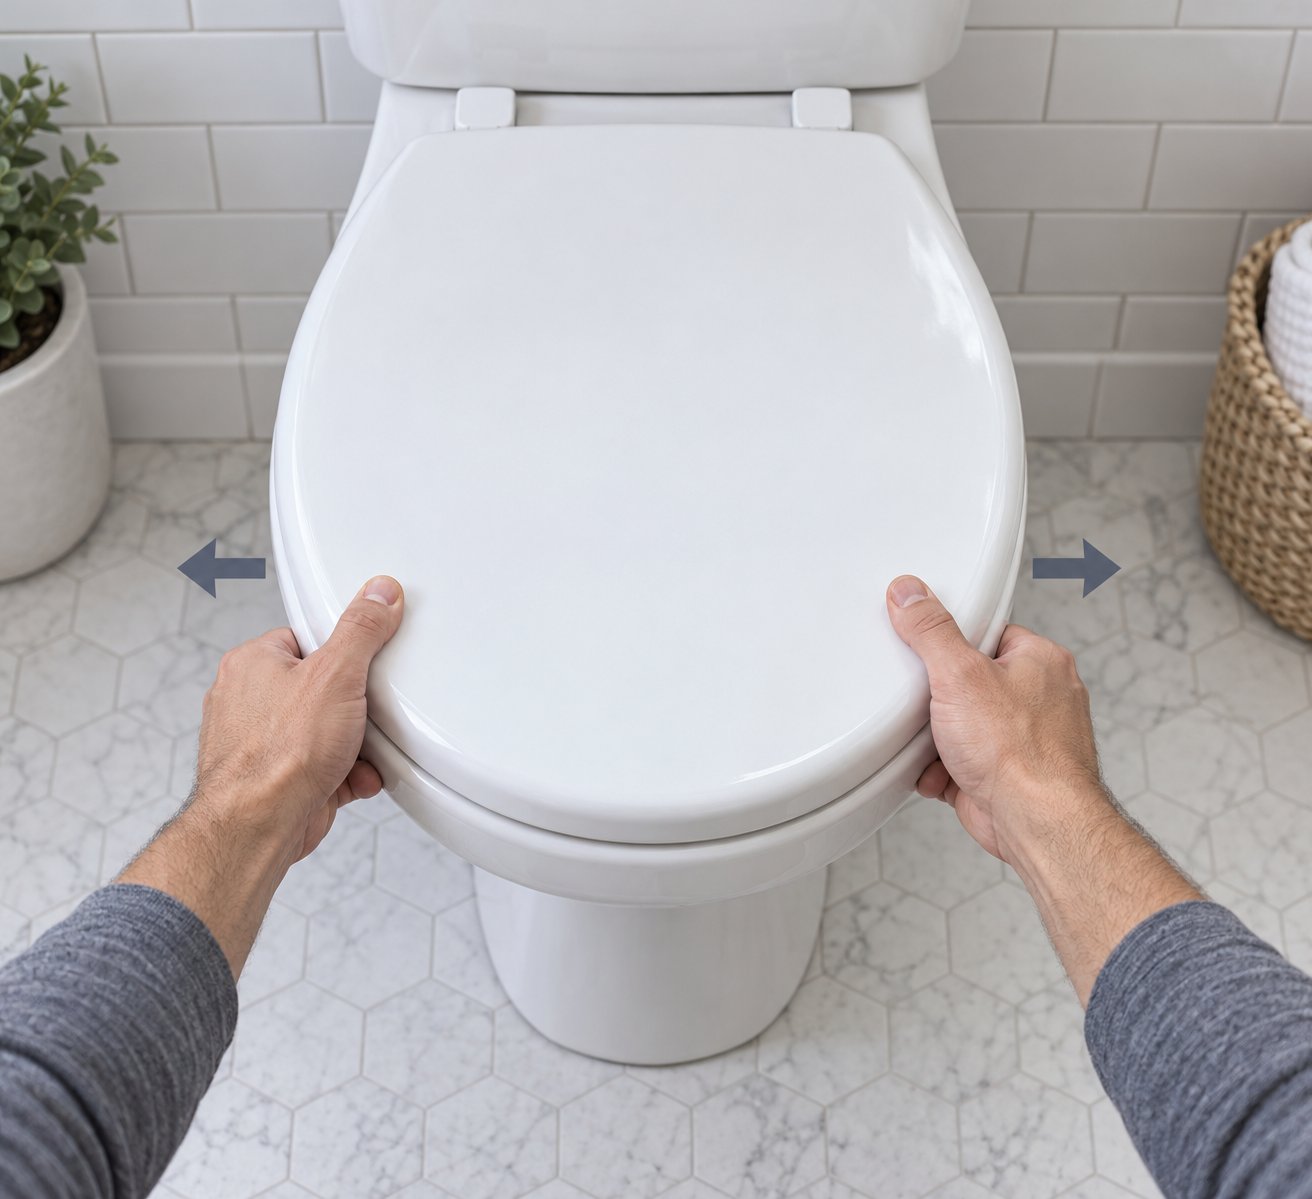
Check 1: The Side-to-Side Shift Test. Stand in front of the toilet, grip the front edge of the closed seat with both hands, and try to push it left and right. Does it rock or slide? If so, you're likely dealing with loose or stripped mounting bolts, worn hinge bushings, or both. This is the single most common cause of a sliding seat — and also the easiest to fix when you know how to tighten a toilet seat properly.
Check 2: The Bumper Inspection. Lift the seat and lid fully upright. Look at the underside of the seat and along the top rim of the bowl. You'll notice small rubber or silicone pads — usually two to four of them — that sit between the seat and the porcelain. Press one with your fingertip. Is it soft and springy, or hard and flattened? Are any missing entirely? Bumpers that have compressed, cracked, or fallen off can no longer create the friction needed to prevent lateral drift. This is a frequently overlooked cause of a loose toilet seat, especially in bathrooms where harsh cleaners have accelerated rubber degradation.
Check 3: The Seat-to-Bowl Outline Comparison. Close the seat and look straight down at it from above. Does the seat outline match the bowl outline? An elongated seat sitting on a round bowl will overhang at the front and leave gaps at the sides. A round seat on an elongated bowl will sit too far back, with no support under the front edge. Either mismatch allows the seat to shift freely, and no amount of bolt tightening will compensate. If the outlines don't align, you'll need to measure your bowl and replace the seat with the correct shape before any other repair makes sense.
These three checks give you a clear starting point. Most people discover their issue during Check 1 or Check 2 — but skipping Check 3 is a mistake that leads to repeated frustration. If you're wondering how to fix a loose toilet seat and nothing seems to work, a size mismatch is often the hidden culprit.
Match Your Symptom to the Right Fix
Diagnosis is only useful if it points you toward the correct repair step. The table below maps each symptom you might have noticed during the three-point test to its most likely cause and the specific section of this guide that walks you through the solution. Think of it as a shortcut — find your symptom, then jump straight to the fix.
| Symptom | Likely Cause | Recommended Step |
|---|---|---|
| Seat shifts side-to-side when pushed | Loose or stripped mounting bolts | Go to Step 4 |
| Seat slides forward when sitting down | Worn bumpers or wrong seat shape | Go to Step 6 |
| Seat outline doesn't match bowl outline | Incorrect seat size (round vs. elongated) | Replace seat with correct size, then Step 4 |
| Seat wobbles even after bolt tightening | Degraded hinge bushings or cracked mounting points | Go to Step 5 or Step 7 |
| Soft-close seat drifts or won't hold position | Failed damper mechanism or loose mounting plate | Go to Step 5 |
| Bolts spin freely and won't grip | Stripped threads or broken anchor | Go to Step 7 |
If you spotted more than one symptom — say, the seat shifts side-to-side and the bumpers look flattened — that's completely normal. Multiple causes can stack on top of each other, especially in older bathrooms. Address the structural issue first (bolts and hinges), then tackle the friction issue (bumpers and stabilizers). A toilet seat tightening kit often solves the hardware side, while fresh bumper pads handle the grip side.
With your diagnosis in hand, the next piece of the puzzle is understanding how your seat attaches to the bowl — because the tightening method that works on one mounting system can be completely wrong for another.
Step 2 - Identify Your Toilet Seat Mounting System
Here's where most repair guides silently fail you. They tell you to "tighten the bolts underneath" as if every toilet seat attaches the same way. It doesn't. Toilet seats use one of two fundamentally different mounting systems, and the tightening method for one is completely wrong for the other. Applying bottom-access instructions to a concealed-fix seat won't just waste your time — it can strip the hardware or crack a plastic hinge cover you didn't realize was load-bearing.
Identifying your mounting system takes about 30 seconds. Get this right, and every repair step that follows will make immediate sense.
Top-Mount vs Bottom-Mount Hardware Explained
The difference comes down to where you access and tighten the bolts that hold the seat to the bowl.
Bottom-mount (also called bottom-fix) systems are the traditional design you'll find on most older, freestanding toilets. Two bolts are fed downward through the hinge holes from the top of the bowl rim. Underneath, each bolt is secured with a wingnut — the classic butterfly-shaped fastener — or a standard hex nut. When the seat feels loose, you reach underneath the bowl, grip that wingnut, and tighten it while holding the bolt head steady from above with a screwdriver. It's straightforward, but only if you can physically access the underside of the bowl. Open-back toilets with visible plumbing make this easy; back-to-wall and wall-hung toilets often don't leave enough clearance.
Top-mount (also called top-fix or concealed-fixing) systems solve that access problem entirely. The bolt assembly anchors from inside the bowl's hinge hole, and all tightening happens from above. Instead of a wingnut underneath, these systems use an expansion mechanism — typically a plastic dowel, rubber expansion plug, or a metal anchor shaped like a lozenge or rhombus — that grips the inside of the ceramic hole when the bolt is turned from the top. Modern sanitary ware increasingly requires top-mount fixings because wall-hung and close-coupled toilet designs simply don't allow access underneath.
Why does this matter for a broken toilet seat or one that won't stop sliding? Because a top-mount expansion dowel that has lost its grip inside the ceramic hole behaves very differently from a loose wingnut on a bottom-fix bolt. The symptom looks identical — the seat shifts when you sit — but the repair path diverges completely. You can't tighten a concealed anchor with pliers from underneath; it doesn't exist down there. And you can't fix a bottom-mount wingnut by turning a screw from above; there's no expansion mechanism to engage.
How to Identify Your Mounting System in 30 Seconds
Stand behind your toilet and look at the hinge area where the seat meets the bowl rim. You're checking for one of two things:
If you see bolt heads, Phillips-head screws, or small plastic caps covering visible hardware on top of the hinge: this is typically a bottom-mount system. Those caps pop off to reveal bolt heads that you hold in place while tightening wingnuts from below. To confirm, reach underneath the back of the bowl near the hinge holes. If you can feel a bolt tip and a wingnut or hex nut, you've confirmed a bottom-fix setup.
If you see a smooth, unbroken hinge cover with no visible screws or bolt heads on top: you likely have a top-mount or concealed-fixing system. There's nothing to feel underneath because the anchor sits inside the ceramic hole itself. Many of these systems have a small Allen-key slot or a flat-head slot recessed into the hinge housing — that's your tightening access point. Some quick-release toilet seats also use a top-mount base plate that bolts to the bowl first, with the seat clicking onto the plate afterward.
If your toilet lid won't stay up or the whole seat rocks despite appearing tight, the mounting type still matters. A failing top-mount dowel can allow the entire hinge assembly to rotate inside the hole, creating movement that feels like a loose bolt but actually requires a completely different fix — re-expanding or replacing the anchor rather than simply turning a nut. Similarly, if the seat feels too big and overhangs the bowl, the mounting system determines how you'll realign or replace the hardware once you've sourced the correct seat size.
The comparison table below gives you a quick-reference breakdown of both systems across the details that matter most for your repair.
| Feature | Top-Mount (Concealed) System | Bottom-Mount (Traditional) System |
|---|---|---|
| Hardware Visibility | Smooth hinge cover; no bolt heads visible on top | Visible bolt heads or removable plastic caps on hinge |
| Tightening Access Point | From above — turn bolt or Allen key into expansion anchor | From below — hold bolt from above, tighten wingnut underneath |
| Common Tools Required | Flat-head screwdriver, Allen key, or coin (varies by brand) | Flat-head or Phillips screwdriver plus adjustable wrench or pliers |
| Typical Toilet Types | Wall-hung, back-to-wall, close-coupled modern toilets | Traditional freestanding, open-back toilets with accessible underside |
One important note: top-mount seats are generally compatible with bottom-fix toilets as well, since the bolt still passes through the same hinge hole. The reverse isn't always true — a bottom-fix bolt and wingnut assembly won't work if the toilet design blocks access underneath. Keep this in mind if you're shopping for replacement hardware, because choosing the wrong system means starting over.
With your mounting type identified, you're ready to gather the exact tools and materials that match your setup — and avoid buying hardware that looks right but doesn't fit.
Step 3 - Gather the Right Tools and Replacement Hardware
Knowing your mounting type is only half the equation. Reaching under the bowl with the wrong wrench — or worse, discovering mid-repair that you don't have replacement hardware on hand — turns a fifteen-minute job into a frustrating hardware store detour. A surprising number of toilet seat repair guides skip the materials list entirely, leaving you to guess. Let's fix that right now.
Essential Tools You Will Need
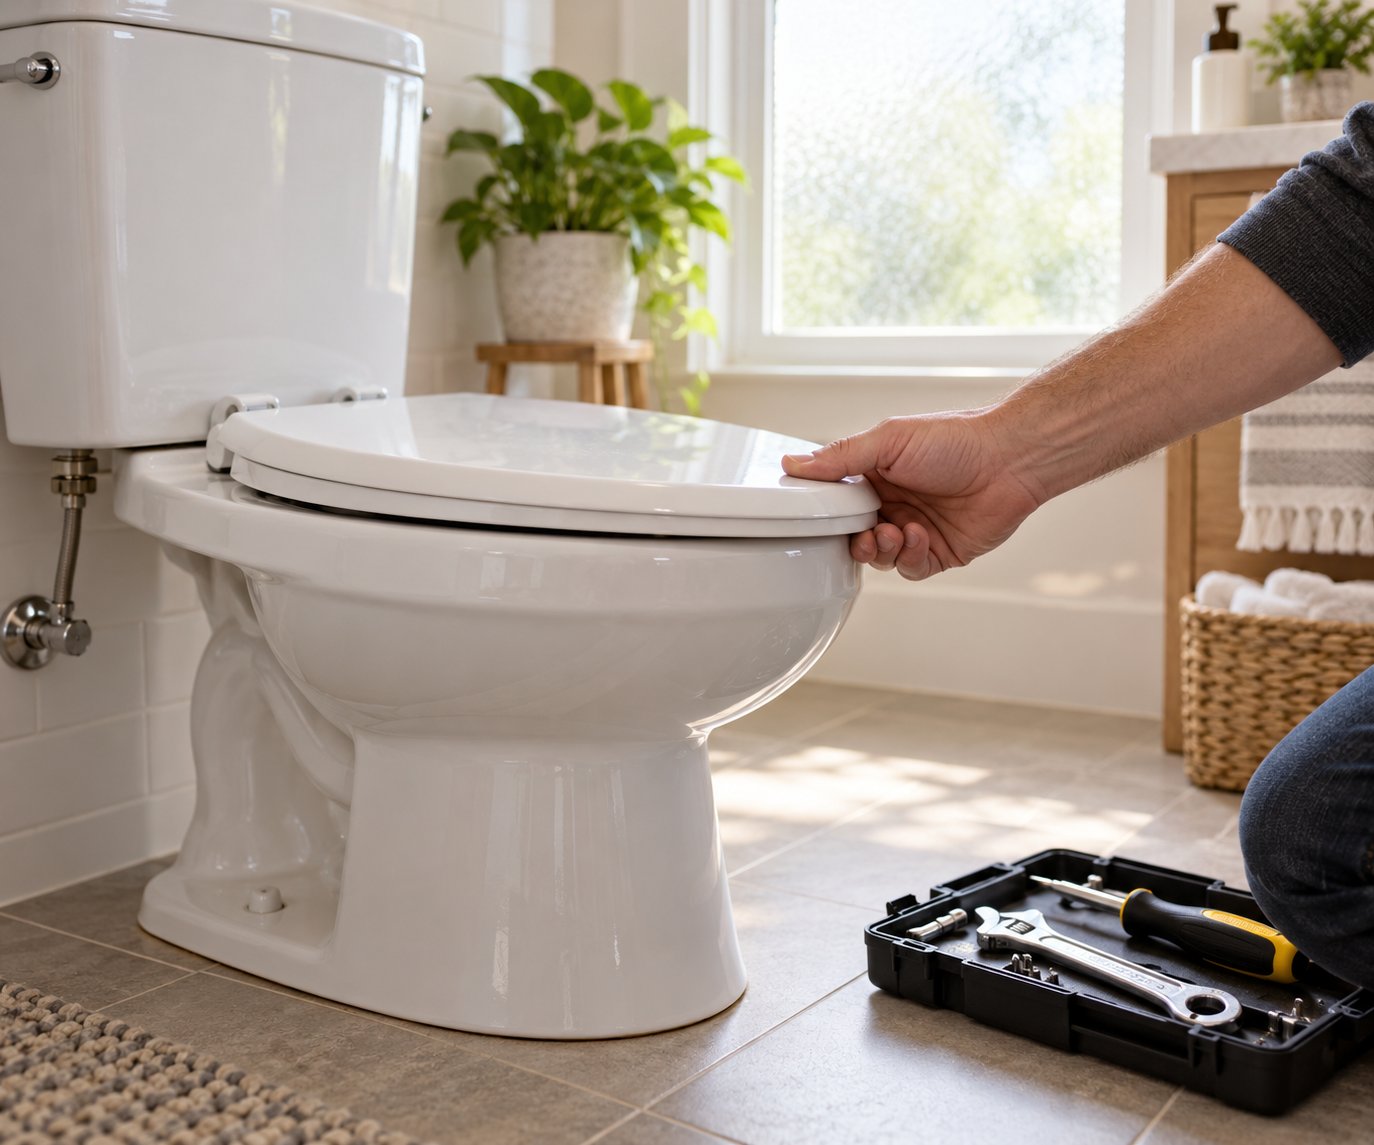
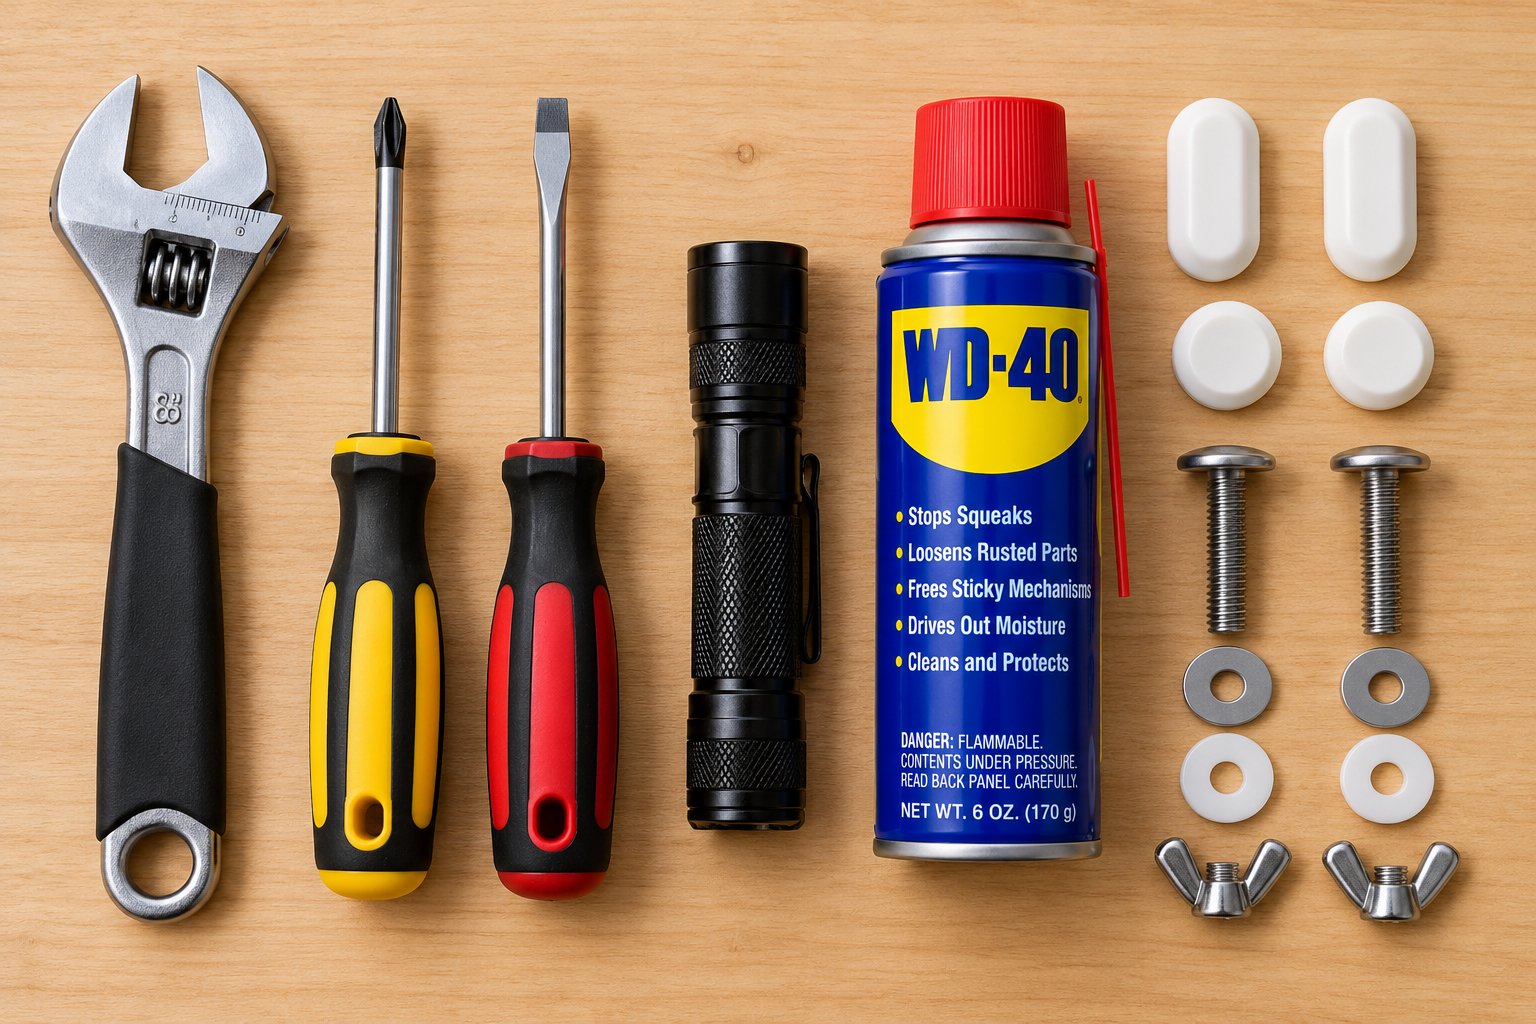
Every tool on this list serves a specific purpose during the repair. You probably own most of them already, but it's worth confirming before you start so you're not improvising with the wrong equipment and risking damage to porcelain.
- Adjustable wrench or pliers — for gripping wingnuts and hex nuts on bottom-mount systems. An adjustable wrench gives you more controlled torque than standard pliers, which matters when you're tightening against porcelain.
- Flat-head screwdriver — needed for prying open hinge caps, turning top-mount expansion bolts, and holding bolt heads steady from above while tightening from below.
- Phillips-head screwdriver — many toilet seat hinge bolts use a Phillips drive. A screwdriver for toilet seat work should have a comfortable grip, since you'll need precise control rather than brute force.
- Flashlight or headlamp — the underside of a toilet bowl is dark, and you need to see the condition of the bolts, washers, and anchor points clearly. A headlamp frees both hands.
- Penetrating lubricant (such as WD-40 or PB Blaster) — corroded metal bolts can seize inside the ceramic holes. A 10- to 15-minute soak with penetrating lubricant loosens rust bonds without the violent force that cracks porcelain.
- Clean cloth and isopropyl alcohol — for wiping down the mounting area and porcelain rim before reinstalling hardware. Residue from old bumpers or cleaning products can prevent new hardware from seating properly.
A quick note on what not to use: avoid power drills or impact drivers. The torque they deliver is far too aggressive for toilet seat hardware — you'll strip plastic threads or crack ceramic in seconds. Every step of this repair should be done by hand.
Choosing the Right Replacement Hardware Material
If your diagnosis from Step 1 pointed to stripped threads, cracked bolts, or hardware that simply won't hold tension anymore, tightening alone won't solve the problem. You'll need replacement parts. And this is where material choice makes a real difference in whether your fix lasts six months or six years.
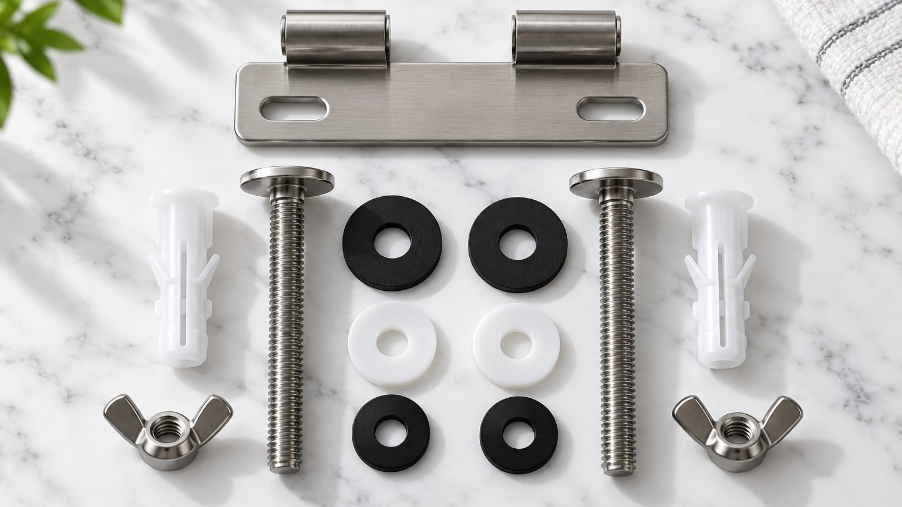
A standard toilet seat tightening kit bundles the core components — bolts, washers, and wingnuts or expansion anchors — matched for compatibility so you're not mixing parts from different systems. These kits are sold in two primary material categories, each with distinct trade-offs.
Plastic hardware (typically nylon or polypropylene) is the most common option bundled with new toilet seats. It's gentle on porcelain — a plastic toilet seat screw won't scratch or chip the ceramic hole the way metal can. Plastic also resists corrosion entirely, which sounds like an advantage until you consider the flip side: plastic bolts become brittle over time, especially when exposed to bleach-based cleaners and the constant humidity of a bathroom. Over-torque a plastic bolt even slightly, and it cracks. That's why installation guides consistently warn against using power tools on plastic mounting hardware.
Stainless-steel hardware takes the opposite approach. Steel bolts and bases resist the vibration-loosening cycle that plagues plastic — the gradual backing-out caused by repeated sitting and standing. They hold torque more reliably over years of use, and they won't degrade from chemical exposure the way nylon does. The trade-off? Metal requires more careful torque control. Overtighten a stainless-steel bolt against porcelain, and you risk cracking the ceramic mounting point itself. You also need rubber or nylon washers between the steel and the porcelain to prevent direct metal-on-ceramic contact.
Plastic hardware is easier on porcelain and resists corrosion but degrades faster under chemical exposure and over-torque. Stainless-steel hardware lasts significantly longer and holds tension more reliably, but it demands careful torque control and protective washers to avoid damaging ceramic surfaces.
Here's the materials checklist for a complete toilet seat repair, covering both material options:
- Replacement mounting bolts — plastic or stainless steel, matched to your mounting type (top-mount expansion bolts or bottom-mount through-bolts)
- Washers — rubber or nylon washers to sit between the hardware and porcelain, preventing scratching and distributing pressure evenly
- Wingnuts or expansion anchors — again matched to your system; bottom-mount uses wingnuts, top-mount uses dowel or rhombus-style anchors
- Rubber bumper pads — self-adhesive replacements for the friction pads on the underside of the seat and lid
- Hinge bushings — small nylon or PTFE sleeves that fit inside the hinge barrel to reduce play (if your diagnosis pointed to hinge wear)
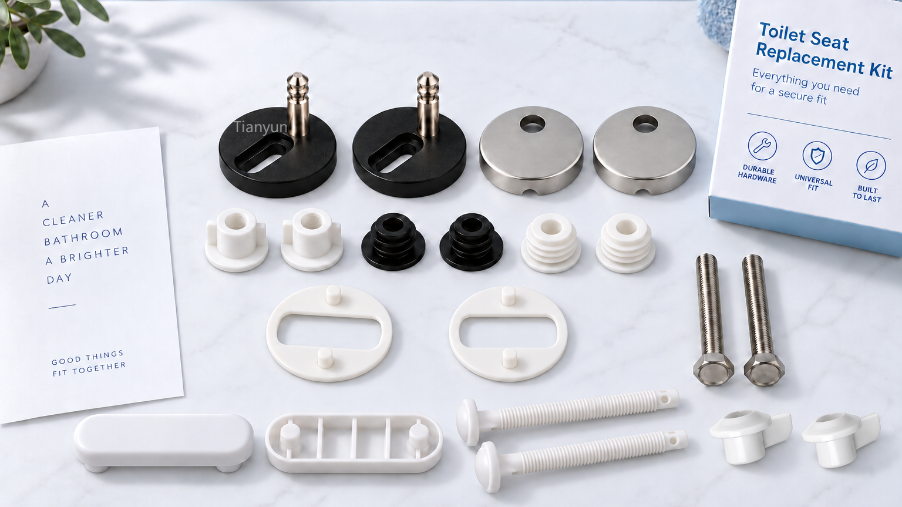
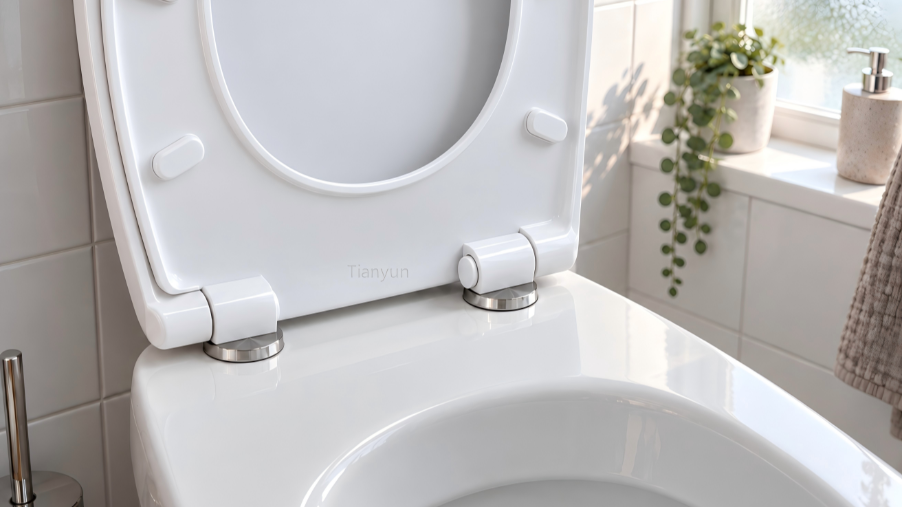
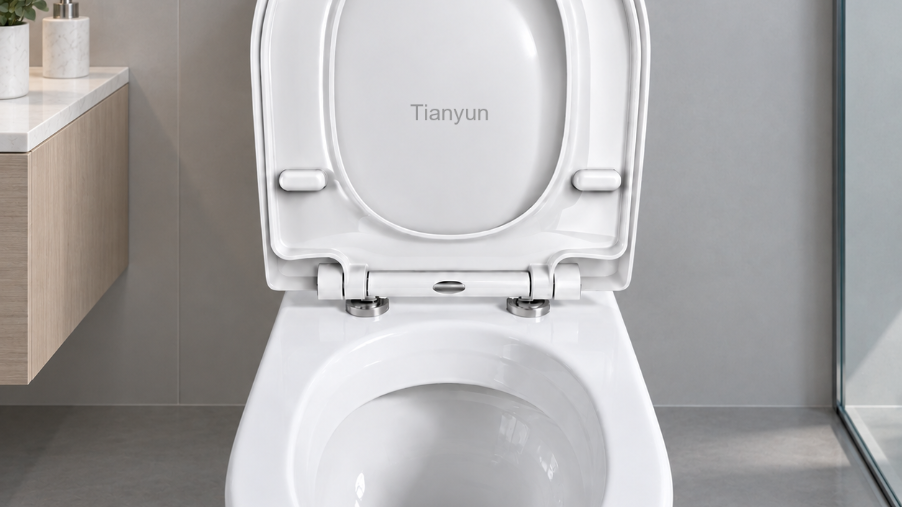
When sourcing replacement hardware, buying matched assemblies rather than individual loose parts avoids the common frustration of mismatched bolt lengths, wrong washer diameters, or anchors that don't fit your ceramic hole size. Companies like Tianyun offer complete toilet seat fixing systems — including hinge mounting kits and stainless steel bases — designed as compatible assemblies for various bowl types. This kind of pre-matched kit eliminates the guesswork of piecing together individual components from different suppliers, and their stainless-steel base options directly address the durability gap that standard plastic kits leave open.
Regardless of which material you choose, one principle holds: buy hardware that matches your mounting system and your toilet bowl type. A top-mount expansion kit won't help if you have a traditional bottom-fix toilet with accessible wingnuts. And an elongated-seat bolt kit may be too long — or too short — for a round-bowl installation. Check the kit specifications against the measurements you noted in Step 2 before purchasing.
With your tools laid out and the right replacement hardware in hand, the actual repair becomes surprisingly fast. The most common fix — tightening or swapping out loose mounting bolts — is where most sliding problems end, and it's exactly where we're headed next.
Step 4 - Tighten or Replace Loose Mounting Bolts
Loose mounting bolts account for the vast majority of sliding toilet seats. The good news? This is the most straightforward repair you'll make — if you follow the method that matches your mounting system. Mixing up the approach is where people run into trouble, so the instructions below are split into two distinct paths based on what you identified in Step 2. Grab the screwdriver for toilet seat work you set aside in Step 3, and let's get this done.
Tightening Top-Mount Toilet Seat Bolts
If your seat uses a traditional bottom-fix system — bolts inserted from above and secured with wingnuts or hex nuts underneath — the tightening happens in two places at once. One hand works from above; the other works from below. Here's how do you fix a toilet seat with this hardware style:
- Close the seat and center it on the bowl. Push it into the position you want it to stay in — even gaps on both sides, no overhang at the front. This step matters because the bolts will lock the seat in whatever position it's sitting in when you tighten them.
- Locate the hinge caps. At the back of the seat where the hinges meet the bowl rim, you'll see two small plastic caps or flip-up covers. Gently pry these open with a flat-head screwdriver. Go slowly — the plastic is thin and can snap if you force it. Some caps unscrew counterclockwise instead of flipping.
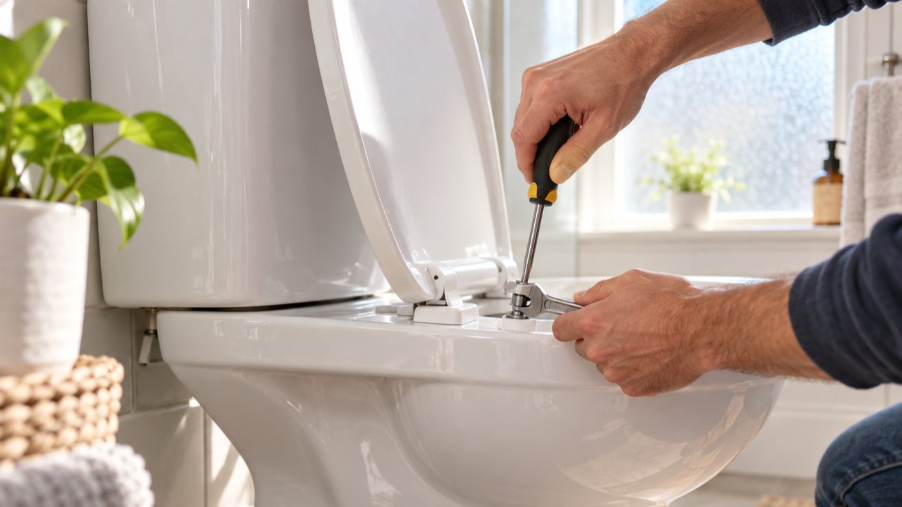
- Hold the bolt head from above. With the caps open, you'll see the top of each bolt — usually a flat-head or Phillips-head slot. Insert your screwdriver and hold it firmly so the bolt can't rotate.
- Tighten the nut from below. Reach underneath the bowl rim near the hinge holes. You'll feel the wingnut or hex nut on each bolt. Using pliers or an adjustable wrench, turn the nut clockwise while keeping the bolt head stationary from above. Alternate between the left and right bolts — a few turns on one side, then a few on the other — so the seat stays centered and pulls down evenly.
- Stop at snug. When the seat no longer shifts side-to-side and feels firm against the bowl rim, you're done. Give it one final quarter-turn at most, then set the tools down. We'll cover the precise feel of "tight enough" in the torque guide below.
- Snap the hinge caps closed. Press each cap back into place gently until it clicks. If a cap won't close fully, the bolt head may be sitting slightly too high — back off the nut a fraction of a turn and try again.
If the bolt spins freely when you try to tighten — meaning you can turn the nut endlessly without feeling any resistance — the nut underneath is rotating along with the bolt. Grip the nut firmly with pliers, hold it completely still, and then tighten the screw from above. You should feel the bolt start to bite and draw the seat downward. If it still won't grip after holding the nut, the threads are likely stripped and the hardware needs full replacement.
Tightening Concealed-Fixing Toilet Seat Bolts
Concealed or top-fix systems handle everything from above, which makes them more convenient but slightly less intuitive if you've never worked with one before. There's no wingnut to grip underneath — the anchor mechanism sits inside the ceramic hole and expands when you turn the bolt. Here's how to tighten toilet seat bolts on a concealed system:
- Close and center the seat on the bowl. Same principle as above — set it in the final position you want before you tighten anything.
- Access the tightening point. Look at the top of each hinge. Depending on the brand, you'll find a flat-head slot, a Phillips-head slot, or a small Allen-key recess. Some modern quick-release seats require you to press the release button, lift the seat off the mounting plate, and then access the bolt head on the plate itself.
- Turn the bolt clockwise. Use the appropriate screwdriver or Allen key. As you turn, the expansion anchor inside the ceramic hole spreads outward, gripping the porcelain from within. You'll feel increasing resistance as the anchor engages.
- Alternate sides. Tighten the left bolt a few turns, then switch to the right, just as with bottom-mount hardware. Even pressure on both sides keeps the seat aligned and prevents one hinge from bearing all the load.
- Test and stop. Push the seat side-to-side. If it doesn't shift, you've reached the right tension. One more quarter-turn for security, then stop completely.
A common frustration with concealed fixings is the bolt that turns but never seems to get tighter. This usually means the expansion anchor has lost its grip — it may have cracked, compressed, or been installed in a ceramic hole that's slightly oversized. In that scenario, tightening the bolt further won't help. You'll need to remove the bolt, inspect the anchor, and replace it with a new expansion dowel or plug that matches the hole diameter. That replacement process is covered in Step 7.
How Tight Is Tight Enough - Torque Feel Guide
This is the detail that almost every guide leaves out, and it's the single biggest reason people either under-tighten (and the seat loosens again within days) or over-tighten (and crack the bolt or the porcelain). There's no torque wrench specification for toilet seat hardware — the guidance is entirely by feel, so here's how to calibrate yours.
The target sensation is "snug but not strained." Imagine closing a jar lid firmly enough that it won't open on its own, but not so hard that someone with average grip strength can't twist it back off. You should feel solid resistance through the screwdriver handle, and the seat should not shift even slightly when you push it. That's the stopping point.
From there, one additional quarter-turn provides a small margin of security against the vibration-loosening cycle that happens over weeks of normal use. Anything beyond a quarter-turn past snug is entering the danger zone — especially with plastic bolts, which can crack without warning once the material reaches its stress limit. You won't hear a gradual creaking sound as a warning. Plastic fails suddenly, and then you're dealing with how to fix a broken toilet seat bolt rather than a simple tightening job.
Stainless-steel bolts are more forgiving with torque, but they introduce a different risk: cracking the porcelain mounting point. If you feel the bolt suddenly become easier to turn after steady resistance — a sensation sometimes described as the bolt "falling through" — stop immediately. That shift in resistance can mean the ceramic around the hole has fractured internally.
One more scenario to watch for: corroded bolts that won't turn at all. Metal hardware that has been exposed to moisture for years can seize inside the ceramic hole. Forcing it with extra leverage risks snapping the bolt or chipping the porcelain. Instead, spray the bolt and nut generously with penetrating lubricant, let it soak for 10 to 15 minutes, and then try again with gentle, steady pressure. A second application may be needed for severely corroded bolts. Patience here saves you from a far more expensive repair.
After tightening, give the seat a real-world test. Don't just tap it — sit down carefully and shift your weight slightly from side to side. Lift the lid and lower it. If everything stays solid, you've solved the most common cause of a sliding seat. But if the seat still drifts despite firm bolts, the issue likely lives in the hinge mechanism itself — particularly if you have a soft-close or quick-release model, where a different set of internal components controls movement.
Step 5 - Fix Soft-Close and Quick-Release Toilet Seats
Soft-close and quick-release seats are everywhere in modern bathrooms — yet most sliding-seat repair guides pretend they don't exist. These seats rely on an entirely different internal mechanism than standard hinges, which means a toilet seat loose on its mount may have nothing to do with the bolts at all. The real culprit is often hidden inside the hinge housing itself.
How Soft-Close Hinges Differ from Standard Hinges
A standard hinge is essentially a passive pivot point. It doesn't resist or control the seat's movement — gravity and your hand do all the work. Soft-close hinges add a damper mechanism to that equation: a small internal cylinder, similar in concept to a door closer, that uses hydraulic fluid or a spring-loaded piston to slow the lid's descent. That controlled motion is what gives you the gentle, silent close instead of a porcelain slam.
The trade-off is complexity. Where a standard hinge has maybe three moving parts, a soft-close hinge has a damper cylinder, internal pins, spring clips, and sometimes a separate tension adjustment. Any one of those components can wear out, detach, or lose resistance over time. When that happens, the seat doesn't just lose its slow-close feature — it can also develop lateral play that makes it slide or shift during use. If you've already tried to tighten toilet seat bolts and the sliding persists, a failing damper is the most likely explanation on a soft-close model.
Fixing a Sliding Quick-Release Toilet Seat
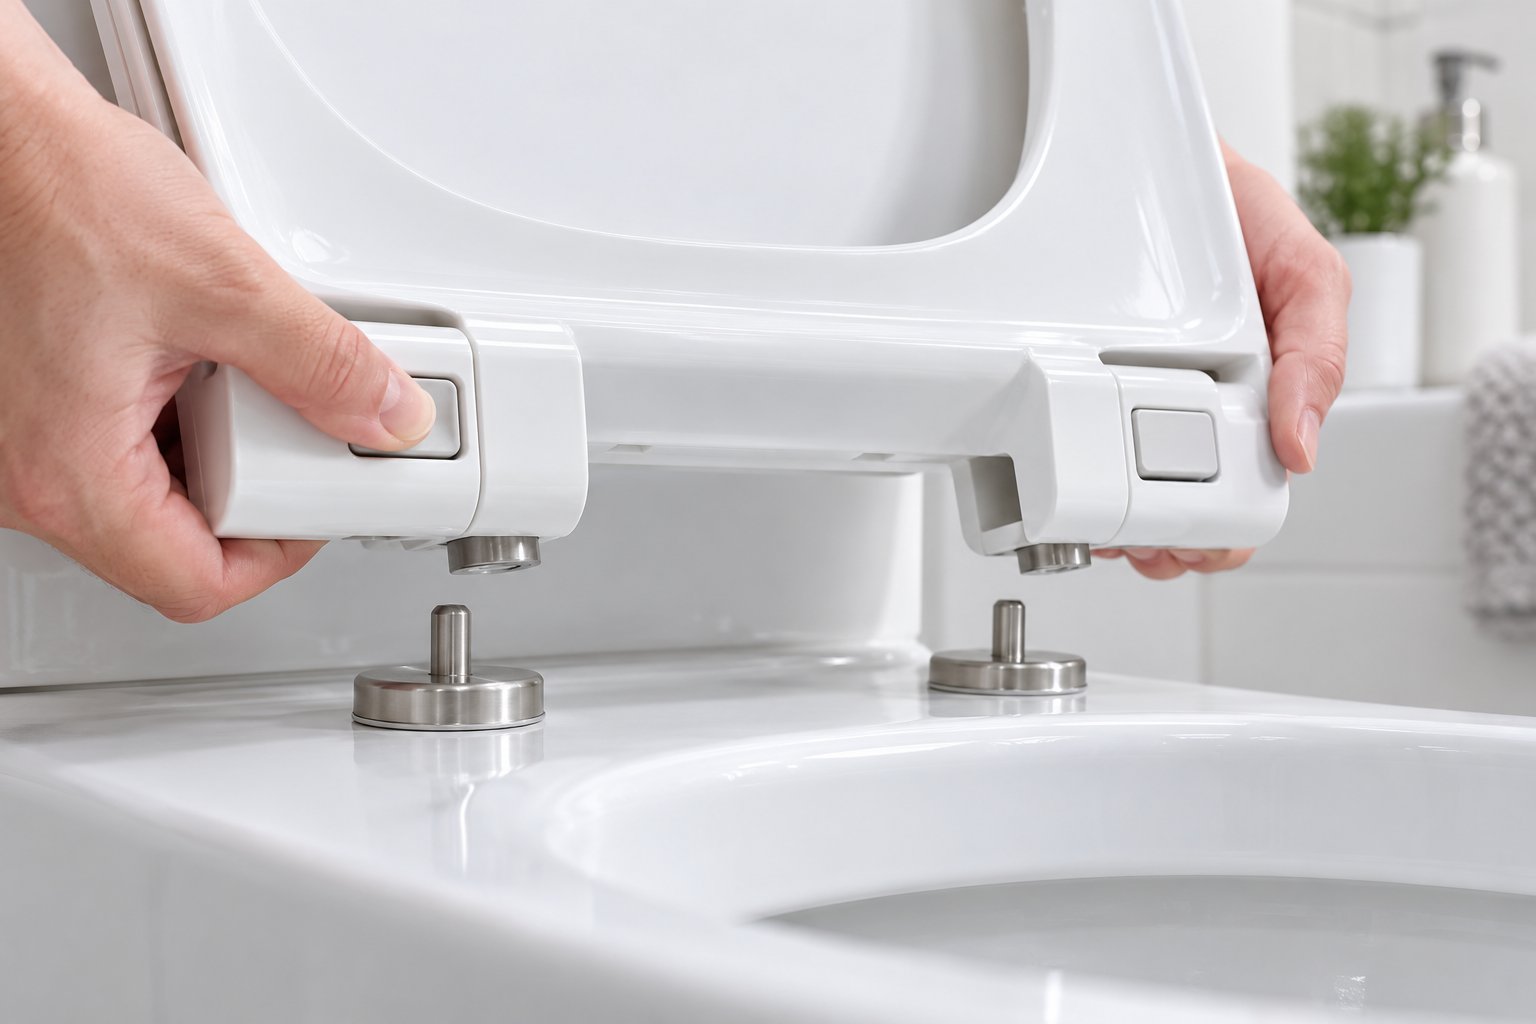
Quick-release seats are designed to pop off the bowl for easy cleaning. A button or tab on the hinge lets you lift the entire seat-and-lid assembly straight up and away from the mounting plate. That convenience, though, introduces a second potential failure point: the mounting plate bolted to the bowl can loosen independently of the seat itself.
Here's the important distinction — when a quick-release seat slides, you need to check two connections, not one. The seat-to-plate clip might be perfectly secure while the plate-to-bowl bolts are the parts that have worked loose. Tightening the seat onto the plate won't help if the plate itself is rocking on the porcelain.
Follow this sequence to diagnose and fix the issue:
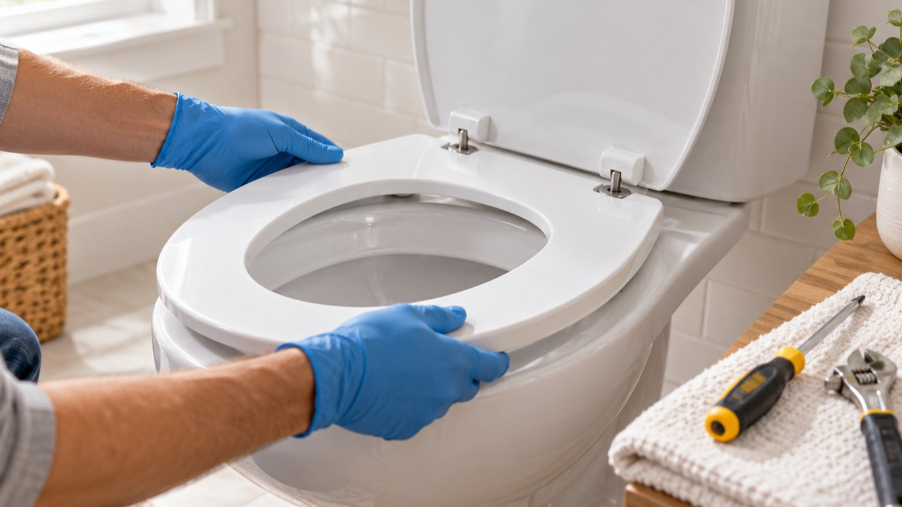
- Release and remove the seat. Locate the quick-release button or tab — usually at the back of the hinge, between the seat and the bowl rim. Press or pull it, then lift the seat-and-lid assembly straight up off the mounting plate. Set it aside on a towel.
- Inspect the mounting plate. With the seat removed, you'll see the plate (or pair of brackets) bolted directly to the bowl. Grip it and try to shift it side-to-side. Any movement here is your sliding culprit. Tighten the plate bolts using the method appropriate for your mounting type — top-mount expansion bolt or bottom-fix wingnut — just as you would for a standard seat in Step 4.
- Examine the hinge pins and damper housings. Turn the removed seat assembly upside down and look at each hinge. The damper cylinder is typically a small barrel-shaped component seated into the hinge body. Check for cracks in the plastic housing, pins that have slipped out of position, or a damper barrel that moves loosely when you press on it. One commonly overlooked detail is a small rectangular plastic retainer clip that holds the hinge pins in place — if this clip has popped out or broken, the pins can shift and the entire hinge develops play.
- Reseat or replace the damper. If the damper barrel has simply slipped out of its housing, push it firmly back into position until it clicks. Apply a thin layer of silicone lubricant grease between the damper's moving surfaces to restore smooth resistance. If the cylinder is cracked or the hydraulic fluid has leaked out (you'll notice an oily residue around the hinge), the damper needs replacement rather than repair.
- Reassemble and test. Click the seat back onto the mounting plate, press down until the quick-release mechanism locks, and test for lateral movement. Lift and lower the lid several times to confirm the soft-close action has returned.
When the Lid Won't Stay Up - Damper Troubleshooting
A related symptom that often appears alongside sliding is a lid that won't stay in the upright position — it drifts slowly forward and falls. This happens when the damper's internal tension is either set too high (applying closing force even when the lid is lifted past 90 degrees) or when the damper mechanism is failing entirely and can no longer hold the lid's weight in any position.
Some soft-close hinges include a small tension-adjustment screw on the damper body. Turning it clockwise increases resistance; counterclockwise decreases it. If your model has this feature, experiment in small increments — a quarter-turn at a time — until the lid holds itself upright without drifting.
If there's no adjustment screw, or if adjusting it doesn't help, the damper cylinder has likely reached the end of its functional life. Here's the practical reality: hinge pins, damper cylinders, and retainer clips are rarely sold as individual spare parts. Most manufacturers package them as a complete hinge assembly, meaning you'll replace the entire hinge unit rather than just the worn damper inside it. This actually simplifies the repair — you get fresh pins, a new damper, and intact retainer clips in one kit, eliminating the guesswork of sourcing individual components that may or may not fit your model.
Damper and hinge issues account for most soft-close seat failures, but they aren't the only reason a seat keeps drifting. Sometimes the friction layer between the seat and the porcelain has simply worn away — and that's a fix that involves a completely different set of parts sitting on the underside of the bowl rim.
Step 6 - Replace Bumpers and Add Stabilizers
Those small rubber pads stuck to the underside of your toilet seat might look insignificant, but they're doing more work than any other component to keep the seat from drifting. When bumpers fail, the seat sits directly on smooth porcelain — and smooth-on-smooth contact has almost zero friction. No amount of bolt tightening will compensate for that lost grip. If your diagnosis back in Step 1 revealed flattened, hardened, or missing pads during the bumper inspection, this is the fix that finally stops the slide at its source.
Replacing Worn Rubber Bumpers
Rubber bumpers — sometimes called buffer pads or seat cushions — are small adhesive-backed discs or rectangles made from rubber or silicone. You'll typically find two to four of them on the underside of the seat and another set on the underside of the lid. Their job is simple: create a friction barrier between the seat and the porcelain rim so the seat grips in place rather than skating across it.
Over months and years of use, these pads compress under body weight, harden from exposure to bathroom humidity, and degrade when cleaning chemicals splash onto them. Eventually they either go completely flat — offering no cushion or grip — or peel off entirely and disappear down the side of the bowl without you ever noticing. That's why a seat that felt perfectly stable six months ago can suddenly start sliding with no obvious explanation.
Replacing them takes about five minutes. Here's the process:
- Lift the seat and lid to the upright position. You need clear access to the underside of both the seat ring and the lid, as well as the top surface of the porcelain bowl rim where the bumpers make contact.
- Peel off any remaining old bumpers. Use your fingernail or a plastic scraper to remove the worn pads. If adhesive residue is left behind, rub it off gently — a cloth dampened with isopropyl alcohol dissolves most adhesive residues without damaging the seat material or the porcelain.
- Clean the porcelain rim surface. Wipe down the spots on the bowl rim where the bumpers sit with isopropyl alcohol on a clean cloth. This removes body oils, soap film, and cleaning chemical residue that would prevent new adhesive from bonding properly. Let it air-dry for 30 seconds.
- Clean the underside of the seat. Do the same for the spots on the seat where the new bumpers will attach. Both surfaces need to be clean and dry for the adhesive to hold.
- Apply new self-adhesive bumper pads. Peel the backing off each pad and press it firmly into position — typically at the front and sides of the seat underside, matching the original bumper locations. Hold each pad in place for about 10 seconds to let the adhesive set. If you're replacing lid bumpers too, apply them to the spots on the lid's underside that contact the tank or the seat ring when lowered.
- Lower the seat and test. Close the seat onto the bowl rim, press down lightly, and try shifting it side-to-side. Fresh bumpers with full elasticity should create noticeable resistance — a subtle "grab" you can feel immediately compared to the bare-porcelain slide you had before.
One tip worth remembering: check bumper condition every time you do a routine bathroom cleaning. It takes two seconds to lift the seat and press a bumper with your fingertip. If it feels hard and doesn't spring back, or if a pad has started to peel at the edges, replace it before the sliding starts again. A pack of universal replacement bumpers costs a few dollars and eliminates one of the most common reasons people end up searching for how to fix a loose toilet seat repeatedly.
Installing Toilet Seat Stabilizers for Extra Grip
Bumper pads restore friction, but they can only do so much when the seat itself is a poor geometric fit for the bowl. Remember the seat-to-bowl outline comparison from Step 1? If your seat is slightly oversized, slightly mismatched in shape, or simply has more play than bumpers alone can control, toilet seat stabilizers provide a physical barrier against lateral movement that friction pads can't match.
Stabilizers are L-shaped or T-shaped brackets that attach to the underside of the seat. When the seat is lowered, a perpendicular tab on the stabilizer drops just inside the inner rim of the bowl, creating a mechanical stop that prevents the seat from shifting side-to-side. Think of it as a guardrail rather than a speed bump — where bumpers rely on grip, stabilizers rely on geometry.
The installation process involves positioning the stabilizer flush against the underside of the seat, drilling a small pilot hole (typically 5/64 inch, no deeper than 3/8 inch — do not drill through the seat), and securing the bracket with the provided screws. Most kits include two stabilizers, one for each side, plus rubber bands for temporary positioning while you mark and drill. Once both brackets are screwed in and the seat is lowered, the tabs should sit snugly inside the bowl rim with just enough clearance to lower and raise the seat smoothly.
Stabilizers are the best solution in several specific scenarios:
- Elongated seat on a standard round bowl — the front overhang creates a lever effect that amplifies any lateral force, and bumpers alone can't counteract it. Stabilizers lock the seat's position mechanically.
- Households with elderly members or anyone with mobility challenges — a sliding seat is more than an annoyance in this context; it's a genuine safety hazard. Stabilizers provide a level of security that friction pads cannot guarantee on their own.
- Seats that keep loosening despite fresh bolts and new bumpers — when you've addressed hardware tension and surface friction but the seat still drifts, a stabilizer adds the third layer of defense: a physical stop that makes movement mechanically impossible.
- Heavy-use bathrooms — guest bathrooms, family bathrooms with children, or commercial restrooms where the seat endures far more movement cycles per day than a single-user bathroom. The added mechanical lock extends the interval between maintenance checks significantly.
Between fresh bumpers restoring friction and stabilizers adding mechanical containment, you've now addressed the two most commonly overlooked causes of a sliding seat — the ones that keep the problem coming back even after the bolts are tight. But what if you've worked through every fix in this guide and the seat still won't stay put? That persistent instability can point to structural damage that no amount of hardware adjustment will solve — and recognizing those signs early saves you from wasting effort on a seat or bowl that's past the point of repair.
Step 7 - Know When to Replace Instead of Repair
A toilet seat keeps coming loose despite new bolts, fresh bumpers, and stabilizers firmly in place. You've followed every step, tightened everything correctly, and the seat still won't hold. At some point, the honest answer isn't a better repair technique — it's recognizing that the seat, the hardware, or the bowl itself has suffered damage that no adjustment can undo. Knowing where that line falls saves you from chasing a fix that doesn't exist.
Five Signs Your Toilet Seat Cannot Be Saved
Each of these indicators points to structural failure rather than a maintenance issue. If you spot even one, repair efforts become a temporary band-aid at best — and a safety risk at worst.
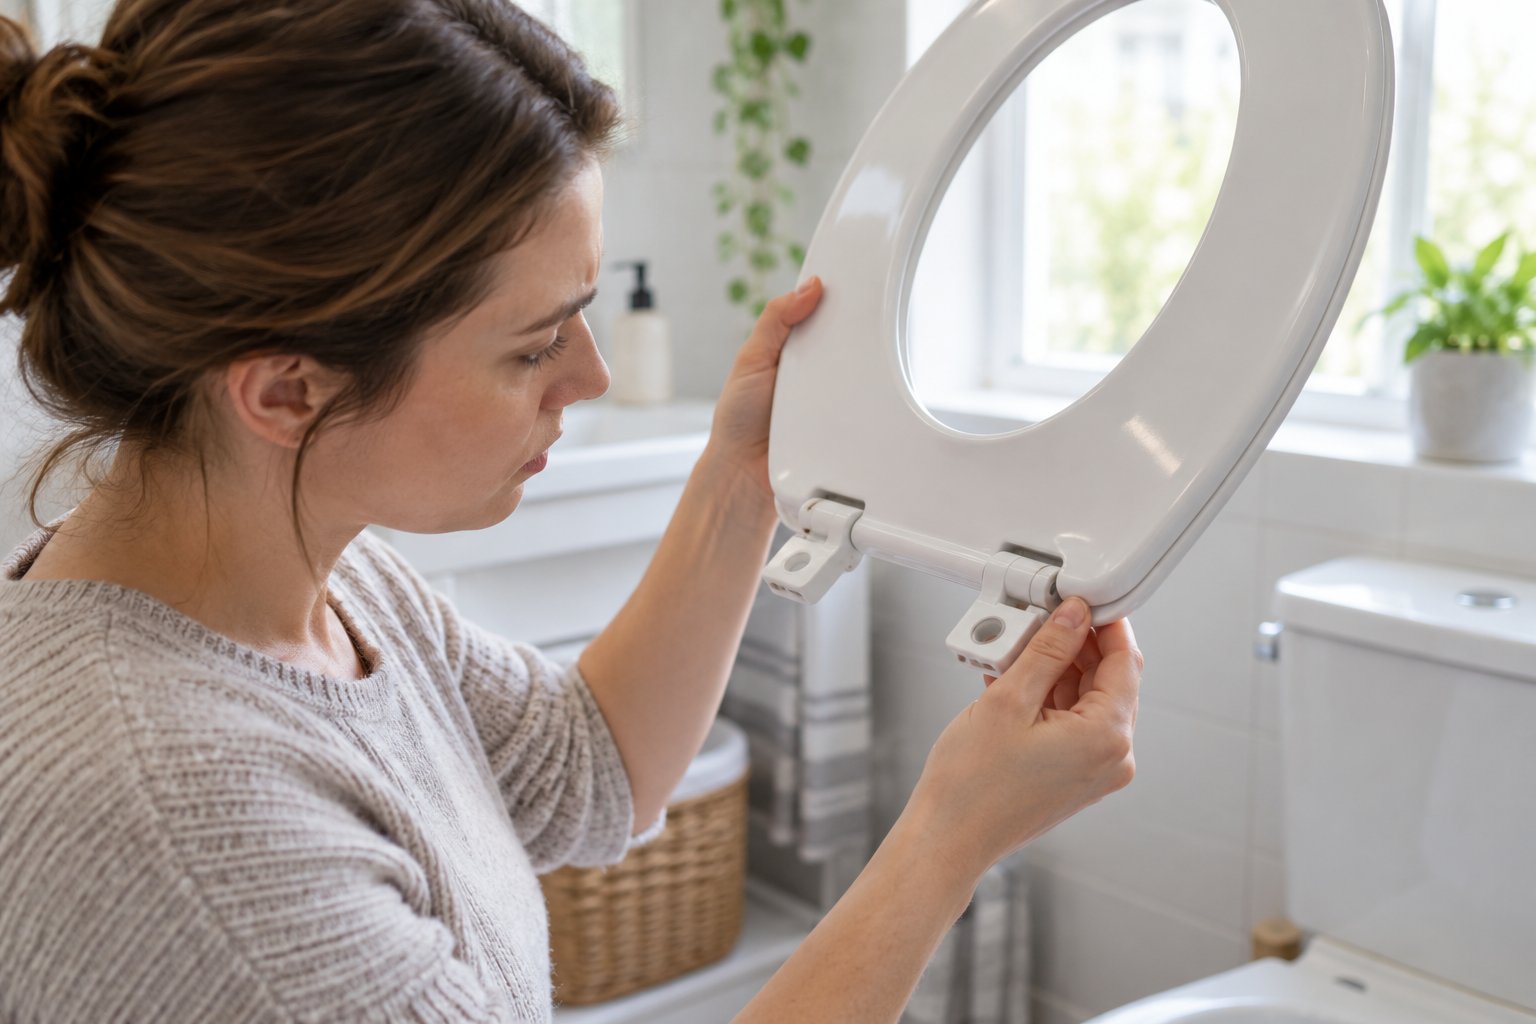
- Hairline cracks radiating from the bolt holes. Pick up the seat and hold it at eye level near a light source. Fine cracks branching outward from either mounting hole mean the material has fractured under load. These cracks will only widen with continued use. As bathroom specialists note, cracks around the hinges also harbor bacteria in places you can't effectively clean.
- Hinge ears snapped off the seat body. The "ears" are the molded tabs on the seat that the hinge pins pass through. Once one breaks, the seat loses its connection point entirely on that side. No glue or epoxy can restore the structural integrity needed to support body weight — the ear will simply shear off again under load.
- Stripped bolt holes in the porcelain bowl rim. If the ceramic around the mounting hole has chipped, crumbled, or widened to the point where no bolt, expansion anchor, or wingnut can grip, the problem lives in the toilet itself — not the seat. You can verify this by inserting a new bolt and checking for any lateral play inside the hole before tightening. Visible chips or a bolt that wobbles inside the ceramic mean the hole is compromised.
- Visible warping of the seat. Remove the seat and place it on a flat surface — a countertop or tile floor works well. Press down on the front. Does one side rock? A warped seat will never sit flush against the bowl rim, and that gap creates the movement that makes the seat slide. Warping often results from heat exposure, chemical degradation, or simply years of uneven weight distribution.
- Persistent wobble after new bolts and bumpers. You've replaced the mounting hardware, installed fresh bumpers, and even added stabilizers — yet the seat still shifts. This is the clearest sign of accumulated damage across multiple components. When every individual fix checks out but the system as a whole still fails, the seat assembly has reached the end of its functional life. The average toilet seat lasts five to seven years under normal use, and pushing far beyond that often leads to exactly this frustrating scenario.
One situation deserves special attention: a cracked or damaged mounting point on the porcelain bowl itself. Unlike a broken seat — which you can swap out in minutes — compromised ceramic may require a professional plumber to evaluate whether the bowl can be repaired with a specialty epoxy or whether the entire toilet needs replacement. Attempting to force new hardware into fractured porcelain risks widening the damage and creating a leak path you can't see until water reaches the subfloor.
Choosing Compatible Replacement Hardware
If the seat body is the problem, replacing it is straightforward — match the bowl shape (round vs. elongated), confirm the bolt-hole spacing (5.5 inches is standard on virtually all residential toilets), and install the new seat using the method for your mounting type. The real challenge comes when you need to figure out how to fix a commode seat that keeps failing because the hardware is the weak link rather than the seat itself.
Mismatched replacement parts are one of the most common reasons a new seat starts sliding within weeks of installation. A bolt that's slightly too narrow for the ceramic hole, an expansion anchor designed for a different hole diameter, or washers that don't distribute pressure evenly — any of these gaps reintroduces the instability you thought you'd fixed. The decision-tree table below maps each condition to the right action so you can skip the guesswork.
| Condition Observed | Repairable? | Recommended Action |
|---|---|---|
| Hairline cracks from bolt holes in seat or lid | No | Replace the seat; reuse mounting hardware if bolts and anchors are intact |
| Hinge ears snapped off seat body | No | Replace the seat and inspect hinge pins for damage before reinstalling |
| Stripped or chipped bolt holes in porcelain bowl | Possibly — depends on severity | Try an oversized expansion anchor first; if it won't grip, consult a plumber about bowl replacement |
| Seat visibly warped on a flat surface | No | Replace the seat; check bowl rim for levelness while the old seat is off |
| Wobble persists after all hardware and bumpers replaced | No | Replace the entire seat-and-hinge assembly as a unit; consider upgrading to stainless-steel mounting hardware |
| Bolts corroded but ceramic holes intact | Yes | Replace bolts, washers, and nuts only; keep existing seat if undamaged |
When you do need replacement mounting hardware, buying a complete matched assembly — bolts, washers, anchors, and base plates designed to work together — eliminates the trial-and-error of mixing individual parts from different sources. Tianyun's toilet seat fixing systems are worth evaluating here, particularly their hinge mounting kits and stainless steel base options. Their systems are engineered as compatible assemblies across various bowl types, which directly addresses the fit problem that causes so many replacement installations to loosen prematurely. For anyone learning how to fix toilet lid stability issues for the long term, sourcing pre-matched hardware is one of the most effective ways to avoid repeating the cycle.
Replacement — whether it's the seat, the hardware, or both — marks the end of the repair process. But a new installation only stays tight if you maintain it, and the environmental factors inside your bathroom are already working to undo every bolt you just tightened. A simple quarterly routine is what separates a permanent fix from a problem that keeps coming back.
Step 8 - Prevent Your Toilet Seat From Ever Sliding Again
Every fix in this guide — tightened bolts, fresh bumpers, new stabilizers, even a complete seat replacement — is already being quietly undermined by two forces you interact with daily: cleaning chemicals and bathroom humidity. The hardware you just repaired sits in one of the harshest micro-environments in your home, and without a simple maintenance habit, the sliding will return. The difference between a one-time repair and a permanent solution comes down to a few minutes of attention each quarter.
A Simple Quarterly Maintenance Checklist
You don't need to disassemble anything on a regular basis. Most recurring loosening is caught early with a quick hands-on check — the same three-point test from Step 1, repeated on a schedule. Here's what to inspect and when:
- Every 3 months: Grip the front edge of the closed seat and push it side-to-side. Any lateral play means the mounting bolts have started to back out. Retighten each bolt a quarter-turn using the method for your mounting type — top-mount or bottom-fix — and retest. This takes under two minutes and catches loosening long before it becomes a noticeable slide. It's the single most effective way to repair a loose toilet seat before it actually feels loose.
- Every 6 months: Lift the seat and press each rubber bumper with your fingertip. A healthy bumper springs back immediately. If it feels hard, stays compressed, or has started peeling at the edges, replace it with a fresh self-adhesive pad. Also check the lid bumpers — these degrade at the same rate and affect how the lid sits against the tank, which in turn influences overall seat stability.
- Every 12 months: Remove the seat entirely. For quick-release models, press the release tab and lift; for standard mounts, unscrew the bolts. With the seat off, clean the bolt channels and the porcelain rim around the mounting holes using isopropyl alcohol and a cloth. Inspect the bolts for corrosion, the expansion anchors for cracks, and the ceramic holes for any chipping. Run your finger around the inside edge of each hole — roughness or grit means debris has accumulated and needs to be cleared before you reinstall. This annual deep-check also gives you a clear view of the hinge pins and bushing condition, catching wear that's invisible when the seat is mounted.
Think of this schedule the way you'd think about checking smoke detector batteries. It's not dramatic, it's not time-consuming, and skipping it once probably won't cause a disaster. But staying consistent means you'll never find yourself back at square one, wondering how to fix a toilet seat that's sliding all over again.
Environmental Factors That Cause Recurring Loosening
Two environmental culprits accelerate hardware failure far more than normal wear and tear — and both are within your control.
Chemical cleaners, especially bleach-based products. Bleach is effective at sanitizing porcelain, but it doesn't discriminate between the surfaces you want to clean and the hardware you need to preserve. Professional plumber Aaron Adams warns that bleach and harsh chemicals left sitting on toilet surfaces eat away at protective glazes and degrade plastic and rubber components over time. When bleach-based bowl cleaner splashes onto the rim — right where your mounting bolts, washers, and bumpers sit — it accelerates the breakdown of nylon threads, rubber gaskets, and silicone bumper pads. The practical fix is simple: spray or squirt cleaner inside the bowl and under the rim, but avoid dousing the top of the rim where hardware makes contact. If cleaner does land on the hinge area, wipe it away promptly rather than letting it sit. This one habit alone can double the lifespan of plastic mounting hardware.
Humidity in poorly ventilated bathrooms. Moisture trapped in a bathroom without adequate exhaust ventilation doesn't just promote mold — it corrodes metal hardware and causes rubber to perish. Stainless-steel bolts resist this far better than standard zinc-plated hardware, but even stainless steel develops surface oxidation in chronically damp conditions. Rubber bumpers absorb moisture, swell slightly, then dry out and crack in a repeated cycle that destroys their elasticity within months. If your bathroom doesn't have a working exhaust fan, or if you tend to skip running it during and after showers, your toilet seat hardware is aging two to three times faster than it would in a well-ventilated space. Running the fan for 15 to 20 minutes after every shower makes a measurable difference — not just for mold prevention, but for the longevity of every plastic, rubber, and metal component on your toilet.
Understanding these environmental triggers is what separates a fix that holds for years from one that needs repeating every few months. The sliding isn't random and it isn't inevitable. It's a predictable result of specific conditions — and now you know exactly how to tighten toilet seat lid hardware, protect the components from premature wear, and catch early signs of loosening before they become a problem.
Diagnose first, match the fix to the root cause, choose durable hardware that suits your mounting system, and maintain quarterly. A sliding toilet seat isn't a mystery — it's a solvable problem with a permanent solution, as long as you address the cause rather than just the symptom.
Frequently Asked Questions About Fixing a Sliding Toilet Seat
1. Why does my toilet seat keep sliding even after I tighten the bolts?
A toilet seat that slides despite tight bolts usually has a secondary issue at play. The most common hidden culprits are worn or missing rubber bumpers on the seat underside, which eliminate friction against the porcelain rim. A mismatch between seat shape and bowl shape — such as an elongated seat on a round bowl — also causes persistent sliding because the seat overhangs and shifts under body weight. In soft-close models, a failing internal damper mechanism can introduce lateral play that bolt tightening alone cannot correct. Check bumper condition, verify your seat-to-bowl fit, and inspect hinge internals before assuming the bolts are the problem.
2. How do I know if my toilet seat needs to be replaced instead of repaired?
Five clear signs indicate a toilet seat is beyond repair: hairline cracks radiating outward from the bolt holes, snapped hinge ears on the seat body, stripped or chipped bolt holes in the porcelain bowl, visible warping when the seat is placed on a flat surface, and a persistent wobble even after installing new bolts, bumpers, and stabilizers. If any of these conditions are present, continued repair attempts become a temporary fix at best. Most toilet seats last five to seven years under normal use, and structural fatigue beyond that point makes full replacement the safer, more cost-effective choice.
3. What is the difference between top-mount and bottom-mount toilet seat bolts?
Bottom-mount (bottom-fix) systems use bolts fed down through the hinge from above, secured underneath with a wingnut or hex nut. You tighten them by holding the bolt head from the top while turning the nut from below. Top-mount (concealed-fix) systems anchor entirely from above using an expansion plug or dowel that grips inside the ceramic hole when the bolt is turned. Your toilet type determines which system you have — wall-hung and back-to-wall toilets typically require top-mount fixings because there is no access underneath. Identifying your system before starting any repair prevents hardware damage and wasted effort.
4. How tight should toilet seat bolts be?
The correct tightness is best described as 'snug but not strained' — similar to closing a jar lid firmly enough that it won't open on its own, but not so hard that it requires significant effort to reverse. Once the seat no longer shifts side-to-side, apply one additional quarter-turn for security and stop. Over-torquing plastic bolts causes them to crack suddenly without warning, while over-torquing stainless-steel bolts risks fracturing the porcelain mounting point. Never use a power drill or impact driver for toilet seat hardware — all tightening should be done by hand for precise torque control.
5. How often should I check and maintain my toilet seat hardware?
A simple quarterly schedule prevents most recurring loosening. Every three months, push the closed seat side-to-side and retighten bolts a quarter-turn if any play is detected. Every six months, inspect rubber bumpers for hardening or compression and replace them if they no longer spring back. Once a year, remove the seat entirely to clean bolt channels, check for corrosion, and inspect ceramic mounting holes for chips or cracks. Additionally, avoid splashing bleach-based cleaners onto the rim where hardware sits, and run your bathroom exhaust fan after showers — both habits significantly extend the life of plastic and rubber components.
Apply This Insight to Your Project
Tell us what you are building and how the topic “How To Fix Toilet Seat From Sliding (So It Never Shifts Again)” relates to your application. Our engineering team can help evaluate the next step.