Which Toilet Seat Do You Have and What You Need to Know First
Wondering how do you install a toilet seat without calling a plumber or spending half your Saturday on it? Here's the good news: this is one of the fastest, most satisfying DIY projects you'll ever tackle. Most toilet seat replacements take fewer than 30 minutes, require only a screwdriver and a wrench, and demand zero plumbing experience. Whether you're dealing with a cracked lid, a wobbly seat that drives you crazy, or you simply want a fresh upgrade, this guide walks you through every step — from figuring out exactly what you're working with to locking in that final bolt.
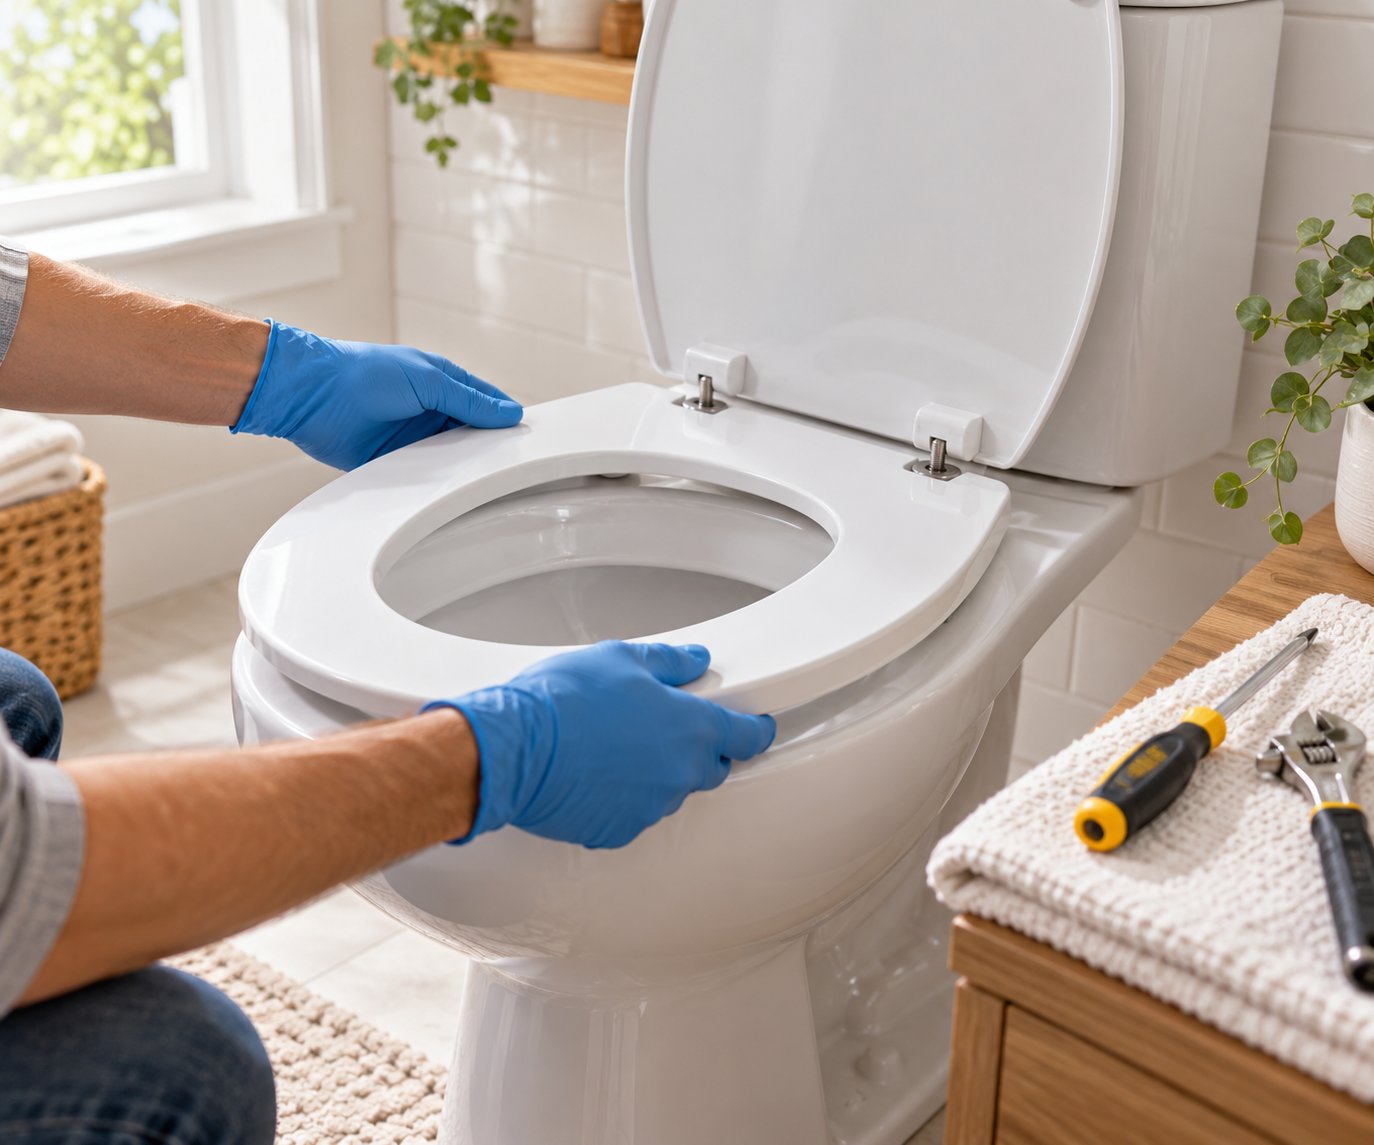
Before you grab any tools, though, there's a critical first step most guides skip entirely. You need to identify two things: the shape of your toilet bowl and the type of mounting system your seat uses. Getting these right upfront saves you from buying the wrong seat and making a frustrating return trip to the hardware store. Think of it as a quick decision tree — answer two simple questions, and you'll know precisely what to buy and how to remove toilet seat hardware when the time comes.
Why Toilet Seat Installation Is Easier Than You Think
If you've never done this before, the idea of replacing bathroom hardware might feel intimidating. It really shouldn't. Unlike fixing a leaky faucet or re-grouting tile, a toilet seat replacement involves no water lines, no shutoff valves, and no risk of flooding. You're essentially unscrewing two bolts, lifting off the old seat, and securing a new one in place. That's the entire project.
Most new toilet seats come with all the mounting hardware you need right in the box. The learning curve is practically flat, and even a first-timer can handle the job confidently. It's the kind of small bathroom upgrade that delivers an outsized sense of accomplishment — and a noticeably cleaner, more comfortable bathroom.
Round vs. Elongated and How to Measure
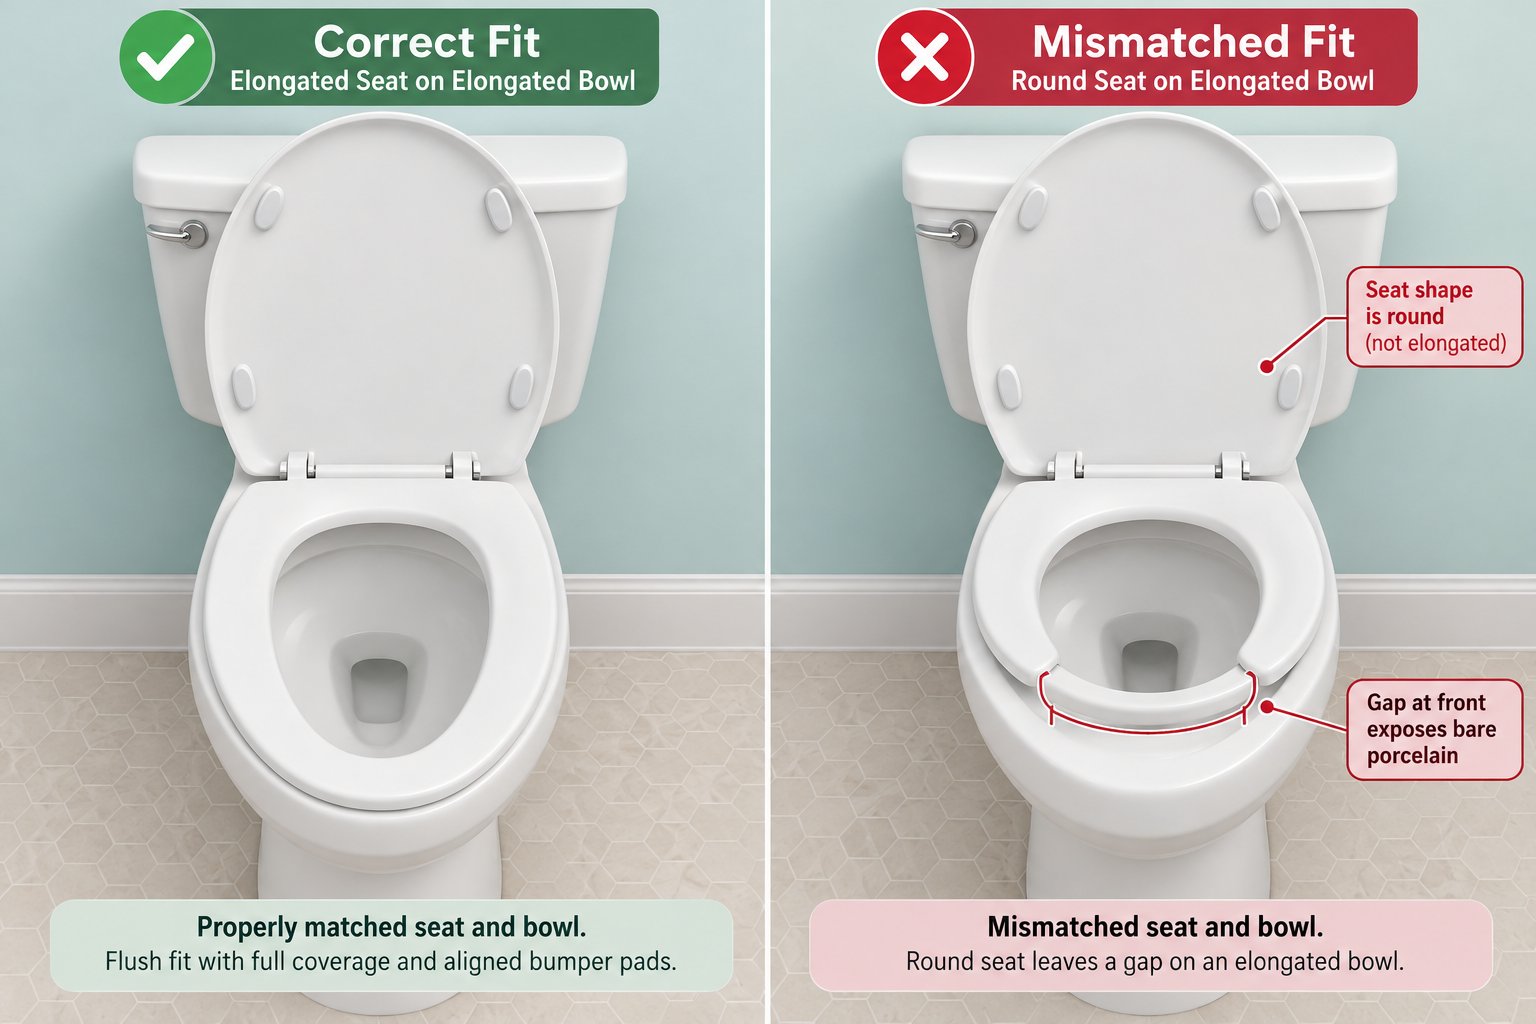
Every standard toilet bowl in North America falls into one of two shapes: round or elongated. Buying a seat that matches your bowl shape is non-negotiable. A round seat on an elongated bowl leaves exposed porcelain at the front, looks awkward, and feels unstable. An elongated seat on a round bowl hangs over the edge and won't sit flush.
Measuring is simple. Grab a tape measure and find the two mounting bolt holes at the back of the bowl — they're the holes where the seat attaches. Measure from the midpoint between those two holes straight forward to the very front edge of the bowl rim. According to Lowe's toilet buying guide, a round bowl measures approximately 16.5 inches, while an elongated bowl comes in at roughly 18.5 inches. If your measurement lands clearly near one of those numbers, you've got your answer. When in doubt, elongated bowls have an oval shape, while round bowls look more circular from above.
You'll also want to confirm the bolt spread — the distance between the centers of those two mounting holes. In most U.S. toilets, this measures a standard 5.5 inches. If yours differs significantly, you may be dealing with a European or specialty model that requires a brand-specific seat.
Top-Mount vs. Bottom-Mount Bolt Systems
Here's the second piece of the puzzle most people overlook when learning how to replace toilet seat hardware: the mounting type. Not every toilet seat with bolts attaches the same way, and knowing which system you're dealing with tells you exactly how the removal and installation will go.
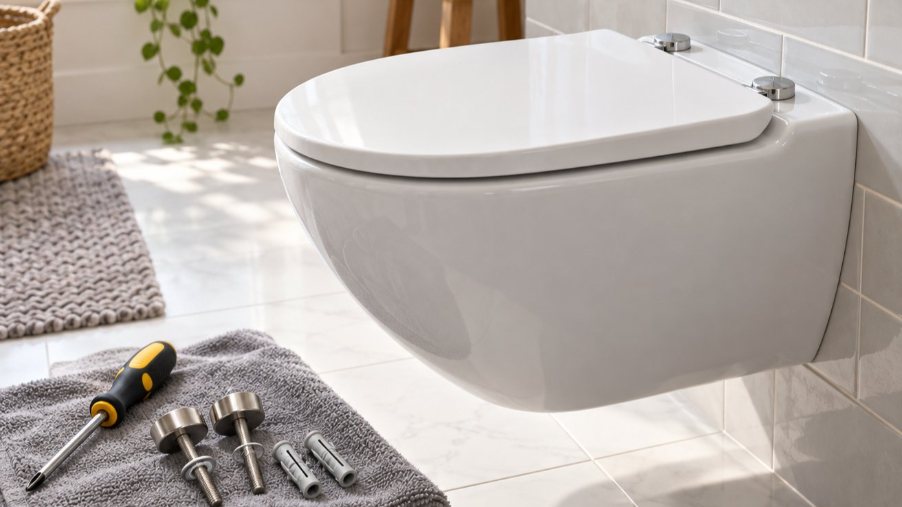
A top-mount system lets you do everything from above the bowl. The bolts thread down through the seat hinges and tighten into expanding anchors or threaded inserts that grip inside the porcelain mounting holes. You never need to reach underneath the toilet. This design is common on many modern and quick-release seats.
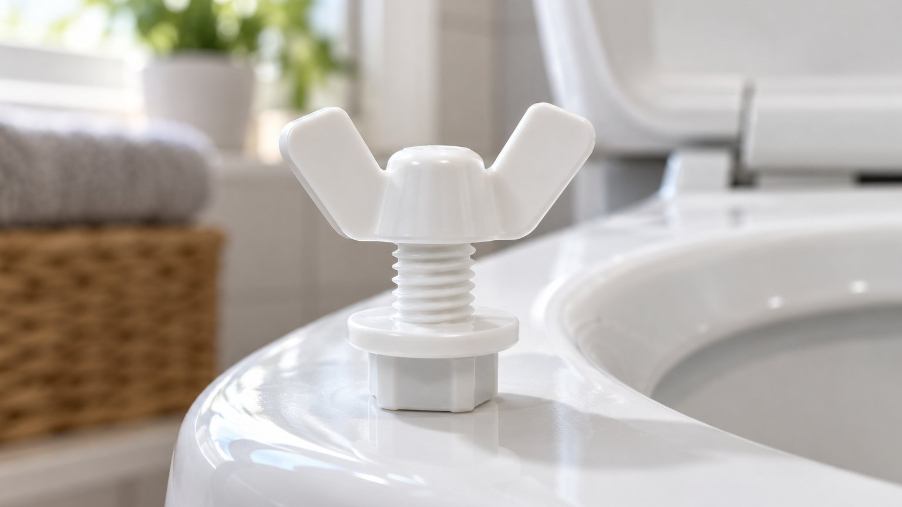
A bottom-mount system is the traditional setup. Bolts drop through the hinge and the porcelain holes, and you secure them from below with a washer and wing nut. It's straightforward, but you will need to reach under the back of the bowl — which can be a tight squeeze in smaller bathrooms. If you've ever tried to figure out how to take a toilet seat off and found a wing nut underneath, you were working with a bottom-mount system. Conversely, if you're wondering how to take toilet seat off a newer model and see no hardware below, it's almost certainly top-mount.
| Mounting Type | How to Identify | Typical Seat Types | Installation Difficulty |
|---|---|---|---|
| Top-Mount | No visible nuts underneath the bowl; bolts tighten from above using a screwdriver | Quick-release seats, many soft-close models, modern designs | Easy — no under-bowl access needed |
| Bottom-Mount | Wing nuts or hex nuts visible beneath the bowl at the back | Standard seats, traditional hinges, most budget models | Easy to moderate — requires reaching under the bowl |
With your bowl shape measured and your mounting type identified, you've already cleared the two biggest hurdles. The next question is whether your current seat actually needs a full replacement — or if a quick tightening job is all it takes to solve the problem.
Signs You Need a New Toilet Seat Instead of a Quick Fix
Sometimes the issue isn't installation at all — it's knowing whether your current seat is worth saving. Maybe you sat down this morning and felt that familiar wobble, or you noticed a discoloration that won't scrub away no matter how much cleaner you use. Before you learn how to replace a toilet seat, it's worth spending two minutes diagnosing whether a simple hardware tightening will do the trick or whether the seat itself has reached the end of its useful life.
Cracks, Stains, and Structural Damage
Hairline cracks in a plastic or wooden seat might look harmless, but they create tiny grooves where bacteria, urine, and moisture settle in and resist even aggressive cleaning. Cleaning expert Isabella Flores notes that once a surface is cracked or worn, attempting a sealant repair still allows bacteria and moisture to accumulate underneath — making full replacement the smarter move, as reported by Family Handyman.
Permanent yellowing or discoloration that persists after thorough bleaching is another red flag. That stubborn staining typically means the seat's protective surface coating has degraded, exposing the porous material beneath. At that point, the seat isn't just ugly — it's a hygiene concern. Any visible crack on a duroplast or solid wood seat compromises structural integrity entirely, and sitting on a weakened seat risks a sudden split under load.
Wobbling That Tightening Cannot Fix
A loose seat doesn't always mean loose bolts. You'll know the difference quickly: if you tighten the hardware and the wobble returns within a few days, something deeper is going on. Stripped bolt holes in the porcelain, degraded rubber grommets that no longer cushion the bolt against the rim, or worn-out hinge mechanisms can all produce a persistent instability that no amount of re-tightening will cure permanently.
As Horow's tightening guide explains, constant wiggling also puts stress on the porcelain around the mounting holes. If re-tightening provides only temporary stability — lasting a week or two before the seat shifts again — the mounting hardware or the seat itself needs replacing rather than another round of adjustments.
Hinge Failure and Broken Bumpers
The small rubber bumpers on the underside of a toilet seat do more work than most people realize. When they crack, flatten, or fall off entirely, the hard seat surface slides directly on porcelain with every shift of your weight. That sliding creates an uncomfortable, unsafe feeling and accelerates wear on both the seat and the bowl rim.
Hinge problems are equally telling. Snapped or corroded hinge pins make the lid impossible to hold open — it either flops backward against the tank or drops forward without warning. Plastic hinges, in particular, tend to become brittle over time and crack suddenly rather than wearing down gradually, according to home cleaning expert Isabella Flores via Family Handyman. If the hinge mechanism itself is damaged, you're usually better off shopping for new toilet seats rather than hunting for proprietary replacement parts that may not even exist for your model.
Not sure where your seat falls? Run through this quick checklist:
- Visible cracks or chips anywhere on the seat or lid surface
- Persistent staining or yellowing that won't respond to bleach or bathroom cleaner
- Wobbling that returns within days of tightening the bolts
- Broken, missing, or flattened bumper pads on the seat's underside
- Corroded, snapped, or frozen hinge pins that prevent the lid from staying open
If even one of these applies, a repair is unlikely to last. The good news? New toilet seats are affordable — most quality options run between $20 and $60 — and installation is genuinely straightforward once you have the right tools lined up.
Tools and Materials You Need Before You Start
Gathering everything in advance might sound like obvious advice, but here's why it matters: nothing kills momentum on a simple project faster than realizing mid-job that you need a different screwdriver or don't have a way to grip a corroded wing nut. The beauty of learning how to install a toilet seat is that the tool list is refreshingly short. Most of what you need is probably already sitting in a kitchen junk drawer or garage toolbox.
Essential Tools for Every Installation
You don't need a plumber's toolkit for this project — just a handful of basics, each with a specific role. Here they are in the order you'll likely reach for them:
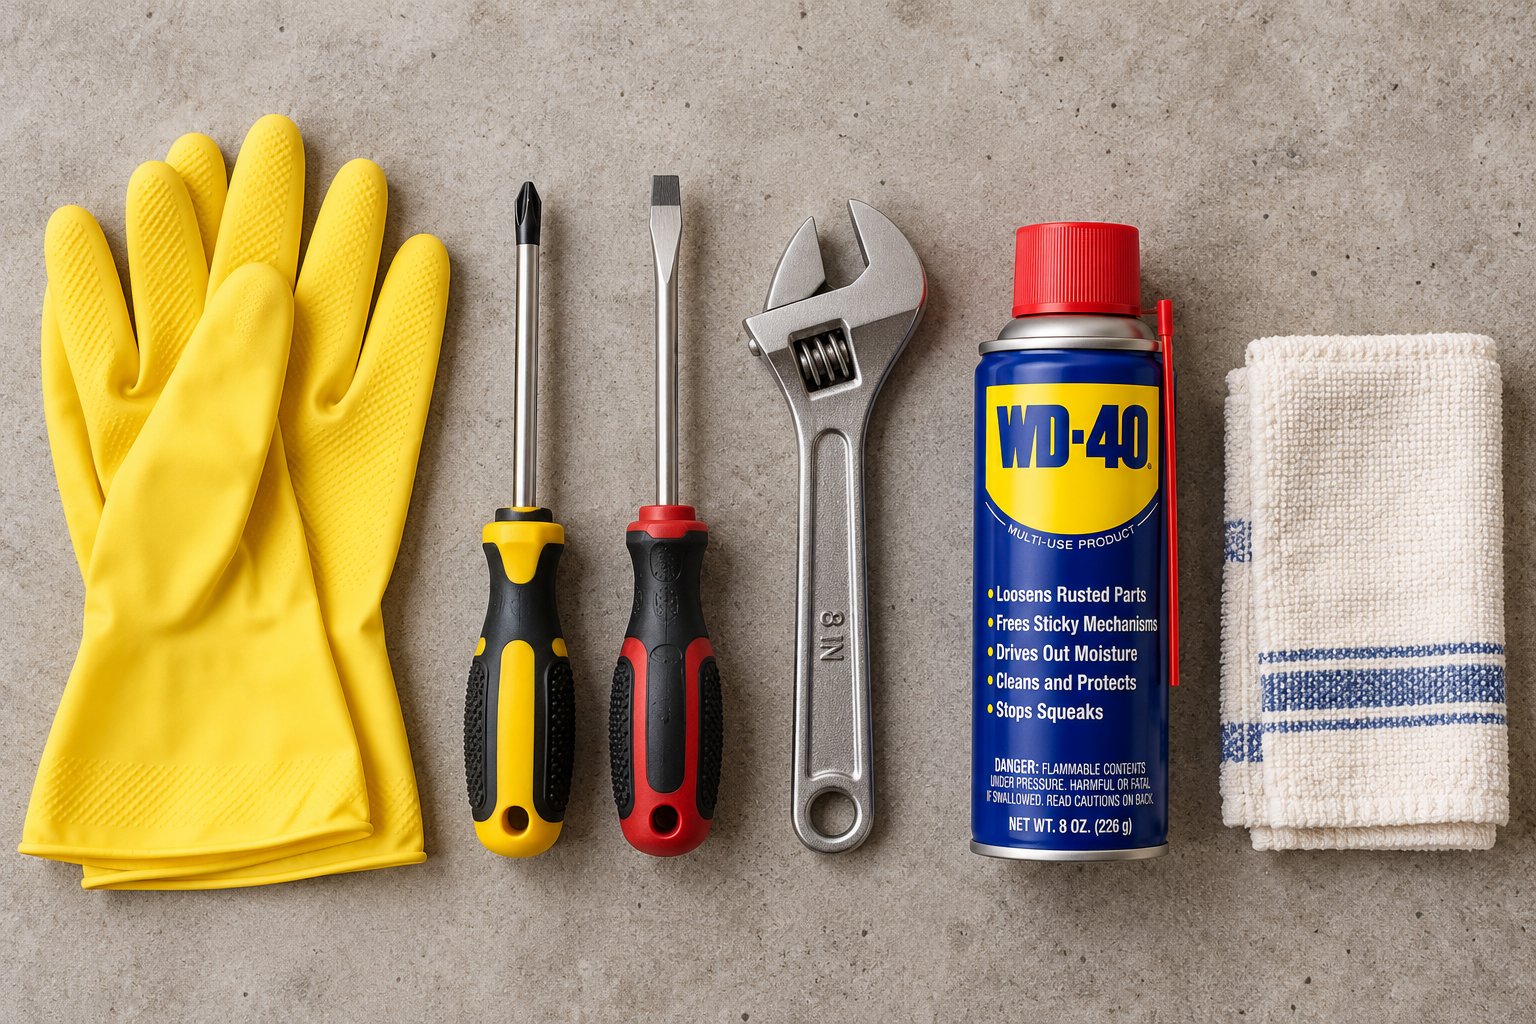
- Rubber gloves — You're working around a toilet, so gloves keep things sanitary and give you a better grip on slippery hardware underneath the bowl.
- Flat-head and Phillips-head screwdriver — Most toilet seat bolts have a slotted or cross-shaped head on top. A flat-head screwdriver is particularly common for holding the bolt steady while you tighten from below. As The DIY Playbook notes, a flathead screwdriver on the top of the screws is usually all you need to secure everything in place.
- Adjustable wrench or pliers — These grip the wing nut underneath the bowl so you can tighten or loosen it. An adjustable wrench is preferable because it provides controlled torque without rounding off the nut.
- Penetrating oil or lubricant spray (such as WD-40) — If you're removing an old seat, there's a decent chance the existing bolts are corroded or seized. A quick spray and a 15-minute wait can save you enormous frustration. Even ToiletSeats.com recommends spraying stubborn nuts with rust penetrant and waiting five to ten minutes before trying again.
- A rag or old towel — Useful for wiping down the mounting area once the old seat is off, and for protecting porcelain surfaces if you need to use any metal tools near the rim.
That's the entire core toolkit. Five items, nothing exotic, and you probably own at least three of them already. If someone asks you how to change toilet seat hardware, this short list is genuinely all they need to get started.
Optional Tools That Make the Job Easier
Imagine you're kneeling behind the toilet, arm wedged beneath the bowl, fingers slipping off a corroded wing nut — that's the exact scenario where a specialty tool pays for itself. These aren't strictly necessary, but they can turn a frustrating 20-minute struggle into a two-minute task:
- Toilet seat removal tool (nut wrench) — This deep-socket wrench is specifically shaped to slide over the long bolts and grip wing nuts beneath the bowl. The DIY Playbook calls it a handy $10 tool that saves time and prevents scraped knuckles, especially in tight bathroom layouts.
- Basin wrench — Designed for hard-to-reach fasteners in confined spaces, a basin wrench gives you leverage on nuts you can barely touch with your fingertips.
- Hacksaw or oscillating multi-tool — When a bolt simply refuses to turn — even after soaking in penetrating oil — cutting through it is sometimes the only option. An oscillating tool with a metal-cutting blade works fastest, but a basic hacksaw gets the job done too.
If you're wondering how do you fix a toilet seat that won't come off because the hardware is frozen solid, these three tools represent your escalation plan. Start with the nut wrench, move to the basin wrench for extra leverage, and bring in the cutting tool only as a last resort.
Materials That Come With Your New Seat
Here's a step most people skip — and then regret. Before you throw away the packaging or toss the instruction sheet, open the hardware bag and verify that everything listed is actually there. A replacement toilet seat typically ships with:
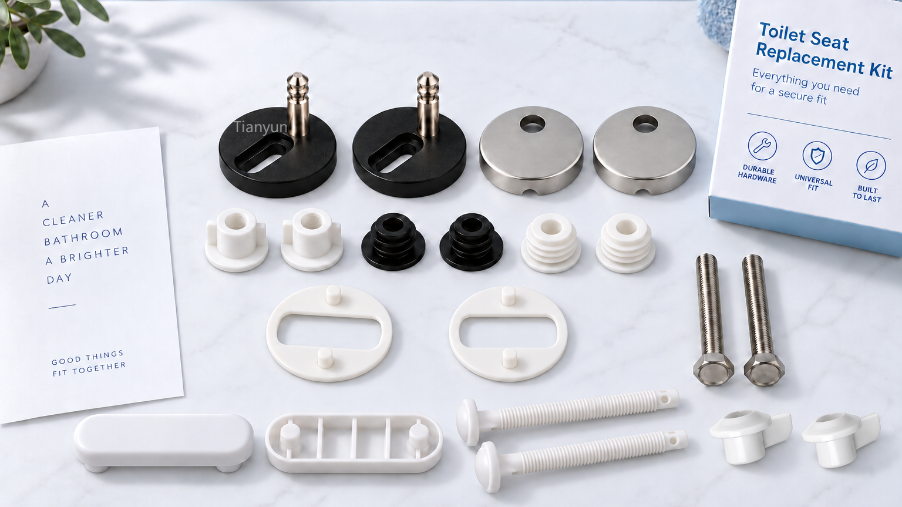
- Two mounting bolts (plastic or metal)
- Two rubber washers or gaskets
- Two wing nuts or threaded fasteners
- Bolt caps or hinge covers
Standard seats usually include universal hardware that fits the 5.5-inch bolt spread found on most North American toilets. Soft-close and quick-release models, however, often use proprietary mounting kits with specialized base plates, tension clips, or push-button brackets that differ from brand to brand. If your new seat falls into that category, read the included instructions before discarding any packaging — replacement parts for proprietary systems can be difficult to source after the fact.
One more thing: if you're reusing existing mounting bolts because they're still in good shape, inspect them closely. Look for corrosion, thread damage, or cracks in plastic bolts. A worn bolt might hold for a week, then gradually loosen under daily use. Fresh hardware is cheap insurance against a wobbly seat down the road.
With your tools laid out and your hardware accounted for, the real hands-on work begins — and for many people, the trickiest part isn't putting the new seat on. It's getting the old one off.
How to Remove an Old or Stubborn Toilet Seat Safely
Ask anyone who's tried to change a toilet seat what the hardest part was, and the answer is almost never the installation. It's getting the old one off. Bolts that haven't been touched in a decade — or two — develop a death grip on the porcelain. Rust fuses metal to metal. Plastic hardware becomes brittle and cracks the moment you apply torque. If you've ever stood over your toilet with a wrench in one hand and frustration in the other, you're in the right place.
The removal process itself is straightforward when the hardware cooperates. When it doesn't, you need a clear escalation plan. Here's how to handle every scenario, from the easy three-minute lift-off to the stubborn bolt that makes you question your life choices.
How to Remove a Standard Bolt-On Seat
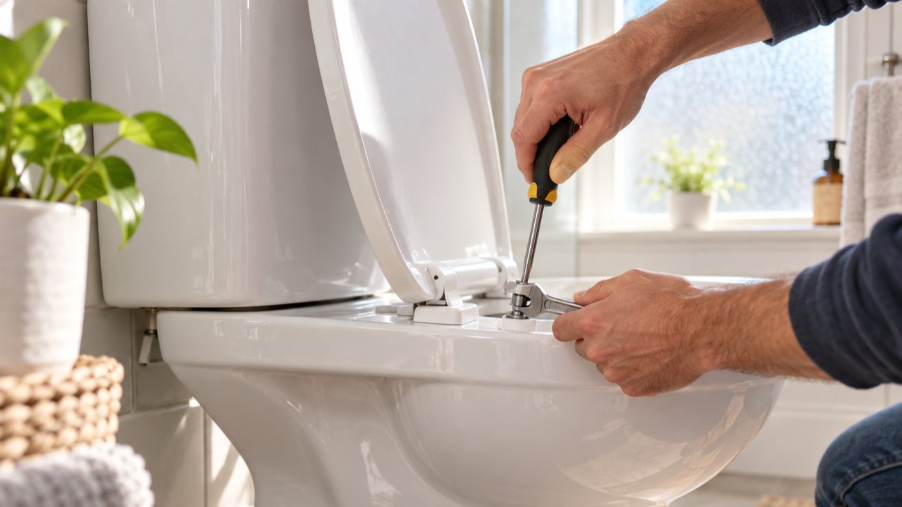
Most toilets use a simple two-bolt system. The bolts sit at the back of the seat where the hinges meet the porcelain rim, and they're usually hidden under small plastic caps. Here's the normal removal sequence:
- Locate the bolt caps. Look at the very back of the seat where the hinges sit on the bowl. You'll see two small plastic covers — one on each side. These snap or flip open.
- Pry the caps open. Slide a flat-head screwdriver or even a butter knife under the edge of each cap and gently pop it up. Don't force it; these caps are designed to lift easily.
- Stabilize the bolt from above. Insert a screwdriver into the bolt head slot on top. This is the step people skip — and then wonder why the bolt just spins in circles. Holding the bolt head stationary from above is essential.
- Turn the wing nut counterclockwise from underneath. Reach below the bowl and find the wing nut (or hex nut) on the bottom of each bolt. Grip it with your fingers or an adjustable wrench and turn counterclockwise while keeping the screwdriver steady on top.
- Pull the bolts free and lift the seat. Once both nuts are off, the bolts should slide straight up and out of the porcelain holes. Lift the entire seat and hinge assembly off the bowl.
That's the textbook version, and it works perfectly on seats that are relatively new or have plastic hardware. The whole process takes under five minutes. The trouble starts when corrosion enters the picture — and that's where understanding how to fix a broken toilet seat situation becomes a matter of strategy, not just strength.
Dealing With Rusted or Frozen Bolts
This is the wall most DIYers hit. You grip the wing nut, turn it, and... nothing. The bolt spins freely on top while the nut refuses to budge, or both pieces are fused together in a solid block of corrosion. Metal bolts in a humid bathroom environment are practically guaranteed to seize over time, especially if they've been in place for ten or more years.
Rather than muscling through it — which risks cracking the porcelain or rounding off the hardware — use this step-by-step escalation approach:
Step 1: Apply penetrating oil and wait. Spray a generous amount of penetrating lubricant (WD-40, PB Blaster, or similar) directly onto the nut, the bolt threads, and the area where the bolt passes through the porcelain. Let it soak for at least 15 to 20 minutes. For severely corroded bolts, a second application after the first wait period helps the oil work deeper into the threads. As Horow's removal guide recommends, tapping the nut gently with your wrench can help the oil seep into the corroded joint more effectively.
Step 2: Grip the nut with locking pliers. Standard pliers and finger-tight wing nuts don't generate enough torque to break a corroded bond. Switch to locking pliers (also called vise-grips) that clamp onto the nut with constant pressure. This frees both your hands — one to hold the bolt head from above with a screwdriver, and one to turn the locked pliers counterclockwise from below. The extra leverage often breaks the rust seal.
Step 3: Cut through the bolt. If penetrating oil and locking pliers both fail, cutting is the final answer. You have two tool options here:
- Mini hacksaw: Slide the blade between the underside of the hinge and the top of the porcelain rim. Saw through the bolt shaft slowly and steadily.
- Oscillating multi-tool with a metal-cutting blade: Faster and more controlled, especially in tight spaces. A carbide-tipped blade handles corroded metal bolts without excessive vibration.
Before cutting, protect the porcelain. Wrap painter's tape or lay a folded towel around the bolt area to prevent accidental scratches or chips from the saw blade. Go slowly — rushing increases the chance of the blade slipping sideways into the ceramic surface.
A real-world example of how stubborn this problem can get: in one case documented on JustAnswer's plumbing forum, a homeowner with a 20-plus-year-old one-piece toilet found that the original brass inserts were molded into the porcelain and had completely seized. Even after cutting the bolts, the old threaded inserts remained stuck in the holes and had to be carefully drilled out with metal drill bits before new top-mount hardware could fit. Situations like these are uncommon on standard two-piece toilets, but they illustrate why patience and the right escalation strategy matter more than brute force.
Never apply excessive force directly on porcelain. Toilet bowls are strong under even compression, but a sharp impact or concentrated pressure from a wrench or hammer can crack the ceramic instantly — turning a simple seat replacement into an expensive toilet replacement.
Removing Quick-Release and Top-Mount Seats
If your seat is a newer model with a quick-release mechanism, the removal process is dramatically different — and much easier. Quick-release seats are designed to pop off without any tools at all, which makes them ideal for thorough cleaning around the hinges.
Here's how they work:
- Find the release button or lever. Look at the back of the hinge assembly where the seat meets the bowl. Most quick-release models have a small button on each side of the hinge, or a single lever at the center.
- Press and lift. Push the release button(s) firmly while pulling the seat straight up. The seat and lid detach as a unit, leaving the mounting plate still bolted to the porcelain.
- Inspect the mounting plate. If you're installing the same brand and model, you may be able to leave the existing base plate in place and simply click the new seat onto it. If the plate also needs to come off — because you're switching brands or how to install toilet seat hardware has changed with your new model — you'll find standard bolts securing the plate to the bowl. Remove those using the same screwdriver-and-wrench technique described for standard bolt-on seats.
Top-mount seats without a quick-release feature use a different mechanism. The bolts thread down through the seat hinge into rubber or plastic expanding anchors inside the porcelain holes. To remove them, simply turn the bolt head counterclockwise from above with a screwdriver. As you loosen it, the anchor contracts and releases its grip inside the hole. After enough turns, you can pull the entire bolt-and-anchor assembly straight up and out. No underside access is needed at all.
Whichever system you're working with, take a moment after removing the old seat to clean the entire mounting area. The surface beneath the hinges accumulates grime, mineral deposits, and bacteria that regular cleaning can't reach. A disinfectant spray and an old toothbrush make quick work of it. Inspect the porcelain around each bolt hole for chips or hairline cracks — any damage here could affect how securely your new seat mounts.
With a clean bowl and clear mounting holes, you're set for the part most people actually searched for: putting the new seat on and making sure it stays tight for months, not days.
Step-by-Step Toilet Seat Installation for Any Bathroom
Clean porcelain, open bolt holes, and a fresh seat ready to go — this is the part where everything comes together. Installing a toilet seat is genuinely one of the simplest home upgrades you can do, yet the difference between a seat that stays rock-solid for years and one that starts wobbling within weeks often comes down to a few small details during this stage. Here's exactly how to get it right on the first try.
Positioning and Aligning the New Seat
Unbox the new seat and set it on the bowl with the hinge end facing the tank. Line up the bolt holes on the seat's hinge brackets with the two mounting holes on the porcelain rim. You'll notice the holes don't need to match with laser precision just yet — there's usually a small amount of lateral play that allows you to slide the seat slightly left or right before final tightening.
What you're checking at this stage is overall centering. The seat should be balanced evenly on the bowl so neither side hangs wider than the other, and the front edge of the seat should follow the contour of the bowl rim without overhanging it. If the front lip extends past the porcelain, double-check that you purchased the correct shape — a round seat for a round bowl, elongated for elongated. An improperly sized seat will never sit flush no matter how precisely you position it.
Once the seat looks centered and the bolt holes are roughly aligned, hold the seat gently in place with one hand while you prepare the hardware.
Inserting Bolts and Securing the Hardware
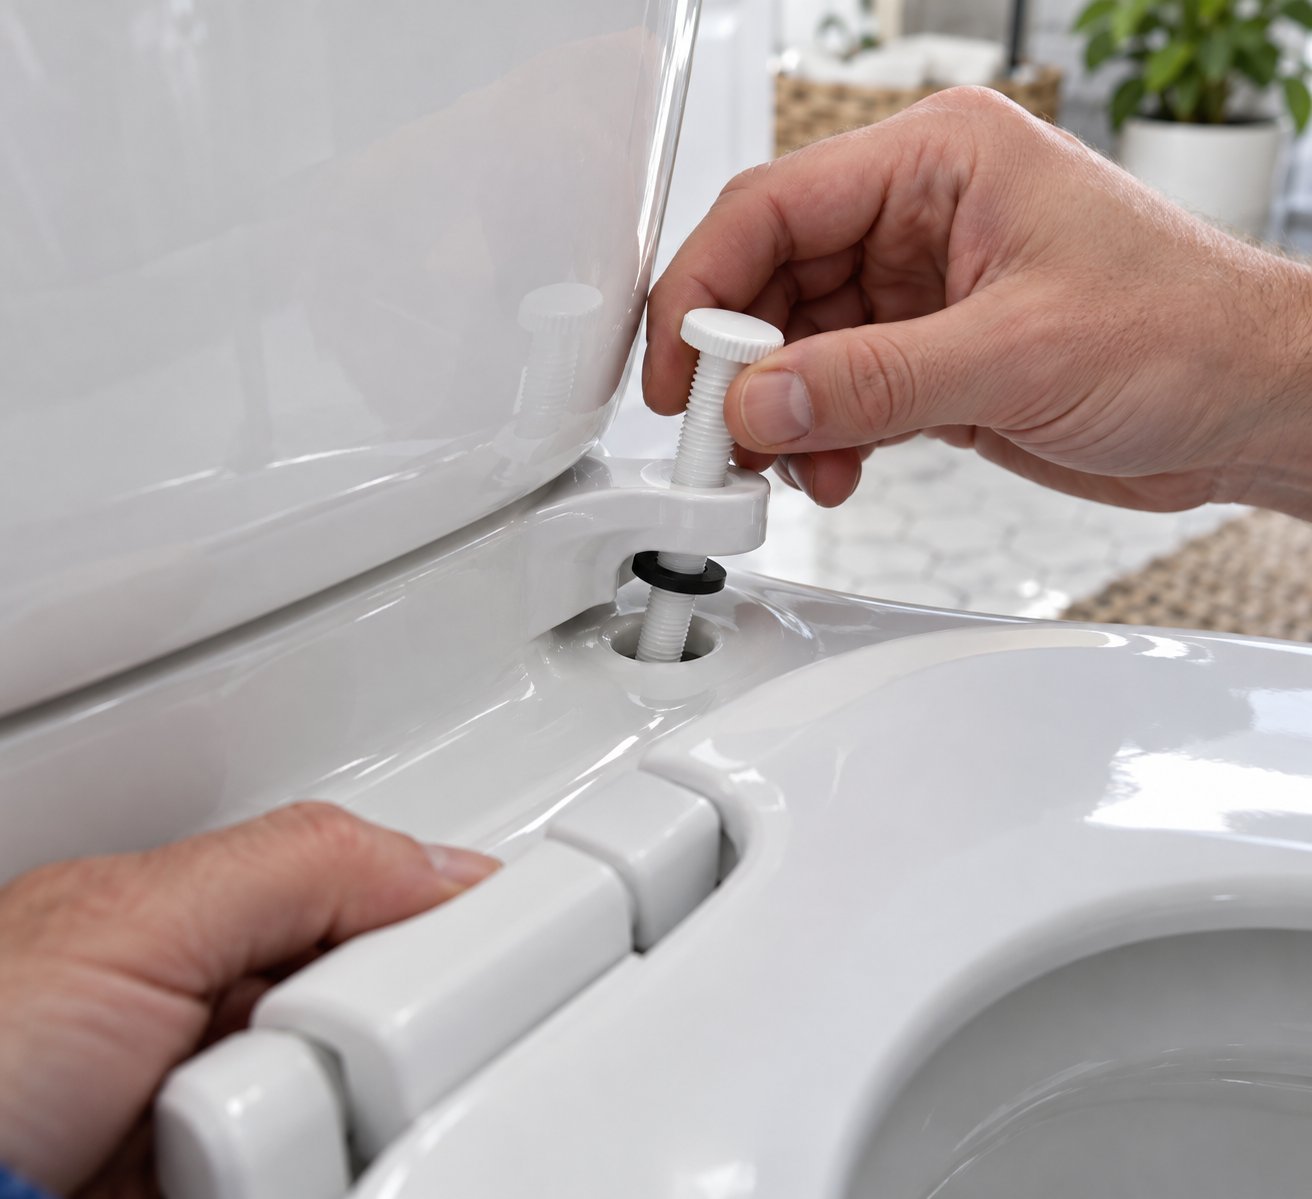
For a standard bottom-mount installation — the most common type — you'll thread each bolt down through the seat's hinge bracket, through the porcelain mounting hole, and secure it from underneath with a washer and wing nut. The sequence matters more than people realize, so here's the critical order:
Place a rubber washer onto the bolt shaft before you insert it through the porcelain hole. This washer sits between the bolt head (or hinge bracket) and the porcelain surface. It serves two purposes: it cushions the hardware against the ceramic to prevent chips, and it creates friction that keeps the bolt from loosening over time. Skipping this small piece is the single most common reason seats gradually wobble loose after an otherwise perfect installation.
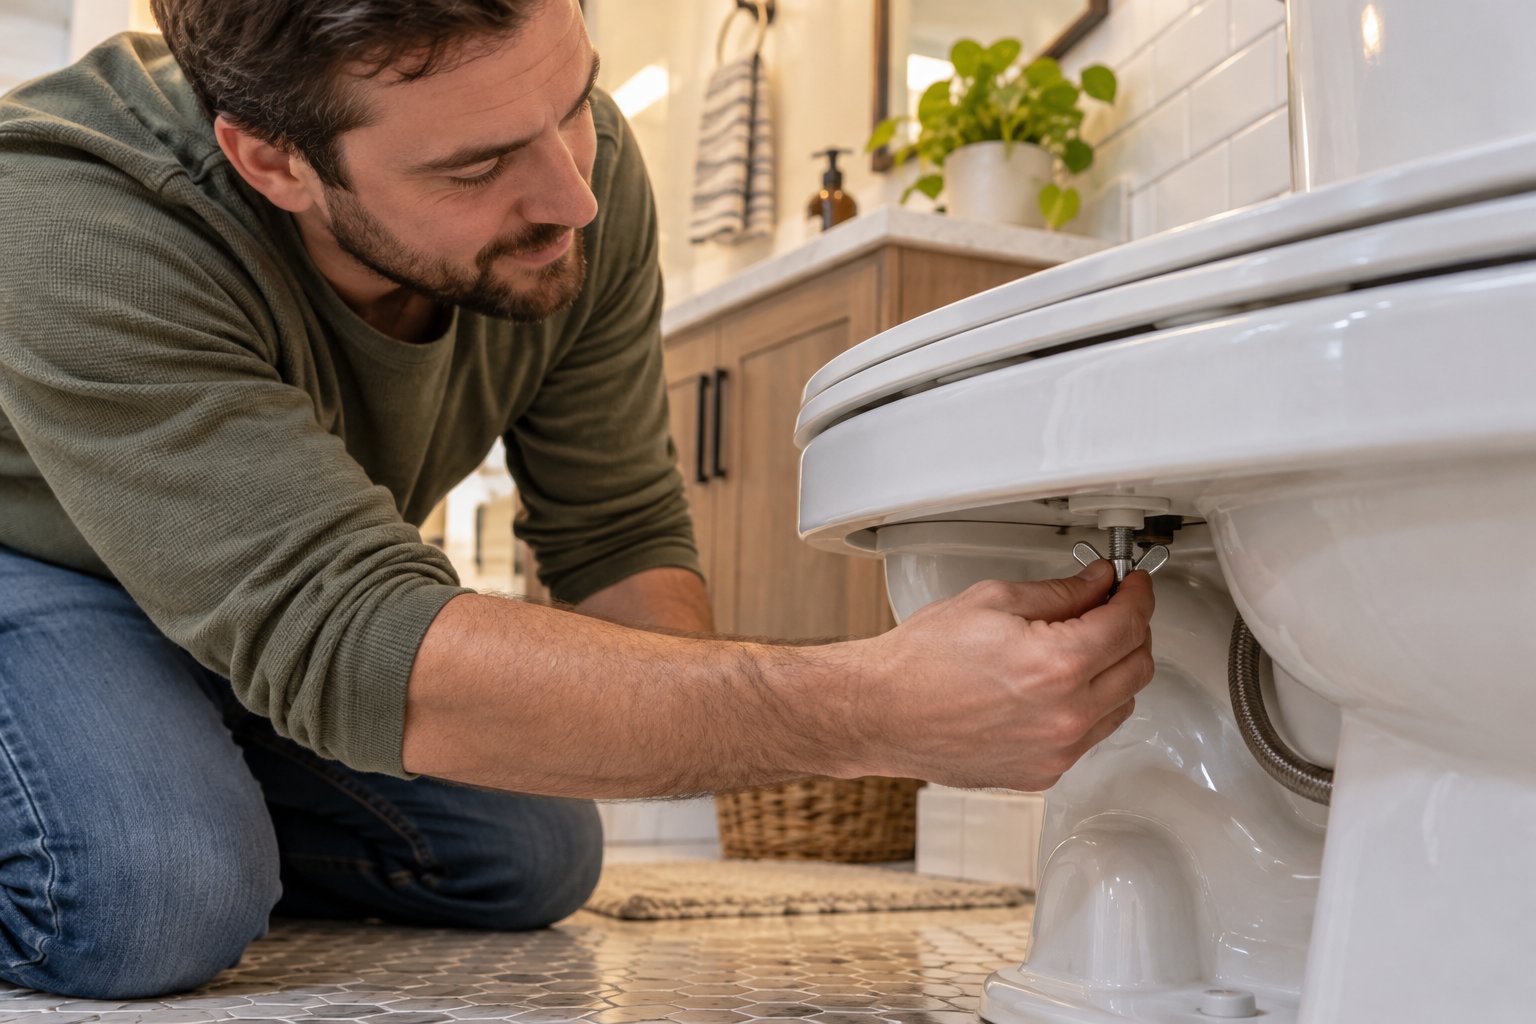
Thread the bolt down through the porcelain hole, reach underneath the bowl, and spin the wing nut onto the exposed bolt threads. Hand-tighten each side first — don't reach for a wrench yet. Alternate between the left and right bolts, giving each a few turns to draw the seat down evenly against the rim.
Here's the question no one seems to answer clearly: how tight is tight enough? The answer is the quarter-turn-past-snug rule. Once the wing nut is hand-tight — meaning you can't easily turn it further with just your fingers — pick up a screwdriver for toilet seat bolt heads and an adjustable wrench for the wing nut below. Hold the bolt steady from above and give the wing nut roughly one quarter turn more with the wrench. Then stop. That small increment compresses the rubber washer just enough to lock everything firmly without stressing the porcelain.
Overtightening is a real risk, especially with metal bolts. Porcelain is extremely strong under even compression but brittle under concentrated point-load stress. Plastic bolts are actually designed to strip before the ceramic cracks — a built-in safety mechanism — but metal bolts offer no such protection. If you feel sudden resistance or hear a faint creak, ease off immediately. A cracked bowl means replacing the entire toilet, not just the seat.
For top-mount systems, the process is even simpler. Insert the bolt through the hinge bracket and into the porcelain hole from above, then tighten the bolt head clockwise with a screwdriver. The expanding anchor inside the hole grips tighter as you turn. The same quarter-turn-past-snug principle applies — snug it by hand, then a quarter turn with the screwdriver, and you're done. No underside access needed at all.
Testing Stability and Making Final Adjustments
Don't declare victory until you sit on the seat and put it through a real-world test. Lower the lid, sit down naturally, and deliberately shift your weight from side to side. Push forward, then back. A properly installed seat should feel completely solid with zero lateral movement.
If you detect any sliding or rocking, tighten each bolt an additional eighth-turn, alternating sides to keep even pressure. Retest after each small adjustment. The goal is the tightest hold you can achieve without forcing the bolts past their comfortable resistance point.
For quick reference, here's the complete installation sequence from start to finish:
- Place the new seat on the bowl and align the hinge bolt holes with the porcelain mounting holes.
- Center the seat left-to-right and confirm the front edge follows the bowl contour without overhanging.
- Slide a rubber washer onto each bolt before inserting it through the porcelain hole.
- Thread the wing nuts onto the bolts from underneath and hand-tighten both sides evenly.
- Hold each bolt head steady from above with a screwdriver while giving the wing nut a quarter turn past snug with a wrench.
- Close the lid, sit on the seat, and shift your weight side to side to test for lateral movement.
- If any wobble is detected, add an eighth-turn to each bolt evenly and retest.
- Snap the hinge covers or bolt caps back into place for a clean, finished look.
The entire process — from unboxing to sitting on a perfectly stable seat — typically takes ten to fifteen minutes. If you ever need to uninstall toilet seat hardware down the road for cleaning or replacement, you'll already know how to unscrew a toilet seat efficiently because you now understand exactly how every component fits together. And if you used the expanding-anchor top-mount system, future removal is even easier: just reverse the bolt a few turns from above and lift straight off.
A standard bottom-mount bolt handles the vast majority of installations, but not every seat follows this template. Soft-close mechanisms, quick-release base plates, and different seat materials each introduce their own wrinkles that are worth understanding before you tighten that final bolt.
Installation Tips for Soft-Close and Quick-Release Seats
Standard bolt-on seats are forgiving. You thread the bolts, snug them down, and move on with your day. Soft-close and quick-release models, however, add mechanical components that demand a bit more precision during setup. The bolt pattern is usually identical — same two holes, same 5.5-inch spread — but the hinge assemblies are bulkier, the alignment tolerances are tighter, and a small mistake during installation can prevent the seat's signature features from working properly. If you've upgraded to one of these models, here's what changes and what stays the same.
Soft-Close Seats and Damped Hinge Adjustment
Soft-close seats rely on hydraulic or friction-damped hinges built directly into the hinge assembly. When you lower the lid, these small internal dampers resist gravity and control the descent speed so the seat glides down silently rather than slamming. It's an elegant mechanism — but it's also sensitive to how the seat is mounted.
The key difference you'll notice immediately is weight. A soft-close hinge assembly is noticeably heavier than a standard plastic hinge because of the damping cylinders inside. That extra weight means the seat tends to shift during positioning, so hold it firmly in place while you thread the first bolt. If the seat drifts even slightly off-center before you tighten down, the damped hinges can engage unevenly — one side closes smoothly while the other catches or resists.
Lateral alignment is critical here. Before final tightening, close the lid slowly and watch how it descends. Both sides should lower at the same speed with the same resistance. If one side drops faster or the lid drifts to one direction during closing, loosen the bolts slightly, nudge the hinge brackets until they're perfectly parallel, and retighten. As Shanghai Toyou Industry notes, specific steps may vary depending on the brand and design, so always check the manufacturer's included instructions for model-specific guidance.
Some soft-close hinges also feature tension adjustment screws — usually small Phillips-head screws located on the rear or side of the hinge body. Turning these clockwise increases resistance and slows the closing speed; counterclockwise loosens the damper for a slightly faster descent. If your lid drops too quickly or creeps down painfully slowly, look for these screws before assuming something is wrong with the installation. A quarter turn in either direction usually dials in the ideal closing speed.
Quick-Release Seats for Easy Cleaning
Ever tried to clean around toilet seat hinges and realized it's nearly impossible to reach every crevice? That frustration is exactly why quick-release systems exist. These seats snap on and off without tools, making it simple to pop the entire seat off, wipe down the mounting area thoroughly, and click it back into place in seconds.
The installation process differs from a standard seat because it happens in two distinct stages. First, you install the base plate. Then you attach the seat to the base plate. Getting the base plate right is everything — the seat itself just clicks on top.
Start by bolting the base plate to the porcelain using the included hardware, following the same bolt-and-washer technique covered for standard installations. Here's the critical detail: the base plate must sit perfectly level on the rim. Even a slight tilt causes the quick-release mechanism to bind when you try to click the seat on or pop it off. Before fully tightening the base plate bolts, use a small level across the plate or simply eyeball it against the flat porcelain rim to confirm it's even. Tighten using the quarter-turn-past-snug method.
With the base plate secure, position the seat over it and press down firmly until you hear or feel the locking mechanism engage — usually a distinct click. Most models use a push-button or slide-tab release: pressing the button disengages internal latches, and the seat lifts straight up. Test the release several times before considering the job done. If the seat hesitates, sticks, or doesn't lock with a clean snap, the base plate likely needs a minor repositioning.
One advantage worth noting: if you ever need to replace toilet seat hardware down the road, quick-release base plates often remain compatible across multiple seat generations from the same manufacturer. You may be able to dismantle toilet seat components on top while leaving a perfectly good base plate in place, saving time and effort on the next swap.
Toilet Seat Materials and How They Affect Installation
The material your seat is made from influences more than just comfort and appearance — it directly affects how you handle installation, how aggressively you can tighten bolts, and what kind of mounting hardware holds up best over time. A lightweight polypropylene seat and a solid wood seat may bolt on using the same holes, but the installation feel is noticeably different.
Lightweight plastic seats are the most forgiving. They're easy to hold in place with one hand, they don't shift much under their own weight during positioning, and the lower mass puts less stress on the mounting hardware over time. Duroplast — a high-quality thermoset plastic with a glossy, ceramic-like finish — is heavier and more rigid. According to Beewill's material guide, duroplast seats are extremely durable and resistant to scratches, stains, and chemical damage, but their added weight means you'll want to ensure the bolts are properly snugged to prevent gradual loosening under the extra load.
Wood seats — whether solid hardwood or molded compressed wood with a laminate finish — are the heaviest common option. That weight provides a satisfying, premium feel when in use, but it also means the mounting hardware works harder. Heavier seats benefit from metal bolts and stainless steel washers rather than the all-plastic hardware kits that ship with budget models. If your wood seat came with plastic bolts, consider upgrading to a metal fixing kit for long-term stability.
Cushioned or padded vinyl seats fall at the other end of the spectrum. They're light and soft, but the flexible surface can make alignment trickier because the hinge area compresses slightly under tightening pressure. Go easy on the torque — cushioned seats reach their ideal snugness sooner than rigid materials.
Here's a side-by-side comparison to help you match your seat material with the right installation approach:
| Material | Weight | Durability | Tightening Sensitivity | Typical Mounting Type |
|---|---|---|---|---|
| Plastic (Polypropylene) | Light | Good — resistant to cracking and chipping | Low — forgiving if slightly overtightened | Bottom-mount or top-mount with plastic bolts |
| Duroplast | Medium-Heavy | Excellent — scratch, stain, and chemical resistant | Moderate — rigid material transfers force to bolts | Top-mount or bottom-mount; often paired with soft-close hinges |
| Wood (Solid or Molded) | Heavy | Good to excellent — varies by finish quality | High — weight demands sturdy hardware; metal bolts recommended | Bottom-mount with metal bolts and stainless steel washers |
| Cushioned / Padded Vinyl | Light | Fair — vinyl can crack or peel over time | High — soft material compresses; easy to overtighten | Bottom-mount with plastic bolts |
Matching your installation technique to the seat material isn't complicated, but it's a detail that separates a five-year installation from one that needs retightening every few months. A heavy duroplast or wood seat paired with flimsy plastic bolts is a recipe for gradual loosening — while a lightweight plastic seat with metal bolts is overkill that risks cracking the porcelain if you're not careful with torque.
Even with the right seat, the right hardware, and a perfect installation technique, there are a handful of common mistakes that trip up both first-timers and experienced DIYers alike. Knowing what to avoid is just as important as knowing what to do.
Common Toilet Seat Installation Mistakes and How to Avoid Them
You've got the right tools, you've matched the seat to the bowl, and you've followed every installation step to the letter. So why does the seat still wobble three weeks later? Or worse — why is there a hairline crack running through the porcelain near the bolt hole? The answer almost always traces back to one of a handful of avoidable errors that even experienced DIYers make when replacing a toilet seat. Some of these mistakes cause immediate damage. Others are slow-burn problems that show up weeks or months after the install, making you think the seat itself is defective when the real culprit was the process.
Here are the most common pitfalls — and exactly how to sidestep each one.
Overtightening Bolts and Cracking Porcelain
This is the most expensive mistake on the list, and it happens more often than you'd expect. The instinct makes sense: you want the seat tight, so you crank the wrench until nothing moves. The problem is that porcelain doesn't give you a gradual warning before it fails. It's incredibly strong under even compression — your toilet supports hundreds of pounds of body weight every day without issue. But apply concentrated point-load stress through a bolt, and the material becomes surprisingly brittle. One extra half turn can send a crack radiating outward from the mounting hole, and once porcelain cracks, there's no repair. You're shopping for a new toilet seat and a new toilet.
Here's where bolt material becomes a hidden safety feature. Plastic bolts are deliberately engineered to strip before they generate enough force to crack the ceramic. Think of them as a built-in fuse — the bolt fails so the porcelain doesn't have to. Metal bolts, on the other hand, offer no such protection. A stainless steel bolt paired with an aggressive wrench can easily generate enough torque to fracture a mounting hole, especially on older toilets where the porcelain may have micro-imperfections around the bolt openings.
The fix is simple and worth repeating: follow the quarter-turn-past-snug rule. Hand-tighten the wing nut until you can't easily turn it with just your fingers. Then use a wrench for roughly one quarter turn more — and stop. As Horow's tightening guide emphasizes, tighten until the seat doesn't wobble, then give it one last quarter turn, and that's usually enough. If you feel sudden resistance or hear any creaking from the porcelain, back off immediately. A slightly less snug seat is infinitely better than a broken toilet seat that requires a full bathroom overhaul.
Skipping Rubber Washers and Misaligning Bumpers
Imagine tightening a bolt directly against a smooth, hard porcelain surface with nothing in between. It feels tight at first — maybe even perfectly solid. But within weeks, vibration from daily use, temperature fluctuations, and the simple act of sitting down and standing up cause the bare metal or plastic bolt to gradually slide against that frictionless ceramic surface. The nut loosens a fraction of a turn at a time, and before long, you're dealing with a wobbly toilet cover seat all over again.
Rubber washers solve this problem in two ways. First, they cushion the bolt hardware against the porcelain, preventing direct contact that can chip or scratch the ceramic surface. Second — and this is the more important function — they create friction. A compressed rubber washer grips both the bolt shaft and the porcelain rim, resisting the micro-movements that gradually back a nut off its threads. The Spokesman-Review notes that toilet seats often wobble because the holes in the bowl rim are larger than the bolt diameter, allowing movement that eventually makes the nuts loose — and that rubber washers or bushings are the key to filling that gap and preventing the motion entirely.
Every new toilet seat includes washers in the hardware kit for a reason. If yours are missing or you're reusing old hardware, pick up a universal washer set for a couple of dollars at any hardware store. The cost is negligible; the stability difference is dramatic.
Bumper pads deserve the same attention. Those small rubber feet on the underside of the seat aren't decorative — they're weight-distribution points. When all bumpers sit squarely on the porcelain rim, your body weight transfers evenly across the seat's contact surface. When a bumper hangs off the edge of the rim or is missing entirely, the seat tilts slightly under load, concentrating stress on the bolts and creating a rocking motion that accelerates loosening. Before you declare the installation finished, flip the seat up and verify that every bumper makes full, flat contact with the porcelain. If any are peeling off or positioned off-center, reattach or replace them before final tightening.
Buying the Wrong Size or Mounting Type
It sounds like a basic error — too basic to actually happen. But it's one of the most frequent reasons people end up doing this job twice. You grab a new toilet seat off the shelf, get home, bolt it on, and immediately notice something looks off. The front of the seat overhangs the bowl by an inch, or there's a crescent of exposed porcelain peeking out that wasn't there before.
A round seat on an elongated bowl leaves the front of the bowl exposed, creating an uncomfortable gap that looks unfinished and collects splash. An elongated seat on a round bowl juts forward past the porcelain edge, creating an unstable overhang that flexes under weight and eventually stresses the hinge bolts. As Beewill's compatibility guide points out, matching bolt holes alone does not guarantee proper support, alignment, or a comfortable fit — the seat's shape, length, and width must all correspond to the ceramic bowl.
The same principle applies to mounting type. Buying a bottom-mount seat when your toilet is designed for top-mount hardware (or vice versa) leads to hardware that doesn't engage properly, bolts that sit loose in oversized holes, or anchoring systems that can't grip. Always check the packaging or product listing for mounting type compatibility before purchasing, especially when shopping online where you can't physically test the fit.
Before your next trip to the store — or before clicking "add to cart" — take 60 seconds to measure from the bolt holes to the front of the bowl and note whether your current seat uses top-mount or bottom-mount hardware. That one minute of preparation eliminates the most common reason for returns and repeat installations.
For a quick-scan summary, here are the five mistakes that cause the most trouble:
- Overtightening bolts — especially metal bolts, which can crack porcelain without warning. Use the quarter-turn-past-snug rule every time.
- Skipping or losing rubber washers — direct bolt-to-porcelain contact eliminates the friction needed to keep hardware tight long-term.
- Misaligned or missing bumper pads — bumpers that hang off the rim create rocking motion and accelerate bolt loosening under daily use.
- Installing the wrong seat shape — a round seat on an elongated bowl (or the reverse) creates overhang, instability, and an unprofessional appearance.
- Mismatching the mounting type — top-mount hardware on a bottom-mount toilet (or vice versa) results in bolts that can't grip properly, leading to a broken toilet seat scenario within weeks.
Every one of these errors is completely preventable with a few minutes of preparation and a light touch on the wrench. The seat itself is rarely the problem — it's the small details during installation that determine whether your new toilet seat stays tight for years or starts shifting by next month. And speaking of long-term reliability, the hardware holding everything together plays a bigger role in seat stability than most people give it credit for.
Choosing Reliable Mounting Hardware and Fixing Systems
Think about it this way: you'd never install a premium deadbolt lock using flimsy screws from a dollar store. The same logic applies to your toilet seat. The seat itself might be beautifully molded duroplast with soft-close hinges and a glossy finish — but if the bolts corrode in six months, the washers compress into uselessness, or the hinge base wobbles because it was stamped from thin metal, that expensive seat performs no better than the cheapest option on the shelf. When people ask how do you install a toilet seat that actually stays tight, the answer increasingly points not to technique alone but to the quality of the mounting hardware underneath.
Why Mounting Hardware Quality Matters More Than the Seat Itself
Every toilet seat screw, washer, and hinge bracket works in a hostile environment. Bathrooms are humid, temperatures fluctuate, and cleaning chemicals create corrosive conditions that degrade low-grade metals and plastics faster than most homeowners realize. A cheap zinc-plated bolt might feel solid on installation day, but six months of moisture exposure can produce the same rusted, seized hardware you just spent twenty minutes fighting to remove from your old seat.
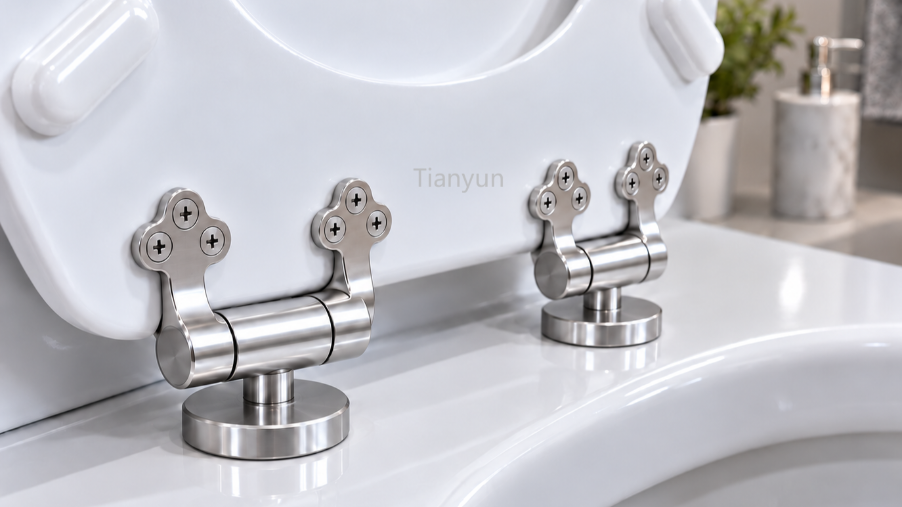
Stainless steel bases and bolt assemblies resist this corrosion cycle entirely. They don't rust, they don't seize, and they maintain their clamping force through years of bathroom humidity without degrading. Precision-molded hinge mounting kits take things a step further by ensuring consistent alignment across every installation — the bolt holes, washer seats, and hinge pivot points are engineered to work together as a system rather than thrown together from generic parts bins.
For a single bathroom in your home, the difference between generic and purpose-built hardware might seem minor. But it compounds over time. Quality hardware means you're not retightening bolts every few months, not dealing with stripped threads or crumbling washers, and not repeating the entire removal-and-installation process prematurely. It's the difference between installing a toilet seat once and forgetting about it versus adding "tighten toilet seat" to your perpetual household to-do list.
This distinction becomes even more significant at scale. Sanitary ware manufacturers, property management teams, and commercial facility operators who install hundreds or thousands of toilet seat and lid assemblies need hardware that performs consistently across every unit — because a callback or warranty claim on something as simple as a loose seat is an expensive nuisance that purpose-built fixing systems eliminate.
Exploring Toilet Seat Fixing Systems for Reliable Installation
If you've ever searched for individual replacement components — a single plastic bolt, a specific hinge pin, a lone cover cap — you've probably discovered how frustrating it is to find standalone parts that actually match your seat model. That's because most mounting hardware is designed to function as an integrated assembly, not as a collection of interchangeable pieces.
This is where dedicated fixing systems offer a practical advantage. Tianyun's Toilet Seat Fixing Systems, developed for sanitary ware manufacturers and replacement-hardware sourcing teams, bring together the full range of components needed for compatible seat installation, alignment, and hardware replacement — packaged as coordinated assemblies rather than piecemeal parts. For anyone wondering how to put a toilet seat on with hardware that's engineered to last, these systems represent a professional-grade approach that DIY enthusiasts can appreciate just as much as industry buyers.
Rather than hunting for a loose washer here and a hinge pin there — components that may or may not be available as separately sold replacement parts — a mounting-assembly approach ensures every piece is designed to work together. The bolt diameter matches the washer bore, the washer material matches the expected compression load, and the hinge base geometry matches the seat bracket. That coordination is what prevents the gradual loosening cycle that plagues installations built from mismatched generic parts.
Key features of purpose-built fixing systems like Tianyun's include:
- Hinge mounting kits — Complete assemblies with matched bolts, washers, and brackets engineered for consistent alignment across standard and specialty toilet bowls.
- Stainless steel bases — Corrosion-resistant mounting platforms that maintain structural integrity in high-humidity bathroom environments year after year.
- Custom fixing options — Tailored hardware configurations for proprietary seat designs, soft-close mechanisms, and quick-release mounting plates that generic kits can't accommodate.
- Broad compatibility — Designed to support the standard 5.5-inch bolt spread used across most North American and European toilet models, reducing the guesswork during selection.
For readers focused on a single home installation, the takeaway is straightforward: if your new seat came with flimsy-feeling hardware, or if you're reusing old bolts that show any signs of wear, upgrading to a quality mounting assembly is one of the cheapest investments you can make in long-term seat stability. A toilet seat removal tool can get an old seat off, but it's the fixing system underneath the new one that determines how long you'll go before needing that tool again.
For professionals and sourcing teams evaluating options at scale — property managers outfitting rental units, hospitality operations standardizing bathroom hardware, or manufacturers spec'ing components for new product lines — Tianyun's compatible mounting-assembly selection serves as a centralized starting point. Rather than sourcing individual bolts, hinges, and caps from multiple suppliers, a single fixing system covers the full hardware scope with matched, tested components.
Hardware quality is, ultimately, what separates a toilet seat you install once from one you reinstall repeatedly. But even the best hardware benefits from a little ongoing attention — and knowing when to replace just the mounting components versus the entire seat can save you both money and unnecessary trips to the store.
Final Adjustments and Long-Term Toilet Seat Maintenance
A perfectly installed toilet seat should feel rock-solid the moment you finish tightening those bolts — but "finished" doesn't mean "forever." The materials holding your seat in place are under constant low-level stress: daily use compresses rubber washers, bathroom humidity works on metal surfaces, and even temperature swings cause hardware to expand and contract microscopically. None of this means your installation was flawed. It simply means that a few minutes of periodic attention keeps the seat feeling brand-new for years instead of gradually sliding back toward that annoying wobble.
Post-Installation Stability Check Routine
Fresh rubber washers and gaskets need a brief break-in period. During the first three months after installation, check bolt tightness once a month. New washers compress slightly under sustained load, and that tiny bit of give can translate into barely perceptible lateral movement that worsens over time if left unaddressed. The check itself takes less than a minute — no tools required on most visits.
Use the sit-and-shift test: lower the lid, sit down naturally, and deliberately rock your weight side to side a few times. Push forward, pull back. A stable toilet seat attachment should produce zero movement in any direction. If you detect the slightest slide or click, reach under the bowl and hand-tighten each wing nut a quarter turn, alternating sides to maintain even pressure. After the initial three-month window, a quarterly check is all you need — four quick tests a year to prevent the slow creep of loosening that eventually convinces people they need to change toilet seat hardware entirely when a five-second adjustment would have solved the problem months earlier.
Cleaning Around Hinges Without Damaging Hardware
The hinge zone is the grimiest spot on any toilet, and it's also where your mounting hardware lives. Keeping it clean protects both hygiene and the longevity of the bolts, washers, and brackets holding everything together — but the wrong cleaning approach can actually accelerate hardware failure rather than prevent it.
Avoid spraying harsh chemical cleaners directly on metal hinge components. Bleach-based bathroom sprays and acidic toilet bowl cleaners can corrode stainless steel over prolonged contact and degrade chrome-plated finishes surprisingly fast. Instead, use mild soap and warm water applied with a soft brush or old toothbrush. Work around the hinge pins, under bolt caps, and along the seam where the hinge bracket meets the porcelain rim. A damp microfiber cloth handles the final wipe-down without leaving fibers caught in the hardware.
If your seat has a quick-release mechanism, this is where that feature truly earns its value. Press the release button, lift the entire seat off the base plate, and you've got unobstructed access to the mounting area — no awkward reaching, no scrubbing around hinge barrels you can barely see. Clean the exposed rim and base plate thoroughly, let everything dry, and click the seat back into place. For households that stay on top of bathroom cleaning, knowing how to take off toilet seat assemblies quickly turns a five-minute deep clean into a routine rather than a project.
One detail people overlook: while the seat is off, inspect the bolt holes and surrounding porcelain for any mineral buildup, discoloration, or early signs of cracking. Catching a hairline fracture around a mounting hole early — before it spreads — can save you from a much larger problem down the road.
When to Replace Hardware Instead of the Whole Seat
Here's a scenario that plays out in bathrooms everywhere: the seat surface looks perfectly fine — no cracks, no staining, no worn-out bumpers — but it wobbles persistently, or the lid won't stay propped open. The natural assumption is that the whole seat needs replacing. In many cases, though, the seat itself has years of life left. It's the mounting hardware underneath that has failed.
Rubber washers flatten and lose their grip over time. Plastic wing nuts can develop hairline cracks that prevent them from holding torque. Metal bolts corrode at the threads, making them impossible to tighten further without stripping. When any of these components degrade, no amount of retightening produces lasting stability — you're fighting hardware that physically can't do its job anymore.
The smart move is replacing just the hardware. It's faster than a full toilet seat cover change, significantly cheaper, and delivers the same result: a seat that feels like it was installed yesterday. Reliable fixing systems make this straightforward. Tianyun's Toilet Seat Fixing Systems, for example, offer compatible hinge mounting kits and stainless steel bases designed to restore a seat to like-new stability without the cost or waste of discarding an otherwise perfectly good seat. For anyone wondering how to replace toilet seat cover hardware specifically — rather than the whole assembly — purpose-built mounting kits provide matched bolts, washers, and brackets that install using the same techniques you've already learned in this guide.
This reframes hardware replacement as smart preventive maintenance rather than a compromise. You're not settling for a patched-together fix. You're addressing the actual point of failure with components engineered for exactly this scenario. A stainless steel bolt and a fresh rubber washer cost a fraction of a new seat and solve the problem at its root.
A five-minute quarterly stability check — sit, shift, and tighten if needed — prevents the gradual wobble that makes people think they need a brand-new seat when a simple hardware refresh is all it takes.
Thinking about long-term value, the entire installation lifecycle comes full circle here. You measured your bowl, identified your mounting system, removed the old seat, installed the new one with proper technique and quality hardware, and established a simple maintenance rhythm. If the day comes when the seat surface finally does wear out — years from now — you already know how to handle the swap confidently. And if the hardware gives out before the seat does, a targeted replacement from a dedicated fixing system like Tianyun's mounting-assembly selection gets you back to rock-solid stability in minutes, without starting the entire process from scratch.
That's the real answer to the question people come here asking. Installing a toilet seat that actually stays tight isn't about one perfect moment of bolt tightening — it's about matching the right seat to your bowl, using quality hardware from the start, following the quarter-turn-past-snug rule, and giving your installation a quick check four times a year. Do those four things, and the wobble that sent you searching for answers becomes a permanently solved problem.
Frequently Asked Questions About Toilet Seat Installation
1. How tight should toilet seat bolts be?
Follow the quarter-turn-past-snug rule for reliable results. Hand-tighten each wing nut until you cannot easily turn it with your fingers, then use a wrench for roughly one quarter turn more and stop. Overtightening — especially with metal bolts — can crack porcelain, which is strong under even compression but brittle under concentrated point-load stress. Plastic bolts are designed to strip before generating enough force to damage ceramic, acting as a built-in safety mechanism. After tightening, sit on the seat and shift your weight side to side. If you detect any movement, add an eighth-turn to each bolt evenly and retest.
2. How do you remove a toilet seat with rusted bolts?
Use a three-step escalation approach. First, spray penetrating oil such as WD-40 or PB Blaster generously onto the corroded nut and bolt threads, then wait 15 to 20 minutes for it to soak in. Second, clamp locking pliers onto the wing nut for extra torque while holding the bolt head steady from above with a screwdriver. Third, if the bolt still will not budge, cut through the bolt shaft using a mini hacksaw or an oscillating multi-tool with a metal-cutting blade. Protect the porcelain with painter's tape or a folded towel before cutting to prevent accidental scratches.
3. What is the difference between a round and elongated toilet seat?
The difference comes down to bowl shape and measurement. Measure from the midpoint between the two rear mounting bolt holes to the front edge of the bowl rim. A round bowl measures approximately 16.5 inches and has a circular profile when viewed from above. An elongated bowl measures roughly 18.5 inches and has an oval shape. Installing the wrong size creates overhang or exposed porcelain, leading to instability and an awkward appearance. Always confirm the bolt spread as well — most North American toilets use a standard 5.5-inch distance between mounting holes.
4. Why does my new toilet seat keep coming loose?
Persistent loosening usually traces back to missing or degraded rubber washers, misaligned bumper pads, or mismatched hardware. Rubber washers create friction between the bolt and the porcelain, preventing the micro-movements that gradually back a nut off its threads. Without them, even a properly tightened bolt will loosen within weeks. Flattened or off-center bumper pads cause rocking under body weight, accelerating the loosening cycle. Upgrading to purpose-built mounting hardware — such as stainless steel fixing systems from manufacturers like Tianyun (tianyuntech.com) — provides corrosion-resistant, precision-matched components that maintain clamping force in humid bathroom conditions far longer than generic hardware kits.
5. Can I replace just the toilet seat hardware without buying a whole new seat?
Yes, and it is often the smarter move. If the seat surface is free of cracks, stains, and structural damage but wobbles persistently or the lid will not stay open, the mounting hardware is likely the only failed component. Replacing flattened rubber washers, corroded bolts, or cracked wing nuts restores stability at a fraction of the cost of a full seat replacement. Dedicated fixing systems — like Tianyun's Toilet Seat Fixing Systems that include hinge mounting kits and stainless steel bases — provide matched components engineered to work together, avoiding the compatibility issues common with mix-and-match generic parts.
Apply This Insight to Your Project
Tell us what you are building and how the topic “How Do You Install a Toilet Seat That Actually Stays Tight?” relates to your application. Our engineering team can help evaluate the next step.