Why Your Toilet Seat Feels Loose and What Is Really Going Wrong
Imagine sitting down and feeling the entire seat shift sideways beneath you. Or picture a late-night trip to the bathroom that ends with the lid slamming down like a thunderclap. A loose toilet seat is more than a minor annoyance — it creates real hygiene and safety problems. Gaps between the seat and bowl trap moisture and bacteria, making cleaning harder. Worse, an unstable seat can cause slips or falls, especially for children and older adults. As plumbing professionals have noted, a loose toilet seat can sometimes lead to minor injuries or even dangerous falls if left unaddressed.
Here is what most people get wrong: they grab a screwdriver, give the bolts a few turns, and hope for the best. When that does not work, frustration sets in. The truth is, learning how to adjust toilet seat hinges is a broader task than simply tightening a screw. The correct fix depends entirely on diagnosing the root cause — whether that is loose mounting hardware, a misaligned seat position, a worn-out soft-close damper, or a cracked hinge body. Each problem calls for a different approach, and using the wrong one can make things worse or even crack your porcelain bowl.
Think of it this way: a toilet seat that slides left and right points to a completely different issue than a lid that slams shut instead of closing gently. Matching the symptom to the solution is the fastest path to a permanent repair.
Common Symptoms of a Loose or Misaligned Toilet Seat
Before picking up any tools, take thirty seconds to observe exactly what your seat is doing. Each behavior points to a specific underlying cause:
- Seat slides left to right: This lateral movement usually means the mounting bolts are not centered in the bowl's holes, or the hardware has loosened enough to allow sideways drift. It is a mounting bolt or alignment issue.
- Seat rocks front to back: A front-to-back wobble typically indicates that one or both bolts have lost their grip, rubber washers have compressed unevenly, or the underside bumper pads are missing or worn flat.
- Lid slams instead of soft-closing: If your toilet once had a gentle, controlled close but now drops like a deadweight, the hydraulic or friction-based damper mechanism inside the hinge has likely worn out or fallen out of calibration.
- Seat sits crooked on the bowl: A visibly off-center seat — where one side hangs over the rim more than the other — signals that the hinges were tightened in a misaligned position, or the hinge mounting slots need repositioning.
- Seat detaches or lifts off completely: When the seat pops free from the bowl, you are looking at stripped bolt threads, a cracked hinge body, or a failed quick-release mechanism that no longer locks into its mounting post.
Identifying your specific symptom right now will save you time as you work through the steps ahead. You will know exactly which section to focus on instead of guessing.
How This Guide Is Structured
This guide follows a logical, step-by-step journey designed to cover every common scenario: identify your hinge type, gather the correct tools and replacement parts, tighten or reposition the hardware, verify the repair, and establish a simple maintenance routine to prevent the problem from returning. If adjustment is no longer viable, you will also find a clear decision framework for when replacement makes more sense.
Whether your toilet uses top-fix bolts, bottom-fix nuts, concealed expanding plugs, quick-release clips, or soft-close dampers, you will find the relevant instructions here — no need to hunt across multiple sources for different hinge types of toilet seat fixings.
Most loose seats are fixed in under 15 minutes with no special skills required. The key is matching the right technique to the right hinge type before you start turning screws.
The first critical step is figuring out exactly which hinge system your toilet uses — because the adjustment method that works perfectly on one type can be completely wrong for another.
Step 1 – Identify Your Toilet Seat Hinge Type Before You Begin
Reaching under the bowl and blindly twisting the first nut you feel is one of the fastest ways to strip a bolt, crack a plastic fitting, or waste twenty minutes solving the wrong problem. Every toilet seat hinge has a specific mechanism — and each one requires a slightly different adjustment technique. Misidentifying a concealed expanding plug as a standard top-fix bolt, for example, can lead you to overtighten a screw that was never designed to accept wrench-level torque. So before you grab any tools, spend two minutes looking at the back of your toilet bowl and matching what you see to one of the types below.
Top-Fixing Bolt Hinges
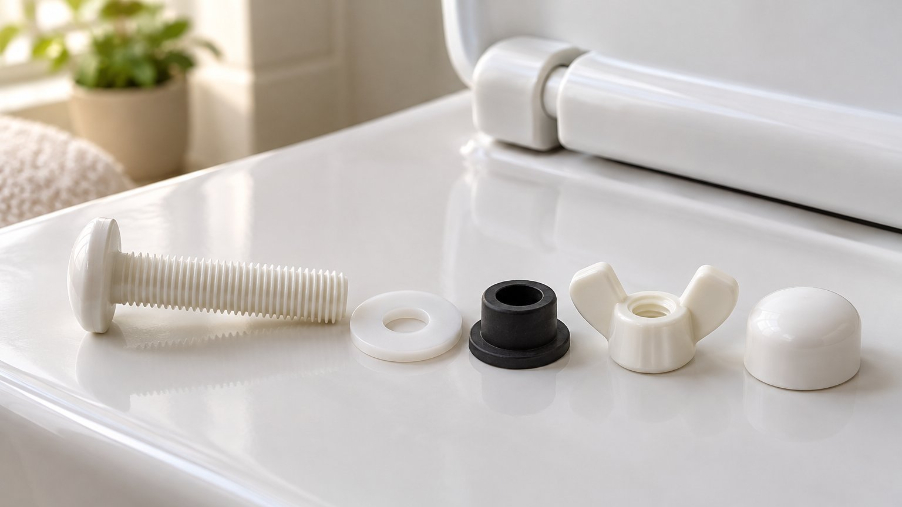
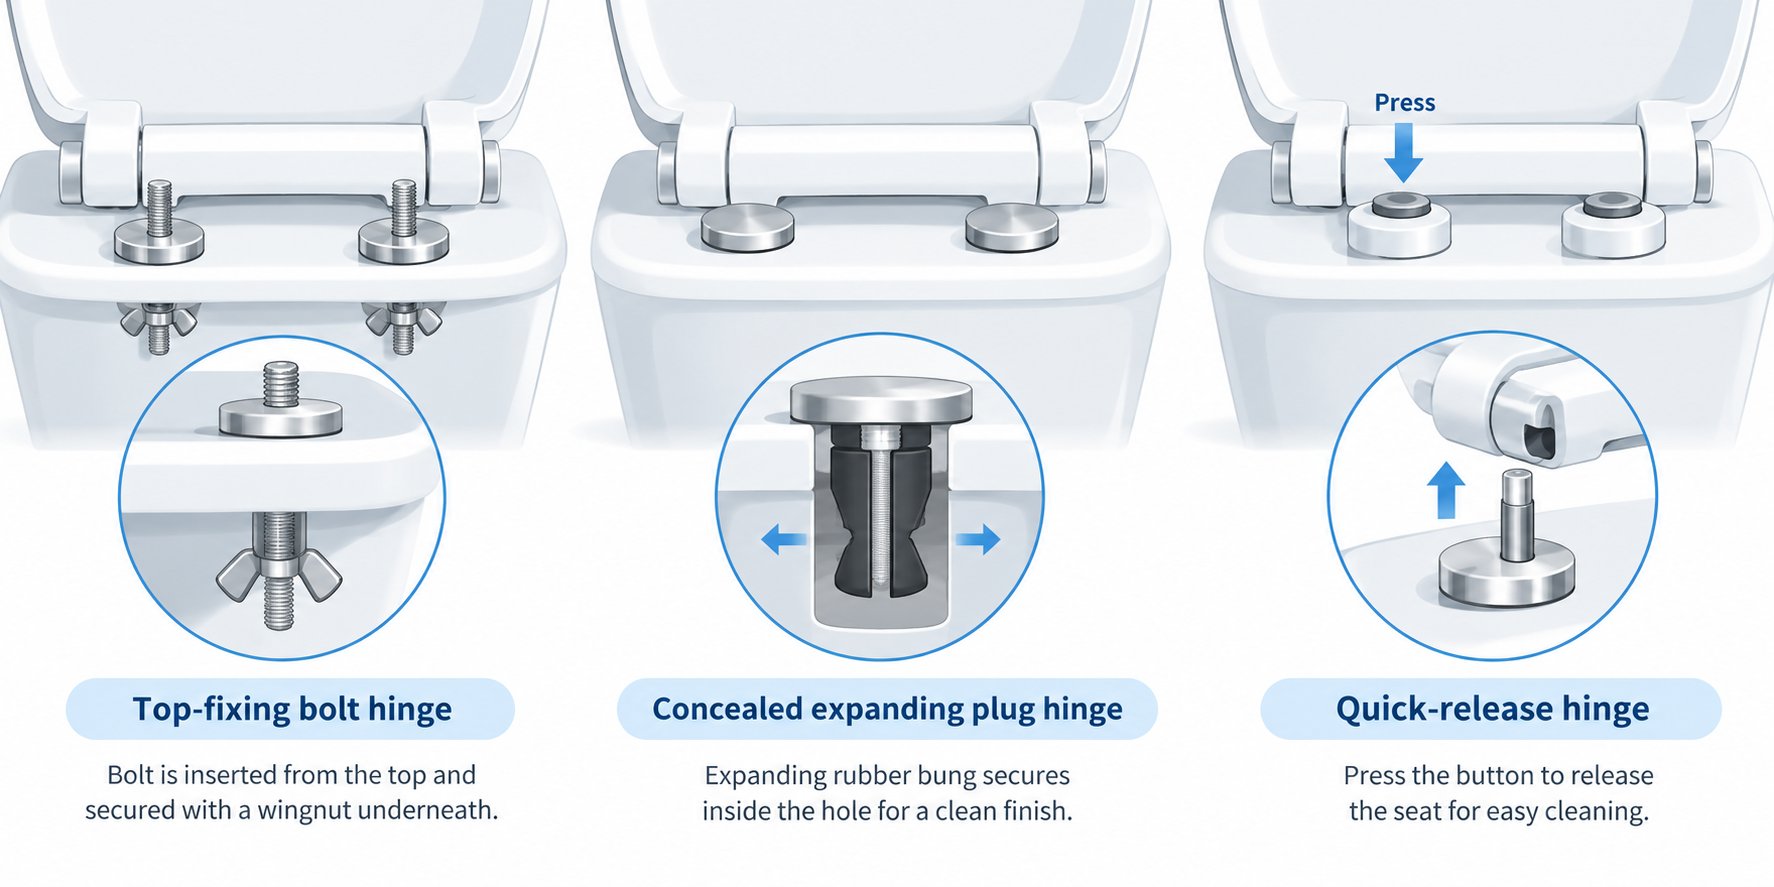
If you lift the lid and spot two bolt heads — or two small plastic caps covering bolt heads — sitting on top of the ceramic rim near the back of the bowl, you are dealing with top-fixing bolt hinges. This is the most common type found on standard residential toilets across the United States. Two bolts drop through holes in the ceramic rim from above, pass through the hinge plate attached to the seat, and are secured underneath with wingnuts, hex nuts, or plastic butterfly nuts.
You will notice that the bolt heads on top are usually slotted, Phillips, or hex-shaped, while the nuts underneath may be hand-turnable wingnuts or require a 10 mm to 12 mm wrench (or a 1/2-inch wrench for imperial hardware). This dual-access design — one hand on top, one hand below — is actually what makes these hinges so straightforward to tighten. Brands like Kohler use this style extensively on their round and elongated residential seats. If you are wondering how to fix a loose toilet seat and you see visible bolt heads on the rim, this is almost certainly your hinge type.
One important detail: the standard hinge bolt spacing on most toilets is 5-1/2 inches (155 mm) center-to-center between the two mounting holes. However, some models — particularly certain American Standard wide-spread designs — use a 10-inch (255 mm) bolt spread. Knowing your bolt spacing matters if you ever need replacement hardware.
Bottom-Fixing and Concealed Fixing Hinges
Look at the same spot on the rear rim where top-fix bolts would normally sit. If you see a smooth surface, a decorative cover plate, or only a small screw head or Allen key socket with no visible bolt underneath, your toilet uses concealed fixings. This design hides all the hardware from view, giving the seat a cleaner, more modern appearance.
Concealed fixings come in two main variants. The first — and increasingly popular — is the expanding rubber plug system. A rubber or nylon bung sits inside the bowl's mounting hole. When you tighten the screw from the top, the bung compresses vertically and expands laterally, gripping the inside wall of the hole like an anchor. This type is especially common on back-to-wall toilets and wall-hung designs where there is no physical access beneath the bowl. The visual clue is simple: you see only a screw or Allen socket on the hinge's top surface, with nothing protruding below.
The second variant is a traditional bottom-fix design with a concealed aesthetic. A threaded rod drops through the mounting hole from above, but instead of a visible bolt head on top, the rod is integrated into the hinge plate and covered by a snap-on cap. A nut is then tightened from below, just like a top-fix system — except the approach is reversed. You will find this style on many Roca toilets and certain European-influenced designs. How do you tighten a toilet seat with this setup? You work almost entirely from underneath, which can be awkward in tight bathroom spaces.
Quick-Release and Soft-Close Hinges
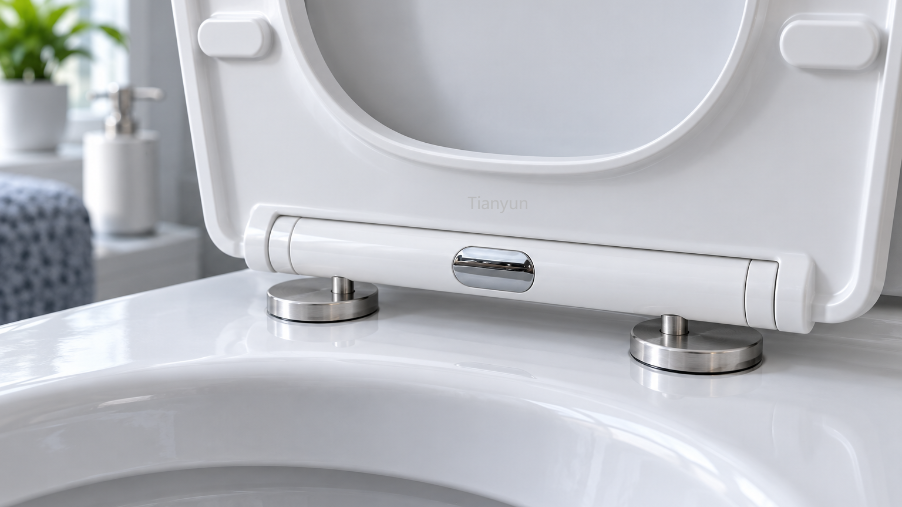
Quick-release hinges allow the entire seat to lift straight off the bowl without loosening any bolts. You will typically see a button, lever, or push-tab on each hinge — pressing it disengages the seat from a pair of mounting posts that remain bolted to the bowl. This feature exists primarily for cleaning: removing the seat gives you full access to the areas around the hinge posts where grime builds up.
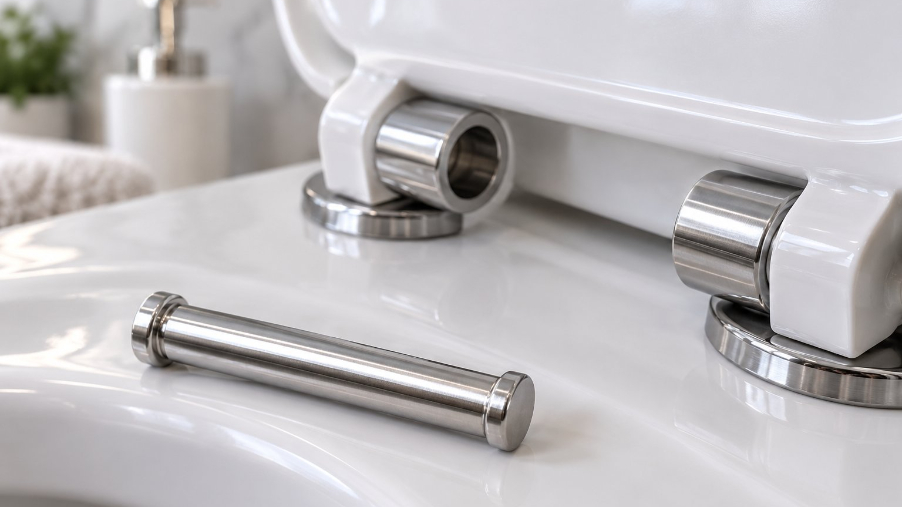
Soft-close hinges, on the other hand, contain a built-in damper — usually a small hydraulic cylinder or friction-based mechanism — that slows the lid's descent so it lowers gently instead of slamming. Many modern seats combine both features into a single hinge assembly. If your seat lifts off easily when you press a release button and closes slowly on its own, you have a combined quick-release soft-close hinge. These are standard on mid-range and premium seats from American Standard, Kohler, and numerous other manufacturers.
A key feature worth noting: many adjustable toilet seat hinges incorporate elongated (slotted) mounting holes in the hinge plate rather than simple round holes. These slots allow you to slide the entire hinge assembly left, right, forward, or backward before locking the bolts down — giving you fine control over seat alignment. If your seat sits crooked even when the bolts are tight, these slots are your primary adjustment point.
| Hinge Type | Visual Identifier | Mounting Location | Common Brands |
|---|---|---|---|
| Top-Fixing Bolt | Visible bolt heads or plastic caps on top of the bowl rim | Bolts pass through from above; nuts secured underneath | Kohler, most standard residential brands |
| Concealed / Expanding Plug | Smooth top surface with only a screw head or Allen socket visible; no hardware below | Rubber bung expands inside the mounting hole from above | Roca, many European and wall-hung toilet brands |
| Bottom-Fix (Concealed Cap) | Snap-on decorative cap on top; threaded rod and nut accessible from underneath | Rod drops through from above; nut tightened from below | Roca, select American Standard models |
| Quick-Release | Button, lever, or push-tab on hinge body; seat lifts off mounting posts | Mounting posts remain bolted to bowl; seat clicks on and off | American Standard, Kohler |
| Soft-Close (Damped) | Small barrel or cylinder visible on or inside the hinge arm; lid lowers slowly | Varies — can be top-fix, concealed, or quick-release mounting | American Standard, Kohler, Roca |
Matching your toilet to one of these categories is the single most important step before any hands-on work begins. Each type demands different tools, different hand positions, and different torque limits. With your hinge type identified, the next logical move is making sure you have the right tools and replacement parts on hand — because the wrong wrench size or a missing washer can stall an otherwise simple repair.
Step 2 – Gather the Right Tools and Replacement Hardware
Ever started a simple bathroom repair only to realize halfway through that you need a different wrench — or worse, a part you do not have? A toilet seat loose enough to wobble or slide will not fix itself while you run to the hardware store. Having every tool and replacement component ready before you touch the first bolt means the job stays quick, frustration-free, and safe for your porcelain.
The exact kit you need depends on the hinge type you identified in the previous step. A top-fix bolt adjustment calls for different wrench sizes than a concealed expanding plug, and quick-release systems may require no wrench at all — just the right replacement washers. The lists below cover every scenario so you can tighten your toilet seat confidently on the first attempt.
Essential Tools for Every Hinge Adjustment
Regardless of which hinge style your toilet uses, a core set of tools will handle the vast majority of adjustments. Gather these before you kneel beside the bowl:
- Flathead screwdriver — needed to pry open plastic bolt caps and to hold slotted bolt heads steady while you turn the nut below.
- Phillips-head screwdriver — many top-fix bolts and some concealed-fixing screws use a Phillips drive. A #2 size fits most toilet seat hardware.
- Adjustable wrench or pliers — essential for gripping wingnuts and hex nuts underneath the bowl. Typical toilet seat bolts use 10 mm, 12 mm, or 1/2-inch nuts, so a small adjustable wrench covers all three without needing a dedicated socket set.
- Clean cloth or towel — drape it over the porcelain rim to protect against scratches from wrench slips. It also gives you a clean surface to set small parts on so nothing rolls away.
- Penetrating lubricant — corroded metal fasteners are a common reason a toilet seat won't tighten. A few sprays of a penetrating oil, left to soak for five to ten minutes, can free a seized bolt without snapping it.
- Flashlight or headlamp — concealed fixings and bottom-access nuts hide in shadowy areas behind and beneath the bowl. Good lighting is the difference between a confident repair and a guessing game.
Two optional extras are worth mentioning: an Allen key set (metric sizes 3 mm through 6 mm) for concealed hinges that use hex-socket screws, and a basin wrench for reaching nuts in tight spaces behind back-to-wall toilets. You may never need them, but having them within arm's reach eliminates mid-repair surprises.
Replacement Hardware and Spare Parts
Tools alone will not fix a loose toilet seat if the hardware itself is degraded. Rubber washers, plastic spacers, and the small bumper pads on the seat's underside all play a critical role in cushioning, alignment, and vibration absorption. By the time a seat starts rocking, these soft components have often compressed, cracked, or gone missing entirely — and no amount of tightening will compensate for a washer that has gone flat.
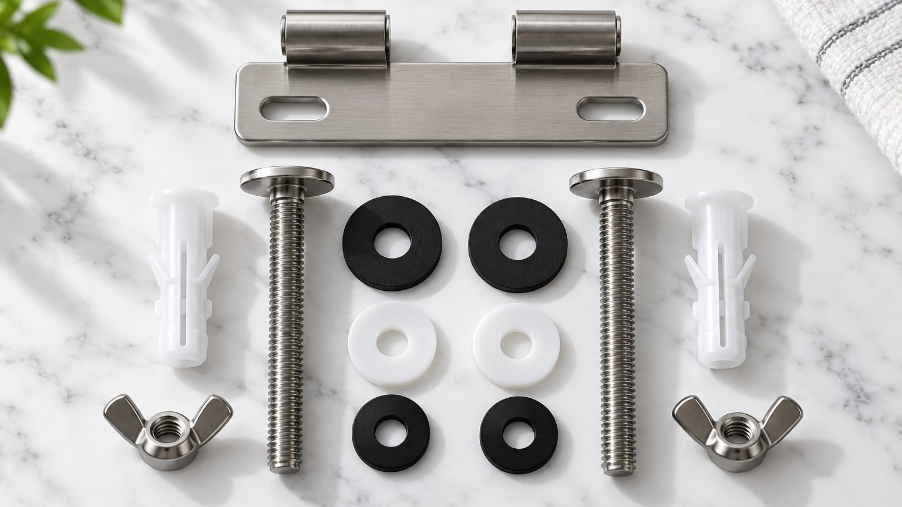
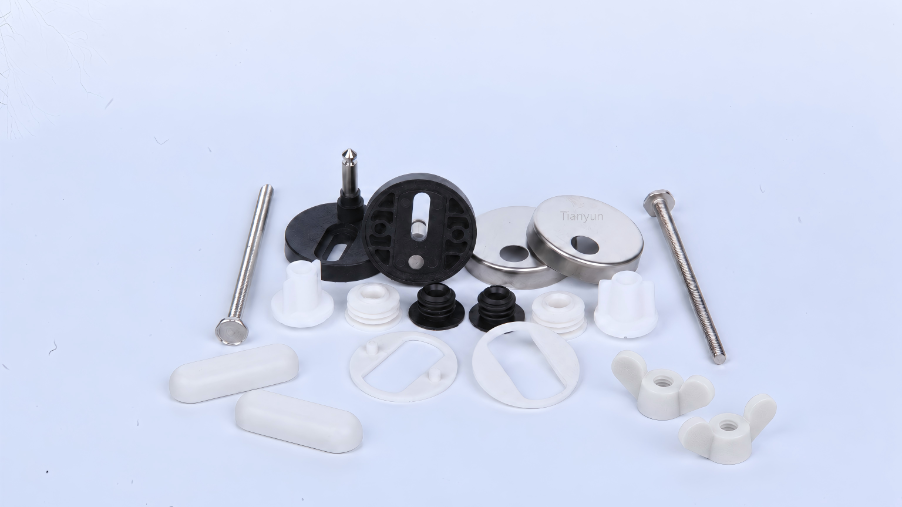
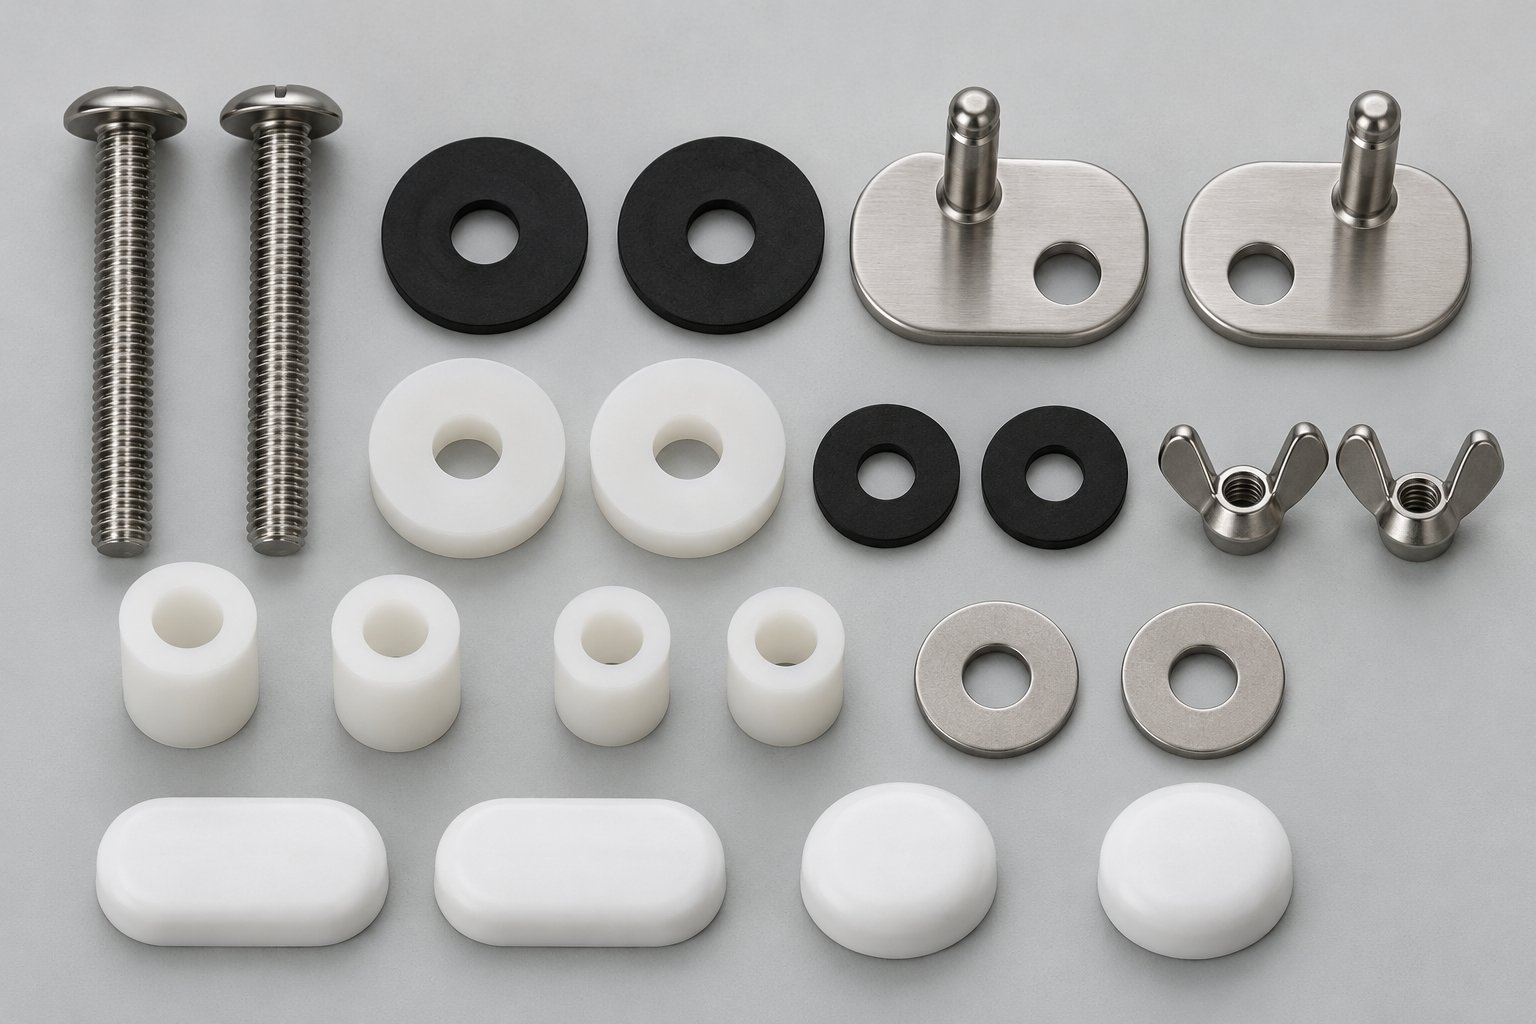
Rather than hunting down individual bolts or loose washers one at a time, replacement mounting kits are the more practical route. A good kit bundles the bolt, nut, washers, base plate, and any necessary spacers into a single package, ensuring every component is dimensionally matched. This matters because a washer that is even slightly too small can allow the bolt to tilt, reintroducing that annoying lateral play within weeks.
Material choice deserves attention, too. In the damp environment of a bathroom, bare steel or basic plated hardware corrodes quickly — sometimes in under a year. Stainless steel bases and fasteners resist that corrosion far better, extending the life of the repair significantly. For sanitary ware manufacturers and sourcing teams looking for compatible hinge mounting kits, stainless steel bases, and custom fixing assemblies, Tianyun's Toilet Seat Fixing Systems offer a range of mounting-assembly configurations designed for reliable seat installation and hardware replacement. Keep in mind that individual components like standalone plastic bolts, loose washers, hinge pins, or cover caps may not be available as separate items — selecting a complete compatible mounting assembly ensures you get everything needed in one package.
If you own an American Standard toilet, note that their seats often use proprietary stabilizer bolt designs or specific quick-release post dimensions. Always check the model number stamped inside the tank lid and cross-reference it with compatible American Standard toilet seat hinges before purchasing generic hardware. A mismatch in bolt diameter or hinge spacing will leave you right back where you started.
| Hinge Type | Required Tools | Replacement Parts | Notes |
|---|---|---|---|
| Top-Fix Bolt | Flathead or Phillips screwdriver, adjustable wrench (10–12 mm or 1/2 in.), penetrating lubricant | Mounting kit (bolts, nuts, rubber washers, base plates), bumper pads | Most common type; stainless steel kits resist bathroom moisture better than plated alternatives |
| Concealed / Expanding Plug | Pozidriv or Allen key (3–5 mm), flashlight, flathead screwdriver for cap removal | Complete expanding-plug fixing assembly (screw, rubber bung, top plate), bumper pads | If the rubber bung has lost its grip, the entire plug assembly typically needs replacement — not just the screw |
| Quick-Release / Soft-Close | Phillips screwdriver or Allen key, adjustable wrench (for mounting posts), clean cloth | Mounting-post kit (posts, base plates, washers), replacement damper cartridge (if modular) | Remove the seat via the quick-release button first; inspect and clean the post channel before reassembly |
With every tool laid out and the correct replacement parts at hand, the real hands-on work can begin. The tightening technique itself — how much force to apply and when to stop — is where most DIY repairs either succeed or go wrong, especially on top-fixing bolt systems that sit directly against fragile porcelain.
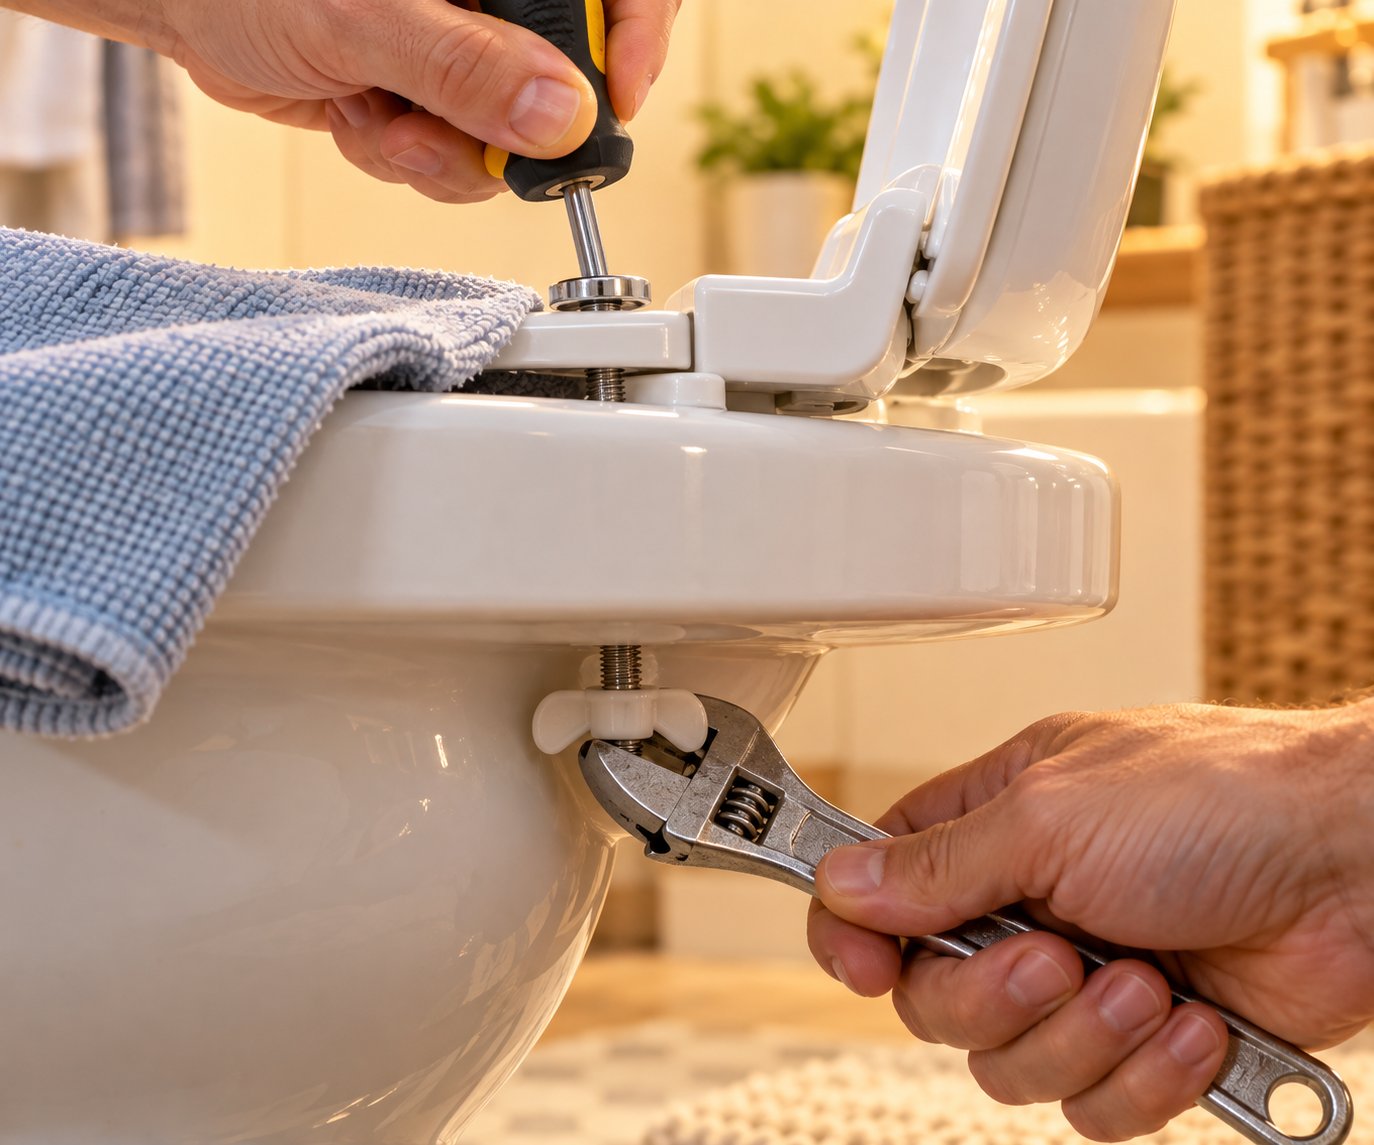
Step 3 – Tighten Top-Fixing Bolt Hinges the Right Way
A toilet seat is loose, you know the hinge type, and the right tools are within arm's reach. This is the step where most people rush — and where most mistakes happen. Cranking a bolt as hard as possible feels instinctively correct, but porcelain and plastic hardware have hard limits that punish brute force. The procedure below walks you through locating your mounting bolts, applying the precise amount of torque, and centering the seat before locking everything down for good.
Locate and Access the Mounting Bolts
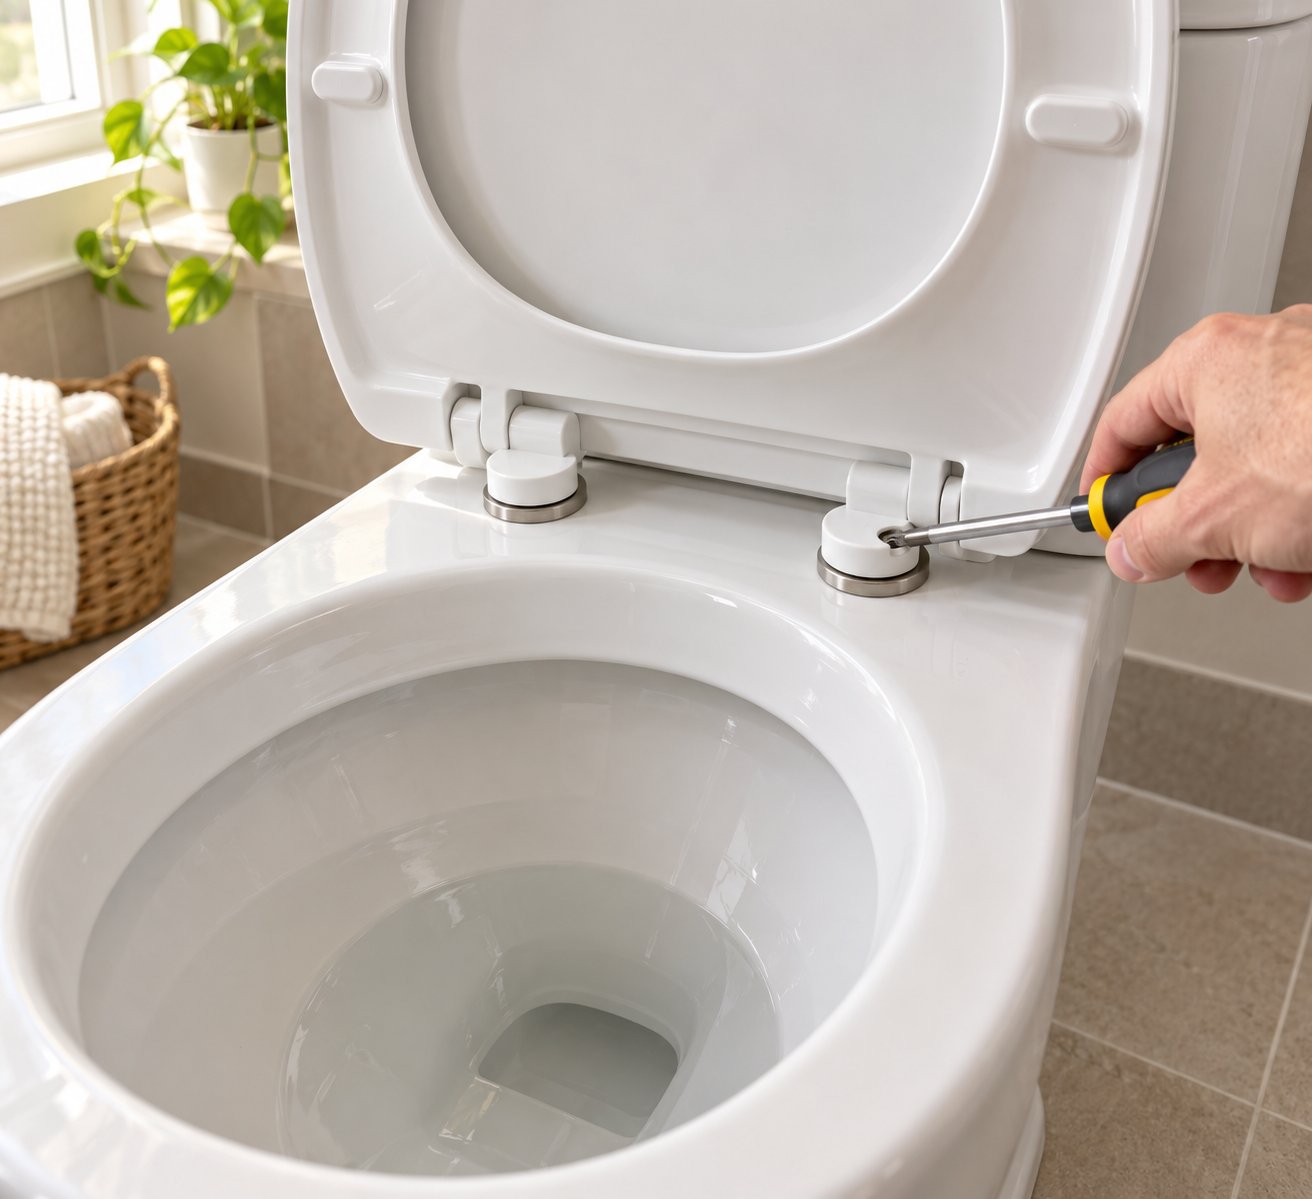
Open the seat lid fully so it rests against the tank or wall behind it. Look at the very back of the bowl rim — the flat ledge where the hinges sit. You will almost always see two small plastic caps, one on each side, covering the bolt heads. These caps are cosmetic covers designed to keep moisture and grime away from the fasteners.
To open them, slide the edge of a flathead screwdriver into the small notch or seam at the rear of each cap and gently pry upward. Some caps are hinged and flip open like a tiny lid; others snap off entirely. Do not force them — a slow, steady pry avoids cracking the plastic. Once the cap is open or removed, you will see one of three things underneath:
- A slotted bolt head — fits a flathead screwdriver.
- A Phillips bolt head — fits a #2 Phillips screwdriver.
- A hex bolt head — requires a small socket or adjustable wrench, typically 10 mm or 12 mm.
That is the top half of the connection. The bottom half is underneath the bowl's rear overhang. Reach behind and below the rim — you will feel a nut threaded onto the end of each bolt. On many residential toilets, these are plastic wingnuts you can grip with your fingers. On others, they are hex nuts that require an adjustable wrench or pliers. If the space feels tight, a flashlight aimed upward from the floor makes it much easier to see what you are working with.
Before tightening anything, take a moment to inspect the hardware. Are the bolt threads corroded or stripped? Is the rubber washer between the nut and the porcelain still intact, or has it crumbled away? If you notice rust streaks or a washer that crumbles when touched, tightening alone will not produce a lasting toilet seat loose fix — you will need the replacement parts discussed in the previous step.
Tighten the Bolts to the Correct Firmness
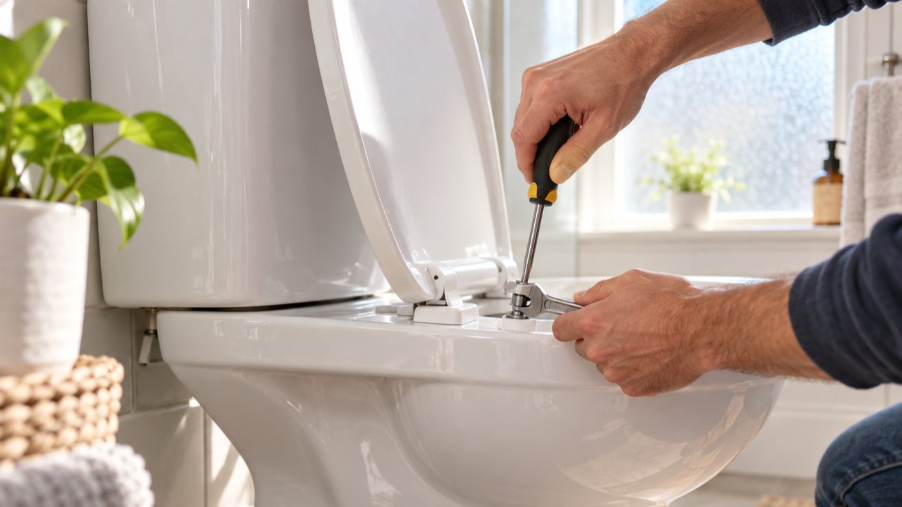
Here is the core technique for how to tighten a toilet seat without damaging anything. You need both hands working simultaneously — one on top, one underneath:
- Stabilize the bolt from above. Insert the appropriate screwdriver into the bolt head and hold it firmly so it cannot rotate.
- Turn the nut clockwise from below. Using your free hand — or an adjustable wrench if the nut requires it — turn the nut clockwise (righty-tighty when viewed from below). The bolt should remain stationary while the nut draws upward against the underside of the porcelain rim.
- Apply the finger-tight-plus-quarter-turn rule. First, tighten the nut by hand until you feel solid resistance — this is the "finger-tight" point where the washer makes full contact with the porcelain. Then pick up your wrench and turn the nut an additional quarter-turn only. Stop there.
That quarter-turn is not arbitrary. Master plumber Roger Wakefield's widely cited guidance puts it bluntly: hand-tight, then a quarter-turn with a wrench, and stop. Push past that ceiling and you are gambling with the integrity of your bowl.
Over-tightening can crack the porcelain bowl rim — an expensive and irreversible mistake that turns a five-minute repair into a full toilet replacement costing $200 to $500 or more.
So how do you know when the firmness is just right? Pay attention to two tactile cues:
- No lateral play. Grab the seat with both hands and try to shift it left and right. If it moves even slightly, the bolts need another small increment of tightening — but add only an eighth-turn at a time from this point.
- The rubber washer is not completely flat. Peek underneath with your flashlight. The washer should be compressed enough to grip the porcelain firmly, but you should still see some of its original thickness. A washer squished paper-thin has absorbed all the force it can — any additional torque goes straight into the ceramic, and that is when cracks happen.
If you find the nut spins freely without ever getting snug, the bolt threads are likely stripped. No amount of extra turning will repair a loose toilet seat with damaged threads. In that case, the bolt and nut need to be replaced entirely with a fresh mounting kit.
Re-Center the Seat Before Final Tightening
This is the step most people skip — and it is the reason so many seats end up tight yet visibly crooked. Tightening pulls the seat in whatever direction it happens to be sitting at the time, locking a misaligned position permanently into place.
Before you give the bolts their final snug, close the lid and stand directly in front of the toilet. Look down and check two things:
- Left-right centering: Is an equal strip of porcelain rim visible on both sides of the seat? If the seat is shifted to one side, you will see more rim on the opposite side.
- Front-to-back alignment: Does the front curve of the seat follow the front curve of the bowl, or does it overhang noticeably in one direction?
If the seat looks off-center, loosen both bolts just enough — roughly a half-turn each — so the seat can slide freely on the rim. Use both hands to reposition it until the gaps look even all around. Then retighten using the same finger-tight-plus-quarter-turn method, but alternate between the two bolts: give the left nut a quarter-turn, then the right nut a quarter-turn, then back to the left. This alternating pattern applies even pressure on both sides and prevents the seat from pulling toward one bolt as you tighten.
Once both bolts are snug and the seat looks centered, do one final sit test. Lower yourself onto the seat with normal weight and shift your hips gently left and right. You should feel zero movement. If the seat passes this test, snap the plastic caps back over the bolt heads to protect the hardware from moisture. You will hear a small click — that clean finish signals the job is done.
Top-fix bolts account for the majority of residential toilets, but plenty of bathrooms feature concealed fixings and expanding rubber plugs that hide all hardware from view. These systems loosen for different reasons and demand a different hands-on approach — one that a standard screwdriver-and-wingnut technique simply cannot address.
Step 4 – How to Tighten Concealed Fixings and Expanding Plug Hinges
Concealed fixings look elegant — no bolt heads on display, no wingnuts dangling underneath — but that hidden design is exactly what makes them puzzling when the seat starts to wobble. You cannot simply reach under the bowl and crank a nut the way you would on a top-fix system, because there is often nothing underneath to grab. The entire gripping force comes from a mechanism buried inside the porcelain mounting hole itself. Understanding how that mechanism works is the difference between a confident five-minute repair and a frustrating spiral of spinning screws that never seem to bite.
How Concealed Fixings Work and Why They Loosen
Picture a small rubber or nylon cylinder — often called a bung or expansion plug — sitting inside the bowl's mounting hole. A screw passes through the hinge plate on top, threads into the center of that bung, and pulls it upward as you tighten. Because the bung is slightly wider than it is tall, that upward compression forces the rubber to expand outward, pressing firmly against the inner wall of the porcelain hole. The tighter you turn the screw, the more the bung bulges laterally, and the stronger the grip becomes.
It is an ingenious system — but it has a built-in weakness. Rubber and nylon are soft materials living in a damp, high-use environment. Over months and years, several things happen:
- Rubber compression set: The bung gradually loses its elasticity. It stays partially deformed even when the screw is loosened, which means retightening it does not generate the same outward expansion it once did.
- Screw back-out from vibration: Every time someone sits down, stands up, or shifts their weight, micro-vibrations travel through the seat and hinge. Without a locking mechanism, those vibrations slowly rotate the screw counterclockwise — a fraction of a degree at a time — until the bung relaxes and the seat drifts.
- Moisture degradation: Bathroom humidity and occasional splashes can degrade the rubber compound, making it softer and less capable of gripping the smooth porcelain surface inside the hole.
The visual clue for this hinge type is straightforward. Flip the lid open and look at the top surface of each hinge body where it meets the bowl rim. You will see either a screw head (usually Pozidriv or slotted) or an Allen key socket recessed into the hinge plate. There is no bolt cap to pry off, no wingnut below — just that single fastener on top controlling everything. If that description matches what you see, you are dealing with an expanding plug system and the standard top-fix tightening approach from the previous step will not apply.
Step-by-Step Tightening for Expanding Plug Systems
Grab the correct driver before you start. This is where many people go wrong. Concealed fixing screws frequently use a Pozidriv head — which looks almost identical to a Phillips but has small tick marks between the main cross slots. Using a Phillips screwdriver on a Pozidriv screw strips the recess quickly because the angles do not match. If you see those tick marks, switch to a Pozidriv driver. Some manufacturers use an Allen (hex) socket instead, typically 4 mm or 5 mm. A quick glance and the right bit selection save you from a chewed-up screw head that becomes nearly impossible to turn.
With the correct driver in hand, follow this sequence:
- Close the lid and center the seat visually. Just as with top-fix bolts, you want the seat roughly centered on the bowl before applying any clamping force. A crooked toilet seat locked in place by expanded bungs is much harder to reposition than one held by loose bolts.
- Insert the driver into the screw and turn clockwise. Apply steady, moderate pressure — not the kind of force you would use on a stubborn wood screw. You should feel increasing resistance as the bung expands and begins gripping the inside of the mounting hole.
- Stop when you feel firm resistance. The screw should feel snug, and you should not be able to turn it further with light hand pressure on the driver. There is no quarter-turn rule here because you are compressing rubber, not threading a metal nut against porcelain. The "right" tightness is the point where the bung is fully expanded but the screw is not crushing the rubber flat.
- Perform the feel test. Grip the front of the seat with both hands and try to shift it sideways. If it moves more than about 2 mm — roughly the thickness of a nickel — the bung has not expanded enough or has slipped out of its ideal position. Loosen the screw a full turn, wiggle the hinge plate to let the bung reseat itself centered in the hole, and retighten.
- Repeat on the opposite side. Both fixings need equal grip. If one side is tight and the other is loose, the seat will pivot around the firm point and feel wobbly in a diagonal pattern.
Here is the critical diagnostic moment: if the screw spins freely and you never feel that rising resistance — the screw just keeps turning without the seat getting any tighter — the rubber bung is spent. It has lost enough elasticity that it can no longer expand to grip the hole. Continuing to turn accomplishes nothing. The entire fixing assembly — screw, bung, and top plate — needs to be replaced as a unit. As noted in the tools section, these assemblies are designed as matched sets, so sourcing the complete expansion system rather than an individual rubber plug ensures a proper fit.
Bottom-Fix Nut Adjustment for Back-to-Wall Toilets
Some concealed-look toilets do not use expanding plugs at all. Instead, they route a threaded rod down through the mounting hole and secure it with a nut from below — just like a traditional bottom-fix design, but with a decorative cap hiding the hardware on top. When this type of seat starts feeling loose, how do you tighten it? The answer is simple in theory: reach underneath and turn the nut clockwise. In practice, back-to-wall installations make that reach anything but simple.
Back-to-wall toilets sit flush against the bathroom wall or a concealment unit, leaving almost no gap behind the bowl. The mounting nuts live in that cramped space between the rear of the bowl and the wall — a gap that your hand and a standard wrench may not fit into. Two tools solve this problem:
- Basin wrench: Its long shaft and pivoting jaw head were designed for exactly this kind of confined plumbing access. Slide the shaft up behind the bowl, hook the jaw around the nut, and turn. You get leverage without needing to wedge your arm into an impossible space.
- Slim-profile socket and extension bar: A 10 mm or 12 mm socket on a 6-inch extension fits into tighter gaps than a basin wrench. Attach a small ratchet handle and you can turn the nut in quarter-turn increments even with minimal clearance.
Once you access the nut, the tightening technique mirrors the top-fix method: finger-tight, then a quarter-turn with the wrench, alternating between both sides. But bottom-fix designs on back-to-wall toilets have one extra vulnerability — because the hardware is hidden and rarely inspected, loosening can go unnoticed for months. By the time you feel the wobble, the nut may have backed off several full turns.
A smart preventive step for these installations is applying a small drop of medium-strength thread-lock compound (the blue, removable variety — not the red permanent type) to the bolt threads before spinning the nut back on. The compound cures into a thin film that resists vibration-induced loosening while still allowing you to break the nut free with a wrench if you ever need to remove the seat for cleaning or replacement. This single addition can extend the time between adjustments from a few months to several years.
With concealed fixings and bottom-fix nuts snugged down properly, the seat should feel rock-solid for everyday use. A firm seat, however, is not necessarily a straight seat — and that distinction matters more than most people realize. Bolts can be perfectly tight while the seat still sits visibly off-center, overhangs one side of the rim, or wobbles because rubber bumpers have worn away unevenly. Correcting that alignment is its own distinct procedure.
Step 5 – Adjust Seat Alignment to Fix a Crooked Toilet Seat
A seat that is bolted firmly to the bowl can still look — and feel — wrong. You sit down and everything feels stable, no wobble at all, yet a quick glance reveals that the seat hangs over the left side of the rim while a wide strip of porcelain is exposed on the right. Or the front edge juts forward past the bowl's curve instead of following it. Tightening will not fix this. In fact, tightening a misaligned seat only locks the problem in place more permanently. Alignment is its own separate repair, and it starts with understanding exactly which direction the seat has drifted.
Diagnosing Left-Right Shifting
Lateral misalignment — the seat sitting closer to one side of the bowl than the other — is the most common positioning issue, and the cause is almost always in the mounting holes. On most toilets, the holes molded into the porcelain rim are round and slightly larger than the bolt shank passing through them. That gap between bolt and hole exists by design; it provides manufacturing tolerance and allows minor repositioning. The downside? It also lets the seat drift sideways over weeks and months of use, one tiny shift at a time, until one morning you notice the seat is visibly off-center.
The fix requires loosening, repositioning, and retightening — but the sequence matters more than you might expect. Here is how to tighten a toilet seat lid back into its correct centered position:
- Loosen both mounting bolts equally. Turn each nut counterclockwise by roughly one full turn — just enough that the seat can slide freely on the rim. Do not remove the bolts entirely; you want them loose in their holes, not out of them.
- Stand in front of the toilet and look straight down. Close the lid so you can see the full outline of the seat against the bowl. Use both hands to slide the seat left or right until an equal strip of porcelain rim is visible on both sides.
- Retighten using an alternating pattern. Give the left bolt a quarter-turn, then switch to the right bolt for a quarter-turn, then back to the left. This alternating sequence is critical — tightening one side fully before touching the other pulls the seat toward the first bolt and reintroduces the very misalignment you just corrected.
- Verify before the final snug. After every pair of quarter-turns, close the lid again and recheck the visual gap on both sides. When the seat looks centered and the bolts feel firm, apply one final quarter-turn to each side and stop.
If your seat keeps drifting back to one side despite careful centering, the gap between bolt and hole is simply too large for friction alone to hold position. In that case, a rubber washer or nylon bushing placed between the bolt shank and the hole wall acts as a shim, taking up the slack and preventing future lateral movement. Many replacement mounting kits include these spacers for exactly this reason.
Fixing Front-to-Back Positioning
Some toilet seats sit too far forward — overhanging the bowl's front curve — or too far back, leaving an awkward gap between the seat edge and the rim. If your hinges have elongated (slotted) mounting holes rather than simple round ones, front-to-back repositioning is straightforward. Those slots exist specifically to allow the entire hinge plate to slide forward or backward along the bowl rim before being locked down.
To reposition, loosen both bolts just enough that the hinge plates can slide within their slots. You do not need much slack — a half-turn on each nut is usually sufficient. Then grip the front of the seat with both hands and gently push it backward, or pull it forward, until the front curve of the seat aligns neatly with the front curve of the bowl. When the two curves run parallel with a small, even gap all the way around, the position is correct.
Retighten using the same alternating left-right pattern described above. If you want to tighten toilet seat American Standard models specifically, note that many of their seats use a center-rear stabilizer bolt in addition to the two side bolts. Loosen all three fasteners before repositioning, and retighten the two side bolts first — alternating quarter-turns — before snugging the stabilizer bolt last. That center bolt is designed to lock the final position and prevent future drift.
For hinges without slotted holes — where the bolt passes through a simple round opening — front-to-back adjustment is limited by the diameter gap between bolt and hole. You can still nudge the seat a few millimeters in either direction, but large repositioning is not possible without switching to a hinge plate that features elongated slots.
Using Bumper Pads to Fine-Tune Seat Level
You have centered the seat, the bolts are firm, yet the seat still wobbles slightly or sits at a faint angle when you lower yourself onto it. What gives? Flip the seat up and look at its underside. You should see small rubber bumpers — typically two to four round or rectangular pads — stuck to the bottom surface of the seat ring and sometimes the lid. These bumpers are the unsung heroes of a stable, level toilet seat. They absorb impact, prevent the hard seat from clacking against the porcelain, and — most importantly — create an even contact plane between the seat and the bowl rim.
When bumpers wear unevenly, peel off, or go missing entirely, the seat loses its level resting surface. One side of the seat contacts the rim directly while the other side hovers a millimeter or two above it, producing a rocking motion that bolts alone cannot eliminate. Even inexpensive aftermarket bumpers — some costing under $8 — can restore that level contact and stop a seat from sliding sideways under body weight.
Replacing bumper pads is one of the simplest bathroom repairs imaginable. Most replacements are self-adhesive: peel, stick, done. But placement matters. Follow these guidelines to get the best result:
- Use equal height on both sides. Mismatched bumper thickness recreates the same uneven contact that caused the wobble. If one bumper is worn thinner than the other, replace both — never just one.
- Position bumpers near the outer rim edge. Placing them closer to the outer perimeter of the seat maximizes their stabilizing leverage, the same way wide-set feet make a table steadier than narrow-set ones.
- Replace in pairs. Always swap the left and right bumpers as a set, even if only one looks damaged. The remaining bumper has the same age and wear, and it will likely fail soon after.
- Clean the surface before sticking. Wipe the underside of the seat with rubbing alcohol or a mild bathroom cleaner and let it dry completely. Adhesive bonds poorly to damp, grimy plastic, and a bumper that peels off within a week defeats the purpose of the repair.
Once fresh bumpers are in place, lower the seat onto the bowl and press down gently on each corner. The seat should contact the rim evenly without any tilt or rock. Combined with properly centered and tightened bolts, a full set of matched bumpers delivers the kind of quiet, stable, no-movement seat that feels like it came straight from the factory.
Alignment and stability solve the most visible problems, but one issue remains that no amount of centering or bumper replacement can address: a lid that once floated down gracefully on its own but now drops with a jarring slam. That symptom lives inside the hinge mechanism itself — specifically in the soft-close damper — and calibrating it requires a different technique entirely.
Step 6 – How to Repair a Loose Toilet Seat With Soft-Close Hinges
You have tightened the bolts, centered the seat, and replaced the bumper pads — yet the lid still drops with an unmistakable thud instead of gliding down gently. The mounting hardware is solid. The alignment is perfect. The problem is not in the connection between the seat and the bowl. It is inside the hinge itself, hiding in a small mechanism most people never think about until it stops working: the soft-close damper.
Soft-close failures are uniquely frustrating because they feel like they should be simple to fix — after all, the lid used to close slowly, so something must have just "come loose," right? The reality is more nuanced. Some dampers can be recalibrated with a screwdriver in under five minutes. Others are sealed units with no user-serviceable parts. Knowing which type you have — and what to do about each — is what separates a quick adjustment from a wasted afternoon.
How Soft-Close Damper Mechanisms Work
Every soft-close toilet seat relies on a damper built into or attached to the hinge arm that resists the lid's natural urge to fall under gravity. Imagine tilting a small jar of thick honey — the fluid does not rush out; it flows slowly because it resists movement. That same principle, scaled down and precisely engineered, is what keeps your lid from slamming.
The two main damper technologies work differently under the hood:
- Hydraulic (fluid-based) dampers contain a sealed chamber filled with silicone oil. When the lid begins to close, a rotor inside the chamber forces the oil through a narrow internal channel. That fluid resistance is what creates the slow, controlled descent. Hydraulic dampers deliver remarkably consistent motion — the closing speed stays even from the moment the lid starts moving until it touches the rim. One quirk worth knowing: silicone oil viscosity changes with temperature. In a steamy bathroom after a hot shower, the lid may close slightly faster because the oil thins. In a cold guest bathroom during winter, the descent slows noticeably. This is normal behavior, not a defect.
- Spring-loaded and friction-based dampers skip fluid entirely. A calibrated spring or friction disc inside the hinge body presses against a contact surface, creating drag that slows the closing motion. These systems are less affected by temperature swings, but the motion quality tends to be slightly jerky or stepped rather than silky smooth — especially as the spring ages and loses tension.
Over time, both types degrade. Hydraulic dampers lose effectiveness when seals wear, oil leaks, or the fluid breaks down chemically. Friction-based systems lose tension as springs fatigue and contact surfaces wear unevenly. The result is the same: a lid that closes faster than it should, eventually reaching the point where it drops with a slam.
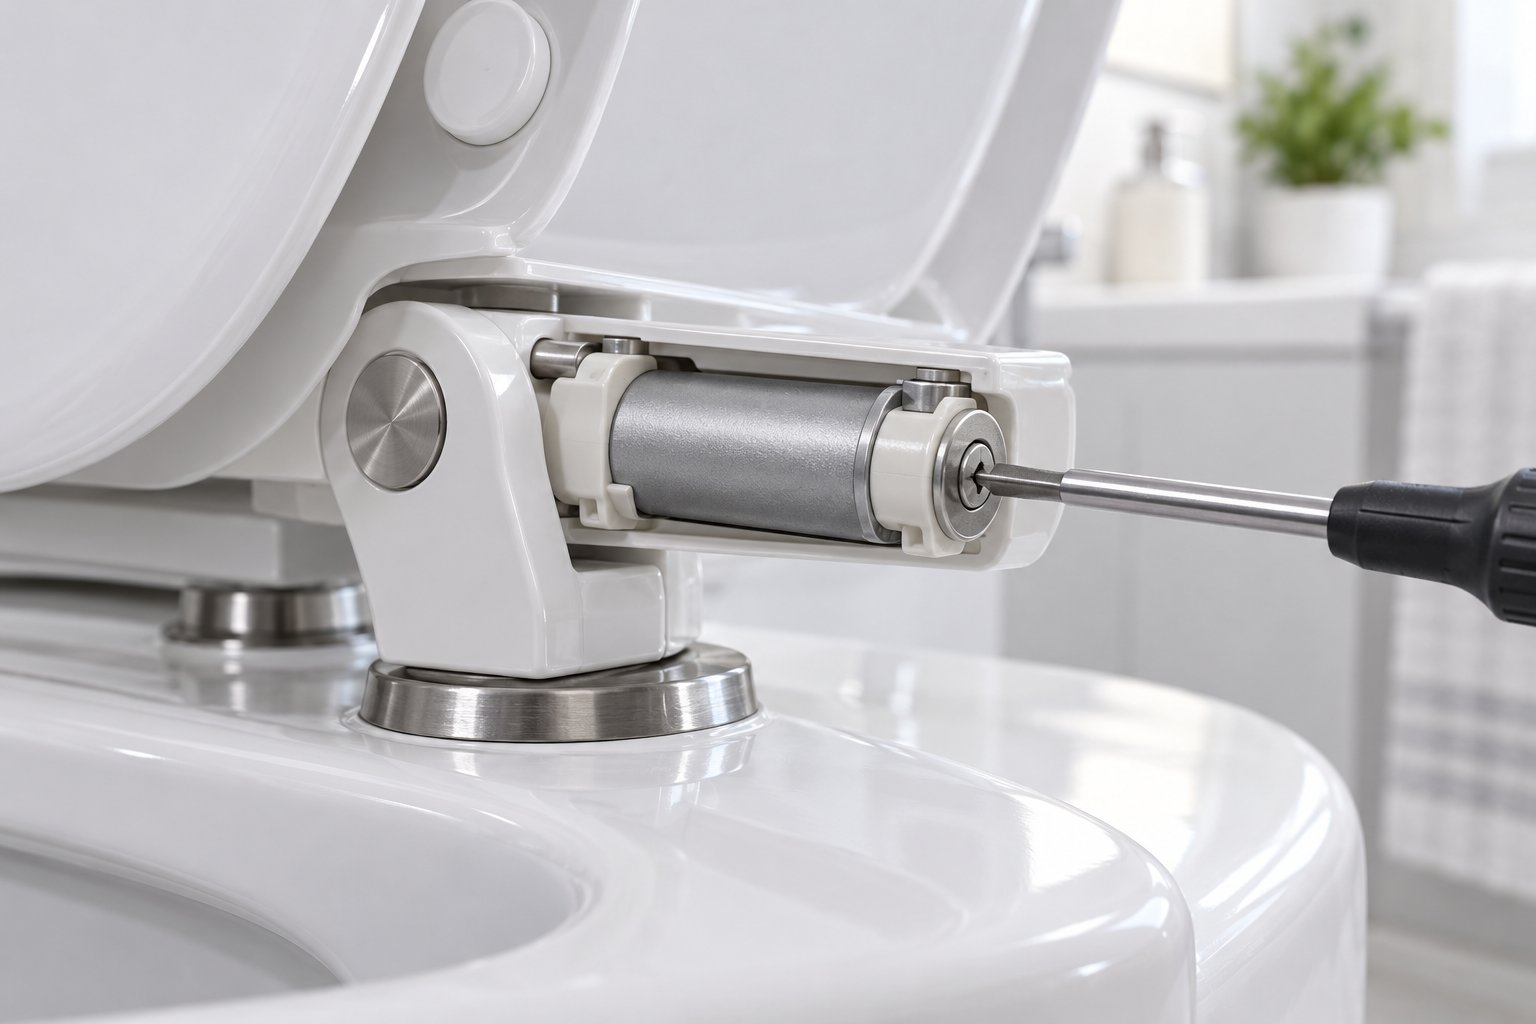
The critical question for your repair is whether the damper in your hinge is modular (removable and adjustable) or integrated (permanently built into the hinge body). Here is how to tell: look closely at the hinge arm where it connects to the seat. A modular damper appears as a distinct small barrel or cylinder — sometimes with a visible seam line — attached to or embedded in the hinge arm. You might even spot a tiny screw head on one end. An integrated damper, by contrast, shows no separate component; the hinge body is one smooth, continuous piece with the damping mechanism molded inside during manufacturing.
This distinction determines everything about what happens next. Modular dampers give you adjustment options. Integrated dampers generally do not.
Adjusting Closing Speed on Modular Dampers
If your hinge has a modular damper with an adjustment screw — a small flathead or hex-socket screw visible on the damper barrel — you can fine-tune the closing speed without replacing anything. This is one of the most satisfying DIY fixes in bathroom maintenance: a few tiny turns of a screw, and the lid behaves like new.
Here is the procedure, step by step:
- Locate the adjustment screw. It is typically on the end or side of the damper barrel, recessed slightly into the housing. You may need a flashlight to spot it, especially on hinges with dark-colored plastic bodies.
- Use the correct driver. Most adjustment screws accept a small flathead screwdriver — a precision or jeweler's size works best. Some use a 2 mm or 2.5 mm Allen key. Using the wrong tool chews up the screw head and eliminates your ability to make future adjustments.
- Turn in quarter-turn increments only. Clockwise rotation typically increases the damping resistance, slowing the close. Counterclockwise decreases resistance, speeding it up. The adjustment range on most residential dampers is narrow — often just one to two full turns total from minimum to maximum. Quarter-turn increments give you fine control within that tight window.
- Test after every adjustment. Lift the lid to its fully open position and release it. Watch how it descends. The ideal speed allows the lid to travel from fully open to closed in roughly five to eight seconds — fast enough that you are not standing around waiting, slow enough that there is no audible contact when it reaches the bowl.
- Avoid forcing the screw past its stops. When you feel the screw reach a hard stop in either direction, do not push further. Forcing past the designed range can crack the damper housing, strip the internal threads, or rupture a hydraulic seal — any of which turns an adjustable damper into a dead one.
What if the adjustment screw has no effect? You turn it back and forth through its full range and the closing speed does not change at all. That usually means the damping medium itself has failed — the silicone oil has leaked out or the friction mechanism has worn past its functional threshold. At that point, the damper barrel needs to be replaced as a unit. Many modular designs allow you to unclip or unscrew the spent damper cartridge and snap in a new one of the same dimensions.
For non-adjustable integrated dampers — the type where the damping mechanism is permanently sealed inside the hinge body — there is no screw to turn and no cartridge to swap. If the damper has lost its resistance, the only path forward is replacing the entire hinge assembly or, in many cases, the complete seat. Quality integrated dampers built with precision rotary mechanisms are rated for 50,000 or more open-close cycles, so a properly matched seat should provide years of reliable service before reaching this point. When it does arrive, though, no adjustment trick will bring a sealed damper back to life.
Tightening American Standard and Brand-Specific Hinges
Brand-specific hinge designs add a layer of complexity that generic instructions do not address. If you own an American Standard toilet — one of the most common brands in U.S. households — the soft-close repair process follows a slightly different path than what works on other manufacturers' seats.
Many American Standard soft-close models use a top-tightening system with a stabilizer bolt positioned at the center-rear of the hinge assembly, in addition to the two standard side-mounted bolts. That center bolt is not just decorative — it locks the hinge plate's final position and prevents rotational drift. When you need to reposition or retighten the seat, all three fasteners need to be addressed, not just the two you can see at the sides.
American Standard seats also commonly feature a quick-release mechanism — a button or lever on each hinge that disengages the seat from its mounting posts. This feature is designed for easy cleaning access, but it plays a key role in soft-close troubleshooting as well. Here is why: debris, mineral deposits, and dried soap residue accumulate in the channel between the hinge post and the seat's mounting slot over time. That buildup creates friction that interferes with the damper's ability to control the closing motion evenly. The lid may hesitate, jerk, or close at different speeds depending on where the grime is thickest.
The fix involves a full remove-clean-reinstall cycle, based on the approach American Standard recommends for their Fluent and similar product lines:
- Engage the quick-release. Lift the seat and lid to their fully open position. Locate the release button or lever on each hinge — it is usually on the inside face of the hinge body, facing toward the center of the bowl. Press both buttons simultaneously while pulling the seat straight up. The seat should lift cleanly off the two mounting posts.
- Inspect and clean the hinge posts. With the seat removed, you will see two cylindrical posts rising from the bowl rim. Examine them for chalky mineral buildup, rust-colored staining, or sticky residue. Wipe each post thoroughly with a cloth dampened with white vinegar or a mild bathroom cleaner. An old toothbrush works well for stubborn deposits in the grooves.
- Clean the seat-side mounting channels. Flip the seat over and look at the underside of each hinge where it clips onto the post. You will see a narrow slot or channel — clean it the same way, removing any grit or residue that could create drag.
- Reinstall the seat. Align the seat's mounting channels directly over the clean posts and press down firmly until you hear or feel the quick-release mechanism click into its locked position. Test the release buttons briefly to confirm the seat is fully engaged — it should not lift off without pressing both buttons.
- Re-tighten the mounting hardware. With the seat back in place, use a screwdriver to snug the two side bolts and the center stabilizer bolt. Follow the alternating tightening pattern: left side, right side, then center. Be careful not to overtighten — the same finger-tight-plus-quarter-turn rule applies here.
Applying a thin film of silicone-based lubricant to the hinge posts before reinstalling the seat can restore smooth soft-close action and prevent future debris adhesion — use silicone spray or grease, never petroleum-based products like WD-40, which can degrade rubber seals inside the damper.
This remove-clean-lubricate-reinstall process resolves the majority of soft-close complaints on American Standard toilets. It also applies, with minor variations, to other brands that use quick-release post-mounted systems — Kohler's ReadyLock and similar mechanisms follow the same general logic. The brand-specific detail that matters most is knowing where the release button sits and how the seat locks onto the posts, because forcing a seat off without engaging the release can snap the plastic clips that hold everything together.
How do you tighten a loose toilet seat on a soft-close model where none of these steps help? If the damper has no adjustment screw, the posts are clean, the bolts are snug, and the lid still slams — the damper mechanism itself has reached the end of its service life. At that point, the repair chapter closes and a different question opens: is it time to replace the hinge assembly, or the entire seat? Before making that call, though, there is one more step worth completing — verifying that the work you have already done is actually holding up under real-world use and establishing a routine that keeps it that way.
Step 7 – Verify the Loose Toilet Seat Fix and Prevent Future Loosening
You have tightened bolts, recentered the seat, replaced worn bumpers, and possibly recalibrated a soft-close damper. Everything feels solid — but feelings can be deceptive when it comes to bathroom hardware. A seat that seems stable during a quick hand-wiggle test can still develop play under real body weight, or a soft-close lid that appears smooth in one test cycle might hesitate or speed up on the fifth. Skipping a proper verification step is how people end up revisiting the same repair a month later, convinced the fix "didn't hold."
A structured post-repair check takes less than two minutes and tells you definitively whether the job is done — or which earlier step needs a second pass. Pair that with a simple maintenance routine, and you can reasonably expect years of trouble-free service from adjustable toilet seat hinges of any type.
The Three-Point Verification Test
Think of this as a final quality inspection. Each test targets a different failure mode, so passing all three means you have covered every common way a seat can misbehave after adjustment.
- The sit-and-shift test (lateral stability). Sit on the seat the way you normally would — full weight, natural position. Then gently shift your hips to the left, then to the right. You should feel zero lateral movement. The seat should stay perfectly planted on the bowl rim with no sliding, clicking, or rocking. If you detect even slight sideways play, the mounting bolts need another eighth-turn or the centering needs revisiting. Do not compensate by over-tightening — return to the alignment step and confirm the bolts are seated squarely in their holes before adding torque.
- The five-cycle lid test (damper and hinge function). Stand up and open the lid fully, then let it close on its own. Repeat this five times in a row. On soft-close models, the lid should lower at a consistent, smooth speed every time — no slamming on the third cycle, no hesitation on the fifth. On standard (non-damped) lids, the lid should hold its position at any open angle without drifting forward or falling. If a soft-close lid accelerates or stutters during any of the five cycles, the damper calibration from Step 6 needs another quarter-turn adjustment. If a standard lid drifts closed under its own weight, the hinge friction is insufficient and the mounting bolts may need slight additional tightening.
- The visual alignment check (positioning). Stand directly in front of the toilet and look down at the closed seat. Compare the gap between the seat edge and the bowl rim on the left side versus the right side. These gaps should be equal — or close enough that the difference is not visible to the eye. Then check the front: the seat's front curve should run roughly parallel to the bowl's front curve, with a small, even gap all the way across. Any visible crookedness means the seat shifted during final tightening and needs to be loosened, repositioned, and re-secured.
If any of the three tests fails, return to the relevant adjustment step rather than simply adding more torque. Over-tightening to compensate for misalignment or damper issues is the single most common cause of cracked porcelain rims.
Passing all three tests confirms a successful repair. Snap the bolt caps back into place, wipe down the bowl rim with a damp cloth to remove any fingerprints or lubricant residue, and consider the active repair complete.
Preventive Maintenance Schedule
A properly adjusted seat does not stay properly adjusted forever. Bathroom hardware lives in one of the harshest micro-environments in your home — constant humidity, temperature swings, daily loading and unloading of body weight, and frequent contact with cleaning chemicals. Without occasional attention, even a perfectly executed repair will gradually degrade. The good news? Maintenance takes almost no time and requires no special skills.
Here is a practical routine that keeps your seat stable between adjustments:
- Every three to six months: Check bolt tightness using only hand pressure. Open the bolt caps, place a screwdriver in the bolt head, and try to turn it. If it moves easily, give it a gentle snug — finger-tight is usually enough for a routine check. You should not need a wrench for a maintenance tightening unless something has gone noticeably wrong. This quick check is especially important if you want to tighten a quick-release toilet seat system, where the mounting posts can loosen gradually from the repeated snap-on, snap-off action of removing the seat for cleaning.
- Once a year: Inspect the rubber washers and bumper pads. Pull the seat off (quick-release) or lift it to its fully open position and examine the washers underneath each bolt and the bumper pads on the seat's underside. Rubber that has turned hard, cracked, or compressed flat is no longer doing its job. Replacing these soft components preventatively — before the seat starts rocking — is far easier than diagnosing a wobble after the fact. As bathroom maintenance experts have noted, the most common cause of recurring looseness is corroded or degraded washers that compress unevenly under load.
- During regular deep cleaning: Clean hinge posts and damper channels. If your seat has a quick-release mechanism, pop the seat off and wipe down the mounting posts with a damp cloth. Remove mineral deposits, soap scum, and grime from the post channels on the seat's underside. For soft-close hinges, clear any debris from around the damper barrel. This prevents the buildup that causes uneven closing and sticky hinge action over time.
What you do during maintenance matters just as much as what you avoid. Certain common habits actually accelerate wear rather than prevent it:
- Do not use harsh chemical cleaners — bleach-based sprays, abrasive powders, or acidic toilet bowl cleaners — directly on plastic hinge components. These chemicals degrade the polymer over time, making plastic brittle and more prone to cracking at the stress points around bolt holes.
- Do not overtighten metal bolts against porcelain during routine checks. The ceramic rim does not get stronger with age. Each over-tightening episode creates micro-stress in the glaze that can eventually propagate into a visible crack — and a cracked bowl is not a DIY fix.
- Do apply a light mist of silicone spray to metal hinge pins and damper barrel surfaces once a year. Silicone lubricant reduces friction without attracting dust or degrading rubber seals, keeping the hinge action smooth and quiet. Avoid petroleum-based lubricants, which can swell and soften rubber gaskets inside hydraulic dampers.
- Do replace mounting hardware proactively if you notice rust spots or discoloration on metal bolts, even if the seat still feels firm. Corrosion weakens the bolt's cross-section, and a corroded bolt can snap under normal tightening force — sometimes leaving the lower half trapped inside the porcelain hole, which is extremely difficult to extract.
Following this schedule adds maybe ten minutes of effort across an entire year. In return, you avoid the cycle of repeated loosening that sends so many people searching for a loose toilet seat fix every few months. The seat stays stable, the lid closes the way it should, and the hardware lasts as long as the seat itself.
Maintenance, though, has its limits. There comes a point where the hardware is too damaged, too corroded, or too worn for any amount of adjustment or preventive care to make a lasting difference. Recognizing that threshold — and knowing exactly what specifications to match when sourcing replacement parts — saves you from throwing good effort after bad.
When to Replace Toilet Seat Hinges Instead of Adjusting Them
Every repair has a ceiling. You can retighten bolts, recenter alignment, replace bumper pads, and recalibrate soft-close dampers — but if the hardware itself is structurally compromised, those adjustments become temporary band-aids on a permanent problem. Knowing when to stop adjusting and start replacing is not admitting defeat; it is the smartest move you can make to protect both your time and your toilet bowl.
The tricky part? Damaged hardware does not always announce itself with an obvious crack or a missing piece. Sometimes a toilet seat won't tighten no matter how many turns you give the wrench — and the reason hides in stripped threads you cannot see or a hinge body that has developed a hairline fracture along a stress point. Other times, the seat has detached completely, and the instinct is to just bolt it back on. But if the underlying cause was a failed component, reattachment without replacement guarantees you will be back on the bathroom floor within weeks.
The indicators below draw a clear line between problems that respond to adjustment and problems that demand fresh hardware.
Clear Signs That Adjustment Will Not Solve the Problem
If any of the following conditions match what you are seeing, tightening or repositioning will not produce a lasting fix. Continuing to force adjustments on failed hardware actually increases the risk of cracking the porcelain bowl — turning a $15 hinge replacement into a $300-plus toilet replacement.
- Bolt threads are stripped and the nut spins freely: You turn the nut clockwise and it just keeps spinning without ever drawing tight against the underside of the rim. The threads on the bolt shank or inside the nut have been worn smooth, eliminating the mechanical grip that holds everything together. No amount of additional turning will restore stripped threads.
- The hinge body or mounting plate is visibly cracked: Inspect the plastic or metal plate that connects the seat to the bolt. Even a small crack in this area means the hinge can no longer distribute clamping force evenly. Tightening a cracked hinge plate concentrates stress on the remaining intact material, accelerating the break until the seat detaches entirely — sometimes while someone is sitting on it.
- The soft-close damper provides zero resistance and has no adjustment screw: You have already confirmed in Step 6 that the damper is an integrated, non-serviceable type. If the lid free-falls with no braking at all, the internal damping mechanism has failed completely. There is nothing left to calibrate.
- The mounting holes in the porcelain are chipped or enlarged: Shine a flashlight into each mounting hole on the bowl rim. If the edges are chipped, the hole has widened beyond its original diameter, or the glazed surface inside the hole is rough and irregular, bolts and expanding plugs cannot grip reliably. This is especially common on older toilets where years of repeated tightening and overtightening have gradually eroded the ceramic.
- The seat material itself is cracked near the hinge attachment points: Look where the seat ring meets the hinge. Stress fractures radiating outward from the bolt holes mean the seat — not just the hinge — is failing. A toilet seat detached at this point cannot be safely reattached because the surrounding material is too weak to hold the fastener under load.
If you spot even one of these conditions, stop adjusting. The cost of replacement hardware is a fraction of the cost of a cracked bowl or an unexpected seat failure, and the time investment is comparable to the adjustment process you have already completed.
Choosing the Right Replacement Hinge or Mounting Kit
Sourcing the correct replacement starts with matching four key specifications to your existing toilet and seat. Grab a tape measure, a notepad, and the model number from inside your tank lid — these details save you from the frustrating cycle of buying parts that almost fit but do not quite work.
- Bolt-hole spacing: Measure the distance between the centers of the two mounting holes on your bowl rim. The most common spacing is 150 mm (roughly 5-1/2 inches), but some models — particularly certain American Standard wide-spread designs — use 180 mm or even wider configurations. A kit designed for 150 mm spacing will not reach 180 mm holes, and vice versa.
- Bolt diameter: Standard residential toilet seat bolts are typically 6 mm or 1/4 inch in diameter. Commercial or heavy-duty seats sometimes use 8 mm bolts. A mismatch here means the bolt either rattles loosely in the hole or will not pass through at all.
- Hinge material: You will encounter three main options — stainless steel, zinc alloy, and plastic. Stainless steel resists bathroom moisture and corrosion far better than zinc alloy, which can develop white oxidation deposits, or bare plastic, which becomes brittle over time. For longevity in a high-humidity environment, stainless steel bases and fasteners are the strongest long-term choice.
- Seat model compatibility: Some seats use proprietary hinge geometries — particularly quick-release and soft-close models — where only the original manufacturer's hardware will engage correctly. If you want to fix a loose toilet seat on an American Standard model with a stabilizer bolt system, for example, a generic three-hole kit may not include the center-rear mounting point their design requires. Always cross-reference your seat's model number with the replacement kit's compatibility list.
One principle simplifies the entire sourcing process: choose complete mounting kits over individual loose parts. A kit bundles the bolt, nut, washers, base plate, spacers, and any necessary bushings into a single dimensionally matched package. Every component is engineered to work together, eliminating the guesswork of pairing a bolt from one manufacturer with a washer from another. For sanitary ware manufacturers and sourcing teams who need hinge mounting kits, stainless steel bases, and custom fixing configurations at scale, Tianyun's Toilet Seat Fixing Systems provide a range of compatible mounting-assembly options designed for reliable seat installation and hardware replacement. As noted earlier in this guide, individual components such as standalone plastic bolts, loose washers, hinge pins, or cover caps may not be available as separately sold items — selecting a complete compatible mounting assembly ensures all parts arrive together and fit correctly from the start.
If you are wondering how to tighten toilet seat on American Standard models specifically after replacing the hardware, the installation process mirrors the adjustment steps from earlier in this guide: alternate tightening between left and right bolts, snug the center stabilizer bolt last, and apply the finger-tight-plus-quarter-turn limit to protect the porcelain.
Making the Repair-vs-Replace Decision
Still on the fence? The table below puts the two paths side by side so you can weigh the practical tradeoffs at a glance. Think about which column matches your current situation — the answer usually becomes obvious once you see the time, cost, and outcome laid out together.
| Factor | Repair / Adjust | Replace |
|---|---|---|
| Typical Symptom | Seat wobbles, slides, or sits crooked — but hardware is intact and threads still grip | Bolt threads stripped, hinge cracked, damper dead with no adjustment option, or porcelain holes enlarged |
| Estimated Time | 5 to 15 minutes | 15 to 30 minutes (including removal of old hardware and installation of new kit) |
| Estimated Cost | $0 if existing hardware is reusable; under $10 for new bumper pads or washers | $10 to $30 for a complete mounting kit; $30 to $80+ for a full seat with integrated soft-close hinges |
| Long-Term Outcome | Effective for months to years if paired with the preventive maintenance routine from Step 7 | Resets the hardware to factory-new condition; longest possible service life before the next intervention |
The pattern is straightforward. If the symptom traces back to looseness, misalignment, or damper calibration — and the hardware itself is structurally sound — adjustment is the faster, cheaper, and perfectly adequate solution. If the hardware is physically damaged, dimensionally worn, or functionally dead, replacement is the only path that delivers a result you can trust long-term.
One final thought worth keeping in mind: toilet seats are not permanent fixtures. Industry data from bathroom retailers suggests an average lifespan of five to seven years for a standard seat under normal household use. If your seat is already in that age range and the hinges are showing multiple signs of failure, replacing the entire seat — not just the mounting hardware — often makes more economic sense than sourcing individual hinge components for aging plastic. A fresh seat with modern mounting hardware, quality stainless steel fasteners, and a properly functioning damper eliminates every issue covered in this guide in a single thirty-minute project.
Frequently Asked Questions About Adjusting Toilet Seat Hinges
1. Why does my toilet seat keep coming loose even after I tighten it?
Recurring looseness usually stems from degraded rubber washers or missing bumper pads rather than insufficient tightening. When washers compress unevenly or lose elasticity, they can no longer maintain a consistent clamping force against the porcelain rim. Daily use vibrations then gradually back the nuts off. Replacing the full set of soft components — washers, spacers, and bumper pads — as a matched mounting assembly is typically more effective than re-tightening alone. Applying medium-strength thread-lock compound to the bolt threads also resists vibration-induced loosening for years. Tianyun's Toilet Seat Fixing Systems (https://www.tianyuntech.com/toilet-seat-fixing-systems) offer complete mounting kits with stainless steel bases and matched washers designed for long-term grip in damp bathroom environments.
2. How do I tighten a toilet seat with concealed or hidden fixings?
Concealed fixings use an expanding rubber plug inside the porcelain mounting hole instead of a visible nut underneath. To tighten them, locate the screw head or Allen key socket on the top surface of each hinge and turn it clockwise with the correct driver — often a Pozidriv bit or a 4-5 mm Allen key, not a standard Phillips. As you tighten, the rubber bung expands laterally to grip the inside of the hole. If the screw spins freely without creating resistance, the rubber bung has lost its elasticity and the entire expansion plug assembly needs replacement as a complete unit.
3. Can you over-tighten toilet seat bolts and damage the toilet?
Yes — over-tightening is one of the most common and costly mistakes in toilet seat repair. Porcelain is strong under compression but brittle under point loads. Excessive torque from a wrench can crack the ceramic rim around the mounting hole, and that damage is irreversible without replacing the entire toilet. The safe guideline is the finger-tight-plus-quarter-turn rule: hand-tighten until the washer sits snugly against the porcelain, then add only one quarter-turn with a wrench. The rubber washer should be visibly compressed but not squished completely flat.
4. How do I fix a soft-close toilet seat that slams shut?
Start by identifying whether the damper is modular (a separate barrel or cylinder you can see on the hinge arm) or integrated (sealed inside the hinge body). Modular dampers often have a small adjustment screw — turn it clockwise in quarter-turn increments to increase resistance and slow the closing speed. If there is no adjustment screw or the damper provides zero resistance regardless of screw position, the damping mechanism has failed. For quick-release models like many American Standard seats, removing the seat, cleaning debris from the hinge posts and mounting channels, and applying silicone lubricant can restore smooth action when buildup is the cause.
5. When should I replace toilet seat hinges instead of trying to adjust them?
Replace rather than adjust when you see any of these conditions: bolt threads are stripped so the nut spins without gripping, the hinge body or mounting plate has a visible crack, the porcelain mounting holes are chipped or enlarged, or the seat material is fractured near the hinge attachment points. Also replace when a non-adjustable integrated soft-close damper has completely lost its braking action. In these situations, a complete mounting kit — which bundles dimensionally matched bolts, nuts, washers, and base plates — delivers the most reliable result. Match the bolt-hole spacing (commonly 150 mm or 180 mm), bolt diameter, and hinge material to your existing toilet model for a proper fit.
Apply This Insight to Your Project
Tell us what you are building and how the topic “How To Adjust Toilet Seat Hinges When Tightening Won't Work” relates to your application. Our engineering team can help evaluate the next step.